Feature Articles

Why Projects are Good for You

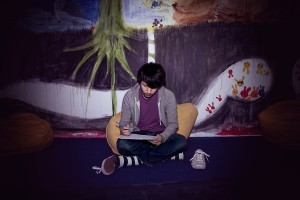
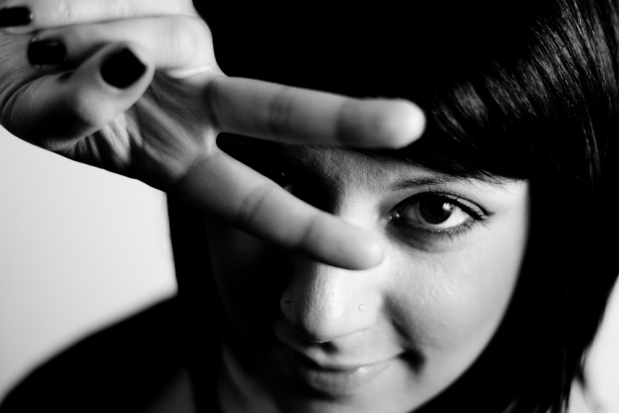
An image from the early stages of a project I'm working on, looking at possessions.

Do you sometimes feel like you’re snapping away aimlessly, fluttering from one photographic subject to another with no rhyme or reason, like some sort of gormless butterfly? Do you feel like you’re at saturation point with your usual subject matter? Have you said to yourself recently “oh look, a lovely sunset. I should get my camera out really, but…meh”? This is, in some ways, a good sign. You’re not content with just taking a photograph, you want more out of your end product. What you need, my disillusioned friend, is a project.

Projects are hard. You have to come up with an interesting theme with an element of originality, work out what form it’ll take, ideally write a project statement and then figure out how it’ll all come together once it’s finished. It’s a long term, complicated process. Which is why it’s very good for your photography. Now I don’t claim to be Mr Project who lives at Project House, Project Lane, Lower Project, Projectsville, Projectstershire but I thought I’d offer a little advice to get you started on and excited about project work. Let’s look at a few key elements that should factor into your project, whatever if may be.

An image from the early stages of a project I'm working on, looking at possessions.

Shoot What Interests You

The well known saying “write what you know” holds a lot of truth. If you write about something that you know about, you do so from an informed standpoint. Writing about an area in which you are knowledgeable gives you a solid foundation from which to create something entertaining and artistic. With photography, it’s slightly different. Rather than just shooting what you know, you should shoot what interests you. Even if you’re au fait with the subject matter, if the subject doesn’t interest you, the work is likely to lack that passion which, in my opinion, is an essential ingredient for creating a piece of work that has real artistic value.

With writing, you can break the “write what you know” rule in a way, but not properly. You may wish to write about something that you know little or nothing about but are interested in: this is still possible but first you must research the subject in some way. Therefore, you can never truly write about something you don’t know about. With photography, you have the freedom to shoot something you are not familiar with. A perfect example of this is the British photographer Leo Maguire, who has spent four years entering and documenting the lives of two families from the Irish traveller and Romany gypsy communities. The subject interested him, yet he knew nothing about it. This is the advantage we have as photographers. Whatever you shoot, be sure that you genuinely care about it.

Have A Plan

So you know what you want to shoot, now you need to think about how you’re going to shoot it. For the sake of example, let’s say you have an unhealthy interest in apples (is that possible, given their inherently healthy nature?) and want to create a project around apples. Apples is the project for you, you appley weirdo. You need to consider a number of factors – will you be shooting all the different kinds of apples you can find? Will you be documenting the journey of an apple from being picked to ending up on a supermarket shelf?

Those are the only two things I can think of for apples, probably because I don’t care enough about apples.

Then you need to think about the overall structure and presentation of your final project. If you’re just shooting apples and the different varieties you can eat, you may want to take each individual apple, set up a mini studio with clean, white light, take a shot of the whole apple, cut it neatly in half, take another shot, turn the pieces over, take another, get in close for that essential pip detail, take another. Then you’ll want to put those four images into a 2X2 square format, mounted into a frame, and entitle it “#12 – Braeburn, 18th August 2011″. Maybe if you’re following the life of an apple, you’ll want to order your final images into a sensible, chronological order, then turn them into a photobook, sprinkled with facts about apple production and quotes from people involved in the process.

Why am I talking about apples so much?

The point I’m making is if you have an idea of how the finished piece will look in your mind’s eye before you begin, it will help the final project look more cohesive and connected. Also, knowing what form you want your end product will take means you will shoot accordingly, in a fashion that will suit the layout, media and presentation you have in mind for the final piece.

Be Efficient: Set Targets

This one is very important. Simply put, make it like a homework project. If you don’t set yourself targets and goals, you’ll never actually get it finished. Going back to the apples (I’m committed now), it might be “photograph and post-process two apple types a week” or “have 30 apple types photographed and ready to be printed by the 1st of September”. It doesn’t matter too much exactly what your targets are, just set a goal that is quantifiable in some way.

Be flexible - the initial layout of these pieces was significantly different to their current form.

Be Flexible

Once you’ve got the wheels in motion, you may find that there are elements of the project that you don’t like, don’t work or don’t excite you. This can happen to you at any time. You need to be prepared to change things, to cut things and to rethink things. This may feel frustrating at first, but think of it as a natural evolution of the project. If, halfway through your freaky apple project you think “What in the Jimmy Cricket am I doing, photographing apples all the time?! Pears are my one true passion!” then go ahead and restart your project using pears. More sensibly, if the 2X2 format looks boring to you, evolve it and make it 3X3, or a single, ultra high detail single photo of an apple exploded into several sections.

When I wrote that last sentence I meant the photo exploded into sections, not the apple, but now I’m thinking it would be more interesting to explode the apple. Heck, let’s have two images in a diptych format: one of a pristine, perfect Golden Delicious and one of that same apple smashed up all over the clean, white studio background. See what happened in those last few sentences? That’s the evolution of an idea. By remaining flexible we’re now on our way to a much more interesting, artistically valuable project.

Projects are Good for You

Projects are good for you because they teach you form, discipline and planning. Not only that, but photography comes into its own once you start creating images that are relevant to each other. A strong photo series can be an exciting journey – a story can be told, a theme runs through that can be followed, understood, appreciated and enjoyed. If a picture is worth a thousand words, a project is worth ten thousand. Finally, projects are good for you because they should make you think more deeply about every aspect of your photography, which means that your work will improve substantially. Don’t worry too much if your project isn’t too original at first, just getting into the habit and the process of creating and completing a project is more important. Plus, it’s incredibly fun and will refresh your enthusiasm for photography.

(How do you tell if a butterfly’s gormless?)

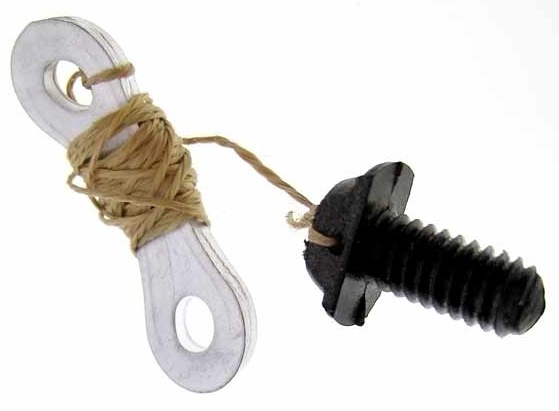
Using a string as a tripod

A DIY photo gadget that you can make from stuff you probably have kicking around in your basement or shed? All right, we are hooked!

It’s one of those completely daft projects, but it actually does work pretty well; creating one of these string tripods takes a few minutes, and if you throw one in your photo bag, it means you're never completely without support when you're out and about taking photos.

But why?

The main problem of taking photos free-hand is that your hands aren’t particularly sturdy. Myself, I find using a heavier camera makes it a lot easier (the inertia of the camera means it is reluctant to move, so up to a point, a heavy camerea is easier to hold still than a very light camera.), but what for lighter cameras? The answer might just be a String Tripod!

I often find myself thinking “Damn, if there was only a way to anchor the camera to the ground…” And that’s exactly the way a string tripod works. Basically, you pull the string taut, and the idea is that you loop the string around something firm – such as your foot, a rock, or a fence. Make the loop bigger, and you can even use it to adjust the height of the camera.

Sure, it will never replace a proper tripod or monopod, but I wouldn’t be surprised if you gain a couple of stops on your shutter time by using this system.

And the best thing? Making one of these is going to cost you less than a bottle of milk and a loaf of bread!

Responding to the Government's response to the Hargreaves Review

White rose

It’s a bit of a convoluted title, I know. But after Ian Hargreaves published his review of what should be done about intellectual property, copyright, and encouraging innovation, the Government penned a response, saying what it agreed with, what it didn’t, and what it was planning to do about it. Now of course, any interested parties are responding to what the Government has said. There are a lot of replies flying about here. From the photographers’ perspective, the Association of Photographers has issued a response to the Government. Here’s what they had to say:

Broadly speaking, the Government has agreed with pretty much all of the recommendations set out by Hargreaves. This embraces some positives but disturbingly, a great many areas which concern us are not addressed.

We have the opportunity to be involved, and are already, at a level of policy-making which can direct the change in the structure of the IP framework over the next few years. We have the opportunity to make our voice heard. Our perspective is set out below;

Firstly, we welcome the Government’s commitment to providing a fast track small claims route for copyright infringement through the County Court system. However, we are concerned to see that the caveat of ‘value for money’ has been attached to this. This crucial reform of the court system must be implemented as soon as possible and the current proposed ceiling of £5000 for claims should be raised to £10,000.

We agree that the proposed limited private copying exception makes sense and would de-criminalise a huge sector of the population without affecting the revenues of those creators. We feel that a carefully drafted exception for parody may be appropriate too but in both cases this must be done in such a way as to not prejudice creators. We note that the Government has said it will consult widely on this (and other points) and insist that creators are involved in that process.

We approve of the proposal that any Digital Copyright Exchange (DCE) would work as an independent marketplace where rights holders can set their own rates and that participation should be free to both creators and users with open standards so that access to such a database can be automated through software solutions. We agree that participation should be voluntary and therefore not in contravention of the Berne Convention. We have a great many concerns regarding any DCE, but as no firm proposals for such a body exist yet, we will wait to hear what the Government has to say by the end of this year as they have stated.

We agree with and welcome the statement that any proposals for the use of orphan works should be subject to satisfactory safeguards to prevent unfair competition from any licensing of such orphans. We agree that any proposals for Extended Collective Licensing (ECL) should be adoptive rather than enforced on any sectors in the industry.

We are very concerned by the proposal that licensing of orphan works could extend to commercial uses, something we, and others, have been against from the start as it undermines the creators’ marketplace and makes a mockery of existing licensing arrangements. We are also alarmed that the Government has made no mention of Moral Rights, which although outside the remit of Hargreaves’ review, are vital to the development of better IP legislation. It is nonsense to talk about licensing orphan works when we still do not have unwaivable Moral Rights, in particular, the right to be identified.

We note that the Government proposes to move forward on the basis of “open and transparent” evidence and are alarmed that whilst they acknowledge that SMEs find it very difficult to provide empirical evidence, there is little suggestion that other ways of engaging with those businesses will be sought.

We are dismayed to see that the Government has not taken the opportunity to provide appropriate education and protection for consumers regarding enforcement, but has placed the burden of such activity on rights-holders and creators. We have little enough time and money as it is to engage in such action.

In conclusion, we accept that there seem to be some areas that the Government wishes to address for the benefit of creators and welcome the opportunity to be involved in discussions around this but we are dismayed that the Government has seemingly missed an opportunity to really strengthen the creative industries in the UK and ensure their survival and future growth.

The Association of Photographers

8th August 2011

Camera remote hacking


I've written this caption four times, but every time it comes out like a cheap sex joke.

You may have heard about a little project I've been working on the past few months; it's an universal camera trigger that lets your camera trigger based on events; a sound, light, lasers, time-lapse photography (even non-linear timelapse photography), and any number of other things you could dream up.

screen_shot_2011_07_28_at_130524.jpgAs a part of this project, I've been spending way more time than what's healthy looking at camera remote control cables, and I've done a few cool hacks to them. Among other things, I've looked at how you can make your own camera connection leads. Making your own is the quickest way to create leads (well, after buying them from us directly, of course), it’s not always the best way to go about it.

Reducing waste

Why? Well, the problem is that many cameras use rather obscure plugs, and you can’t turn to Maplins or Radioshack to buy them. So, Unless you’re Triggertrap Megacorp and able to order them by the hundreds, for most of us, the only way to actually get your hands on the right connector lead for your camera, is to go online and buy a cheap knock-off remote control for your camera on eBay.

I always thought it was a bit of a waste to take a perfectly good remote control, lop off the remote control part, and only use the cable. So, that got me thinking: Is there a way to leave the remote control intact, but add a 3.5mm socket to the casing, so you can use it as a normal remote control, but so you can also connect the Triggertrap to it when you want to use it?

So basically, we're adding a remote control to your remote control? Well that makes sense. Let's do it.

Before we get started; Here’s how you recognise what camera remote you need, and there’s a list of cameras and their corresponding remotes as well.

Step 1

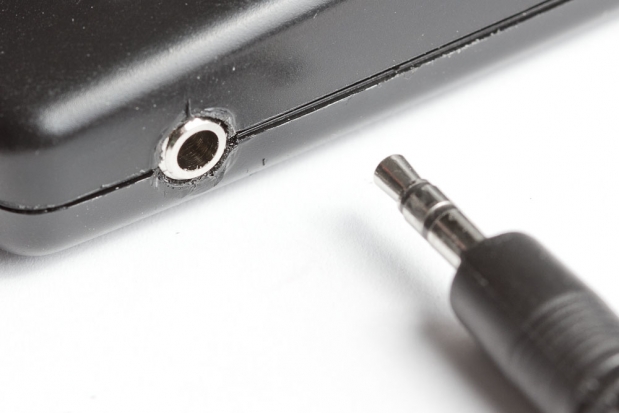
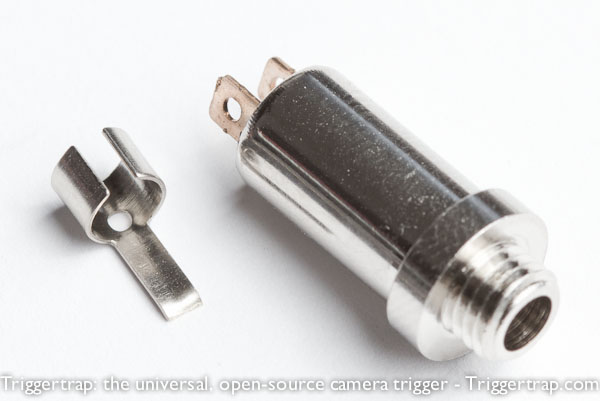
First of all, you need to source a 3.5mm jack socket. Technically, it's known as a 'Screened Chassis Socket'. Try Maplins or Radioshack, but they also show up on eBay from time to time.

Step 2

Get a remote control that fits your camera. This one is a MC-30 camera for Nikon cameras; but you can adapt most remote controls quite easily.

Step 3

When you look at the insides of these things, you realise why they're so cheap: But it works, which is the important part. Also, its simplicity means that it's easy to adapt to our needs. See that little space at the end of the metal parts? That's where we'll be installing our socket.

Step 4

There's three wires. From the top, they are Ground, Focus, and Shutter. Wanna know how I know that? A multimeter may have helped a little bit.

Step 5

To get the socket to fit in the confined space, I had to take off the little rear wing

Step 6

I didn't have a drill or my Dremel handy, so I used my soldering iron to burn a hole in the side of the remote. Highly not recommended, I probably shaved about 2 years off my life by breathing those fumes. Anything for a good blog post, eh?

Step 7

Everything soldered in place and the socket installed. Because the hole is small enough that the threading on the socket grips properly, I didn't need to put the flange back on the end (besides, the remote's walls were too thick to make it fit anyway). I'll have to be careful when inserting the mini jack so I don't use too much force, but so far it works fine.

Step 8

Voila! It's hardly the most beautiful DIY job in the world, but it does the trick.

Step 9

Step 10 – Enjoy the spoils of your endeavours!

Well will you look at that! It works!

Behind the scenes at SceneThat

haje-jan-kamps-20100730-30072010162

When you hear that the government is in talks with various groups, interested parties, and representatives from particular communities regarding this proposal or that law, you might wonder who these people are. For all we know, they could be wind-up dolls that officialdom wheels out for the purpose of nodding approval and not objecting.

I’m really pleased – and relieved – to report that when it comes to consulting on photographers’ rights, it’s not a dolls’ house of Barbies and Kens that Theresa May turns to. One of the organisations that talks with the Home Office is SceneThat. It was founded by former BBC-man Mark Singleton in 2008 and earlier this week I asked him a few questions to find out a bit more about him, his organisation, and his work for photographers’ rights.

It turns out that SceneThat came about through a life-changing, in fact a near life-ending, experience for Mark, as he explains: ‘During the early part of 2008, I had a brain attack. Literally. A blood vessel at the back of my head burst, and changed my world in a stroke.’

Okay, so it wasn’t the burst blood vessel that led to the foundation of SceneThat directly, more what happened to Mark during his convalescence when he couldn’t face watching daytime TV (I think we’re all with you there, Mark) but decided to get out on the streets of London with his camera and a tripod (sounds like a valid alternative to me).

You’ve probably guessed, the experience of being the man with the camera and tripod wasn’t a pleasant one. ‘I suddenly understood why the press was so full of horror stories about the treatment of photographers. Twenty years prior to that, as a member of BBC Newsgathering, I had “been there, done that, got the T-shirt”. It was fair to say that in my first month of wandering around with a camera as part of my “rehab”, I met more hostility than I had in a decade of covering everything from the Troubles in Northern Ireland to the widespread riots during 1984’s summer of discontent.’

Realising that it wasn’t just the police who didn’t understand fundamental laws in this country, but that photographers were doing themselves absolutely no favours with a very wishy-washy knowledge of what they could and couldn’t do, knowledge Mark likens to that which is rolled out at pub closing time, Mark decided to do something about it. As Mark put it, it’s all very well wanting to make the country a safer place, but it shouldn’t come at the price of abandoning our freedoms.

So, he spoke to a few photographer ‘buddies’, who happened to be high up in the legal world. They offered to keep him on the ‘straight and narrow’ as he strove to point photograhers in the right direction when it came to their rights, provided that he didn’t offer specific legal advice. You can land yourself in rather murky water if you start doing that. SceneThat helps photographers to find their own authoritative answers.

Over the past three years individual ‘legal eagles’ have come and gone from the SceneThat, ehm, scene, but they’ve maintained their objective of providing pointers to the facts. As a result of his own improved knowledge Mark has campaigned on behalf of photographers; talking with politicians, police and anyone else who would listen!

Mark says that he’s often asked if things are really going to get better: ‘I can only answer by saying that in my experience, there is now a real desire to cull decades of “poorly-worded” laws, and replace them with less, fairer and more proportionate legislation.’

That really does sound positive, but he points out that we can’t afford to take our eye off of the ball and we have to ensure that these intentions are followed through.

And there is some movement, Mark says: ‘Continuing the top-down approach, Government is introducing changes to policing that delivers greater accountability coupled with better internal guidance and procedures.’ Mark was recently one of those ‘interested parties’ who met at the Home Office alongside some people who advise on training security guards – the aim was to cascade the message to every level of ‘officialdom’. We might not be there yet, but Mark is convinced that things are getting better. ‘Over-zealousness is being replaced with increasing levels of common sense. It is a slow process, but lasting change often requires that approach.’ No, big change doesn’t happen quickly, just as difficult problems don’t have easy solutions.

When I asked what still needs to be done, Mark told me that SceneThat will be keeping their eyes on officialdom to make sure that promised changes aren’t forgotten. ‘We’ll keep the pressure on our leaders and those who lead police and security officers to ensure that our safety doesn’t mean giving up our freedoms. As photographers, we’ll continue to think how the pursuit of our art and craft may be perceived by others – and we’ll help them to overcome their anxieties in the process. After all, photography is not a crime.’

Many thanks to Mark for chatting with me. If you are in search of legal advice regarding photographers’ rights, SceneThat is the perfect place to start. They’ll empower you to find out just what you need to know. And if you have a bad experience with a police officer or a security guard, let them know. The more knowledge that they have of people’s experiences, the more effective their campaigning can be.

Don’t Be Scared of Studio Lighting

Softboxes were placed very close to the model here, meaning there is very low contrast between the specular highlights and the diffuse value, giving flattering, evenly lit skin.

To clarify, this month’s Photography Concept on Friday is not a self-help guide for photoaugliaphobics ( people with a fear of glaring lights – of course I looked that up ) – it’ll centre more around the basics of studio lighting and the basic properties of light. If you’re interested in a bit of studio lighting but don’t know where to start, or would like to know at least a little before you begin, then this month’s PCoF is for you. 

Specular Highlights and Diffuse Value

Softboxes were placed very close to the model here, meaning there is very low contrast between the specular highlights and the diffuse value, giving flattering, evenly lit skin.

Now it’s very easy to go into too much detail too quickly with studio lighting. I am writing from the point of view that you have never seen or considered the principles of lighting before, so please don’t roll your eyes too far back into your head if any of this seems obvious. Everyone starts somewhere – I started to improve my studio lighting the moment I got these concepts into my head.

Specularity refers to an object’s shininess. If you imagine a snooker ball in a pub (or snooker hall, if you’re a more reputable sort than myself), the bright white spot on that ball is the specular highlight of the ball.

Diffusity refers to how evenly spread out light is across an object. The more diffuse the light, the less contrast there is. This is represented by a more gradual transition from light to dark across an object. An object with a strong specular highlight has a higher contrast value around that highlight, as the brightness of the object changes much more suddenly.

In Short – Specular Highlights mean more contrast, Diffuse Lighting leads to less contrast.

Now, let’s look at a situation where we control the light source- we’ll ignore the different properties surfaces can have for now, to keep it simple (a snooker ball is a lot more reflective than human skin, for example. If your skin is as reflective as a snooker ball, see a doctor).

Controlling Light

There are two factors we should keep in mind for basic control of lighting. These are the size of your light source and the distance of your light source from the object being lit.


Size of Light Source

The size of your light source determines how it lights the object in question. Assuming the distance is the same, let’s look at the difference between a torch and a softbox (which look like this).

A torch has a very focused, directional beam – the light isn’t very diffuse. When you use a torch in the dark, it only lights the small area you point the torch at. On our imagined snooker ball, this creates a strong specular highlight, giving high contrast to the ball. If we replace this with a softbox, a much larger light source, we create a light source with more diffuse, spread out quality. This will lessen the contrast on our snooker ball, and light it more evenly than the torch will.

In Short – The larger the light source, the more diffuse the lighting, giving us less contrast. The smaller the light source, the more focused the lighting is on one point, giving us greater contrast.

As an extra point if you’re not confused yet – the more diffuse the light, the darker it is, due to the light available from the light source being spread more thinly.

Distance of Light Source

Due to the Afro of Doom in this pic, I had to move the light sources much farther away. This has led to a greater contrast between the specular highlight and the diffuse, which is why we see the stronger highlights on the bridge of the nose, for example. To combat this, I used my large light source for the face and brought the smaller one in for the hair.

The distance of the light source shares many qualities with the size of the light source, seeing as they are almost exactly the same thing as far as your camera is concerned. The closer the light source is to your subject, the larger it is and the further away it is, the smaller it is. Therefore, all the qualities pertaining to size of light source apply here also. There are two differences, however.

The first, most obvious difference is that the closer the light source, the less far the light has to travel, meaning the light is stronger.

The second, less obvious difference, is the difference between the specular highlight (high contrast area) and the diffuse value (low contrast area). The closer you place the light source, the less difference there is between the specular highlight and the diffuse value. The farther away you place the light source, the greater the difference there is between the specular highlight and the diffuse value.

In Short / To Simplify – All you really need to keep in your head here is that the farther away you place the light, the more contrast you will have between the shiny bit and the non-shiny bit. As you put the light closer, the difference between the two will be lessened, allowing for much more even lighting. So, for even lighting, put your light source closer. For higher contrast, move it back.

Oh Sweet Lord My Brain What Have You Done?

Essentially, explaining the basics of lighting is the equivalent of explaining the offside rule in football – it’s actually fairly simple but once you start trying to explain it, it sounds horribly complicated. It’s really not. What I suggest to you is, take this mini guide, go and rent some portable studio lighting (when I rented mine a few years ago, it only cost me £40 for a week), find some unsuspecting victims (or snooker balls) and try this stuff out. It’s not nearly as daunting as you might think. Go on, get some studio lights and try it yourself, it’s fun!

In the future, I’ll do some more lighting write ups, if people have found this useful. Just remember, if you’re still having trouble with the difference between size of light source and distance of light source, use this handy, cow based reference.

When time and space swap places

What happens when you want to interchange time and space in a video? Watch and find out, in this video by Last Future.

On the Vimeo page, he explains... "I was sitting in a train traveling through The Netherlands recently when for some odd reason I decided I had to take a video of the landscape passing by. I had no real use for it but decided to try and make something of it.

I remembered slit-scan photography, a method where a slit is moved across the picture plane essentially taking a temporal image, where different times of the scene are captured on different parts of the film."

Combining the technique of slit-scan and a spot of video editing, he came up with a brilliantly unique video...

Watch the video:

Temporal Video Experiment from lastfuture on Vimeo.

And there's a 'making of' explanation, too:

Temporal Video Experiment - Making Of from lastfuture on Vimeo.

Darkening a room by adding light


The Revenge of SpaceLemon (29/365)

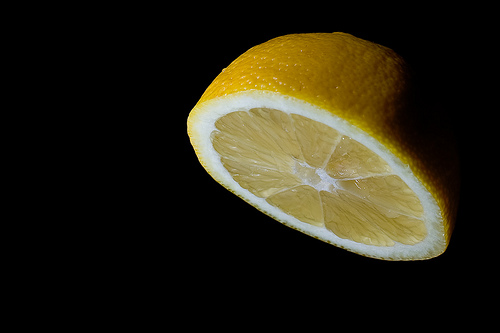
I was doing a photo shoot a few days ago, where I was photographing a lemon suspended from a piece of thread. I wanted to make it look as if it was hovering in pitch darkness.

Upon seeing the results, someone asked me an interesting question: Isn’t it difficult to focus your camera in the dark? Well, no, because the photo was taken in the daytime, with my lights on. So, how come does it look like it was taken at night?

That, my friends, is the power of contrast in lighting. You have to remember that you don’t need a dark room in order to make a background completely dark – you just need to ensure that your foreground is significantly brighter than the ambient light. Here’s how and why… 

It’s all about relative brightness

To take the lemon photograph, I used a pretty simple set-up: A couple of flashguns aimed at the lemon, from a very close distance. Because the flashes were so close to the subject (they are just out of frame, in fact), it adds a lot of light. If you’re curious why that is, check out the inverse-square law on Wikipedia.

Say 'bonjour' to the magical space-lemon. It's citrus powered, awesome, and magical. Oh, and it hovers in space, clearly. That's what makes it awesome. If you want to take a closer look, click on the photo!

The reason why the photo came out as it did, is because of the camera settings: The camera was set to ISO 100, with f/9.0 aperture and 1/200 second shutter time. If you can’t visualise what those settings would do in the circumstances described, I welcome you to try that right now. Don’t worry, we’ll wait. Set your camera to precisely those settings, and take a photo indoors, without using a flash.

If you can’t be bothered to do the experiment: Even in a relatively well-lit room, that will result in a very dark photo indeed.

So, as far as the camera is concerned, it is taking a horribly underexposed photo. Which is perfectly fine, because I want a dark background. It’s the foreground that is important, and that is where my flashes come in.

Let me get this straight, you’re taking photos that look like darkness in a well-lit room?

4332652944_7eaaf93a40_o.jpg

This portrait was also taken in a relatively well-lit room - but again, because of the high flash output and the fast shutter time (in this case, f/8.0 and 1/500 second at ISO 100), it looks like it's taken in pitch darkness. Groovy. Clicky for bigger.

Short answer: Yup.

Slightly longer answer: Yup. You can do this by settin your camera to manual, and use an exposure which results in a dark room (by choosing a fast shutter time). The next step is to use your flashes to light the subject.

Of course, this doesn’t work if the light from your flashguns spill onto the background (you’re trying to keep that as dark as possible, remember?) so it is a good idea to use a snoot or a honeycomb grid to ensure that the flash light isn’t accidentally re-lighting your background, because then you’re back to square one.

Can this be used for anything else?

Well of course. Always remember that it’s all about the contrast in lighting: If your flashes are more powerful than the light you are photographing in, then you can ‘darken the room’ with your camera settings, and use the flashes to light your scene.

Hell, if you’ve got enough flashes, you can turn even broad daylight into night. Don’t believe me? Check out this article on ganging flashes, and scroll down to “Turning Noon Into Night With High-Speed Sync”. Pretty impressive stuff, but there’s a pretty ridiculous amount of money in flash equipment being used right there.

You don’t have to go to those extremes, though – using flash outdoors on a shady day can give great effects, because when done well, your subjects look as if they are brighter than the surroundings. When done subtly, it can look bloody fantastic – your eyes are automatically and subconsciously drawn to the main subject – always a good sign in a photograph.

10 awesome photography projects on Kickstarter


Kickstarter: Exciting times for creative types

Do you believe the world needs more creativity? I certainly do. There's something awesome about people going out there, having fun, outlandish, or downright genius ideas (sometimes all three at once), and then turn them into reality.

Guess what, you can help... Kickstarter.com is a pretty nifty website, which in a very short period of time has developed into the world’s largest funding platform for creative projects, and your dollars can go towards any project of your choice.

A lot of photographers and inventors of photography gadgets have embraced Kickstarter - and I've rooted out the top 10 awesome projects that are worth a closer look

Police Tape

screen_shot_2011_07_01_at_131342.jpgWhat's the idea? Police Tape examines the impact of police recordings over the last 20 years, and how controversial police recordings are often withheld from public view.

Why is it worth your hard-earned dollars? When the police screw up, who finds out about it? With the advent of modern recording devices on dashboards of police cruisers, as well as ride-along camera crews, it’s baffling how many police officers still get away with infringing on citizen’s rights.

Help a Berkley student get his project out to the masses, so perhaps something can be done to affect change.

Funding goal: $1,500
Currently funded: $2,390

Check out Police Tape on Kickstarter!

Naked Sea

screen_shot_2011_07_01_at_131407.jpgWhat's the idea? Showcasing the importance of the Dead Sea, which is slowly disappearing, and its importance to the neighbouring cultures of Israel, Jordan, and Palestine.

Why is it worth your hard-earned dollars? Ari Fruchter and famed photographer Spencer Tunick team up to boost the significance of the dwindling Dead Sea by doing something no one has ever done before – taking nude photos.

Ok, nude photos have been done before, but by bringing together the three nations who surround the sea and photographing them nude has certainly never been accomplished, and will provide contributors with some fantastic original photos.

Funding goal: $60,000
Currently funded: $116,270

Find out more about Naked Sea on Kickstarter!

Ethiopian Wolf

screen_shot_2011_07_01_at_131453.jpgWhat's the idea? Documenting the extinction of the Ethiopian Wolf.

Why is it worth your hard-earned dollars? Less than 500 of these unique furry creatures exist today, mostly due to human decimation of their natural wildlife. With the help of donors researchers and photographers can document the species and help bring more attention to the wolf, hopefully to help it survive.

With over six months of research already invested, this project is using local and world-wide researchers to give the Ethiopian Wolf the best chance possible.

Funding goal: $13,500
Currently funded: $13,705

Read more about Ethiopian Wolf on Kickstarter!

Red Pop

screen_shot_2011_07_01_at_131540.jpgWhat's the idea? An iPhone accessory for true photography lovers.

Why is it worth your hard-earned dollars? Remember when your phone was all buttons, how satisfying it was to push them? Now it’s all touch screens and slides, and even taking a photo isn’t fun anymore.

Red Pop hopes to put some of the ‘click’ back into your iPhone use, by providing an accessory that makes the iPhone feel more like a real camera. So, if you feel like a dork every time you take out your iPhone for photos, here’s an accessory you can really get behind!

Funding goal: $20,000
Currently funded: $47,151

Find out more about Red Pop on Kickstarter!

Go Pano Micro

screen_shot_2011_07_01_at_131601.jpgWhat's the idea? Turns your iPhone into a 360° camera!

Why is it worth your hard-earned dollars? Whether you love your iPhone, love photography, or just enjoy panoramic pictures, then perhaps a small investment in this add-on would make your day.

By adding the Go Pano Micro to your iPhone you can record meetings, sports, or just take great 360° panoramic videos and photos. Imagine the possibilities!

Funding goal: $20,000
Currently funded: $169,209

Find out more about Go Pano Micro on Kickstarter!

Camera Lens Cap Holder

screen_shot_2011_07_01_at_131635.jpgWhat's the idea? Unique lens cap holder that attaches to the camera strap.

Why is it worth your hard-earned dollars? If you’ve tried everything to keep track of your lens holder to no avail, then this is the camera accessory for you. The holder lives on the strap, so when you remove the cap it is help onto the strap. No strings, no stickers, and no more lost caps.

Innovative, original, and definitely useful, this little guy will definitely take off, and you can be the first to own one!

Funding goal: $3,900
Currently funded: $14,623

Find out more about the Camera Lens Cap Holder on Kickstarter!

Olloclip

screen_shot_2011_07_01_at_131651.jpgWhat's the idea? Expands the photo and video capabilities of the iPhone by offering additional lenses.

Why is it worth your hard-earned dollars? Amateur photographers who are limited by the lens capabilities of their iPhone can now get satisfaction with the Olloclip, which gives you convenient lens options including fisheye, wide-angle, and macro lenses.

The pocket-sized holder takes just a few seconds to open, pick a lens, and attach to the iPhone, so you’ll never get stuck with the wrong lens again.

Funding goal: $15,000
Currently funded: $68,201

Find out more about the Olloclip on Kickstarter!

Lens Loop Camera Strap

screen_shot_2011_07_01_at_131709.jpgWhat's the idea? A solution to bulky, expensive camera straps.

Why is it worth your hard-earned dollars? While the strap that traditionally comes with your camera is a pain in the neck, upgrading to a new, more comfortable strap can be exorbitant. Luxury straps are usually also too bulky to be packed away when not in use.

But now there’s Lens Loop! Design from recycled car seat belts and featuring nickel-plated steel hardware, this product is comfortable, convenient, and comes in a variety of custom colours.

Funding goal: $5,000
Currently funded: $2,952

Find out more about the Lens Loop Camera Strap on Kickstarter!

Capture Camera Clip

screen_shot_2011_07_01_at_131807.jpgI posted about the Capture Camera Clip a few days ago here on Pixiq, and it's one hell of an awesome idea.

What's the idea? Innovative locking camera clip that attaches to your belt or bag strap.

Why is it worth your hard-earned dollars? Honestly, why has no one thought of this before? No more dangling cameras weighing down your neck, instead your camera is attached to your belt or bag strap via a handy locking plate system.

The quick release button ensures you can quickly have your camera ready, while the redundant twist lock keeps it safe and secure when not in use. A truly great product that nearly every camera enthusiast will find useful!

Funding goal: $10,000
Currently funded: $271,383

Find out more about the Capture Camera Clip on Kickstarter

Triggertrap – The Universal Camera Trigger

screen_shot_2011_07_01_at_131842.jpgWhy will you look at that, I found a way to tell you about my own project that's currently gaining momentum on Kickstarter - the Triggertrap!

What's the idea? Open source hardware project to create a universal camera trigger.

Why is it worth your hard-earned dollars? This camera accessory is not only convenient, it’s also super-cool! You can choose from a pre-made TriggerTrap, which will trigger your camera by laser-interruption, sound, time, or pretty much anything you can think of. Or, you can opt for the open source version, which provides you with a kit so you can build your very own TriggerTrap. Finally, as if you need any more reasons, the Kickstart campaign for TriggerTrap lets you get your hand on a versatile camera trigger for less than half of the cost of similar products. Sweet!

Funding goal: $25,000
Currently funded: $9,748

Find out more about Triggertrap on Kickstarter or on Triggertrap.com!

Go spend some money!

There you have it – ten great projects! Whether you have cash burning a hole in your pocket, are looking for some awesome new camera accessories, or love to support the arts and tech of photography there is certainly a Kickstart project that you can really get behind.

Don’t hesitate – these artists and innovators really need your assistance to get their projects off the ground.

The Making Of: Triggertrap pitch video


I think my favourite part of the video is where my hand shows up in frame. It breaks the fourth wall nicely.

With the fantastic response on my Kickstarter project so far, I've had quite a few comments and questions about the pitch video that accompanies the Triggertrap over on Kickstarter, including two High School teachers (hi guys) who wanted to make videos with this with their kids.

First of all, have a quick look at the video as a reminder of what it was all about:

This video is mostly stop-motion animation.

Step one: The audio

Since I knew that I wanted the video to be short, I had to think about what I actually wanted to say. In the film world, this means that you have to write a script. In my case, I've written quite a few voice-over and radio scripts before, as I studied journalism under the rather illustrious Richard Rudin, who is a bit of a broadcasting legend in his own right. Of course, this was all ten years ago, but some of the key points still stuck in my mind.

Eventually, I landed on a script that was going to be about 2 minutes long, which I figured would be a good length for a Kickstarter video. From my days at T3 (I used to edit the gadget website T3.com), we did a fair bit of research about video length etc. Later, when I was producing FiveFWD, we discovered that 2-5 minutes was the perfect length for a web video, but that the longer videos only 'stuck' with people if they were patient and interested in the product. There are examples from Fifth Gear and the Gadget Show, if you're particularly curious.

Anyway, so I decided to make my script as short and to the point as possible. I spend 10 seconds introducing myself, 5 seconds setting the scene for what I've done before, and then, only 21 seconds in, I tell my audience what the idea is, and what it does. 26 seconds in, the hard sell happens, in that I rattle off the main bread-and-butter features of my device, and then at 41 seconds, I start what I believe to be the 'killer feature': The auxiliary port, which opens the device for use in god-knows-how-many-ways: A hackable camera trigger for people who aren't hackers.

Next, I recorded the audio with the video function on my Olympus E-P1. I do have both better cameras (the Canon T1i springs to mind) and better microphones than the one that was built-in, but I wanted to keep it a little bit lo-fi.

When recording the videos, I did re-takes whenever I stumbled over words (you have no idea how hard it is to say 'auxiliary port'. Or 'pressure sensor'), and then edited the audio together in Final Cut Express. I kept the video of my face whilst editing the audio, because it's often easier to edit audio smoothly when you can visualise it, as well. I don't know if you can tell, but the final audio track has about 20 edits in it. The only one that's very obvious is the one where I go from live action (i.e. the very first 4 seconds) to recording sitting much closer to the camera.

The audio recording and editing session took about 90 minutes in total, I think.

I then put my script into Google Spreadsheets, and went through the audio, and timecoded the whole thing. By using a little bit of spreadsheet magic, I was able to automatically calculate how many frames of animation I would need for each phrase or idea in my script, and so I had a shot list.

The full script, should you be curious, is downloadable as a PDF here.

In the original script, I didn't have everything in capitals: Usually, only the words you would emphasize are in capitals, and you would also include extra punctuation to remember to take breaks whilst you're speaking.However, when the time came to start doing the shots, the odd capitalised word was distrating, so I put it all in caps.

Like this: in the ORIGINAL script, I didn't have everything in capitals ... Usually, ONLY the words you would EMPHASIZE , are in capitals ... and you would ALSO include extra punctuation , to REMEMBER to take BREAKS , whilst you're speaking.

It takes a bit of time to get used to reading scripts like this, but once it becomes second nature, it makes it a lot easier to read 'naturally' into a microphone.

Planning the shots

With a solid audio track, I started planning out each one of my shots. My lovely girlfriend Ziah (who has worked in the film industry for many years) helped by asking lots of difficult questions about how we were going to visualise everything. 

The video was going to be a mixture of stop motion (i.e. moving toy cars around and taking photos of them), animation (i.e. drawing an idea or a sketch, and taking a photo every few lines, so it would look as if the thing is being drawn right in front of you), Collages (basically, still frames shown on screen) and live footage (Me speaking to camera). As it turned out, once we got about half-way through making the video, it turned out that the sheer amount of rapid cuts we used would have turned the original video into a sensory overload. It is already pretty intense as it is - imagine the same video with another 20 or so cuts added. It wouldn't have been very pleasant to watch.

Anyway, so we reduced the number of shots we needed, and instead expanded the length of some of them a little.

Stop motion animation

Stop motion is when you move an item a few millimeters, take a photo. Move a few millimeters, take a photo. When the photos are played in quick succession, it gives the illusion of movement - hence stop motion. Let's start with an example:

For the stop motion animation of my video, I used the fantastic iStopMotion, by Boinx software to put it all together. It's really easy to use, and if I had a decent video camera (or a good web-cam), it would have been very fast to do the actual animation, too.

Sadly, I didn't have the appropriate camera, so I used a Canon EOS T1i instead, with a home-made remote trigger. I did consider putting together a quick clap sensor (clap your hands, take a photo) especially for this, but figured a quick button to press would work just as well.

In the video, the part with the robots and the Arduino and the chips moving around is all stop-motion animation.

Animation

Now, my particular brand of animation wasn't exactly super high tech; cell animation (like what you expect from old Disney movies, for example) is a lot more work. Instead, I was inspired by a video I saw by PhD comics:

Dark Matters from PHD Comics on Vimeo.

Of course, there's a pretty big difference between PhD comics and myself: They know what the hell they are doing, and I, quite clearly, do not.

But that has never stopped me before, and I decided that whilst nobody would back Triggertrap with a single nickel if I showed the final drawings, perhaps if I animated it, it would come to life a bit more. I gave it a shot, and it looked like it worked well.

Creating the animation was pretty simple: Set up the camera above the drawing paper, tape the paper to the table, and take a photo. Draw a bit of a line. Take a photo. Repeat.

Again, I imported all the still frames into iStopMotion, and exported them as a movie file. This movie file was then imported into Final Cut Express, and matched up with my audio track.

Editing it all together

screen_shot_2011_06_30_at_084231.jpg

Editing this beast turned out to be a royal pain in the arse. After all, I had more than 700 frames of animation, a load of video clips, some photos (of the books and the Triggertrap), and it all had to be edited down to a 2-minute video. Ouch.

For the stop motion, Lightroom turned out to be a complete lifesaver: I was able to make the photographic adjustments to just one of the frames (color balance, crop, spot editing, contrast, etc), and then just copy the settings over to all the other frames, too. If I would have had to do that manually, I think I would have just given up.

Of course, we didn't animate anything more than we absolutely had to, which means that I didn't have any extra footage to 'cut into'.

This is where the still frames came in handy - At the end of each animation, I used the same frame for a few frames (usually about 15; so half a second) to give the reader a visual cue that there was a cut coming. That makes it less stressful to watch, and it saved me from having to come up with extra bits to animate.

The final brainwave I had when I exported the video the first time: The animation doesn't lead the viewer's eye very well, so it's not always clear what I want you to look at - so I introduced 'video movement'. This is basically done digitally, where there are slow zooms out or in (or, in the case of the segment about the auxiliary port, fast movements from important bit to important bit), to help the viewer fix their eyes on what is important.

Then, finally, I discovered that none of the timelapse footage I had shot myself was particularly suitable for the video. I tweeted out a cry for help, and within seconds Tim Haynes sprang to the rescue, and allowed me to use a snippet of his awesome Calanais Sunset timelapse video. You've simply got to love the internet.

20110621_img_6242_5184_x_3456.jpgAfter a few hours of tweaking and fiddling, it all came together nicely in Final Cut Express. I added some final credits, and decided that would have to be good enough - there's only so much time I was going to spend on a video, after all. 

The whole thing - from script writing via sound recording, to animation, to final edit, was about 20 hours of solid work, and Ziah helped me for about 6 hours as well, animating part of the video (the bit with the mad scientist is hers, that's why it looks way, way better than the bits I did myself), and coming up with clever ideas for some of the segments.

So, there you have it - The making of the Triggertrap pitch video.

I know you're just itching to see it one more time, aren't you? Awesome. Head over to Kickstarter and press 'play'. Then, if you're impressed enough by what the Triggertrap actually does, why not pre-order one? You know you want to...

Is 500px encouraging copyright theft?

screen_shot_2011_06_28_at_141835.jpg

The problem is the 'embed' functionality that's built into 500px. In the social networking box, there are your standard 'like' on Facebook, 'tweet' on Twitter, Submit to Stumble Upon and all that jazz.

One of these buttons reads 'Embed', and gives you a HTML snippet that makes it easy to embed photos into your blog. In fact, the Embed code goes further, and actively encourages it: "Copy the code to your LiveJournal or Wordpress blog".

I don't want to be difficult, but I haven't given permission to 500px to dissaminate my photos like that. Not without my permission, not without a licence in place, and (probably) not without paying me.

If I find a series of my photos on someone else's website, where they are being exploited commercially, I'd send them a takedown notice and an invoice.

screen_shot_2011_06_28_at_142649.jpgThe problem, then, is that 500px seem to be encouraging its users to commit copyright infringements of my copyrighted materials. They claim, apparently, that it is "good exposure" for the photographers. Personally, I strongly disagree - I'll decide what is good exposure for my own photos, thank you very much.

Right-clicking on a photo on Flickr has a completely different outcome: You get a pop-up reminding you that the content is copyrighted.

Against their own T&C

Okay, I'm showing off my geekdom properly, in admitting that I am actually reading the Terms and Conditions on the sites I visit, but allow me that.

On the 500px site, in the Terms of Service, it states "By submitting photographic or graphic works to 500px (...) you agree that this content fully or partially may be used on 500px web-site for promotional reasons (such as photos at home page)". 

There is no mention whatsoever about re-distributing my images to a wider audience, whether via blogs, LiveJournal, Twitter, Facebook, etc. Enabling (nay - encouraging) users to embed my copyrighted photos on their own blogs, then, is against 500px's own terms and conditions.

Thanks, but no thanks

I understand what 500px is trying to do: Opening the internet is admirable, and wanting to share content all over the place is a great idea. But it's only a great idea when you own the content, and when you've decided that this fits in with your business objectives, and your approach to copyright.

500px deciding to share my photos with the world, encouraging people to commit copyright infringements via a feature I cannot turn off, is not my idea of a well thought-through website.

Let me turn off Embed feature, at least...

...Unless you are happy to receive a ream of invoices from me, of course. In which case, carry on, and could you send me the address to your invoice payable office, please?

Hat tip to @phillprice for the tip re: this article

The power of going viral to “kickstart” your project


“Wow” seems to be the only word that entrepreneur Peter Dering can say about the response he’s received for his first product, which has the twitterverse buzzing and the photography world salivating.

Dering, a former civil engineer and amateur photographer, quit his engineering job last April to develop an idea he’d had for two years. He spent the better part of last year developing the Capture Camera Clip System, which is a small device that allows you to clip your SLR securely to any strap (belt, backpack, etc.)

Click-and-go

Dering was hoping to solve the problem that many SLR users face: where can you keep your camera so that it’s easily accessible but out of your way to use your hands, yet still well protected? Wearing a camera strap around your neck is great for access, but a heavy camera dangling around your neck is both uncomfortable and dangerous for the camera and lens. A camera bag offers great protection, but you may miss some great shots without your camera readily at hand.

Dering’s Capture System solves this problem with a small, lightweight device that has two components: one clips onto your strap and the other clips into your tripod mount on your camera. When the two components are secured, you have a quick and easy way of mounting your camera on your belt strap or backpack strap - or in the future your bicycle or the roof-rack of your car. There’s a quick-release button for easy access, but there’s also a redundant twist lock you can use for times when the quick-release might be accidentally triggered.

It’s a clever little piece of kit, and it was bound to be well received by the photography community - however the speed at which this is happening is what’s truly remarkable about this story.

Enter Kickstarter.com

Dering decided to use Kickstarter to try to fund the first production run of his device. His Kickstarter project went live on May 2, and by the powers of the viral qualities of the internet, he had reached (and quickly surpassed) his $10,000 funding goal by May 4.

At the time of writing this article, the project has 3,859 backers who have funded the project to $251,746 - a far cry from the $10,000 initial goal. So, how did this happen? How did a device go from no one hearing of it to being the next must-have photography gadget seemingly overnight?

The news of the gadget traveled far and wide through the type of viral speed and growth we’ve come to expect only from funny youtube videos. News was spreading fast via Twitter, Facebook, and tons of blogs. Loads of tech & photo websites, such as Gizmodo, Peta Pixel, Digital Trends and Photo Weekly Online all did articles about the Capture clip. It didn’t take long for this rush to “capture” the imaginations (and wallets) of the internet photographers.

Get involved!

The project will be funding until July 16 - so if you want to be one of the first to get your hands on the device you can pledge at least $50 on Kickstarter . Once the first run is done, the normal retail price is expected to be $70 plus shipping.

Perhaps Kickstarter is going to the next great tool for creating buzz around your photography ideas and gadgets - certainly many of the most successful projects on the site have come from the photography universe. Peter Dering seems to agree, and his gratitude is palpable: “This is absolutely mind blowing.  Backers, bloggers, facebook status updaters...thank you, thank you, thank you.  Thank you!!!”

My own Kickstarter project

So, independently of Dering's project, I have started a Kickstarter project of my own. It's photography related, it's awesome, and it's here.

This article was written by Ziah Fogel, who is part of Team Awesome: The gang working on my Kickstarter project.

SOS, Drowning in Lens Choices, Send Help

lens

“Only a complete idiot would pass up the opportunity to grab a 14-50 f/2.8 Zoom EFS EX IS USM ASPH L DFS OMG LOL Mark II at that price”. You may have heard this sentence (with fewer made up acronyms at the end) from some grumpy camera store owner who decided to bite your head off because you dared to consider buying a lens beyond the kit lens your new DSLR came with. (disclaimer – only 94% of them are like this, some are nice). Intimidated by the camera shop troll, you decided to go online, where the user ratings were either “5 stars! Buy this! Remortgate your house it’s worth the £3,000!” or “0 stars! Avoid! This lens gives you smallpox somehow!” and nothing in between. Well now you can relax, because here at Small Aperture, we’re going to help you on your way to a relaxing, informed first lens purchase.

Lens Terminology Explained

First off, let’s look at an example lens name and go over what each part of the description means, so you know what features you’re looking at. I’m going to use the Canon EF-S 55-250mm F/4.0 – 5.6. I’ve picked this lens purely for the name, as it has the most commonly occurring type of description and it will allow me to run through what it all means.

Canon EF-S is the brand name and the fit of the lens – it tells us what kind of cameras it will fit on. I’m a Canon user, so if you have a Canon, take a look at your camera now. If it has a red dot and a white square, your camera can use lenses that are described as either “Canon EF” or “Canon EF-S”. If you only have a red dot, you can only fit EF lenses to the camera. It’s worth pointing out at this stage that you don’t have to buy only Canon lenses as a result of this – any lens that is described as “Canon-fit” will be OK for your camera. If you’re unsure, your best bet is to take your camera with you to the shop, endure the eye rolling and see whether the lens you’re after will fit your camera. It’ll give you a chance to test it, too.

On location, my "walkaround lens" allows me to zoom out and capture environmental detail which my prime would have trouble with.

55-250mm indicates the focal length range. Simply put, the low number is how wide your lens will go (literally how much width and how “zoomed out” your point of view can get) and the high number is how far you can zoom in. For reference, a 17mm focal length will give you a decent amount of width for landscape images and 250 will give you a decent amount of zoom for basic wildlife photography (although those looking to travel abroad on safari and the like would probably be interested in a higher zoom, something like 500mm).

F/4.0-5.6 describes the maximum aperture at both ends of the focal length range (more on aperture in our first PCoF here, read this first if you’re not sure about aperture). In this example, F/4 is the lowest aperture you can set at the “wide” 55mm end of the focal length range, and F/5.6 is the lowest aperture you can set at the “zoom” 250mm end of the focal length. You will notice that some of the more expensive zoom lenses only have one number here, for example the Sigma 70-200mm F/2.8. This means that the lens is able to be set to its lowest aperture of F/2.8 at any focal length, be it 70mm or 200mm.

These are the most commonly occurring suffixes to a lens name that you’ll need to know and understand. There are many, many other suffixes – some that describe features, some that describe the particular product range that brand of lens is in. For example, “L” on a Canon lens is referring to the top of the range series of lenses that Canon make (indicated by a red ring around the base of the lens) whereas “USM” refers to “UltraSonic Motor” and refers to a small motor built into the body designed to aid speed of autofocus. There are so many of these and they tend to be company-specific. In addition, they tend to be half product description, half marketing tool, so don’t get too dazzled or excited by these things.

So Which One Do I Buy?

To know what lens to buy, it’s important to ask yourself what kind of photography you undertake the most.

I took this using a 50mm prime for the extra detail it provides me.

Portraiture

As a portrait photographer who takes a lot of head / head and shoulders images, my main lens is a Prime Lens. A prime lens is one that has a fixed focal length: that is, you can’t zoom in nor can you zoom out. A fixed focal length means that there are significantly fewer moving parts inside the lens. This allows the glass inside the lens to be much more precise, allowing for sharper, higher quality images. This is exactly what you need for striking portraits. The other advantage is that this sometimes brings the price down. I don’t want to be seen as endorsing a particular company over another, but I have used the Canon EF 50mm f/1.8 II for a few years and it is dirt cheap for the quality it provides me. You can pick one up for about £80. For balance, Nikon have an equivalent lens of the same price, the Nikkor 50mm F/1.8 is a good buy and also seems to get very good reviews. Another good reason for using a prime is it teaches you to think about composition more, as you can’t just zoom out or in more to get the desired crop.

Landscape / Architectural

If you are a landscape and architectural sort of person, you will want a lens with a good wide-angle focal length. I only dabble in landscape for my own enjoyment, so I find my walkaround lens (see below) serves me just fine with a wide focal length of 17mm. Those that are serious about landscape will want to look at how wide the focal length goes (14mm is good) and the actual quality of the lens glass itself. Detail and sharpness are of the most importance for the landscape photographer. Maximum aperture is less of a problem, because you will be looking at setting your aperture to ranges of f8 -f11 and beyond anyway, to get all the detail of the landscape in. As I say, my Tamron walkaround creates landscapes that are sharp and vivid enough for me, but those of you looking for more might want to take a look at the Canon EF 17-40 F/4L (where it starts getting pricey), the Tokina 12-24mm f/4 which fits Nikon cameras (very wide angle) or you might even want to go super wide with the Sigma 10-20mm f/4-5.6 EX DC.

All this lens talk is making me want to buy things.

Close Up, Abstract and Insects

If you like looking at ants up close (weirdo) or if your photography is all about extreme close up, abstract work, you need a Macro Lens. These are lenses with very high levels of magnification, and are used for insect and other high-magnification photography. I can’t say I’ve done much of this but it sure looks like a lot of fun! I don’t have time for fun. I would advise reading up extensively on the subject if you’re serious about macro photography.

Don't forget that you can play around with the rules - here I've used a landscape lens to create a portrait. What a rebel!

Stop Trying to Pigeonhole Me you Square! My Photography Transcends Categories, I Photograph All!

If you do a bit of everything (and even if you don’t) you’ll want to find a good “walkaround lens”. This is a term used to describe a general purpose lens that will always come in handy for most situations – something that will do a variety of jobs to a decent level of quality. When on assignment for a magazine commission, I take my both my walkaround lens and my prime for portraiture. Again, not wanting to advertise, but you will find that many people recommend the Tamron 17-50mm f/2.8. Now if you’ve been paying attention, you will see that this means the lens has a maximum aperture of f/2.8 at both 17mm and 50mm focal lengths. You can pick one of these up for around £320-£360 these days and, for the price range, the image quality is excellent. Put it this way: I have been using it for published magazine work for over a year now, and my clients have been more than happy with what we’ve ended up with. It’s good for me because I can use it for portraits but also I can zoom out and grab some surrounding environmental detail aswell.

So who’s feeling spendy? Is spendy a word? Does anyone care? It’s Friday, which means tomorrow is Saturday, which means it’s time to buy your very first lens. Hopefully, by applying what you’ve learned from this, you’ll be able to stride into the camera shop and bellow “SHOPKEEP, PROCURE ME A CANON-FIT PRIME WITH A 50MM FOCAL LENGTH OF THE FINEST QUALITY, SPORTING AN ULTRASONIC MOTOR! MAKE HASTE!“. Go on, do it. I double dare you.

Watermarking your images


I very occasionally use a small watermark on my images - but only for my travel blog, oddly.

I recently received an e-mail from Danielle, a reader who was confused that I seemed to post most of my photos online without watermarking them. We had an interesting e-mail discussion, and I received her permission to re-write the discussion into a blog post.

The case for watermarking

Photography seems to be an ever evolving art movement. As quickly as it began, it has undergone many advancements. This relatively new art practice has gone from the camera obscura to cameras built-in to our tweet-enabled, facebooking phones. Anyone has the ability to snap a photo and have it uploaded onto the web within seconds. Mind blowing? Sure. Good for business? Definitely not.

Just as quickly as advancements in technology giveth, they taketh away. Technology has made stealing photos, your sweat, blood and hard work as easy as holding down two buttons. If you don’t properly identify your photographs as your own copyrighted pieces of work with watermarks, you may find yourself hiring ip lawyers to get your intellectual property taken down and back into the rightful owner’s hands. Not watermarking your photographs with some form of logo or even simply a name is putting your work at risk.

Many photographers don’t find watermarking extremely important. In thinking that, you are putting your work out to the world to use as it pleases. Without a proper watermark, you will never know who will copy and use your photograph somewhere else. More importantly, you never know where these photographs will end up.

As a photographer, you should be aware that watermarks are there for your protection and to protect those clients who agree to be photographed. If a client should happen onto an inappropriate webpage or print that includes their picture, they will come to you looking for answers. Will you be prepared to explain the situation? As an artist, shouldn’t you take enough pride in any work you publish to include your name on it?

Some artists misconstrue watermarks as bulky and at times unprofessional looking. What they are not considering is how many different types of software and options there are to create these copyrighting texts for your photographs. Researching just a few watermarking software programs will show you that watermarks can be as simple and elegant or as bulky and obnoxious as you’d like. Of course not many artists would want a bulky addition to their work, but the point is artists have that option.

When photographs are taken out of context or away from the artist’s original concept, the integrity of the work is compromised. As photographers, we should be concerned with maintaining the utmost relevancy and honor in our work. Watermarking photographs might not be the end all to protection, but it is definitely a step in the right direction. All artists should consider taking these steps while they can because it is only a matter of time before the next boom of technology will flip the art of photography upside down once again.

What do you think?

I don't think I agree all that much with Danielle above - I do think that watermarks detract from my images, and I doubt whether watermarking is as much of a deterrent as she thinks. 

What do you think?

Walking in the air

img_e7fc6d2904d10440b38cd22838c3b0af2cb31bf6

How do you take a photo that makes it look as if you’re floating, or maybe flying? If you’re Natsumi Hayashi, a twenty-something photographer based in Tokyo, with a fast shutter-speed and by jumping up and down. Lots. Up to 300 times per shot, in fact. Sometimes she uses a self-timer and sometimes she ropes in a friend to click the shutter. But she still has to jump up and down. And with some shots taking up to an hour to get right, I’m surprised that she isn’t permanently exhausted.

I’m completely stunned by her ability to maintain a composed facial expression whilst she’s leaping about.

You can follow Hayashi’s jumping exploits – and those of her cats, which don’t levitate – on her photo blog, Yowayowa camera woman diary.

(Thanks, Graeme.)

Today, I'm only shooting feet

_small_DSC_3339 - Version 2

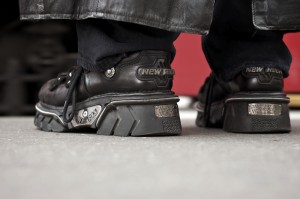
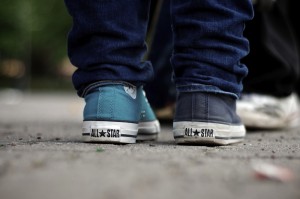
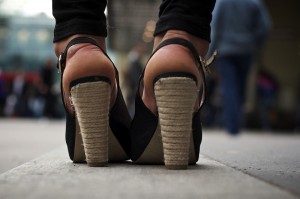
We love a bit of street photography here at Small Aperture, and we’re always looking for new ways to tempt newbies to have a go at it or give old hands some ideas for their next outing pounding the streets. When Thomas Leuthard, a photographer based in Switzerland, dropped a couple of suggestions in my inbox, I asked him if he wouldn’t mind expanding on them a bit. So, here’s one of his suggestions, and I have to say, I love it. Thomas, over to you…

Today, I’m only going to shoot feet…

When you’re shooting on the street, it’s far too easy for your eye to get distracted. Therefore, it’s a good idea to have a small concept to concentrate on whilst out with your camera. Beginner or not, it helps to have a plan; something to hold on and to follow to. I like the concept of just shooting feet. The reason for that is very simple: feet are always out there and people wear different shoes.

In addition to saying that you’ll shoot only feet, it can help to set yourself some more boundaries. Try picking a few (or even all) from this list:

  • Detail only
  • Camera on the floor
  • From the back while standing
  • Same focal length
  • Same aperture (a small one)
  • Landscape format
  • In colour
  • A series of 10 photos
  • All in 60 minutes

I like time limitations as I find that I normally work better under pressure. It means that I know that I have to hurry up and can’t just hang around with my camera looking down at ladies’ legs. I have a mission and have to fulfil it in the time provided. (How very James Bond!)

If you target your focus, you’ll be astonished by how much you can accomplish. It doesn’t matter if you’re a beginner or an old hand, try to focus on one thing. It can be a colour, body part, accessories, or whatever you fancy, really. It is all about focussing on the essential and not getting overwhelmed by the rest of the street.

Anyway: back to our feet that we’re shooting. If you want to get a good and easy shot on a pair of shoes, try a bus stop, a pedestrian crossing, or anywhere else where people have to stand still for a moment. This is your moment and you have to be quick. Set your camera to aperture priority and try f/4. If you’re shooting with your camera on the floor, flick on autofocus. You’ll look like an idiot with your head down there, peering through the viewfinder. You might need to practise, but that’s half the fun, no?

Sure, you’re going to have to be brave, but if anyone asks, tell her or him that you study photography and that today’s topic is feet. They will think you are crazy and walk away. It’s true, people often don’t understand what I do and why I do it, but I often find that showing them some photos helps to explain it. They soon realise how beautiful street photography can be.

It’s all a question of good ideas, interesting angles, and composition. A good street photo doesn’t need to show faces. Feet are perfect, and the chances are you won’t have any legal issues, publishing someone’s feet.

Now, go forth and have fun, and try not to walk into lamp posts or anything whilst you’re looking down!

This article was guest written by Thomas Leuthard, and all of the images are his. You can see more of his street photography on his website: 85mm.

Why I don't need an expensive camera.

On My Flickr Feed, I some times get questions about my use of camera. “Why”, it is asked, “do you shoot with a 450D/550D”?

I understand the question completely. When I was photographing professionally, I wouldn’t have dreamed of using the then-bottom-level camera (the 300D, at the time, I think) even as my back-up camera. The 10D (and later the 20D and 30D) was my the back-up and second-lens camera to my 1D. So how did I end up photographing with the bottom-of-the-range model from Canon only a few short years later?

Let me in on a secret: Even the cheapest d-SLR cameras on the market today are absolutely phenomenal pieces of equipment, and chances are that you don’t need to spend much money to take phenomenal photos.

What am I missing?

"Waves breaking Slowly" - a smoke photo. Taken with a Canon 450D (clicky for full size and details)

As some of you might have noticed, I occasionally dabble in concert photography, and this is where my 550D occasionally lets me down. And then, only in one very specific aspect of my photographic work: I want to take photos faster. I want to be able to take more photos in a shorter period of time. Some times, you realise you’re witnessing something awesome, and you just want to keep the shutter pressed until the awesome has gone away – and then keeping your fingers crossed that one of the six billion photos you’ve taken in the meantime is the shot you were hoping (and praying, if you’re a praying man. Which I’m not. I think I might have gotten better photos with a god on my side, but this is just not That Kind of Blog™) for.

Interestingly, that is the only situation where I’ve ever felt my 550D isn’t up to the job. With the appropriate lighting, my portraiture work comes out lovely. I’ve taken my camera to a load of different countries, and I’ve taken some rather splendid street photos in all of ‘em (if I may say so myself).

The other situation where you might find yourself stuck (although I haven’t had the experience myself, as I make a point of staying as far away from sports as I can) is, er, sports photography.

So, if the 550D is good enough… Is it all just a scam?

You'll often find that lighting is a much bigger factor in photography than the camera you're using. (shot with a Canon EOS 450D. Clickie for bigger)

Wait a minute, cowboy, I never said that. All I’m saying is that at my level (and, I wager to say, at the level of many other photographers), the 550D (and any equivalent low-level SLR cameras) are plenty good.

The problem with photography is that it’s simply too tempting to splash a lot of money for everything, and then end up bankrupting yourself on the wrong things. Sure, I would love to have some of the features offered by more expensive cameras, but I can work around them. For concert photos, I’ve learned to anticipate the movements of the artists, and then try to act on those. I have no doubt that I’ve missed some cracking shots along the way, but equally, I think the limitations of my photographic kit has made me a better photographer. Put differently: Put a 1Ds mk III in my hands now, and I think I’ll be able to take better photos with it than I could have before I learned the limitations of another camera.

The most important thing to remember, though, is that as far as a camera body goes, it doesn’t actually have all that much to do with the picture-taking process itself. Yeah, I know. Controversial. But I said it, and I meant it.

Portrait - taken with a 450D. (click for higher res & info)

Think about it: You are taking a photo of an antelope jumping across a savannah. The sunlight comes from high above, hits the antelope, flies through your lens, into your camera… and the only part of the camera which actually gets involved is the imaging sensor.

I’m not going to lie: I use expensive photographic equipment. I’ve recently splashed a few thousand dollars on lighting equipment. I have some extraordinarily delicious lenses – including my ludicrously fantastic Canon 50mm f/1.4 USM prime lens, a rather sexy 70-200mm f/2.8, etc etc etc. But this illustrates an important point: I’m spending the most money on the bits of kit that will actually impact my photos.

Truth be told, there isn’t that much difference between a 7-year-old Canon digital SLR camera like the 300D and a brand spanking new 550D. Sure, the latter has higher resolution and better toys, but most people simply don’t need the extra resolution. What you need is a shutter that works, a mirror that will move out of the way in time, and a sensor without too many dead pixels. From there on out, it’s all about the quality of your glass (i.e. your lenses), the quality of your light (i.e. sunlight / flash / natural light / diffusers / softboxes / light filters / etc) and… You.

With all the electronics, magnificent optics, and delicious equipment at your beck and call, the sad, scary, horrible truth is that the weakest link in everything I’ve just described is you. A competent photographer can take good photos with a single-use camera.

My advanced motorcycling club has a motto: “Upgrade your skills to match your machine”. In other words: Your motorcycle is probably better than you are, and you need to work smart (and hard) to not kill yourself. Granted, I’d be willing to accept that more people kill themselves with a set of handlebars between their hands than with a SLR, but the point stands: If you haven’t got the skills, there’s no point in blaming your tools.

What are the benefits of pricier cameras?

I quite like the fact that the Canon 450D looks unobtrusive: It makes street photography just that tiny bit easier.

As you go up the Canon and Nikon ranges, you get some very good benefits. If you’re working as a (semi-)professional photographer, the first thing you’ll notice is build quality. The budget cameras aren’t badly put together, but they’re made of plastic. Drop one, and there’s a pretty good chance it’s all just game over. The more pricey cameras are built of aluminium or magnesium, and can take significantly more abuse.

The higher-priced, higher-specced cameras also tend to have better screens, higher-resolution sensors, higher shooting and processing speed, and more gadgets to help you get the photos you desire. I’m not saying this is a bad thing: there’s a ‘right’ tool for every job. Very often, a more advanced tool can be used to do jobs that a cheaper tool could have completed, but not vice-versa.

I also note that ISO speed has come up in the comments a few times, and that had me wondering. I asked a good friend of mine who reviews camera equipment for a living. He explains that ‘budget’ SLR cameras are as good as their larger parents. It is possible to get better performance, of course, but that involves going full-frame, and then you’re suddenly well and truly out of budget-camera-territory, price-wise.

On the ISO front, you sometimes get an improvement with the latest high-end model but it very quickly filters down (see for example how fast the 550D got great high-ISO capabilities so soon after 7D).

Hey, aren’t you meant to be some hot-shot writer?

Again with the street photography! Don't I ever give up? Nope, of course not. (clicky for bigger)

Uhm… Yeah, I’d like to think of myself as one, anyway (and I’ve got the resume to back it up, if you’re particularly curious…), but the truth of the matter is that most of my writing is aimed at photographers who rank from ‘geez, which hole do I look into to see what I’m taking a photo of’ beginners, to ‘Hey, I do wonder what the comparative benefits of shooting in RAW is, compared to taking only JPEGs’ intermediate photographers. Truth is, more expensive cameras are objectively ‘better’.

… But the bottleneck is still the photographers. Take it from me: you’ll be much happier with a ‘cheap’ dSLR, a decent lens, and an oath to work hard on taking better photos, than by owning the hippest, coolest, and newest equipment on the market.

Concert photography is the only time where I'm feeling the 450D can occasionally let me down. But then again, I seem to have learned to work around its weaknesses, and still walk away with some pretty nifty photos... (clicky for bigger)

There’s nothing quite as embarrassing as a clueless newbie behind the wheel of a sportscar. My 550D is the all-rounder that lets me do everything I need to do with a camera.

And best of all? A 550D isn’t throw-away money, but if something horrible were to happen to my camera and I lost or destroyed it somehow, I could swear for 45 minutes straight, before walking into the nearest shop to buy myself another one. A Canon 1Ds mk III is small-family-hatchback territory; not the kind of money I can afford to lose.

The bottle-neck of good photography is often the photographer. This photo, I could have taken with a disposable camera (well, maybe. Certainly with a compact).

Finally, the 550D is more like the camera that my readers are likely to use. Truth of the matter is that people who own a much more expensive camera are more likely a) to no longer need my articles, b) to think they no longer need my articles, or c) to be so far ahead of the game that I haven’t got anything to offer them anymore.

Oh, and by the way… I sort of like the fact that the 550D is made of plastic. It’s much lighter to travel with, looks cheaper (and so is less likely to get stolen from me) and is less invasive when I’m working with my street photography projects

Which doesn’t mean that I don’t occasionally think about upgrading... The 60D and 600D are both rather tasty cameras - and the ability to sync with Speedlites without an external ST-E2 is tempting... But I don't really hunger for the top-end Canons.

Equivalent exposures

Changing, say, the aperture on your camera changes things beyond the amount of light that gets into your camera. As such, you might decide that you want a smaller aperture, in order to get a greater depth of field. A smaller aperture means that less light comes in to the camera. How do we solve this?

Your camera has three different adjustments for exposure: Shutter speed, aperture, and ISO. If you adjust one so the exposure would be brighter, you can adjust another one to compensate for the additional light captured.

For example: Let’s start with an exposure taken at 1/100 second, f/4.0 and ISO 200. Now, you can change your camera settings to 1/200 second. That would let half the amount of light into your camera compared to 1/100 second, because the shutter is only open for half the duration. Your photo will now be darker. If you change your ISO to 400, the sensitivity of the sensor is doubled, and the photo will come out looking more or less the same, from a brightness point of view, as with your original exposure.

You can change any of the settings to compensate for any of the other settings: A smaller aperture can make up for a higher ISO, a faster shutter speed can make up for a larger aperture, and a lower ISO can make up for a slower shutter speed.

Other effects of exposure changes

Of course, ISO, Aperture and shutter speed don't just affect the brightness of the image... Here's a handy reminder for what else they affect:

brighter_darker_600_v2.jpg


Easy peasy!

250 photography tutorials


Time for some tutorials, because at some point, we all want to grow beyond the cliché holiday snaps...

A curious thing happened with the advent of the internet - and that is that people seemed to shun photography clubs, classes, books, and even learning from your mates, and turn more towards learning from online tutorials. In some ways, that's a shame - but given how many hard-working photographers there are out there who are more than happy to share their knowledge with the masses, we're probably in a better place now that we ever have.
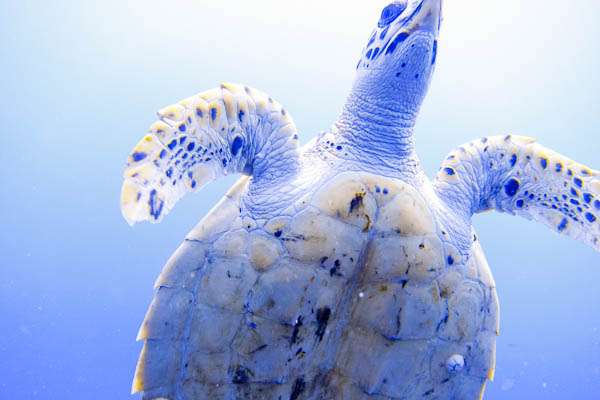
20110429_img_0900_3648_x_2736.jpg

The kids nowadays - and by 'the kids', I mean everybody who is currently taking photographs - are learning at an incredible rate, and most of all, we're learning from each other. The curious thing is that we're transferring knowledge in a completely new way: through the magical mystery world of photography tutorials

With that in mind, I figured I might have a look and see if I couldn't dig up a couple of high-quality tutorials to share with you all. When I set out to search for 'a couple', I soon found a dozen. Then a score. Then a couple more... And rapidly, my search completely spiralled out of control, ultimately resulting in the list you're looking at here.

Yes, there's 250 of 'em, and yes, there are a few tutorials covering the same topics... But I challenge anyone to have a look through this list and not find a few tutorials they like - and who knows, you may even learn a couple of things along the way.

Enjoy...
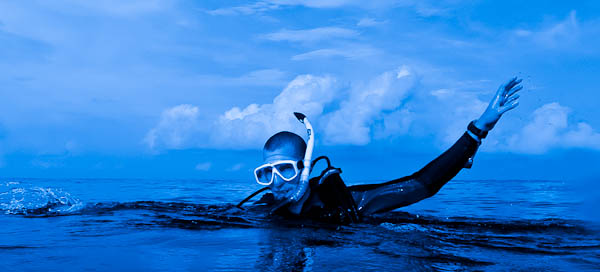
20110428_img_0674_3648_x_2736.jpg

1 - Digital Basics

It happens rarely that I find an article that seems to cover all the basics of digital photography, but this article hits the spot very nicely indeed. It's a one-shot introduction to the basics - nearly as good as buying one of my books! :)

Get the full skinny at Digital Basics on Photo Pursue

2 - Learn Photography in Five Steps

Panning. I think I cried the first time that I tried it. I might've had a better experience with this clear, five-step tutorial to capturing moving subjects.

Find it all on Learn Photography in Five Steps on Step By Step Photography

3 - Working with Models for that Perfect Wide-Angle Photo

So you've tried your hand at underwater photography and you love it. Now you want to try something a bit more advanced. How about including a model? Here's how...

There's more at Working with Models for that Perfect Wide-Angle Photo on Stephen Frink

4 - Avoiding the evil of red-eye

If you're using a compact camera, red-eye can turn a portrait of your best friend into a picture of the devil incarnate. This guide explains what red eye is, how it happens, and how to avoid it.

Read more on Avoiding the evil of red-eye on Small Aperture

5 - Digital Photography Tutorial

Basic ideas in photography are covered here: composition, exposure, editing, storage, and printing. There's nothing too detailed, but it does offer an entry-level guide - a perfect tutorial to forward to your clueless mum / dad / sibling who just got their first camera

Read it all on Digital Photography Tutorial on Hub Pages

6 - Beginners Guide to Photography for computer Geeks

A beginners' guide to photography written by a beginner with a sense of humour. It has everything from metering to filters, as well as a decent explanation of focal length.

Learn more at Beginners Guide to Photography for computer Geeks on Bernie Sumption

7 - How to write and sell a photo story

You're a photographer, right, not a writer? But sometimes, you need words to accompany your images. This'll help you to find the words to sell your story.

Check out the full tutorial on How to write and sell a photo story on Pixiq

8 - Understanding your Digital SLR Camera

What happens if you change your camera's aperture? How about shutter speed? And ISO? How can you make sure your camera focuses where you want it to focus? What's a good lens to have? This tutorial has it all.

The full article is on Understanding your Digital SLR Camera on Kevin and Amanda

9 - Photographing Panoramas

Photo Guide's guide to Panorama photography is a simple guide covering all the major points for photographing panoramas, including how to get the photos, and how to stitch them all together. A great introduction guide.

More at Photographing Panoramas on Photo Guides

10 - Dave Hill Quick photography Tutorial

Ever fancied giving your photos a cartoon-like effect? This tutorial shows you just what you need to do with a little HDR and unsharp mask help.

Have a read at Dave Hill Quick photography Tutorial on Abdu zeedo

11 - How to Develop your Photography Skills

Taking good photos isn't just about understanding physics and the technicalities of your camera. It's about knowing what makes a good picture and spotting the opportunities. This tutorial tells you what to look out for.

There's more at How to Develop your Photography Skills on Bama Scenes

12 - The Digital Photography Tutorial

You've filled a memory card with images. Now what? This tutorial will walk through your workflow, from post-processing and on through organisation, printing, sharing and storing.

More at The Digital Photography Tutorial on Best Family Photography Tips

13 - Beginning Photography Tips: Top 10 Techniques for Better Picture

You might have aperture sewn up and ISO is no longer giving you a headache, but what other elements contribute to a great photo? Composition, the weather, time of day, timing. This website covers ten things you need to think about.

There's more at Beginning Photography Tips: Top 10 Techniques for Better Picture on Better Photo

14 - Learning Photography

A lot of photography is instinctive: knowing what makes a good image and how best to capture. These five pointers help you to get the most out of your pictures by experimenting and practising.

More at Learning Photography on Dan Heller

15 - Understanding Histograms

The histogram. That groovy little graph that shows you just how over- or under-exposed your picture is. This tutorial walks you through the magical art of using a histogram to make sure your images are just right. Nifty!

The full article is on Understanding Histograms on Digital Photography School

16 - Six Secret Steps for Taking Great Photos

These secrets probably aren't all that secret, but they certainly reinforce what we know about taking good pictures: get as much advice as you can, keep on practising, and enjoy yourself!

The full article is on Six Secret Steps for Taking Great Photos on Free Digital Photography Tutorials

17 - How to Take Sharp Images

Great idea for a picture; a pity that it has come out a bit fuzzy around the edges. Here are seven tips to ensuring you get pin-sharp images.

Check out the full tutorial on How to Take Sharp Images on Hypergurl

18 - How to find great Locations for Model shoots

Finding a shoot location can be a headache. But have you thought about checking the geotag locations on Flickr images? What about using places you've never considered? What do you need to take with you? How about lighting? This article has got it all.

There's more on How to find great Locations for Model shoots on Lights Talking

19 - An introduction to Digital Imaging

Film cameras and digital post-processing can live harmoniously. Honest! This article tells you what hardware you'll need and explains the benefits that a bit of software can bring to a negative or slide.

Check out An introduction to Digital Imaging on Luminous Landscape

20 - Introduction to Photography: Ten Ways to Improve your Skills

If you're setting off with your first camera, this article has some useful ideas for how to make the most out of the experience, like keeping a diary and not giving up when things seem a bit tough.

Get the full skinny at Introduction to Photography: Ten Ways to Improve your Skills on Paxton Prints

21 - Crash Course Guide to DSLR Photography

You've just bought your first dSLR! Congratulations! Now what? Well, you'll want to get it out of auto mode, and this crash-course demystifies aperture, ISO, and shutter speed to help get you started.

Have a read at Crash Course Guide to DSLR Photography on Photo Guides

22 - What is correct Exposure?

A great tutorial on how to combine aperture, shutter speed, and ISO to ensure that your pictures are correctly exposed. Banish the auto mode and take control of your photography!

There's more at What is correct Exposure? on Photoxels

23 - Photography Basics

Clear diagrams show you how light passes through your camera to create an image, and explains how aperture, shutter speed, and ISO affect your pictures.

Get more at Photography Basics on Tutorial 9

24 - Camera Skills Manual

Confused by the different settings on your camera? This tutorial explains the difference between Tv and Av, and what the benefits of shooting fully manual are.

There's more at Camera Skills Manual on Worth 1000

25 - How to take Great Photos of your Projects?

Have you ever wondered how to take photos to illustrate your own tutorial? This tutorial walks you through it, from what you need to how to do it.

Learn more at How to take Great Photos of your Projects? on Ada Fruit

26 - Photography in low light Conditions

We've all been there: you're presented with a great image, but the light is on the low side to actually capture it. These suggestions should help you to get the shot that you want when things are a little dim.

The full article is on Photography in low light Conditions on How to Photography

27 - Develop your Photography Skills

An amazing step by step tutorial to develop your photography skills. It is based on basic knowledge of photography and is a great starting point for struggling photographers who want to take their photography further.

Read more on Develop your Photography Skills on Wiki How

28 - Digital Photography Tips for Beginner

This tutorial reminds you to get to know your cameras and recommends different ways to experiment with it so that you get the most out of it, and out of your pictures.

There's more at Digital Photography Tips for Beginner on Oh Blitz

29 - The Golden Hour

When is the golden hour? What is the magic effect that it has your photographs? If you want to learn how to make your photos sizzle, read on!

Read more on The Golden Hour on Small Aperture

30 - Basic Photography Tutorial

If you want to try shooting on film, need to know how to load a spiral, or would like to have a go at processing your own black and white film, you'll find the answers here.

Learn more at Basic Photography Tutorial on Silver Light Uk

31 - Taking Photographs At Unfamiliar Places

Taking photos when you're travelling can be a daunting experience. Differences in culture and outlook and just unfamiliarity with the place can be difficult to navigate. Travel photographer Alissa Everett has some useful advice.

Can't get enough? Read it all on Taking Photographs At Unfamiliar Places on Pop Photo

32 - Travel Photography Introduction

When are you most likely to take photos? Probably when you're on holiday. This guide will help you to make the most out your holiday snaps, with a look at the technical and the practical side of things.

The whole nine yard's at Travel Photography Introduction on Dan Heller

33 - Taking Professional Photos

From using plastic boxes as light diffusers to walking you through Photoshop, this tutorial aims to help you get the most professional looking pictures you can, whatever camera you have.

There's more on Taking Professional Photos on The Switch Board

34 - How to Make Great Photographs

Photography is not just about taking photos - but taking great photos. This detailed tutorial discusses just about everything you need to start photography - and sees you on your way to become a great photographer.

Read more on How to Make Great Photographs on Ken Rockwell

Composition
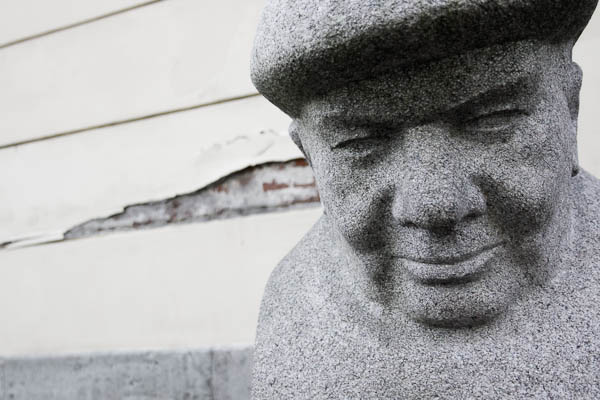
20100924_img_3053_5184_x_3456.jpg

Technically part of the 'basics' in everybody's book, composition still deserves its own little mini-section in this list - it's an important topic, after all - and well worth a read, of course.

35 - The Rule of Thirds

Have you heard of the Rule of Thirds? If you haven't, you've almost certainly seen it. It's a groovy trick to help you compose your images. This article explains all.

Learn more by going to The Rule of Thirds on Digital Photography Tips

36 - An Introduction to Photography Composition

From the rule of thirds, through leading lines, to different points of view, and including a whole heap more, this tutorial covers just about everything you might want to know about composition.

Get it all on An Introduction to Photography Composition on Yanki Photo School

37 - Vantage Points in Park Photography

Who hasn't taken a picture in a park before now? I bet we all have. But how can you get the most out of your local patch of green? Here're four great tips.

Learn more by going to Vantage Points in Park Photography on Photography Tutorials

DIY photography
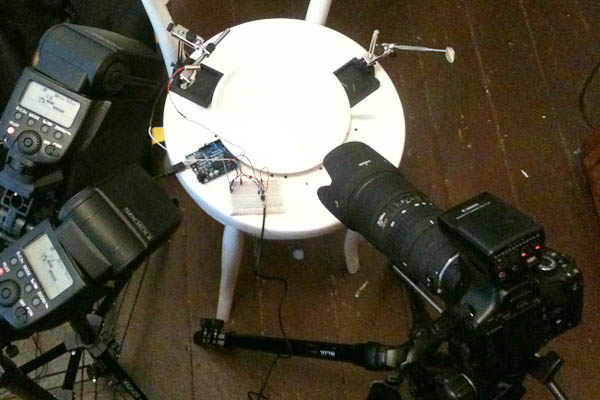
20100217_img_0116_2048_x_1536.jpg

Photographers are a curious and crafty bunch - and there's something rather lovely about building parts of your own kit. With these tutorials, you'll get the creative do-it-yourself juices flowing!

38 - How to Create a Low-Budget Reflector or Diffusor

The more you practise photography, the more things you find you need. Like reflectors. Or diffusers But, you don't have to buy them, you can make a two-in-one reflector and diffuser yourself.

Learn more at How to Create a Low-Budget Reflector or Diffusor on Pxl Eyes

39 - Making your own Macro lens for $10

If you have a can of pringles kicking about, you can turn it into a surprisingly good macro lens. It'll take an afternoon, but it'll be worth it!

Read more on Making your own Macro lens for $10 on Pixiq

40 - How to Make and Use a Pinhole Camera

Lo-fi photography can be great fun, but it also helps you to develop as a photographer. So how about trying pinhole photography? Don't have a pinhole camera? No problem - here's how to make one!

Get the full skinny at How to Make and Use a Pinhole Camera on Kodak

Equipment
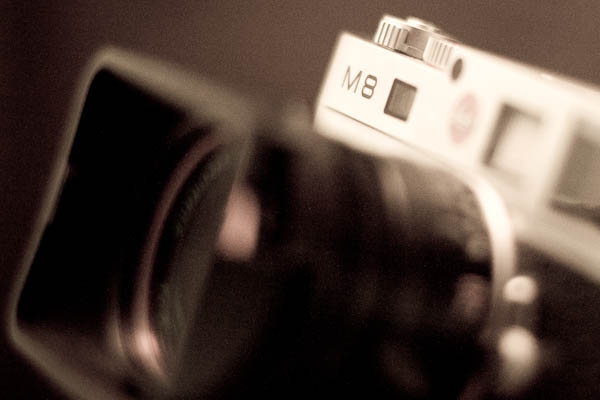
20100312_img_1410_4272_x_2848.jpg

Without equipment, there's no photography - but without knowledge about your own equipment, it's all too easy to mis-invest your hard-earned cash into stuff you either don't need, or aren't able to use. This set of tutorials collects some of the info I wish I had when I first started out with photography.

41 - Compact vs Digital SLR cameras

You've just starting out taking pictures. You're not really sure how a point-and-shoot compares to an SLR. Do you really need to splash out on an SLR for what you want? This'll help you figure it out.

Give it some love at Compact vs Digital SLR cameras on Cambridge in Colour

42 - Choosing a Camera

Itching to get started in photography? The first conundrum to solve is deciding on what camera to buy. This tutorial will help you choose the one that best suits your style of photography.

There's more at Choosing a Camera on Geoff Lawrence

43 - 7 ways of ruining your photo equipment

We love our cameras. They take pretty pictures. But some things don't love our cameras, like salt and dust. Here are the top seven camera ruiners, and how best to combat them.

There's more on 7 ways of ruining your photo equipment on Digital Photography School

44 - Taking good photos with an iPhone

I always say that it's not about the camera, but its operator. To prove my point, here's a tutorial proving you can can a pretty good photo with your iPhone. Honest! Here are seven ways to make sure that you do.

Have a read at Taking good photos with an iPhone on eHow

45 - Using a Point & Shoot Camera

If you don't have access to an SLR camera, for whatever reason, you can still get great photos from a point-and-shoot. This article shows you how.

There's more on Using a Point & Shoot Camera on Photo.net

46 - 10 Super cool creativity boosting Photography gadgets

If you've a little money to spare and fancy splurging on some fun and creative photography gadgets this list of ten cool things might help you burn through your cash!

The full tutorial lives at 10 Super cool creativity boosting Photography gadgets on Creative Closeup

47 - Lenses; What do all These Characters mean?

If you've ever been confused and befuddled by the strings of near-impenetrable numbers and letters on a lens, you're not alone. And now you can feel enlightened as this article sorts out EF from EF-S and reveals the mystery of IF.

Interested? Check out Lenses; What do all These Characters mean? on Car Photo Tutorials

48 - Upgrading to a Digital SLR (Single Lens Reflex)

When you've reached the ceiling with your point-and-shoot or bridge camera, what should you look out for when you take the plunge and upgrade to a dSLR?

Read all about it on Upgrading to a Digital SLR (Single Lens Reflex) on Digi Diversity

49 - Cleaning your DSLR Sensor: Tips and Advice

If you can see spots on your images or when you look through the viewfinder, something in your camera probably needs cleaning. This article helps you diagnose where the problem is and what to do about it.

Have a read at Cleaning your DSLR Sensor: Tips and Advice on Photo.net

50 - Camera Lenses for Indoor Event Photoraphy

If you're shooting indoors, probably with limited light, you need some fast glass. This article looks at primes and zooms, wide angle and telephoto, and helps you decide what you'll need in which situation.

There's more at Camera Lenses for Indoor Event Photoraphy on Picture Correct

51 - Lens Diffraction and Photography

Diffraction. It has a nasty habit of interfering with the pictures you want to take. This article explains what it is and how to resolve it.

There's more at Lens Diffraction and Photography on Cambridge in Colour

52 - Travel Photography Equipment

You're off on your travels so naturally you're taking your camera with you. But what else do you need to pack to capture those glorious sunsets and amazing architecture? Take a look here.

Read more on Travel Photography Equipment on Dan Heller

53 - Understanding Polarizers

Doubtless you've heard of a polarising filter before now. But what does it actually do? Why do you need one? How do you use one? All your answers are here.

There's more at Understanding Polarizers on Luminous Landscape

54 - Avoid Flash Media Problems and Save your Images

Flash cards are not cheap and if you shoot digitally, you can't do it without them. This article talks you through caring for your flash media, how you can prolong its life, and how to get the best out of it.

Find it all on Avoid Flash Media Problems and Save your Images on Paxton Prints

55 - Choosing a Digital Camera

Buying a camera is a major financial investment. This website outlines what you need to look for to make sure that you get the right camera that meets your needs, at the right price.

Have a read at Choosing a Digital Camera on Photoshop Tutorials

56 - Using a tripod

After a shiny camera and a couple of lenses, a tripod is probably the next piece of kit a photographer needs. Why? What are the benefits of a tripod? What are the different types of tripod? What should you look out for? Are there alternatives? This reveals all.

Read all about it on Using a tripod on Cambridge in Colour

57 - How to Choose a DSLR Camera

Upgrading from a point-and-shoot to a dSLR can be overwhelming. This article shows you what you need to consider, how you find the right camera for you, and makes some camera suggestions.

More at How to Choose a DSLR Camera on Digital Photography School

58 - Cleaning and Maintaining Your Camera

Cameras can get dirty pretty quickly, no matter how carefully you treat them. This tutorial shows you why you need a clean sensor and how to clean it yourself.

Read more on Cleaning and Maintaining Your Camera on Paxton Prints

59 - Prime lenses (and why you need one)

Not being able to zoom might be seen as something of a disadvantage when it comes to a lens. But actually, a prime lens is rather wonderful thing that every photographer should have. This explains why.

Read more on Prime lenses (and why you need one) on Pixiq

60 - How to clean your DLSR sensor

Got a grubby sensor? (It happens to all of us.) Want to have a go at cleaning it yourself? (It's not that scary.) Here's how.

The full article is on How to clean your DLSR sensor on Better Photo

61 - Choosing your first dSLR

Your compact camera just isn't doing it for you anymore. You need more control and more options. But where's the best place to dive in for a dSLR? This article covers everything from brands to megapixels, looks at the body or glass debate, and even makes some recommendations.

Find it all on Choosing your first dSLR on Pixiq

Essays & Philosophy
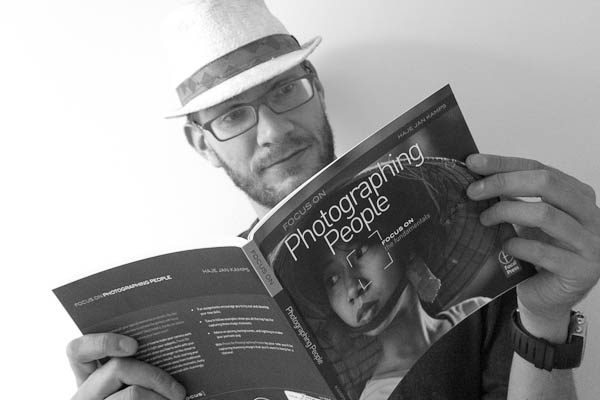
20110512_img_1003_2736_x_3648_2.jpg

As I started collecting my tutorials, I occasionally found a load of articles that weren't technically tutorials - but that were simply too good to leave off the list anyway. So, hereby, in this haphazardly named section, 'Essays & Philosophy', I offer a series of these articles

62 - Knowing your Limits as a Photographer

Sometimes we are limited in our photography, maybe we don't have a macro lens to capture that bee or the landscape is actually really flat and boring. Recognising these limits can be useful, and so can knowing what to do about them.

Read more on Knowing your Limits as a Photographer on Digital Photos Secrets

63 - Getting Started as a Second Shooter

Breaking into professional photography is not an easy feat. One way to get started is as a second shooter. This article explains what a second shooter is, how to land yourself a gig as one, what you'll need and what you need to do, and how to make the most of it.

Interested? Check out Getting Started as a Second Shooter on Pxl Eyes

64 - Understanding Films

Film. If you've grown up digitally, it's a whole new world. Here's your map that explains metering, film speed, and even how to store it.

Interested? Check out Understanding Films on Dan Heller

65 - Why is the F-stop scale so weird?

Yes, the f-stop scale is weird, but it makes perfect sense as to why f/18 is a 'small' aperture and f/1.4 is a 'large' aperture when it's explained. Read on!

Have a read at Why is the F-stop scale so weird? on Pixiq

66 - Haje's History of Photography

This 3-part epic is a complete history of photography, starting in the era before film was even invented, and taking us well into the digital age. Well worth a read if you've never thought about where it all started...

Check out the full tutorial on Haje's History of Photography on Pixiq

67 - Why fake what you make?

Here I am having a questionably erotic moment with myself and a strawberry. This never really happened. - a great article about how whilst there is a pace for fakery in photography, some times, there's absolutely no need

Read more on Why fake what you make? on Pixiq

Exposure
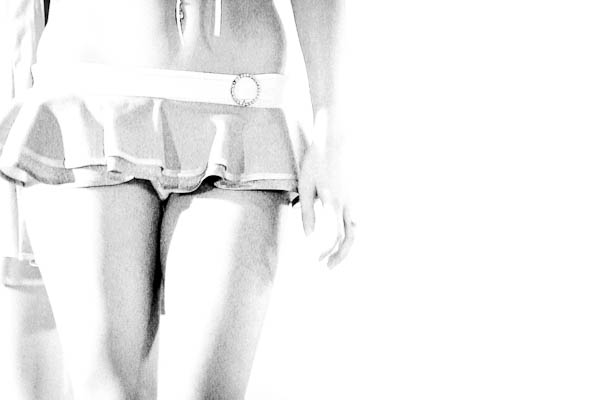
20040602_img_3099_2048_x_3072.jpg

Easily the biggest stumbling block for new and old photographers alike, Exposure is an integral part of photography... Which seems to confuse the hell out of people rather frequently. Here's a collection of articles and tutorials to help you keep your shutter speeds apart from your apertures.

68 - Shutter Speed

Wikipedia has an in-depth discussion on shutter speed - and whilst (in true Wikipedia stylee), it's completely devoid of character, it does introduce a lot of the relevant topics in a more or less useful manner.

The full tutorial lives at Shutter Speed on Wikipedia

69 - Breathtaking Long Exposure Photography and How to Capture It

Seven great examples of photos shot with a long exposure are shown here. Then it explains how what to do, and gives you some tips for achieving something similar yourself.

Read more on Breathtaking Long Exposure Photography and How to Capture It on Designzzz

70 - Benefits of Using Manual Mode

Taking full control of your camera and setting it to manual mode can be a daunting experience, but this article explains the benefits of switching the dial to 'M'.

Can't get enough? Read it all on Benefits of Using Manual Mode on Digital Photography Tricks

71 - Understanding Aperture Priority Mode

How do you control aperture? Why do you want to control aperture? This tutorial shows which dials you need to turn and what a different depth of field resembles.

There's more at Understanding Aperture Priority Mode on Free Digital Photography Tutorials

72 - Capturing Motion with Slow Shutter Speeds

So much in photography has both a technical and a creative application. Shutter speed is one of those very things. This article shows you how shutter speed works and what you can do with it.

Find it all on Capturing Motion with Slow Shutter Speeds on Picture Correct

73 - Understanding High ISO

High ISOs don't have to be scary and full of noise, honestly! These four facts take the fear out of high ISO and low-light photography.

More tasty treats at Understanding High ISO on Dp Mag

74 - Aperture and Shutter Priority Tutorial

A dSLR gives you a wealth of creative options, but only if you take it out of auto mode and use what it has to offer. This tutorial shows you what you can do with Aperture and Shutter Priority settings.It even has suggested exercises to practise what you've learned.

Get the full skinny at Aperture and Shutter Priority Tutorial on Photo.net

75 - Understanding Shutter Speed

This tutorial begins at the very beginning with shutter speed, explaining what a camera shutter is and how shutter speed is measured, before going on to examine the impact shutter speed has on your pictures and how to control it.

There's more for you on Understanding Shutter Speed on Free Digital Photography Tutorials

76 - Understanding Exposure

So you've switched to manual mode and you're wondering just how to get your exposure right. This guide to metering will have you set on the right path.

Learn more by going to Understanding Exposure on Luminous Landscape

77 - Using Camera Shutter Speed Creatively

From capturing motion to freezing time, via 'zoom blur', this article gets creative with the effect that altering shutter speed will have on your photographs.

There's more for you on Using Camera Shutter Speed Creatively on Cambridge in Colour

78 - Understanding Long Exposures

This article uses side-by-side comparison photos to illustrate just what effect altering your exposure times can have on your pictures, including landscapes, waterfalls, fireworks, and lightning.

More tasty treats at Understanding Long Exposures on Dan Heller

80 - Understanding Aperture

Here's a quick guide to what aperture and depth of field are. There's also an explanation of the aperture limits on lenses, and how they can change depending on the focal length of your lens.

Read more on Understanding Aperture on Free Digital Photography Tutorials

81 - Understanding Camera Exposure

We know that aperture, ISO, and shutter speed combine to influence exposure, but understanding the interplay between them is not always straightforward. This article should help to explain things.

Can't get enough? Read it all on Understanding Camera Exposure on Cambridge in Colour

82 - How-To: A Primer on Long Exposures

Ever wondered how to get that cool light-streaking effect in your photos? It's all to do with long exposure, but this article will tell you how.

There's more at How-To: A Primer on Long Exposures on Digi Photo Mag

83 - How to shoot in Bright Daylight

Photographing food is tough at the best of times. In broad daylight, it's even harder. But fear not, here's how to handle it and make the most of the situation.

Read more on How to shoot in Bright Daylight on Diners Journal Blogs

Focus and Depth of Field
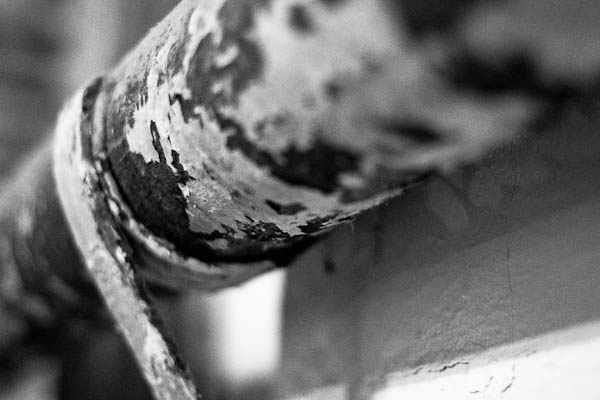
20110103_img_4362_5184_x_3456.jpg

Remember what I said about Exposures? Yeah - well, if the exposures don't get you, the focus will. Here we go - a collection of articles to help you get a firm grasp of focus, depth of field, and everything in between.

84 - Depth Of Field For Geeks

This is a comprehensive guide to depth of field - from circles of confusion to tilt-shift miniatures - conveyed with pictures, diagrams, even mathematical equations, and a great sense of humour.

There's more at Depth Of Field For Geeks on Bernie Sumption

85 - Understanding Depth in Field

There seems to be a bit of a love affair with shallow depth of field. But deep depth of field can be wonderful, too. This article goes through its advantages, and what you need to consider when you shoot with one.

Can't get enough? Read it all on Understanding Depth in Field on Photo tutsplus

86 - Depth Of Field

This tutorial explains what depth is field is, how to control it in your images, its relationship with focal length, and even provides a handy-dandy calculator. Nifty!

Check out the full tutorial on Depth Of Field on Cambridge in Colour

87 - How to use Shallow Depth of Field

This tutorial gives you an introduction to depth of field, explains how to achieve a shallow depth of field, and suggests when to use one.

Get the full skinny at How to use Shallow Depth of Field on Emmett Lollis

88 - How to control Depth in Field

Aperture isn't the only way to control the depth of field in your photographs. This article explains the influence of proximity to the subject and lens focal length, too.

There's more at How to control Depth in Field on The Photo Argus

89 - Where to put the Focus in the Pictures

Your photo is all about your subject, and where you put it in your composition can turn an okay image into a stunning one. This tutorial gives you four key pointers on where to place your focus.

Get more at Where to put the Focus in the Pictures on Digital Photos Secrets

90 - Getting shallow DOF in your photos

What is a shallow depth of field? Why would you want one? How do you achieve one in your photos? This articles gives you your answers!

Get the full skinny at Getting shallow DOF in your photos on Digital Photography School

91 - When to disable Autofocus

Autofocus is a wonderful thing. But sometimes you need to switch it off and do it yourself. This article explains the whens, the whys, and the hows of manual focusing.

Read more on When to disable Autofocus on Digital Photos Secrets

92 - Understanding AutoFocus

Autofocus. It's an amazing tool, it makes our lives so much easier. But if you actually understand how it works, as explained here, you can make your pictures so much better.

More at Understanding AutoFocus on Cambridge in Colour

Nature and Landscapes
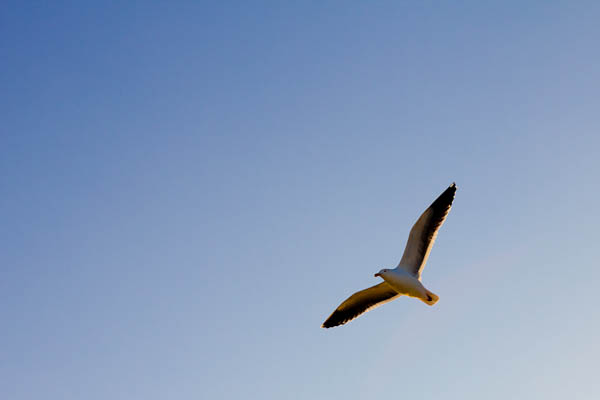
20110103_img_4282_5184_x_3456.jpg

Moving beyond the basics, two of the most exciting photography subjects are landscapes, animals, and the environment around us. Tutorials galore - bon appetit!

93 - How to create beautiful Seascapes

This tutorial guides you through capturing your ultimate seascape, from scouting a location and timing your shoot to the techniques you'll need with your camera and in post-processing.

Find it all on How to create beautiful Seascapes on Free Hobby Solutions

94 - How to: Photographing a Stunning Sunset

A sunset photograph is incredibly evocative, but it isn't necessarily easy to get right. These six top tips should set your on your way to ride into the sunset (photos).

Get more at How to: Photographing a Stunning Sunset on One Side Photography

95 - Improving Mountain Photography

Mountains make wonderful photographic subjects, but capturing one effectively can be a bit of a challenge. This tutorial covers composition, time of day, and even the weather.

Read more on Improving Mountain Photography on Learn Digital Photography Now

96 - Photographing Birds in Flight

As if photographing birds isn't hard enough anyway, if you fancy a bigger challenge, try catching them as they are careening around, hunting for mosquitoes and other food. Sounds impossible? Maybe, but with a bit of practice and this tutorial, you'll get there.

There's more at Photographing Birds in Flight on Mike Atkinson

97 - Beach Photography

There must be millions of beach photos out there and you don't want yours the same as everyone else's. This tutorial encourages you to think differently about your beach photos.

Get it all on Beach Photography on Cameras About

98 - A Guide for Nature Photographer

Light meters are useful little gadgets, but you know, our eyes do a fairly good job of judging exposure, too. Train them, and they'll be the best exposure calculator you've ever used. Here's how.

More at A Guide for Nature Photographer on Fred Parker

99 - Zoo Photography Tutorial

If you're okay with the concept of zoos, they offer excellent opportunities to practise your photography and develop particular skills; aside from dealing with animals, you encounter glass and fences. This tutorial shows you what you can learn.

More at Zoo Photography Tutorial on Yanik Photo School

100 - Shooting in the Snow

There's a lot to think about when you take pictures in the snow. It's that vast expanse of white. This tutorial should help you get a handle on exposure, metering, and lighting in wintry weather.

There's more for you on Shooting in the Snow on The Photo Argus

101 - Taking Photos in Pine Forests

Have you ever thought about photographing a pine forest? No? Perhaps you should. They're atmospheric places with a wealth of wildlife. This tutorial shows you what you're missing out on.

More tasty treats at Taking Photos in Pine Forests on Ephoto Zine

102 - How to take Great Landscapes shots when its raining

There's no need to put your camera away when it rains. This tutorial shows you why and tells you how to protect your kit, too.

The full tutorial lives at How to take Great Landscapes shots when its raining on Ephoto Zine

103 - Flower Photography

Flowers really do make wonderful pictures. They're easy to photograph and look pretty. But you can approach them in lots of different ways and learn from the process, as this tutorial shows you.

There's more for you on Flower Photography on NYIP

104 - Basic Field Techniques in Bird Photography

Wildlife and bird photography go hand in hand - but you've got to start somewhere, so this tutorial collects the basics all in one handy place.

Read more on Basic Field Techniques in Bird Photography on Mike Atkinson

105 - Landscape Photography Techniques

Professional landscape photography tips, tutorials and techniques will help you improve your scenic photography and allow you to shoot stunning panoramic pictures, with any digital camera, that are full of realism.

There's more at Landscape Photography Techniques on Digital Photography Tricks

106 - Shooting Stunning Nighttime Landscapes

If you've never really turned your hand to landscape photography and are wondering where to start, start here. It takes you through location scouting, what to wear and pack, composition, and so much more.

Learn more at Shooting Stunning Nighttime Landscapes on Paxton Prints

107 - Landscape Photography at Twilight

Did you know that there are four phases to twilight? No, I didn't either, until I read this article. It explains their different properties when it comes to capturing them as photographs.

More tasty treats at Landscape Photography at Twilight on Picture Correct

108 - How to Shoot Amazing Landscapes

Landscape photography isn't all about kit and set-up. It's got a whole lot to do with composition. This tutorial explains what to look for and how to get it right.

Read more on How to Shoot Amazing Landscapes on The Photo argus

109 - Take Better Wildlife Photos

Nature has been one of the primary subjects of photography for more than 100 years, but it turns out that wildlife isn't the easiest of subjects. This tutorial attempts to kill some of the myths and help develop your photographic thinking in the right direction.

Learn more by going to Take Better Wildlife Photos on Tutorial 9

110 - Shooting Nighttime Landscapes

Taking pictures at night isn't as counter-intuitive, or as difficult, as you might think. This tutorial gets you started, with location ideas, composition tips, and technical know-how.

Read more on Shooting Nighttime Landscapes on The Photo argus

111 - Wildlife Photography

Never work with children or animals goes the adage, but wildlife is such a great photographic subject who wouldn't want to? This tutorial walks you through the kit you'll need, the practical side of taking photos in the wild, and how to get the most out of your pictures.

Read more on Wildlife Photography on Tutorial 9

112 - Surefire Landscape Photography

The epic landscape is a picture to behold. But how do you go about achieving one? These 11 key pointers should have you well on your way to getting there.

Read more on Surefire Landscape Photography on Digital Photography School

113 - Twelve ways To improve your Digital Landscapes

From when to shoot to a reminder that you won't always get the photo you're looking for, these 12 tips should help you to get the most out of your landscape pictures.

Read more on Twelve ways To improve your Digital Landscapes on Paxton Prints

114 - How to Catch a Humming Bird

If you want to try to capture a gorgeous, fast-moving, and tiny hummingbird, it's probably a good idea to read this guide first - it ain't easy. But when you succeed, it's like winning an award!

Read more on How to Catch a Humming Bird on Prong Horn Wildlife Photography

115 - Tips For Photographing Stunning Sunrise

Getting up early for a sunrise photo might feel like hard work, but the results can be stunning. These eight pointers should make it all worthwhile.

Interested? Check out Tips For Photographing Stunning Sunrise on One Side Photography

Lighting
20110105_img_4435_5184_x_3456.jpg

Without lighting, there's no photography - but how do you get it all to work properly, and look as good as it can? There's plenty of writing about lighting on the internet - here's a smattering of the best.

116 - Strobist Lighting 101

David Hobby's website the Strobist is a great starting point for wannabe Speedlite photographers. His 101 is a great introduction to the magic of multi-strobe setups, but beware - you are liable to waste several days reading the wealth of information that's available on his site!

The whole nine yard's at Strobist Lighting 101 on Strobist

117 - Shooting & Editing a High Speed Fruity Water Splash

From the equipment that you'll need through to editing your final shot in Photoshop, this tutorial gives you the low-down on those gorgeous shots of fruit splashing into water.

Learn more by going to Shooting & Editing a High Speed Fruity Water Splash on Photo Tuts+

118 - How to Photograph Lightning

Capturing lightning can be tricky and you might not have that many chances. This tutorial, with its practical and technical insights, should help you get it right.

The full article is on How to Photograph Lightning on Weather Scapes

119 - How to take Photographs of Sunsets

Photos of sunsets are always popular. But how do you elevate yours above a holiday snapshot into something truly spectacular? This tutorial takes you through from beginning to end.

There's more at How to take Photographs of Sunsets on NYIP

120 - Don't let good light ruin a photo

When you're used to using artificial lighting, you sometimes miss the wood for the trees and forget about the awesome effect you can get with ambient light. Don't. Here's a reminder as to why ambient light can be just what you need.

Interested? Check out Don't let good light ruin a photo on Strobist

121 - Photographing Young Children with Low-Key Lighting

From the easiest lighting set-up to props that you'll need (including Mister Smiley-Face), this tutorial gives you a great overview of how to photograph young children in the studio.

There's more for you on Photographing Young Children with Low-Key Lighting on Studio on a Shoe String

122 - Why You Should Own an External Flash

If you've not yet been convinced as to why you need an external flash, this tutorial will show you just why you ought to skip off to the shops and add one of these to your shopping basket

Check out Why You Should Own an External Flash on Digi Diversity

123 - Professional Lighting in Model Photography

Interested in model photography with correct lighting? This short tutorial will help you understand various aspect and characteristics of lighting in model photography and how it works well.

Read more on Professional Lighting in Model Photography on Tutorial 9

124 - Studio Lighting Examples

Using a toy car as a model, this tutorial demonstrates the different effects that light placements will have on your studio photos. Super stuff, and makes it easy to grasp the concepts!

Learn more at Studio Lighting Examples on Worth 1000

125 - Painting with Light

Light painting is great fun and not that difficult. This article tells you what you need and how to go about capturing fun images in the dark.

Learn more by going to Painting with Light on DIY Photography

126 - Take Better Indoor Photos Using An Off Camera Flash

Flashes are great for ensuring that your pictures aren't black holes, but the light can be harsh and unflattering. This tutorial shows you how to take aperture, shutter speed, ISO, and type and direction of flash into consideration to get the best image.

Give it some love at Take Better Indoor Photos Using An Off Camera Flash on Expert Photography

127 - The 5 Lights of Nature

Photography is all about using the natural light correctly according to the situations and scenarios. This fantastic tutorial will help you underdstand the five major lights of nature which can ultimately will enable you take some stunning outdoor photos.

Interested? Check out The 5 Lights of Nature on Pixiq

128 - Shooting Photos in the Dark

Too dark to take photos? No such thing - this tutorial lays down seven basic principles to help you get the most out of pictures taken in the dark.

Interested? Check out Shooting Photos in the Dark on Photoshop Tutorials

129 - Homemade Light Box for Product Photography

If you want to give product photography a go, you'll almost certainly be needing a light box. You might not, though, want to go investing in one quite yet. So how about making one? Here's how.

Interested? Check out Homemade Light Box for Product Photography on Studio Lighting

130 - Master Photography Lighting

If you'd like to know how to capture rays of light in your photographs or how best to achieve a silhouette, take a look at this simple-to-understand article.

The full tutorial lives at Master Photography Lighting on HD Japan

132 - Glass Product Photography

Photographing anything in a glass container is fraught with peril. This tutorial begins with the kit that you'll need and takes you through the post-processing, ehm, process, to leave you with professional images.

Learn more by going to Glass Product Photography on Tim Kainu

133 - Photography Poses

Taking people photos are sometimes tricky as it is not easy to guess about the pose that might suit accordingly. In this tutorial five simple poses are discussed which can really help you in suggesting pose for variety of people.

Read more on Photography Poses on Digital Photography Tricks

134 - Photographing sunsets

Sunsets might play evil tricks with your camera, but if you follow the tips and advice in this tutorial, you'll get the better of the evening's last vestiges of light.

More at Photographing sunsets on Digital Photos Secrets

135 - Beginners Guide to Lighting Kits

Investing in lighting is a big undertaking. This guide demystifies what's available, what things do, and should help you to work out just what you need to get started.

Can't get enough? Read it all on Beginners Guide to Lighting Kits on Photo.net

136 - Understanding Basic Light Properties for Photography

Light isn't just light. It has different characteristics and comes in different temperatures from different sources. This tutorial throws some light on the subject. (Pun absolutely intended.)

Interested? Check out Understanding Basic Light Properties for Photography on Picture Correct

137 - Measuring Light

A lot of photography writing focuses on 'exposure', which is all fine and well, but what are you exposing for? In order for your camera to get the best possible photos, it needs the best possible light measurements. This article explains some of the theory - and a lot of practical aspects - of measuring light.

Find it all on Measuring Light on Dan Heller

138 - Golden Hour a Magical Time for every Photographer

The golden hour gives photos the most gorgeous warm glow. This tutorial will ensure that you can make the most of those magical two hours every day.

There's more on Golden Hour a Magical Time for every Photographer on Digital Photos Secrets

139 - 35 Photography Poses Tips/Tricks Guidelines

You might have the most attractive model in the world, but if she or he is badly posed it'll ruin your photo. These 35 pointers should help you avoid smelly armpits and two-headed bodies.

Find it all on 35 Photography Poses Tips/Tricks Guidelines on Free Digital Photography Tutorials

140 - Lightning Photography

This tutorial helps you figure out what you need practically and technically to get that perfect picture of lightning. It even has some neat post-processing ideas, too.

Can't get enough? Read it all on Lightning Photography on The Photo Argus

141 - Indoor and Studio photography

This tutorial is for those who want to excel in their abilities of indoor and studio photography. This is a step by step guide which goes over the basics to get you started.

Find it all on Indoor and Studio photography on Photo Tutsplus

142 - Using Fill Flash

You might hear the term 'fill flash' a lot but not know exactly what it is and why you might need it. Wonder no longer as this article explains what fill flash does and how it'll improve your pictures.

Learn more at Using Fill Flash on Digital Photography School

143 - Photographing Large Group in a Studio

If photographing one person can be demanding, taking pictures of a large group might feel impossible. But it isn't, and this tutorial will help you through it.

Can't get enough? Read it all on Photographing Large Group in a Studio on Studio on a Shoe String

144 - Shooting Glassware on a black background

Photographers are only successful when they are versatile in their abilities. The best photographers are able to produce mind-blowing images in all sorts of circumstances. Shooting Glassware on a black background is an cool exercise to get a firmer grip of your studio work.

Check out Shooting Glassware on a black background on Pixiq

145 - How to Paint with the Light in a Photograph

Want to have a go at light painting? It's a lot of fun! This tutorial shows you how, and gives you some ideas to get you started.

Get the full skinny at How to Paint with the Light in a Photograph on The Photo Argus

People & Portraiture
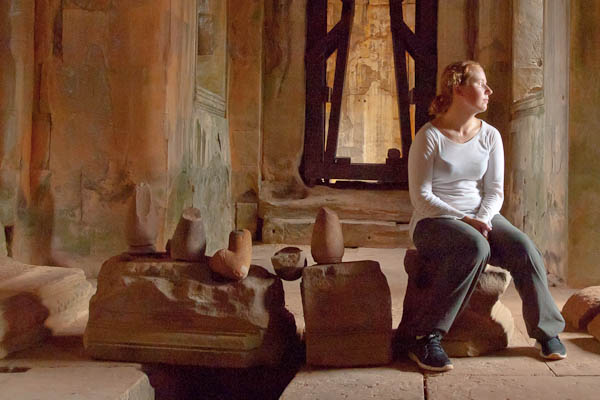
20110504_hk040155_4032_x_2688.jpg

It it weren't for the fact that people can't seem to get enough of people, I doubt there was much photography at all. Unsurprisingly, there's also a load of writing about the subject online - here's a tasting menu of awesomeness.

146 - Portrait Photography

Photographers should take photography from all direction and from every aspect. Mastering photography in one specific field is never appreciated. You can take some stunning portrait photos if you know how to take them and add wow factor to your images. This tutorial helps you exactly the same way.

The full article is on Portrait Photography on Digital Photography Tricks

147 - Shooting an orchestra's portrait

One full orchestra, all of their instruments, and only 15 minutes to photograph it. How on earth do you go about that? This article explains it all.

Give it some love at Shooting an orchestra's portrait on Pixiq

148 - Wedding Photography

If you want to make a memorable wedding you surely will be looking for some amazing photographs. This tutorial will provide you with some really cool tricks and guide-lines about wedding photography.

Have a read at Wedding Photography on Media College

149 - A Beginner’s Guide to Candid People Photography

Posed portraits have their place, but there's something incredibly appealing about the candid shot. This tutorial shows you what to look out for and how best to capture that unexpected moment.

Get the full skinny at A Beginner’s Guide to Candid People Photography on Lights Talking

150 - How to turn Photos into Cinematic Portraits

If you fancy having some fun by taking an average portrait and transforming it into something overblown and cinematic, this tutorial gives you the step-by-step instructions you'll need.

Interested? Check out How to turn Photos into Cinematic Portraits on TutsPlus

151 - Try nude photography

Taking a portrait can be scary enough; but taking a nude portrait? Well, actually, it's a very challenging and interesting form of photography. These are my insights and recommendations from my experiences.

There's more for you on Try nude photography on Pixiq

152 - Wedding Photography

Wedding photographer Jeff Ascough talks about how and what he shoots, what kit he uses, his workflow, and the finished product in the demanding world of wedding photography. An insightful read if you're thinking of starting out there.

Learn more at Wedding Photography on Photo.net

153 - Wedding Photography

If you're considering embarking on wedding photography, you'll need to decide if you're heading down the more traditional or the more journalistic path. This article assesses the differences and helps you to decide which best suits you.

Read it all on Wedding Photography on Shutter Bug

154 - Tourism and Photographing People

Photographers are always on the move and those who love traveling along with photography will surely love this tutorial as it covers almost every aspect of photographing people and tourism.

Give it some love at Tourism and Photographing People on Dan Heller

155 - The Classical Portrait lighting setup

Main light? Fill light? Background light? Hair light? If you've ever wondered about the lighting set up for a portrait shoot, this tutorial explains all the terms, what they do, and why you need them.

Read it all on The Classical Portrait lighting setup on Pixiq

156 - Introduction to Portrait Lighting

This excellent tutorial uses roll-over images to show you exactly the properties of different lights and the effects of light placement on your portraits. A must-read.

Find it all on Introduction to Portrait Lighting on Cambridge in Colour

Photoshop and Editing
20110428_img_0864_3648_x_2736.jpg

Very few photographers see 'photography' as a purists' artform anymore. It's a rare image that doesn't stand improving a little through a little bit of Photoshop (or, in my case, Lightroom) tickling - and here's an impressive array of tutorials to get you started.

157 - Fantasy art tutorial

This tutorial walks you through the post-processing steps that you need to transform an ordinary portrait into a water-nymph fantasy-styled picture, complete with stars. Now where did I leave those unicorn stock photos?

More tasty treats at Fantasy art tutorial on Lorelei Web Design

158 - Taking Clone Photographs

A very exciting and cool tutorial about combining clone photos to a single image. This gives your picture and interesting and fantastic look.This also adds some fun element to your snaps.

There's more at Taking Clone Photographs on Net Glos

159 - Replacing a Background with The GIMP

This tutorial shows you how to use GIMP to replace the background of an image so that quickly-snapped portrait can lose the clutter behind it and look a whole lot more professional.

Check out the full tutorial on Replacing a Background with The GIMP on Gimp Guru

160 - Grunge & Dark Art Tutorial

This tutorial shows you how to transform a perfectly normal, healthy looking subject into a clone of the legions of the undead. Perfect for Hallowe'en!

Read more on Grunge & Dark Art Tutorial on Dubtastic Blog

161 - 10 Easy Steps to Advanced Photography Skills

The title says it all: simple steps that will help you to improve your photography. Whether you are a beginner or more advanced, you'll find something of value amongst the collection of tips, tricks, and advice.

Read all about it on 10 Easy Steps to Advanced Photography Skills on Smashing Magazine

162 - Gradient Mapping for Better Landscape Photos

By using the gradient mapping tool, you can transform images that are a little on the flat and dull side into something with a bit more zing. This tutorial shows you how in 12 steps.

There's more at Gradient Mapping for Better Landscape Photos on Wipeout 44

163 - Fresh Photo Manipulation Tutorial

Do you fancy applying a bit of surrealist, Dali-type effect to your photos? This tutorial gives you some ideas and shows you how to do it.

Read all about it on Fresh Photo Manipulation Tutorial on Noupe

164 - Colouring an Old Black & White Photo

You probably have a stack of old photographs lying around that you'd love to have a go at retouching and giving a bit of colour. This tutorial shows you how to do just that.

Read more on Colouring an Old Black & White Photo on Tutzor

165 - Creating a Searing Hot Effect

Using a combination of the ripple, wave, and displace filters, this handy-dandy tutorial shows you how to give your pictures a sizzling heat-haze effect. Smokin'.

Check out Creating a Searing Hot Effect on 123RF

166 - Fast and easy facial retouching

This six-step tutorial shows you how to remove blemishes and smooth out skin tones to give an okay portrait a much more professional look - and to make your models look just that little bit more model-like.

Give it some love at Fast and easy facial retouching on TutsPlus

167 - Repairing an old photograph

You can restore life to your old photographs using this fabulous tutorial. It'll guide you through the entire process to repair them, from retro-broken to current-fantastic. Your grandparents will thank you.

There's more on Repairing an old photograph on Show and Tell Graphics

168 - Sharpening Techniques Explained

You've heard the term 'sharpen' before, but what does it mean for your photos? Why and how can you apply it to them? This tutorial explains all of that, and even gives you a few different methods to sharpen your images.

There's more at Sharpening Techniques Explained on Car Photo Tutorials

169 - Fake tilt-shift photography

Creating photos that look like miniatures is done through a technique called tilt-shift photography. If you don't have the hundreds of dollars that a proper T/S lens costs kicking about, then maybe a spot of Photoshop can help you along. This tutorial shows you how.

Read more on Fake tilt-shift photography on The Unofficial Apple Weblog

170 - Five ways to speed up Lightroom

If you're a little frustrated because Lightroom seems to be running slowly, here are five top tips to help speed up your post-processing software and workflow.

There's more at Five ways to speed up Lightroom on Pixiq

171 - Creating Sleepy Village Photos

You can have a lot of fun by merging together several different images to create something entirely new. This tutorial gives you the step-by-step instructions you need to achieve the finsihed product.

Get it all on Creating Sleepy Village Photos on TutsPlus

172 - Changing a model's hair colour

Well you don't have to visit a hairdresser anymore to colour your hair, especially when you want to impress your friends. You can easily do that in your Photoshop just by using few magical tools. Visit this tutorial if you want to learn it step by step.

Get the full skinny at Changing a model's hair colour on Photoshop Tutorials

173 - How to Tweak Images

Have you heard of the puppet warp tool in Photoshop? It enables you to alter the placement of key features in images, for example leaf stems or limbs. This tutorial shows you how to amend slightly awkward arm angles or deal with lines that are suffering from lens distortion.

Get it all on How to Tweak Images on TutsPlus

174 - Optimizing the look of your HDR images

So you've heard of HDR and you've seen just what it does to photos, but how do you recreate it yourself? This tutorial takes you through the process of creating an HDR photo, step-by-step.

Get more at Optimizing the look of your HDR images on Pixiq

175 - Using Layer Masks to Create Unique and Fun Images

Once upon a time, if you wanted to create a composite image you needed to expose a single frame multiple times. Not so anymore, there's Photoshop. This tutorial teaches you what you need to know.

There's more at Using Layer Masks to Create Unique and Fun Images on Paxton Prints

176 - Creating Dreamy photos

There are two skills related to photography. First skill works when you take your photos and your second skills come into play when you start editing them. This tutorial shows you how to add a touch of 'dreaminess' into your shots.

Get more at Creating Dreamy photos on Stock XCHNG

177 - Sharpening your photos using Unsharp Mask

The term 'unsharp mask' might seem completely counter-intuitive to use to sharpen images, but it's not, really! Here, you get told the origins of the term, why you need to sharpen your images, and are shown how to do it.

Read more on Sharpening your photos using Unsharp Mask on Pixiq

Printing & Exhibiting your work
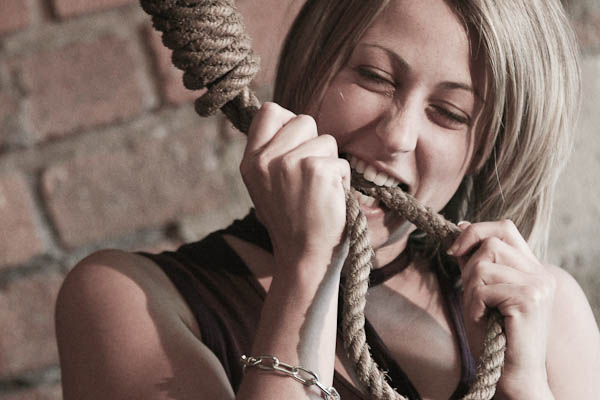
20030706_img_3157_3072_x_2048.jpg

So you've taken the photos... What next? Time to make some presents, post 'em online, or create a gallery show.

178 - Exhibiting your Work

For some photographers, the pinnacle of their career will be an exhibition of their work. This tutorial tells you what to expect from exhibitions, when and when not to exhibit your work, and how to promote yourself.

Learn more at Exhibiting your Work on Photoshop Tutorials

179 - Why Prints Can look Bad

If you have recently changed cameras, there are a whole host of reasons why your prints might not look as good as they used to. Trouble-shoot your way back to perfect pictures with this tutorial.

There's more at Why Prints Can look Bad on Dan Heller

180 - How to win photography competitions

Seven invaluable tips from yours truly (who's judged enough photo competitions to write a blog post) on how to catch the judges' attention and win that coveted prize.

The whole nine yard's at How to win photography competitions on Pixiq

Topic-specific tutorials
20100208_img_9592_4272_x_2848.jpg

So far, we've been covering photography from a generic point of view - but of course, that's not how we take photos. Tutorials shine especially when the time comes to learn a specific new technique. Let's have 'em...

181 - Water Waves Tutorial

If you're going to be making waves with your photography... Okay, yeah, I went there. Photographing waves is a cool exercise in studio work - it combines a fast-moving subject with advanced lighting techniques, the risks of working with a 'wet set', and a huge amount of patience - it's not that hard, though, and the results can be rather fabulous. Give it a go!

Get more at Water Waves Tutorial on Chris Nuzzaco

182 - Infra Red Photography

So you've heard about infrared photography and you'd like to give it a go. But where do you start? And where do you end? This tutorial walks you through it.

Can't get enough? Read it all on Infra Red Photography on Galits

183 - Panoramas and Photomerge

A very good tutorial about panorama photos, featuring a good collection of picture stitched together to show an extended view of landscape. The in-depth instructions in the article help you get started - and the extra little bit of inspiration included in the article comes in handy, too!

There's more at Panoramas and Photomerge on Second Picture

183 - Doll Photography Tutorial

Photographing dolls might seem quite specific, but this tutorial provides useful information on general product photography. Don't overlook it just because of the niche subject matter.

There's more for you on Doll Photography Tutorial on American Doll Outfitters

184 - Easy Water Photography

Photographing water is never the same twice; it's fun and challenging. This tutorial gives you lots of ideas and takes you through the process of capturing coloured water droplets.

Get it all on Easy Water Photography on Free Photo Sources

185 - Night Photography Step by Step

Your adventures don't stop when the sun goes down, and your photography shouldn't have to either. Night photography can record beautiful scenes that have a fairytale world feel to them when compared to their daytime counterparts. This 6-page guide shows you how.

Get it all on Night Photography Step by Step on Photography about.com

186 - Photographing Smoke

There might not be a 'right' way to photograph smoke, but there are some tips and recommendations to help you get the most out of it. These are some of the best.

The whole nine yard's at Photographing Smoke on Pixiq

187 - Smoke Photography Tutorial

This tutorial takes you through capturing awesome photographs from everyday smoke sources. There are some fabulous pictures to set alight the flame of inspiration, too. Break out those incense sticks, sing some Kumbaya, and take it from there.

There's more on Smoke Photography Tutorial on Designzzz

188 - Basics of HDR photography

Which kinds of photos work well for HDR; which don't? What do you need to create HDR images and how do you go about it? This tutorial explains it all.

The full article is on Basics of HDR photography on Emmett Lollis

189 - How To Photograph Comets

With everything from rough dates of meteor showers to required kit, this tutorial guides you through everything you need to capture gorgeous images of shooting stars, comets, and meteors.

More tasty treats at How To Photograph Comets on Free Photo Sources

190 - Macro Photography

Taking close-up photos of small and things is always an amazing experience especially when you start enjoying it. This tutorial will provide you with useful information and tips about macro photography.

More tasty treats at Macro Photography on Photo Net

191 - How to take Worlds Best concert Photos

How do you get that iconic rock photograph? Once you've got yourself into the pit and snapped the picture that freezes time in low-light, how do you make some money from it? This article reveals all!

Read more on How to take Worlds Best concert Photos on Photo Shelter

192 - The Complete Guide to Shooting Farming Agriculture

This one wins the prize for most bizarre tutorial: How to take photos at farms. I have no idea why anyone thought this was a good idea, but it's actually pretty well written, and the photos are nifty, too.

Find it all on The Complete Guide to Shooting Farming Agriculture on Photo Tuts+

193 - Night Photography

Night Photography isn't exactly easy, but it makes for great pictures. This tutorial will help you to get the best pictures out of low-light situations.

The full article is on Night Photography on Photoxels

194 - Hunting for superior mirages

Ever seen a superior mirage? It's a mirage in the sky above an object, rather than below it. They're awesome to photograph, if you get the chance. This guide helps you find them, and them capture them with superior results.

Read all about it on Hunting for superior mirages on Weather Scapes

195 - Food photography on Wikipedia

Want to know how to make drinks sparkle, keep green vegetables looking green, and glasses stay frosty? This article is full of the sneaky tricks used by food photographers.

The whole nine yard's at Food photography on Wikipedia on Wikipedia

196 - Making a time-lapse

Making a time-lapse is fun and with Small Aperture's excellent step-by-step guide, you'll be having a go in no time. Sunsets never were this awesome!

Get more at Making a time-lapse on Small Aperture

197 - Introduction to Lomography

Off-kilter, bleeding colours, slightly blurry, but definitely fun. It's lomography. Want to have a go at it yourself? This quick and easy guide shows you how.

Read all about it on Introduction to Lomography on Lights Talking

198 - Car Photography That Sells the Car

Most of us are probably taking photos for fun or 'just for the art of it', but what happens when you actually need to go the whole hog into the world of commercial photography, as the photos are going to be used for 'something'? Photographing cars is one of those instances - if you've ever browsed eBay for second-hand cars, it's easy to see how huge the variation is in the quality there's available. This tutorial helps you along.

More at Car Photography That Sells the Car on Car Photo Tutorials

199 - Camera Toss Photography Techniques

If you're confident that you won't drop your camera, camera tossing can create some beautiful photos. If you'd like to give it a go, take a look at this tutorial.

Check out Camera Toss Photography Techniques on Designzzz

200 - Photographing Buildings a Guide

Architecture is an abundant photographic resource - it completely surrounds you. So why aren't you taking more beautiful photos of buildings and bridges? Maybe because you think it's difficult? This tutorial takes the stress out of it.

Get the full skinny at Photographing Buildings a Guide on Free Photo Sources

201 - How to Take the Perfect Spring Flower Macro Photograph

Flowers are fab photo subjects, and even better in macro. Want to have a go at some floral close-ups? This guide will get you started.

Learn more by going to How to Take the Perfect Spring Flower Macro Photograph on Lights Talking

202 - Underwater Photography

I'm a complete convert to underwater photography. But it is very different from shooting on dry land. If you want to give it go, read this first!

Get the full skinny at Underwater Photography on NYIP

203 - How to Photograph The Moon

So you like macro photography, do you? How about doing the exact opposite: Photographing outer space? Even just as an experiment, you can learn a lot from attempting to get a good shot of the moon - and this article shows you how to, er, shoot for the moon.

Get it all on How to Photograph The Moon on Photo Tips

204 - 13 Steps for Shooting The Perfect Water Droplet

Photos of water droplets aren’t hard to come by. Flickr is littered with them and although some might look impressive, they all seem to have very similar composition and formation. However, the techniques used to capture a water droplet may not be second nature to all of us and the skills learned here will undoubtedly be applicable to other photographic situations. Here are 13 steps to getting the technique right!

There's more on 13 Steps for Shooting The Perfect Water Droplet on Photo Tuts+

205 - Camera Skills Night Photography

Lighting is what makes or breaks a shot, writes the author, so it's a little ironic that night is one of my favorite times to shoot. I totally know where you're coming from - and this article is a lovely guide to stumbling through the darkness with your camera.

Learn more by going to Camera Skills Night Photography on Worth 1000

206 - HDR Explained

This tutorial explains what HDR is, what you'll need to take HDR pictures, and then how to ut it all together when post-processing for that overall HDR effect.

Get it all on HDR Explained on Free Photo Sources

207 - How to Photograph Macro Water Droplets Splashes

Photographing water droplets is an easy way to drive yourself mad, but you might be able to avoid plenty of hair-pilling and head-scratching if you read this guide first.

Read more on How to Photograph Macro Water Droplets Splashes on Hypergurl

208 - Photographing Waterfalls

With some great technique tips, for example ensuring that your images aren't too dull or too busy, this tutorial helps you ensure that your waterfall photo isn't just another waterfall picture.

Read more on Photographing Waterfalls on Luminous Landscape

209 - How to Take Great Photos of Holiday Lights

Want to take great photos of the lights on your Christmas tree, or of your Chanukiyah? This tutorial is full of advice to getting it just right.

Interested? Check out How to Take Great Photos of Holiday Lights on NYIP

210 - The Ultimate Guide to HDR photography

What is HDR photography? How did it come about? What does it mean for your pictures? This guide explains the mysteries of high dynamic range.

Give it some love at The Ultimate Guide to HDR photography on Pixiq

211 - Photography Secrets from One of the World's Top Shooters

Photography secrets from Joe McNally shares a series of stories behind some of his best shots: a great behind-the-scenes insight into some lovely photographs. A great inspiration, and best of all: you may even learn a few things!

Read it all on Photography Secrets from One of the World's Top Shooters on Creative Pro

212 - Food photography for Amateurs

This food blogger takes one image of a plate of food and deconstructs it critically, explaining just how it can be made better. This makes for an excellent read in both constructive criticism and good food photography!

Read more on Food photography for Amateurs on Jenn Cuisine

213 - The Complete Guide For Photographing Live Insects

Some photographers prefer their insects for macro photography to be standing still - but that doesn't mean you have to kill 'em to get a decent photo! This guide gives you an insight into how you can capture live insects

The whole nine yard's at The Complete Guide For Photographing Live Insects on DIY Photography

214 - Auto Racing Photography

Fast cars and race tracks make for brilliant photos, but how do you get involved and how do you go about it? This tutorial gives you lots of ideas, pointers, and advice.

The whole nine yard's at Auto Racing Photography on Luminous Landscape

215 - Winter Photography Tutorial

Winter scene photographs look amazing, but what about getting the exposure right for snow, or your camera coping with the cold? This tutorial comes with advice a-plenty to ensure you get that perfect snow landscape.

The full article is on Winter Photography Tutorial on Picture Correct

216 - Beginners Guide to Sports Photography

Want to have a go at sports photography? This tutorial goes through equipment basics, composition, what to expect when you're at a game trying to capture images, and post processing.

Check out the full tutorial on Beginners Guide to Sports Photography on TutsPlus

217 - Concert Photography

Concert photography - if you're mad enough to try it, what with nothing staying still and the light being low - is monumentally rewarding. Want to give it a go? Start here!

Read more on Concert Photography on Pixiq

218 - How To Photograph Bubbles

To quote Jaques the Cleaning Shrimp from Finding Nemo: Bubbles! Bubbles! Bubbles! My bubbles!. Erm, yes. (can you tell I've been spending just a tiny bit too long writing descriptions about photography tutorials? Especially awesome because I have my doubts whether anyone will ever read far enough down this list to actually read this, but hey. I did set out to do 250 tutorials, and by jove, will I complete this herculean task). Anyway - this tutorial is called how to Photograph Bubbles, and you win today's top prize if you're able to guess what it covers.

Read more on How To Photograph Bubbles on Learn My Shot

219 - Abstract Photography

If you want to make some cool, dramatic images you should read this fantastic tutorial. It'll help you to approach photography from a new, abstract angle.

There's more at Abstract Photography on Ron Bigelow

220 - Rural Photography

Rural photography isn't just about landscapes. There're plenty of details to pick up on an stories to tell. This guide will get you started. Strap on your wellington boots, dig out your flatcap, and let's get started.

More tasty treats at Rural Photography on Digital Photos Secrets

221 - Night Photography

From using reflections, to light painting, to cooling down and warming up images, this is a pretty comprehensive guide to taking pictures at night. Now where did I leave those night-vision goggles?

Read it all on Night Photography on Photo.net

222 - Getting started with Time Lapse Photography

Photography, from its very infancy, has been great at the art of either freezing or 'flowing' motion. Time lapse photograpy bridges the gap between motion and stop-motion, between photography and video, and between the real and the uncanny. This is a lovely introduction to the art - and a great little article to boot.

There's more on Getting started with Time Lapse Photography on Picture Correct

223 - Shooting in Low light Situations

These four pointers will help you get the best out of your low-light shots, helping you to think about composition as well as develop some practical skills.

Get it all on Shooting in Low light Situations on The Photo Argus

224 - An introduction to Food Photography

What does it take to make a plate of food look good enough to eat? These eight top tips let you in on the secrets of successful food photography.

There's more for you on An introduction to Food Photography on Digital Photography School

225 - Spectacular Night Shooting

Getting great shots at night isn't as hard as you think it might be, despite the relative lack of light. If you follow these five steps, you'll be well on your way.

Learn more by going to Spectacular Night Shooting on Digital Photos Secrets

226 - Smoke Photography

Starting with the equipment that you'll need and taking you right the way through to post-processing to capture some delicious-looking smoke photographs, this tutorial is a lovely starting point for smoke photography!

More at Smoke Photography on Paxton Prints

227 - Shooting in the Rain

A downpour doesn't necessarily mean that you have to put away your camera. This guide to rain photography helps you to freeze raindrops, to create a background haze with rain, and to have some fun with soft focus.

Have a read at Shooting in the Rain on The Photo Argus

228 - Moon Photography

We love the moon...' except that it isn't always easy to photograph. This tutorial gives you six invaluable tips and plenty of inspiration to get it right.

Can't get enough? Read it all on Moon Photography on Dan Heller

229 - How to photograph fireworks

Want to know how to capture the gorgeousness of a fireworks display? These ten tips will guide you through tripods, framing, and exposure to help you get it right.

Give it some love at How to photograph fireworks on Digital Photography School

230 - High speed Photography Tutorial

With equipment lists, hand-drawn diagrams, and photos to aspire to, this tutorial tells you everything that you need to know to get started taking photos of things moving at high speed.

Get more at High speed Photography Tutorial on DIY Photography

231 - Photographing Star trails

If you'd like to have a go at making a time-lapse of the night sky or photographing star trails but aren't sure where to begin, try here. There's lots of useful information and plenty of inspiration.

Get it all on Photographing Star trails on Dan Heller

234 - Lomo Photography Tutorial

You know, you don't have to spend money on a Lomo-camera to create lomo-style images. Nope! With good old post-processing you can get that Lomo-look. This tutorial shows you how.

Read more on Lomo Photography Tutorial on Digital Photography School

Photography Theory

20100306_img_0899_4272_x_2848.jpg

A lot of the stuff we've had so far is rather practical, but what if you want to learn some of the theory of what goes on behind the scenes? Do not despair, my fellow photography comrades, here's a load of theory for you to enjoy!

235 - How to Get Tack Sharp Photo Images

What does it take to achieve pin-sharp images, both technically and practically? This guide sets out the basics, looking at shutter speeds, focal length, and more.

The whole nine yard's at How to Get Tack Sharp Photo Images on Apogee Photo

236 - What is ISO?

If you're new to photography, ISO can seem this arbitrary scale that has some sort of effect on your pictures. This guide explains what ISO is and how it can have an impact on your images.

The whole nine yard's at What is ISO? on Small Aperture

237 - Understanding White Balance

If you come from the world of film, you may remember using filters to correct for incandescent or fluorescent lighting. Most people didn't bother and their indoors pictures invariably came out with a yellow/orange or bluish cast. In the digital world, these correction filters are no longer necessary, replaced by a feature found in most -- even the entry-level -- digital cameras called, White Balance. Here's an article explaining the whats, hows and wherefores

There's more at Understanding White Balance on PhotoXels

238 - What is shutter speed?

What sort of effect will adjusting your shutter speed have your pictures, both technically and creatively? This short tutorial has some answers - and a light dusting of inspiration, too.

Read it all on What is shutter speed? on Small Aperture

239 - Photography illustrated

A fun and unusual take on teaching photography, this site takes a couple of cartoon characters explaining photography to each other, and turns it into a somewhat-readable guide to various aspects of photography. I'm not a big fan myself, but several of my readers e-mailed the link to me, saying it helped them out - so why not!

Get it all on Photography illustrated on Worth 1000

240 - What is a small aperture?

What is a small aperture? How will altering the aperture of your lens affect your photos. This quick and easy guide should answer those questions.

Read more on What is a small aperture? on Small Aperture

241 - What is white balance?

Knowing what white balance is, how it affects your pictures, and how to control it can make a huge difference to your pictures. This introductory guide will help you out.

There's more for you on What is white balance? on Small Aperture

242 - Infra Red Basics

Infra red photography is a great challenge - and enables you to take a couple of steps into the world of the arcane and unreal-looking. With a side helping of awesome. Here's how...

Read more on Infra Red Basics on Worth 1000

243 - Understanding Lens Contrast

Many photographers — even some experienced and knowledgeable ones — seem permanently confused about contrast, especially when the word is used to describe lenses. This article thoroughly rectifies that situation, and is well worth a read if you're interested in having a deeper understanding of lenses and what you're looking for when you buy one.

There's more at Understanding Lens Contrast on luminous Landscape

244 - 8 steps to sharper pictures

I personally love this tutorial as it has helped a lot of photographers get a firm grip on how to produce sharp images without using any specific software such as Photoshop or Lightroom. 8 Simple and easy to follow steps to make difference in your images.

Check out the full tutorial on 8 steps to sharper pictures on Pixiq

245 - Your pictures; your rights, redux

This article sets out the difference between copyright and licensing rights, and highlights what you need to look for when signing licensing rights deals, even if it's only to display your pictures on a photo-sharing website.

Interested? Check out Your pictures; your rights, redux on Small Aperture

246 - Understanding Polarizing Filters

There are a lot of photographic efects you can re-create digitally easily enough... Polarisers isn't one of them, so if you're planning to take the leap into the world of landscape photography, you could do a lot worse than buying one - and learning how to use it.

Check out the full tutorial on Understanding Polarizing Filters on Cambridge in Colour

247 - Understand digital camera Sensors

For the geek among us, learning how a camera sensor actually works is very interesting indeed - this guide talks you through some of the details about how to make it tastier.

There's more at Understand digital camera Sensors on Cambridge in Colour

248 - White Balance Basics

Digital SLRs do a great job of figuring out white balance for you, but sometimes they don't get it quite right. If you understand the principles behind white balance, and how to control it yourself, your photography will come on leaps and bounds. This guide will get you started.

Can't get enough? Read it all on White Balance Basics on Paxton Prints

249 - Your pictures; your rights

What is copyright? When do you need a model release? If you want to use your images commercially, what do you need to know? This quick-and-dirty guide should help you out.

Read more on Your pictures; your rights on Small Aperture

250 - Understanding Camera Lenses

This tutorial sets out the basics in lens composition and focal length. It talks you through zooms and primes and it covers apertures. When you're starting out with glass, start here.

Get the full skinny at Understanding Camera Lenses on Cambridge in Colour

A big thank you

This epic post couldn't have happened without the help from Daniela and the rest of the Small Aperture gang. If you liked this post, head over to Small Aperture, and subscribe to the RSS feed right away. You know it makes sense.