highlight

Sizing up split toning

Historically, split toning was used when developing photos from negatives. Two different toners would be used one after the other in order to produce different colours in the highlights and shadows of an image. For example, follow selenium with gold and you'll produce purple-blue mid-tones; or use sepia and then blue for sepia highlights, blue shadows, and green mid-tones. The effect could be altered by using different papers, too. While chemical split toning isn't an exact science, it does offer some compelling effects for your photos and can give them an entirely different feel. You can use it to add warmth or to cool down an image; you might want to introduce a blue tint, or an orange cast.

Now, split toning is more likely to be achieved using the dedicated split toning panel in Lightroom, or with a colour balance adjustment layer in Photoshop, and it is far more controllable. If you've not ventured into the split toning panel, the degree of variation that it offers you might be a little overwhelming; it can radically alter your photo in a ways that you might not anticipate. That shouldn't stop you from experimenting, and to get you started, here are some suggestions. And don't forget that if you're working in Lightroom, nothing can't be undone.

A quick introduction

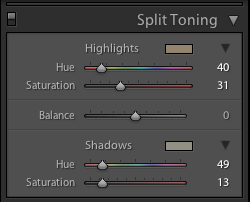
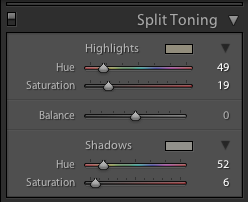
If you're using Lightroom, the split toning panel allows you to select the colours that you would like to emphasise in both the highlights and the shadows, the saturation for each of these tones, and then the balance between them.

The eyedropper is likely easier to use than the sliders

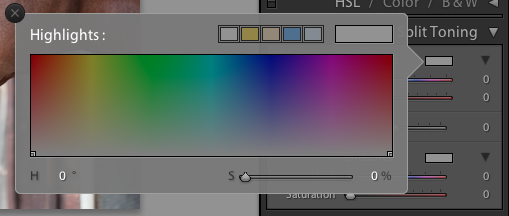
If you find using the sliders to control these adjustments a little too abstract, click on the colour swatches beside 'Highlight' and 'Shadow' and use the eyedropper to select the precise colour you'd like for each.

The balance slider places more emphasis on either the highlights or shadows. Once you've selected your highlight and shadow tones, move it about a bit to see which direction, if any, you prefer.

Black and white

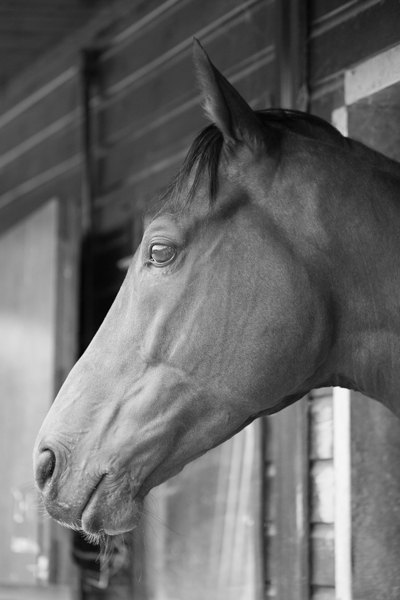
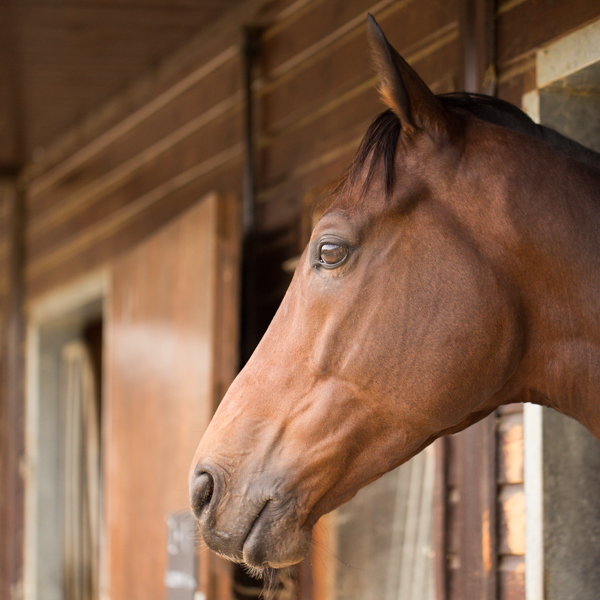
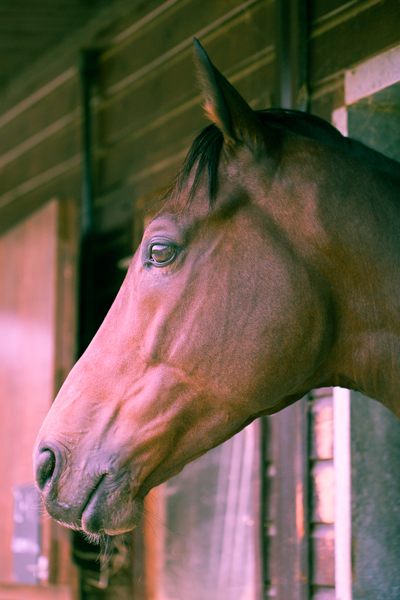
The straight black and white conversion is fine. But could it be warmer and have more depth?

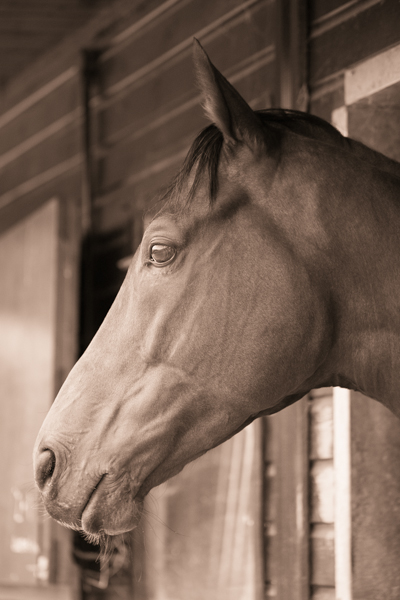
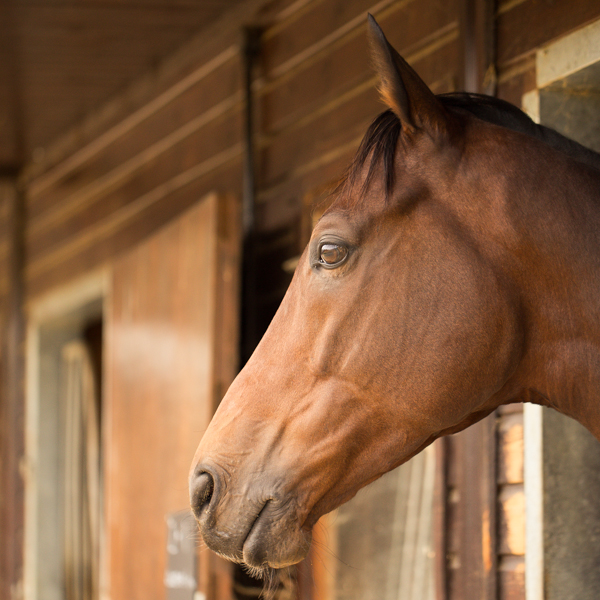
The original black and white conversion of Willie's portrait is coming up quite grey-green in tone. By adding some muted browns—that in the shadow very pale—you can introduce a great deal more warmth to the image and bring about an almost-sepia tone.

You don't need to push the saturation or the tones too far

Willie with a sepia feel is less harsh.

Adding warmth

Would bringing some warmth produce a more golden-hour feel to the photo?

This photo was taken fairly early in the morning, on a day when the cloud didn't lift. While the light was wonderfully diffuse, it wasn't especially warm. Even after correcting the white balance, it still felt as if it needed to be brought to life. By adjusting the highlights and shadow tones, it meant I could introduce a more golden-hour feel to the photo.

The adjustments don't need to go too far

You don't need to push too far into the oranges or yellows to intensify the warmth in a photo: sticking to browns and beiges might be enough.

A warmer and more golden Willie

Of course, if you wanted to do the opposite and bring about a colder feel to a photo, you would do that by applying more silvery-blue tones, greys, greens, and even some yellows, to the shadows and highlights.

Cross-processed look

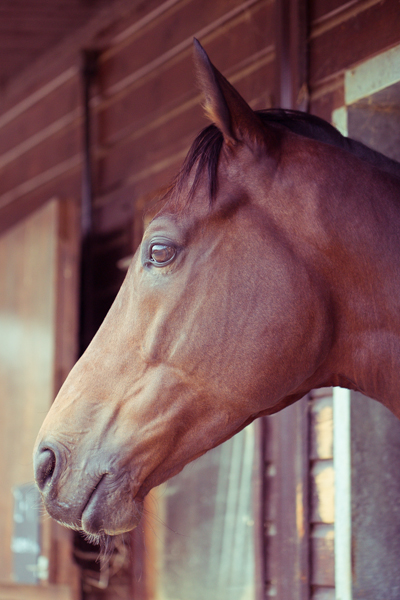
Greens in the highlights and magentas in the shadows

Until now, I've used fairly similar highlight and shadow tones in my split toning adjustments. But for a cross-processed effect, you need to select contrasting colours for your highlight and shadow tones: green and magenta, or cyan and yellow, for example. Which you apply will depend on whether you're looking for a warmer or cooler over all effect.

[gallery columns="2" ids="7128,7127"]

By reversing the shadow and highlight tones (now magenta highlights and green shadows) you can see the imapct it has

By adding a graduated filter, upping the contrast and saturation, and reducing the clarity, you can create a fake toy camera look. We've a tutorial for that, in case you'd like to give it a go.

Split tone away!

The best way to get a feel for split toning is to try it for yourself and see what you can achieve using it. Remember: if you don't like it, you can undo it.

Infinite iPhone colour manipulation with ColorTime

When it comes to smartphone photography my default editing app is Snapseed. It does just about everything that I want in an app that I use on a device with a screen that's the size of the palm of my hand and it's intuitve. Sometimes, however, I find myself looking for a bit more control, the ability to adjust shadows, highlights, and midtones independently, or a white balance correction that is more fine-tuned. I've found it. It's called ColorTime. mzl.ncemfpho.320x480-75

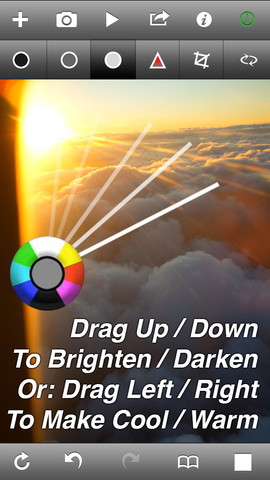
ColorTime allows you to select between shadows, mid-tones, highlights, and saturation, adjusting the intensity on a colourwheel. Dragging up adds white or brightens the image; swiping your finger downwards introduces darker tones; and then you can increase warmer tones by swiping to the right and cooler colours by swiping leftwards.

Furthermore, you can paint particular areas of your image to adjust the tones selectively, or choose between the centre or edges of the image.

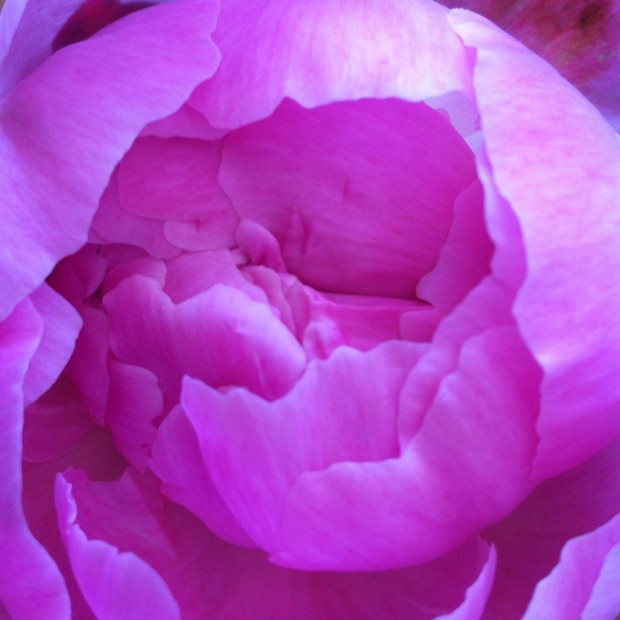
A rather blue-tinged peony

There are of course many occasions when any of this is useful, but I've found it particularly helpful for correcting the white balance in my iPhone photos, which always seem to be far too blue, and for adding a golden hour-like glow. If that's all far too subtle and practical for you, it's possible to make near-infinite adjustments: you keep moving your finger upwards (or downwards, left, right, four o'clock, 11 o'clock, whatever) until you reach the edge of the screen, and then you start over again.

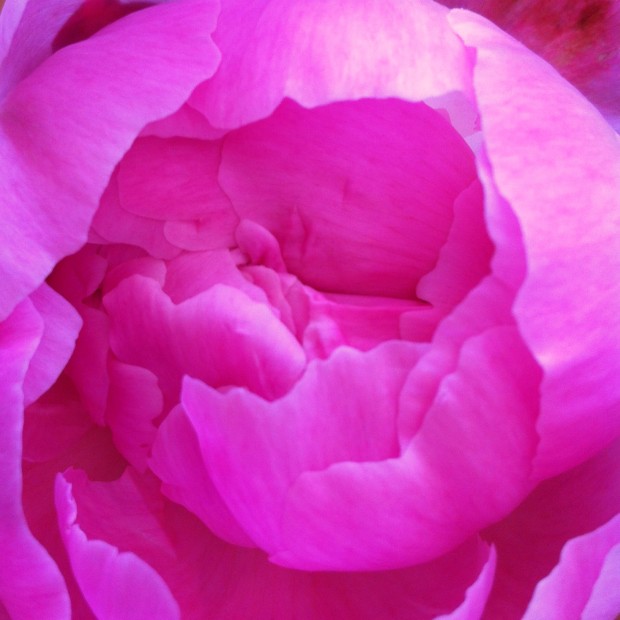
... made to look rather more pink with ColorTime

The independent shadow, mid-tone, and highlight functions, in combination with the colour wheel, means that you can add blue to the highlights but orange to the shadows. If you want.

If you decide that you don't like you last adjustment, you hit the back arrow and it revokes it; if you decide that you've screwed it all up and want to start over, select the revert button. Should you not be able to decide, you can toggle between the original image and your adjusted image to decide which works best. Or you could select the animate function and let ColorTime present you with a loop of optins.

There is a crop and rotate function, but I haven't found it that easy to use. It feels underdeveloped and doesn't give you the control that you'd expect when the rest of the app is so responsive. It's not a huge problem, but for the moment, I will continue to crop in Snapseed.

I've really enjoyed using ColorTime and it has provided me with some terrific results. However, it is a learning curve. None of the buttons is labelled and I have occasionally found myself mistakenly adjusting entirely the wrong thing, but thankfully there is that undo feature. And there's a guide that is relatively easy to access.

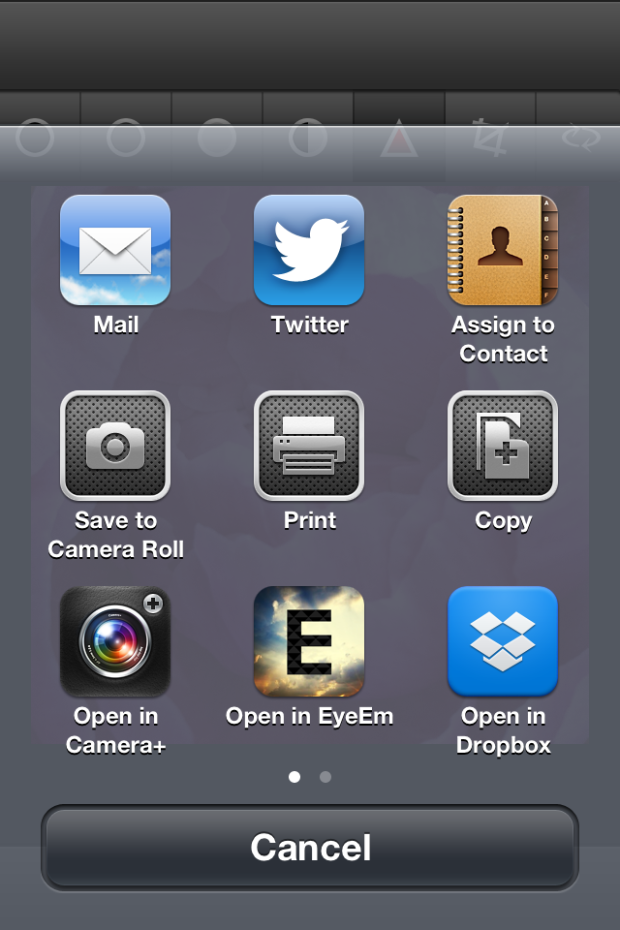
When you're done, you can save your fixed image to your camera roll, email it far and wide, tweet it, save it to your Dropbox, or choose from a few other options.

photo

ColorTime is £1.49 in the App Store. For anyone who does even a moderate amount of iPhone photography, I reckon it's worth it.

Don’t Be Scared of Studio Lighting

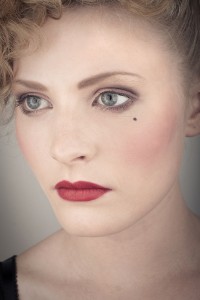
Softboxes were placed very close to the model here, meaning there is very low contrast between the specular highlights and the diffuse value, giving flattering, evenly lit skin.

To clarify, this month’s Photography Concept on Friday is not a self-help guide for photoaugliaphobics ( people with a fear of glaring lights – of course I looked that up ) – it’ll centre more around the basics of studio lighting and the basic properties of light. If you’re interested in a bit of studio lighting but don’t know where to start, or would like to know at least a little before you begin, then this month’s PCoF is for you. 

Specular Highlights and Diffuse Value

Softboxes were placed very close to the model here, meaning there is very low contrast between the specular highlights and the diffuse value, giving flattering, evenly lit skin.

Now it’s very easy to go into too much detail too quickly with studio lighting. I am writing from the point of view that you have never seen or considered the principles of lighting before, so please don’t roll your eyes too far back into your head if any of this seems obvious. Everyone starts somewhere – I started to improve my studio lighting the moment I got these concepts into my head.

Specularity refers to an object’s shininess. If you imagine a snooker ball in a pub (or snooker hall, if you’re a more reputable sort than myself), the bright white spot on that ball is the specular highlight of the ball.

Diffusity refers to how evenly spread out light is across an object. The more diffuse the light, the less contrast there is. This is represented by a more gradual transition from light to dark across an object. An object with a strong specular highlight has a higher contrast value around that highlight, as the brightness of the object changes much more suddenly.

In Short – Specular Highlights mean more contrast, Diffuse Lighting leads to less contrast.

Now, let’s look at a situation where we control the light source- we’ll ignore the different properties surfaces can have for now, to keep it simple (a snooker ball is a lot more reflective than human skin, for example. If your skin is as reflective as a snooker ball, see a doctor).

Controlling Light

There are two factors we should keep in mind for basic control of lighting. These are the size of your light source and the distance of your light source from the object being lit.


Size of Light Source

The size of your light source determines how it lights the object in question. Assuming the distance is the same, let’s look at the difference between a torch and a softbox (which look like this).

A torch has a very focused, directional beam – the light isn’t very diffuse. When you use a torch in the dark, it only lights the small area you point the torch at. On our imagined snooker ball, this creates a strong specular highlight, giving high contrast to the ball. If we replace this with a softbox, a much larger light source, we create a light source with more diffuse, spread out quality. This will lessen the contrast on our snooker ball, and light it more evenly than the torch will.

In Short – The larger the light source, the more diffuse the lighting, giving us less contrast. The smaller the light source, the more focused the lighting is on one point, giving us greater contrast.

As an extra point if you’re not confused yet – the more diffuse the light, the darker it is, due to the light available from the light source being spread more thinly.

Distance of Light Source

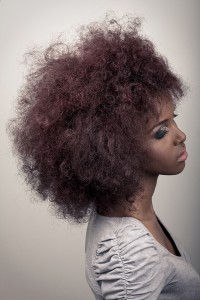
Due to the Afro of Doom in this pic, I had to move the light sources much farther away. This has led to a greater contrast between the specular highlight and the diffuse, which is why we see the stronger highlights on the bridge of the nose, for example. To combat this, I used my large light source for the face and brought the smaller one in for the hair.

The distance of the light source shares many qualities with the size of the light source, seeing as they are almost exactly the same thing as far as your camera is concerned. The closer the light source is to your subject, the larger it is and the further away it is, the smaller it is. Therefore, all the qualities pertaining to size of light source apply here also. There are two differences, however.

The first, most obvious difference is that the closer the light source, the less far the light has to travel, meaning the light is stronger.

The second, less obvious difference, is the difference between the specular highlight (high contrast area) and the diffuse value (low contrast area). The closer you place the light source, the less difference there is between the specular highlight and the diffuse value. The farther away you place the light source, the greater the difference there is between the specular highlight and the diffuse value.

In Short / To Simplify – All you really need to keep in your head here is that the farther away you place the light, the more contrast you will have between the shiny bit and the non-shiny bit. As you put the light closer, the difference between the two will be lessened, allowing for much more even lighting. So, for even lighting, put your light source closer. For higher contrast, move it back.

Oh Sweet Lord My Brain What Have You Done?

Essentially, explaining the basics of lighting is the equivalent of explaining the offside rule in football – it’s actually fairly simple but once you start trying to explain it, it sounds horribly complicated. It’s really not. What I suggest to you is, take this mini guide, go and rent some portable studio lighting (when I rented mine a few years ago, it only cost me £40 for a week), find some unsuspecting victims (or snooker balls) and try this stuff out. It’s not nearly as daunting as you might think. Go on, get some studio lights and try it yourself, it’s fun!

In the future, I’ll do some more lighting write ups, if people have found this useful. Just remember, if you’re still having trouble with the difference between size of light source and distance of light source, use this handy, cow based reference.