white balance

Sizing up split toning

Historically, split toning was used when developing photos from negatives. Two different toners would be used one after the other in order to produce different colours in the highlights and shadows of an image. For example, follow selenium with gold and you'll produce purple-blue mid-tones; or use sepia and then blue for sepia highlights, blue shadows, and green mid-tones. The effect could be altered by using different papers, too. While chemical split toning isn't an exact science, it does offer some compelling effects for your photos and can give them an entirely different feel. You can use it to add warmth or to cool down an image; you might want to introduce a blue tint, or an orange cast.

Now, split toning is more likely to be achieved using the dedicated split toning panel in Lightroom, or with a colour balance adjustment layer in Photoshop, and it is far more controllable. If you've not ventured into the split toning panel, the degree of variation that it offers you might be a little overwhelming; it can radically alter your photo in a ways that you might not anticipate. That shouldn't stop you from experimenting, and to get you started, here are some suggestions. And don't forget that if you're working in Lightroom, nothing can't be undone.

A quick introduction

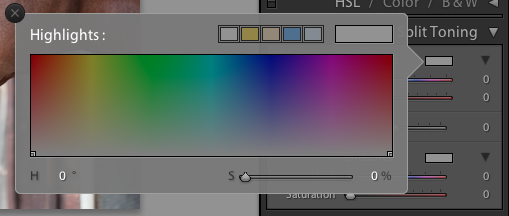
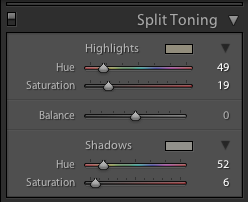
If you're using Lightroom, the split toning panel allows you to select the colours that you would like to emphasise in both the highlights and the shadows, the saturation for each of these tones, and then the balance between them.

The eyedropper is likely easier to use than the sliders

If you find using the sliders to control these adjustments a little too abstract, click on the colour swatches beside 'Highlight' and 'Shadow' and use the eyedropper to select the precise colour you'd like for each.

The balance slider places more emphasis on either the highlights or shadows. Once you've selected your highlight and shadow tones, move it about a bit to see which direction, if any, you prefer.

Black and white

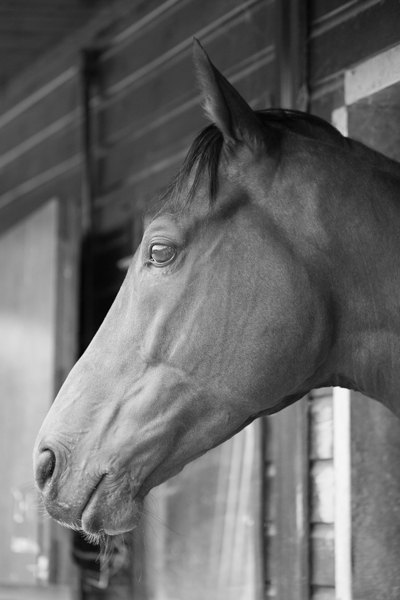
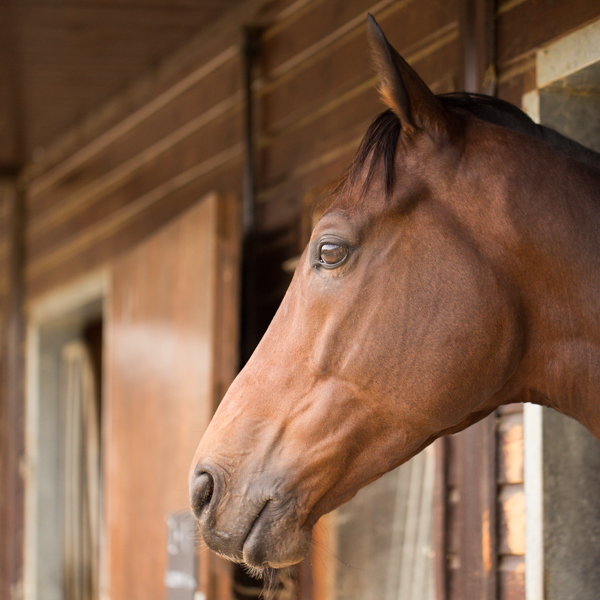
The straight black and white conversion is fine. But could it be warmer and have more depth?

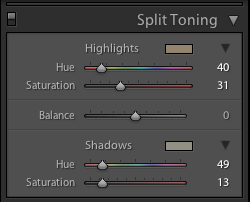
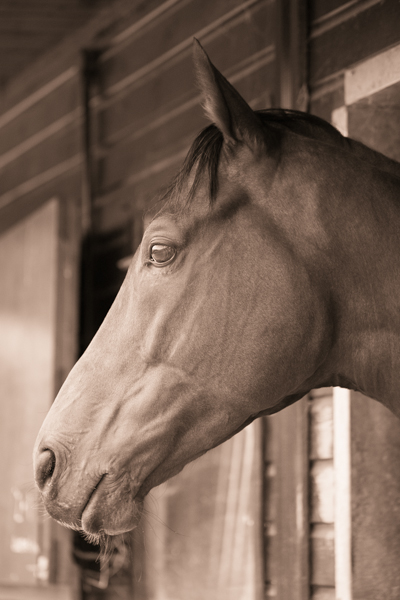
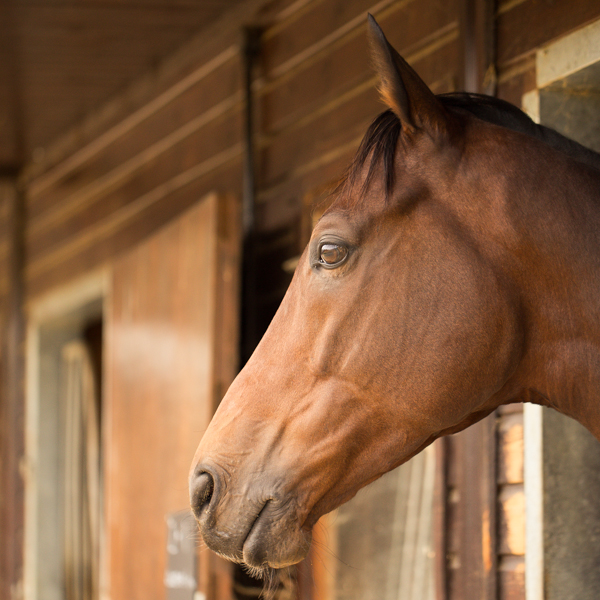
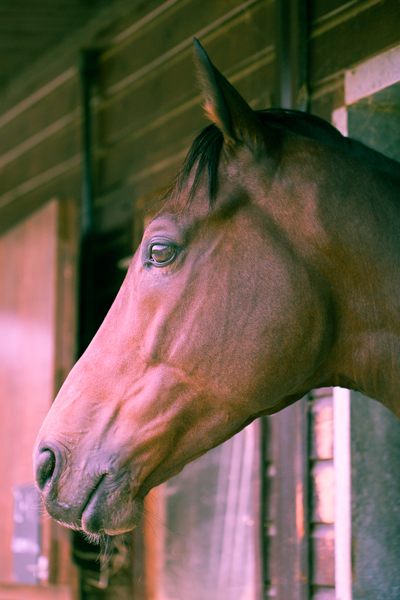
The original black and white conversion of Willie's portrait is coming up quite grey-green in tone. By adding some muted browns—that in the shadow very pale—you can introduce a great deal more warmth to the image and bring about an almost-sepia tone.

You don't need to push the saturation or the tones too far

Willie with a sepia feel is less harsh.

Adding warmth

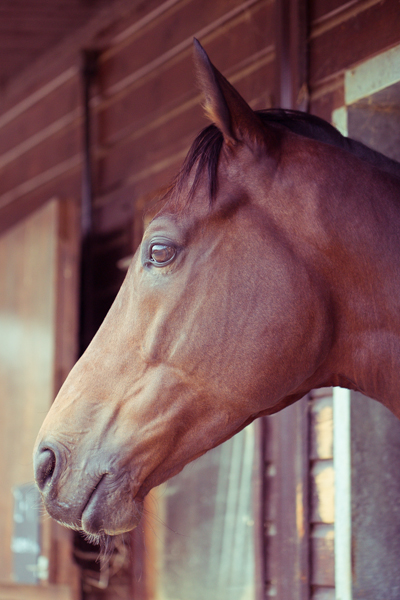
Would bringing some warmth produce a more golden-hour feel to the photo?

This photo was taken fairly early in the morning, on a day when the cloud didn't lift. While the light was wonderfully diffuse, it wasn't especially warm. Even after correcting the white balance, it still felt as if it needed to be brought to life. By adjusting the highlights and shadow tones, it meant I could introduce a more golden-hour feel to the photo.

The adjustments don't need to go too far

You don't need to push too far into the oranges or yellows to intensify the warmth in a photo: sticking to browns and beiges might be enough.

A warmer and more golden Willie

Of course, if you wanted to do the opposite and bring about a colder feel to a photo, you would do that by applying more silvery-blue tones, greys, greens, and even some yellows, to the shadows and highlights.

Cross-processed look

Greens in the highlights and magentas in the shadows

Until now, I've used fairly similar highlight and shadow tones in my split toning adjustments. But for a cross-processed effect, you need to select contrasting colours for your highlight and shadow tones: green and magenta, or cyan and yellow, for example. Which you apply will depend on whether you're looking for a warmer or cooler over all effect.

[gallery columns="2" ids="7128,7127"]

By reversing the shadow and highlight tones (now magenta highlights and green shadows) you can see the imapct it has

By adding a graduated filter, upping the contrast and saturation, and reducing the clarity, you can create a fake toy camera look. We've a tutorial for that, in case you'd like to give it a go.

Split tone away!

The best way to get a feel for split toning is to try it for yourself and see what you can achieve using it. Remember: if you don't like it, you can undo it.

Top 3 edits you should make to every photograph

Earlier this week an infographic design agency, NeoMam Studios, sent us an infographic about 'smoasting' which they'd produced on behalf of print company Photobox. Once I'd got over the shock of awful elision of 'social media' and 'boast' to form the ghastly portmanteau word 'smoast', there was one particular statistic that caught my eye. Take a look at the infographic and guess which it was.

Despite the prevalence of Instagram, the host of editing features that are built into apps such as EyeEm, Facebook, and Twitter, and the plethora of free-to-download editing programmes, only 28% of photos are cropped or styled in some way? Wow! I am surprised. And it's something I think deserves remedying.

While Team Photocritic advocates getting as much right in-camera as possible—you'll certainly not be able to turn a sow's ear into a silk purse—we're not beyond a little post-processing, either. If it's good enough for Cecil Beaton and Horst, it's good enough for us, too. A snip here and a swipe there can elevate an ordinary image into something a bit more special.

This isn't about air-brushing away half of someone's thigh, but about making minor adjustments to three specific areas: the crop, the colour, and the contrast. Here at Photocritic we call them The Three Cs. They're not complicated and they'll make a world of difference.

Crop

However well composed you think your image is, it will almost certainly benefit from having a few pixels shaved off it. It might be a case of reinforcing the rule of thirds, removing a bit of unwanted background that crept into the frame, or getting a bit closer to your subject.
The original isn't that bad

Being a purist, I tend to stick to traditional 4:3 or 3:2 ratios, but don’t feel limited by my prejudices. Select from any of the standard crops, from square to 16:9, or free-style it to adjust the crop any way you like.

But a crop does make it better

At the same time as cropping, make sure to straighten your image, too. Unless you are deliberately tilting the frame for creative reasons, uprights should be upright and horizons should be level. When lines that are expected to be upright or level are wonky, it has an unpleasant impact on our sense of balance. By correcting wonky lines, you'll produce a stronger image.

Colour

Light has a temperature, and depending on the source of the light, or the time of day if it’s the sun, that temperature will vary. When the temperature varies, so does the colour of the light. As a general rule, we don’t notice the variation because our eyes cleverly adjust to the changes. Our cameras on the other hand aren’t quite so clever.

Notice how the sheet and Cookie's white fur has a blue tinge?

Have you ever noticed how white objects in your photos can show up with blue or yellow casts? That’s because the white balance in your photo was off.

Corrected by nudging the white balance slider to the right

It's a relatively easy correction to make using the 'Warmth' or 'White Balance' function in an editing programme. If you think the whites are looking a bit too blue (or if an image looks a little 'cold' over all), nudge the slider to the right. If the whites are too reddish in tone, or the photo looks a bit warm, slide it to the right. It's a case of trial and error to make the right adjustment, but the more that you practise it, the better you'll understand the shortcomings of your camera and how it reacts to different types of light.

Now if you want to intensify or tone down your colours, you can do so using the saturation slider. I don't recommend bumping up the saturation too much; it can result in a cartoon effect rather than a photo!

Contrast

Contrast is the difference between the dark and light tones in your photos. Images shot on bright sunny days tend to have a lot of contrast, with dark shadows and bright highlights, but those taken in fog won’t have a great deal of tonal variation and will be low contrast. From time to time, you’ll want a low-contrast image, but, generally speaking, your photos can be improved by increasing the contrast a touch. It brings definition and depth to them.

The original looks good enough to eat

Don’t go overboard, though, as too much of a good thing can turn bad. You’ll find that if you over-cook the contrast you’ll lose too much detail and end up with an ugly image. Subtlety beats brickbats.

But increasing the contrast can bring some depth

If you use Snapseed to make your edits, it's worth getting to know the ambiance slider, too. I've often found that this is a preferable alternative to the contrast slider.

Anything else?

At this point, any other adjustments are gravy. I'm a fan of Snapseed's 'centre focus' options and often apply one of those. You might want to play with a tilt-shift effect. Or there's the waterfall of filters you can try in any programme, but you might find that you prefer your own edits to prefabricated filters, now.

Oh, and don't forget that it all starts with a decent photo, so check out our eight tips for better smartphone photos, too.

Ember looks to light up iPhone photos

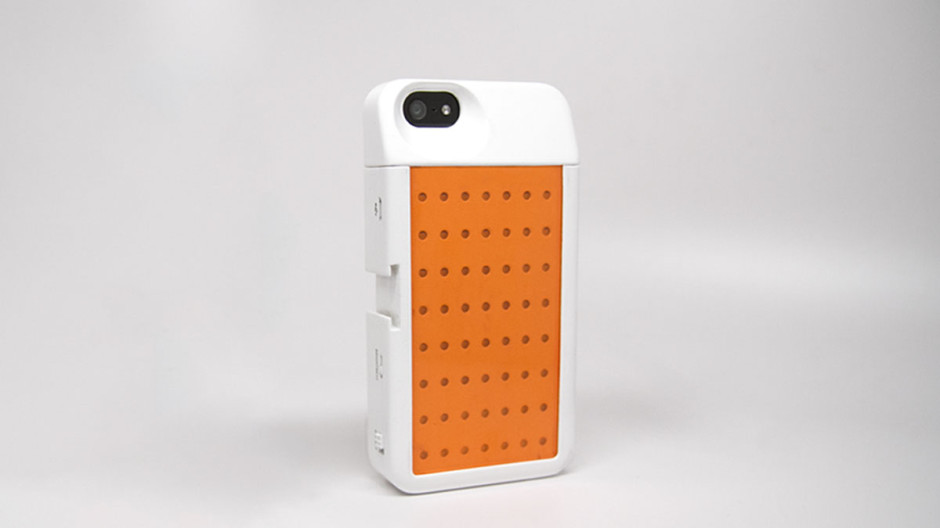
In December last year we featured a Kickstarter project called Lightstrap, which aimed to bring better lighting to smartphone photos. About a week into the campaign, Brick and Pixel, the team behind Lightstrap, pulled the plug on it citing that a better offer had come along. While quite a few people were disappointed by this decision, it has proved to be something of a small mercy for Ember, a new night photography tool that is looking for Kickstarter backing. Ember slides over your smartphone like a case. It comprises 56 LEDs and a diffuser, with the ability to adjust its brightness using a slider and a range of filters to control for light temperature. This should make for more evenly lit photos that don't wash-out people's skintones or give them evil red eyes.

Ember onthe iPhone 5

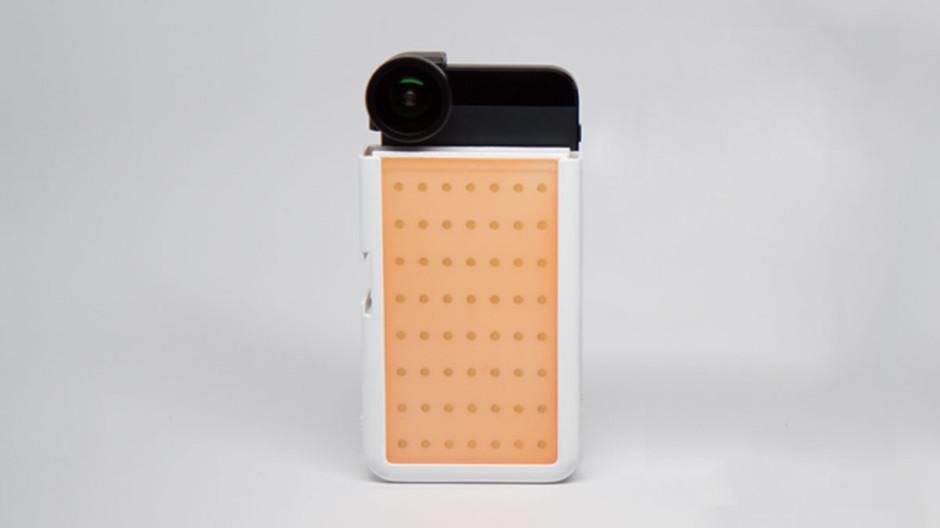
By removing the top of the Ember case, it's possible to continue to use add-on lenses, for example Olloclip or Moment. It's charged through a micro-USB port, making it independent of your phone's battery, and capable of providing light for about four hours of shooting.

Compatible with additional lenses

Embers are only iPhone 5 and 5S compatible, which is a shame for any other type of smartphoneographer; it's not as if we don't take photos or would appreciate some better lighting options. If, however, you're an iPhone 5 or 5S owner and interested, you can help make the Ember happen with an early-bird Kickstarter pledge of $59. Should you miss out on that level, it's $79 for one Ember.

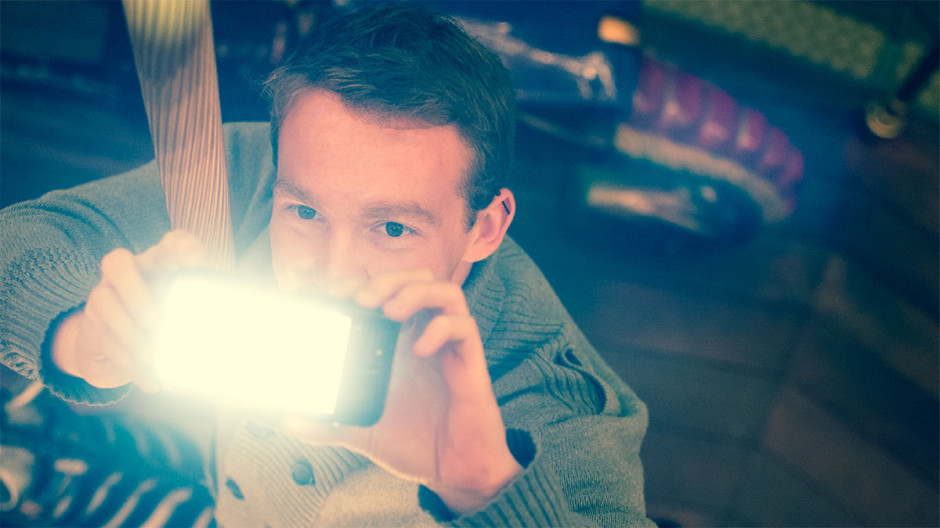
Adjustable brightness and filters for colour temperature control

Ember needs to raise $30,000 to make it a reality; with 25 days to go, it's raised just over $4,000. At this rate, it's touch-and-go if it makes it.
Flickr introduces Aviary as its replacement image editing suite


When Google announced that it was pulling the plug on Picnik - its free, web-based image editing service - millions of us were left wondering just what we'd use to replace it, and that included photo-sharing behemoth Flickr. Picnik was Flickr's in-house photo editor. You clicked on 'Actions' above any photo and there it was, towards the bottom of the list, 'Edit photo in Picnik'. From 19 April, though, that wouldn't be an option.

A saviour has swooped down to rescue millions of Flickr users from the ignominy of badly cropped photos and skewed white balance: Aviary. From Thursday 5 April, Flickr will begin to implement New York-based start-up Aviary as its default editing suite.

When Flickr began its search for a replacement editing service, it sought the opinion of its members, who came back with two primary demands: speed and simplicity. People wanted to be able to load a photo and have it ready to edit. They also wanted to be able to make their changes with the minimum of fuss. Aviary provides just that.
Users can make alterations to all the aspects of an image you'd expect - such as crop, colour, and contrast - but it also lets you add stickers and text and apply filters. A click here and a click there, and it's done and your photo is back in your photostream, looking more gorgeous than ever. Aviary's real clincher, though, is that it's built using HTML5, meaning that it is iPad-compatible.

Flickr's anticipating that the roll-out process could take up to two weeks to reach every user. I'm looking forward to giving Aviary a whirl when it appears in my Actions menu!

A brief introduction to white balance?

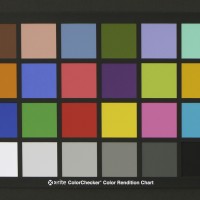
Photograph of X-Rite ColorChecker Color Rendition Chart

If you’re a new recruit to the digital photography vanguard, white balance might not mean very much more to you than a button on your camera. For veterans of the analogue campaigns, white balance is something much more familiar. However, knowing what white balance is and how it affects your pictures could help to make them a whole lot better. Thus we present to you the Small Aperture guide to white balance, in technicolour.

Light temperature

What we think of as white light isn’t really white. It’s actually the spectrum (red, orange, yellow, green, blue, indigo, and violet) mashed together. Light that comes from different sources – the sun, tungsten bulbs, fluorescent bulbs, candles – is made up of different proportions of the spectrum, and is said to have a different colour temperature (measured in Kelvins). Warmer light temperatures comprise more blue tones whilst cooler light temperatures makes things seem more orangey-yellow. (Yes, it seems counter-intuitive, but it’s about the energy in the light.)

Midday sunlight on a clear day is pretty evenly balanced across the spectrum and has a temperature about 5,000K, but light from tungsten bulbs has more red wavelengths in it, so will give your pictures a yellow or orange cast. Light on a cloudy day, on the other hand, is made up of more blue wavelengths. Unsurprisingly, this can give pictures a bluish tinge.

Auto White Balance

By the awesomeness that is nature, our eyes automatically adjust to these warmer or cooler temperatures of light, so things will always look as they should. Things that are white will look white, not a bit jaundiced or dying of cold.

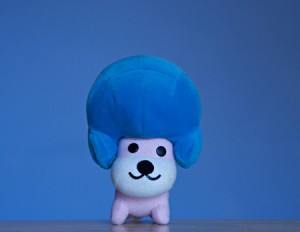
Afro-Ken, taken with auto white balance

Now, digital cameras usually have an Auto White Balance (AWB) setting that overall does a pretty good job of compensating for the variations in light temperatures. But unlike our eyes, it doesn’t always get it quite right and pictures can come out a bit blue or yellow. In which case, you’ll find that there are a few options to help you out.

Presets

My camera has six presets – daylight, shade, cloudy, tungsten (incandescent) light, white fluorescent light, and flash – in addition to AWB and a custom setting.

If I’m shooting inside under incandescent lights (3,200K) and my pictures are coming out a bit yellow, I can try switching to the tungsten setting. It’ll balance things out with some blue tones.

Outside on a cloudy day the light will be warmer in temperature (perhaps 8,000K), so might give everything a blue hue. If I apply the cloudy setting: tah-daa! Less blue, better balanced pictures.

Afro-Ken photographed using the daylight setting

If you hadn’t already guessed, blue and amber filters would have done (and indeed still do) the job of these different white balance settings for film cameras.

See how much more yellow-y he looks in the 'shade' setting?

Custom white balance and RAW

I also mentioned that I’ve a custom white balance setting on my camera. This can be really useful if, for example, you’re photographing something that is predominantly red. Your camera might mistake all those red tones for light that’s cool in temperature and make things a bit too blue. If your picture has two different light sources in it, one warm and one cool, custom white balance can make sure you get the picture that you want, not what your camera thinks that you want.

When you set the custom white balance, you’ll need something that is white to act as a point of reference for your camera, so it knows what ‘white’ should look like.

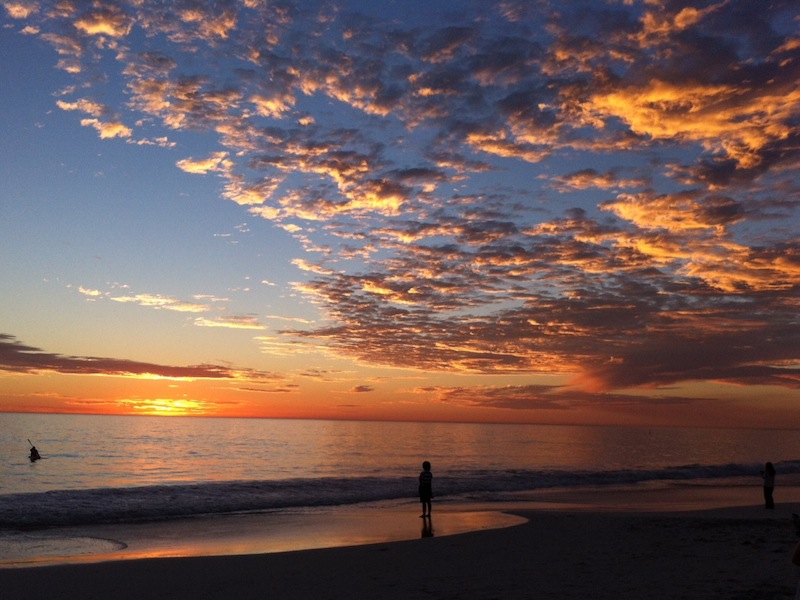
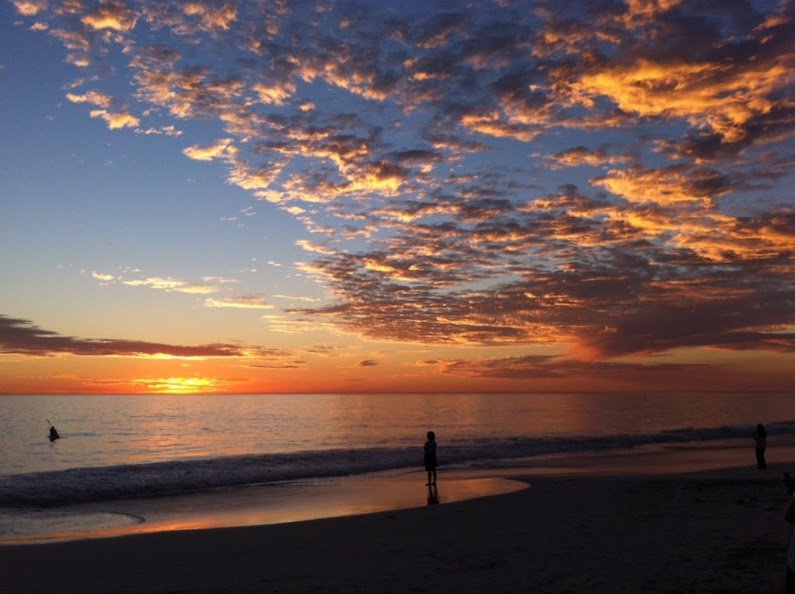
Of course, if you shoot in RAW, you can always adjust the white balance in post-processing. If nothing else, it’s a fun five minutes to make a sunset glow blue.

In summation

  • Light comes in different temperatures: sometimes with more red wavelengths (lower temperature), sometimes more blue (warmer temperature)
  • Our eyes adjust to these different versions of ‘white’
  • Differences in light temperature can make our pictures look too blue or too yellow
  • In the film days, these differences were fixed using filters, now cameras have an auto white balance (AWB)
  • Sometimes, AWB doesn’t get it quite right, so you can adjust your camera to the light’s temperature using some preset white balances, or you can customise the white balance
  • If you need to, you can correct the white balance of a picture in post-processing

Experiment! Play around with the different settings to see what the effects are. You never know, you might decide that you quite like green sunrises!

For a giggle, here's Afro-Ken made to glow blue by using the tungsten setting without any tungsten lights

PhotoEngine: edit in real-time

Oloneo

If you’ve ever wanted to turn off or dim a light in a photograph after you’ve taken it, or if you’d like to be able to adjust exposure as if you were still behind the lens but aren’t, then the people over at Oloneo might have just the piece of HDR software for you. What’s more, it makes the adjustments in real-time.

PhotoEngine allows you to alter the lighting in your pictures, for example to switch on or off light sources or adjust their white balance. It also gives you the capacity to recover details lost to over-exposure, or to restore areas that have been under-exposed. And there’s a noise reduction tool, too.

PhotoEngine is still in Beta and is only available for Windows, but you can learn more about it and download it for free from Oloneo.

When RAW is not enough

4150358922_e5af95be9e

One of the first pieces advice I give to people who wonder where to start getting their photos to become better, is to shoot in RAW. There’s many obvious reasons for why this is a good idea.

With RAW, the final result can be sharper, you have better control over white balance, you get wider dynamic range, you can do HDR photography, and, well, it’s what all the cool kids done. Recently, however, I have moved away from shooting in RAW for several reasons. Or, to be precise, I have started shooting in RAW+JPG.

Here are some compelling arguments for why you should do the same… 


Becoming a better photographer

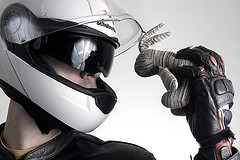
Holding a bunny to your face while wearing full Motorcycle protective gear is a great way to become a better photographer. Aw, c'mon, give me a break, what would YOU use to illustrate this article? (clicky for bigger)

RAW is great because it is lenient – you can over-expose a photo quite significantly, and still rescue the highlights, because you have significantly higher bit-depth (and more information) than you would do with JPGs.

This is a life-saver for press, event, and action photographers: The fact that you aren’t completely buggered even if you’ve screwed up the exposure a fraction is a godsent!

The problem is that I’ve recently talked to a lot of photographer of the ‘new garde’. People who have rarely – or never – shot on film, and are unaware of how often RAW is helping them out of a hole. There’s two ways of looking at this: Either, use the extra flexibility RAW gives you on a regular basis, and accept that we’re now in the digital age. Or shoot as if you’re still shooting on film, and use the extra flexibility as a safety buffer.

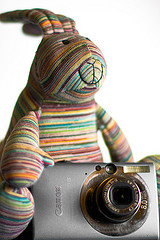
Bunny is sad because his compact camera doesn't take photos in RAW. (clicky for bigger)

I’m a strong believer in the latter: Ultimately, when you present your photos, you have to save them as 8-bit colour anyway, so you’re in fact re-compressing the image back into a lower bit depth. This isn’t a bad thing: the human eye can’t really cope with more than 8 bits anyway.

The problem is that it’s difficult to estimate how much of the photo is over-exposed when you’re relying on RAW to save you – and there will come a day where you are relying on it, and you’re off. There’s only so much recovery you can do of a photograph, and if you miscalculate, you don’t have a safety buffer anymore.

Personally, I’ve become a huge fan of trying to take perfect exposures out of the camera: Shoot as if the JPEG is your film. Get the white balance right. Get the exposure right. Sharpen the JPG in-camera. Set the saturation and contrast you like. In short; Make your JPEGs be as perfect straight out of the camera as possible. In addition to making you a much better and more conscious photographer, this has several benefits. To wit:

Better previews

Getting the white balance right on shots like this is challenging, but hellasatisfying. It's good to know you can fall back on RAW if you did make a hash of it after all (clicky for bigger)

RAW photos are unsharpened out of the camera. This is a blessing, because as we discussed in the article on how you can sharpen your photos, you should never sharpen your photos twice. Your JPGs are sharpened in-camera, which means that if you sharpen them on your computer, you’re not getting as high quality as you could. Not a good thing.

In situations where you're taking lots of photos (like when snapping gigs), it's a relief to have JPG preview - it saves you from opening hundreds (or even thousands) of RAW files to find out which ones turned out well.

The flopside of this, however, is that RAW photos can look flat and lack energy. The photos that really zing are the ones that are tack-sharp – and if you’re only looking at RAW photos, you may actually miss the photo that is sharpest, because it hasn’t been sharpened to its full potential.

When you shoot RAW+JPG and your JPEGs are perfectly exposed and whitebalanced, they are the ultimate previewing tool: Full resolution previews, beautifully sharp, which your computer can deal with very quickly. Even better, if you need to e-mail or upload previews of a shoot anywhere, it’s an order of magnitude faster to resize and compress JPGs than RAW files.

So, Shoot with JPG, keep them, and use them for previewing purposes. If you decide to edit any of ‘em, use the RAW files, but at least you’ll have a much better picture (har har) of the potential of your photos

Submitting photos to magazines

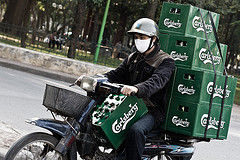
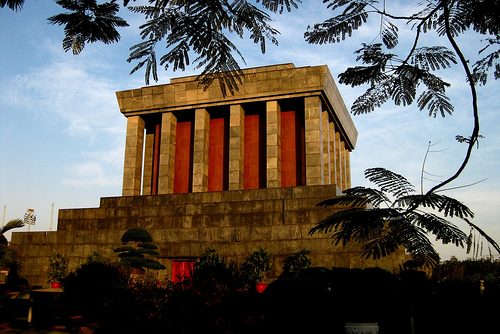
Enough with the useful captions already. Here's a picture of a guy in Vietnam with 10 (yes! Ten!) cases of beer on his motorbike. (clicky for bigger)

So you occasionally shoot paperazzi stuff? You do events? You shoot news? Honestly, you don’t want to piss off the picture editors: if you send them a photo they’ll have to do a lot of work on, you’ll need to have a damn fine explanation… And find yourself some other customers, because they won’t use you again.

They’re on extremely tight deadlines, and they prefer photos they can just drop into their page layouts without fiddling with them too much. Shoot perfect JPGs, and that’s usually good enough for magazine use.

Let them know that you have a RAW file if they need it, of course, but 99 times out of a hundred and twenty two, they won’t want it – they don’t need the hassle.

Workflow speed

My university professor stole a wise saying from someone else once: Work smarter, not harder. This saying really is eminently applicable here.

I don’t care how fast your computer is – RAW will slow you down in one way or another. If you organise your photos so you can preview the JPGs, you’re making your life a lot easier.

If the JPG looks out of focus, the RAW will be too – that’ll save you a few seconds opening the RAW file to check. Multiply that by 300 photos, and you’ve saved yourself 10 minutes. Presto!

There’s no reason not to

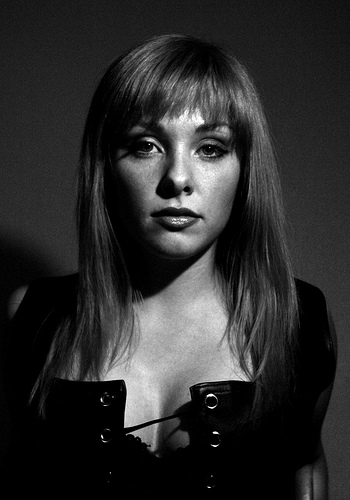
This model wants you to shoot RAW+JPG. Just look at how stern she looks. Would you dare not to? Thought so. Grab your camera right now and change your settings. (clicky for bigger)

Set your camera to RAW+JPG, and bring plenty of memory cards. They cost next to nothing these days, and if you do a shoot where you know you don’t need to keep the JPGs, you can always trash them after you’ve downloaded them – sort ‘em by size (the RAW files tend to be 3-4 times bigger than the JPGs) and delete half the smallest files. Or sort ‘em by type and delete all the JPGs. Whatever you prefer.

If you have enough memory cards (and you should. Really. If you don’t, head over to Amazon and be Amazed (groan) at how cheap they are), there really is no reason not to shoot in RAW+JPG.

Go on. Give it a shot. And let me know how much time you’re saving :-)


Do you enjoy a smattering of random photography links? Well, squire, I welcome thee to join me on Twitter -

© Kamps Consulting Ltd. This article is licenced for use on Pixiq only. Please do not reproduce wholly or in part without a license. More info.