cool kids

Perfect Portraits

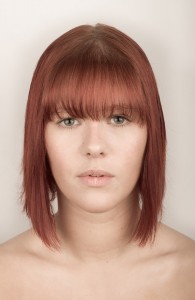
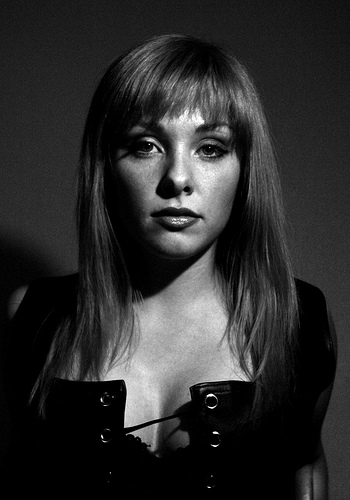
An example of a studio lit portrait. Portraiture, face pics, mush captures, gob snaps. In today’s PCoF (it’s what all the cool kids and hip youngster-dudes are calling Photography Concept on Friday) we’ll be dipping our toe into the gigantic swimming pool that is portraiture. It’s a metaphorical swimming pool. Into which we metaphorically will be dipping our metaphorical toe. Got it? Good. I can feel myself starting to waffle already, so I will resist the charms of loquacity and press on.

A natural light portrait - this ladybird wanted in on the action. No I did not pin it to her thumb.

Essentially, there are two sides to portraiture: lighting and, for want of a less hateful phrase, ‘people skills’. Lighting is a massively complex subject, and there are many, many blogs, books and videos out there to teach you the basics and more. I’m going to focus on the ‘people bit’, as repeating basic lighting theory is horribly boring and can be found elsewhere. Not only that, but the actual interaction with people and how you get the best out of them is the bit I actually enjoy.

First, however, I will briefly look at a couple of technical basics that you should follow to take your portrait from 'holiday snap on your mum’s compact' to 'ooh, very professional!', whether that's Venture Photography-style light and bright or far more whimsical magazine-style images.

Basics

In most cases, the eyes should be the focus of any portrait (in most cases), so ensure that the eyes are in sharp focus. Anything less and you should be throwing it away, I’m afraid. Composition is also of the utmost importance. The ‘rule of thirds’ (as explained by our very own Duncan Howsley here) should be kept in mind at all times. Of course, don’t be afraid to break the rules every now and then if it works for the shot.

Finally, on the subject of composition, pay close attention to your backgrounds. If you’re not shooting someone against a plain background, you really want to avoid having anything too busy going on behind your subject. There’s nothing worse than getting home after a shoot and loading up that shot you were so pleased with, only to find that there’s a double decker bus growing out of the side of her or his head.

Even if your portrait is well lit, technically sound, in perfect focus and head object-free, if the subject of the shot looks awkward and uncomfortable (unless that’s the intention of the image, of course) the image is, essentially, a big ol’ failure. So how do you get them to act natural?

Relaxing Your Subject

An example of a studio lit portrait.

First off, talk. Talk, talk, talk. Give your subject directions on what to do. Give them positive feedback, even if it’s going horribly. You’ll find that the more you praise (‘good’, ‘that’s great’ and ‘yeah that looks really nice, let’s do a couple more like that’), the more their confidence will build.

Not only that, but talk to them in general. Show an interest, get them chatting, perhaps between lens and lighting changes. Not only does this help you get a bit more background about the kind of person they are, it helps them to relax a little more. Finally, don’t be afraid to tell them when they’re doing something wrong, just do it constructively. Tell them what is working, but that they’re doing a thing with their eyebrows that looks insane, and oh Lord it needs to stop. Except more constructively than that.

I often find that people get very dry-eyed and ‘blinky’ after a relatively short space of time, so a little trick I like to use is getting the sitter to close their eyes while I compose and then asking them to open their eyes and look into the lens. Not only does this keep the subject more relaxed, it adds a bit of movement to the equation, meaning that there is less of a posed look to the shot.

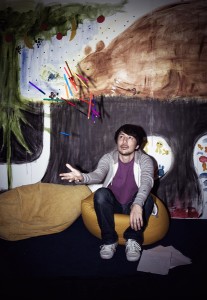
An example of an "on location" portrait for a magazine.

In general, movement is good. Although it can feel cheesy, getting the sitter to turn their head into the shot can also remove some of that stiff, posed element, as they spend less time keeping their head perfectly still. To avoid blinking, I sometimes count people in, so they know when to not blink. Check with your subject whether they like this or not, though, because I find some people are straight up terrified of a countdown and will pull crazy, panicked faces.

Don’t spend too long framing your shot – get used to framing quickly. The longer you make your sitter wait for you to take the photo, the more anxious they become, and the less natural and relaxed they will look. Just imagine being on the other side of a dSLR with two large softboxes pointed at you, waiting for a good four or five seconds for a flash to go off, trying to keep your eyes open and a fixed smile on your face for the duration.

A nice, cheeky one is to tell your subject that you’re just ‘testing the lighting’. This doesn’t have to be a complete lie: you could indeed be experimenting with your lighting setup. This little trick sometimes has the effect of the subject completely relaxing, in a ‘oh, well this shot doesn’t even count’ sort of way and you can snap them while they’re totally off guard. Sneaky, eh?

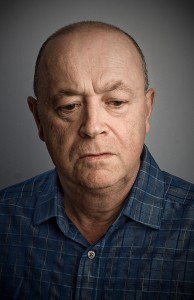
Another studio image, captured during a quiet spell.

Finally, make sure you switch up the poses quite a lot. Not only does this allow you to get a good idea of the subject’s best side, it also allows you to keep them busy and distracted. This will make them forget about the fact that there’s a camera pointed at them, as they’ll be busy taking on the directions you’re giving them. In short – practice, practice, practice. The above advice is the most relevant for very simple headshot setups with ‘normal’ people, or anyone whose job doesn’t involve being photographed five times a week.

Good portraiture, in my opinion, is essentially about tricking your subject into forgetting that there’s a camera pointed at them, even if it’s just for a split second. The examples in this article, shamelessly taken from my own portfolio, have been chosen because I think they all reflect that philosophy in some way.

So, on your ‘to do’ list this weekend – grab an unsuspecting friend and have a portraiture session with them. See what you get out of it! You might just get hooked.

When RAW is not enough

4150358922_e5af95be9e

One of the first pieces advice I give to people who wonder where to start getting their photos to become better, is to shoot in RAW. There’s many obvious reasons for why this is a good idea.

With RAW, the final result can be sharper, you have better control over white balance, you get wider dynamic range, you can do HDR photography, and, well, it’s what all the cool kids done. Recently, however, I have moved away from shooting in RAW for several reasons. Or, to be precise, I have started shooting in RAW+JPG.

Here are some compelling arguments for why you should do the same… 


Becoming a better photographer

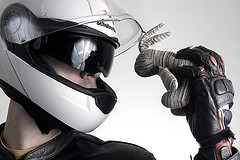
Holding a bunny to your face while wearing full Motorcycle protective gear is a great way to become a better photographer. Aw, c'mon, give me a break, what would YOU use to illustrate this article? (clicky for bigger)

RAW is great because it is lenient – you can over-expose a photo quite significantly, and still rescue the highlights, because you have significantly higher bit-depth (and more information) than you would do with JPGs.

This is a life-saver for press, event, and action photographers: The fact that you aren’t completely buggered even if you’ve screwed up the exposure a fraction is a godsent!

The problem is that I’ve recently talked to a lot of photographer of the ‘new garde’. People who have rarely – or never – shot on film, and are unaware of how often RAW is helping them out of a hole. There’s two ways of looking at this: Either, use the extra flexibility RAW gives you on a regular basis, and accept that we’re now in the digital age. Or shoot as if you’re still shooting on film, and use the extra flexibility as a safety buffer.

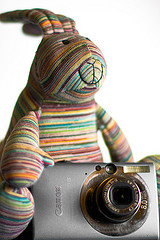
Bunny is sad because his compact camera doesn't take photos in RAW. (clicky for bigger)

I’m a strong believer in the latter: Ultimately, when you present your photos, you have to save them as 8-bit colour anyway, so you’re in fact re-compressing the image back into a lower bit depth. This isn’t a bad thing: the human eye can’t really cope with more than 8 bits anyway.

The problem is that it’s difficult to estimate how much of the photo is over-exposed when you’re relying on RAW to save you – and there will come a day where you are relying on it, and you’re off. There’s only so much recovery you can do of a photograph, and if you miscalculate, you don’t have a safety buffer anymore.

Personally, I’ve become a huge fan of trying to take perfect exposures out of the camera: Shoot as if the JPEG is your film. Get the white balance right. Get the exposure right. Sharpen the JPG in-camera. Set the saturation and contrast you like. In short; Make your JPEGs be as perfect straight out of the camera as possible. In addition to making you a much better and more conscious photographer, this has several benefits. To wit:

Better previews

Getting the white balance right on shots like this is challenging, but hellasatisfying. It's good to know you can fall back on RAW if you did make a hash of it after all (clicky for bigger)

RAW photos are unsharpened out of the camera. This is a blessing, because as we discussed in the article on how you can sharpen your photos, you should never sharpen your photos twice. Your JPGs are sharpened in-camera, which means that if you sharpen them on your computer, you’re not getting as high quality as you could. Not a good thing.

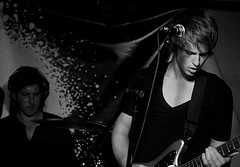
In situations where you're taking lots of photos (like when snapping gigs), it's a relief to have JPG preview - it saves you from opening hundreds (or even thousands) of RAW files to find out which ones turned out well.

The flopside of this, however, is that RAW photos can look flat and lack energy. The photos that really zing are the ones that are tack-sharp – and if you’re only looking at RAW photos, you may actually miss the photo that is sharpest, because it hasn’t been sharpened to its full potential.

When you shoot RAW+JPG and your JPEGs are perfectly exposed and whitebalanced, they are the ultimate previewing tool: Full resolution previews, beautifully sharp, which your computer can deal with very quickly. Even better, if you need to e-mail or upload previews of a shoot anywhere, it’s an order of magnitude faster to resize and compress JPGs than RAW files.

So, Shoot with JPG, keep them, and use them for previewing purposes. If you decide to edit any of ‘em, use the RAW files, but at least you’ll have a much better picture (har har) of the potential of your photos

Submitting photos to magazines

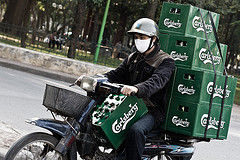
Enough with the useful captions already. Here's a picture of a guy in Vietnam with 10 (yes! Ten!) cases of beer on his motorbike. (clicky for bigger)

So you occasionally shoot paperazzi stuff? You do events? You shoot news? Honestly, you don’t want to piss off the picture editors: if you send them a photo they’ll have to do a lot of work on, you’ll need to have a damn fine explanation… And find yourself some other customers, because they won’t use you again.

They’re on extremely tight deadlines, and they prefer photos they can just drop into their page layouts without fiddling with them too much. Shoot perfect JPGs, and that’s usually good enough for magazine use.

Let them know that you have a RAW file if they need it, of course, but 99 times out of a hundred and twenty two, they won’t want it – they don’t need the hassle.

Workflow speed

My university professor stole a wise saying from someone else once: Work smarter, not harder. This saying really is eminently applicable here.

I don’t care how fast your computer is – RAW will slow you down in one way or another. If you organise your photos so you can preview the JPGs, you’re making your life a lot easier.

If the JPG looks out of focus, the RAW will be too – that’ll save you a few seconds opening the RAW file to check. Multiply that by 300 photos, and you’ve saved yourself 10 minutes. Presto!

There’s no reason not to

This model wants you to shoot RAW+JPG. Just look at how stern she looks. Would you dare not to? Thought so. Grab your camera right now and change your settings. (clicky for bigger)

Set your camera to RAW+JPG, and bring plenty of memory cards. They cost next to nothing these days, and if you do a shoot where you know you don’t need to keep the JPGs, you can always trash them after you’ve downloaded them – sort ‘em by size (the RAW files tend to be 3-4 times bigger than the JPGs) and delete half the smallest files. Or sort ‘em by type and delete all the JPGs. Whatever you prefer.

If you have enough memory cards (and you should. Really. If you don’t, head over to Amazon and be Amazed (groan) at how cheap they are), there really is no reason not to shoot in RAW+JPG.

Go on. Give it a shot. And let me know how much time you’re saving :-)


Do you enjoy a smattering of random photography links? Well, squire, I welcome thee to join me on Twitter -

© Kamps Consulting Ltd. This article is licenced for use on Pixiq only. Please do not reproduce wholly or in part without a license. More info.