Feature Articles

Painting with light - a how-to to get you started

If you'd like to try a more unusual approach to lighting a photo, whether that's because you want to experiment or because you don't have access to studio lights, you might want to consider light painting. This isn't the type of light painting when you make patterns and shapes and designs with light sources to create your image, but using light sources to illuminate your scene during a long exposure. At its simplest, it involves outing the lights, setting your camera to bulb mode, and using a torch to 'paint' light onto your subject. Want to give it a go? Read on!

Paited with light (image thanks to Triggertrap)

Kit

You don't need anything especially fancy for light painting: a camera on a tripod, a scene that you want to illuminate, and a torch are the minimum requirements. You might find it easier to control your camera's shutter using a cable release for flexibility and when you're more confident you might want to try some more advanced techniques, but let's start here.

Imagining your scene

Before embarking on your light painting adventure, it's best to think about the scene that you want to illuminate and the story that you want to tell. While you might herald some impressive results from waving your torch about in random formations, that's unlkely to result in the image that you anticipated. Take a little time to consider your subject and how you want to light it.

Tasty, but not necessarily interesting. Wait until we let some torches loose on it, though! (Image thanks to Triggertrap)

Camera!

Scene set and lighting scenarios imagined, you need to secure your camera on your tripod and select your exposure. For light painting, try bulb mode controlled by a cable release, a low ISO, and an aperture that gives you the look you want. You'll need to manually focus on your subject, too!

Lights!

Turn out the lights and start your long exposure.
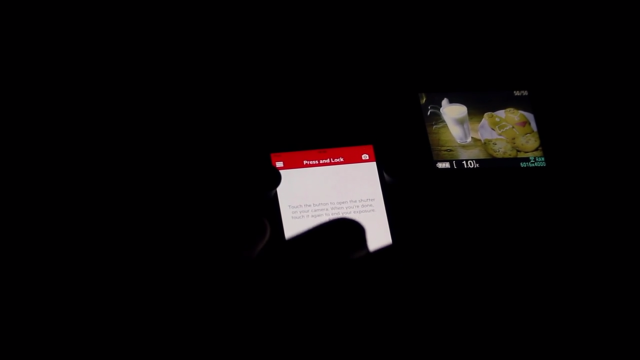
Lights! Camera! Action!

Action!

Use your torch to begin to paint light over your subject. There's going to be some trial and error involved in getting the effect that you want, but that's half of the fun! Not keen on what you see? Try it again!

Stretching your creativity

When you've mastered the basics, you can push your experimentations further. Try introducing coloured light to your images by covering your torch with coloured gels, or even sweetie wrappers. You can make cut-out filters to shape your light. Or direct your light more accurately with a snoot manufactured from cardboard and gaffer tape. You're not limited to inside, either. Try light painting buildings and monuments or flower pots - whatever takes your fancy and you've sufficient fire-power to illuminate!
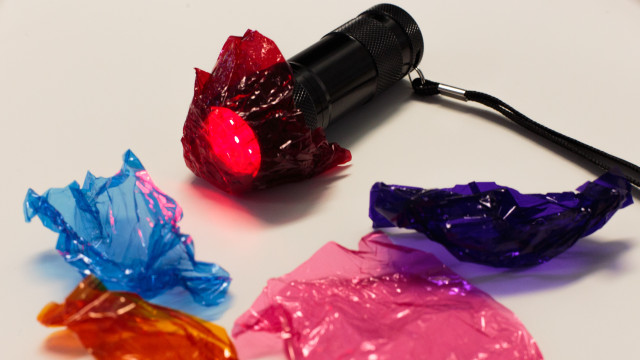
Sweetie wrappers will do in the absence of gels (image thanks to Triggertrap)

This is something that doesn't have to cost the earth but can render some fabulous results.


Much of this, including all the images, is based on the fantastic How to paint a still life with light tutorial found on Triggertrap's How-To microsite, and it's reproduced with permission. Triggertrap How-To is full of great content for making the most of your camera. You should take a look.

We're going on a roadtrip - grab your camera and drive-lapse

I'm meant to be driving to Edinburgh tomorrow—good health permitting—and if my car weren't due to be crammed to the gunwales with my brother's belongings, I might've considered turning it into a drive-lapse. Or a time-lapse of the journey. It would be possible to do this using a common-or-garden time-lapse technique, but if I were to find myself stuck in a traffic jam (heaven forfend), we'd have shot after shot of my car stationary on the A1, which isn't so thrilling. The clever people at Triggertrap have developed a way around this problem, however: distancelapse mode. Rather than triggering your camera to take a photo at timed intervals, it exploits your smartphone's GPS to take a photo at specific distance intervals. How very nifty!

Safety first

Shooting a drive-lapse will necessitate mounting your camera and triggering device securely in your car, with a decent view of where you're going. While this might seem simple, whatever means you choose to mount your camera in your vehicle, you must do it safely. Laws will vary from country to country, but the primary consideration is that your kit mustn't obscure the driver's vision and neither must it be a distraction. Do be sure of the regulations before you go anywhere.

Selecting a mounting option

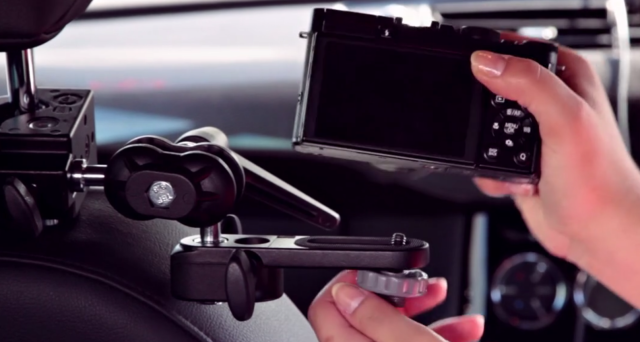
You have a few options to mount your camera in your car. A superclamp attached to the passenger seat's headrest stalks is ideal: it won't obscure the driver's vision and the camera has a great view. Alternatively, you could opt for a suction cup on the windscreen or a tripod wedged in the backseat. Remember: it's about being safe.

Aperture priority mode or Manual?

Choosing your preferred shooting mode for a drive-lapse can be a bit of a conundrum. If you're likely to encounter changes in the weather conditions or light throughout the duration of your journey, manual mode will leave some shots over-exposed and other under-exposed. Aperture priority mode can solve the exposure issue, but leave you with a flicker problem. You're going to have to weigh up which mode will suit your journey, and therefore your final video, best.

Time and space considerations

If you're going on an especially long journey, you'll need to make provision for this, in terms of your personal needs and your kit's. Your memory card will require sufficient space and you might need an external charger for your phone, too.

Drive time!

With all of these considerations, ehm, considered, it's time to do this!

Mount your camera

As we've already discussed, your camera needs to be mounted legally and securely. You don't want it wobbling about if you encounter potholes or sleeping policemen.

This was a Manfrotto clamp, for the record

Camera, meet Triggertrap

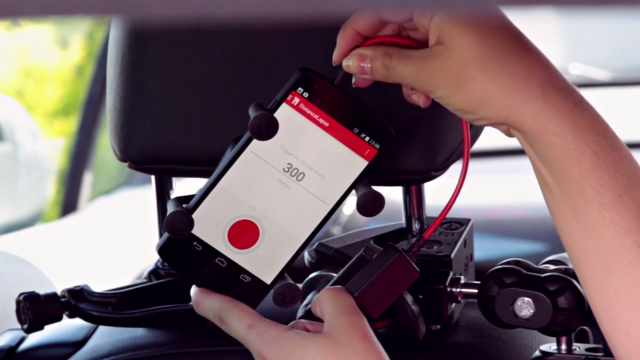
Hook up your camera to the Triggertrap dongle and the dongle to your smartphone. Secure your smartphone, too, as you don't want that moving about.

You could do this as an ordinary time-lapse, but if you get caught in traffic, it could prove a bit dull

Set your camera

Your camera needs to be in manual focus mode in order for Triggertrap to function, so if it isn't already, switch it to manual focus and adjust to get the image sharp. You also need to choose between aperture priority and manual exposure modes, and set your exposure accordingly.

Let Distancelapse take the strain

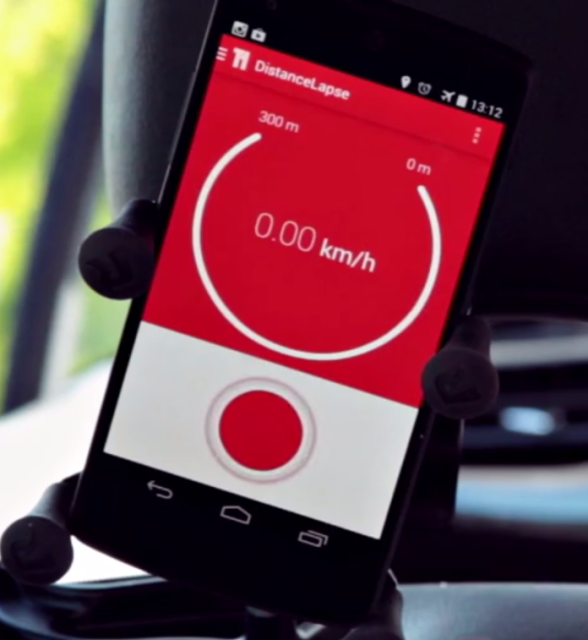
Open up the Triggertrap app and select the Distancelapse mode. If you're driving on the motorway, 300 metres is a good interval. Hit the big red button, allow the GPS to settle, and then off you go!

300 metres should do the job

Putting together your video

When you've completed your journey and have all your images, it's time to compile them into a video. We'll save that for another article, but this one should get you started. Then you get to relive the journey, in shortened form.


Much of this, including all the images, is based on the fantastic How to shoot a road trip timelapse tutorial found on Triggertrap's How-To microsite, and it's reproduced with permission. Triggertrap How-To is full of great content for making the most of your camera. You should take a look.

Shooting star trails

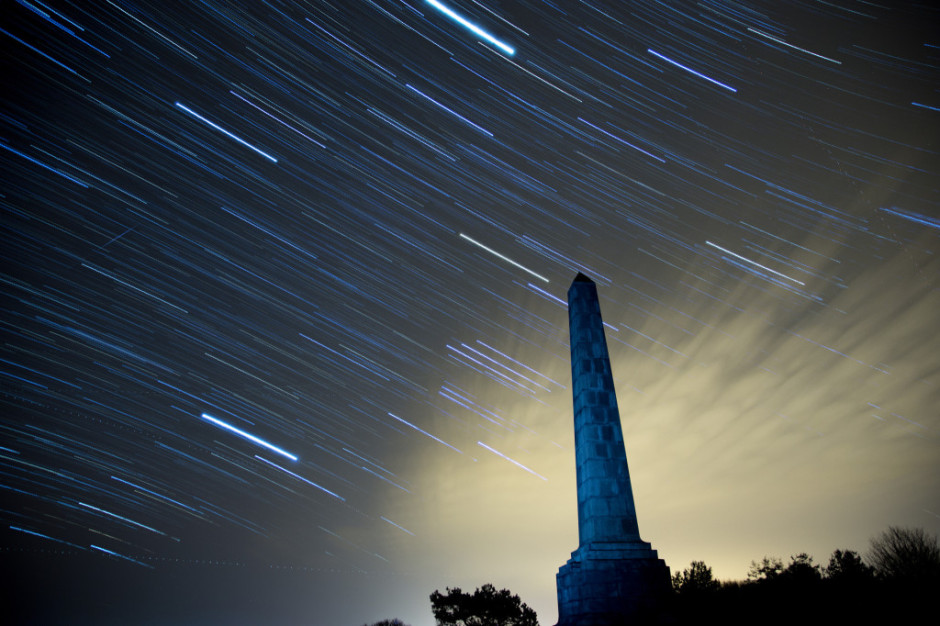
Star trail photos can be incredibly compelling and while they take time to produce, they're probably not as difficult as you might think they are. In fact, there are two methods that you can use to capture the night sky with the stars streaking across it: a single long exposure or what effectively amounts to a time-lapse composited into a single image. This is our guide to shooting star trails. Star trails by Thomas Langley (thanks to Triggertrap)

Location

Light pollution can be a pain when you're attempting to shoot a star trail photo. If you're not able to see the stars, your camera won't be able to, either. Should you live in a city, this means looking for a location that's suitably isolated to give you a view of the sky, but isn't so isolated that you make yourself vulnerable. And if you don't live in a city, you still need to be somewhere accessible.

You also want to think about your scene. You might find that having something of interest in the foreground of your shot will improve it. Barns, dilapidated or otherwise, obelisks, and rock formations are all good starting points.

By finding Polaris and focusing on that, you'll produce a circular star trail; point your camera somewhere else in the sky and your trails will be more linear.

Timing

The best time of year for shooting star trails is definitely dependent on personal preference. How long you can manage safely in the cold is probably your primary concern. But you do need to be shooting on a cloudless night with no or little moon.

Setting up

Once you've decided on your location and set up camp with warm clothes, thick boots, and a thermos flask, it's time to set up your camera.

Camera

Set your camera on its tripod; place it in manual mode and switch the lens, preferably a wide-angle one to get as much sky in the shot as possible, to manual focus, too. Frame your shot—ideally with something of interest in the foreground—with the lens focused to infinity.

When it comes to exposure, you need to be in bulb mode, the aperture should be as wide as possible, and try ISO 1,600.

Take a test shot with a exposure time of 30 seconds; if the stars are bright and clear, you're ready to go. If it looks a little dark, adjust the exposure time until you're happy.

Camera trigger

If you're using an intervalometer, you need to set it to record as you would for a time-lapse video, using the exposure time you tested for.

Choose your exposure time, number of exposures, and the intrval between them

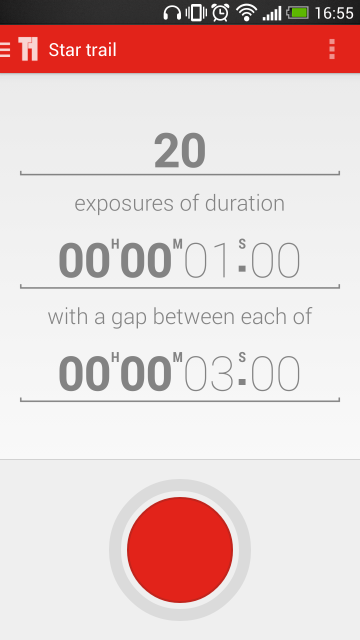
If you're using Triggertrap Mobile with its star trail mode, set the exposure time that you established in testing with a two second interval between frames, and select the number of frames you want to take. You can choose a huge number of frames and stop after half an hour or 45 minutes of shooting if you're not certain how long you need to be out there for.

Hit go!

That should be about it. Hit go and wait for your camera and the universe to work its magic. Do remember to keep warm and safe!

Compilation

When you've accumulated all the images that you need, it's time to compile them into a single image with the help of some software. If you have Photoshop, that's perfect. If you don't, there are other options including the star-trail-specific StarStax.

A stack of images

Transfer your images from the memory card to your harddrive, keeping them in a single folder with their original file numbers. Whichever programme you use, this is important to ensure that the images don't get out-of-synch. The rest of this tutorial uses Photoshop to assemble your star trail shot, but you should be able to extrapolate the process to any other programme.

Import your images

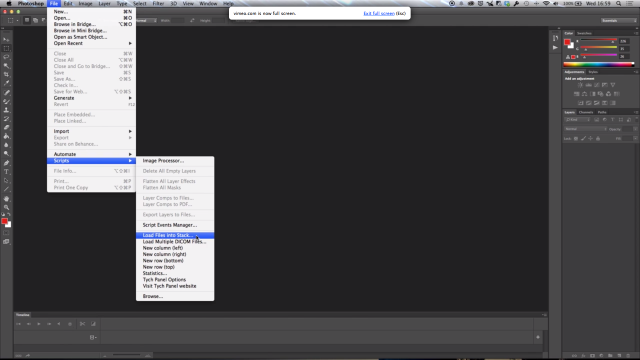
Open Photoshop and import your star trail images using File –> Scripts –> Load Files into Stack. Select your folder of star trails photos, highlight all of the photos, and then select Open followed by OK.

Stack importation makes life easy (Image thanks to Triggertrap)

Blending

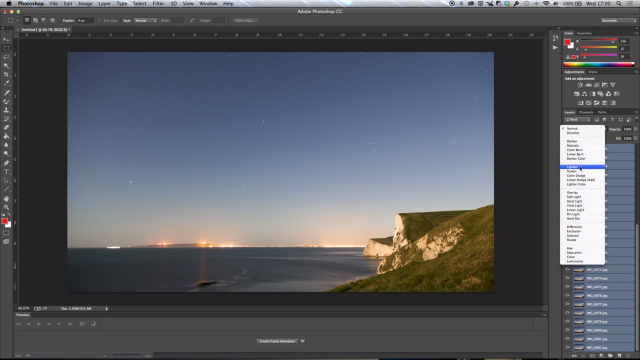
When all of your photos have made their way into Photoshop, select all of them in the Layers panel, and then in Blending Mode select Lighten. Tah-da! You should have a star trail composite.

Blend them together for your final image (Image thanks to Triggertrap)

You can make adjustments to individual layers if you want, but otherwise, you're done and it's a case of saving. (You might want to save an unflattened PSD file and a flattened JPEG version.)


Much of this, including all the images, is based on the fantastic How to capture a star trail tutorial found on Triggertrap's How-To microsite, and it's reproduced with permission. Triggertrap How-To is full of great content for making the most of your camera. You should take a look.

What do football, copyright, and Vine have in common? A lot of money and a lot of confusion

The English Premier League kicks off tomorrow and in addition to last minute transfer news, shock managerial sackings, and managerial press conferences, copyright and broadcasting rights and the use of tablets inside Old Trafford have made headlines, too. The issue of tablets and laptops inside Old Trafford is fairly self-explanatory: Manchester United has prohibited bringing them inside the grounds owing to security reasons. The copyright issue seems to have people in more of a flap. And heavens, this isn't the first time it's happened. The Premier League has stated that it will be taking action against people who compile and share Vines of goals that they record from live broadcasts of matches. Being able to live-pause broadcasts makes this relatively straightforward technologically, but it's a breach of copyright.

This has thrown up a few interesting questions, not least from the BBC's Technology Correspondent, Rory Cellan-Jones, who wondered if his Google Glass recording of Brentford matches would violate copyright.

I'm fairly certain it wouldn't violate copyright, but it could well infringe on other rights. So if everyone will be please calm down, and preferably sit down, I'll explain what (I think) the situation is.

Copyright

Copyright is the right to make copies of someone else's creative endeavours. When I click the shutter on my camera, I own the copyright to the image that creates. When BT Sport or Sky Sports record and broadcast a football match, they own the copyright to the broadcast. That is, the producer decides on which cameras to use and how to put together their sequence of use, which constitutes the original work. The football match itself isn't copyrightable, it's the broadcast of it that is.

As well as charging their subscribers a fee to watch the matches, BT Sport or Sky Sports can charge other broadcasters to use these images or they can keep them all theirselves. Their pictures; they decide.

When someone sitting at home on the their sofa and watching a football match compiles a Vine of the goals using pictures transmitted by BT Sport or Sky, they're violating BT Sport's or Sky's copyright. They are taking BT Sport's and Sky's work and using it without permission and without paying for it.

When you read that BT Sport and Sky Sports are complaining about their copyright being violated, this is what they mean.

Broadcast rights

When BT Sport and Sky Sports won the contracts to televise Premier League matches, they paid an excruciating sum of money for broadcast rights, or the opportunity to transmit live pictures from the game. The BBC holds the broadcast rights to highlights of the Premiership matches. They paid a fair whack for that, but not quite as much as BT Sport and Sky Sports. This season The Sun and The Times have the online rights; this is big business and it's this money, paid to the Premier League, which has made it into the financial behemoth that it is.

Turning up at Old Trafford or Stamford Bridge and taking photos or video of a match would get you into a different type of trouble, therefore. If you were to try to stream the match live from your seat, you wouldn't be very popular with a gaggle of corporate lawyers for infringing on broadcast rights. Not to mention you'd likely upset the fans sitting around you if you obstructed their view. Whether or not you can take a camera into a football stadium and take some photos for personal use seems to be open to clubs' interpretation. It's worth checking what it says on the ticket. Some might be happy for you to take a photo to remind yourself of the day; others might want to throw you out for just having a camera.

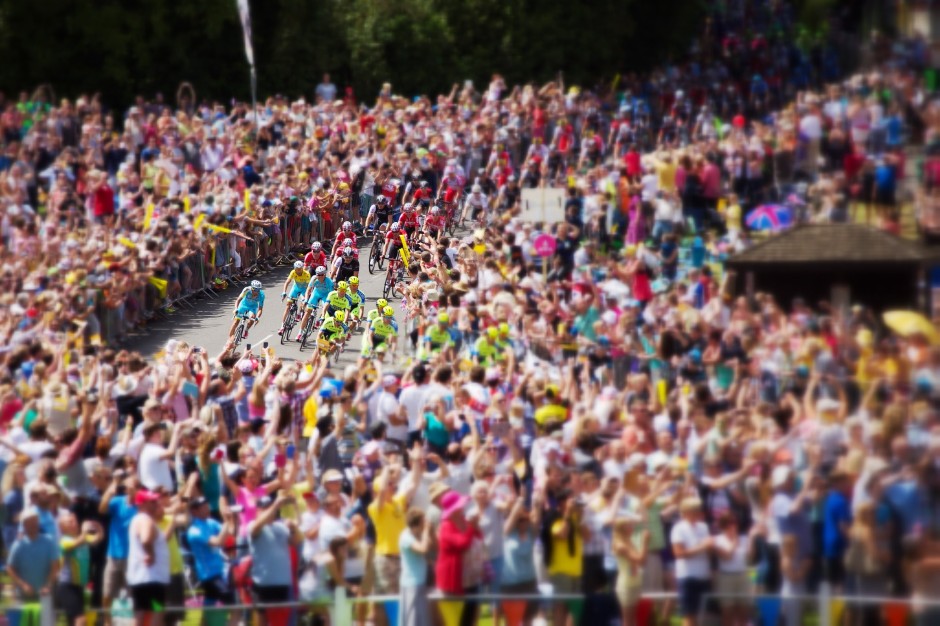
I have no football photos, so have one of the Tour de France instead

Broadcast rights and copyright are different beasts, but from the same genus. You'd own the copyright to any images you were fortunate enough to make inside a stadium, because you'd made them. What you wouldn't own are the broadcast rights to let you redistribute them. Not unless you'd paid an eye-wateringly large sum of money for the privilege and you probably don't have enough kidneys for that.

Performers' rights

Back to Rory Cellan-Jones and his tweet asking about copyright violations at Brentford, someone asked if it wouldn't breach performers' rights. No. As far as I can tell, performers' rights don't extend to sporting events, at least not in the UK, so there would be no infringement there.

Tablets

Now we get onto Manchester United's prohibition against tablets and laptops inside Old Trafford, which was announced earlier this week. According to officials there, the decision to ban larger devices, including iPad Minis, was made in response to security concerns. They're worried someone might want to pack a bomb into a device, much like airlines are. The ban doesn't extend to smartphones, provided that their dimensions are no larger than 15 centimetres by 10 centimetres (5.9 inches by 3.9 inches). Seeing as smartphones have not been banned and they're still capable of taking photos, we'll take this one at face value. And quite frankly, if it stops people obscuring others' view with when they're recording with the iPads, so much the better.

In conclusion

Please remember that I'm not a lawyer. I'm a writer who takes a fiendish interest in copyright and I've applied a healthy dose of common sense to its ramefications, together with a bit of research.

If you want to take photos or video at any sporting event, I suggest that you check with the stadium before you turn up with any manner of kit. You don't want to forfeit your ticket or have your gear confiscated. Speaking from experience, just go and enjoy the game. Fiddling about with electronic equipment detracts from the atmosphere and what's happening in front of you - the reason why you're there. But maybe that's for another article.

When it comes to making Vines from what you can see on TV - don't. Protecting intellectual property applies to little guys as much as it does to big guys. If we don't want them stealing our content from social media sites and using it for free, best not to infringe their copyright either.

Dare to stray into bulb mode

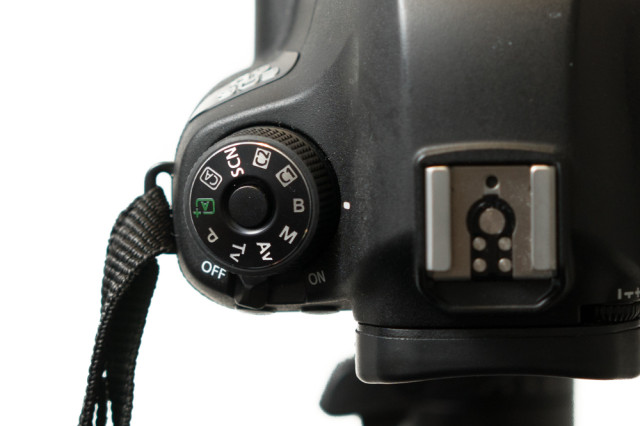
When setting your shutter speed, have you ever wound the adjustment wheel so far into long exposure that you've gone past seconds and found 'B' or 'Bulb' on your screen? Or maybe you've noticed that you have a 'B' option on your mode wheel, somewhere between Manual and Custom settings? This is bulb mode, and it allows you to control the duration of the exposure for precisely as long as you would like. It's perfect for exposures in excess of the 30 seconds that most cameras have as their longest shutter speed, or for when you need to be in control, for example if you're practising high-speed photography. First, a quick word on why it's known as 'bulb' mode. Haje has a much more thorough explanation here, but it doesn't have anything to do with light bulbs. It's from back in the day when you could control your shutter speed using an air bulb connected to your camera.

'B'? What the hell does that do? (Picture thanks to Triggertrap.)

When your camera is in bulb mode, you open the shutter by depressing the shutter release button; as soon as you raise your finger off of the button, the shutter will close. Seeing as it isn't terribly convenient to stand with your finger on your shutter release button for minutes or even hours on end—and it's not fabulous for camera-shake, either—most people use bulb mode in conjunction with a remote shutter release. And a tripod, but that's probably quite obvious.

Plenty of remote shutter releases come with a locking mechanism, so that you don't need to hold your finger down there, either. However, if you go for something such as our much-beloved Triggertrap, you can select from a variety of different modes to control your super-long exposure, including a timed release that lets you set the duration of your exposure down to fractions of a second, a star-trails setting, and even a bulb-ramping option to fine-tune exposure during very long time-lapse recordings.

Late night in East London

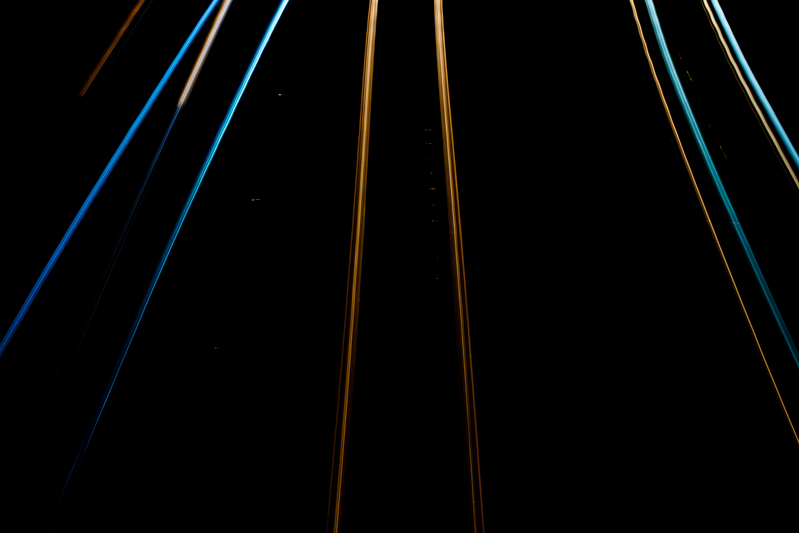
Even if you're shooting at night, your camera's sensor will be able to detect far more light than you think it can, especially with a very long exposure. Consequently, using a small aperture is recommended. If you're photographing during the day, you might benefit from a neutral density filter to prevent unavoidably over-exposing your images, too.

It is worth bearing in mind that using bulb mode can drain your battery enormously. Don't set off to capture star trails with a less-than-fully-charged battery. Take a spare if you have one, too. It's a complete waste to maroon yourself in the middle of nowhere with limited light pollution only for your camera to keel over halfway into the exposure.

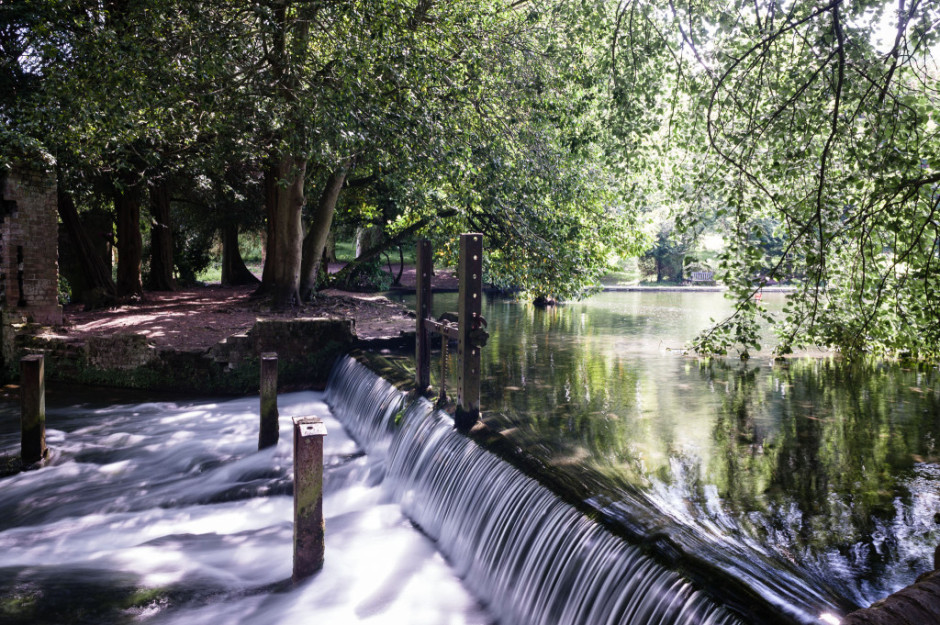
Waterfalls, shot using bulb mode. (Picture thanks to Triggertrap.)

Now that you know what bulb is, what can you do with it? Perhaps you'd like to try some long exposures of landscapes? Or maybe capture some smooth, milky-looking water tumbling from a fall. You might want to try your hand at a star trail, or have a go at light painting. You could even grab a flash adapter and have a crack at some high-speed photography and burst some water balloons. So many options presented to you with so much time from bulb mode!

Depth-of-field in greater detail

We're probably all familiar with the notion of aperture controlling the depth-of-field in our photos. By using a faster aperture, you create a shallower depth-of-field. To keep more of your image in focus, you need to use a smaller aperture. But there's a whole lot more to depth-of-field than adjusting your aperture to get more or less of the scene in focus.

'Acceptably sharp'

Let's start with setting out what we mean by depth-of-field. It's the range of distance in a photo that is considered to be 'acceptably sharp', or what we would regard as 'in focus'. Only the actual point of focus in a photograph is definitively sharp and 'in focus'; depth-of-field describes the zone of acceptable sharpness either side of it. A wider band of 'acceptable sharpness' running through an image equates to a greater depth-of-field. To introduce more blur into your photos you would want a shallower depth-of-field with a narrower band that's 'acceptably sharp'.

A shallow depth-of-field with a gradual fall-off

It's worth remembering that there's no sudden transtition from 'sharp' to 'unsharp': focus falls off gently on either side of the plane of focus, regardless of the aperture you use. It is fair to say, though, that larger apertures have a more rapid transition from in- to out-of-focus than larger apertures.

[gallery ids="6855,6856,6857"]

Controlling the depth-of-field in an image is achieved primarily by adjusting your aperture—a smaller aperture for a greater depth-of-field; a larger aperture for a shallower depth-of-field—however, there are other factors that affect it, too.

Focal length

You'll often hear people say that telephoto lenses have a shallower depth-of-field than wider angled lenses. This isn’t strictly true. It’s more accurate to say that because telephoto lenses are mostly used to magnify subjects, and the subject will then fill more of the frame relative to the background, the depth-of-field appears to be shallower.

200mm; ƒ/3.2

All the same, it's worth capitalising on the magnifying effect from telephoto lenses to pick out your subjects and surround them with blurred foregounds and backgrounds.

Subject-to-lens proximity

If you've ever practised macro photography, you'll appreciate how getting closer to your subject makes it harder to get it all sharp. The closer that you position your subject to your lens, the shallower your depth-of-field will be. Choose a subject further into the background and you'll find that the depth-of-field surrounding it is larger.

Crazy-shallow depth-of-field with a macro lens

Distribution of acceptable sharpness

Depending on the focal length you use, you will find that the depth-of-field isn't divided equally in front of and behind the plane of focus. Instead, the area of acceptable sharpness behind the point of focus is generally larger than that extending in front of the focal plane. As focal length increases, so too does the distribution of the depth-of-field in front of the subject.

When you shoot with a focal length of 15mm about two thirds of the depth-of-field will be behind the subject and one third in front of it. When you get to 400mm it's closer to a fifty-fifty divide.

Depth-of-field: not just about aperture.

Standing out in the crowd - or how to take meaningful photos among lots of people

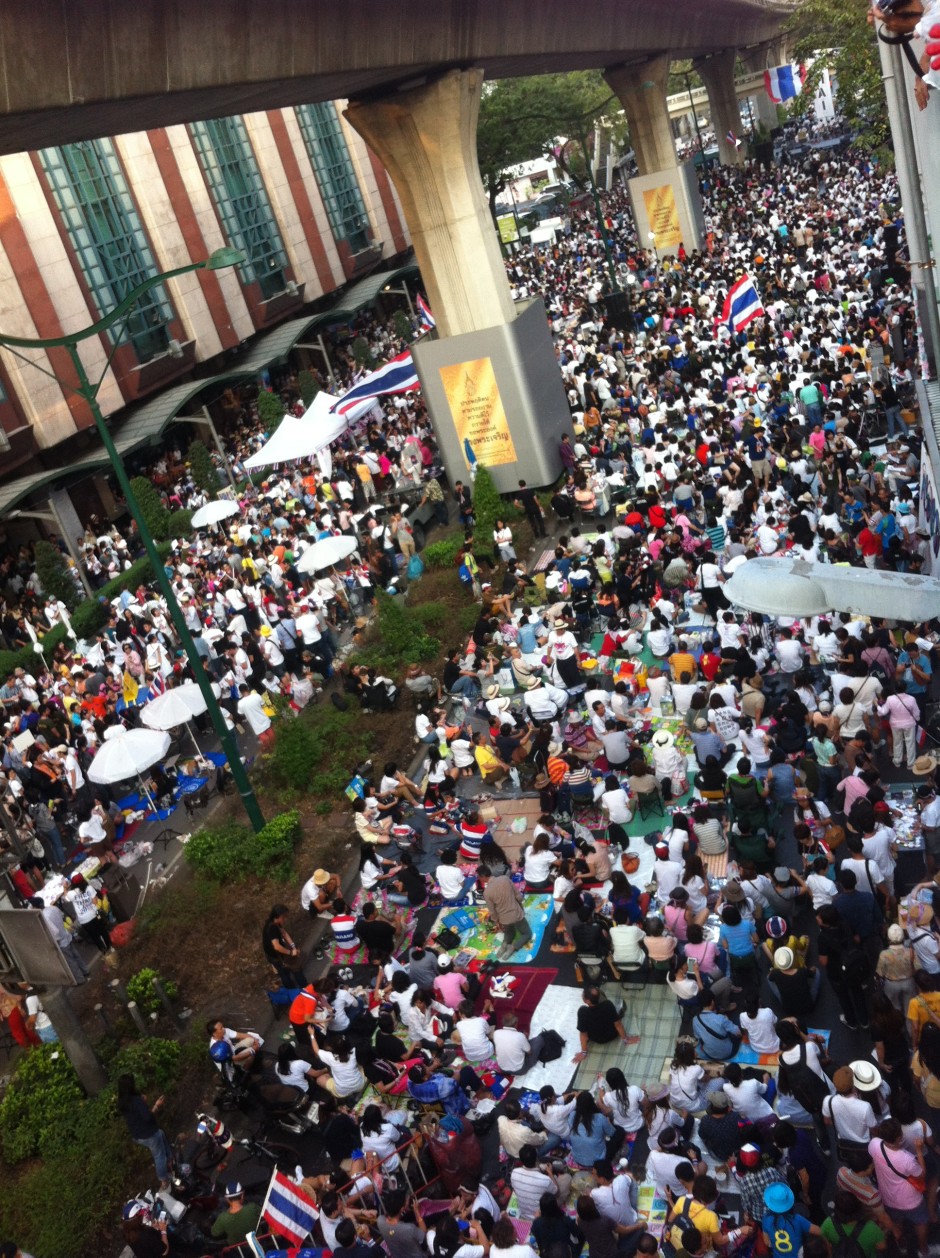
'Tis the summer (here in the northern hemisphere). 'Tis the season for festivals and fairs and fetes. 'Tis the season when people might want to capture crowd scenes with their cameras. Shooting crowd scenes is easy, yes? There's so much going on that all you have to do is raise your camera, point it in the right direction, and shoot to produce an interesting photo, yes? Ehm... no. Anyone who's ever tried to take a compelling crowd scene photo will appreciate that it's far harder to get it right than it is to get it wrong. Frequently, crowd photos emerge as amorphous collections of strangers with no clear narrative or obvious focal point. Anyone whose attention doesn't wander irretrievably will be left asking 'So it's a photo of what?' But mostly the eye will scan over an ordinary crowd scene shot, fail to find anything of interest and be drawn into the story, and move on to the next shiny thing. Your audience is gone.

It's a crowd. And a large one. But where is it going? What is it doing?

What makes crowd photos so difficult? The very fact that there is so much going on in these scenes is usually their undoing. Every photo must tell a story. (Along with 'Get closer!' and 'Just because it's on the Intergoogles, it doesn't mean it's free to use!' it forms the third edge of the Photocritic mantra triumvirate.) Rather than expecting your audience to determine what the story might be among the tens, maybe even hundreds, of people, you have to set about deciding on what the story is and composing an image that conveys that.

When you're thrust amongst a crowd, or are perhaps looking down upon one, ask yourself: 'What am I trying to relate here? What's the story?'

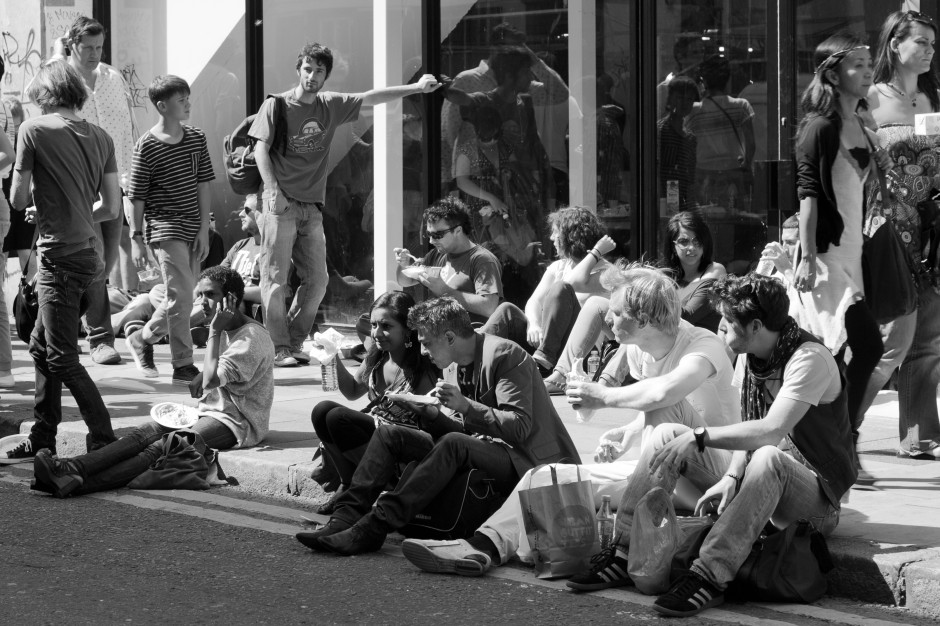
Sunday. Corner of Brick Lane and Hanbury Street. It's always crowded. Look for the lull, the change, the aberration. The guy leaning, and watching, and waiting.

Perhaps it's the sheer number of people? Maybe it's the focus of thousands of individuals on one figure on a stage? Is it a solitary red shirt in a sea of blue? Sometimes it's a case of waiting patiently for that moment: a sting of eye contact, a dropped doll, a wearied pause. Define the story and you're halfway to creating a compelling image.

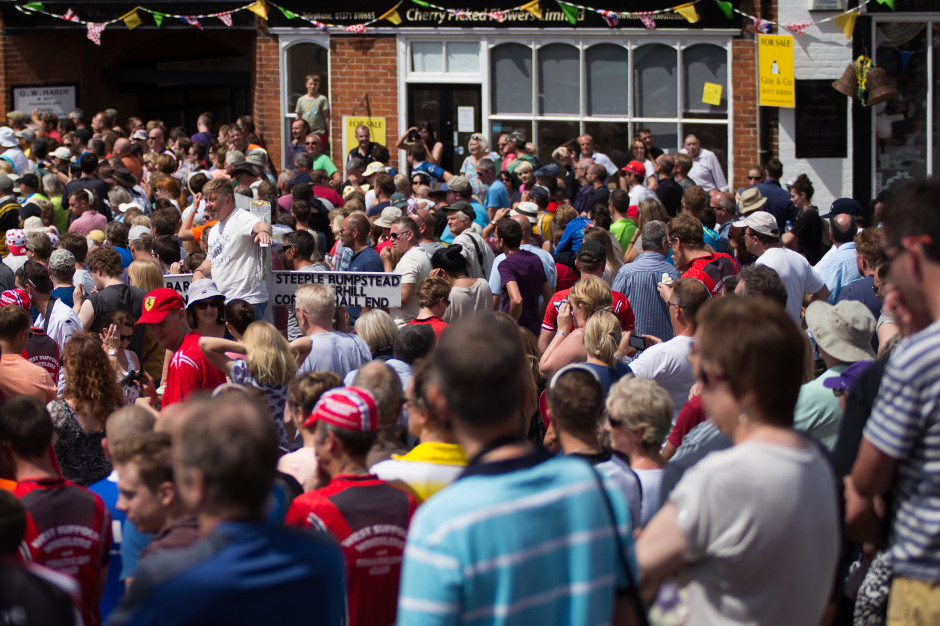
Finchingfield, July 2014, waiting for the Tour de France. The village was heaving and when people are sitting a-top fingerposts, you know it's crowded.

Now, ask yourself: 'What can I do to convey this?' How you compose and expose your photo will ensure that your audience can grasp what you're trying to say and will help them to connect with it.

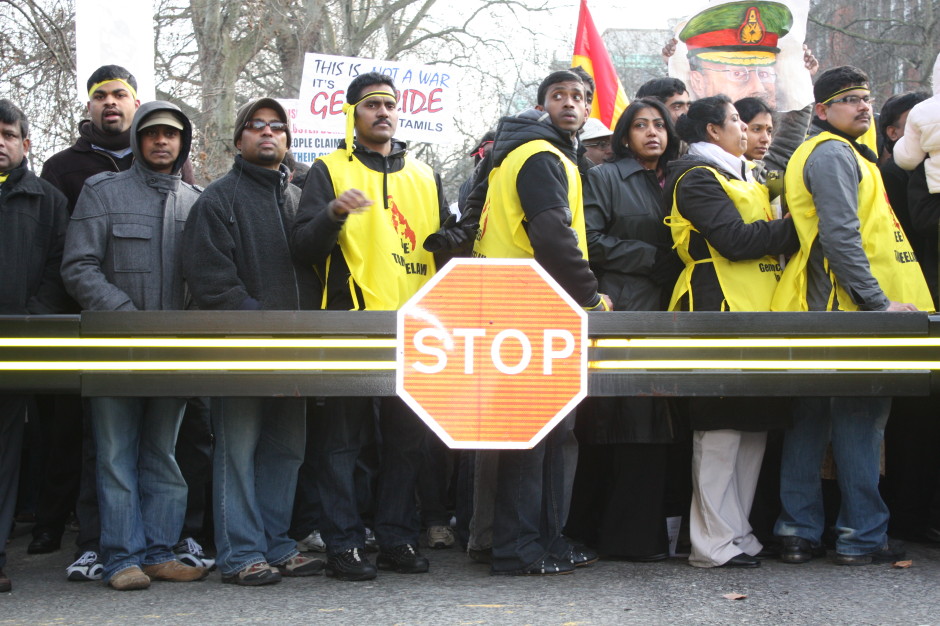
Tamil protestors, London, February 2009. The crush behind the barrier, the emptiness before the barrier, and the 'Stop' sign.

When you're trying to express numbers, find a point of juxtaposition to emphasise them: look for something small or noticeable that stands out and contrasts against the heaving mass. When a horde is focused on one thing, use lines to direct the viewers' eyes and channel them into the moment. For an aberration in the flow of things, try to isolate the rogue figure and plant it amongst the norm.

Rather than point and shoot, hoping that you'll produce an image that people will find interesting, draw on your compositional skills—the rule of thirds, leading lines, colour theory, pattern and repetition—together with your technical knowledge—focal length, aperture, shutter speed, and metering—to tell a story. Then you'll capture the crowd.

Just because you found it on the Intergoogles it doesn't mean it's free to use

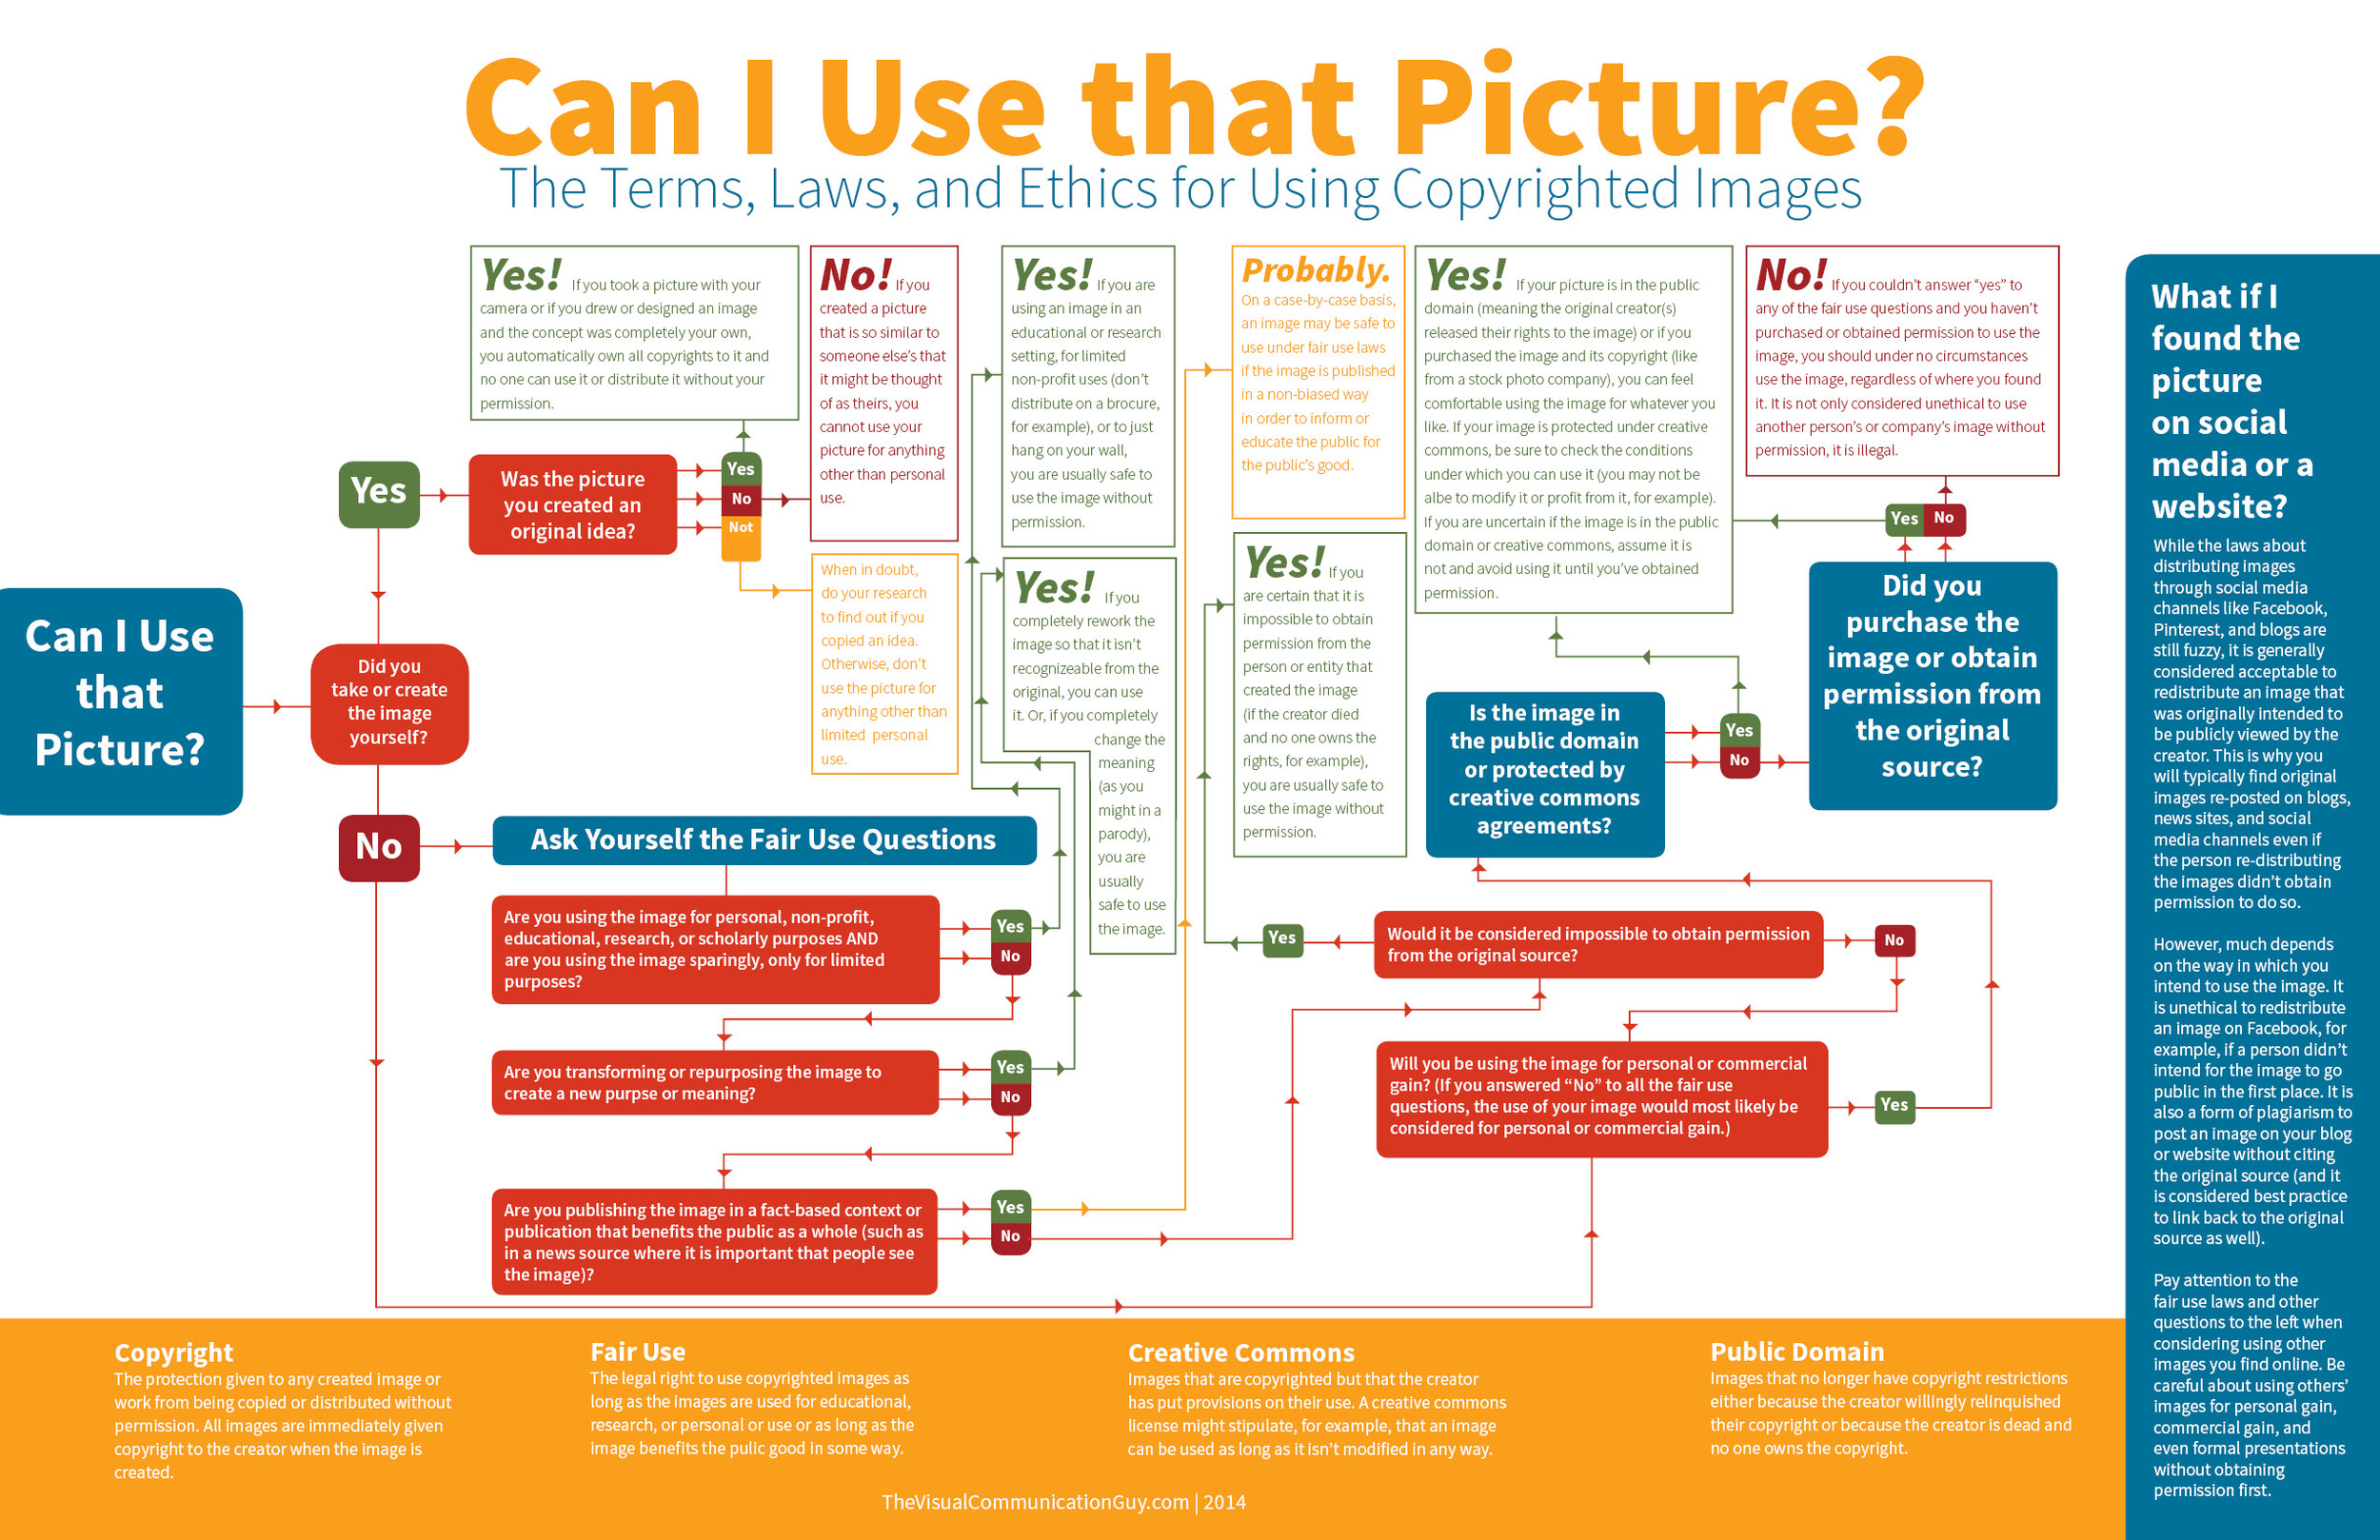
I was having a fairly good morning, until I took my lunchtime peruse of Feedly to see if anything interesting or exciting had dropped into it. Apart from a new post by my favourite film critic, nothing was outstanding until I reached Lifehacker. The Lifehacker team has just posted a link to a visual media usage rights flowchart created by The Visual Communication Guy. Excellent! Ignorance is no excuse when it comes to image theft and unauthorised use and reproduction of photos. While we're all perfectly aware that when you place something on Facebook, Flickr, or your personal version of Frankie's Funky Photos, there's a real chance that someone will try to use it improperly, the more that we can educate people about the right way to do things, the better. This one, however, was not quite so excellent.

You'll find the original here and the Lifehacker article here.

If you're wondering, I can reproduce it here under fair dealing: criticism and review use.

Apart from the fact that it's far too dense and word-heavy, it contains at least one humongous, glaring, verging on the unforgiveable fault for something that purports to advise on usage rights. Take a look and tell me if you can see it. (And tell me how many others you can see. There are plenty.)

Found it?

If you haven't, because it's a horrid thing to read, here it is:

While the laws about distributing images through social media channels like Facebook, Pinterest, and blogs are still fuzzy, it is generally considered acceptable to redistribute an image that was intended to be viewed publicly by the creator. This is why you will typically find original images re-posted on blogs, news sites, and social media channels even if the person re-distributing the images didn't receive permission to do so.

No, no, no, no, no, no. And for good meaure I'll say it again. No.

Images that are shared on social media aren't free for redistribution unless the creator has expressly said so. I put my images on Flickr and use them here on Photocritic and put them on my personal website to display them, to illustrate concepts, to tell stories. I do not put them on the Intergoogles so that anyone else can make use of them. And you should never assume that anyone else does, either.

The law regarding this is hardly fuzzy about the situation, either. There's been at least one monumental court case that supports this opinion, when photographer Daniel Morel sued AFP and Getty Images after they redistributed his images from the Haitian earthquake, which he'd shared via Twitter, without his permission.

Copyright exists from the moment that someone creates something, whether it's a photograph, a tune, a poem, or a piece of prose. It doesn't matter how a creator wishes to share her or his creation with the world, unless she or he has definitely signed away the rights to it, the rights remain theirs.

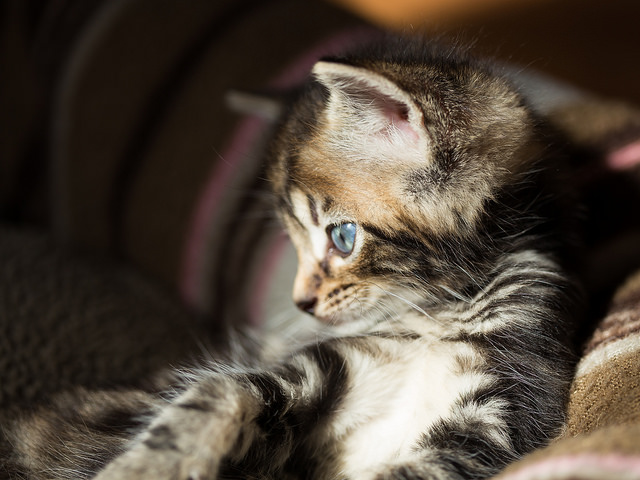
Mine! All mine! Now sod off!  Actually, this was one of Haje's foster kittens. The photo's mine and the kitten is now someone else's. But it's a kitten on the Internet. I couldn't think of a more appropriate image for this article.

To be fair to the Visual Communications Guy, he does state 'My rule above all else? Ask permission to use all images. If in doubt, don’t use the image!' in the post that accompanies the flowchart, but that's not really good enough. It's the flowchart that people are going to share and see, not the article. When incorrect information such as this gains traction, we all suffer. Suddenly what's not right becomes commonly accepted. Or people who were doing their best to not be ignorant are in the wrong when they thought they were doing right.

So I'll say the mantra and everyone can repeat it after me: 'Just because I found it on the Internet, it doesn't mean it's free to use.'

Manual flash - not as scary as you might think

Once you've got a proper handle on your camera and what it's capable of, and you've built up an understanding of your lenses, you might find that you want to extend your photographic experimentations to flash so that you can create alien space lemons and bright and breezy high-key portraits. It's probably easiest to start out using through-the-lens (TTL; iTTL; or eTTL) metering, but much the same as you progress and take more control over your camera, there will probably come a point when you need to exert more control over your flashes and have to change the mode to manual. Adding a new variable into any mix can be a daunting prospect, but don't let it put you off. It's another skill to master and put to use.

Through the lens metering

TTL stands for through the lens metering. Rather than you dictating how much power your flash puts out, your camera and your flash will combine to make the calculation. It does this by emitting a small pre-flash to determine how much light is required for the scene and your camera settings.

The primary advantage of TTL metering is that you don't need to think too hard, so when you're photographing an event or something fast-moving, you won't miss your shot for need of fiddling.

But if you need consistency in your exposure between shots, then TTL isn't very useful. You'll have to switch to manual mode.

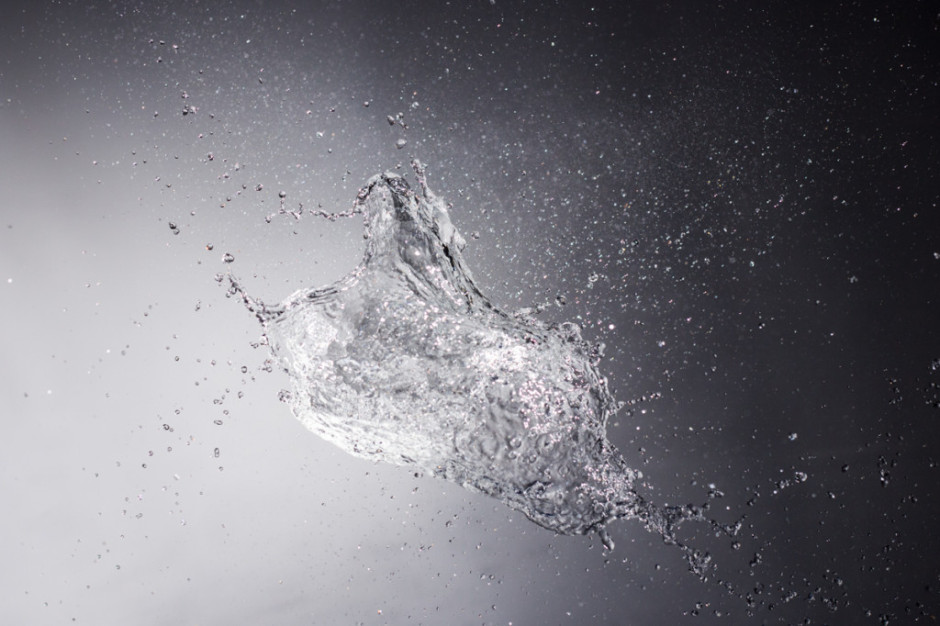
Splat! (Image thanks to Triggertrap)

The advantage of manual flash

Much like using manual mode on your camera gives you complete control over your exposure, manual mode on your flash gives you complete control over the power it emits. Between them, they will provide you with consistency.

Understanding the power out-put

The power out-put on a flash is typically displayed as fractions. Full power is 1/1; the least powerful setting is usually 1/128.

Don't forget that if you set your flash to full power, it'll be working at its hardest and will take longer to refresh in between shots.

When you're experimenting with your flash, you might want to set the power to 1/16, which is roughly half-power. You won't have too far to move in either direction if you need to make adjustments.

Sync speed

Your camera and flash need to synchronise in order for the sensor to be able to detect the flash. Open the shutter for too short a period of time and it won't be able to catch the flash, rendering the entire process futile. Cameras, therefore, have a maximum shutter speed that can be used in conjunction with an off-camera flash; it's known as the sync speed. The maximum sync speed tends to be 1/125 second, but do check your camera's manual to be sure.

The exposure triangle

Seeing as you'll be using manual mode on your camera, you'll need to be certain of the impact that altering shutter speed, aperture, and ISO will have on your exposure.

First: changing your shutter speed will not have an impact on your flash exposure. Shutter speed will have an impact on ambient light. Want more ambient light? Use a slower shutter speed.

Second: adjusting your aperture will have an impact on your flash exposure.

Third: ISO has an effect on both flash and ambient exposure.

Actually doing this

Now that the theory is in place, how about some practical photography?

Step 1: Set up the flash

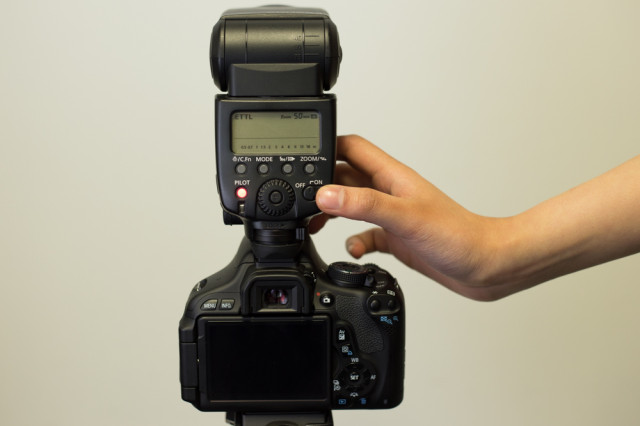
Turn on the flash and set it to manual. This is normally achieved by cycling through the MODE button on most flashes. If you’re not sure about this bit, check the information in your flash manual.

Select manual

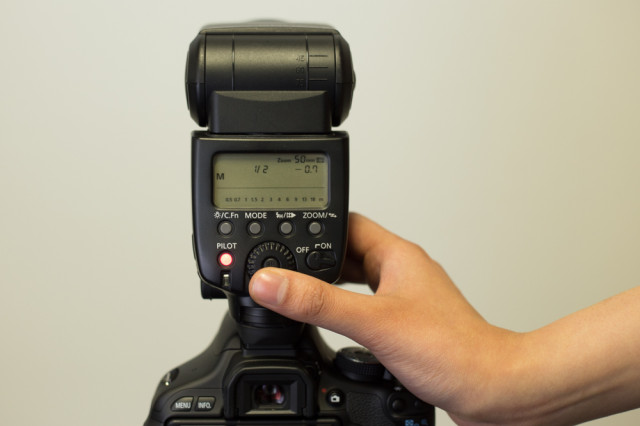
Step 2: Adjust the power

Now you can adjust the power by pressing the arrow keys. 1/1 is full power, and each click down will decrease the power.

Adjust the power. 1/1 is full power.

Step 3: Set the camera

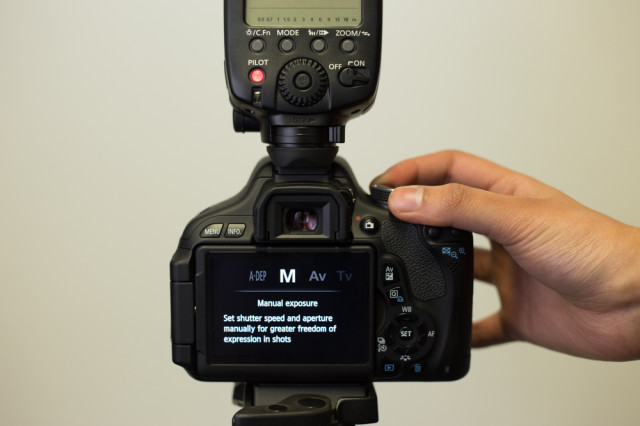
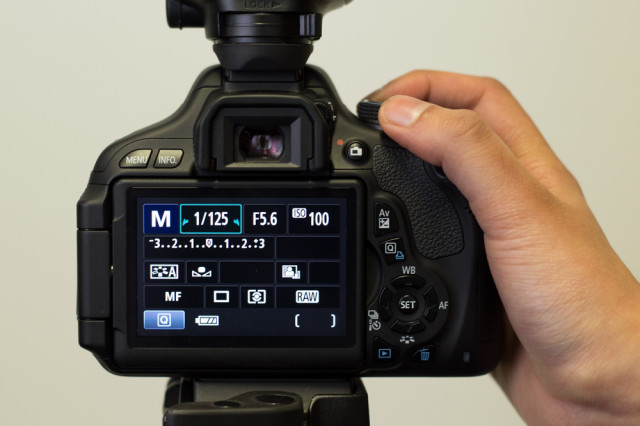
Place the flash on the hotshoe of the camera, or attach the lead or radio trigger if you're using either of those, and switch on the camera. In manual mode, set the shutter speed to 1/125 second and adjust your aperture and ISO.

Select manual mode for your camera

Step 4: Incremental adjustments

Take some photos!

If your images are too bright you can:

  • Decrease the flash power
  • Increase the aperture
  • Decrease the ISO

If your images are too dark, do the opposite!

Adjust as necessary!

Experiment with different combinations of flash power, aperture, and ISO to get a feel for what you can achieve with flash photography. After that, the world is your playground!

For a video version of this tutorial, here's Team Triggertrap explaining things:


Much of this, including all the images, is based on the fantastic How to use manual flash tutorial found on Triggertrap's How-To microsite, and it's reproduced with permission. Triggertrap How-To is full of great content for making the most of your camera. You should take a look.

Up or across? The choice between horizontal and vertical frame orientation

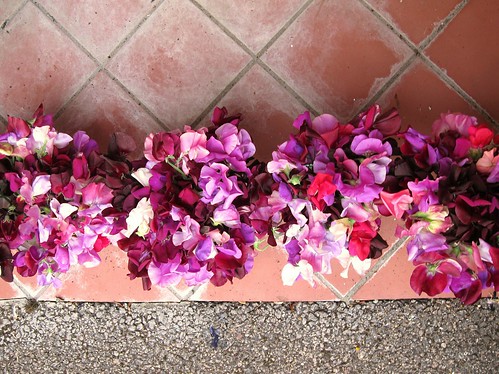
Sweet peas

It is a truth universally acknowledged that landscape format pictures work more successfully in articles than their portrait format counterparts.

When I'm offering feedback on the assignments submitted by our Photography School students, one of my most frequent questions is 'Did you think about framing this vertically?' Or at least, something along those lines. Human vision is binocular, meaning that we have two eyes that happen to be positioned adjacent to rather than on top of each other. We are, therefore, predisposed to scanning things along a horizontal plane rather than a vertical one. It’s no surprise then that we’re more inclined to capture horizontally oriented pictures. The vast majority of cameras have been designed around this fact, thus have a default horizontal orientation and it's just about uncomfortable enough to rotate it that we sometimes overlook doing so. 

We shouldn't be so hasty.

The case for horizontal

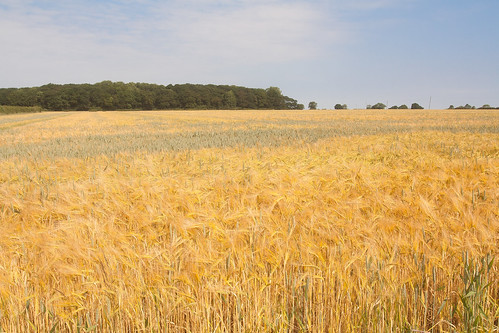
The long and the short of it (ahem) is that the majority of subjects that are wider than they are longer will benefit from being photographed in landscape format. You'd have to be standing an awfully long way back to fit all of the Schonbrunn Palace into a portrait format picture. Most of the time, the horizon in a landscape photo will demand to take up as much space as possible, stretching across the frame. Typically, there's more to see when you scan left-to-right than there is up-to-down. But not always.

Corn field

The case for vertical

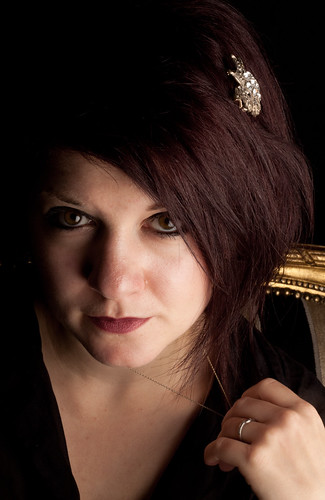
It's hardly an accident that vertically oriented pictures are referred to as 'portraits'. Any subject that is taller than it is wider—people, trees, skyscrapers, doorways, bottles—will suit a portrait shot.

Sheara i

It's hardly a co-incidence that portraits are called portraits.

It's a case of letting the natural lines in the image dictate how it's framed. Don't be afraid to swing your camera through 90° and give it a go.

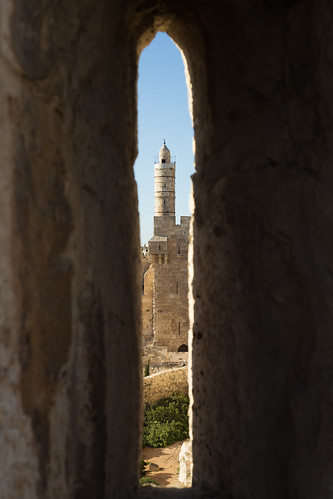
Arrow slit

The entire point of this image is the vertical. Why would I shoot it horitonzally? Let the subject dictate the line.

Creative choices

If you stop to think about it, the majority of the time it will feel obvious whether you should be framing your subject horizontally or vertically. There will be a natural line and flow to your composition. Sometimes, however, you might be presented with a compositional dilemma or you might want to spread your creative wings.

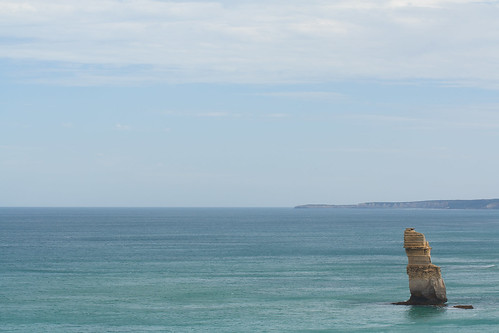
Lonely Apostle

The Lonely Apostle might be a vertical feature, but it's the landscape that gives it context and the horizontal framing emphasises that.

For example, you might have a landscape that features a mountain range running off into the distance—a horizontal motivation—but with tall trees in the foreground that would enjoy the vertical emphasis of a portrait framing. Which do you go for? What you have to decide is which element do you want to be the dominant one and therefore be emphasised by your framing. There's not necessarily a right or wrong here; it's about ensuring the subject and the framing complement each other.

Sheara ii

But portraits don't always have to be oriented vertically. A landscape format can look fabulous.

If you've time, shoot both. You've nothing to lose.

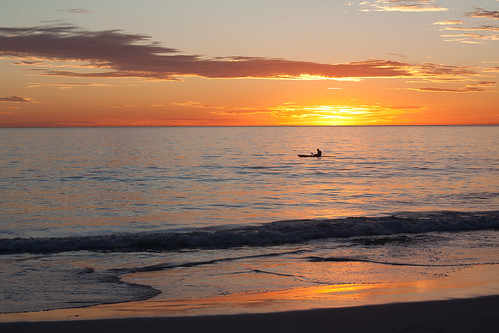
Sunset kayaker, Mullaloo

The traditional landscape format works perfectly for this sunset seascape...

It is worth trying something new and different, though, to challenge your thought processes and expectations. You don't need to be wasteful and practise obscure compositions for their own sake, but it is always worth moving and rotating and shifting and changing. Don't feel constrained by what is expected, work to produce an image that tells a story.

Mullaloo beach

... but take nothing away from the vertical version.

Pass me a C-47 - or how a clothes peg got its film-set name

I was flipping through a book on film-making when I stumbled over a box-out mentioning the C-47. Or a clothes peg. Wooden clothes pegs are much-used on film-sets, where they don't conduct heat so can't burn people or melt. They make perfect handles for hot barn doors and they hold gels in place without dribbling into a puddle on the floor. Not to mention their grip over scripts, straws, and cables. Sometimes simple soilutions are the best. It did set my mind a-thinking, however. How did the humble clothes peg come to be known as a C-47? After a little digging, I don't have a defnitive answer, but I do have some pleasing stories.

Pass me a C-47!

After a plane?

The C-47 was a plane used extensively throughout the Second World War for troop movements, medical evacuations, and reconnaissance, and afterwards when it played a crucial role in the Berlin Airlift. It was a versatile plane, which mirrored the versatility of the clothes peg. Servicemen returning from the front to film studios carried over the name.

From a storage bin?

Some film studio somewhere stored its clothes pegs in a bin designated C-47. The name has stuck.
Its requisition number

Clothes pegs were assigned the catalogue or military requisition number C-47. They became known by their catalogue number rather than their common-or-garden name. Which leads neatly into the accountancy theory...

For accounting purposes

When gaffers and key grips were submitting requisition forms or expenses claims to film studio executives, accountants, and tax officials, they had trouble doing so for a bundle of clothes pegs, no matter how vital their presence was on set. By changing the name to something far more significant sounding, for example the clothes pegs' catalogue number, nit-picking officials were none-the-wiser and the best boys', grips', and lighting crew's fingers remained unburned.

Finally...

It makes a great joke to ask the new boy or girl for a C-47 and they have absolutely no idea what one is. And I'm reliably informed that what I know as a clothes peg (or even just 'peg') here in the UK is known as a clothespin in the US. Not that I'll be using any today for their traditional purpose of hanging washing on a line: it's pouring down.


Written with help from:

Back to basics with a pinhole camera

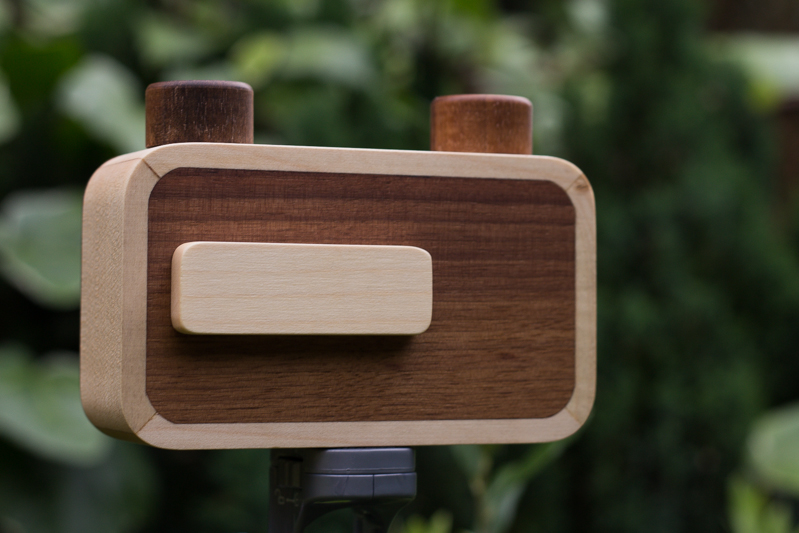
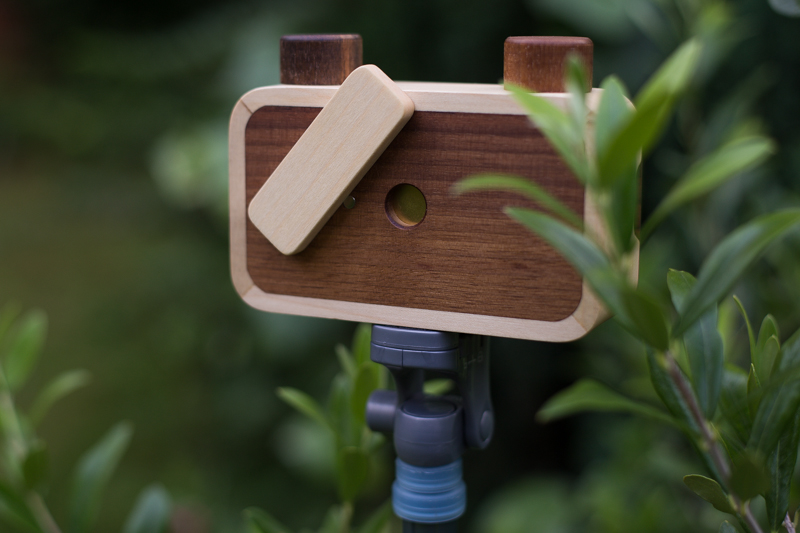
A few weeks ago I was contacted by Elvis Halilović, the man behind the ONDU Pinhole camera company, asking me if I'd like to try out one of his handmade, wooden pinhole cameras. It's not the sort of offer I'm likely to decline. Last week my entirely gorgeous 135 Pocket Pinhole arrived through the post. On Monday I took advantage of glorious sunshine and the flourishing abundance of the allotment and headed out with a few rolls of film to see what the camera could see. Today I collected an envelope of developed images from the shop in town. One ONDU 135 Pinhole camera, with an approximate focal length of 25mm

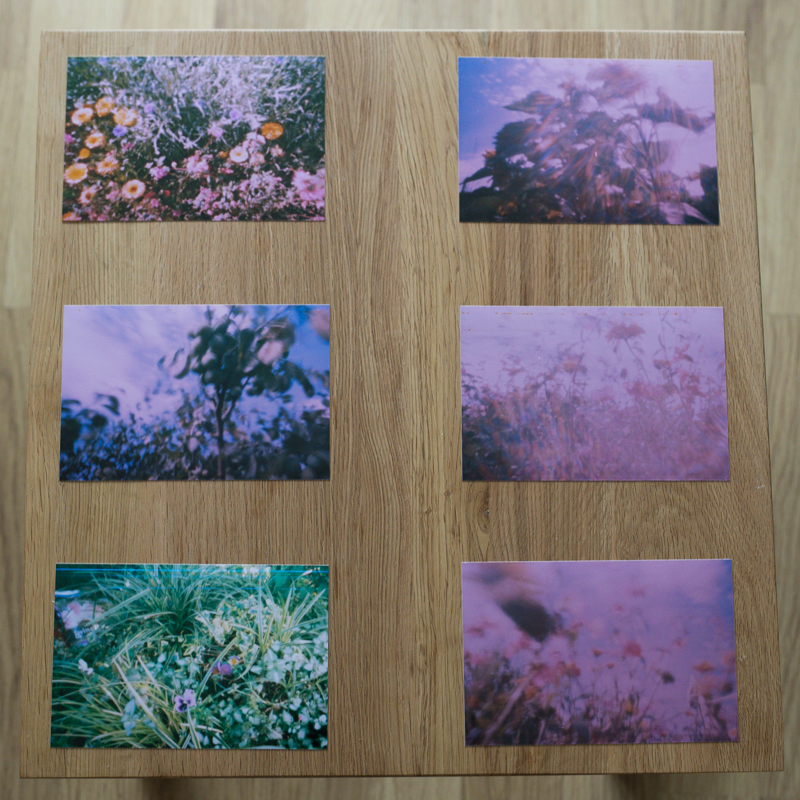
How did they turn out? Actually not all that brilliantly. The film was expired, which has resulted in all of my photos having a rose pink cast. Despite the very useful exposure guide provided by ONDU, judging shutter speed was a very hit-and-miss affair that was counted in pink elephants and almost everything is over-exposed. My little Lollipod stand is a perfect match for the ONDU pinhole, but I've not mastered opening the shutter without disturbing the camera, and of course the longer exposures means motion blur, so everything is hazy. And without a viewfinder, you're guessing at just what the camera can see, so what's in the frame isn't necessarily what I'd anticipated would be there.

Proof of the pinhole

But the truth is, none of that matters. What matters is that I'm proud of these pictures and that I had fun taking them. I enjoyed experimenting with exposure times and attempting to determine what the camera could see. I recalled the anticipation of my childhood, when I'd send films off to be developed and have no idea what would be sent back to me. It was, in fact, the most fun that I've had with a camera for a very long time.

I won't deny that I had a few frustrations, but they weren't enough to deter me. The ONDU requires you to tape the film onto the receiving spool and count one-and-half rotations to wind on between frames. Loading the film was a bit tricky and I succeeded in breaking one roll with a heavy-handed winding action. There were a couple of unintentional double-exposures, too. No one said this was going to be easy, or indeed fast, though.

The ONDU pinhole in action

Perhaps the best tip that I have is to head out with a notebook when you're shooting, to record the lighting conditions and exposure time for each frame. When I go out next time, if the lighting conditions are similar, I'll know to open the shutter for a fraction shorter duration. If the conditions are different, I'll be making more educated guesses. Whatever the light, I'll be having more fun.

Pinhole photography itself is intuitive, with the requirement to judge and estimate and guess. It's also visceral and plays on your emotions of surprise and vexation. The more that you practise it, the better you'll become, not just at pinhole photography, but at the general discipline of photography. It pulls you back to the founding principles of expose and compose: a simple concept but with a nuanced practice.

The opportunity that a pinhole camera gives you is to play with light in a box: photography in its most deceptively simple form. If that doesn't intrigue and inspire you, and remind you what's wonderful about taking pictures then I'm not sure what will. Get hold of a pinhole camera and go back to basics; you won't regret it.

Bridge cameras - what are they and who are they for?

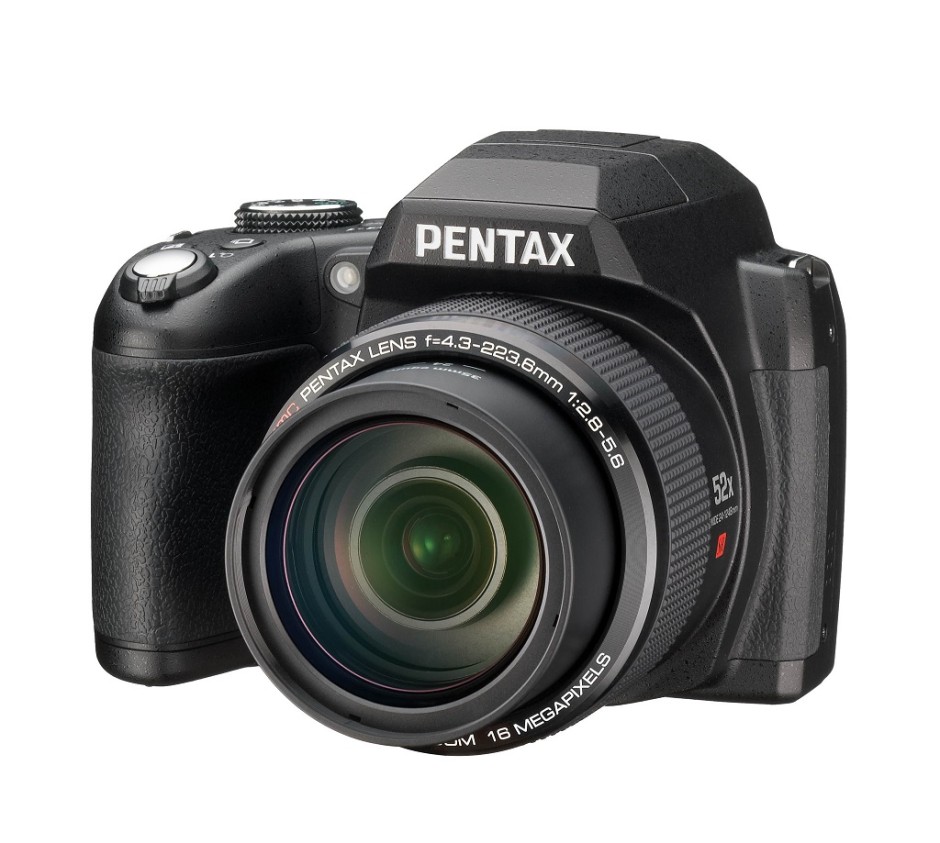
In the early hours of this morning (if you're in Europe), Ricoh announced a new bridge camera, the Pentax XG-1. But what exactly is a bridge camera, and who constitutes the target market?

Spanning the gap

It's all in the name, really. A bridge camera spans the gap from small compact cameras with fixed lenses to larger and heavier dSLRs with interchangeable lenses. They're fixed lens cameras that enjoy impressive optical zoom capabilities—in the case of the XG-1 a 52× zoom or the 35mm equivalent of 24 to 1,248mm—and the full manual control that you'd expect from a dSLR. However, although they might share a similar shape to a dSLR with its characteristic pentaprism hump, they don't share the mirror and the optical viewfinder mechanism. They function akin to compact cameras, making them smaller and lighter than their dSLR cousins.

Ricoh's new Pentax XG-1 bridge camera

Benefits of bridge cameras

Although a bridge camera usually comes in bigger and heavier than a compact camera, they're smaller and lighter than dSLRs; this means you get the advantages of manual control and impressive telephoto prowess but without the bulk. As the lens with all the optical zoom is built into the camera body, there aren't any expensive, bulky lenses to schlep about, either. You can switch from wide angle to telephoto with the movement of a button, rather than the inconvenience of a lens change and the potential of subjecting your sensor to dust and dirt. If you're shooting in dirty or dusty conditions, a bridge camera might be preferable to an interchangeable lens model.

Bridge cameras present you with control and magnification in a neat, cheap package. The new Pentax XG-1 is priced at £250 £280*; the Canon, Nikon, Fujifilm, and Olympus equivalents aren't too far off that mark and have generally similar specs.

Drawbacks to bridge cameras

My 70-200mm zoom lens doesn't extend nearly as far as the 1,248mm of the Pentax XG-1. But it does have a fixed maximum aperture of ƒ/2.8. So whether I'm zoomed in or out, I can open my aperture as wide as ƒ/2.8. This isn't usually the case with bridge cameras. At its maximum zoom, the XG-1 has a maximum aperture of ƒ/5.6. (When it is zoomed out, the XG-1 has a maximum aperture of ƒ/2.8.) While this might not be a terrible state of affairs where depth-of-field is concerned because the magnification factor is so high, it can be an issue with respect to letting in sufficient light.

With such an enormous zoom, camera shake is a big issue for bridge cameras and to help mitigate that, you need a fast shutter speed assisted by a large aperture. Most bridge cameras do have image stabilisation to help prevent camera shake making itself obvious in your photos, but that smaller aperture at maximum zoom can be problematic.

The huge zoom can you close to the action with a bridge camera, but they don't always enjoy lightning fast autofocus and the EVF can be slow to refresh if you're shooting action scenes. That might mean the difference between shot made and a shot lost, particularly if you're trying to photograph sports or anything fast-moving.

Most bridge cameras use a 1/2.3" sensor. Although that gives them more klout than many compact cameras, they aren't as well endowed as dSLRs, which come with APS-C or full-frame sensors. This can be detrimental to image quality, with noise rearing its ugly head in images.

Bridge cameras versus EVIL cameras

While both bridge and EVIL cameras tend to be smaller than dSLRs, there remain significant differences that set apart the two groups. EVIL cameras come with a range of different sensor sizes, but they need separate lenses. They're also more expensive than bridge cameras, particularly when you factor in lenses, which doesn't place them in direct competition.

So bridge cameras are meant for...

People who want the flexibility of manual controls, incredible zoom, and a lightweight camera are the ideal consumers for bridge cameras. They're excellent for travel, even if they can struggle in low-light and be a little slow to focus. Bridge cameras don't require an arsenal of lenses, but do get you close to your subjects. And they tend to be afforable, too.


* We received a price correction from Ricoh on Tuesday 22 July

Nothing new under the sun? The darkroom techniques we apply digitally

When you tell people that image processing and manipulation isn't anything new, but is just about as old as the art of photography itself, you can get some funny looks. Many of the processes that we carry out without a second thought were equally normal for analogue developers. Depending on how proficient you are with Photoshop, compositing might be faster today, but it's not new. Think of Man Ray and his image Le Violon d'Ingres. And beautifying subjects with the help of a brush was a far from alien practice for Cecil Beaton. Yes, really.

The difference is that now the ubiquity of editing suites means that techniques that were once the preserve of skilled darkroom practitioners are accessible to anyone with a computer. The degree of skill required to complete subtle, effective, and credible edits is still high, but the mystery has gone. Or rather, the mystery has assumed a new narrative as the dark arts of the darkroom remain under wraps.

To try to set some of that record straight, here's an extensive, but not necessarily exhaustive, list of the techniques that bridge the analogue and digital divide.

Crop

Have you noticed how the crop icon is a variation on a theme, in almost every editing package you encounter? That's because it's based on the tool that would be used to crop and resize images in the darkroom.

[gallery ids="6782,6783,6784"]

Brushes

The brush icon is another familiar one, whether you're in Photoshop or Pixelmator or Aperture or GIMP. Brushes were used extensively in the darkroom, to define edges or enhance details, to hand colour, to spot correct, to complete just about any task for which you might now use a digital brush.

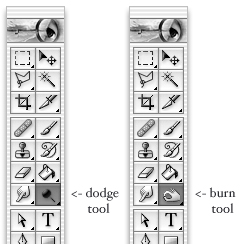
dodge.jpg

Dodging and burning

Haje has already written an article that explains why the dodge icon resembles a lollipop and the burn one a fist. Of course, they're techniques that were used in the darkroom to lighten or darken specific areas of an image as required. The dodging 'lollipop'—or piece of black paper on a stick—could protect the photographic paper from too much light during the development process, thereby keeping the areas in question lighter in the final image. The fist would be your hand, controlling how much light got through to darken areas of your photos.

Masking

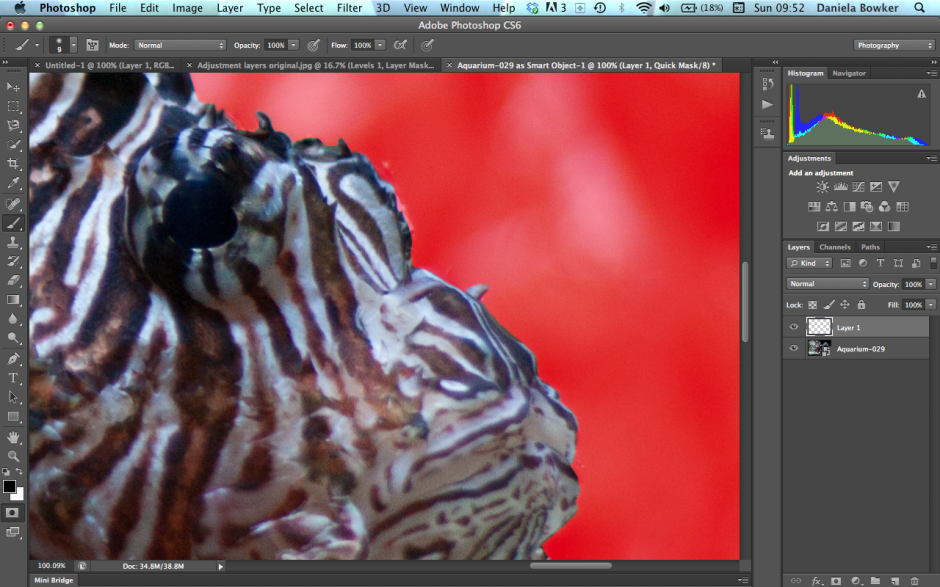
Using red to distinguish masked from unmasked elements in an image wasn't an arbitrary choice by software engineers. That too is a hangover from darkroom days. Mask an area that you don't want developed with red, gel-like rubylith and the light won't be able to penetrate it in the darkroom, so it won't be exposed. If you've ever found yourself irritated when masking a complicated outline in Photoshop, imagine what it would be like doing it with a scalpel!

Photoshop's Quick Mask overlay isn't red arbitrarily

Sharpening

Yes, there's a reason why the sharpening tool in Photoshop is called the Unsharp Mask. Again, Haje has a comprehensive explanation here, but the short answer is that images were sharpened using a not-quite-sharp positive of the image to make a mask (an unsharp mask) combined with the negative. The blurriness of the positive image should work with the negative to create a sharper final image.

Split-toning

Maybe you use the split-toning feature in Lightroom to create cross-processed effects, or to give a golden-hour glow to your photos, or perhaps to correct the white balance in your images. But it was originally a darkroom technique that allowed different tones to be present in the highlights and shadows of an image. Split-toning was something of a dark art, relying on the interplay of different papers and different chemical toners deployed after the standard developing and fixing process to produce different colours in the final image. Getting the balance right with your sliders might be a frustrasting experience now, but I'm sure it beats fiddling with gold-, selenium-, and sodium-based chemicals!

Split-toning isn't a new-fangled Lightroom thing

Contrast

It might be simple to adjust the contrast in your photos on a slider in a digital darkroom, but you had at least three ways of doing so in an analogue darkroom: with graded papers, with variable contrast paper, or with filters.

Colour

Unless you're shooting with a Leica Monochrom, you can choose between colour or black and white for any given photo now, switching back and forth between them as many times as you like in a non-destructive editing package. But in the early days of film it was black and white, maybe sepia, or perhaps the vagueries of split-toning, unless you opted to hand-colour your images. Love or hate selective colouring, for some people that was all that they could afford when hand colouring was a time-consuming art form. It isn't just a Photoshop abomination.

Airbrush

Finally, the much-maligned airbrush. It's not just a new-fangled phenomenon that magically reduces the size of an already-stick-thin model's thighs. The airbrush has been removing undesirables from images since at least Stalin's time and Cecil Beaton was famous for slimming his subjects.

I think you'll find, then, that there is very little that's new between the red light of the darkroom and the digital glow of Photoshop.

10 alternatives to Apple's Aperture

Now that everyone has got over their shock that Apple will be consolidating its image editing and organisation features later this year, with the result that its top-end programme Aperture will be closing up completely, people are probably beginning to think about alternatives. I've pulled together ten Aperture alternatives and sought out their positive and negative features. They're all Raw compatible, but do double-check their non-destructive capability. A standard gripe for the majority of these programmes is that they're tricky to get to learn, or that the interfaces aren't intuitive. While it is entirely possible that some of these programmes do have seriously unfriendly workflows and interfaces, it might also a case of them being different to what you know. I remember opening Lightroom for the first time and wondering if it controlled the International Space Station, too. It's all a learning curve. Still, it's probably worth bearing in mind that the open-source options don't have such pretty interfaces as the paid-for programmes.

And finally, we really don't know what Apple's plans are for its photo management and editing programmes. It's possible that Aperture's features will be integrated into whatever comes next. Or maybe they won't, if Apple is looking for a simpler, more consumer-friendly package. But it remains to be seen.

Adobe Lightroom

Lightroom is probably the most obvious option for people looking for an Aperture replacement. It's a comprehensive editing suite that sets the standard in its field. In addition to the expected functions, Lightroom includes advanced features such as brushes, gradient tools and specific lens corrections. It's my editing suite of choice that I feel offers me almost everything I want in an image editor.

However, some photographers—me included—are concerned that the option to purchase Lightroom as a stand-alone editor will be subsumed into the subscription model Creative Cloud and we'll find ourselves beholden to Adobe in perpetuity. If the potential for that bothers you, you might wish to look elsewhere.

Positives

  • Regarded as the market-leader in its class

Negatives

  • Feature-laden interface can be overwhelming
  • Some people unhappy with Adobe

Lightroom perpetual licence: £102.57 Adobe Photography CC bundle (Photoshop CC + Lightroom): £8.78 ($9.99)/month

Corel AfterShot Pro

If anyone doubted that Corel were still in business, yes, it is. And if you're wondering what happened to image editing software Bibble, it was bought by Corel... and became AfterShot Pro. The first version met with significant criticism for lack of basic features such as red eye correction and a reset button. This has been corrected for version 2, together with improved batch editing features and new noise reduction features. By all accounts, it's a pretty nippy piece of kit.

Corel has also stated that it is looking to make life as easy as possible for Aperture users who are looking for a alternative programme. It's reasonable price together with its comprehensive feature set makes AfterShot Pro a compelling option. And you can check it out for free before buying, too.

Precise control with selective editing in Corel's AfterShot Pro

Positives

  • Quick and responsive
  • Comprehensive feature set
  • Supports layers
  • Batch processing options
  • Enjoys local editing features

Negatives

  • Idiosyncratic lay-out
  • Limited plug-in selection
  • No web or email sharing capability

Corel After Shot Pro: £57.99 (usually $79.99, currently $59.99)

Cyberlink PhotoDirector Suite

PhotoDirector claims itself to be 'a unique application that combines all the features you need for photography in a single workflow – efficient photo management, complete adjustment and creative editing.' It comes with some serious editing firepower—from body-slimming tools to content aware object removal—and some sparkling reviews. You can try before you buy with a 30 day free trial. If the PhotoDirector Suite is a bit too pricey for you, have a look at PhotoDirector Ultra, instead.

Create tilt-shift effects in PhotoDirector

Positives

  • Intuitive interface
  • Comprehensive feature set
  • Facial recognition

Negatives

  • No batch processing
  • Inconsistent import times
  • No geo-tagging capability
  • Limited lens correction profiles

Cyberlink PhotoDirector: £114.99 (currently £89.99)

PhaseOne Capture One Pro

You might think of Capture One as being a medium format image processor, but it's capable of handling dSLR- and EVIL-created files, too. It's history of medium format processing means that many of the features that you're accustomed to seeing in places such as Photoshop as well as Aperture and Lightroom come as standard in Capture One. You might need to take a deep breath when you look at the price, but there is a free trial to test it out first.

Positives

  • Comprehensive feature set
  • Supports layers
  • Local adjustment tools
  • Clean and customisable interface

Negatives

  • Expensive
  • Can be sluggish

Phase One Capture One: €229 (currently €114)

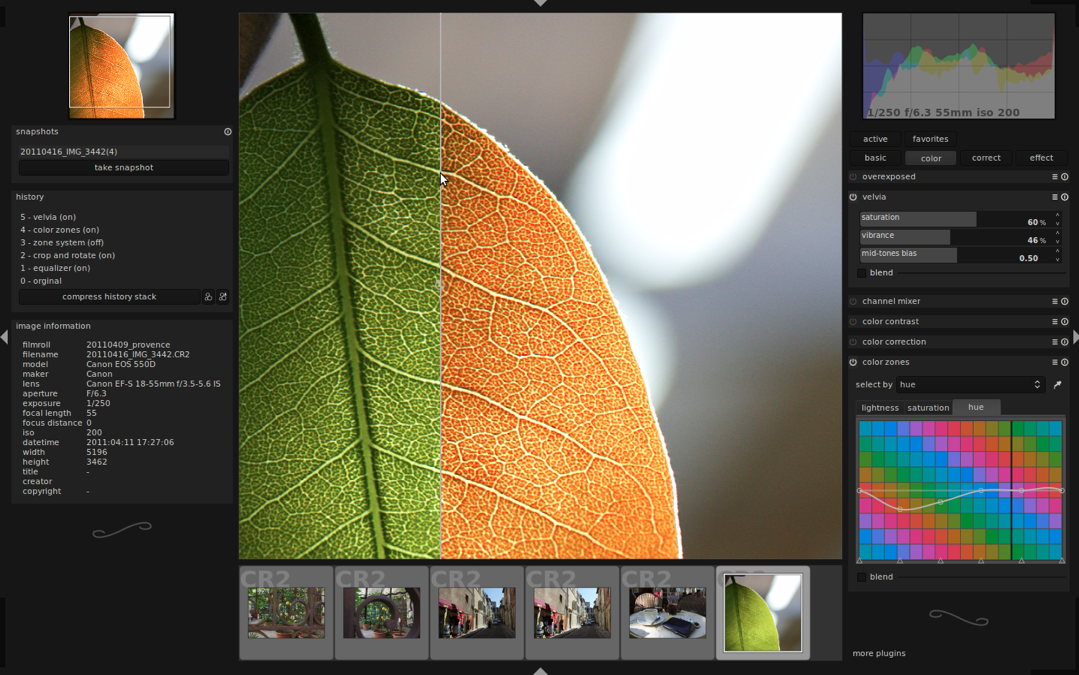
Darktable

Darktable is a free, open-source image editing suite that does seem to offer the most comprehensive and user-friendly experience without having to pay for anything. While one should never judge a book by its cover, the Darktable website is the most professional looking one in the open-source category.

Darktable in action
Darktable in action

Positives

  • It's free
  • Impressive range of functions, including split toning, film emulation, watermarking
  • Tethered shooting support

Negatives

  • Interface requires refinement
  • Clumsy and confusing image filing system
  • Undo system could be better

Darktable

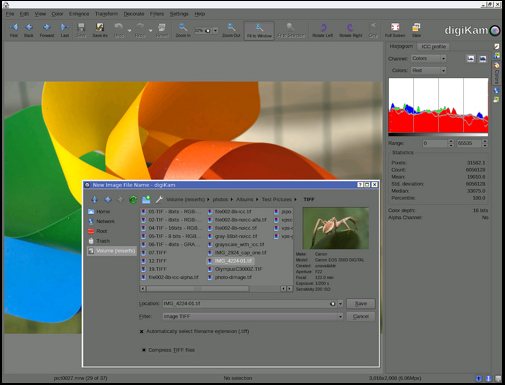
digiKam

The digiKam website does give me a mild headache, but plenty of people seem to like the software. In particular it includes some features that aren't available in places such as Lightroom yet, for example fuzzy search and facial recognition.

digiKam in action
digiKam in action

Positives

  • It's free
  • Map integration for geo-tagged images
  • Facial recognition and fuzzy search capabilities

Negatives

  • Can be buggy
  • Idiosyncratic workflow

digiKam

Lightzone

Once upon a time, Lightzone was a commercial enterprise under the aegis of the now-defunct Light Craft company. It went off-line unexpectedly in Sepember 2011, but resurfaced as an open-source initiative tentatively in December 2012 and then more fully in June 2013. Given it was once a commercial product, Lightzone does benefit from better-than-average-for-anope-source-project documentation.

Lightzone, with notes

Positives

  • It's free
  • Extensive functionality
  • Well documented for an open-source project
  • Intuitive layout
  • Previews effects in miniature
  • Supports layers
  • Localised adjustments

Negatives

  • Users need to register before downloading the software
  • Weak image management tools

Lightzone

Hasselblad Phocus

Hasselblad's Phocus might have started out for Hasselblad cameras, but it now supports a wide range of manufacturers' devices.

Positives

  • It's free
  • Mobile app
  • Intuitive, attractive interface

Negatives

  • Not that many people know about it or use it (maybe that's a good thing?)

Hasselblad Phocus

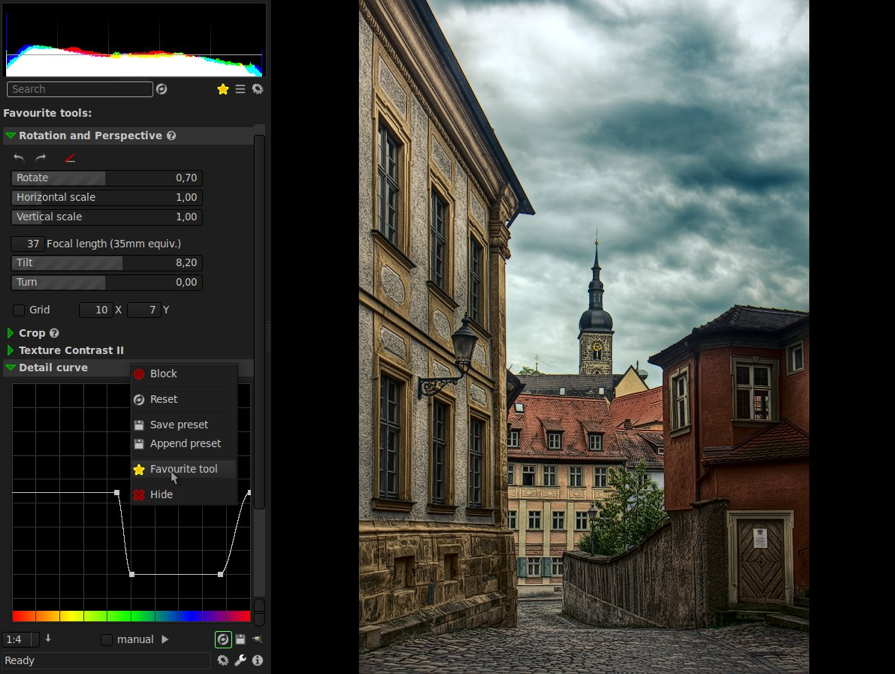
Photivo

Most of what I've read about Photivo suggests that it's a powerful piece of kit, but that it isn't necessarily easy to leap into it and get started. It doesn't offer any management features, just development functions, and is open about it not being for beginners.

Photivo in action
Photivo in action

Positives

  • It's free
  • Localised adjustments
  • Extensive control
  • GIMP integration

Negatives

  • Not necessarily intuitive
  • Not designed for image management

Photivo

Raw Therapee

Raw Therapee seems to offer a peculiar mix of some incredibly advanced editing capability with some serious oversights. While its demosaicing feature is super for low noise images, it's reported that it doesn't cope well with noisier photos. With today's strospheric ISOs, it might be a dciding factor.

Raw Therapee dealing with chromatic aberration

Positives

  • It's free
  • Demosaicing feature
  • RL Deconvolution sharpening tool

Negatives

  • Slow
  • Complicated workflow
  • No batch processing option
  • No localised adjustments
  • Wobbly image management interface

Raw Therapee

Buying and selling mobile imagery - where to go

There have been at least two pieces of news this week featuring companies that sell stock images created on mobile devices: first, EyeEm announced that it has redesigned its Android app and has partnered with Uber to offer new users a free ride to let them go places to take photos; second, Fotolia has also released a new Android app—Fotolia Instant—to complement its iOS version, which allows photographers to upload and sell their mobile images via the stock site. This got me thinking: how many stock agencies are mobile photo-friendly? Or where can you buy images made on mobile devices if that's what you want or need? I did a little digging and a little thinking and put together this list. I've tried to limit it to agencies or sites that are mobile-specific, have dedicated mobile collections, or easy means of uploading mobile images. There are sites such as Picfair that readily accept mobile images, but that's just part of its library.

Mobile-oriented sites

logo_black

EyeEm

EyeEm is a mobile photography sharing app and community that launched Market, a platform for its members to sell their photos, earlier this year. Invitations are still being issued to join Market, but it's simple enough to request one.

EyeEm Market EyeEm apps: Android; iOS

Foap icon

Foap

Images can only be uploaded to Foap via its app. As well as adding images to the Foap library, image-makers can participate in missions set by brands and agencies searching for more specific content. Foap's terms of use are quite broad, which is worthy of consideration before deciding to sell images there.

Foap website Foap apps: Android, iOS

Scoopshot icon

Scoopshot

Scoopshot expands on Foap's model, with buyers setting tasks for photographers in order to acquire the images they want. If someone sees a news image that they think is vaulable, it can be sent to the news task. Scoopshot doesn't go in for manipulated or filtered images; they prefer fresh and newsworthy content that meets task criteria.

Scoopshot website Scoopshot apps: Android, iOS

Twenty20 icon

Twenty20

We took a look at Twenty20 last year and while we thought its simple pricing structure for selling mobile image files was great, the sales mechanism required some refinement. It's still in the beta stage, but it is there!

Twenty20 website Twenty20 app (iOS only)

Mobile-friendly agencies

Stockimo icon

Alamy

The more traditional Alamy stock agency has embraced mobile photography and its photographers can use the Stockimo app to upload their mobile images for sale amongst the Alamy library. Buyers can look for mobile images in the dedicated Stockimo collection.

Alamy website Alamy Stockimo collection Alamy Stockimo app (iOS-only)

Clashot icon

Depositphotos

Depositphotos is a microstock agency that sells images under royalty free licences. It has a dedicated mobile photography app and collection: Clashot.

Depositphotos Clashot Clashot apps: Android, iOS

Fotolia Instant icon

Fotolia

Fotolia is home to over 20 million images and it's prepared to add mobile photos into that mix. You can find all its mobile images in its Fotolia Instant collection.

Fotolia website Fotolia Instant collection Fotolia Instant apps: Android, iOS

Getty Moment icon

Getty, including iStock by Getty

When people think of stock agencies, they think of Getty. If they don't think specifically of Getty, they might well think of a Getty subsidiary. Getty photographers are being invited to join Moment, along with the old Flickr collection, while new photographers should be able to join in due course. Whether or not you want to get involved with the Getty licensing machine is another matter.

Getty Images Getty Moment app (iOS-only)

Any other suggestions? Leave them in the comments section!

The Photocritic second-hand kit buyers' guide

I recently saw an article that listed sound advice when it comes to saving money when purchasing new camera gear. Amongst other suggestions, it mentioned part-exchanging your gear, buying at demo days, and waiting for manufacturers' seasonal cashback offers. What it didn't suggest was to buy second-hand, however. Someone did point out to me that then the gear wouldn't be 'new' in its strictest sense, but I take a slightly less stringent view of the word 'new' in this respect. It's still new to the buyer, after all. I'm a huge fan of buying camera gear second-hand. Some of the lenses that I've picked up have been practically box-fresh, but bought at a half or two-thirds of the retail price. And it's a small step towards reducing waste and the use of valuable resources. But buying second-hand does require you to put some trust in the seller as well use some of your nous and common sense. So what should you do? This guide has been put together using my own experiences together with advice from Campkins Cameras in Cambridge (where I buy lots of my kit) and Adorama, who sell used as well as new gear. It is of course advice, and while it's as thorough as I can make it, it probably falls short of comprehensive somewhere.

What to buy

My own preference is for new bodies but second-hand glass, still there are great deals to be had on very well kept camera bodies. Used accessories can be picked up on the cheap, too. Almost anything that you'd like to establish or augment your photographic arsenal can be purchased second-hand, from vintage kit to barely used up-to-date digital gear.

Given that there are so many places to look for used photographic equipment, it's advisable to begin your search with a clear idea of what you want and how much you have to spend. You might not get very far with 'I want a new lens!'

Where to buy

How long is a piece of string? There are so many places offering second-hand sales it might feel a little overwhelming. The first places that might spring to mind are eBay, Craigslist, and Gumtree. Then there are major retailers who offer second hand sales in addition to their new business: Adorama, KEH, Wex Photographic, Wilkinson Cameras, for example. Your local independent camera dealer probably has a second-hand range, too. It's also worth watching Twitter as well. I quite often see people offering their kit for sale there before taking it to a dealers or trying eBay.

Anyone want to buy my Holga? Boxed. I think I've put two rolls of film through it. Make me an offer.

All of these come with their advantages and disadvantages. Online auction sites offer you the opportunity for great deals on price, but you have to place your trust in the seller that they're honest and reliable and that their descriptions are accurate. What you might think of as mint condition could be different to someone else's idea; and heaven forfend that someone takes your money and doesn't deliver the goods, or fences stolen property. The aftersales care and protections, for example returns and warranties, are less straightforward than with established traders, too.

Purchases made through established companies might be a bit more expensive than what you'll manage on eBay or similar, but most of them have a clear returns policy and even offer a warranty on goods. These companies' ratings systems usually afford you a clearer indication of the condition of the product you're looking to purchase, so you shouldn't receive any nasty surprises when it arrives. But, if you're buying over the Intergoogles, you don't have the opportunity to hold the product in your hand and test it out for yourself. This is perhaps the biggest advantage of local traders. I pop down and test out lenses before spending money on them and ask about a gazillion questions as well. Where I shop offer me a six month warranty on second-hand purchases, which is a great benefit.

It all depends on how confident you are buying over the Internet and how comfortable you feel spending money on goods sight unseen.

When to buy

If you're in the market for a particular camera or lens, it's worth keeping an eye on manufacturers' release cycles. When new models in the line that you're interested in go on sale, you're likely to find a bump in people selling their older versions when they upgrade. For example, Nikon announced its D810 today; as a consequence, people wishing to upgrade from their D7100 or even their D800 or D800E will probably start thinking about selling them on soon.

Nikon's new D810 - what will people be selling on as they upgrade to it?

Taking a look at the second-hand market just after Christmas is a good idea, too. People receive gifts, they're given money to put towards new gear, and they resell their old equipment as a consequence.

Or you can do what I do. Decide on the specifics of your next purchase, but not restrict yourself to a timescale and ring up your local dealers every week to ask if they've anything that fits your requirements.

Questions to ask

You might not have the opportunity to ask questions of goods being sold online by major retailers, but you can ask questions of sellers on auction sites and in bricks-and-mortar shops. The first question I always ask is 'Why is it being sold?' If the seller can't give you an answer that sounds reasonable, you might want to reconsider the purchase. I ask about the original paperwork for the product, too. And I always double-check on the returns policy and the warranty.

If you're buying via an auction site, don't be afraid to ask the seller to clarify anything mentioned in the description, for more images of the product, or anything you'd like to know but hasn't been covered, for example where and when it was purchased originally.

What to look for

Should you be buying via a site that uses a grading system for second-hand goods, read their ratings descriptions carefully to understand the condition of the product you're looking to purchase. Some sites won't sell goods that don't function normally but others will, indicating that they're good for parts. Make sure you know the code!

If you're looking at goods graded N or D on Adorama, these are just about as good as new and it's unlikely that there will be much difference in the price from a brand new product. You're likely to get a better deal on something that Adorama grades as E or OB. OB means 'Open Box' and it's the equivalent of a demonstrator car: it's been used as a display model or for training purposes.

Here are some of the things to look for, but remember it isn't an exhaustive list by any means.

Cameras

  • Actuations - how many times has the shutter been released? Obviously the fewer the better
  • Battery and battery connectors - you don't want the battery to have leaked or for any of the connectors to be mis-shapen
  • SD card slot - do cards move in and out cleanly and record without issue?
  • Sensor - are there any dead pixels (you can spot them by taking a shot into the lens cap and looking at it in an editing suite) or dust or oil spots?
  • Lens mount - it mustn't be mis-shapen or have worn threads
  • Auto-focus - does it work properly?
  • Scrapes and scuffs, dents and dings - a couple are to be expected, but you probably don't want it looking as if it were dropped down a well and dragged out again

No. You can't buy the Trip.

Lenses

  • Dust and spots - you'll never get a lens that's perfectly dust-free, even brand-new, but you really don't want obvious dust or dirt spots
  • Fungus - lenses that have been left in dark, slightly damp conditions are prone to growing fungus. You don't want any of that.
  • Scratches - you want a scratch-free lens
  • Aperture blades - check the aperture blades work properly and are clean
  • Zoom and focus rings - twist the zoom and focus rings to ensure they're in full working order
  • Auto-focus - check the auto-focus works properly
  • Threads - you don't want the threads to be stripped or in any way mis-shapen

Finally, remember the adage: if it seems too good to be true, it probably is. Now: happy shopping!

Struggling to understand the exposure triangle? Try thinking of it as a glass of water

ExposureTriangle.gif

There are three things that affect an exposure: speed, aperture, and ISO. They work in a triangle to achieve an exposure.

When you give with one you take with another to ensure that you don't over- or under-expose your shot. In your early days of setting your exposure manually, it can be a bit tricky to remember how they fit together. But if you think of exposure as a glass being filled by water from a tap, it might help. Here's how it works.

Aperture

Think of aperture as how much you open the tap. The wider you open it, the more water flows into the glass. Open the aperture wider and you let more light into the camera.

Shutter speed

If aperture is how far you open the tap, shutter speed is how long you open the tap for. If you open it for a long time, a lot of water comes out. If you open it only briefly, just a little water comes out.

ISO

The final control in the exposure triangle is ISO. From the perspective of our water-glass analogy, ISO could be described as the size of the glass. At a low ISO, the glass is a large one. At a higher ISO, the glass is smaller. In effect, if you are shooting with a high ISO, you need less water to fill the glass.

Equivalent exposures

Much like filling a glass with water, getting an exposure can be achieved quickly or slowly, but you'll get there in the end. You can use a trickle of water—so that would be a small aperture—for a very long time, and the glass will eventually be filled. Alternatively, you can open the tap all the way—the equivalent of a large aperture—very briefly, and the glass will be filled.

The same is true in photography. Two different exposure settings can result in the same amount of light being recorded inside the camera.

Sunset beer

Okay, it's a glass of beer. But that's much more fun than water.

How, then, do you put this into practice? It depends on what you want to achieve with your photo. If you're looking to secure a particular depth-of-field you'll set your aperture accordingly and then adjust the shutter speed and ISO to complete the exposure. For a long exposure shot you'll need to think about whether it needs a small or a large aperture and a low or a high sensitivity.

Drink up!


More unusual ways of looking at things and remembering rules are in my lovely book, The Rules of Photography and When to Break Them. Available in print from Amazon UK and US.

ImageBrief: a new approach to selling images

Control, commission, and contacts. If that sounds like a reasonable premise under which to sell your image online, you might want to check out ImageBrief. It's an online global image marketplace where buyers request specific images to meet their needs and photographers submit photos that they believe meet the brief. The average fee is $800 and photographers take upto a 70% cut. Interested?

How does ImageBrief work?

Buyers, who are a mixture of art buyers, creative directors and editors at advertising agencies, brands, corporates and publishers, as well as freelancers, submit a brief describing exactly what they want in detailed but natural language. Photographers who are signed up to ImageBrief can then submit photos that they think meet the brief's criteria for consideration. Before any images are presented to buyers, however, they're all vetted by the ImageBrief staff to ensure relevance and maintain quality. For the successful photographers, there's a potential 70% of the commission fee available. I've not seen one brief below $200 and plenty in excess of $1,000.

Photographers are able to keep up with new briefs via email and an iPhone app notification. There's an Android app in the works.

In a world where the stock agency model holds sway, how is ImageBrief attracting buyers and photographers?

It's all very well having a great model that serves buyers' needs without giving them photo-blindness from trawling through acres of potentiall suitable images, and gets photographers' images in front of buyers, but if no one knows about it, it doesn't benefit anyone. ImageBrief has found that word-of-mouth has worked in their favour, togetehr with social media and targetted email campaigns. Rainer Waelder was spotted by the ImageBrief team and invited to submit a portfolio for consideration.

Sign up?

The ImageBrief team is very keen to point out that its fresh approach is part of its appeal: 'The images are different, the process is different and the outcome for the brands and clients they represent is different.'

The importance of the curaton model

ImageBrief regards the curation model as critical to its success and integrity. 'It's what allows us to present such amazing, tailored content. Each of our photographers is reviewed upon registration and then images are curated every step of the way to ensure quality and relevance to the client.' The buyers aren't overwhelmed in their search and photographers making sales take better a better cut of a significant fee. It's win-win.

Photographers' opinions

Uploading images to a stock agency and forgetting about them might seem like a relatively easy and stress-free option to sell your photos, but ImageBrief photographers are quick to point out that it doesn't offer nearly the return that an ImageBrief sale does. 'I’ve only made one sale so far with ImageBrief though I have been shortlisted several times. But that one sale was my biggest ever and more than made up for the effort expended on other briefs. One of the great things about ImageBrief is that it attracts high-profile clients still willing to pay a fair and proper rate for images. That makes us photographers feel it’s worth our while to submit images in the first place,' says UK photographer Matt Doggett.

Take a look at the Collections for an idea of what they sell

What's next for ImageBrief?

A commissioning platform is in the works that is intended to allow clients to seek out a photographer when they haven't found the perfect pre-existing image. This can be tailored based on location, categories, or references. A new premium account structure will let photographers put themsleves forward for assignments and maybe develop relationships with clients that could go for ages.

Want to get involved?

It's free to sign up to ImageBrief and that's probably the fastest way to learn how it works. Look at the kinds of images that clients are buying in the 'Collections' section. Download the app so that you can keep on top of new briefs.

ImageBrief photographer Slobodan Blagojevic recommends being selective and making sure that you fulfil the brief to be in with a chance, but perhaps more importantly 'do not think of ImageBrief as just another stock library, i.e., do not submit typical stock imagery. Clients come to ImageBrief precisely because they want something different, something fresh, something unique.'

Getting value for money when buying a camera

Last month, Ricoh 'repositioned' the prices of four of its Pentax cameras: two dSLRs, one EVIL camera, and its 645D digital medium format camera. From Ricoh's perspective, it's an attempt to make the Pentax brand more attractive to consumers and present them with some competitively priced options that aren't Canon, Fujifilm, Nikon, Olympus, or Sony. What does this mean from the consumer's perspective, however? What sort of value for money can a Pentax purchase offer? I decided to do a bit of digging.

K-3: £950 body-only

The K-3 is Pentax's flagship dSLR camera, heading its modest line up of current models. It isn't, however, the likes of a Canon, Nikon, or Sony flagship camera, which are all full-frame. This has an APS-C sensor and is much more similar to their high-end smaller-sensored cameras.

The weather-sealing makes the K-3 attractive

The K-3's key features include a maximum sensitivity of ISO 51,200; top frames-per-second speed of 8.3; a 24 megapixel sensor; a dual SD card slot; and full weather sealing. At its new £950 price point, this leaves the K-3 in an interesting position.

For around £850 you can pick up a Canon 70D or a Nikon D7100. It's not a straight-up comparison against the 70D, though. That has lower resolution (20 megapixels); a slower continuous shooting speed (7 frames-per-second), and its sensitivity tops out at ISO 25,600. Where it does beat the K-3 is on connectivity—it has wi-fi functionality—and on video capability. By all accounts if you're interested in recording video, you're better off with the 70D than the K-3. Finally, Canon has a far broader range of lenses than Pentax, which presents you with much more flexibility as well as purchasing options.

Against the Nikon D7100, you're looking at similar resolution, dual SD card slots, and dust and water resistance (but not water-proofing), but lower sensitivity (ISO 25,600) and slower frames-per-second rate (6). Video on the D7100 is also meant to be good and Nikon has a huge lens selection, too. Unless you're very serious about action photography or need cold-resistance too, the D7100 seems a better option to me.

But if you're prepared to spend a bit more, closer to £1,300, you can pick up a full-frame Canon (6D), Nikon (D610), or Sony. Yes, that is Sony's a7, so it isn't a dSLR, but it's food for thought.

K-50: £500 body-only

The K-50 isn't Pentax's 'entry-level' offering, that's the K-500, but it does boast weather resistance, a top sensitivity of ISO 51,200, and a maximum frames-per-second rate of 6. It's sensor is a 16 megapixel APS-C one. So at around £500 (although you can pick them up cheaper), how does it compare?

Against the Nikon D5300, it's a day at the races: some you win and some you lose. Where the K-50 loses in the megapixel race (16 versus 24) it wins in the frames-per-second stakes (6 versus 5) and the ISO handicap (51,200 versus an expanded 25,600). The K-50 doesn't have an entry when it comes to wi-fi and GPS, giving the Nikon a walk-over; but the situation is reversed when it comes to weather sealing. With the D5300 selling for around £550 body-only, it'll be a case of careful consideration what you want from a camera. Something that slots into a system with which you can grow significantly (the Nikon), or something that's reliably built but doesn't offer huge scope for progression with lenses or more extensive specs.

Unless you specifically want a dSLR, it's also worth looking at EVIL options; around the £500 mark there are a few choices that can give you plenty of camera for your money. There's the Sony NEX-6 or a6000, or Fujifilm's X-M1. You'll be getting very similar specs, and in the case of the a6000 and X-M1 wi-fi to boot, but not the weather sealing. The question is, what do you want from your camera?

Q7: £340

The Q7 comes in a swap-shop of multi-colours

With a 1/1.7" sensor, it's actually a struggle to find a direct EVIL competitor for the Q7. Sony and Canon use APS-C sensors, Panasonic and Olympus use Micro Four Thirds, and Nikon favours CX. There's nothing that small. If you're looking for a camera as handily sized as the Q7, that's reasonably priced, but still has interchangeable lenses, take a look at the Olympus E-PM2. Or you could ignore the interchangeable lens issue—with a camera that small, having interchangeable lenses might overwhelm the benefits of its smaller body anyway—and go for a compact. Something like Canon's S120, Olympus' XZ-2, or if you can stretch the pennies further, Sony's RX100.

645D: £4,250 body-only

Excellent value for money

This one is the easiest of the lot. If you're looking to dip your feet into medium format waters, there is nothing as affordable as the Pentax 645D. You'll either be sticking with a top-of-the-range Canon or Nikon dSLR, or a Hasselblad or Mamiya medium format.

Conclusion

Having test-driven a few Pentax cameras, there is a lot to like about them. And if you live anywhere that rain or dust might conceivably be an issue, the weather-sealing is a very attractive prospect. But it's a case of considering what your needs are from a camera and whether or not you're looking for heaps of compatible lenses, both native and third party, as well as accessories and add-ons. How far do you think you might want to take your photographic progress? How far do you want to take your camera? How much money do you have to spend?

Getting good value for money isn't just about the pennies in your pocket right now and the current crop's spec sheets. It's also about long-term planning and ensuring that you and your camera—and the system into which you've bought—have a future together.

Whatever you're looking to buy, it's always worth considering all of your options.