How can you bring a feeling of three dimensionality to a two dimensional medium?
Creating panoramas: a basic guide
The Photocritic Holiday Gift Guide: presents for landscape photographers
It's Day Five of the Photocritic Holiday Gift Guide. This means landscapes. We have suggestions for budding landscape photographers and a few treats for more hardened souls.
Wide-angle lens
Landscape photography and wide-angle lenses go together like strawberries and cream. While I've taken great pleasure using a Sigma 17-35mm ƒ/2.8-4.0, it's now out of production. However, the Tamron 10-24mm ƒ/3.5-4.5 is regarded as a great value-for money option that comes in a range of mounts. You can of course spend a whole lot more, or choose a prime instead of a zoom lens, but that's a good starting point.
Tamron 10-24mm ƒ/3.5-4.5 for Canon | Nikon | Pentax | Sony
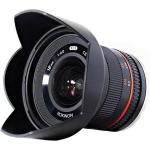
Photographers with mirror-less cameras might want to consider the Samyang/Rokinon 12mm ƒ/2.0, which is cracking value for money and is available for plenty of different cameras.
Samyang/Rokinon 12mm ƒ/2.0 for Canon M | Fujifilm X | Micro 4/3 | Samsung NX | Sony E
Tripod
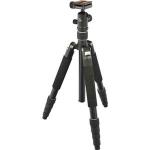
Tripods suitable for landscape photography are awkwardly demanding. They need to be portable: doubtless you will be schlepping it and yourself up hill and down dale in search of shots. But simultaneously, they need to be sturdy and able to withstand wind, maybe rain, and uneven terrain.
We've picked out the Giottos Vitruvian at $200 for its height, weight, and strength. For something a little cheaper there's the Slik Pro 700DX.
Filters
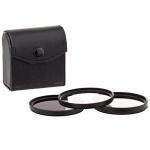
Securing vivid colours and correctly exposed landscape photos often relies on the judicious application of a filter across a lens: maybe a neutral density filter, perhaps a polarising filter. Filters need to be the right size for the lens and they come in various grades, for example you can choose between one and 12 stops—with everything in between—for a neutral density filter.
A filter kit containing a UV, polarising, and neutral density filter is a good place to start. We've picked out two, at different price points, which should fit on the Tamron lens we've suggested. But do double-check!
There's the Vivitar kit at just over $16 and the $48 Pro-Optic kit.
If you like trying things that are brand new and shiny, take a look at the filters just released by VU and Mefoto.
Camera bag
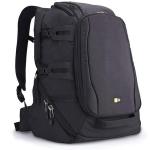
You need a bag that's easy to schelp about all day. It needs to be weatherproof. You should be able to attach a tripod with the minimum of fuss. And of course your kit should fit snugly. We think that the CaseLogic DSB-103 (can't they think of memorable names?) is great value at a little under $70. It's a backpack; it has a detachable waterproof cover; tripod storage shouldn't interfere with bag access; and it'll fit a camera and four lenses.
Waterproof cover
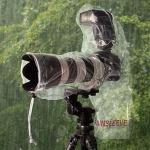
It's all very well your camera bag being waterproof and you looking fit to go to sea in a Force 5 gale, but if your camera isn't protected from the elements, then your landscape photography expedition will be a fruitless endeavour. Or possibly a very expensive one if your camera suffers from water damage. Pick up a rainhood. They don't cost $10 and they'll let you take photos in the most inclement of conditions.
Remote shutter release
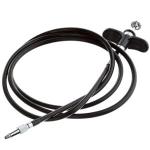
You have erected your tripod and ensured that it's stable on uneven terrain. You have composed your shot with a perfectly positioned horizon and delectably enticing leading lines. You have carefully calculated your exposure to capture the light and the intensity of the colours. And then you go an ruin it all by depressing the shutter button and introducing a fraction of camera-shake into the shot.
Use a remote release. Please.
You can pick up a Triggertrap mobile kit from £22. That affords a vast array of possibilities for camera-triggering. A basic remote release is about $10.
Torch
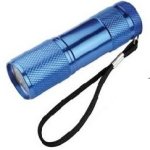
There are so many smaller accessories that I could have included in this list which make the life of a landscape photographer easier and more pleasant, the article would have run to the length of a post-graduate degree-level essay. I've opted for a torch, however.
(Okay, seeing as you asked, the leading contenders for this entry included a pocket knife, gaffer tape, and a bubble level.)
Weather-appropriate clothing
I loathe cold feet. They make me incontrovertibly miserable. They can also be a curse of landscape photography. Buy your landscape photographer loved one some warm, waterproof socks and you will win yourself many favours. Head to your nearest outdoor shop to see what they've got on offer.
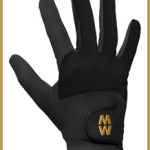
A good pair of gloves goes a long way, too. I love MacWet gloves: warm, waterproof, but they don't compromise on grip.
You might also want to consider hats, scarves, jackets, and trousers. Even boots. Or for the warmer months: sunscreen and insect repellant.
Book
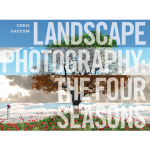
For inspiration, look no further than Ansel Adams. But to improve your technique, I rather like Chris Gatcum's Landscape Photography: the Four Seasons.
Kendal Mint Cake
For those moments when an energy boost is required.
Gifts for high-speed photographers < < Holiday Shopping with Photocritic > > Gifts for photographers, big and small
Up or across? The choice between horizontal and vertical frame orientation
It is a truth universally acknowledged that landscape format pictures work more successfully in articles than their portrait format counterparts.
When I'm offering feedback on the assignments submitted by our Photography School students, one of my most frequent questions is 'Did you think about framing this vertically?' Or at least, something along those lines. Human vision is binocular, meaning that we have two eyes that happen to be positioned adjacent to rather than on top of each other. We are, therefore, predisposed to scanning things along a horizontal plane rather than a vertical one. It’s no surprise then that we’re more inclined to capture horizontally oriented pictures. The vast majority of cameras have been designed around this fact, thus have a default horizontal orientation and it's just about uncomfortable enough to rotate it that we sometimes overlook doing so.
We shouldn't be so hasty.
The case for horizontal
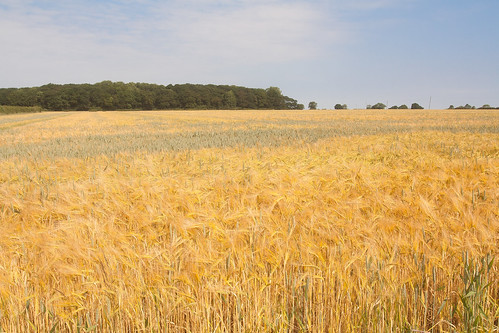
The long and the short of it (ahem) is that the majority of subjects that are wider than they are longer will benefit from being photographed in landscape format. You'd have to be standing an awfully long way back to fit all of the Schonbrunn Palace into a portrait format picture. Most of the time, the horizon in a landscape photo will demand to take up as much space as possible, stretching across the frame. Typically, there's more to see when you scan left-to-right than there is up-to-down. But not always.
The case for vertical
It's hardly an accident that vertically oriented pictures are referred to as 'portraits'. Any subject that is taller than it is wider—people, trees, skyscrapers, doorways, bottles—will suit a portrait shot.

It's hardly a co-incidence that portraits are called portraits.
It's a case of letting the natural lines in the image dictate how it's framed. Don't be afraid to swing your camera through 90° and give it a go.
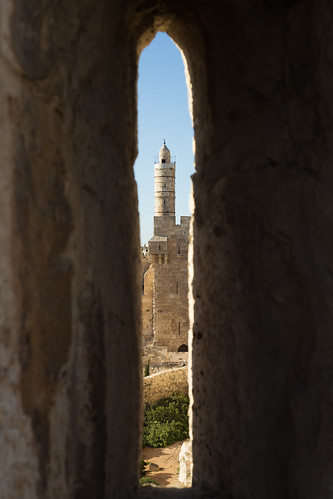
The entire point of this image is the vertical. Why would I shoot it horitonzally? Let the subject dictate the line.
Creative choices
If you stop to think about it, the majority of the time it will feel obvious whether you should be framing your subject horizontally or vertically. There will be a natural line and flow to your composition. Sometimes, however, you might be presented with a compositional dilemma or you might want to spread your creative wings.
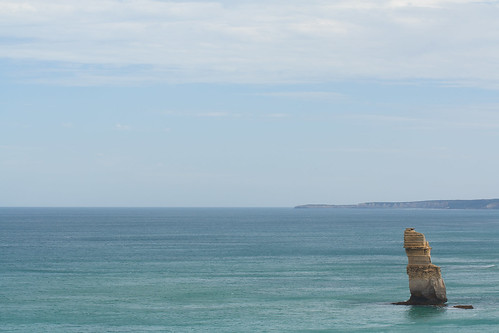
The Lonely Apostle might be a vertical feature, but it's the landscape that gives it context and the horizontal framing emphasises that.
For example, you might have a landscape that features a mountain range running off into the distance—a horizontal motivation—but with tall trees in the foreground that would enjoy the vertical emphasis of a portrait framing. Which do you go for? What you have to decide is which element do you want to be the dominant one and therefore be emphasised by your framing. There's not necessarily a right or wrong here; it's about ensuring the subject and the framing complement each other.

But portraits don't always have to be oriented vertically. A landscape format can look fabulous.
If you've time, shoot both. You've nothing to lose.
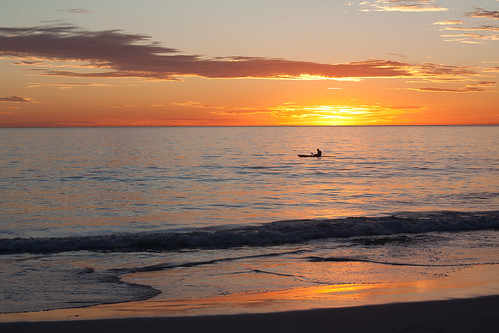
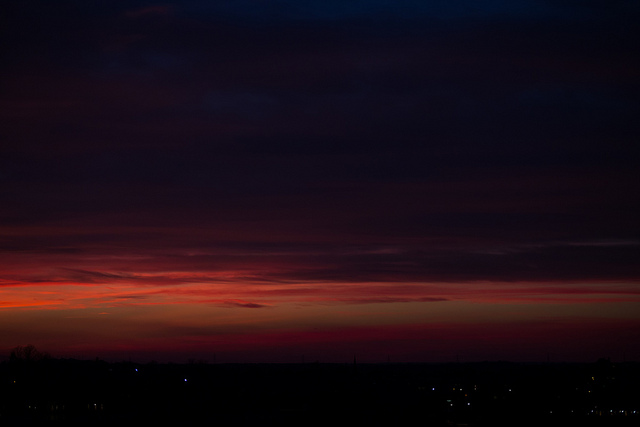
The traditional landscape format works perfectly for this sunset seascape...
It is worth trying something new and different, though, to challenge your thought processes and expectations. You don't need to be wasteful and practise obscure compositions for their own sake, but it is always worth moving and rotating and shifting and changing. Don't feel constrained by what is expected, work to produce an image that tells a story.

... but take nothing away from the vertical version.
What is dynamic range?
The Photocritic Photography Fundamentals series continues with dynamic range. No, we're not talking about high dynamic range (HDR) photography here, we're going back a step. Dynamic range and HDR are linked but before you can have HDR you need to have dynamic range, and whilst HDR is a tool, dynamic range is a basic principle that underpins photography.
Not just about photography
Dynamic range isn't a concept that's restricted to photography. It's something that we make use of every day, with our eyes and our ears. It's what allows us to hear someone mounting the stairs at the same time as listening to the radio, or be able to see both the sunny and shady areas of a garden simultaneously. Being a 'range' it does have its limits, though: when you're in a dark room that has a brightly lit window, you won't be able to see the view through the window and the room interior simultaneously. One will be over- or under-exposed when the other is properly exposed. The tipping point is the extent of your eyes' dynamic range.
Dynamic range is the maximum difference between bright and dark or high and low that you're able to absorb simultaneously.
So it relates to photography how?
In photography terms, dynamic range is how much difference in contrast your camera is able to record. If you imagine a landscape picture with bright white clouds that are almost over-exposed, the more detail you are able to detect in the shadows is indicative of a wider dynamic range. It follows then that a camera with a wider dynamic range will be of more use than a camera with a narrower dynamic range: it has the ability to record more data and therefore produce images with more detail.
Measuring dynamic range
There's no strict measurement for dynamic range in cameras. Sometimes you'll see it referred to as 'EV', sometimes as 'stops'–as in ƒ/stops–and even as 'bits'. In fact, you often won't find it referred to on a camera's specification and you have to go to independent testing and review websites to get a dynamic range measurement.
If you're anything like Team Photocritic and like amassing geeky facts, you'll want to know that the dynamic range of the human eye is approximately 24 stops; cameras have a dynamic range of between ten and 15 stops.
Making the most of your camera's dynamic range
The huge caveat to dynamic range is that you can only make the best of it if you shoot in Raw. Shooting in Raw records vast amounts more data than if you shoot in JPEG and allow your camera to make decisions about what information should be kept and what should be discarded. The bucket-loads of data and the accompanying flexibility that comes in a Raw file is as a result of your camera's dynamic range. Shoot in JPEG and you'll miss out.
TL;DR
- Dynamic range is the maximum difference between bright and dark (or high and low acoustically) that you can absorb simultaneously
- Photographically, dynamic range is the maximum degree of contrast that your camera can record
- Dynamic range can be measured in 'EV', sometimes as 'stops'–as in ƒ/stops–and even as 'bits'
- To make the most of your camera's dynamic range, you need to shoot in Raw


