I'm meant to be driving to Edinburgh tomorrow—good health permitting—and if my car weren't due to be crammed to the gunwales with my brother's belongings, I might've considered turning it into a drive-lapse. Or a time-lapse of the journey. It would be possible to do this using a common-or-garden time-lapse technique, but if I were to find myself stuck in a traffic jam (heaven forfend), we'd have shot after shot of my car stationary on the A1, which isn't so thrilling. The clever people at Triggertrap have developed a way around this problem, however: distancelapse mode. Rather than triggering your camera to take a photo at timed intervals, it exploits your smartphone's GPS to take a photo at specific distance intervals. How very nifty!
Safety first
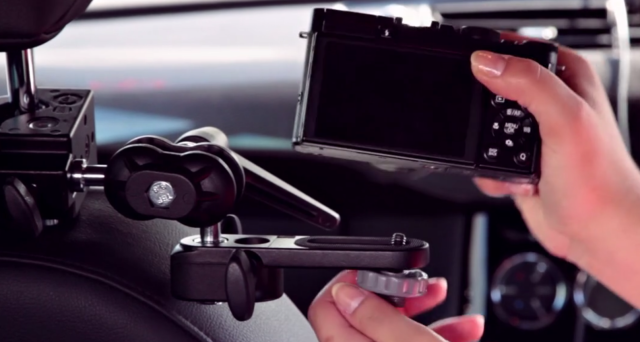
Shooting a drive-lapse will necessitate mounting your camera and triggering device securely in your car, with a decent view of where you're going. While this might seem simple, whatever means you choose to mount your camera in your vehicle, you must do it safely. Laws will vary from country to country, but the primary consideration is that your kit mustn't obscure the driver's vision and neither must it be a distraction. Do be sure of the regulations before you go anywhere.
Selecting a mounting option
You have a few options to mount your camera in your car. A superclamp attached to the passenger seat's headrest stalks is ideal: it won't obscure the driver's vision and the camera has a great view. Alternatively, you could opt for a suction cup on the windscreen or a tripod wedged in the backseat. Remember: it's about being safe.
Aperture priority mode or Manual?
Choosing your preferred shooting mode for a drive-lapse can be a bit of a conundrum. If you're likely to encounter changes in the weather conditions or light throughout the duration of your journey, manual mode will leave some shots over-exposed and other under-exposed. Aperture priority mode can solve the exposure issue, but leave you with a flicker problem. You're going to have to weigh up which mode will suit your journey, and therefore your final video, best.
Time and space considerations
If you're going on an especially long journey, you'll need to make provision for this, in terms of your personal needs and your kit's. Your memory card will require sufficient space and you might need an external charger for your phone, too.
Drive time!
With all of these considerations, ehm, considered, it's time to do this!
Mount your camera
As we've already discussed, your camera needs to be mounted legally and securely. You don't want it wobbling about if you encounter potholes or sleeping policemen.

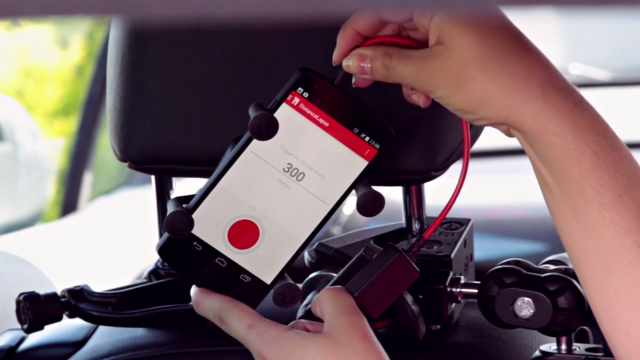
Camera, meet Triggertrap
Hook up your camera to the Triggertrap dongle and the dongle to your smartphone. Secure your smartphone, too, as you don't want that moving about.

Set your camera
Your camera needs to be in manual focus mode in order for Triggertrap to function, so if it isn't already, switch it to manual focus and adjust to get the image sharp. You also need to choose between aperture priority and manual exposure modes, and set your exposure accordingly.
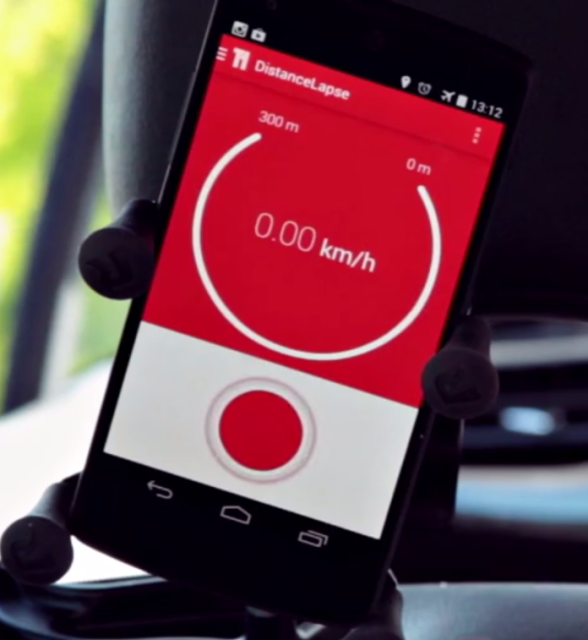
Let Distancelapse take the strain
Open up the Triggertrap app and select the Distancelapse mode. If you're driving on the motorway, 300 metres is a good interval. Hit the big red button, allow the GPS to settle, and then off you go!

Putting together your video
When you've completed your journey and have all your images, it's time to compile them into a video. We'll save that for another article, but this one should get you started. Then you get to relive the journey, in shortened form.
Much of this, including all the images, is based on the fantastic How to shoot a road trip timelapse tutorial found on Triggertrap's How-To microsite, and it's reproduced with permission. Triggertrap How-To is full of great content for making the most of your camera. You should take a look.


