Feature Articles

For those days when you need to be in several places at once: multiplicitous images

Multiplicity, or the art of creating images containing several yous, or anyone elses for that matter, isn’t a digital discovery. It’s something that people have been doing for decades: it's remarkably easy to achieve with film. You set up your shot and either you don’t wind on your film before re-exposing the frame with your subject positioned anew in the scene; or you wind on your film and then wind it back again in between shots. The important thing here is to slightly under-expose all of your shots in the sequence to ensure that your final image isn’t an over-exposed white mass. That might look like me, but actually it's my Ma
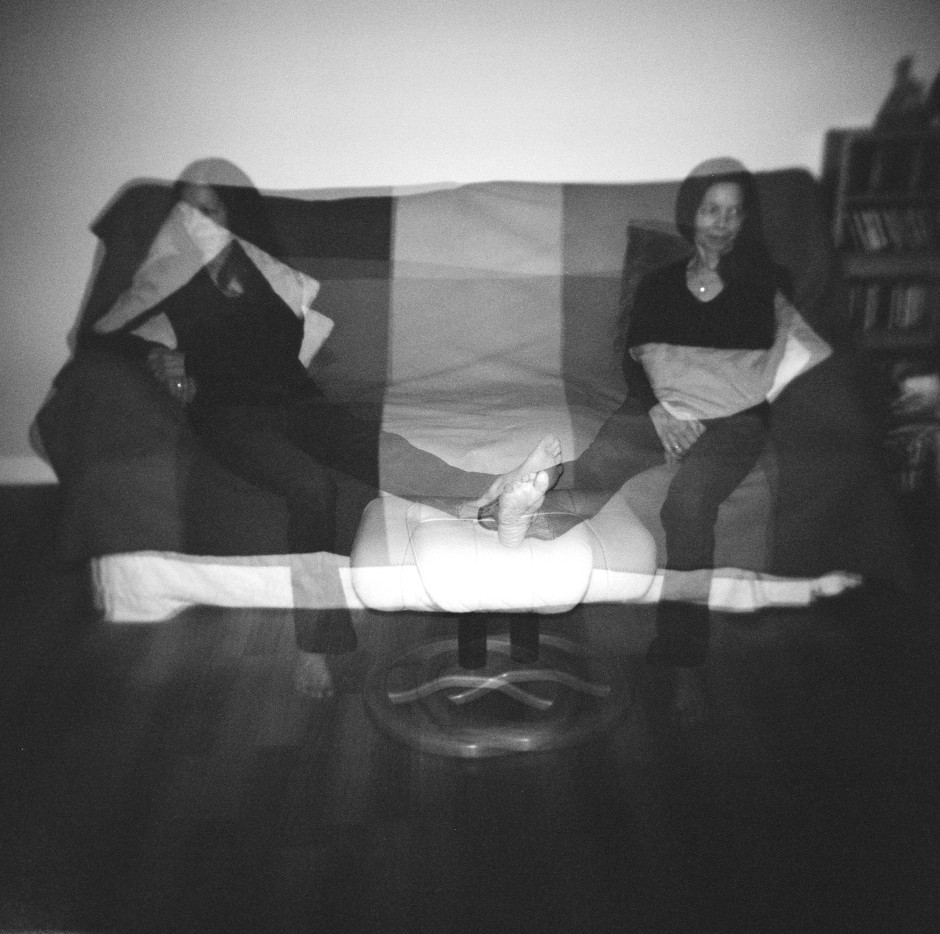
If you don't happen to have a Holga lying about (they're great for creating multiple exposures), you can do it with a digital camera, too. Depending on the camera you have, you've a few options for creating a multiplicitous image. Quite a few come with a multiple exposure setting now: you determine how many exposures you want to make and the camera will re-expose the same 'frame' in-camera and adjust your expose settings accordingly to ensure that you don't end up with a too-dark or too-light image. Marvellous... if you have a camera that can do that. If not, you'll need to make friends with Photoshop, or a Photoshop-esque editing package.

Before we go any further, it’s important to remind you that achieving a great final image relies on producing a good image in-camera first. It doesn’t matter how ginormous the barrage of editing you’re going to subject your photo to, it’s got to be good from the get-go. This is just the same for a multiplicity image as any other.

When you set out to create a multiplicitous image, your starting point is your concept. Think of the story that you're trying to tell and what you need to tell it. Having a clear plan makes it so much easier when you're shooting the images because—unless it's a distinct element of the story—you need consistency in your images: furniture can't move between shots, the light needs to be coming from the same direction, and you don't want to be flapping around.

When the scene's arranged, set your camera on a tripod, adjust it's exposure settings and focal point, and shoot a 'plate' image. This is a base photo, devoid of the story's characters, onto which you'll build your final creation.

Now you can shoot your series of images containing your subject in as many different positions as your composition merits. I've found it useful to go for more rather than fewer photos; it gives you more flexibility when you compile your final image.

[gallery ids="6703,6704,6705"]

When you've shot your images, import those you think you might want to use into Photoshop using the Load Files in Stacks option (File>Scripts>Load Files in Stack), which should import your images so that they are perfectly layered one on top of the other.
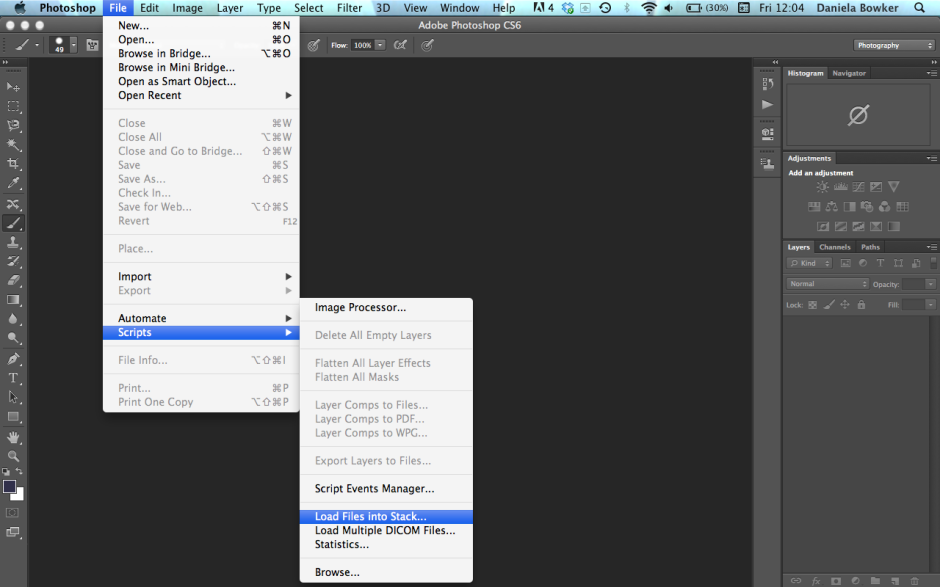
Importing made easy

Next apply a layer mask to each of the layers, barring the background image, which should be the ‘empty’ plate.

Using the eye icon on the Layers Palette, toggle off all of the layers from view except Layer 1. Now brush your subject, along with anything like indentations in the chair where she or he is sitting or shadows, out of the image. It's those small details which add credibility to the unbelievable, which is what makes them important to the final composition. And while it might seem counter-intuitive to brush your subject out of the image, it isn't really.
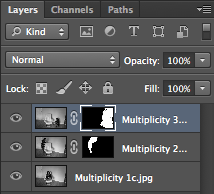
Brush out your subject - it makes sense, really

When you’ve disappeared your subject from the scene and you’re happy with the refinement of the edges, invert your selection by pressing Cmd+I on a Mac or Ctrl+I on a Windows machine. The subject will miraculously reappear and the superfluous background will disappear.

Do take care when you're areas where overlapping occurs, because it's here where your image will succeed or fail in its realism.

Repeat this process for each of the layers, toggling them on and off as necessary to decide on which placements you want to keep, and which you wish to discard. I’d recommend saving the image as a PSD file with all the layers intact, which will allow you to revisit it and re-edit as often as your Dr Jeckyll needs to meddle with your Mr Hyde.
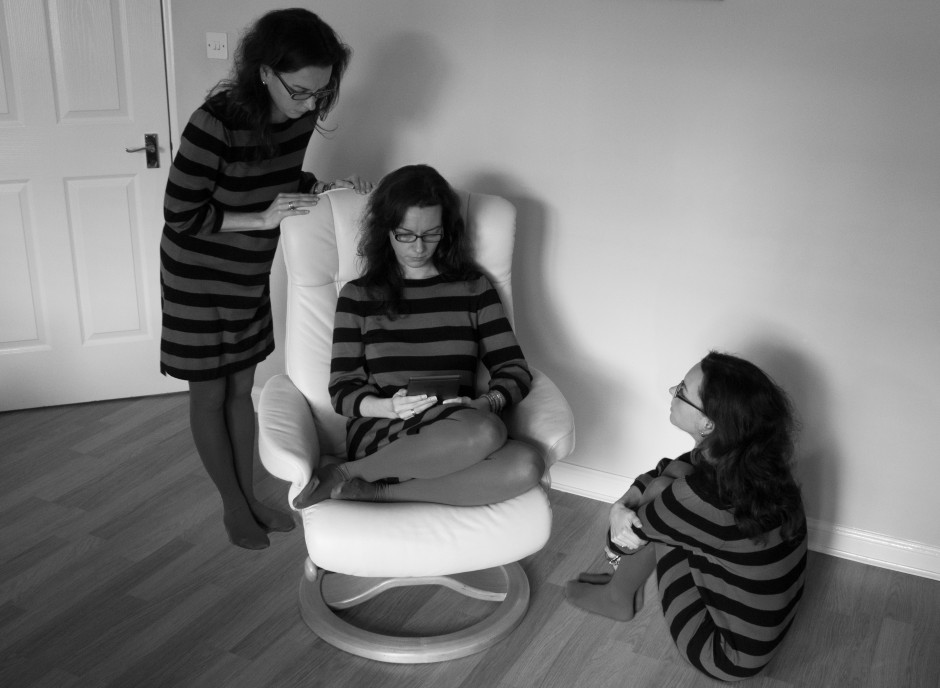
Three wise monkeys? Or something like that

When you've settled on a final version, delete the layers that you don't want, save it as a PSD file, and then flatten it and export it as a JPEG image. Ta-dah!

From light to dark: the Photocritic guide to vignettes

For literary types, a vignette can be either an anecdote or short story, or a illustration—often foliage-inspired—found on chapter headers. For photography types, a vignette is the gradual fall-off of light from the centre towards the edges of the frame of an image. If you enjoy Instagram or play around with Snapseed, you might know a vignette as a cool effect that you can add at will. They are, however, far more than just an effect. Thus we present to you the self-contained, but not necessarily short, Photocritic guide to vignettes, without any vines.

Types of vignette

Photographic vignettes occur because of natural, optical, mechanical, and technical reasons and can appear whether you prefer analogue or digital technology. While we might associate vignetting with vintage, it's hardly stuck in the past. Digital sensors managed to introduce their own form of vignetting, and a great deal of it is down to lenses. What are we looking at, then?

Natural vignetting

You are most likely to see natural vignetting when you use a wide-angle lens. It's a gradual darkening of the image that happens because light reaches the sensor (or film) at different angles. As the photons need to travel further to reach the edges of the sensor, they lose their strength, hence the darkening.

Optical vignetting

Lens design is primarily responsible for optical vignetting; the lens' barrel prevents light reaching the sensor evenly, and the lens elements stacked up on top of each other can have an impact, too. Optical vignetting is more pronounced when shooting at wider apertures; stop-down a bit and you can reduce its prevalence.

Mechanical vignetting

If anything physical blocks the passage of light to the sensor, for example a lens hood or a filter, it can cause a vignette. This is the easiest vignette to correct: check all of your accessories are properly attached.

Pixel vignetting

The pixels towards the edges of a sensor aren't always able to record light at the same intensity as those closer to its centre, mostly because of the angle at which the light hits them. This can lead to a darkening of the image towards its edges. Sensor manufacturers have caught onto this phenomenon, however, and have introduced compensations to rectify it.

Why add a vignette?

If a vignette is regarded as an aberration, why would you want to add one deliberately to an image? When used reservedly, they can bring focus to your subject and draw your eye into the frame, particularly in portraits. First because they allow for fewer distractions at the edges of the frame, but also because they mimic the natural effect of the eye. We don't see sharply all the way to the edges of our vision, and a vignette's fall-off has a similar impact on our photos. They reproduce a degree of 'normality' that we can find pleasing. The essential factor in applying them is to be subtle, therefore.

Adding a vignette

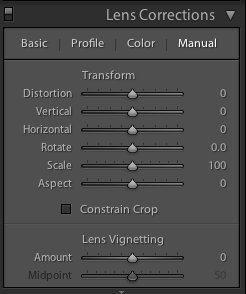
Lightroom allows you both to add artificial vignettes and to correct those produced as the result of optical or mechanical aberrations. If you need to correct a vignette, reveal the Lens Corrections panel, where you can also adjust various types of lens distortion, and nudge the Lens Vignetting sliders until your photo looks 'right'. (They sit beneath the Manual tab.) Easy!
Correct unwanted vignettes in the Lens Corrections panel (or use it to add easy vignettes to uncropped images)

This is also an easy means of adding a subtle vignette to a largely uncropped photo, too. It doesn't let you over-do it, which is the cardinal sin of adding vignettes, and there aren't too many factors to consider. It's sneaky, but if you're working with a cropped photo, not helpful. For a cropped photo, you need to head to the Post-Crop Vignetting options in the Effects panel.

Here, you have far more control over the vignette that you add to your image.

Gently does it with the Post-crop Vignetting options

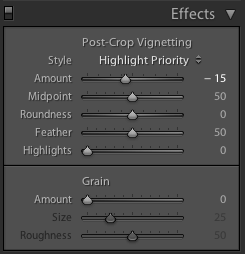
With three drop-down options and five sliders, it might appear as if adding a vignette is more trouble than it's worth, but it's relatively straightforward. We'll deal with those drop-down options first.

Highlight Priority, Colour Priority, or Paint Overlay?

Highlight Priority, Colour Priority, or Paint Overlay? Highlight Priority allows for highlight corrections and recovery, so is good with images that have specular highlights, but it might have an adverse impact on the colours in the darker areas of your image. If you're working in black and white, colour shifts won't be an issue, so it's an easy choice.

Colour Priority won't produce such a pronounced shift the colours in the darker areas, but it won't let you recover highlights, either. Julieanne Kost, who works for Adobe, reckons it's a more subtle effect. You might want to consider this if your photo is in colour.

As for Paint Overlay, it is supposed to mimic the effects of overlaying your photo with either black or white paint.

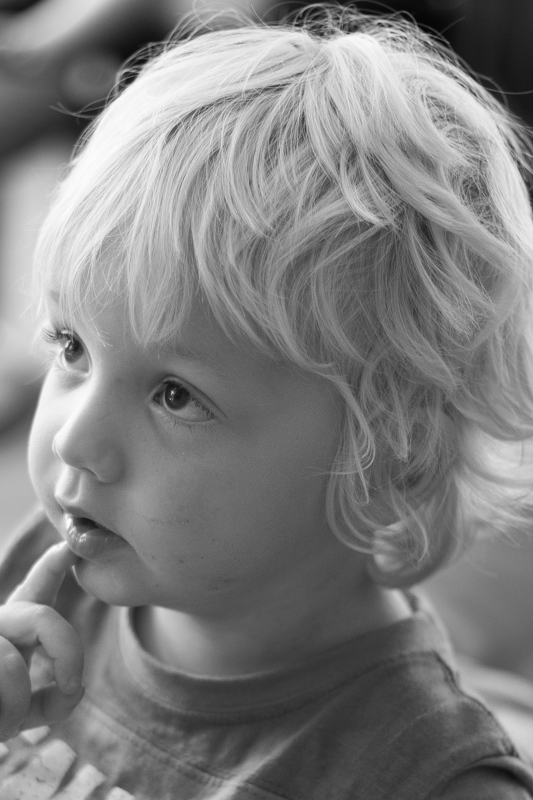
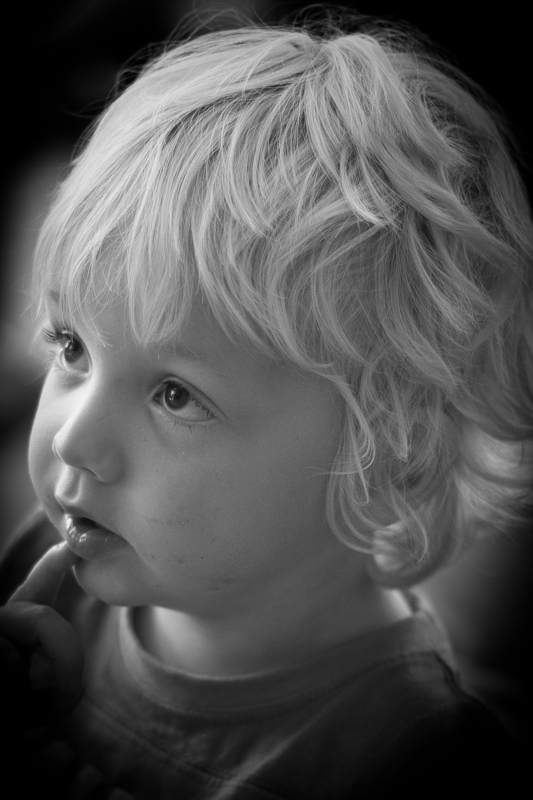
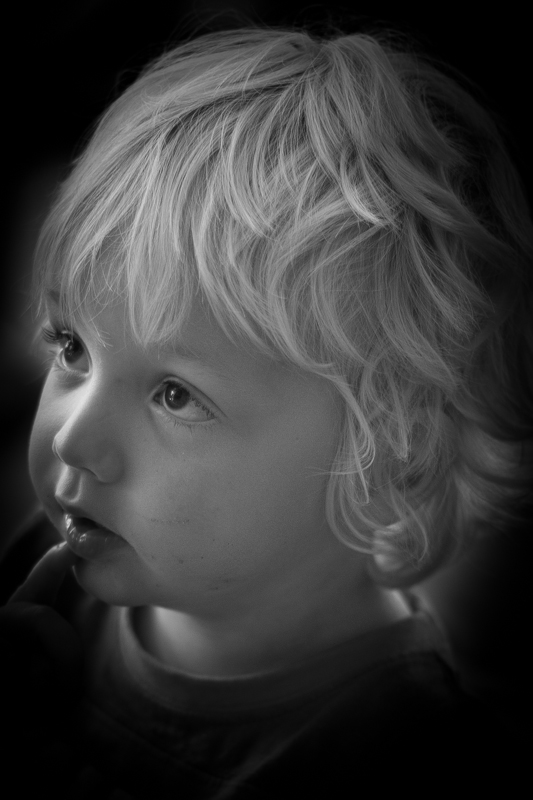
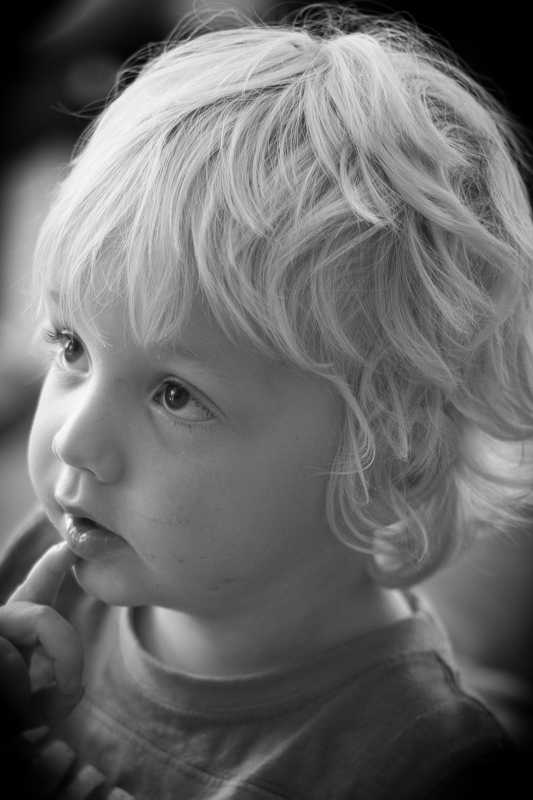
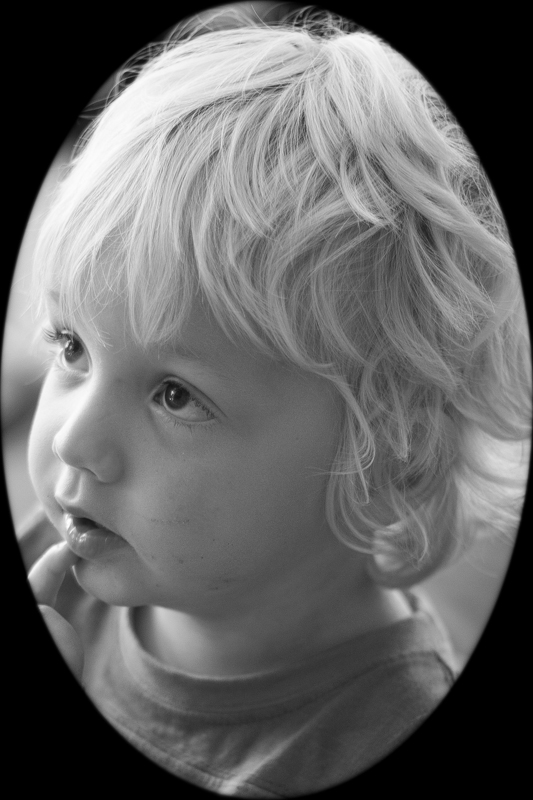
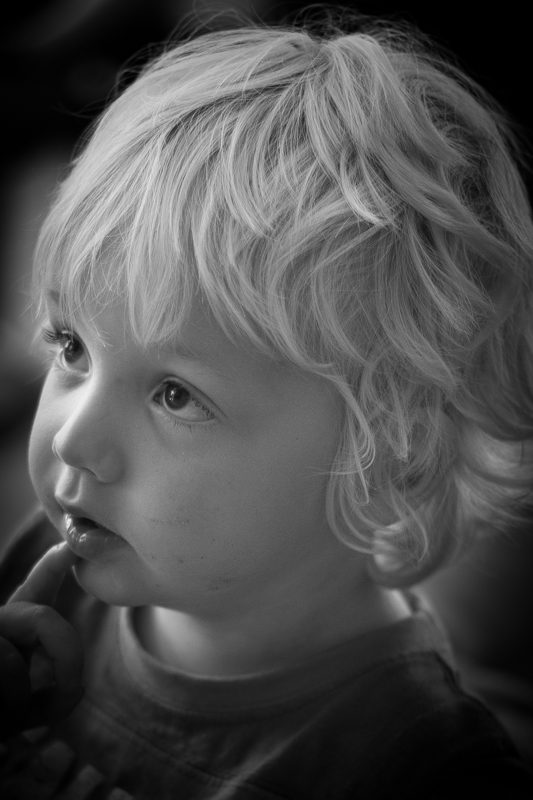
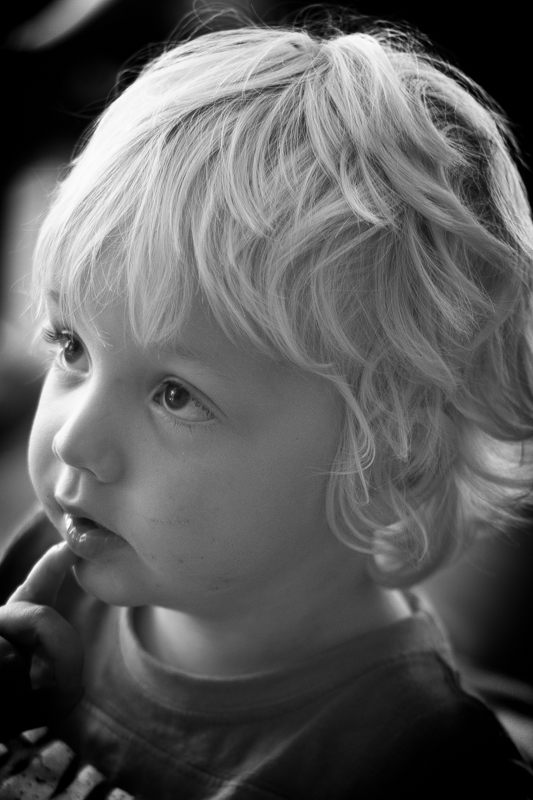
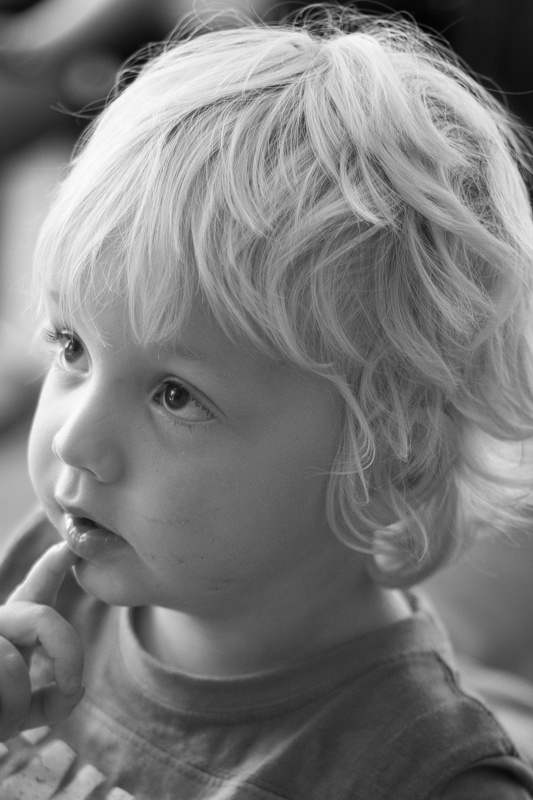
To walk through the sliders, I'm using a photo of my nephew Wil for demonstration purposes. It's been cropped, converted to black and white, and had all of its other adjustments made. The last thing on the list is the vignette. That's how you should apply one, too.

Wil, ready for his final curtain vignette

Amount

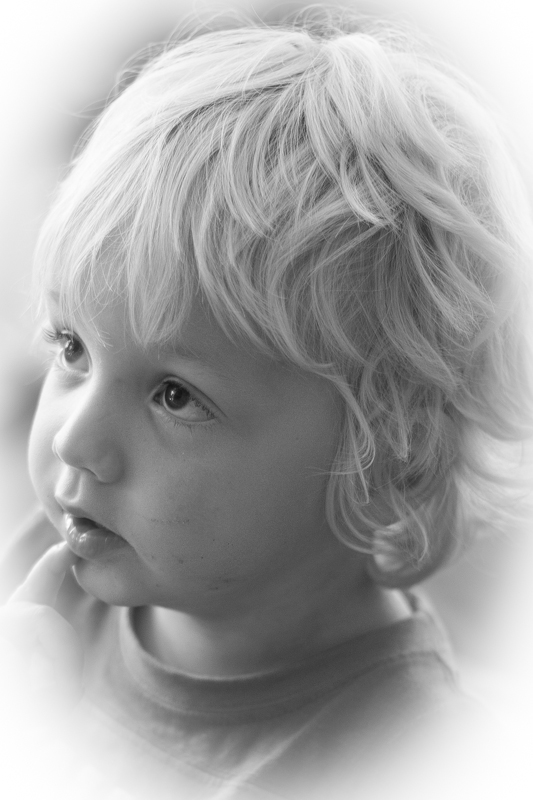
The Amount slider is the crucial slider when adding a vignette. It determines how strong the darkening or lightening of the edges of the frame will be. Set it at -100 and you'll have deep black edges; conversely, +100 will leave you with bright white edges. Without adjusting this slider, none of the other Post-Crop Vignetting sliders will have any impact on your image.

A bright white vignette with the Amount set to +100

From now on, we'll look at all the other sliders having an effect with the Amount set to -100. It offers the clearest demonstration of their impact.

Amount at -100

Mid-point

The Mid-point slider controls the size of the vignette from the centre of the frame. It naturally sits at 50 points; reduce it to 0 and you'll produce a vignette that encroaches far into the frame.

Amount -100; Mid-point 25

Set it at 100 points and it'll sit closer to the edges of the frame.

Amount -100; Mid-point 75

Roundness

The Roundness slider controls the shape of the vignette. At 50 points, it's elliptical in shape. Push it to 100 points and you'll have a circular vignette. At 0, it's a rectangle with rounded corners. (By pushing all of the Post-crop Vignetting sliders completely to the left, you'll create a rounded-corner rectangular frame effect for your photo.)

Feather

To control the strength of the transition between the vignette and the centre of the image, adjust the Feather slider. 100 points ensures a very subtle transition; 0 points is a sharp transition with a hard edge. Its native position is 50 points; I don't often vary far from there.

Amount -100; Feather 0

Amount -100; Feather 100

Highlights

Finally, we're left with the Highlights slider that starts at 0. Why might you want to increase the highlights slider? It prevents the vignette being applied too heavily to highlights in the image and helps to keep them bright. There's no hard-and-fast rule for this slider; it needs to be adjusted on the merits of each image.

Amount -100; Highlights 100

It's important to note that the Post-crop Vignetting panel applies the vignette centred according to the crop. If you want to introduce a vignette that works around an off-centred subject, you'll need to do that using Radial Blur. That's a whole different article, however.

Other vignette options

If you don't use Lightroom, you can add a vignette using plenty of other editing suites. Photoshop, of course. And Pixelmator. Or Pixlr. Under the 'Centre Focus' tab if you're in Google+. In Apple's Aperture.

The end product

Butter wouldn't melt in his mouth

This is my final version of Wil, with a vignette Amount of -15 and a Mid-point of 75. That was it. Remember: subtle is better!

Adding some va-va-voom with vibrance

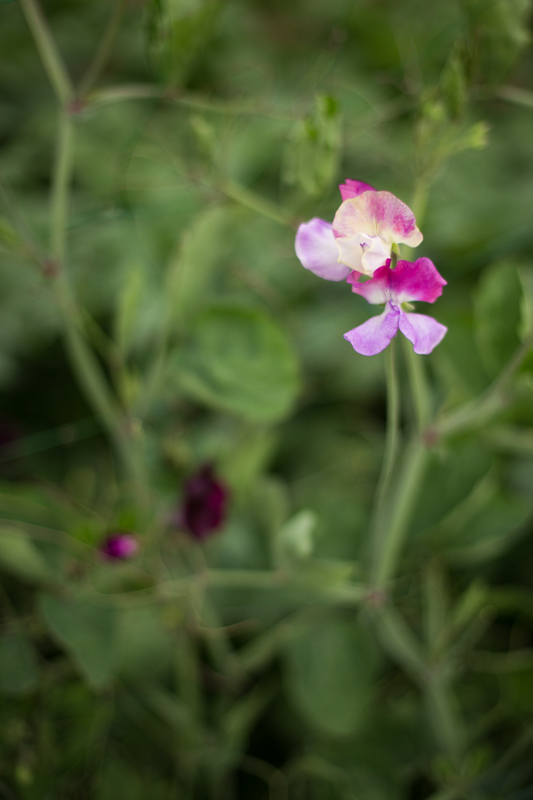
A few weeks back, we took a peruse around Lightroom's clarity slider, to see what it does to your photos and how you can get the best out of your photos by giving it a gentle nudge here and there. This week, it's the turn of the vibrance slider—clarity's bed-fellow—to come under the Photocritic microscope. With the vibrance pushed to +20, the greens look more alive, but the sweetpea petals aren't overcooked

Much the same as the clarity slider has its most pronounced effect on the mid-tones of your images, the vibrance slider is also a 'smart slider' and applies its effects selectively. Rather than adjusting the contrast in the mid-tones, a la clarity, vibrance takes hold of the more muted tones in your photo and gives them some oompf. It's a selective saturation slider, if you will.

This is where this balcony-dwelling geranium started out

With the saturation at +50, it's too much

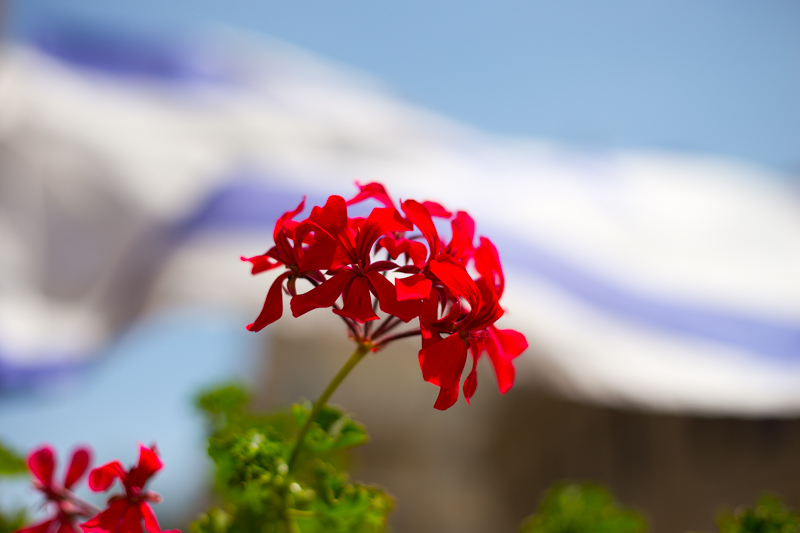
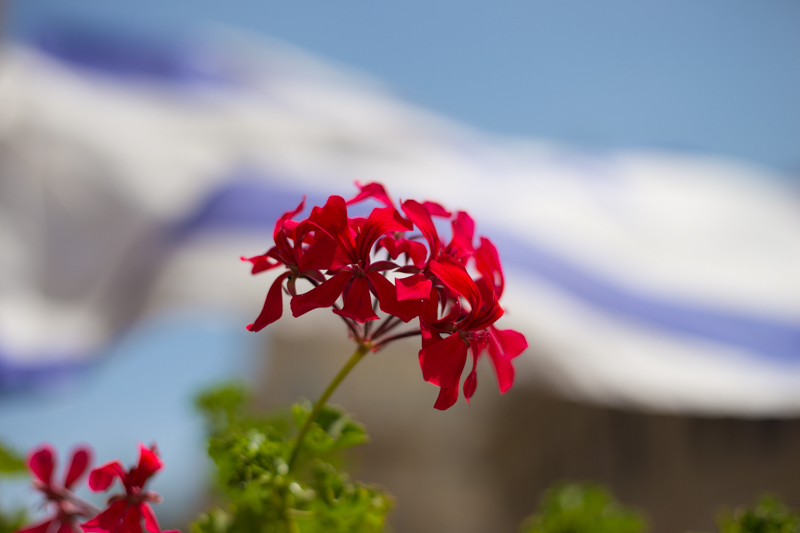
... but with vibrance increased, the sky looks bluer while the reds aren't overdone

More often than not, vibrance will pick up on the blues and greens in a photo but go easier on the reds and oranges. This is great for bringing out the intensity of a sky or making a lawn look that bit more inviting while not letting your portrait subjects look as if they've been tangoed. I've heard some people refer to vibrance as being like 'fill light for colours'.

I've tweaked the contrast and white balance here, but vibrance and saturation are, as yet, untouched

You can see that with +60 on the saturation, my brother's skintone is odd, although the sky looks intense...

... increasing the vibrance, however, gives Josh a better skin tone and the sky a more intense colour. Much better! (Although I'd probably not go as far as +60, as I did here.)

With the exception of the sweetpea, I've not been exactly subtle with either the vibrance or the saturation in any of my examples here, but that's to give you a clear illustration of the difference between them. Usually, I'd be far more reserved and I'm sure you would be, too. But at least you know what vibrance does now, and can begin using it to intensify your colours without feeling you've chucked a red wash over your photos.

The handy-dandy social media photo sharing guide

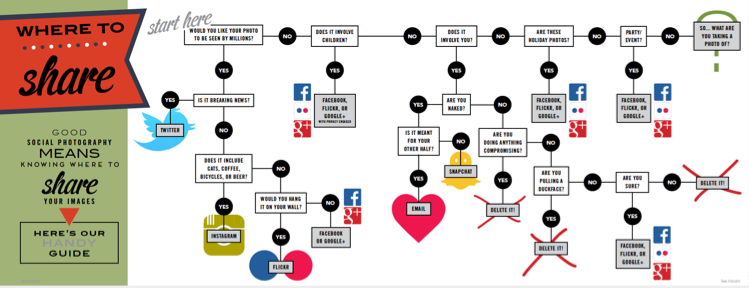
One photo, so many options. Where on this huge web of interconnected social media outlets are we best sharing our quick snaps, our painstakingly created works of art, and our selfies? Really, it all comes down to whom you want to see them. The chances are that different people follow you in different social media spaces, and if Twitter's mostly a work thing for you, selfies on the beach aren't all that appropriate a posting there. You're probably best putting those on your friends- and family-only Facebook account. It only takes a few moments of thought, really, but if you're new to the social media fandango, seeing all those apps lined up on your phone can be a little overwhelming. For a bit of fun, I drew up (quite literally, it involved an enormous sheet of paper and felt-tipped pens) this handy-dandy guide to sharing your photos via social media. Of course it isn't meant to be taken deadly seriously, but it's a pretty useful starting point all the same.

Click for bigger!

You can find it looking even more beautiful in print in the delicious-looking Social Photography, which is available now, either in print or to download!

Like the Google+ Stories idea but not keen on Google+? There are options

On Tuesday, tech and photo sites were awash with the Google+ Stories story. Rather than having to sift through your own images and organise them into virtual albums to chart your travels, document your days out, and record your parties, Google+ can auto-algorithmically-awesomely collate them into Stories or Movies by simple virtue of uploading them there. You can then edit them if necessary, add captions when appropriate, share them if you want to, and generally enjoy. Stories and Movies capabilities are already working on the web and Android platforms and will be making their way to iOS shortly. If you're like me and you auto-upload your iPhone images to Google+, open the web interface and you'll find there are some stories ready and waiting for you.

The Story of my cousin's birthday

But what if you don't want to upload your photos to Google+, for whatever reason, yet still rather like this idea of hands-free image curation? With the vast number of image storage and organisation apps and services out there, someone, somewhere, must be offering an alternative. There are plenty of apps that can organise your images and videos into a timeline, for example Dropbox's Carousel and Picturelife, but not that many which create narrative albums based on time, date, and location that are ready to go. There are, it seems, two apps that manage something along the line of Stories.

Flayvr

Flayvr is an Android- and iOS-compatible app that organises your images and videos into editable and shareable 'Flayvrs', or albums. That's pretty much what the Google+ Stories feature does. But unlike Google+, which collates all your photos and videos stored there, this works by collating the photos and videos stored on your device's camera roll, making it much more mobile-centric. If you're using Google+ to store all of your images, regardless of the device used to capture them, its capable of giving you a more complete story.

Still, it's swish and stylish, free to download, and I've had fun using it to collate some 'Flayvrs'.

Keepsake

I've not been able to download Keepsake for a trial spin because it seems to be a US-only iOS app at the moment. However, it does look to be slick and easy to use. It automatically sorts images into stories that you can edit them using the pinch-and-drag mechanism. When you have a complete story, you can share it with your contacts via text message.

It's also worth remembering that Google+ acts as a storage mechanism for your photos as well as organising them into sharable (or not) albums. Flayvr explicitly states that it isn't a data storage service. That's going to be a plus for some and a minus for others.

There aren't many options, but there are some, and I'm sure that Google's move will herald the insertion of automatically curated albums from other sites before long.

Spring cleaning my photography apps

I acquire a huge number of photography-related apps on my phone. Some of them I'm requested to review, some of them I choose to download so that I can compare them against similar apps, some of them I download for a specific purpose and never use again, a few of them I even use on a regular basis. I'm not too bad at sifting through them perodically to delete those which aren't serving any purpose and doing nothing more than consuming memory on my phone, but when I realised that I had four folders of photography apps, I concluded that it was time for a spring clean. Thus began the great app cull of Spring 2014. It was a fairly simple process based on the question 'Do I use this app?' If I did, I kept it; if I didn't, it was sent to the great spare app repository in the cloud. Admittedly, I did make a few exceptions, but all will be revealed.

Snapseed is my go-to editing app (followed by Aviary and ColorTime) so why did I have Photoshop Express lying redundant on my phone?

Adobe Photoshop Express? I don't remember the last time that I used it. I prefer Snapseed or Aviary. Gone!

Camera+? Plenty of people rave about it, but I've never got on with it. Gone!

Camera 360 Ultimate? I downloaded it when I was writing the Surreal book; it's served its purpose. Gone!

Loom? Now integrated with Dropbox making the app defunct. Gone!

Luminance? Again, lots of people love it, but I've never been drawn to it in the same way. Gone!

Marksta? An excellent app if you choose to watermark your mobile images, but I don't. I downloaded it when I was writing the Social book, but seeing as I no longer need it, it's... Gone!

Plastic Bullet? In the unusual event that I want to add filters and washes and heaven-knows-what to my photos, Pixlr-o-matic and FX PhotoStudio get the first looks-in.

Water My Photo? Not used it in almost two years. Does it still work? Gone!

And this list doesn't even skim the surface of those that have already enjoyed their five minutes of screen space and been moved on to pastures new. These include DXP Free (I prefer Juxtaposer); NoCrop, Squaready, and Squaregram (out-flanked by Instacrop and Instasize); and blasts from the past Photogram and Flex Photo Lab.

So what's left? Well, with three folders' worth, still quite a lot. I could probably condense it to two folders if I tried hard enough and made a choice between long exposure apps, plumped for either Instacrop or Instasize, and when I've finished off a few things I'm working on that require apps here and there. But I've still plenty of editing options with Snapseed, Aviary, and ColorTime, not to mention the tools that come with EyeEm, Flickr, and Instagram. There's touchReTouch for heavier duty removals, Touchnote for sending postcards, and Flipagram for flipbook-type-videos. Finally for triggering there's Triggertrap (obviously) and Gorillacam.

And there are a few apps that I've kept despite not having used them very much. I'm hoping that by making them more visible amongst my photo app arsenal, I might feel more inclined to tap them. I'm sure that I was suffering from a case of app-blindness with so many unused ones camouflaging ones that I might otherwise be useful. It's certainly been a liberating experience for my phone's memory; I'm hoping it might be an enlightening one for my mobile photography now.

Less is more, I think.

Hot and happening trends in stock imagery according to iStock by Getty

A few weeks ago we published our guide to selling stock images, with content suggestions, style advice, and labelling tips, among other hints. This week, iStock by Getty Images has released an infographic documenting the eight leading trends in business imagery that they've charted over the past year. If you're looking to sell business images, these are the kinds of subjects that buyers are after:

  1. Transparency and openness - business-type scenarios shot through windows and glass
  2. Show me "Innovation" - unusual concepts, unusually shot
  3. The New Leader - think start-up trendy rather than power-dressed exec
  4. Service-oriented workforce
  5. Dads on deck - or hands-on dads
  6. Women in power - we're growing in number
  7. Hipsters are taking over - beards, bikes, and coffee (apparently)
  8. Working from home - more of us are doing it, so it needs to be reflected

Top Trends In Business Imagery 2014_iStock by Getty Images

Get cracking, then!

What is the clarity slider? And why might you want to use it?

Your photography has been progressing and you've made the leap from shooting in JPEG to Raw. Along with this, you've plunged headlong into Lightroom and all of the editing marvels that it affords you. Plenty of the controls are familiar, after all you've been adjusting the white balance in your iPhone photos since you realised you could stop people looking corpse-blue with a simple slide to the right in Snapseed. A few of the others need a bit more thinking about, but they're essentially the same. And then there's the clarity slider. Clarity? What the blinking heck is that all about?

Defining clarity

Before we wade headlong into the ocean of clarity, we need to take a step back and have a quick re-cap of contrast. Contrast is the difference between light and dark in an image. Increase contrast and an image will seem bolder; decrease contrast and it'll have a more muted feel. Adjust the contrast and it has an effect across the entirety of the photo: highlights, shadows, and mid-tones. This is where clarity comes in.

Clarity's influence over contrast happens in the mid-tones of an image; by increasing clarity, you sharpen the edge detail and definition among these tones, leading to a punchier, sharper looking image. Conversely, decrease the clarity value and you'll soften edge detail and lose definition.

Ramping up the examples

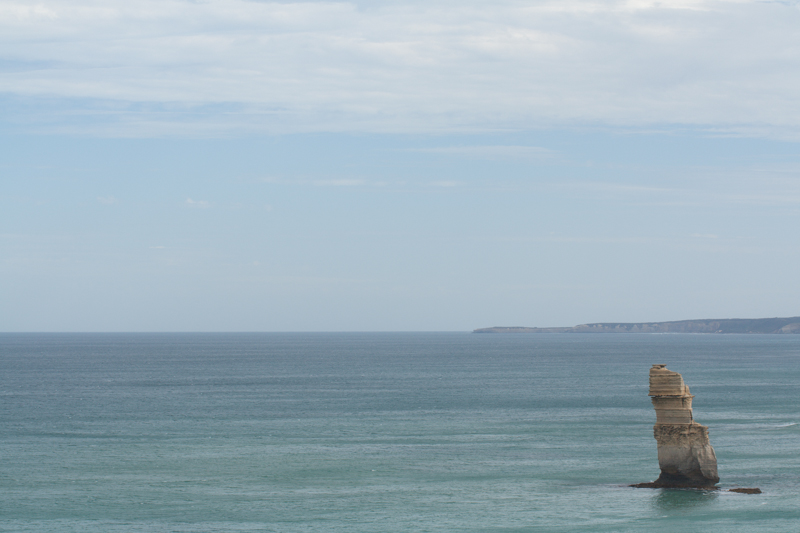
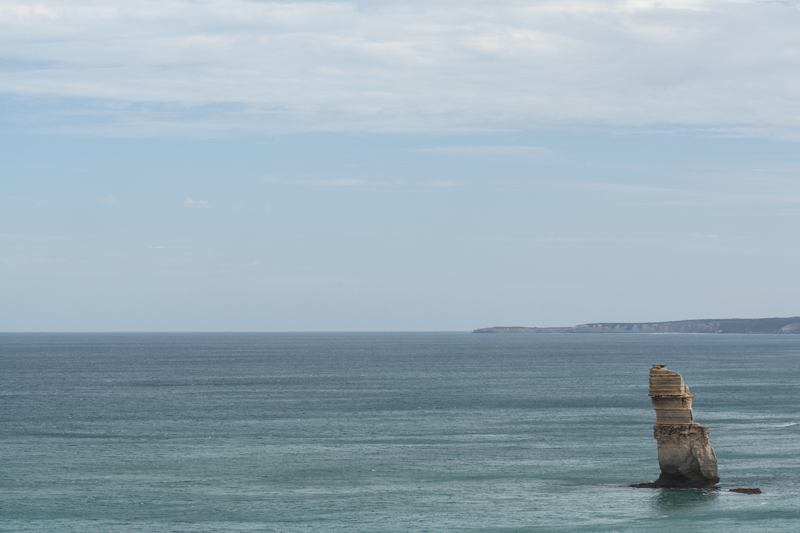
The effect that the clarity slider has on your photos is likely as clear as mud until you see it in action. I have, therefore, reproduced the same image but with different clarity adjustments, to see how it looks.

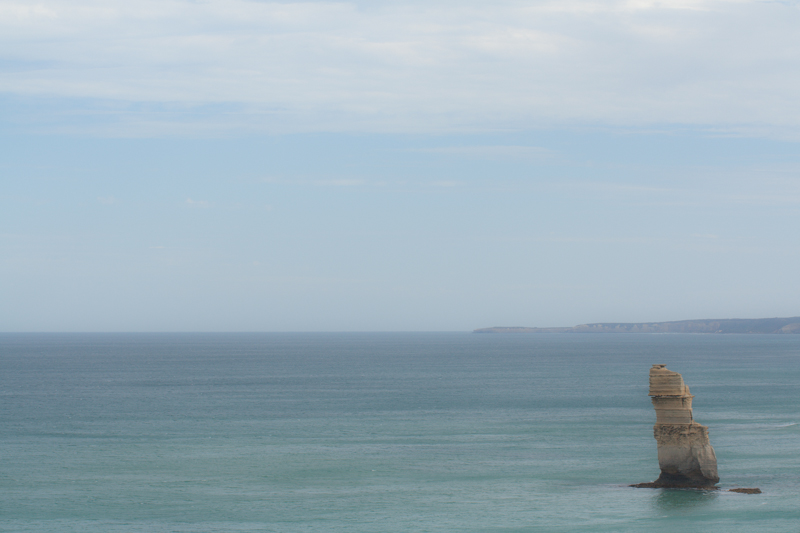
My original photo of a lonely Apostle off of the Victorian coast. It's been adjusted for crop and white balance.

Same image but with the clarity slider pushed to +50. Note how much more defined the waves are, and how the strata in the Apostle are clear?

With the clarity slider moved to -50, everything becomes much softer.

Why, then, would you want to adjust the clarity in your photos? For a start, I've exaggerated the adjustments in my examples to show you precisely the impact it can have. With more subtlety, it can add definition to landscapes, or emphasise a misty, dreamy feel, and give portraits a gentler feel.

Subtler examples

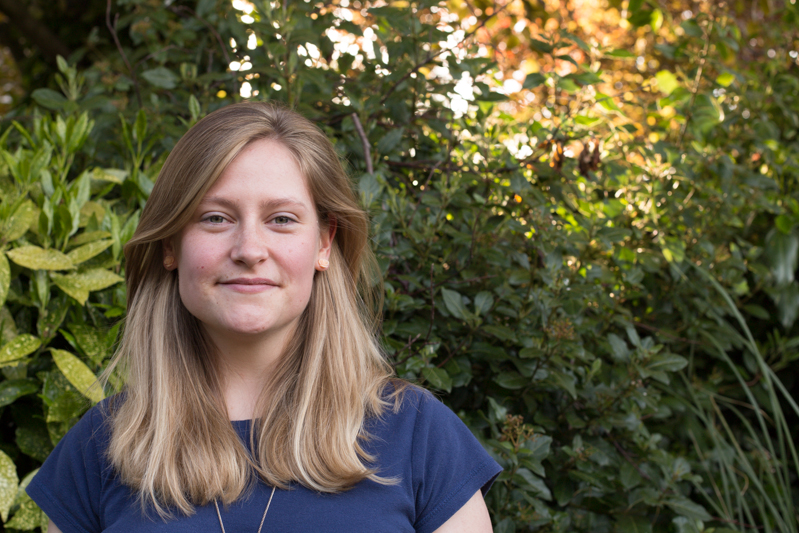
These aren't especially thrilling portraits of my cousin, Emma, but they serve the purpose of exploring the clarity slider perfectly.

Nothing terrible (or exciting, either, to be fair) about the original here

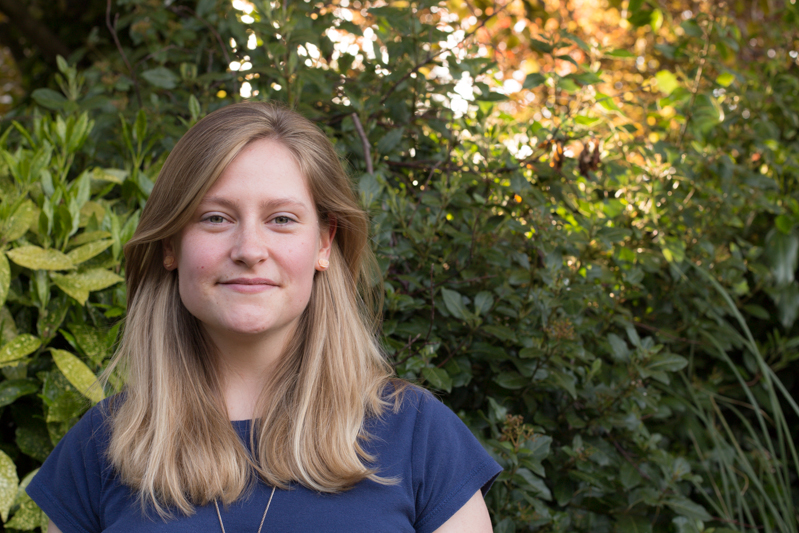
There's nothing at all wrong with the original image (it's been cropped and white balanced); but look at how Emma's skin appears softer and more even with a -15 point adjustment to clarity. The background hasn't been affected too much, but she looks better for it.

But a slight adjustment to the clarity slider (-15), softens Emma's skin a touch.

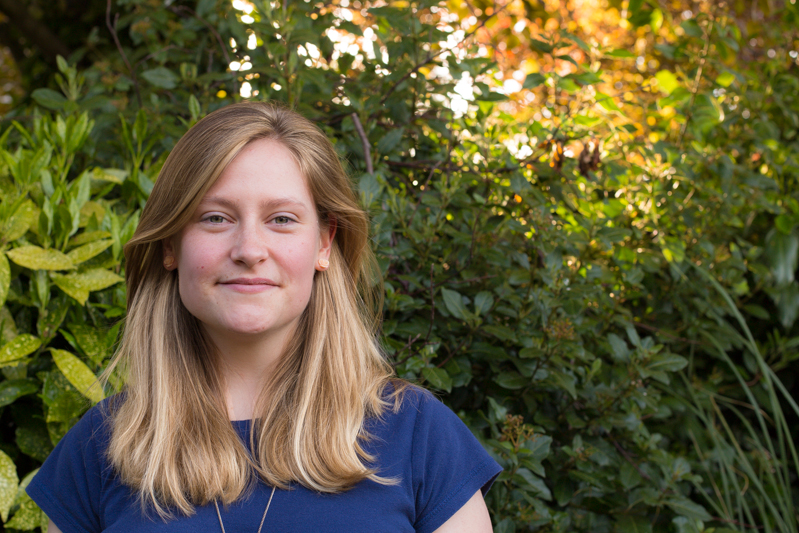
If you'd like to get even more advanced, you can use Lightroom's adjustment brush to paint softer and more even skin with a negative nudge, but bring definition to a portrait subject's hair by selecting that and giving it a positive clarity adjustment. That's what I've done here.

Here, I've softened Emma's skin with negative clarity, but brought out the definition in her hair with a positive clarity brush.

A cautionary conclusion

As with most things, subtlety is the key to clarity. Too much of it in either direction can leave your photos looking more like cartoons or watercolours than you otherwise might want. And you're not going to want to fiddle with the clarity slider on every photo, either. But at least you can have a bit more confidence about what it does and how you can make it work for you now.

What's the story?

Last week I was fortunate enough to attend a Q&A session with Mary Ellen Mark, winner of this year's Sony World Photography Awards' Outstanding Contribution to Photography. She was asked many pertinent questions and gave a great many eloquent answers, but it was the statement that 'Photography has to say something,' that struck the most resonant chord with me. It chimed right back to one of the very first things that I was taught when I started to wield a camera. I learned the basics of photography from my friend Daniel's mother, exploring the hedgerows around my school and attempting action shots of my classmates playing sport. Linda was patient, enthusiastic, and inventive. I was desperate to do well under her tutelage and one of the most piercing criticisms that she could give of my photos was 'But what's it a photo of, Daniela?' You see, every photo is meant to tell a story, and if your audience cannot discern what you're trying to say, then you've failed in your task as a photographer.

View from the top

'What's the story?' is a mantra that has adhered with me for some 27 years, and it's the starting point for any critique that I give a photo, whether it's mine or it's someone else's. Even a photo of a gorgeous flower in bloom has a story to tell, and this story is the origin of all picture-taking. Your audience needs to be able to connect with your image and they will do that through its story.

All is not what it seems

When you're faced with a compelling scene, it's pointless to wave your camera about wildly, snapping at everything you think is relevant and hoping that something will come out of it. All that you'll succeed in producing will be photos as scatter-brained as your approach. Think about: there is a story there that caught your eye and you need to convey it. So think about what that story is and concentrate on narrating it through an image.

Port cranes at sunset, Livorno

When you shoot a landscape, picking out the isolated stone house nestling in the valley will convey a sense of loneliness, or maybe peace. Catching the glint in your nephew's eye as he sneaks a biscuit out of the tin says everything about his cheeky furtiveness. It's all there for the telling.

Violet

Building further on this notion, by identifying the stories in your photos and concentrating on how you aim to tell them, your photography will improve. You will have a clearer idea of how to compose your frame and it will give you a starting point for your technical settings. You might not get it right first, or even second or third time, but you will be working in the direction of whatever it is that you're trying to say rather than fumbling in the dark. In every possible way you'll be strenghtening your photography: creatively, technically, and practically.

Sometimes, it comes together

Before you depress the shutter button, ask yourself, what's the story and how am I going to tell it? Remember: every photograph has to say something.

Before entering a competition, read the terms and conditions

This isn't a new drum that we're beating here today, but we think it's a significantly important issue to warrant another parade: competition rights grabs. Or the attempt by competition organisers to inveigle themselves of the right to use any of the images entered into their photographic competitions, for any purposes, with no compensation to the photographer. This reminder comes as I received a call for entries to a competition run in conjunction with an organisation that I respect and trust, and hoped would be above cheap tactics to help magazines or other companies amass a photo library for free. Apparently not. To quote from the terms and conditions:

By entering your photos in the competition you agree to grant REDACTED and REDACTED a non-exclusive licence to reproduce, publish and feature the photos in association with this competition, or for any other purpose, at any time, in any publication, website or other associated media outlets, without compensation. By entering you agree to grant REDACTED and REDACTED an exclusive royalty-free licence to use the full set of images taken on your photography trip [which comprises the prize] for 12 months.

To use images submitted to contests as promotional material for the competition or its future iterations is a reasonable condition of entry; but to demand they be made available for use in any publication associated with the organisers, for any purposes, across all media, and without compensation is, in my opinion, exploitative.

I have written extensively about the damage that these terms and conditions do to both photographers and the photographic industry before now, so I shan't reprise it here. But do bear in mind that if you're seeking your big break from a competition that employs these sorts of terms, you are doing yourself and fellow photographers—amateur and professional—a disservice in the long run. Furthermore, don't assume that just because the competition is being organised by or run in conjunction with a big name that it won't be out to take advantage of you.

The finale to this performance is then: always check the terms and conditions of a competition and if you consider anything to be unsavoury, please don't enter.


Seeing as I've been asked: no, I shan't be naming the competition in question. I'd rather not bring any more publicity to it. Just read the T&Cs!

7 super suggestions for selling stock

Love them or loathe them, stock agencies are a significant sector of the photography industry. How else do people who are looking to buy images for use in publications, in advertising campaigns, or on websites acquire them without commissioning a photographer? For some photographers, then, selling stock imagery can be an important source of income. It might not keep the wolf away from the door, but it could well keep the candles burning. In which case, how do you make the best of it? If you're looking to make a bit of pin-money selling your photos, what are the dos and don'ts? If you're already in the stock game, how can you do it better? I spoke to a variety of stock agencies—Alamy, Shutterstock, and EyeEm Market—who kindly shared their words of wisdom to help you make the most out of the stock market.

Content

It might come as a surprise, or it might not, but stock agencies need photos of anything and everything. That's pretty much the entire point of them, you see. Alan Capel, Head of Content at Alamy says: 'Everything can be updated, good photographers will look for a new take on old clichés.' Like me a few weeks ago, people need generic photos of the father-of-the-bride. However, there are particular types of imagery that are preferable and subjects that have growing demand. So think about producing:

  • Real-looking, natural-feeling photos; posed and staged photos aren't so in demand
  • Photos that are out-of-the-office and out-of-the-ordinary; think oil rig as opposed to desk, farm yard instead of back yard, mountain-top rather than table-top
  • Images from the emerging markets: Brazil, Russia, India, China, South Africa
  • Healthcare and medical photos
  • Anything that documents culture and diversity
  • Photos local to you - who else is there to shoot them?

'We’d love to see more adventurous shoots in more unusual locations/scenarios!' says Capel. While he knows that might be easier said than done, 'Photographers are tenacious and resourceful and they will find a way.' And if you're pursuing the emerging markets theme, that should include lifestyle and local culture as well as business and industry photos. Remember: there are consumers in those emerging markets, too!

Be on the alert for local culture and diversity

Is there anything that absolutely should be avoided? Well, if a photo's good, anything goes. But over at EyeEm, they warn people off of pets, pot plants, and predictable self-portraits.

Go for unusual takes on the usual

Spotting trends

It's probably a good idea to keep one eye on what's happening now and another on the horizon. Scott Braut, VP of Content at Shutterstock, recommends using social media to gauge trending topics and examining news headlines for common themes (for example politics, pop culture) to help you pick out favourable subjects. But at the same time, think about what might be happening in two, three, or four years' time: Olympic Games, World Cups, centenaries, and anniversaries.

Keep an eye on forthcoming events and commorations

Style

It's always best to stick to what you know best, which is your own style. But Capel says not be afraid of adding another string to your bow by including mobile images—Alamy has the stockimo app for that, and there's the new EyeEm Market, too—and Braut says that photos with Instagram-esque filters are popular.

You might not like Instagram-esque filters, but they are popular

Selection

Be ruthless when it comes to submitting photos to stock houses: if something about an image doesn't feel right, it's probably wrong. Don't include it.

And both Braut and Capel say the same thing about repetitious photos: don't do it! Make sure that each photo you submit is distinct, so that they don't detract from each other.

Accessibility

People need to be able to find your images to buy and use them. This means that they need to be identifiable through tags, labels, and key-words. Capel suggests thinking along these lines:

  1. Literal - what is actually in the shot
  2. Conceptual - what moods, emotions, concepts does the shot evoke
  3. Photographic – predominant colours, any techniques or treatments used

At EyeEm, their top search terms include the abstract, such as 'happiness' and 'hope' as well as more descriptive, for example 'family' and 'fitness'. Spread your net far and wide, but make sure your terms are accurate.

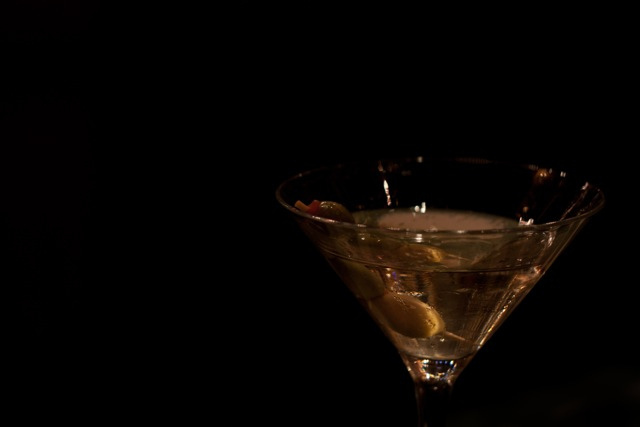
Martini, cocktail, drink, alcohol, sophisticated, James Bond, shaken-not-stirred, party, olive, gin, Vermouth, low-key, dark

And don't be afraid to re-visit and re-label photos after you've submitted them. You never know what you might think of with fresh eyes.

Practicalities

Photos that have people in them will require a model release if they're to be used commercially. Logos have to be rights cleared and securing that can be a proper pain. It's much better to do away with labels on bottles, use plain clothing, and hide obvious branding.

As much as I love this photo, the chances of me getting a model release for it are slim-to-none

Finally

The word that came up again, and again, and again was 'real'. Buyers want imagery that's natural and believable, not contrived. There's a whole world out there waiting to be documented, so go explore!

The Pre-Photography Checklist


So, you're ready to do a photo shoot? No, seriously, are you really ready for your shoot?

A while ago, I was challenged with creating a pre-shoot checklist for photographers - I figured it'd be rude not to, so I gave it a whirl.

Before you press the shutter button...

  • Check your settings – Is your camera set to the mode you planned to use? Is the ISO set to a useful setting?
  • Fill the frame – Does your subject fill the frame? If not, get in closer, either by walking closer, or by zooming in.
  • Pre-focus – When you press your shutter button half-way, your camera will focus and measure the light. Use that functionality every time
  • Check your focus! – If you’re taking a photo of something with eyes, make sure you have the eyes in focus. If not – well, try to get the important bits in focus.
  • Compose – Keep the shutter button pressed half-way, and re-compose your image so everything you want in your photo shows up the way you want it.
  • Check your edges – Before you press the shutter all the way down, run your eyes along the edges of the frame. Is there anything along the edges that shouldn’t be there? If so – re-compose your shot and try again!
  • Check the background – New photographers are so focused on what’s happening in the foreground, that they fail to notice the huge dog taking a poo in the background. You laugh, but I’ve seen it happen
  • Deep breath – Hold your breath whilst you very slowly press the shutter button all the way down. This helps eliminate camera shake when you are taking the photo.

Best of all, if you want a handy, keep-in-your-pocket version of this checklist, it's printed on the back of my super-handy Photocritic Grey Cards. Spiffing. 


If you think that photos all in one colour are boring, think again!

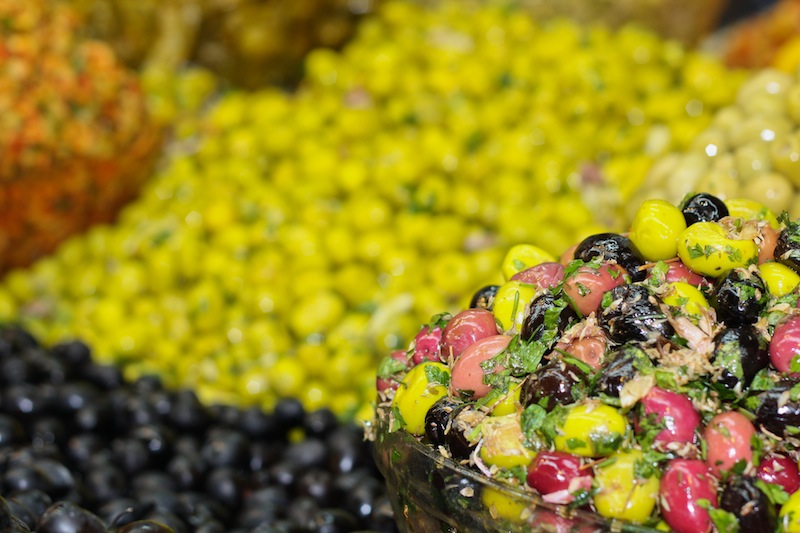
No, we don't mean black and white here. We mean all one colour. All red, all green, all yellow. All anything. Colour is one of the most powerful tools in your compositional arsenal and it can be easy to forget how striking images composed of all one colour can be; we get caught up in the idea of complementary colours and of our images having to contain enough to satisfy and intrigue their viewers. And monochromatic images can do that: the key is to have as many different varieties of one colour within an image so that it becomes an exercise in naming the different shades, tones, and tints of one hue. Colours are able to elicit strong emotions in people. It might sound terribly airy-fairy, but there are introverted—blues, greens, and some purples—colours that give a calm, even subdued feeling and there are extroverted colours, such as reds, oranges, and some yellows, that are positive and energetic. You can prompt particular responses from your audience by using particular colours in your photos.

Red

Red is regarded as the 'strongest' colour; certainly, if you've a multi-colour image that contains just a speck of red, people's eyes will automatically be drawn to that red dot. But if you choose a monochromatic red image, be prepared for something that feels passionate, energetic, and vital. A strong colour will incite a strong response.

Orange

It shouldn't come as any great surprise that I have a particular fondness for orange: I'm Dutch. Daniela rather likes it, too, if how often she wears it is anything to go by. Hardly surprising, then, that we chose it as the Photocritic theme colour. There's something very inviting and reliable about it. Maybe that's because it's the colour of sunrise and sunset. You know it'll happen every day, and that you have the the chance the start over and then to put everything beind you.

Yellow

Yellow is cheerful, optimistic, uplifting, vigorous: anything positive, really. And it's easy to grasp the association with the sun, with good weather, with the opposite of darkness.

Green

It's spring here in the UK, and we're being presented with a riot of green. It is abundant, youthful, verdant, and symbolic of growth and renewal.

Blue

Ever since I can remember, my parents have painted their bedroom blue. They do it precisely because of blue's qualities: it's calming, contemplative, and restful.

Violet

You don't find that many purply tones in nature. Of course there are some, especially amongst flora, but it's rarity means that violet tends to have a mysterious and superstitious quality to it. The expense of dying fabric purple in Roman times (the dye came from murex shells) meant that it was reserved for only the highest echelons of power, which contributes to the regal and superior feeling purple has, too.

So, don't be afraid of the monochrome: embrace and experiment with it!

Dust Art: intriguing images of dust that won't make you sneeze

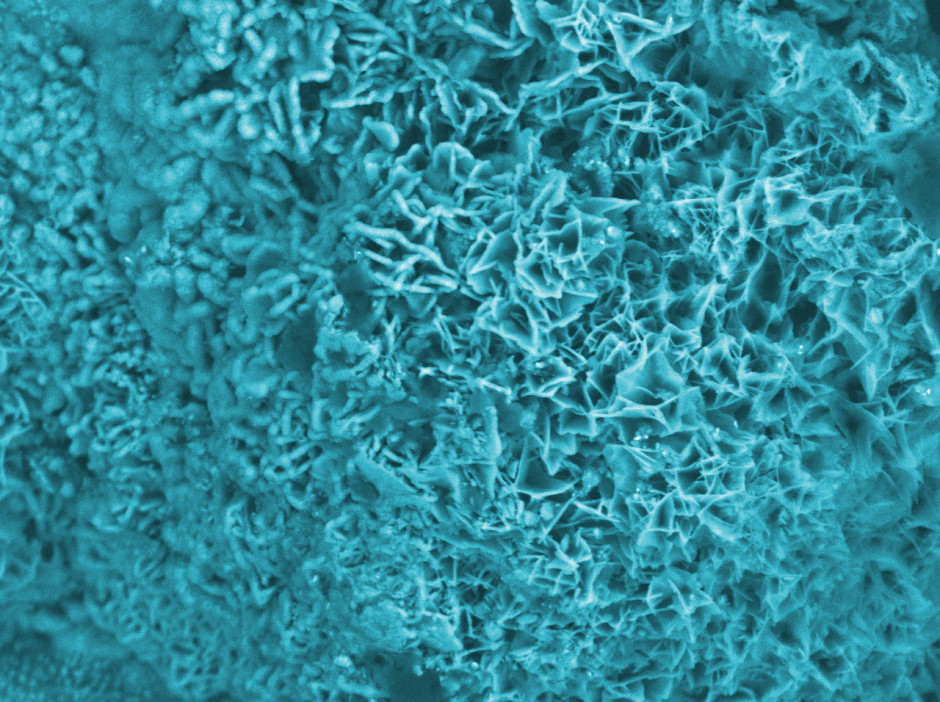
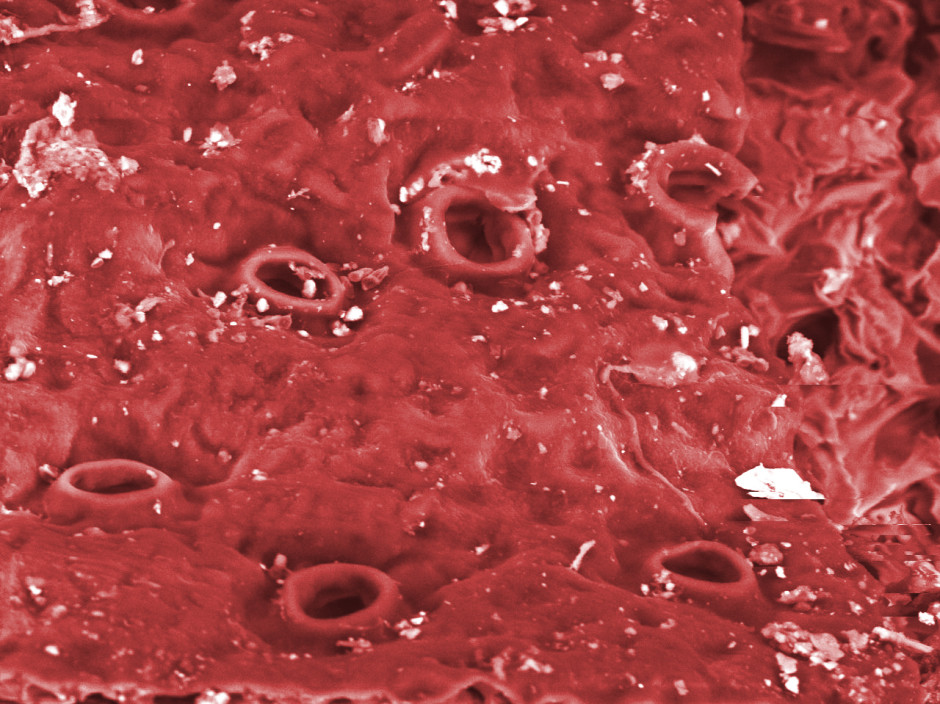
I can't say that I've ever felt compelled to examine all that closely the dust particles that my vacuum cleaner accumulates; I'm rather more interested in getting it out of the house. You too? I'm not surprised. However, a project by electrical goods manufacturer Electrolux not only investigated what the dust churned up in different houses across the world said about their respective environments, it produced enlarged images of different types of dust particles and turned them into Tumblr and Pinterest posts, too. Intrigued to know what plant residue with iron rich clay found in Stockholm looks like? Or how about calcium phosphate from Singapore? What of titanium white paint in Seoul? You can take a look at them on the Dust Art Tumblr or Pinterest run by Electrolux.

Iron rust dust from Taipei

As well as the unexpectedly pretty pictures, Electrolux's research turned up the perhaps-not-so-unexpected findings that our dust says a lot about our individual lifestyles—do lots of laundry and you'll have a higher than average zeolite particle numbers, play tennis and there might be grass or clay amongst your dust—and about where we live. On average 58% of the dust particles in a home come from outside of it. (Want to help reduce that? Take off your shoes when you come inside and open the windows when it rains.)

Plant residue with sand in Los Angeles

What city-specific findings did the researchers turn up? Well, if you live in Taipei you're more likely to have iron-rich gypsum particles amongst your dust because it's used as a coagulant to produce Chinese-style tofu. Old buildings in Paris had high lead particle counts, because lead used to be added to paint to help it dry and make it more durable. Brazil is the world's top producer of aluminium, meaning that Sao Paulo's prevalance for bauxite dust shouldn't come as much of a surprise. Los Angeles homes had traces of marine organism skeletons in their dust. And Singapore's damp climate means that its houses have little by way of external mineral content because it's harder for the wind to distribute it.

Fluff dust with old paint in Paris

I'm never going to look at a vacuum cleaner in the same way again.

The influence of colour in our photos

Colour: it's one of your most valuable compositional tools. But it's also something that we can take for granted, rather than actually considering the impact of colour in our photos. Different colours and their tones can influence how people will look at your images, so depending on what you want to achieve and how you want your viewers to respond, it's worth thinking about the colour palettes that you use in your photos. Colour makes everything look delicious

So what can you do to enhance colours, to make them even more involved in the impact that your photos can have?

The colour wheel

Lets start with the colour wheel, with its primary, secondary, and tertiary colours. How they interact forms the basis of colour theory, and great looking colour photos.

Additive and subtractive primary colours

When we were at primary school, we were taught that the three primary colours were blue, red, and yellow. Or technically, cyan, magenta, and yellow. You can mix blue and yellow to achieve green; red with blue makes purple; yellow and red creates orange; and mix them all together and you get black. They're known as the subtractive primaries and they're used in print.

Red-Yellow-Blue colour star (image courtesy of Wikipedia)

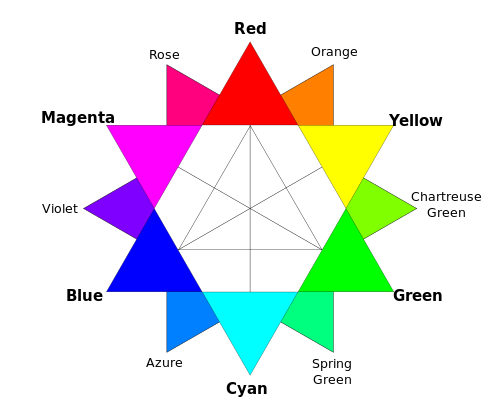
But there are three other primary colours, the additive primaries, which mix to form white. These are the 'digital' colours that are used in screens and sensors to create colours. They're blue, red, and green, and they form the 'RGB' colour wheel. There's a shock!

The 'RGB' - or Red-Green-Blue additive primary colour wheel

It doesn't matter which version of the colour wheel, with it primary colours you prefer, understanding it, and how the colours in it interact, will help you to produce gorgeous photos.

Balancing colours

Combining different colours in your images can create a sense of balance or tension in them. The sense of balance that you get in a seaside picture usually comes from the contrast between the sea and sky blues and the golden-orangey sand.

Ever wondered why a pink flower on a green background looks so stunning? It's because of the inter-play of the colours. Complementary colours, or those that sit opposite each other on a colour wheel, create well-balanced images.

If you're looking for a more harmonious image, focus on combining analogous colours, or those that sit adjacent to each other on the colour wheel. Done right, it isn't boring, but inviting.

Purples, oranges, and reds work together

Combining colours

Using lots of colours simultaneouly can be overwhelming: the eye doesn't know where to focus and the image descends into a confused mess. However, it doesn't mean to say that you can't take a photo with a riot of explosive colour.

Don't be afraid of a multi-coloured photo. It can work!

If you get it right, and people know what they're looking at, they can be vibrant successes, rather than confused failures.

Enhancing colours

Don't forget that black and white can have an impact on colour properties, too. If you place a colour against a white background, that colour will lose some of its vibrancy and appear somehow muted and dull.

Things don't appear as bright on white

It's hardly surprising that the opposite effect happens with black backgrounds: colours become brighter and emboldened. This is useful to remember for portraiture, but vital if you ever dip your toes into product photography.

Muting and saturating colours

By muting your colours, or 'toning them down' you can lend a calm, subdued, or even a sombre feel to your photos. If you saturate the colours in your photos, and intensify them, you can make them feel more vibrant and alive.

You might want to be careful when it comes to saturation, though. Too much of it and you can leave your photos feeling unrealistic, almost cartoon-like. It might be the effect you're looking for every now and again, but probably not all the time. People with orange skin don't tend to look so great!

Beware of red

Finally, beware of red. Our eyes are drawn to it and even a tiny fleck of red in a scene can be a monumental distraction.

The positive impact of negative space

One of the fundamental rules of photography that we're all taught early in our learning curves is to 'fill the frame'. In fact, the first lesson in the Photocritic Photography School is all about getting closer to the subject and making sure that there's nothing extraneous in the frame. You don't want it to be a tiny, practically unidentifiable blob somewhere in the image that your eye has the hunt to locate. As a consequence, the idea of 'negative space'—or the presence of nothingness in an image—probably seems counter-intuitive. Instead of seeing them as polar opposites, it might help to think of 'getting closer' and 'negative space' as two sides of the same coin that complement each other. Sometimes, a little bit of nothing is just what your subject needs.

Bringing balance

If you have a complex subject that’s detailed and busy, contrasting it against an area of nothing will bring some balance to the composition. It helps the eye to find a point of focus and to stop the image from feeling chaotic.

Even if you’ve done all the ‘right’ things compositionally—you’ve selected the appropriate frame orientation, you’ve used the rule of thirds or the Golden Ratio, the image is balanced, there are leading lines directing the eye to the subject—sometimes an image won’t look as good as it could. By putting some negative space around the subject you give everything ‘room to breathe’ and it somehow becomes better balanced.

A sense of space

If you fill your frame with a recurring pattern or repeating subject, like a mosaic or a pile of fruit, and not give it any boundaries, you can create a sense of the infinite in your photos. Surrounding a solitary subject with negative space creates a similar effect.

For example, you could photograph a sailboat on a lake and include the shoreline, which limits the feeling of space. By composing your image so that you capture just the sailboat on a negative space of water—perhaps by altering you vantage point slightly, maybe by getting in a little closer, or even shooting a touch wider—it is suddenly sailing on an infinite sea.

Creating atmosphere

Negative space can contribute to the atmosphere that you want to create in your photographs. Dark negative space can imply brooding or foreboding. Negative space in particular colours can lend a certain feeling to an image; blue is calming, for example, whilst yellow is uplifting. Or there's the opposite of dark and foreboding with positive and airy negative space created by light colours.

Accentuating the subject

When there is nothing else to look at except the subject in an image, that’s exactly where the eye will go. Placing the subject in a sea of negative space will accentuate it. Obviously this is ideal for product photography, when you want the £50,000 diamond ring to be the centre of attention, but you can also use it to make dramatic or slightly surreal images that aren’t intended to sell something!

Achieving this sort of effect isn’t difficult. The first option is to photograph your subject on a plain background. If you don’t have a professional backdrop, a scarf or a sheet will work, too. However, you can also use lighting to surround your subject in negative space. You can either light your background so strongly that you ‘blow it out’, or over-expose it to the extent that the sensor cannot detect anything in that area; or you can light the subject significantly more strongly than the ambient light, so that it will look as if it is emerging from the darkness. Both techniques are highly effective and you can have a lot of fun experimenting with them.

Enhancing patterns and shapes

Our eyes and brains are constantly roving for patterns and shapes: think about gazing up at a bright blue sky, and how we look out for cloud formations that resemble faces, animals, and countries. The interaction of positive and negative space in a photograph, especially a minimalist black and white composition, creates similar opportunities to make and look for shapes. You just have to look out for the interplay between objects or between light and shadow.

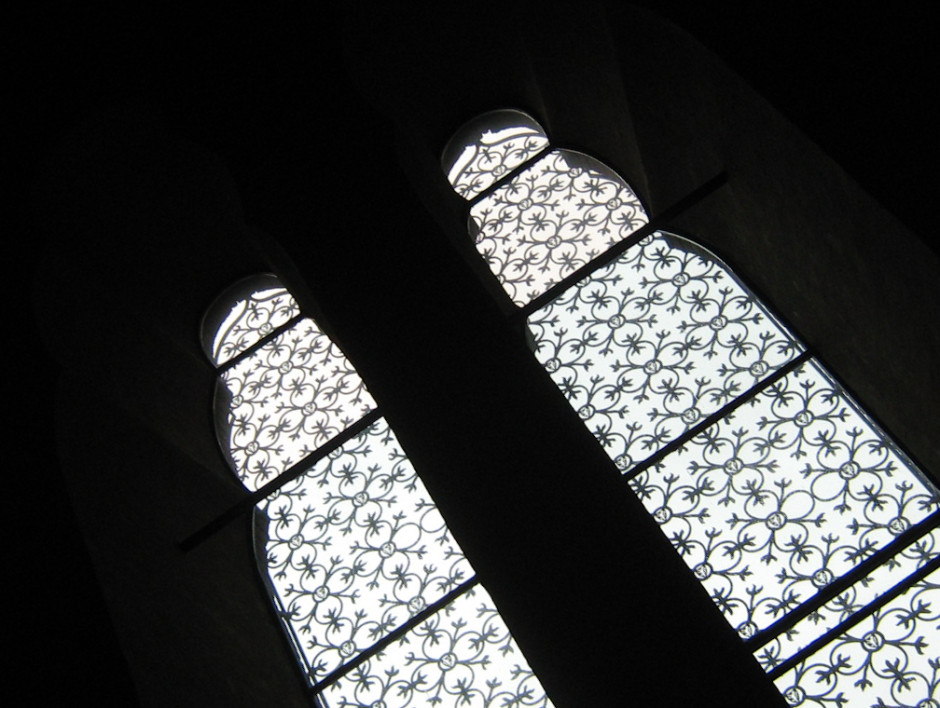
There are two sets of negative space working to create an image here. The black outlines the windows; the light coming through the window highlights the detailing of the latticework.

So that's something for you to try this weekend: looking for the positives in negative space.

Sean Batten, the winner of the UK National Award - 2014 Sony World Photography Awards, chats with Photocritic

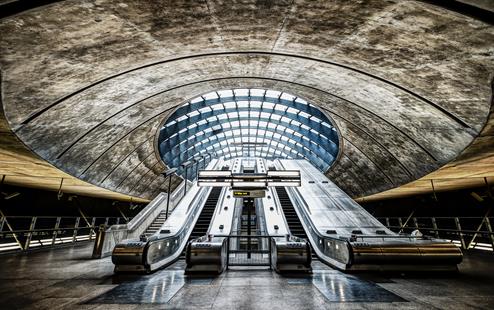
As part of the 2014 Sony World Photography Awards, the judges went on the hunt for the best photographers representing a selection of different countries. In the UK it was 41 year old Sean Batten, a C++ and C# software developer who's from Bristol but now lives in Surrey, who came out on top. He particularly likes architectural and street photography, so his winning image of Canary Warf tube station isn't too much of a surprise! Sean took his winning image at Canary Wharf tube station at 12:54 on a Wednesday. He says that it was planned to the extent that he took his camera to work that day knowing that he wanted some photos of Canary Wharf and the area, but that particular view came about by chance: 'I just happened to go into the smaller entrance on Upper Bank Street and was impressed by the smaller space (compared to the rest of the station) and the impressive, and imposing, roof.'

The Calm Before the Storm by Sean Batten (Winner, UK National Award 2014 Sony World Photography Awards)

Taking photos on the Underground isn't anything new for Sean, so he knew what to expect in terms of being able to get his shot: 'The staff don’t mind what you do as long as you’re not obstructing anybody and you don’t use a tripod.' Not being able to use a tripod meant that he shot wide open at ƒ/2.8 with his 14­-24mm lens on his Nikon D800. The light coming in from the glass roof together with the shadows meant he needed three bracketed shots to cover the dynamic range.

He took a series of images to help secure against camera-shake, and although he knew he had a good image on his hands when he started to process the sets, it was down to social media that he entered it into the Sony World Photography Awards. 'I uploaded it to Flickr and got a lot of positive feedback, so it seemed like an obvious choice to enter into the Sony WPO awards.'

Now that Sean has a new Sony A7 to play with, I asked him if there's anything in particular that he's looking forward to photographing. Unsurprisingly, he's looking forward to taking it out and around London for some street photography, being lighter and more discreet than his Nikon D800. For someone who enjoys street photography in the capital, he hasn't had too many bad experiences with his camera.

Sean says that it can be difficult trying to take photos outside the Shell Centre on the Southbank, but that his experiences with the police have been positive. 'Every 5 November I go along to the Operation Vendetta march from Trafalgar Square to Parliament Square and there’s always a load of police to make sure the event goes off without any trouble. They never ask you to stop taking photos, and will even stop and let you take their picture, sometimes alongside a protestor!'

As for his dream shoot, that's an easy answer: 'Antarctica! I’ve always wanted to go, and these days it's become a more of a possibility, even though it’s still expensive. If I win the lottery then that’s where I’ll be going with my camera.' Although, if he doesn't win the lottery, he'll aim for San Francisco or Seattle.

Many congratulations to Sean, and our thanks for taking the time to talk with us. You can see his winning image 'in bigness' (as my father would have it) at the Sony World Photography Awards exhibition at Somerset House, London, from 1 to 18 May 2014. Sean is particularly looking forward to seeing winner of the Smile category, by Alpay Erdem, and the winner of the Korean National Award by Dowon Choi. Otherwise, you can see more of Sean's work on his Flickr stream.

Know the rules so that you can break them properly

Rules. They're pretty important. Can you imagine trying to get anywhere without some rules for the road? No one would know when to stop, when to go, or even where to go. It'd be chaos, and not my idea of fun. They provide us with a framework, a means of understanding how things work, which enables us to get from A to B more safely. Then there are photography's rules. They aren't quite so critical to everyone's navigational competence and safety—the rule of thirds will hardly prevent me from getting run over—but they are there to make pictures look better.

Breaking them properly

If having rules and laws and dos and do-nots seems terribly restrictive to a creative pursuit (or how fast you want to ride your motorbike), remember that if you know and understand them properly and put them into practice, it gives you one up on anyone who doesn't. In fact, it gives you two up on people who follow them blindly. When you know them properly, you know when you can break them successfully, too.

Make sure your horizons are level...

The power in breaking a rule comes from understanding why it's a rule in the first place. When you know how and why something works, you also understand its limitations and restrictions. This means that you know when you need to reverse it, to stand it on its head, or to smash it altogether in order to get the effect that you want.

...except when they're definitely not.

This works better with an example.

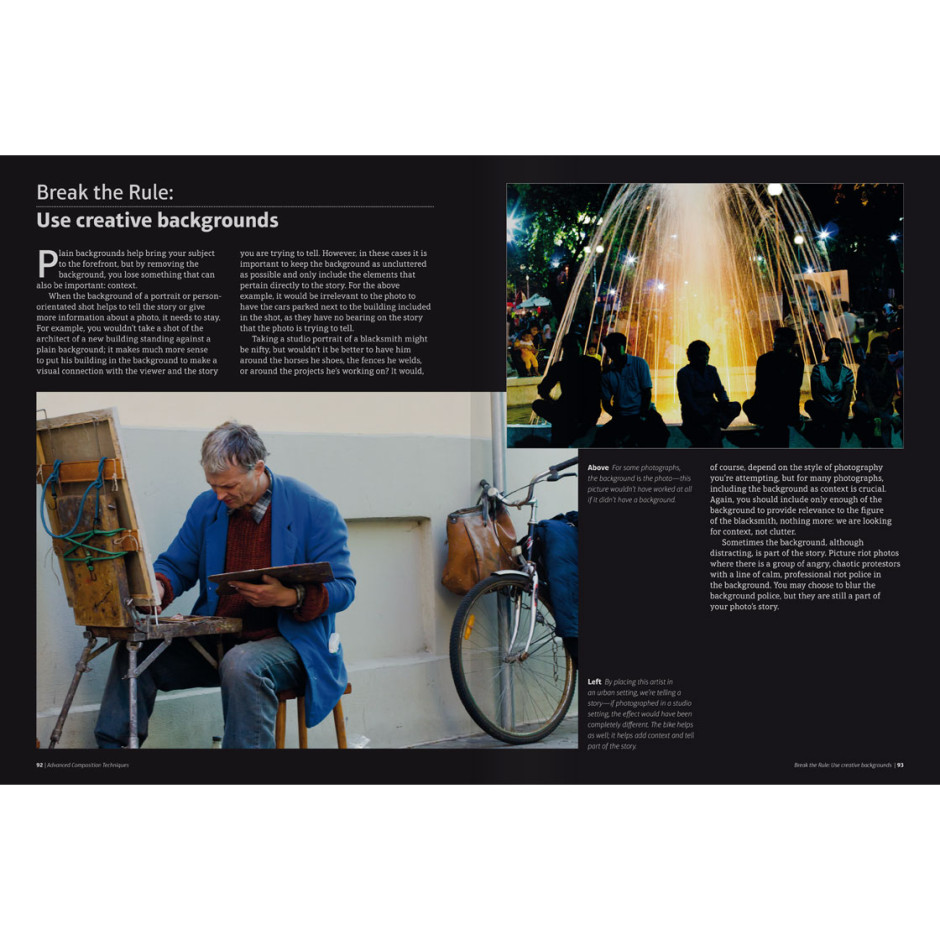
Plain versus creative backgrounds

If you want to show off your subject optimally, you're best to use a plain background. That's a fairly obvious photographic rule. A busy background will compete for attention with your subject and your eye will struggle to focus where it should be focusing. The type of plain background that you use has its own set of rules that goes with it: black makes colours bolder, white makes them duller, complementary colours are striking, and using the same colour background as your subject can look stunning, too. But you know that the rule is a plain background will serve your subject best.

Nothing else to distract from gorgeous Sheara

Except...

When you need to provide some context for your subject. Photographing an academic against a plain background might make for a lovely portrait, but it doesn't really convey who this person is or what she does. Photographing her in her study, surrounded by her books, would be much more meaningful. What's important here is that the background isn't cluttered or confusing. You need the eye to fall on the professor, but the books to relay who she is.

This background helps to show the context in which the photo was taken, however busy it is

Of course, if you're photographing something like a riot or a protest, the chaos and the confusion needs to come over in the picture. You'll need a point of focus for the eye to fall upon, but everything swirling around it will add to the story.

So you want to be a rebel with a cause?

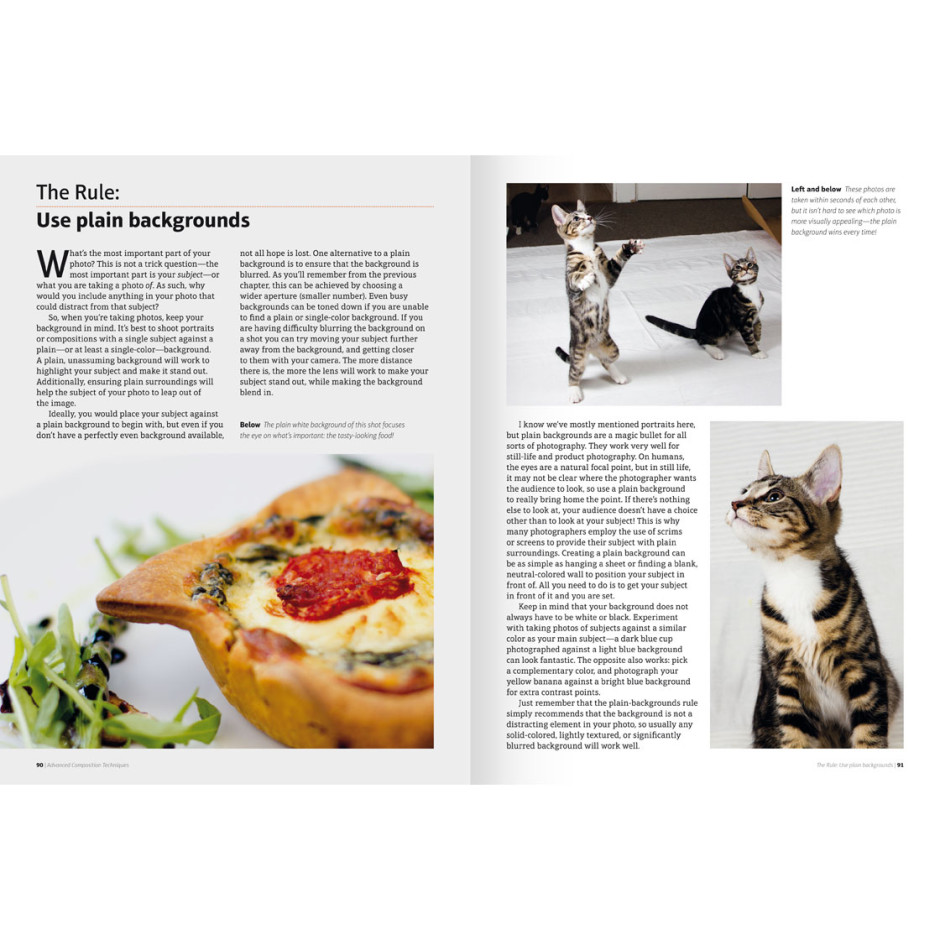
Photography is full of rules. Which means that understanding them properly presents you with hundreds, thousands of opportunities to break them to creative effect. Rather helpfully, Haje combined lots rules and examples of when and how to break them into one rather awesome book: The Rules of Photography and When to Break Them.

Always use a plain background to bring focus to your subject

Except when you need to bring context to your story

Even better, Rules is currently only £4.99 if you download it from the swish looking Ilex Instant site. That's half-price! This means you can read all the rules and learn how to break them. Go on, be a rebel!

Unpicking Snapseed's Ambiance slider

If you use Snapseed to edit your smartphone photos, you might have noticed the 'Ambiance' slider under the 'Tune Image' settings. Ambiance? Isn't that the mood or feeling you get at a party, not a photographic term? Yes, exactly, and that's why I avoided it for quite a while. I just couldn't figure out how to apply it effectively to my photos. And Google, which owns Snapseed, was hardly helpful. The Google help page ambiance explanation reads:

The Ambiance control is a special type of contrast that controls the balance of light in a photo. It can be used to balance backlit photos or to accentuate contrasts throughout your photo. Swipe right for photos where the subject is darker than the background. Swipe left to increase the contrast of dark objects and create a slight glow around darker objects. This is especially helpful in photos that are slightly flat.

I wasn't aware that there was a 'special type of contrast' available to photographers, just the plain old difference between light and dark, so that was surprising. And it's all very well telling us to 'swipe right for photos where the subject is darker than the background,' but what effect will it have?

As with just about everything associated with photography, the best way to understand it is to use it. So that's how I've come to write this and present you with some compare-and-contrast examples where I have swept the slider both left and right on a series of photos and analysed its impact.

In order to create examples that are clear enough for illustrative purposes, all of the ambiance settings, whether positive or negative, have been exaggerated. Subtlety and demonstration aren't natural bedfellows; that's for the real thing.

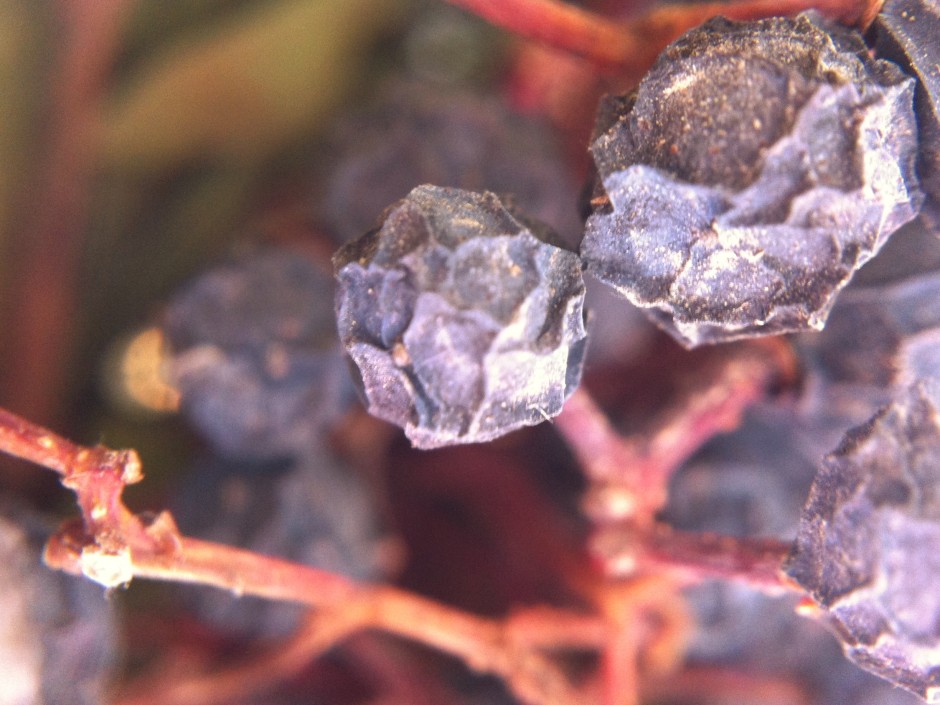
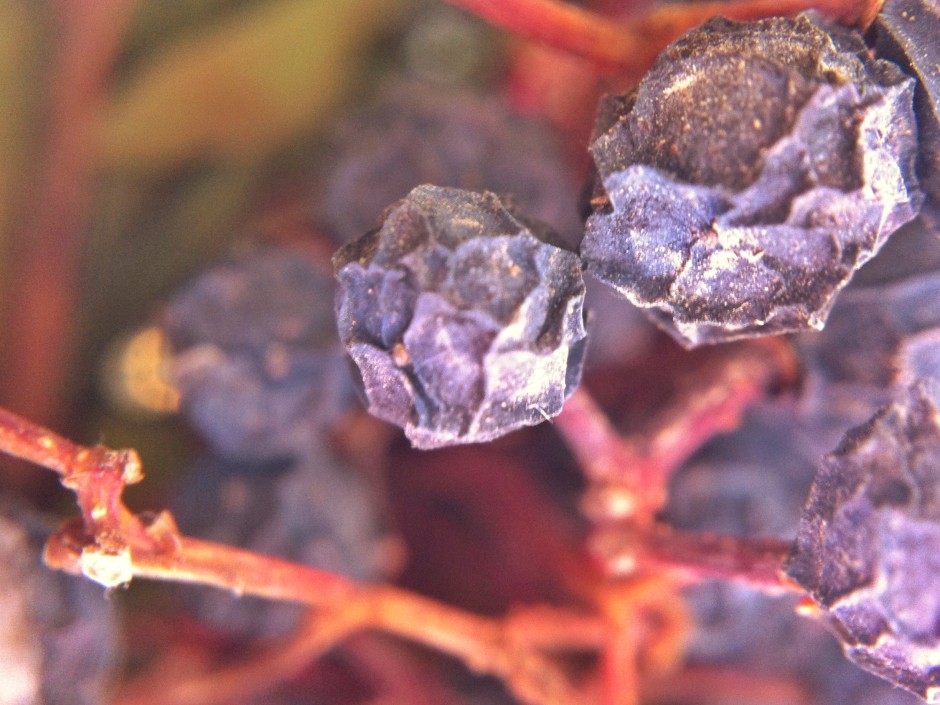
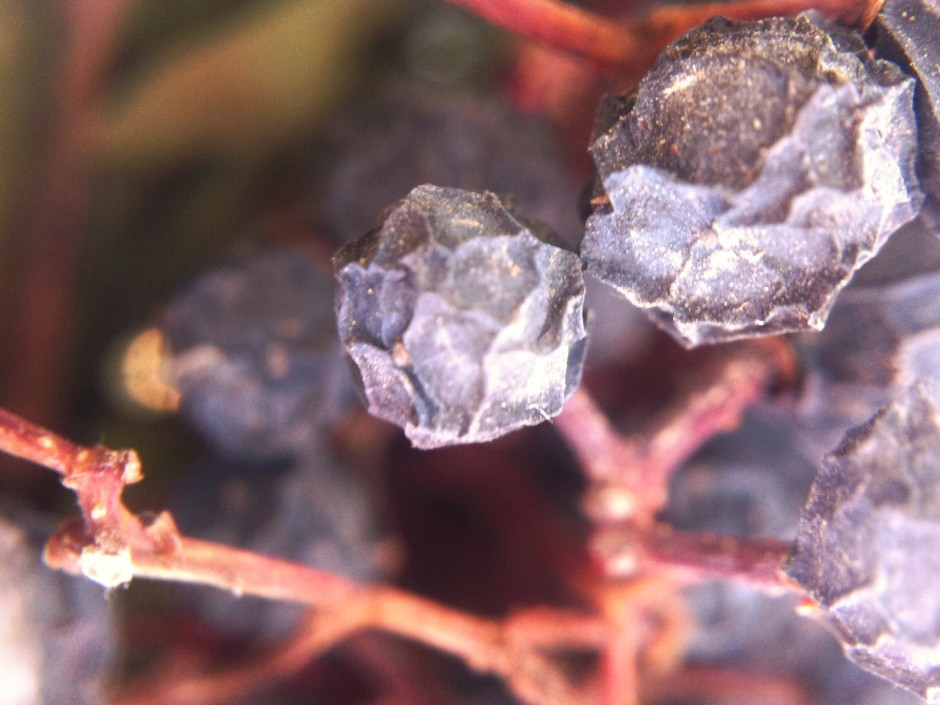
Dried berries

Let's start with this image of some dried berries. I've adjusted the white balance to correct for a light temperature that was out by several thousand Kelvin and cropped it marginally, but that's all. It's a good base.

Adjusted for white balance and marginally cropped

By increasing the ambiance setting by 60 points, you can see that the image has taken on a more reddish tone. The background has also been lightened, but the highlights—say those on the bottom right of the centre berry—haven't become overwhelming, as you might otherwise expect from an increase in contrast. The definition of the berries has improved, but not at expense of the highlights.

Ambiance increased by 60 points

When I swiped the slider to the left and dropped the ambiance by 60 points, you can see that the background became darker, the red tone has diminished, and the berries have become softer looking and less defined. A negative ambiance setting has given the photo a softer, more muted look.

Ambiance set to -60

Eva

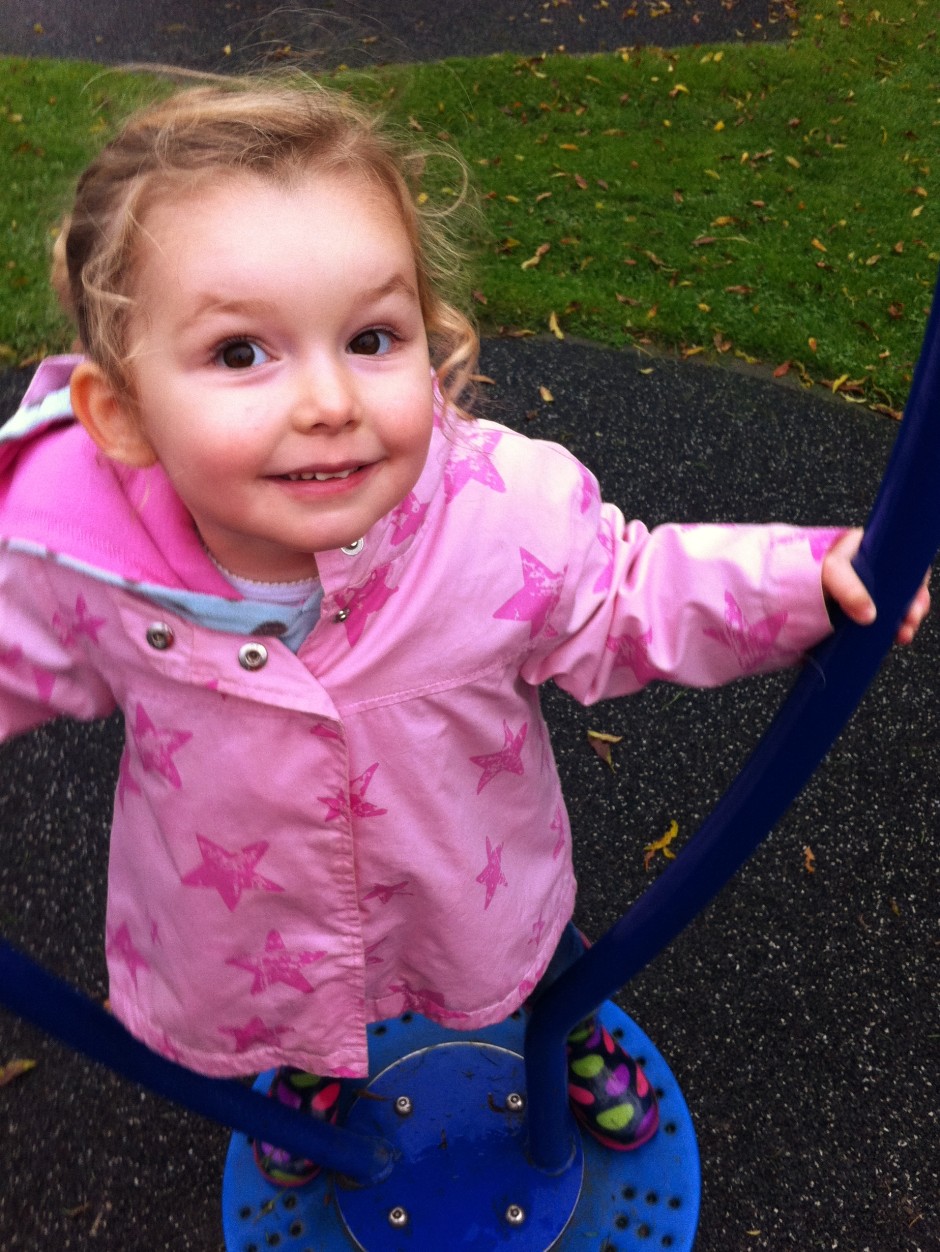
This is my niece, Eva. She's three. She's being spun (by me) on an upright-spinny-device in the park. I've adjusted the original image to correct the white balance, but that's it.

Adjusted for white balance, but nothing else

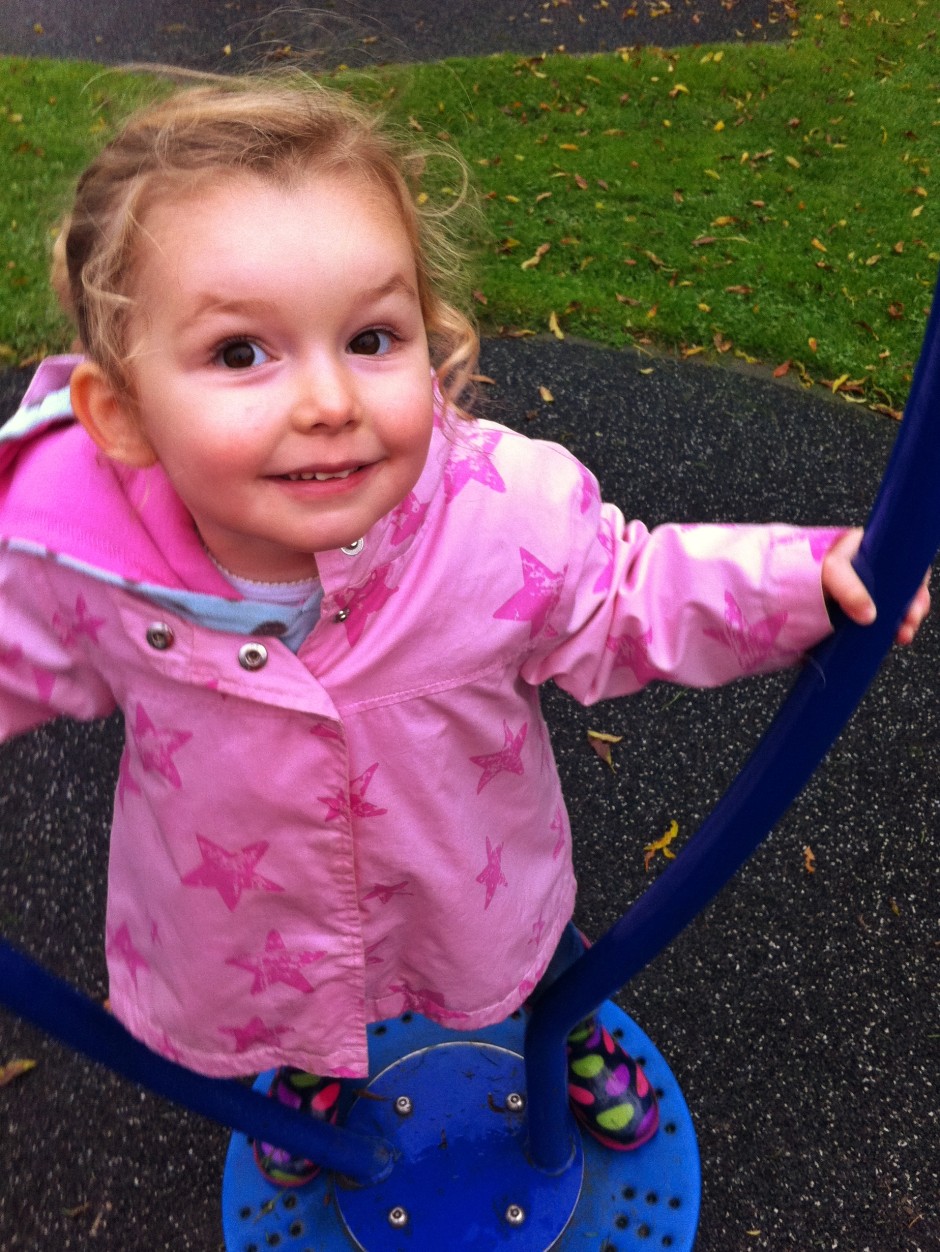
When I increased the ambiance, pushing it to +60 made Eva look as if she's been on a sunbed every day of her life since birth. It was awful. So I went for +30 instead. She still looks comically rosy-cheeked, but not horrifically so. Her coat is an unattractively bright shade of pink, her wellies are deeply saturated, but the grass looks good.

With an ambiance increased to +30, Eva doesn't look herself.

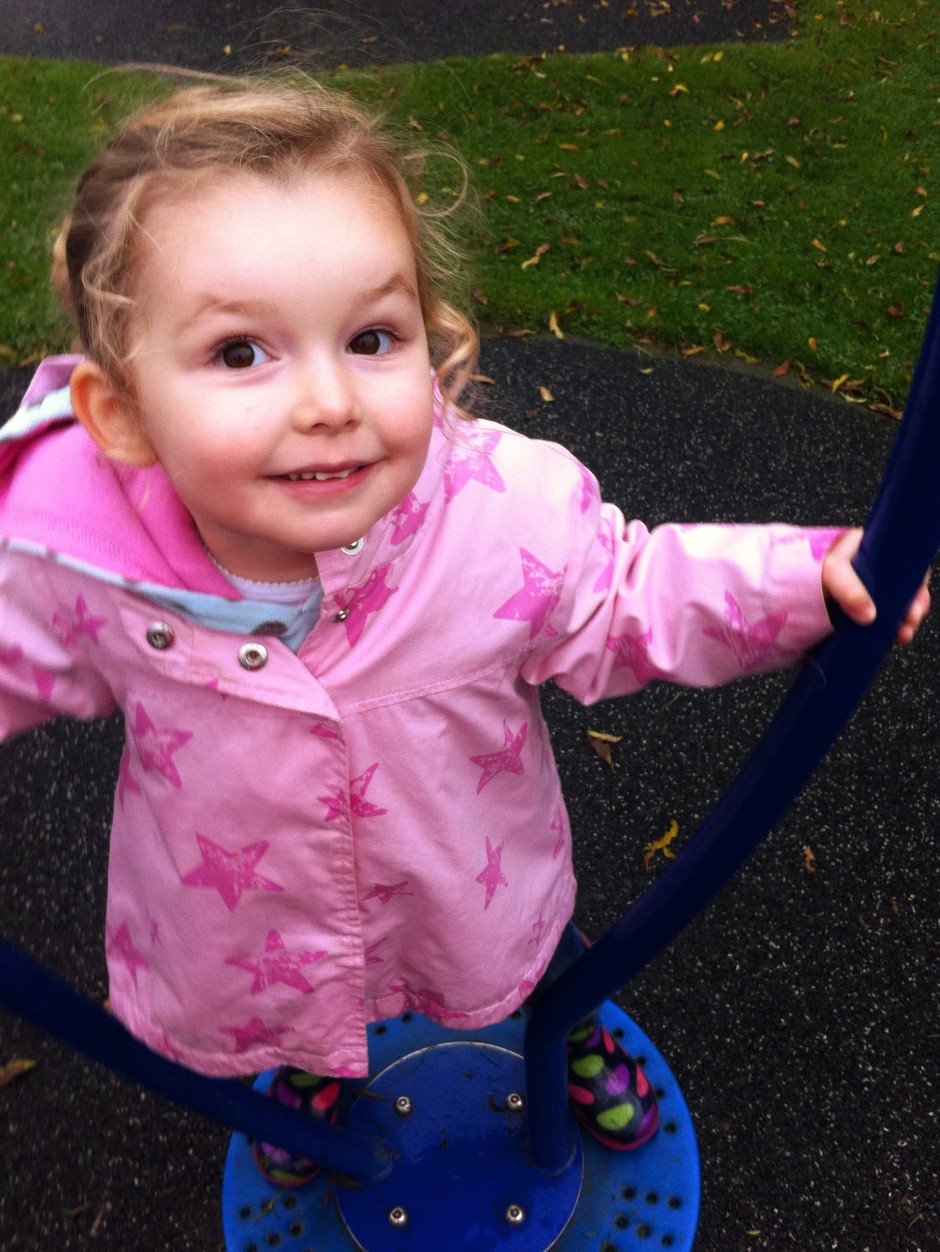
Decreasing the ambiance to -30 had a rather pleasing effect, though. Her skin became more milky and the darker background helped her to gain even prominance in the image. I reckon that decreasing it even further could make for an even better look.

Decreasing the ambiance, in this instance, makes for a better image

Me

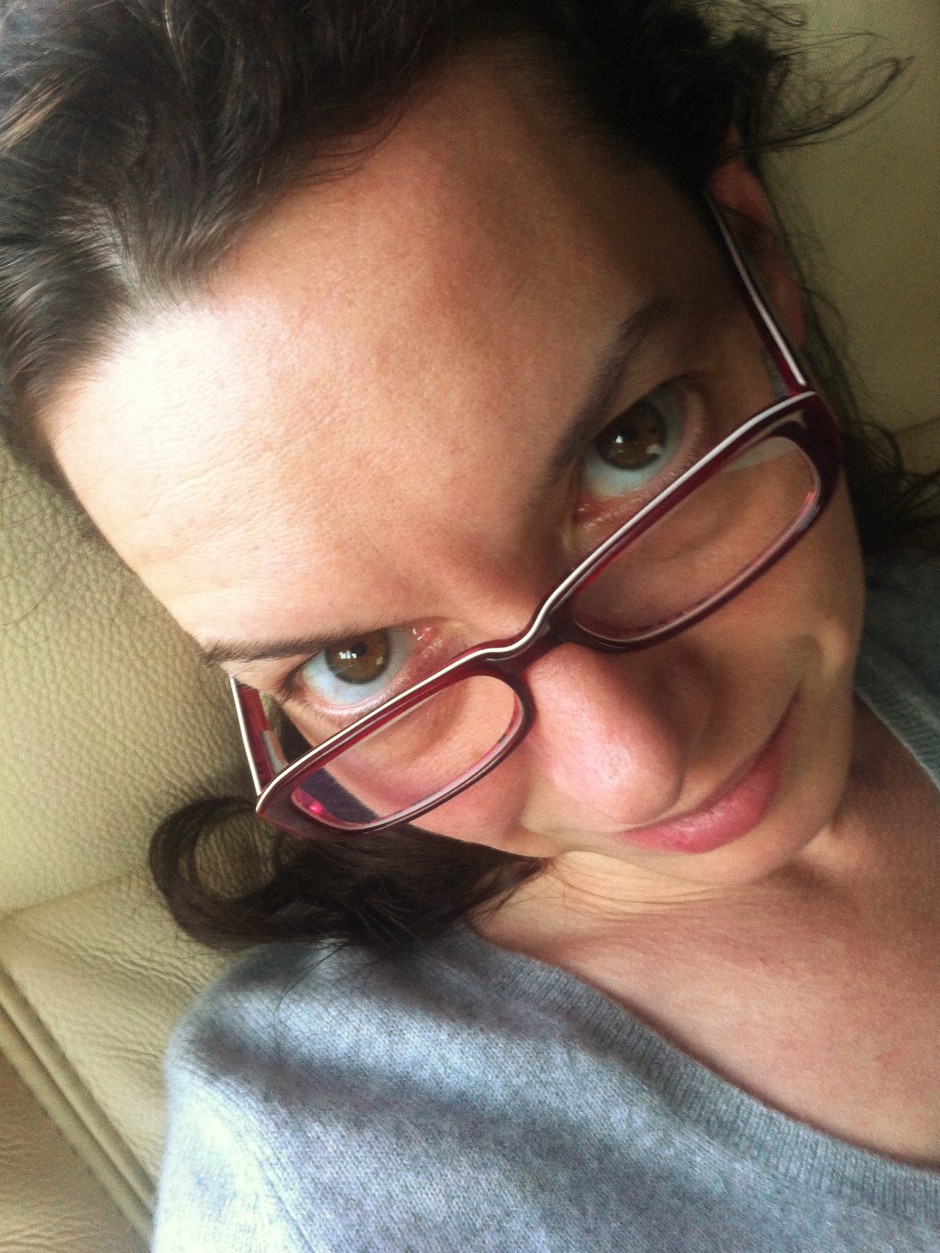
Having tried increasing ambiance in Eva's portrait to unpleasant effect, I didn't even bother trying it with my self-portrait. Decreasing the ambiance, this time to -100, was effective, though. I'm not sure if I prefer the original (again, slightly cropped and heavily adjusted for white balance) image or the edited one, but it's a good demonstration of the tool and shows how it gives a more muted feel to your photos.

Me, looking studious

With the ambiance dropped to -100

Having a swipe and swish with the ambiance slider is definitely something to be considered when you're fiddling with your smartphone photos. The general rule seems to be that left is great for portraits and go right a bit for still lifes. But every photo's different. And maybe 'ambiance' isn't such a terrible descriptor, either. One way is more lively and bouncy and the other more muted and moody. Just like the atmosphere can be at a party.

Making a Pringles Can Obscura

I spent Saturday at the Cambridge Festival of Science and Royal Photographic Society's photography day, listening to talks on megapixels and watching videos of caesium react with water in slow-motion. It was mostly a fun and informative experience, but apart from the caesium videos, the best bit was sitting inside Fotonow's Camper Obscura. That, just as its name suggests, is a camper van that has been transformed into a camera obscura. A camera obscura is the basis of any photographic camera, from a pinhole to a dSLR. A camera obscura is literally a dark (obscura) room (camera) with a hole poked into it, through which light can pass to create an image of the outside world on a screen. There are room-sized camerae obscurae in Bristol and Edinburgh, but they don't have to be walk-in activities. It's easy enough to scale them down and make something portable. I was aiming for something more along these lines when I decided to devise my own.

Of course, if you replace the screen with photo-sensitive paper you have a pinhole camera and by steadily improving the light-gathering and focusing abilities of the hole, with lenses, you end up with a camera more akin to those we use every day. But that's another project for another day.

Undeterred, I looked around for some DIY camera obscura instructions and found the perfect example on Exploratorium, which used a Pringles can. Seeing as Haje has already used a Pringles can to create a cheap macro extension tube, it seemed entirely appropriate to transform the snack container into a portable camera obscura. A Pringles Can Obscura.

1. Take one Pringles can

After securing a can of Pringles either from a nearby shop or your pantry, you'll need to divest it of its contents—whether you eat them all or transfer them to a new container is up to you—and then wipe it clean and keep the lid.

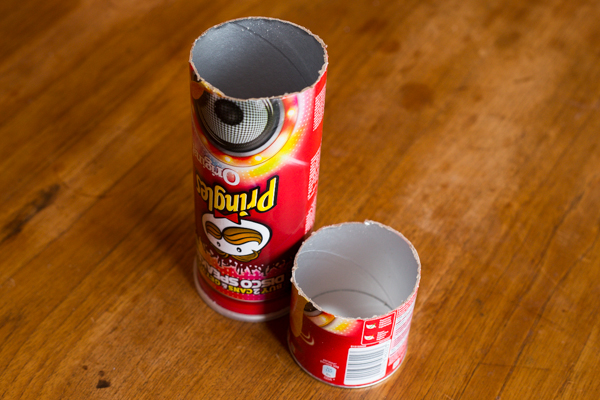
One Pringles can, two pieces

Draw a line around the tube, about 6cm or 2½" up from the base. Using a craft knife, or in my case, a bread knife, cut through the tube so that you're left with two pieces. The shorter section will be from the bottom of the can, and the longer section from the top.

2. Make a screen

You need to make a screen onto which your image will be projected inside the can. The cheapest and most readily available means to make one is from tracing paper.

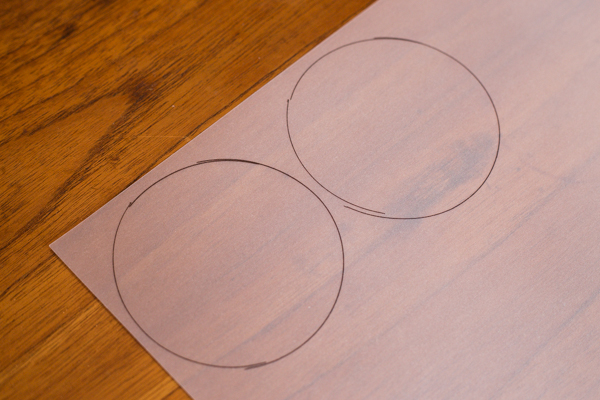
I drew a spare, just in case.

Place the lid of the Pringles can on a sheet of tracing paper, draw around it, and then cut it out. Secure the tracing paper on to the top of the tube using the lid.

3. Put the can back together

Rather than reconstruct the can with the two cut ends meeting again, you want the cut end from the bottom section of the can meeting the lidded, tracing-papered end from the upper section. Secure them in place using gaffer tape or electrical tape. No light should be able to pass through the join.

I got so carried away sticking it together that I forgot to take a photo. I'm sorry.

4. Pierce a hole

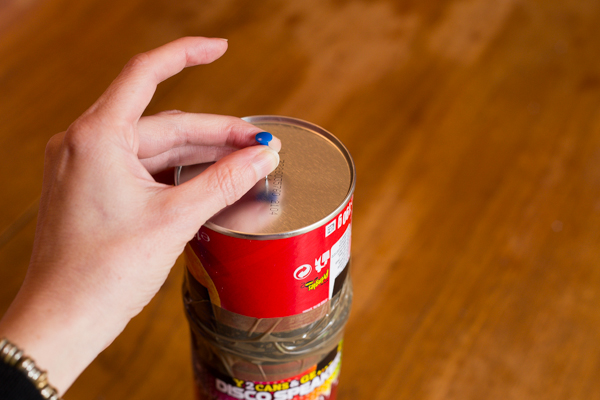
In order for the light to pass into the can and create an image, pierce a hole using a drawing pin in the base of the can.

Wanton assault with a drawing pin

5. Finish off your Pringles Can Obscura

To make sure that you don't end up with spurs of cardboard poking into your face when you hold your Pringles Can Obscura to your eye, tape up the cut surface with some electrical tape. And if you don't want it to resemble a Pringles can that you've hacked up, wrap some coloured paper around it.

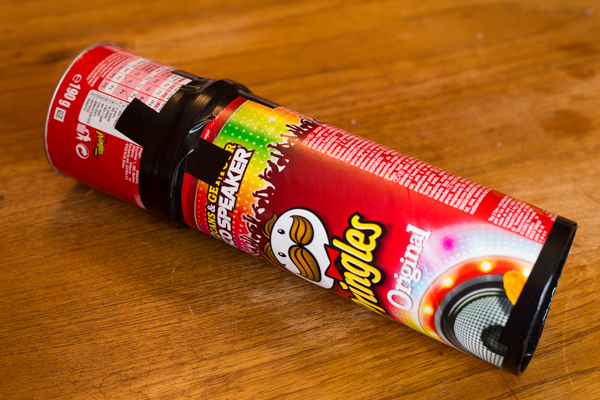
A Pringles Can Obscura!

6. Head out into the light

The brighter the day, the better the image you'll be able to render on your screen. Just remember that everything will appear upside down. And then it will be a case of moving nearer and farther away from your subject to get it in focus.

It's a great tool to remind you just how simple the principles of photography are, and to get you back in touch with moving subjects into and out of focus.

(And don't go getting any ideas about the gorgeous image of the tree. That's obviously, from the Camper Obscura.)