google

The handy-dandy social media photo sharing guide

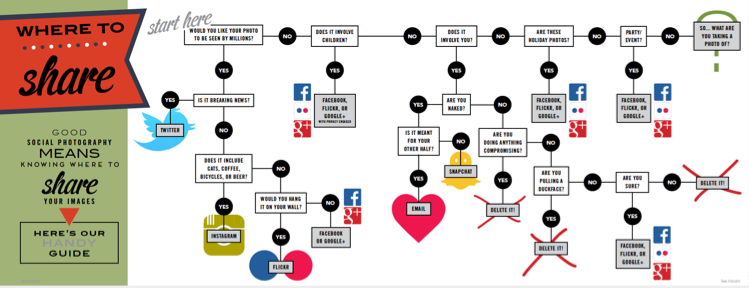
One photo, so many options. Where on this huge web of interconnected social media outlets are we best sharing our quick snaps, our painstakingly created works of art, and our selfies? Really, it all comes down to whom you want to see them. The chances are that different people follow you in different social media spaces, and if Twitter's mostly a work thing for you, selfies on the beach aren't all that appropriate a posting there. You're probably best putting those on your friends- and family-only Facebook account. It only takes a few moments of thought, really, but if you're new to the social media fandango, seeing all those apps lined up on your phone can be a little overwhelming. For a bit of fun, I drew up (quite literally, it involved an enormous sheet of paper and felt-tipped pens) this handy-dandy guide to sharing your photos via social media. Of course it isn't meant to be taken deadly seriously, but it's a pretty useful starting point all the same.

Click for bigger!

You can find it looking even more beautiful in print in the delicious-looking Social Photography, which is available now, either in print or to download!

Like the Google+ Stories idea but not keen on Google+? There are options

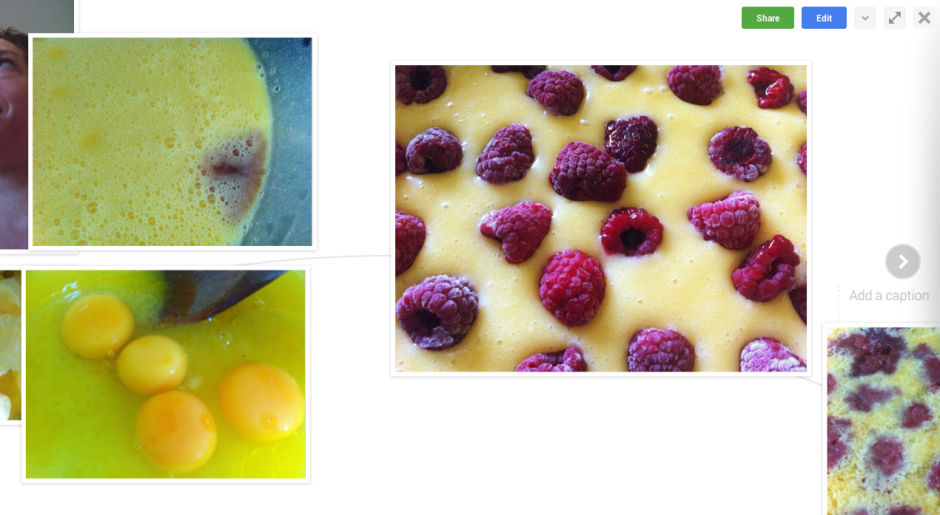
On Tuesday, tech and photo sites were awash with the Google+ Stories story. Rather than having to sift through your own images and organise them into virtual albums to chart your travels, document your days out, and record your parties, Google+ can auto-algorithmically-awesomely collate them into Stories or Movies by simple virtue of uploading them there. You can then edit them if necessary, add captions when appropriate, share them if you want to, and generally enjoy. Stories and Movies capabilities are already working on the web and Android platforms and will be making their way to iOS shortly. If you're like me and you auto-upload your iPhone images to Google+, open the web interface and you'll find there are some stories ready and waiting for you.

The Story of my cousin's birthday

But what if you don't want to upload your photos to Google+, for whatever reason, yet still rather like this idea of hands-free image curation? With the vast number of image storage and organisation apps and services out there, someone, somewhere, must be offering an alternative. There are plenty of apps that can organise your images and videos into a timeline, for example Dropbox's Carousel and Picturelife, but not that many which create narrative albums based on time, date, and location that are ready to go. There are, it seems, two apps that manage something along the line of Stories.

Flayvr

Flayvr is an Android- and iOS-compatible app that organises your images and videos into editable and shareable 'Flayvrs', or albums. That's pretty much what the Google+ Stories feature does. But unlike Google+, which collates all your photos and videos stored there, this works by collating the photos and videos stored on your device's camera roll, making it much more mobile-centric. If you're using Google+ to store all of your images, regardless of the device used to capture them, its capable of giving you a more complete story.

Still, it's swish and stylish, free to download, and I've had fun using it to collate some 'Flayvrs'.

Keepsake

I've not been able to download Keepsake for a trial spin because it seems to be a US-only iOS app at the moment. However, it does look to be slick and easy to use. It automatically sorts images into stories that you can edit them using the pinch-and-drag mechanism. When you have a complete story, you can share it with your contacts via text message.

It's also worth remembering that Google+ acts as a storage mechanism for your photos as well as organising them into sharable (or not) albums. Flayvr explicitly states that it isn't a data storage service. That's going to be a plus for some and a minus for others.

There aren't many options, but there are some, and I'm sure that Google's move will herald the insertion of automatically curated albums from other sites before long.

More editing power for Google+ on Android

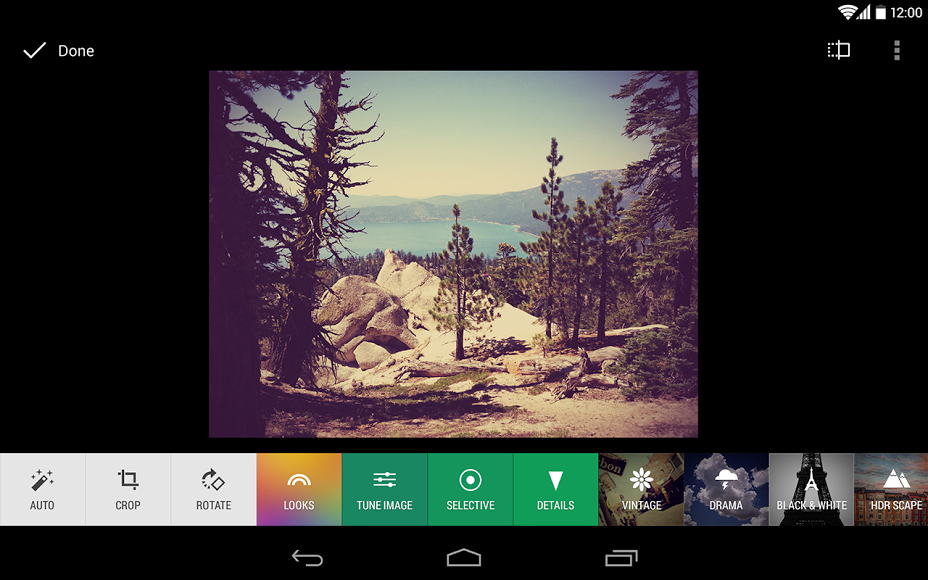
Google has introduced some Snapseed-like editing tools to its Android version of Google+ today, as well as what it calls 'non-destructive editing in the cloud' and new ways to view your images. The updates to the editing tools themselves are fairly basic: crop, rotate, one-touch filters, and enhancements that are familiar to Snapseed users, for example Retrolux and HDR-scape. They're the sorts of tools that you'd expect in a basic editing suite. 'Non-destructive editing in the cloud' is a touch more exciting, however. While it might be a horribly cumbersome term, 'non-destructive editing in the cloud' should make for a far more integrated photo-editing and sharing experience for Google+ users. It is designed to allow users to edit their images across different devices, and being non-destructive, start over if required. This means you can start to edit a photo on your desktop at home, continue your processing on phone on your way to work, and finish it off at your other-half's on their tablet. If you decide you don't like what you've done at any point, you can revert to the original before sharing on Google+.

New tools for editing in Google+ on Android

As for the new ways to view images, the 'All' view allows you to see all of your photo library, whether on the device that you're using or backed up to the cloud, and you can sort them by date. If you've tens of thousands of images, you won't be seeing all of them in the 'All' view yet, but they're on their way.

Whatever you think of Google+ as a social network, it's always worth keeping it in mind as an image storage solution, especially with this integrated approach to editing and filing. You don't have to share your images there if you don't want to.

(Headsup to Engadget, further details from Todd Kennedy at Google)

Google's just made it easier to search for images according to licence type

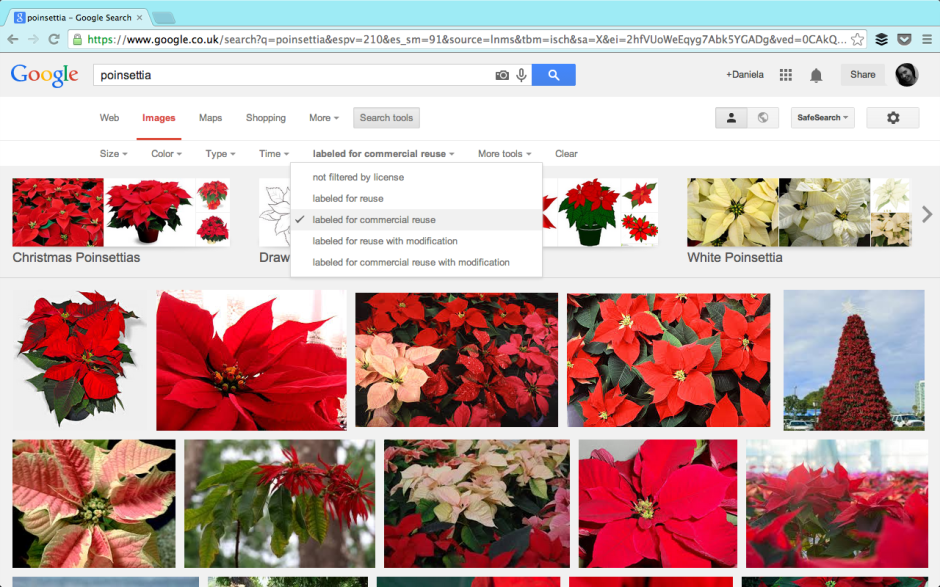
'I found it on Google, so that makes it alright!' No, no, and no. Just because you found an image on the Intergoogles does not make it free to use. How many times have we been through this? I've lost count, I'm sure. It's simple: unless the copyright owner says otherwise, you can't use her or his photos without permission. There are some images that are free to use, but you have to search for them specifically. Thankfully, Google has just made that easier. To be fair, Google Image Search has allowed for refined searches for quite some time, but now they've made it more obvious and easier. Hit the 'Search tools' button and it presents a series of drop-down menus that allow you to select the size, colour, age, file type, and licensing options for your desired image.

Define which type of licence you need in your search

Searchers can choose licences covering available for reuse, commerical reuse, reuse with modification, and commercial reuse with modification. So whether you need a poinsettia to illustrate a blog post or a giraffe to add to a surreal composite, the search tools to find them are at your fingertips.

According to the tweet from Googler Matt Cutts, the suggestion for the refinement came from law professor Lawrence Lessig, who's heavily involved in the Creative Commons movement.

It will still be incumbent upon anyone wanting to reuse an image to double-check its rights and ensure that they comply with any caveats, for example proper attribution, that might be ascribed to it. However, together with Bing's refined image licence search, there are fewer and fewer excuses of the whine of 'But I found it on the Internet!' when it comes to image theft an misuse.

(Headsup to Dave Stevenson and the Google blog)

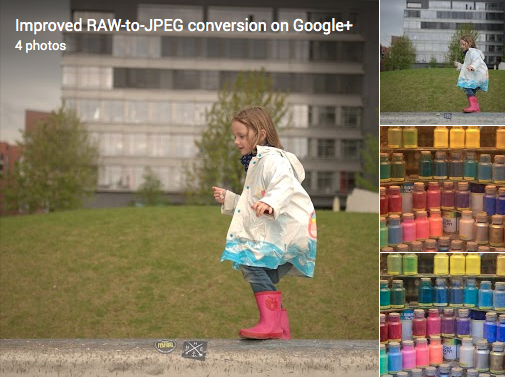
Improving Raw-to-JPEG conversion is all well and good, Google, but photographers need Raw editing power

Plenty of people seem to be excited, or at least pleased, by Google's announcement that it has improved its Raw-to-JPEG conversion process for image files created by over 70 different cameras. I, however, cannot help but feel that Google, and the Nik Photography team that worked on the project, have overelooked one of the key factors that motivates photographers to shoot in Raw: we like the flexibility that it provides us. From a to b; Raw to JPEG; in Google+

The Raw-to-JPEG conversion process doesn't allow photographers to make edits to the Raw file, where the majority of the data are stored and where the photographer can have the most significant impact on the final version of her or his photos. Instead, it converts the Raw file to JPEG and expects the photographer to make edits to an already adjusted image. An image that has been adjusted according to what the conversion programme deems best, not the photographer.

It's a process that rather defeats the purpose of shooting in Raw.

I might as well shoot in JPEG format and allow the camera to make the development choices if I'm going to shoot in Raw and then let a series of Google-written algorithms develop my photos for me. It'd save oodles of storage space.

If Google is anticipating that photographers are using Google+ as a back-up of Raw files and just want a glimpse of them in JPEG for identification purposes, that's all well and good, although it does strike me as a ridiculous waste of development time to produce something they believe so sophisticated for what's a relatively trivial demand. Should the aim be for Google+ to rise as a serious contender for serious image storage and processing, it needs to rearrange its cart-and-horse configuration.


For completeness, the cameras whose files are supported by the new conversion process are:

Canon EOS: 100D, 1000D, 1100D, 1D Mark III, 1D Mark IV, 1Ds Mark III, 1Dx, 20D, 30D, 350D, 400D, 40D, 450D, 500D, 50D, 550D, 5D, 5D Mark II, 5D Mark III, 600D, 60D, 650D, 6D, 700D, 7D, M Canon Powershot: G12, G1X, S100 Nikon: 1 J1, 1 J2, 1 J3, 1 S1, 1 V1, 1 V2, Coolpix A, D300, D300s, D3000, D3100, D3200, D4, D40, D40X, D5000, D5100, D5200, D600, D700, D7000, D7100, D800, D800E, D90 Olympus: OM-D E-M5, PEN EP1, PEN EP2, PEN EP3, PEN EPL3, PEN EPL5 Panasonic: LUMIX DMC GF1 Sony: Alpha 700, NEX-5, NEX-5N, NEX-6, NEX-7, NEX-C3, NEX-F3, RX1, RX100, SLT Alpha 55, SLT Alpha 77, SLT Alpha 99


(Headsup to ePhotozine; full details on Google+.)

Google brings Snapseed to Google+

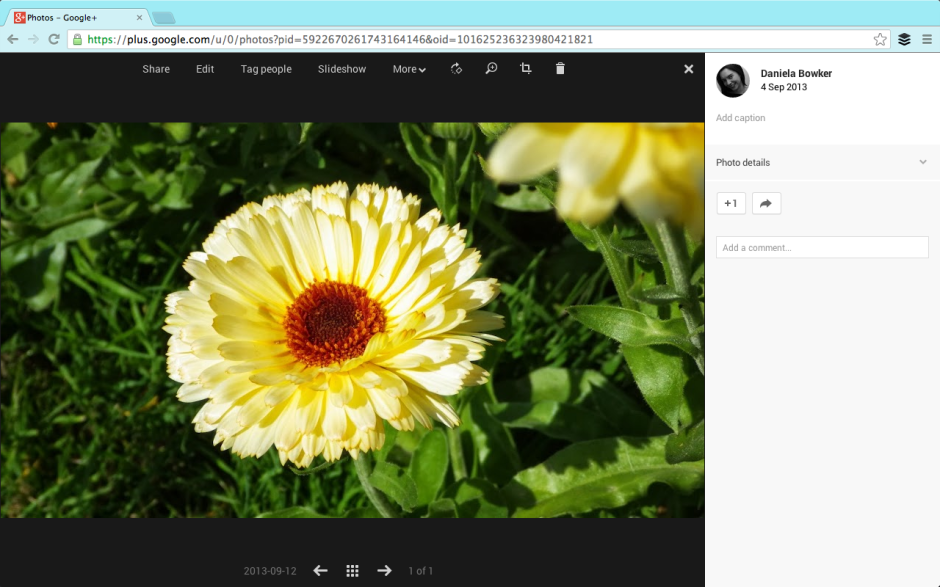
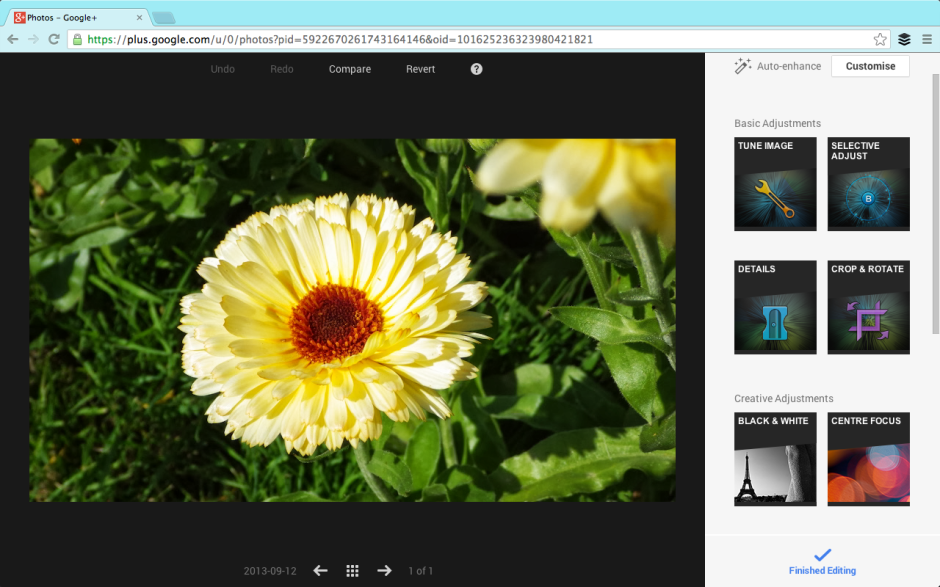
Earlier this year when Google shuttered the Snapseed for desktop app, it didn't exactly leave me heartbroken, but it did mean that I had one fewer cheap and reliable editing option that I could recommend to nascent photographers. (If they'd shuttered Snapseed for iOS, I might've gone into a raging frenzy, but thankfully that wasn't necessary.) Now, however, Snapseed is making a desktop come-back, provided that you use Google+ on Chrome. The 'Edit' button should be appearing on a G+ screen near you soon

Upload an image to Google+, select it, hit edit, and you're presented the opportunity to adjust it using Snapseed's tools. If you're already familiar with Snapseed for mobile, you'll be right at home. If you're not familiar with Snapseed, it is easy to get along with it and there's always the 'Revert' button for your edits get a little over-zealous.

All the usual Snapseed features are there

It is a rolling roll out, so if you don't see it yet, you should have it soon.

Headsup to Engadget

Snapseed says hello to Android


Snapseed editing awesomeness now available for Android

When Google snapped up Snapseed, which is undoubtedly my favourite editing app for mobile photography, earlier this year there was a lot of groaning and sighing around the Intergoogles. There's been a nasty tendancy to acquire successful companies for their talent, but shutter the product itself. Snapseed, however, might have been a trend-bucker. When Google bought out Nik Software, Snapseed's owners, it was an iOS-only app. But not from today. Now it's all hunky-dory and Android-ified.

Phones and tablets that are running Ice Cream Sandwich or later are able to make use of Snapseed's comprehensive and intuitive editing package. Sure you can do fun things with your photos using Snapseed, for example adding grunge effects or a vintage look, but it offers you the ability to adjust and control the fundamentals–such as the white balance, the contrast, and the sharpening–and make selective adjustments easily, too. Snapseed lets you edit 'properly'; it isn't just about fun filters.

It's this solid base that's made Snapseed so popular, and allowed Dan Chung to live blog from Olympics with his iPhone

Snapseed, whether on iOS or Android supports nine different languages, and as of today is now free, too.

You can download Snapseed from the App Store or Google Play.

CanvasDropr: probably not just another photo-sharing website


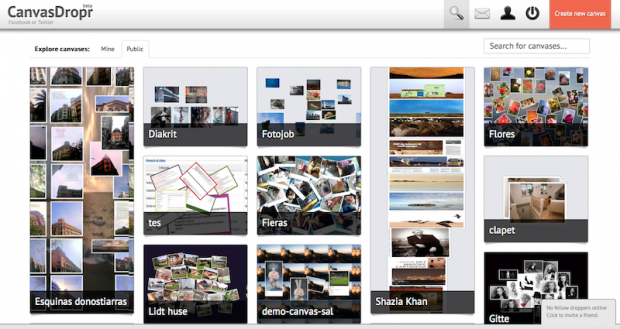
When I get an email asking me to take a look at yet another photo-sharing website, it usually elicits a small groan, a roll of the eyes, and I wonder just how SuperPixShare is going to do a better job than ShareSuperPix, which I looked at last week. If I end up writing about ShareSuperPix, then it has to be either fantastically unusual or breathtakingly terrible; which means that CanvasDropr, a collaborative content-sharing website out of Denmark, has to be one or the other.

The idea behind it is that groups of people can collaborate around images or videos, creating giant digital collages in real-time that they can comment on, resize, and rotate at will. There's a video introducing it, if you fancy.

But you know, I really like CanvasDropr.

It's well laid-out and easy to use. You can drag and drop images and videos onto your canvas from your computer, or import them from other sites such as Flickr and YouTube. I love that this enables you to create an album of photos and videos from a trip or event that's all in one place and is easy to share with family and friends.

Even better, of course, is that other people can collaborate with you to create a giant canvas of shared images and videos from a holiday, party, festival, or celebration. You can see all the media simultaneously, and everyone contributing to the canvas can add, resize, rotate, and comment on content in real-time.

You can even integrate your canvas into your own site. 

The team behind CanvasDropr don't just see it as a way of sharing media amongst friends, but as a useful tool for designers, media types, and photographers. As they put it, it's like Google Docs for images and videos.

I'm intrigued to see how CanvasDropr develops. It is certainly something that my family could make use of to consolidate the thirteen million images that we manage to take at one party. I might even be tempted to use it to create a collage or two from my current trip.

CanvasDropr: you should check it out.

The Dead Sea Scrolls just got interactive

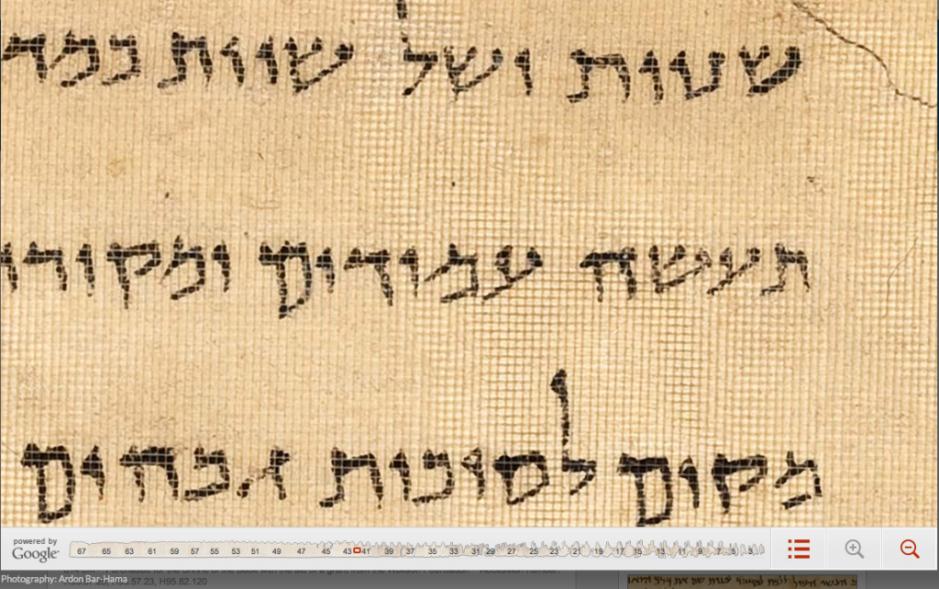
Zoomed right in to the Temple Scroll

Despite my constant mocking of the megapixel race in common-or-garden cameras, I am more than happy to admit that there are times when resolution really is make-or-break, and I’ve just found an instance of it. Google, the Israel Museum in Jerusalem, the photographer Ardon Bar-Hama, and scores of archaeologists and historians have worked to make five of the Dead Sea Scrolls accessible via the marvel that’s the intergoogles.

Zoomed right in to the Temple Scroll

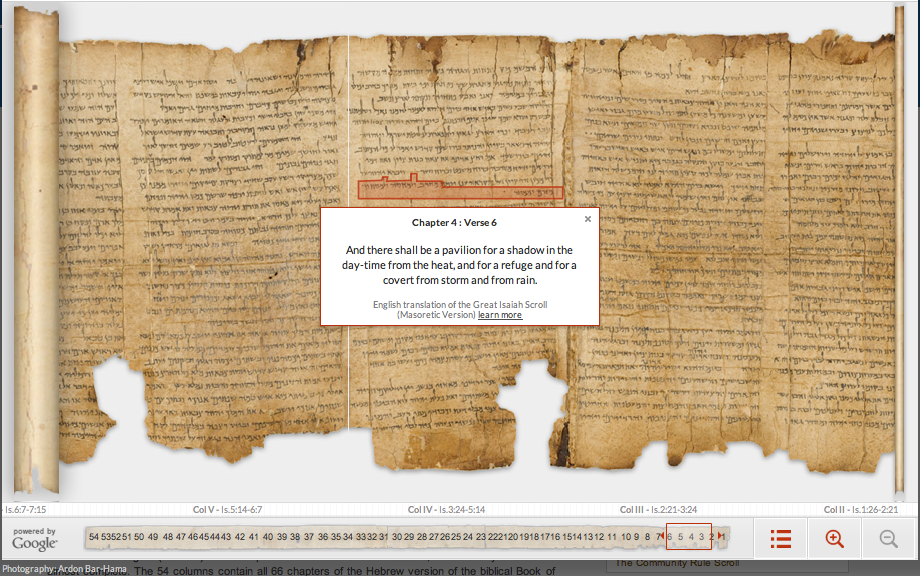
The Great Isiah Scroll, the Temple Scroll, the War Scroll, Commentary on the Habakkuk Scroll, and the Community Rule Scroll have all been photographed in 1,200 megapixel glory so that you can zoom in close enough to see the contours of the animal skin on which they were written. If you’re browsing the Great Isiah Scroll, you can also click on the Hebrew text to get an English translation, or just look on in wonder at something written about 2,000 years ago that was preserved by being hidden in jars in a series of caves.

The Great Isiah Scroll, with translation

I reckon this is pretty awesome, and not in a godly way!

(You can read more on the omniscient Google’s blog.)

Learning from the pros on YouTube

Earlier today, I was catching up on my RSS reading and dipped into Search Engine Watch (Yeah, I have a dark past working in SEO, and I like to keep an eye on recent developments), when I found a post about the recent Google Doodle - and how it caught the eyes of the world, where all sorts of talented people decided to play the ridiculously low-tech instrument (I mean... Who plays a search engine? Rage against the Machine's Tom Morello - that's who). It rekindled my passion for Youtube, and I decided to have a look around and see if I could find any good photography video tutorials. Turns out that was easy to say and even easier to do...

Ladies and gents, without further mincing of words:

Rick Sammon's top 10 photography tips

Night photography

Full photography school

Episode 1:

Also, see the full 13-episode series here.

Light painting tutorial

Make your own macro lens

Make Magazine made a great little video tutorial of my Macro Photography for £10 article:

Wedding photography

Photoelasticity Birefringence Photography

Using a softbox

High key lighting setups

A great stop motion inspirational movie

So there we have it - a metric load of fabulous learning, inspiration, and general fun on YouTube. So the next time you're stuck for inspiration, why not just search for 'photography' on YouTube, and see what it spits out? You never know what you might learn by accident...

Lightroom's Graduated Filter - not just for skies!

Lightroom-Thumb

When you’re accustomed to using something, it’s easy to forget that its capabilities might stretch beyond just that for which you usually use it. You get into some sort of rut don’t explore whatever it is that you’re using, whether it is your food processor, your mixing desk, or your copy of Lightroom.

Jamie Gladden got in touch with us to tell us about a rather nifty way of putting Lightroom’s Graduated Filter to better use than just applying it to skies. Jamie, it’s over to you…

I recently posted an article on my blog describing some simple portrait retouching techniques using Adobe Photoshop Lightroom. A friend of mine later commented to me that he wasn’t that familiar with some of the Lightroom tools that I’d mentioned, so he’d go off, find some tutorials, and play around with these new toys. Great! There are loads of cool tutorials out there, and he’ll definitely learn some useful techniques which will improve his photo retouching skills.

One of the tools I wrote about was Lightroom’s Graduated Filter, which was introduced in version 2 and is very handy. If you do a Google search for this, you’ll find lots of useful tutorials explaining how to use the tool to pep up your landscape shots, darkening a bright sky to add more detail and produce a more even exposure without changing the area of land beneath the sky. Cool! So that’s a new technique we’ve learned, the Graduated Filter is used to even up the overall exposure of your landscape shots by darkening the skies, just like using a Neutral Density Graduated filter in front of the lens on your camera.

What if you don’t shoot that many landscapes? You’ll never need to use that filter, right? Maybe, maybe not. It’s easy sometimes to get stuck with the idea that some of the features serve one purpose only, but with a little experimentation, you can find new and unexpected things to do with them.

In my own photography, I tend to photograph bands and people more than I do landscapes. If I’m working in a studio, then I’ll have full control over the lighting, and the light goes mainly where I want it to go – most of the time! Sometimes, I’ll need to make minor post-production tweaks here and there to compensate for areas which are a little brighter or darker than I’d like.

From the studio to the Lightroom

Take a look at these two photos.
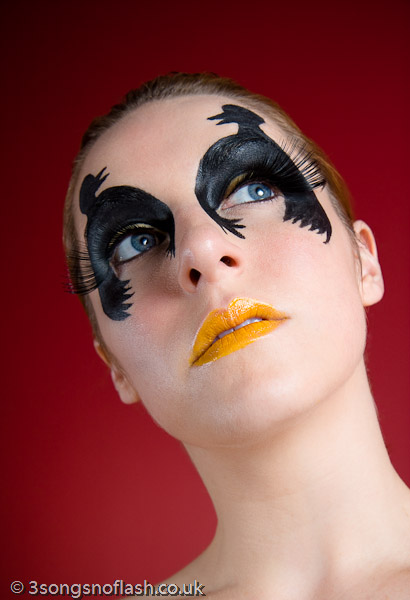
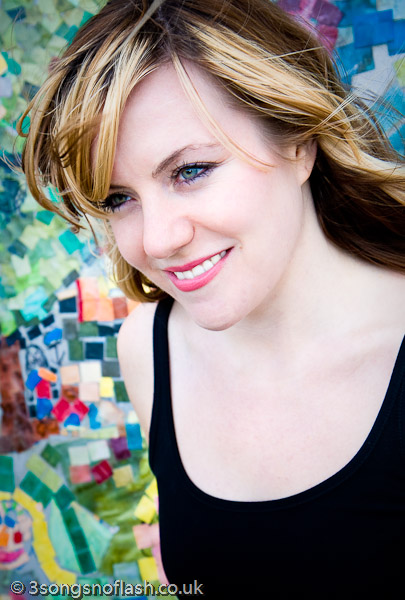
The top shot is complete up to the point at which I was happy with all the retouching and post-processing work I’d done, apart from one thing. I thought that the model was just a little too bright on the right side of her face and neck for my liking. The main light is coming in from camera right, and I had a fill light off to the left, and it’s the main light which is doing the damage.

I wanted to tone this down a little, but only on the slightly brighter area on the right side of her face. Decreasing the exposure or brightness isn’t really an option, because that would change the exposure/brightness of the whole shot, and that’s not what I wanted.

I could also have used the adjustment brush to paint over the too-bright areas, and then adjust the brightness level which would change only the area I’d painted over. That would certainly do the trick, and it does give you more control, but it can be a little fiddly sometimes, and would take more time.

But wait! What about the Graduated Filter? Couldn’t we use that to give us a subtle darkening of her skin on one side which is too bright without darkening the skin on the other side of her face? Definitely. The grad filter is perfect for that.

You can see the effect in the second photo. It’s quite a subtle difference, but for me it was necessary to fix it. After selecting the grad filter tool, I dragged the crosshair across the photo from right to left, stopping when I thought I’d arranged the markers in the correct position.
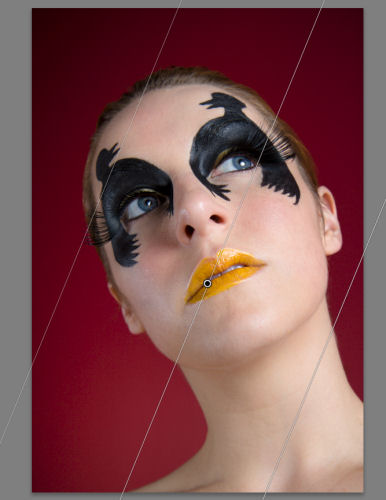
Then, I adjusted the grad tool’s exposure setting down to a level that evened up the lighting nicely, and I was happy.

Outdoors, but not about the sky

Here’s another example. This is Alice:
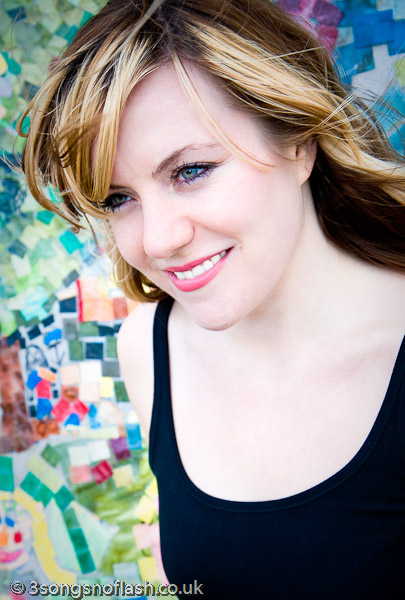
If you’re working outdoors with natural light, then it’s not so simple to move the light source to where you want it to be, so you have to work the light to your advantage, and maybe use a reflector or diffuser to shape the light how you want it. Again, there will usually be some tweaks needed in post-production.

In the first photo, the background in the bottom left is just a touch too bright for my taste, and I think it draws your eye away from her face. Just a quick application of the Graduated Filter, as before, and it was fixed. Simple and quick. Which leaves you more time to go out and take photos, rather than sitting at the computer.

And even for concert photography

For a final, and more dramatic example, here’s a shot of Benjamin Curtis from the band School of Seven Bells:
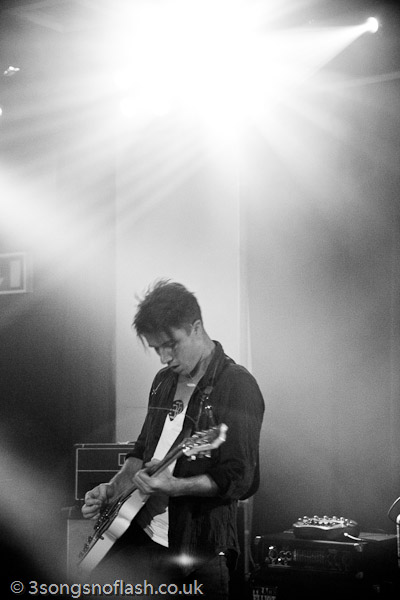
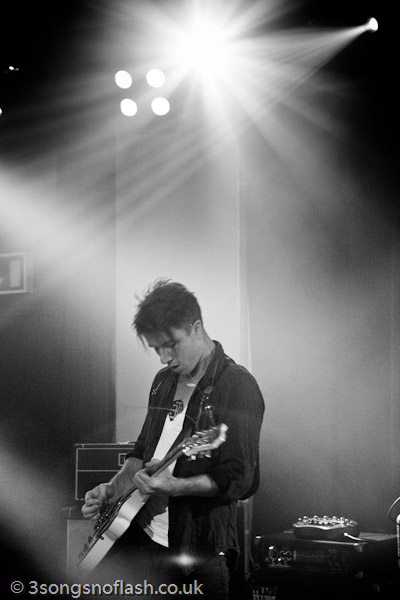
When you’re shooting bands on stage, you’re totally at the mercy of the stage lights, which often change quite rapidly. Often, I like to make the lights a feature of my shots, rather than using them solely to illuminate the artist.

In the first photo, the lights are quite overpowering, and they detract from the shot, but by just simply adding a grad filter straight down from the top of the picture, we’ve toned it down a lot, and produced a really cool and striking effect from the stage lights.

So, there are just three examples of using Lightroom’s Graduated Filter, and not a single sky has been prodded. One of the real selling points of Lightroom for me is that it’s easy to experiment like this, safe in the knowledge that if it doesn’t work out, it’s so simple to go back to your original RAW file and start again.

About the author

This article was written by Jamie Gladden. Jamie’s a freelance photographer based in London, UK, with interests in music, fashion and portrait photography. He’s passionate about music and loves discovering new bands and artists. He reckons that there’s nothing better than seeing a really talented unsigned band in a cramped room above a pub. He’s similarly passionate about photography, and there’s no greater pleasure for him than being able to combine the two. Check out his site; 3 songs no flash.


Do you enjoy a smattering of random photography links? Well, squire, I welcome thee to join me on Twitter -

© Kamps Consulting Ltd. This article is licenced for use on Pixiq only. Please do not reproduce wholly or in part without a license. More info.