Feature Articles

What do beards, witches, and fathers have in common?

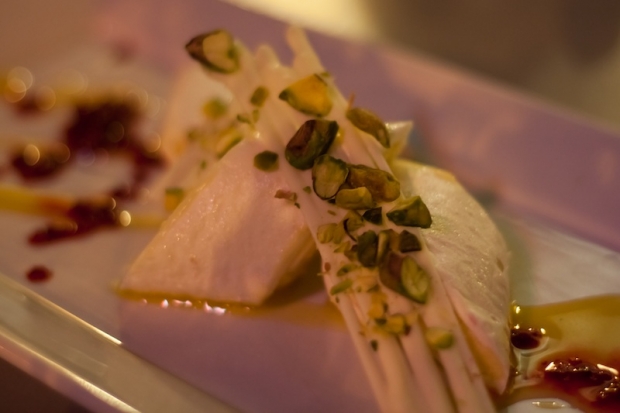
What do beards, witches, and fathers have in common? Witches often come with beards in folklore? Some dads have beards? Ehm... According to stock house iStock, we can expect to see all three of them at the vanguard of visual trends in the coming months. Move over vampires, the covern is on the rise. It doesn't have to be all eye of toad and wing of bat, either. Think swishing black taffeta and piercing eyes for our 21st century witches.

Witch hat - bobbieo #9722956, via iStock by Getty

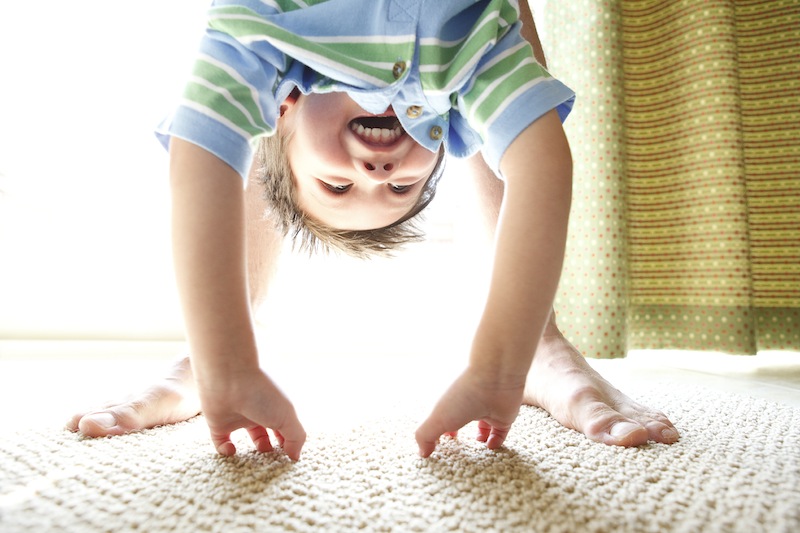
Do you remember 'that' poster of the topless man cradling a baby? Just a vague recollection of it hanging in the window of Athena or plastered to the wall of teenaged girl's bedroom? It was taken by Spencer Rowell in 1986 for the poster shop Athena and it's supposedly the biggest-selling poster in British history. While that might've heraled the 'New Man' aesthetic, this season you'll be looking at dads having all the fun with their children.

Little boy - LifeSizeImages #20428785, via iStock by Getty

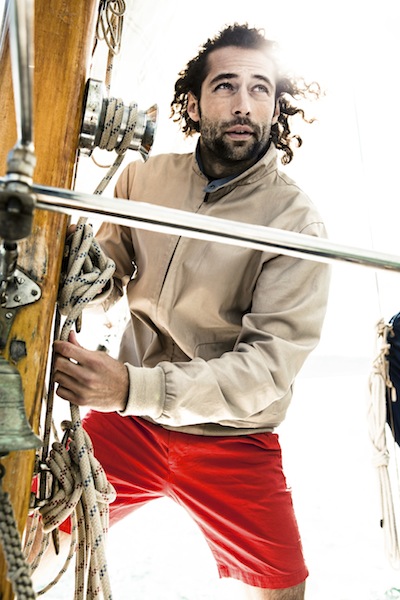
Beards. We're going to be seeing a lot more beards. They were all the rage on the Paris, London, and New York catwalks, I'm told. Something to do with 'geek chic'. I bet that the male half of team Photocritic never thought of himself as a fashion icon!

Beared sailor - Alija #24912776, via iStock by Getty

Instacanvas is now Twenty20, but how is its vision?

Did you hear of Instacanvas? It was a canvas printing company devoted entirely to Instagram images. You could link your Instagram account to their website and choose your favourite filtered, square-cropped photo to hang on your wall. Or, you could establish your own gallery and let other people wander through your photos and select your Madagascan sunset to adorn their living room. The idea was that it freed people from the tyranny of mass-produced images supplied by Swedish furnishing behemoths and instead provided them with the opportunity to choose from millions of photos created by people like them. Matt Munson and Instacanvas' other co-founders wanted to let people buy and sell images without a curatorial middleman. Smartphones have brought photography to everyone; why can't everyone benefit from the plethora of photos?

Plenty of people agreed with that sentiment.

Instacanvas has grown enormously since those first heady days when it went public in May 2012. Its range of products has grown, although your public gallery remains Instagram-only you can upload photos from other sources to print for yourself, and the number of photos on its books is in the region of 30 million. It's perhaps this achievement, and the potential that it holds, that has led to Instacanvas' next steps.

It's now called Twenty20 and it is venturing into the stock image market. With a book of images to rival Fotolia or Shutterstock, how are things shaping up for this 13-person operation based in Santa Monica?

I have to say that my first experience with Twenty20's website didn't get off to the greatest of starts. For anyone who lives in a cricket-playing country, your first Google hits for 'Twenty20' will be about the limited overs form of the game. Don't forget to modify 'Twenty20' with 'canvas' and things should be better. When you hit the splash page you're faced with something attractive, but utterly uninformative. There's no mission statement or suggestion as to what it is or does, there's no 'About Us' link or 'Contact us' option, and there's no indication as to how to access what lies beneath. How frustrating!

Attractive looking, but what's it about?

Eventually, I learned that in order to be able to find out what Twenty20 is all about or just to peruse its wares, I needed to register. My gut reaction to this was that it felt in someway deceptive; now I'm more inclined to perceive it as absurd. Why actively try to prevent people from learning more about your company by demanding information from them? I persevered because of professional interest, but would someone who's casually looking for wall art?

Taking this a stage further, would someone who's looking for stock imagery be bothered to sign up and then navigate to the stock pages when you can rock up at Shutterstock, Fotolia, or iStock, type your desired subject into the search box on the front page and be presented with pages of findings immediately?

Munson told me that forcing people to register is a recognised tactic to encourage interaction on social media sites and it's something that other social media sites employ, for example, Twitter. It's an interesting theory, but I'm not sure it's quite the right approach for Twenty20. For a start, Twitter's splash page isn't link-less or a desert of information, and Twitter is rather more well known than Twenty20. When your aim is to convince people to part with their money, you need to do everything that you can to lure them in, rather than push them away. Twenty20 might have its roots in social networking, but ultimately it's about sales and this has to be as easy as possible.

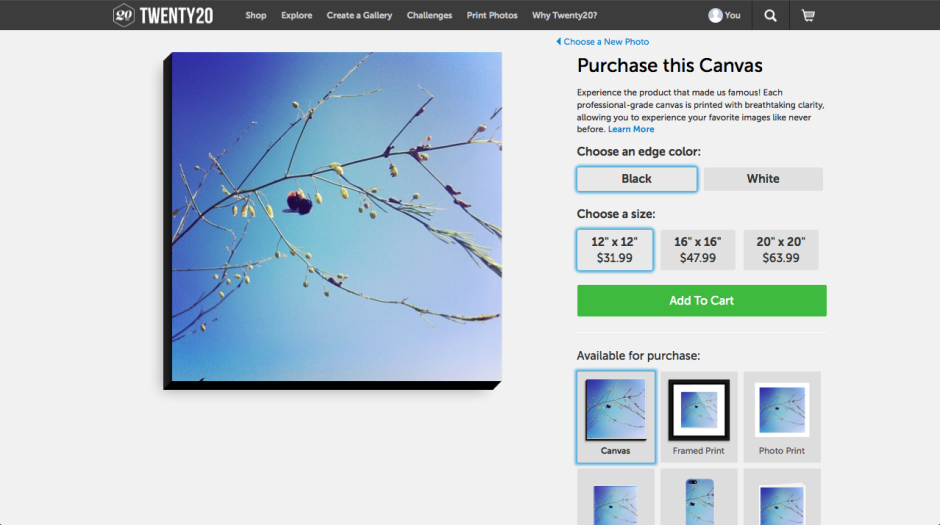
Once people have been lured in, selling products via Twenty20 is refreshingly simple. Signing up with Instagram means that your images are there, ready and waiting to be made into prints or prisms to hang on your own walls, or to be curated into a gallery ready for anyone else to peruse and transform into something to hang on their walls. You don't set your own fees, they're standardised, which makes it easy for buyers and you know that you'll always take a 20% cut of the sale.

Oh-so-easy to turn your own Instagram images into canvas prints

Although the pricing structure for digital image files is uncomplicated: $20 per image, with discounts for bulk buys, acquiring them isn't quite as easy. You need to contact the Twenty20 team to proceed. I'm hoping that this is merely a teething problem in Twenty20's new venture. First because it puts it on the back foot when compared with other stock houses; second because this is where I think that Twenty20 could excel. Imagine how much easier it would be to buy and sell news-oriented Instagram images via Twenty20, rather than have them used fee-free by news publications? Wouldn't it be great if your skinny-no-foam-latte photo is the one favoured by wannabe-hipster food blogs? (If they were real hipsters, they'd be using their own Instagrams, clearly.) But this relies on the system becoming faster and easier to use: instant access to your Instagram images.

Make it easier to access and buy your stock and they will come

When you have crossed the drawbridge, negotiated the portcullis, passed through gatehouse and into the bailey, and finally made your way into the keep that is Twenty20, there are some beautiful products for purchase and a welter of images for sale. It's such a shame that Twenty20's website design has made everything so inaccessible. Indeed, it's ironic. It's a company that's built on the principle of bringing the wealth of gorgeous digital media that languish in the aether onto people's walls and breaking down the barriers that sit between digital artists and their potential clients that have been erected by the curators of galleries and stock houses. There might not be any curatorial gate-keepers accepting or rejecting images, but there are technological ones discouraging people from making use of Twenty20.

If Twenty20 wants to truly realise its vision, I think it needs to follow through with its technological accomplishments to the same degree as its ideological principles. The theory's simple; keep the practicalities that way, too.

What is time-lapse photography?

This photography fundamentals session looks at the theory behind time-lapse photography: how it works and what you can use it to achieve. For a collection of time-lapse videos from across the world, housed in one place, check out Primelapse. If you feel inspired and want to have a go at trying it yourself, we've a tutorial on that, too!

Speeding up time

Anyone who has ever watched a nature documentary will be familiar with time-lapse photography, even if they couldn't identify the technique itself as time-lapse. When you watch an African riverbed flood and desiccate and flood again over the course of a year, but the footage has been condensed into a running time of thirty seconds, that's time-lapse. Seeing a plant grow, flower, and die within the space of ten seconds would have been achieved using time-lapse photography, too.

The Oxford English Dictionary's definition of time-lapse photography is:

the photographic technique of taking a sequence of frames at set intervals to record changes that take place slowly over time. When the frames are shown at normal speed the action seems much faster.

The difference is in the frame-rates

How about a photographically or cinematographically-oriented explanation? Video is made by shooting a series of photographs (or frames) in succession and then stringing them together so that they can be watched in sequence. Films shown in the cinema are usually filmed at 24 frames-per-second; depending on where you are in the world, television programmes will have a frame-rate of 24 or 25 frames-per-second. When they're played back at 24 or 25 frames-per-second it gives the impression of things happening in 'real time'.

The time-lapse sequences in the nature documentary, however, will have a much slower frame-rate with a significant period of time elapsing between each shot. They might have been 60 frames-per-minute, or six frames per minute, or 24 frames per day. When these frames are strung together and shown as a video replayed at 24 or 25 frames-per-second, it makes whatever was recorded appear to take place faster than it really did. It's an excellent technique for documenting change and a great first step into film-making.

Documenting change

For anyone interested in having a go at time-lapse photography, it will require identifying a subject that is going to change over time, taking a series of photographs of this subject as it morphs, and then piecing together these photographs to create a video. The result will be a video showing the change happening faster than it really did. You don't have to worry about recording sound, about focus-pulling or panning, or about directing your subjects. All you really have to remember is that the faster the change takes place, the shorter the interval between each shot will need to be. This is why a pregnant woman's swelling belly can be documented with one photo a day but a melting ice cube will need several shots every minute over the course of, say, 30 minutes.

Time-elapsed sequences can be as involved or as simple as you want. They can be shot over a matter of minutes, for example drifting and shifting clouds; the span of months, such as the construction of a building; the course of years, or anything in between. They can be taken on the move, for example in a car or on a bus. And they can involve shifting vantage points and changes in focus as you grow more sophisticated. The key is to have a subject that is changing.

If you were to reverse the time-lapse process and shoot hundreds or thousands of frames-per-second and replay them at 'normal' speed, or 24, 25, or 30 frames-per-second, you would create the opposite effect: slow-motion photography!

TL;DR

  • Time-lapse photography is a technique that is often used to document change
  • It works by shooting a series of images over a period of time but playing them back at 'normal' cinematic or televisual speed; this gives the impression that things happened faster than they did in reality
  • Time-lapse photography projects can take place over minutes, days, months, or years
  • The faster that something changes, the shorter the interval between frames is needed to document it

Speed << Photography Fundamentals >> Vibration and camera shake

What was an optical low-pass filter and why did we need one?

Fujifilm tried it with the X-Pro1 at the beginning of 2012 and carried on with the X-E1 in autumn 2012 and the X20 early 2013. Nikon's D800E had a go, too. Pentax did it with its K-5 II s in 2012 and recently its K-3. The Olympus OM-D E-M1 went without, and so did the Ricoh GR, Sony's RX1R, and the newly announced Sony A7R and Nikon D5300. What sort of fire have these manufacturers been playing with? They have all omitted the optical low-pass filter, or anti-aliasing filter, from their cameras.

But what was an optical low-pass filter, why did we used to need them, and why can our cameras suddenly cope without them?

Low-pass filters

A low-pass filter comprises several layers of optical quartz that have been cemented together and placed in front of a camera's sensor. They were put there to help prevent the appearance of moiré in images, or that odd effect when anything with a close pattern, for example ties or denim, would appear to be swirling and fuzzing, almost like the screen of an untuned television set or an animated gif. Moiré can be hugely distracting.

Mis-align one grid with another and the effect is not great (Diagram courtesy of Wikipedia)

Moiré

If you're familar with the concept of temporal aliasing in video, when spinnning wheels sometimes look as if they're going backwards, moiré isn't too far removed from that.

The pixels in a camera's sensor are arranged, somewhat logically, in a grid. If you were to photograph a subject that also has a close-knit grid-like pattern there's a significant chance that the pixel-grid and the pattern-grid won't align perfectly, leading to a jumpy, swirly clash of lines of pixels and lines of pattern. Imagine one patterned transparency placed over another, but with the patterns mis-aligned. It's called aliasing.

To prevent this from happening, camera manufacturers placed optical low-pass filters—or anti-aliasing filters—before their sensors. These filters worked by softening and blurring the image a touch, reducing the effect of the moiré. If you shot in JPEG you might not have noticed this added softening because the camera would compensate for it, but for anyone who favoured Raw, you would notice the need the sharpen your images. It also ate into the detail that your sensor could record, too.

What's changed, then? Why can we now do without these filters?

To a degree increased pixel density has helped to create a situation where moiré doesn't happen anymore, or at least it happens less frequently. The more pixels there are on the sensor, the less likely they are to form a grid of a size that will clash with a subject's patterning.

Add editing software that is more capable of dealing with moire to moiré's less frequent appearances, and the filters become less desirable, especially when they eat into an image's resolution and sharpness.

Finally, manufacturers such as Fujifilm are moving away from sensors with rigidly aligned pixels to slightly more randomly distributed pixels, as you'd find on film. This negates the propensity for grids and lines to clash.

Better without the low-pass filter because...

... it should improve colour rendition, sharpness, and detail in your photos.

If all they did was remove the filter, why were the Nikon D800E, Pentax K-5 II S, and Sony's RX1R and A7R more expensive than their filtered counter-parts?

It wasn't quite as simple as removing the filter. The filters needed to be replaced because they performed other functions, too, for example acting as infrared filters. New technology isn't always cheap. Sony's kept with the 'One-with, one-without' option for its new full-frame mirror-less camera, the A7 and A7R, but Nikon's D5300 is low-pass filter-free and so is the Ricoh Pentax K-3. It seems this is way of things to come.

Five free and easy ways to back-up your smartphone photos

According to a piece of research conducted by the printing company SnapBox, which I initially read about on the Amateur Photographer website, 36% of the people they questioned had lost 'precious picture memories' from their smartphones; 28% because they'd dropped or damaged their smartphones. That's a lot of pixels that've disappeared into the aether and quite a few slightly downcast individuals. It doesn't have to be this way. Snapbox reckons that you should print out your smartphone photos to keep them safe. It would; it's a printing company. I'm also a fan of printing and I periodically have sets of images printed. But I'm a bigger fan of backing up your data. And the truth of the matter is: it can be both free and easy.

Here are five options to auto-upload images from your smartphone to the Cloud, and until you hit their data limits, none of them will cost a penny.

Amazon app logo

1. Amazon Cloud Drive

Set up an Amazon Cloud Drive account, download the Amazon Cloud Drive Photos app, flick the Auto-Save function to 'On' and you're up-and-running.

5GB for free, more GB with payment. iOS and Android.


Dropbox logo

2. Dropbox

Dropbox gives you 2GB of free cloud storage when you sign-up. There's a free app for iOS and Android devices. When you've downloaded it, head to Settings and the Camera Upload option. Flip the toggle from 'Off' to 'On' and you're done.

2GB for free, more GB with payment. iOS and Android.

Flickr logo

3. Flickr

When Flickr updated its app for iOS 7, it included an auto-upload feature that will back-up your camera roll images to your Flickr account and keep them private until you're ready to share them. If you want to share them at all.

With Flickr offering 1TB of free storage, you have to take a lot of mobile images to come close to exhausting your limit. However, you do need to be running iOS 7 for this feature.

Google+ logo

4. Google+

You might not have any interest in a Google+ account, but it does have a free and rather nifty benefit. It allows you to auto-upload all of your smartphone images to a private album from its app. Provided that you upload them as standard sized images, so 2048 pixels on the longest edge, they won't count towards your Google Drive quota, either. Go to Settings > Camera and Photos > Auto Backup and then switch the toggle from 'Off' to 'On'.

A Google+ account is free, the app is free download, and you get 15GB of free Google Drive storage. Storage of 'standard sized' image is unlimited. iOS and Android compatible.

Loom logo

5. Loom

Loom is designed to collate all of your images from all of your devices in one place, and make them accessible from anywhere. In order to make this easy it has integrated auto-upload functions, including one from your iPhone. When you first establish your account, you can power upload everything on your camera roll to Loom in one sitting. After that, it's a case of opening up the app to let it synch.

5GB for free, more GB with payment. Loom is iOS-only at the moment, but an Android version is planned.

Told you: easy. And don't forget that you can set your iPhone to store your images in the iCloud, too. No more lost photos and videos now, mmkay?

How can a lens have a 'speed'?

This week's Photography Fundamentals column answers a question that came to me as an anguished plea in my Twitter feed from a relative newcomer to photography. In short: How can a lens have a speed? Whilst he knew that speed equated to aperture and that a 'fast' lens was one with a large aperture, the terminology felt far from intuitive. How could an opening behind a lens be described in terms of 'fast' or 'slow'?

I'm guessing that if he were perplexed by the use of the the word 'speed' in conjunction with 'lens', there are a few other people out there who find the concept that lenses can be 'fast' puzzling, too. Or illogical. Or something that's accepted terminology. Or something that made sense many years ago but has since become obsolete. This might help.

It's not actually as illogical as it sounds to refer to lens speed. It's more a case of joining the dots.

We know that large apertures are referred to as 'fast'. A lens with a large maximum aperture, let's say ƒ/1.8 for the sake of an example, is described as a 'fast' lens. We know that the larger the aperture, the more light is able to reach the sensor (or film, if you're old school). We know that by the virtue of the exposure triangle, the more light that is able to hit the sensor, the shorter the time the sensor needs to be exposed to capture the image and the faster the shutter speed we can use. The shorter exposure time is a direct result of the larger aperture. The larger aperture allowed for a faster image capture, hence a large aperture is a fast aperture.

If you were wondering, yes, it's for this reason that higher ISOs are referred to as fast ISOs: increased sensitivity allows for faster capture.

A lens can have a 'speed' then, because it refers to how fast it can allow you to capture your images, which I hope isn't nearly as illogical as it first seemed.

Rule of thirds << Photography Fundamentals >> Time-lapse

Five ways to liven up your autumn photos

This is a guest post by Danny Groner, who is the manager of blogger partnerships and outreach at Shutterstock. Here in the northern hemisphere, autumn is upon us, which means that we've already started to see some of the red, orange, and yellow colours of the season crop up. Marketers and advertisers know how to appeal to our autumnal eye, sprinkling these bright colours everywhere possible. For photographers looking to cover the autumn season, that poses a challenge: How do you shoot these natural settings in new, innovative, and vibrant ways? Here are five suggestions for how to add some flavour to the autumn season:

Apply traditional colours unconventionally

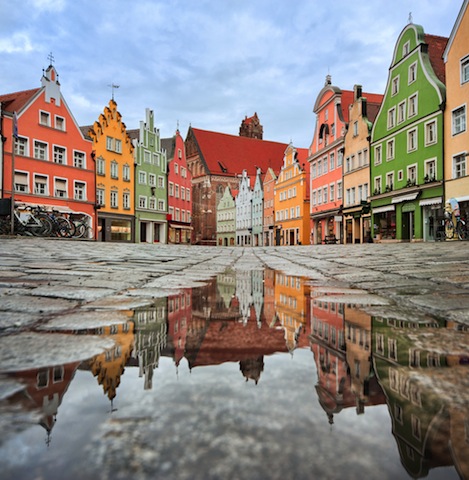
House image via Shutterstock

Keep close to what is proven to work this time of year, but adapt your style to show these colours in another way. For instance, a row of houses, instead of forestry, might offer the same feelings of seasonal foliage without leaves piling up. It's about the season after all. Discover an urban forest beyond the trees.

Bring it indoors

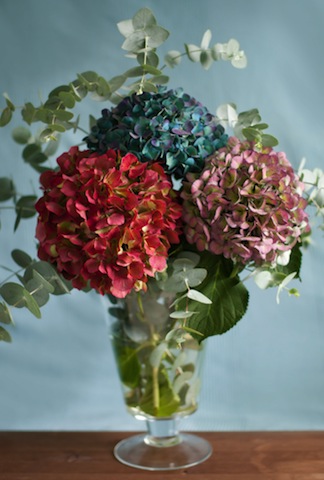
Flowers image via Shutterstock

Flowers and plantlife may grow predominately outdoors, but that doesn't mean that you can't bring their vivacity inside. A well-placed bouquet, taken with the right light and proper angle, can give the same punch as inside its more natural setting. Moreover, solid colored walls can complement the flowers, adding a nice backdrop to your pictures.

Go minimal

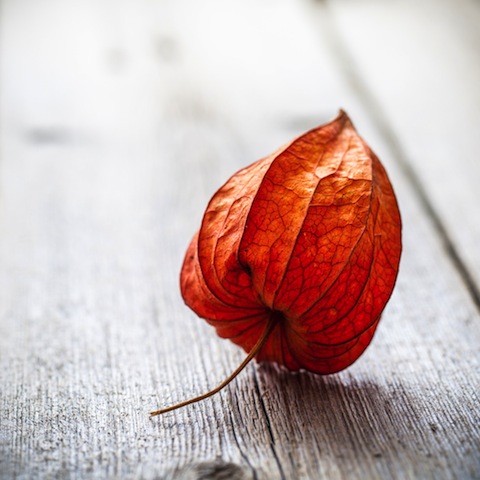
Leaf image via Shutterstock

If you do decide to use leaves to help tell your story, you don't have to do it with so many. Sometimes, less is more. In this case, you can see more expression from a lone leaf than you may find inside of a pile of them. It's a living being, and focusing on one will help convey some emotion that can get lost in transit otherwise.

Be abstract

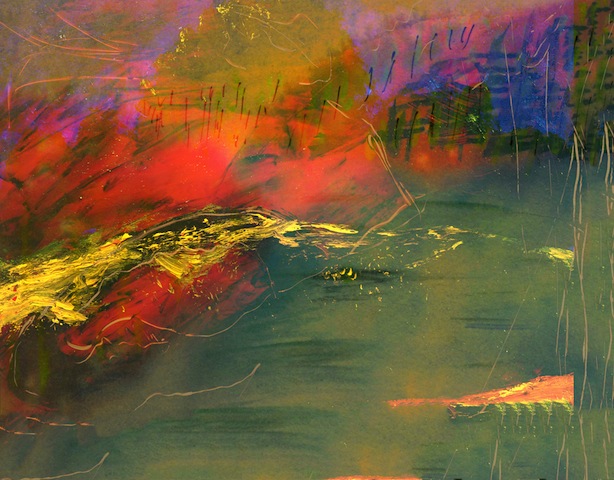
Abstract image via Shutterstock

Your favourite colours can go further if you allow them to blend and dance. Inside pieces of artwork, there's more flexibility and movement than what is naturally created. Reds and oranges can look and feel remarkably louder when paired with some darker colors. Art and photography have a similar relationship worth exploring.

Use non-traditional colours

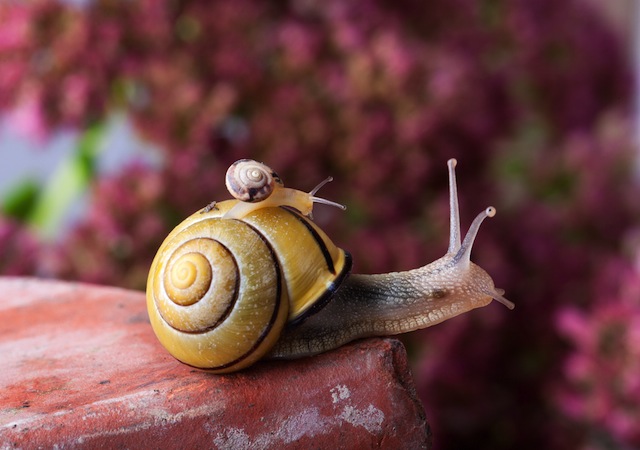
Snail image via Shutterstock

Nature has so much more to offer than the most traditional colours. Surprise your audience with some other colours, like purples, that show up this time of year but may take a little more digging. It's worth pursuing a shot through a slightly different lens. Even if you don't know what you're looking for as you trudge through piles of leaves, you'll recognise it when you see it. It may not look as familiar at first, but it'll surely be at peace with the season at hand.

What is the rule of thirds?

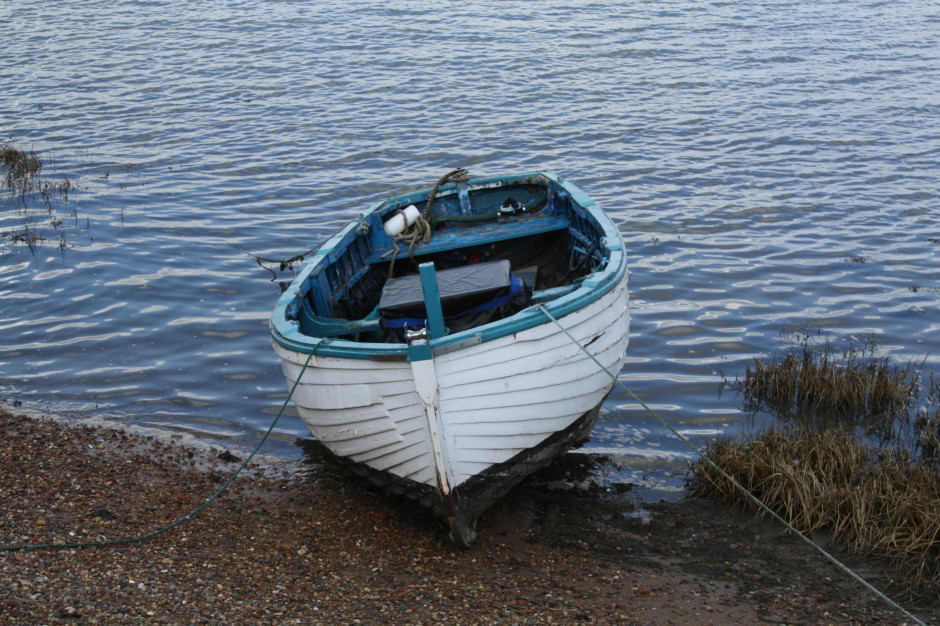
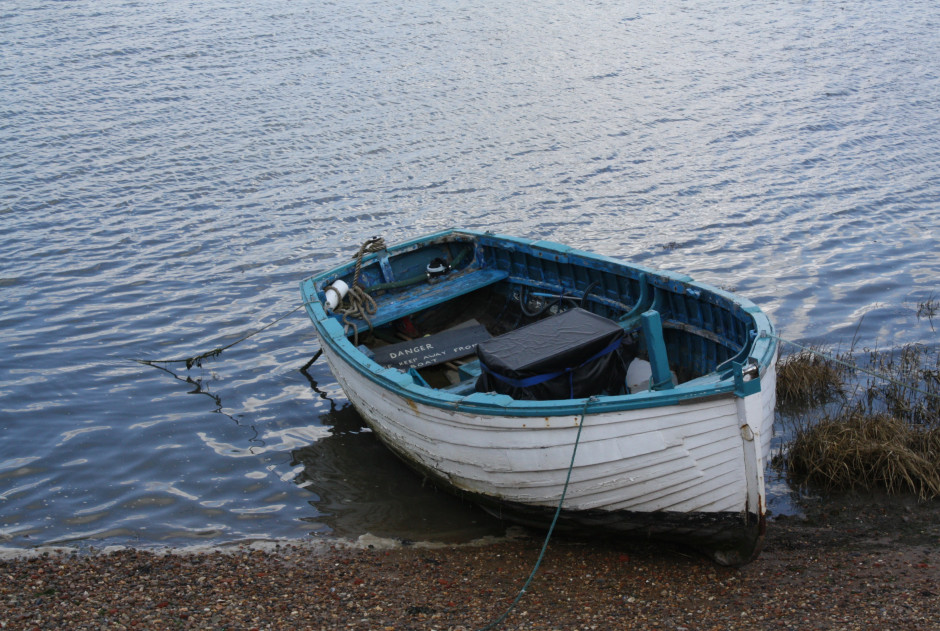
This week's Photography Fundamentals column digs into composition, and one of the most-cited 'rules' of the discipline: the rule of thirds. Even if you don't know what it is, you've probably heard of it. We are, therefore, here to explain what it is and why it's useful. And then when you understand the rule and you know how to implement it, you can go ahead and break it properly. We have a natural tendency to place our subjects in the centre of the frame. It makes sense, logically, to have our point of focus right in the middle, being gloried by its surroundings and utterly unavoidable to the eye. Except that centred subjects don’t really make for very interesting images. There’s an unmistakable flat and dull quality to them. Compare this:

IMG_0347

With this:

Washed up copy

Next time you’re watching a film or TV, notice where the heads and the eyes of the people doing the talking are. I’ll bet they’re not in the centre of the frame.

Instead, they’ll be positioned slightly to one side. They’ll probably be making use of what’s called the rule of thirds.

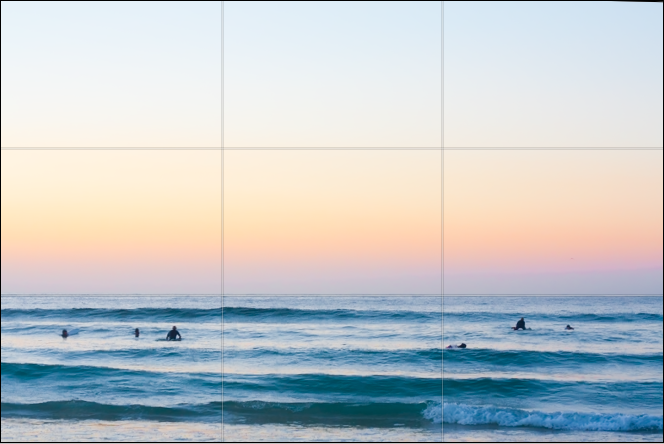
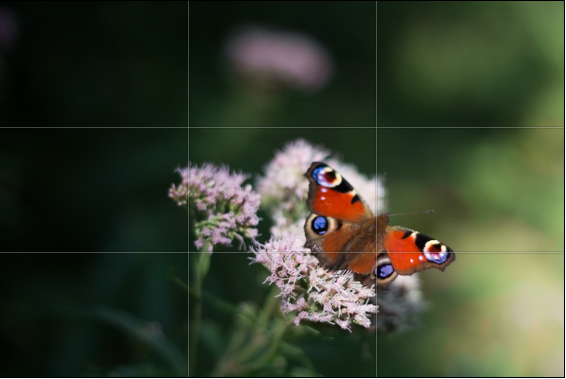
Imagine that your frame is divided by four lines: two running horizontally and two vertically. They are equally spaced and split the frame into nine smaller rectangles. The points at which the four lines intersect create four ‘points of interest’. This grid is your guide for composing an image.

rule-of-thirds grid

Aim to position subjects that run upright through your image along one of the vertical tri-lines. Lines running across the image—especially skylines and horizons—should run along a horizontal tri-line. (Definitely not through the centre with a horizon.)

The horizon is sitting perfectly along the lower tri-line.

Aim to place anything that’s of particular significance to the composition, for example the eyes in a portrait and the sun in a sunset scene, on one of the points of interest.

The butterfly is sitting on the lower-right point-of-interest.

Variations

I often find that rather than using the rule of thirds to place my subjects, I have a natural predeliction for the Golden Rectangle. It's based on the mathematical princple of the Golden Ratio: an irrational number equal to approximately 1.618. It's also known as Phi (φ). If you want the technical explanation, it's

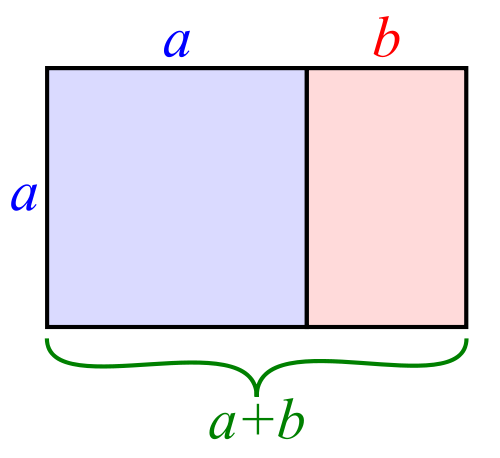
If you divide a line unevenly into two sections a (longer) and b (shorter), the ratio of these two sections will equal φ if a divided by b is equal to the sum of a plus b divided by a.

The Golden Ratio translated to Golden Rectangles. (Diagram thanks to Wikipedia.)

Yes. Ahem.

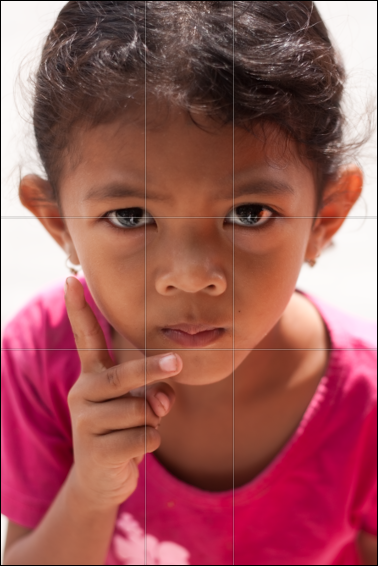
Rather than divide your frame using three equally spaced lines along each edge, as you would with the rule of thirds, you have two longer sections (a) either side of a shorter section (b). The ratio of the longer side to the shorter is the golden ratio.

It looks like this:

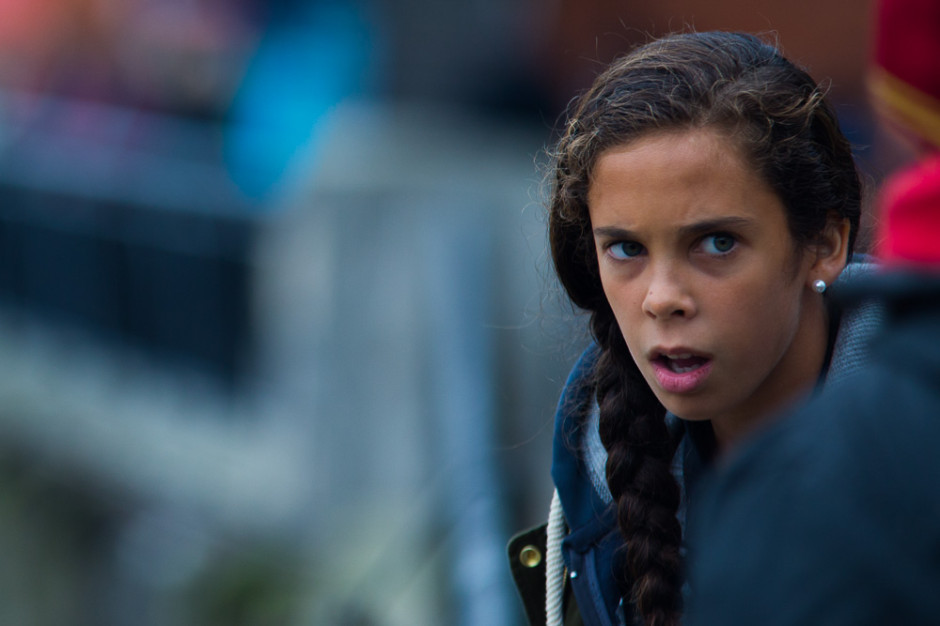
Her eyes are sitting on the Golden Ratio's points-of-interest.

Square crops

If you're using a square crop for any of your photos, you might find that the rule of thirds doesn't produce the sort of dynamic image that you're used to with a rectangular frame. That's because the eye tends to move around a square photo, rather than across it. For this reason, centred subjects often work effectively in square frames. Or try dividing the frame into triangles, and using those for balance.

Butterfly

TL;DR

  • The rule of thirds is a compositional aid that places two equally spaced lines across your frame, and two down it
  • The horizontal lines can be used for the strong placement of horizons and skylines
  • The vertical lines can be used to position key vertical elements in your frame
  • The four points at which the lines intersect are known as 'points of interest'
  • Use the points of interest to place significant elements of your composition, for example the eyes in portraits or the sun in sunsets, in your frame
  • There are variations on the rule of thirds, based on the mathematical principle φ
  • The rule of thirds doesn't necessarily work with a square crop; you might find a centred subject works better

Quality vs quantity << Photography Fundamentals >> Speed

Quality versus quantity

This instalment in the Photography Fundamentals series is a slightly cerebral departure from the norm. We're going to explore the idea of quality versus quantity. It's not a debate over the merits of digital compared to film, more a costs and benefits analysis of them both. Quality versus quantity; it's a purely digital conundrum. Back in the days of film, you had a given number of exposures per roll and that was that. Even if you kept a ready supply of film on you, having the rolls developed wasn't a cheap business, so you thought carefully about every image. You set upon the story, you nailed the composition, and you got the exposure bang-on. Or at least you tried to. The point was that you aimed for quality every time.

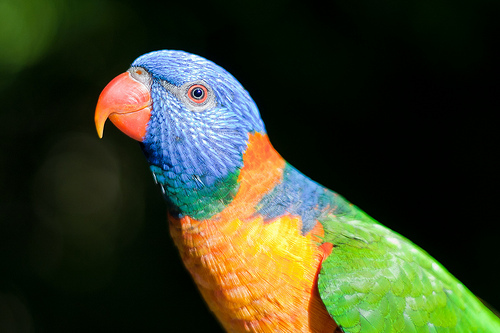
Red collared lorikeet

Now, memory is cheap—you can pick up an 8GB memory card for under £10—and you can shoot and shoot and shoot until your heart is content: I can get several hundred Raw images from my Canon 6D on said same card. If you fill up your memory card and don't have a spare, you can scan back through your files and delete those that are out of focus, horribly exposed, or just don't work. We're no longer hide-bound by physical (and economic) limitations of film, allowing us the ability to play, experiment, and get things wrong ad infinitum. The barometer has swung from quality to quantity.

This has to be a good thing, right?

Well… yes, and no.

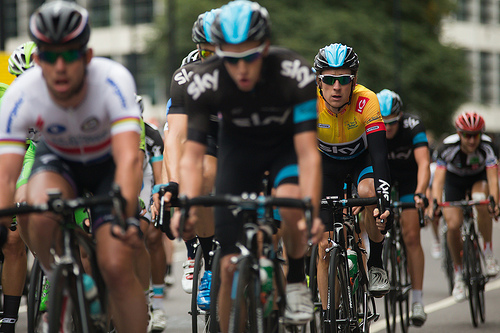
Being able to take hundreds and hundreds of images off the reel is stupendous, especially when you combine it with the ability to shoot in high frame rate bursts. I was epically grateful for this last weekend, when I went out to photograph the final stage of the Tour of Britain. Not only did the cyclists racing around the central London circuit ten times give me ample opportunity to capture them as well as stand and cheer, so did my memory cards. I wasn't concerned that I'd waste rolls of film and not have anything to show for my endeavours; digital had me covered.

Sir Bradley Wiggins

However, there's also a possibility that the ability to shoot almost endlessly is making us lazy as photographers. We don't have the over-arching need to plan our photos properly anymore, we can simply 'hit and hope'. Are there elements of the craft that are being forgotten, lost, and ignored because quantity is ruling over quality? If I'd only had one chance to capture those cyclists on Sunday, as opposed to ten, would I have been able to get the shot because I'm too accustomed to being able to go back and try again?

Sauvignon Blanc

Does this make me sound like a curmudgeonly luddite who'd rather be shooting wet plates? Probably. But it isn't meant to. It's meant to highlight the balancing act that we need to perform between the limitations of restricted exposures and the potential for exploration and experimentation with virtually unlimited exposures. It's actually me saying that quantity is awesome, but we shouldn't worship at its altar to the ignorance of quality.

So why don't you try this as an experiment. Allow yourself 36 exposures, and no peeking at your LCD screen. How many shots from your 36 make the grade and what did you learn from the experience? Maybe you always under-expose, or perhaps you have a tendency to sloppy framing. Are you thinking about your aperture carefully enough? You might notice that your subject placement is something that you do consistently well. Perform the exercise on a regular basis and it could lead to an improvement in your photography. Then you won't need to take so many shots off the reel!

Prime lens << Photography Fundamentals >> Rule of thirds

Photographs rendered in Play-Doh

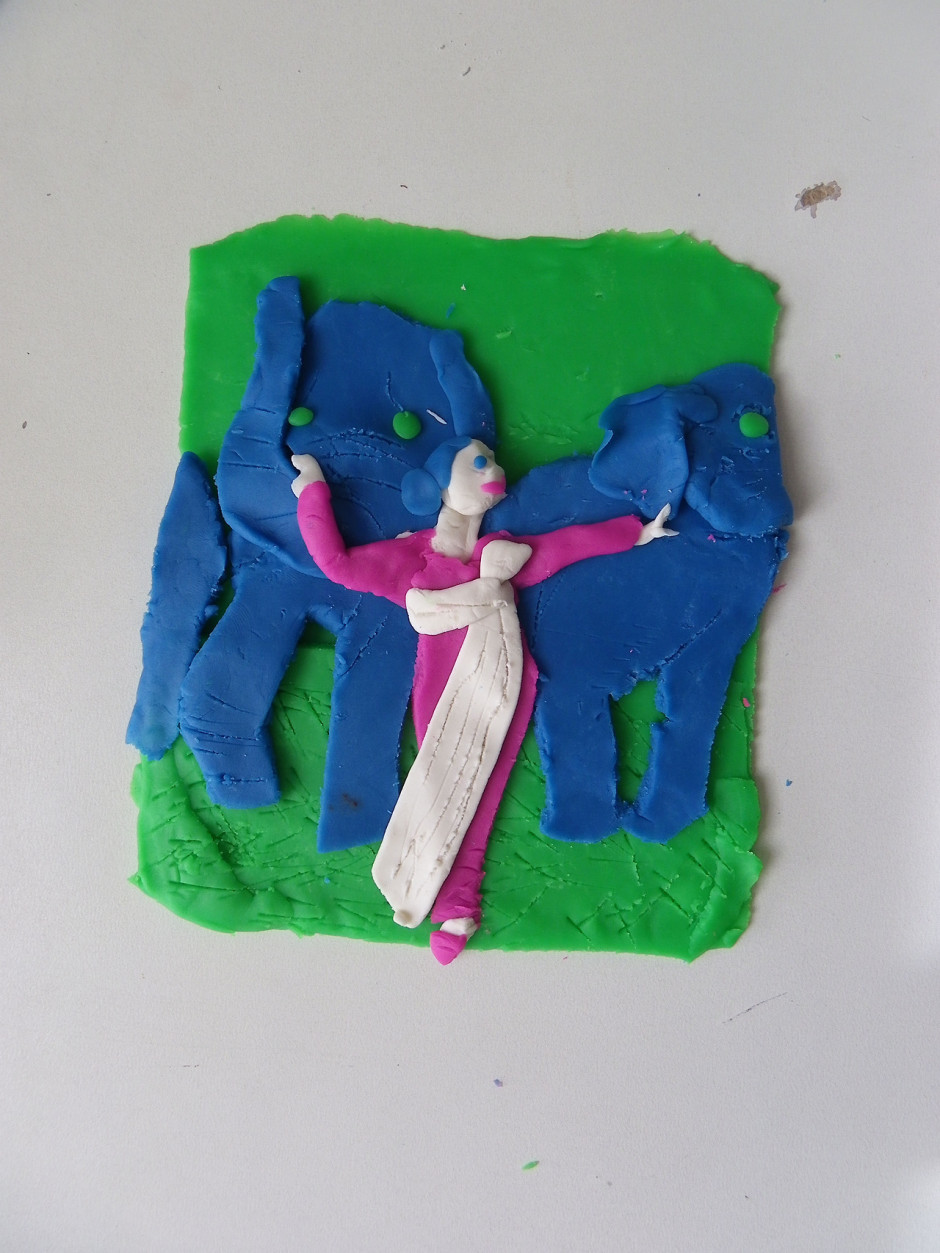
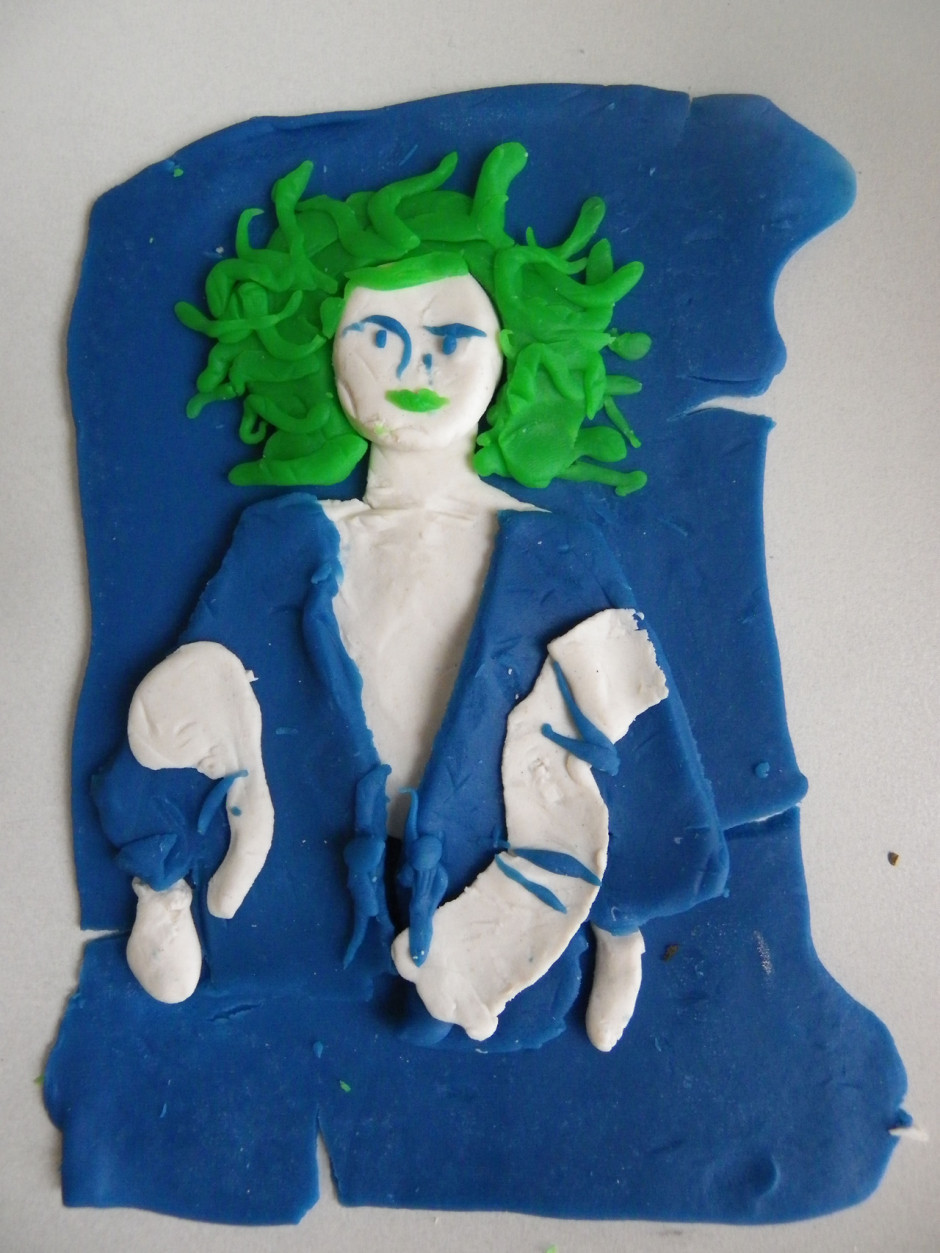
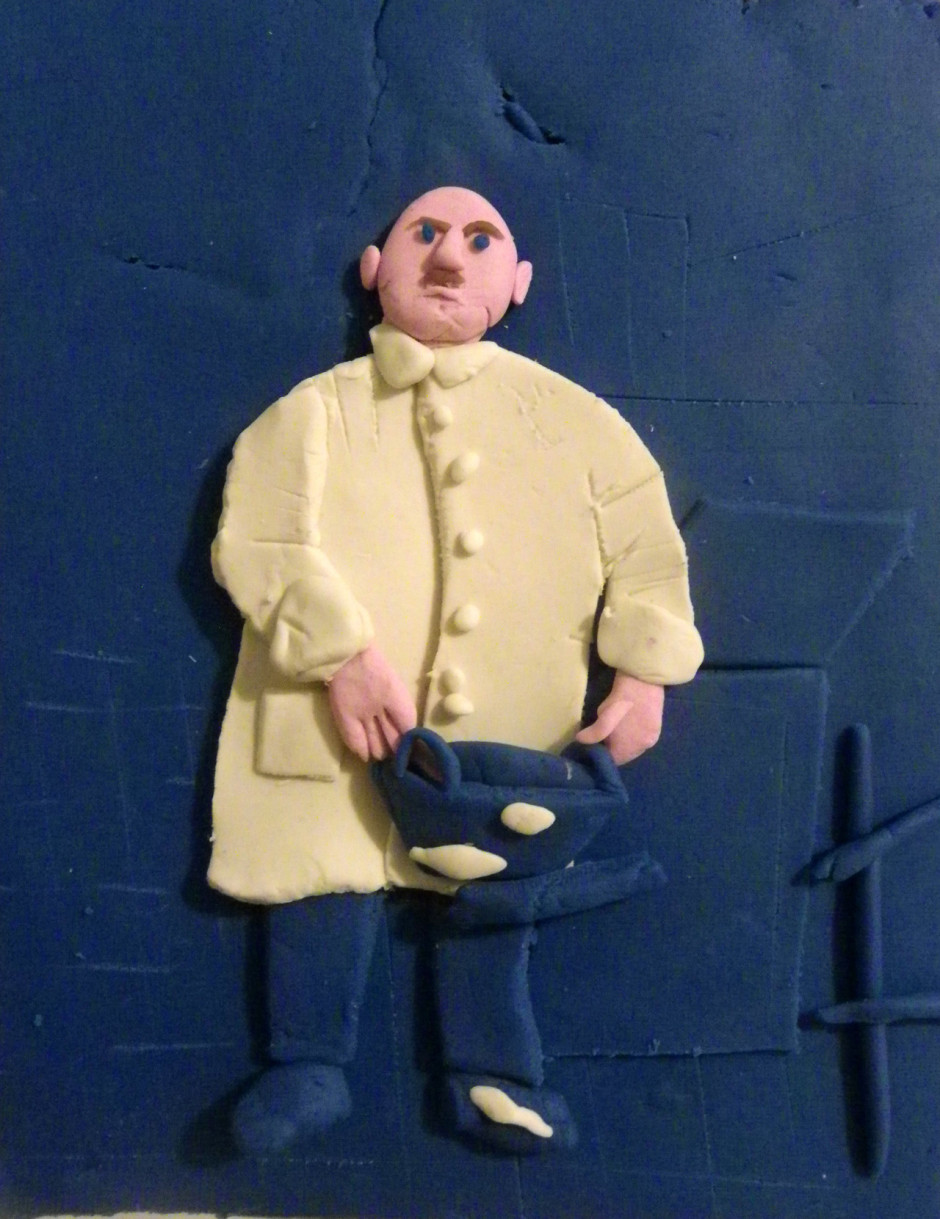
I've normally walked out of a pub quiz with some nuggets of new-found information and I've occasionally left with the victor's prize, but I've never come away with a new hobby. Obviously I'm going to the wrong class of pub quiz, unlike Eleanor Macnair. When she attended a pub quiz hosted by Miniclick by MacDonaldStrand, one round asked the participants to recreate an iconic photograph using Play-Doh. Rather taken by the process, she started doing them at home for a bit of fun. It's grown a bit, with friends requesting specific recreations and a Tumblr dedicated to her work. Now anyone can see her version of August Sander's Pastrycook, Dovima with elephants, evening dress by Dior, Cirque d’Hiver by Richard Avedon reworked in Play-Doh by Eleanor Macnair, or her rendition of Helen Tamiris by Man Ray, whether they're in Yemen or Equador.

Original image: Dovima with elephants, evening dress by Dior, Cirque d’Hiver, August 1955 by Richard Avedon

Each postcard sized plaque is nothing more than a fleeting creation, however, and Eleanor is not amassing an archive of flour-water-salt dough representations in her living room. She crafts them in under an hour using a pint-glass rolling-pin and a blunt knife from a globally recognised homeware megalith, and they last long enough to be photographed before being broken up and the different Play-Doh colours returned to their respective tubs, ready to be reformed into another image, another day.

Original image: Helen Tamiris 1929 by Man Ray

Eleanor says that she cringes when she sees people on the Internet debating the value of her project. It is, after all, a bit of fun. But if she can lead lead people to discover new photographers or look again at well known photographs, she's happy. And 'Sometimes it's nice to have the freedom to do something just because.'

Original image: Pastrycook, 1928 by August Sander

Quite frankly I think it should be every photographer's aim to have Eleanor recreate one of their images. They'd be in hallowed company.

You can check out all of Eleanor's Play-Doh photos on her Tumblr: Photographs rendered in Play-Doh.

Can I use this photo I found on the Internet?

(Or, the non-photographer's guide to image use) It's a truth universally acknowledged that articles, newsletters, blog posts, posters, and basically anything involving blocks of text can be improved upon by the addition of an image. When you're writing about the local cycling club's criterium or producing a short introduction to crochet and macrame, you'll probably want some pictures to illustrate events or to explain techniques alongside your race report or detailed how-to. Can you take a look at the site of a local photographer and use some of his images from the cycle race? Can you conduct a Google Image Search for 'crochet' and download some photos of great examples of people's work?

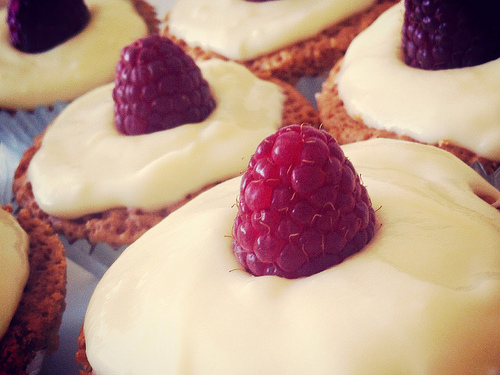
Cakes with Flickr denim filter

The short answer is always 'No'. Just because someone has posted an image on the Intergoogles, it doesn't mean that it is free for other people to use. You can't use the china in John Lewis' window display without paying for it first, and a photo on Flickr is just the same. Images belong to the people who create them—or in some circumstances, to their employers—so they get to decide how and when they can be used and what the appropriate fee for using them is. We put them on our websites or on photosharing sites because we're proud of our work and we like to display our capabilities, but it's not an open invitation to filch them.

There are a few exceptions to this rule, but until you know better, work under the assumption that every photographer keeps the tightest control over the use of all of her or his images. Being confronted by an angry photographer wielding an invoice for unauthorised image use is not a pleasant situation, so remember: You can't use other people's photos. Mmm'kay?

For completeness, what are these exceptions you talk of?

Some people are happy to licence their images under Creative Commons terms. Creative Commons licences aren't designed as an alternative to traditional copyright, but a complement. They're easy-to-use copyright licenses that allow you permission to use a photographer's images under terms decided by the photographer. One photographer might let you modify and use his images commercially, but another might say that her images must be attributed, cannot be used commercially, and aren't to be modified. However, not all photographers use Creative Commons terms (you'll see it close to the photo if they do) and if there's no evidence of a Creative Commons licence, assume that you can't use the image.

If you receive an image in a press release or it's made available to you from the press section of a website, this will be free to use in the context of the product or situation. For example, when Olympus releases a new camera, it will make a bundle of images illustrating it available to me. Provided that I'm writing about that camera, I'm free to use them in an article. The National Portrait Gallery will supply a selection of images from each of its exhibitions so that if you're reviewing it or publicising one, you have photos to illustrate the article. But, you can only use those photos in relation to the relevant exhibition and they must be attributed under the terms set out by the NPG.

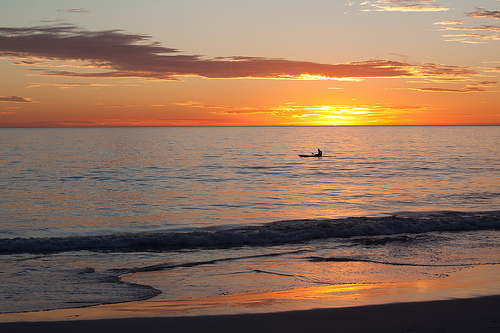
Sunset kayaker, Mullaloo

Some news agencies, for example AFP, are happy for you to use their photographers' images non-commercially and for personal use provided that you credit the photographer and agency and link back to the site. But, some agencies aren't. And you wouldn't want to face the wrath of AP or Reuters. Again, unless you're absolutely certain, assume that an image isn't free to use.

But what if you see an image and want to use it? What should you do?

Get in touch with the photographer! Most of us make it easy to send an email: do just that. We don't bite. Mostly. Tell us who you are, why and how you'd like to use a photograph that we've taken, and ask if you can come to an arrangement. The worst that we can say is 'No'.

That's not so hard, is it?

Embracing automatic ISO.

Recently, I find myself in more and more situations where I know what I'd like my shutter speed and aperture to be, but realising that the light situation is changing around me. In a recent round of street photography, for example, I wanted to shoot wide open (f/2.8, using my 70-200mm lens), and I knew that I wanted reasonably fast shutter speeds (I spent the day shooting at 1/800 second)... But given that I was walking down Southbank in London, where there's a lot of trees, overhangs, and rapidly changing light situations, what's a guy to do? The solution, more and more often, is automatic ISO: Select the things you care about, and let your camera adapt to the changing lighting situations by varying the ISO.

It isn't that long ago since this would have been completely impossible - Most of the camera bodies I've had so far, have had rubbish quality photos beyond ISO 3200 or so. With my most recent camera bodies, however (Canon EOS 5D mark 3, which I ended up selling because I found it too heavy for everyday street photography, and replacing with a Canon EOS 6D instead), the full breadth of the ISO range is perfectly usable.

'Yah, whatever...'

The above photo, for example, I captured by setting my camera to f/2.8 and 1/800. The camera selected ISO 320 for this shot. Perfectly fine; there's no discernable noise in the image at all.

Going Macro

More extreme, however, was the example I experienced recently. I've done a fair bit of macro photography (I did write the book on it, after all), but I found myself in a situation that was nearly impossible: Taking photos of insects on the move, without my usual flashguns. What to do? I was shooting with my 100mm f/2.8 Macro attached to my Canon EOS 6D, and no light sources or light shapers. All natural meant that I needed a relatively high shutter speed (because I was shooting hand-held), and a relatively small aperture (to deal with the extremely limited depth of field). Even in bright sunlight, that doesn't leave an awful lot of light left... But it turns out that automatic ISO still does the trick:

Shot at 1/800 second shutter speed and f/8.0, the camera chose ISO 4000 to fit the lighting conditions. Which, as it turned out, was perfect!

So I guess the lesson here is that on modern cameras, you can in many situations leave the camera to get things right, whether you're willing to let shutter speed, aperture, or ISO to be variable. Nifty stuff.

Case Logic SLRC-206-BLACK camera bag review

With lots of clever features, and great ergonomics, Case Logic pulls a surprise winner out of the hat. When you're thinking camera bags, Case Logic may not be the first brand that pops to mind, but my recent experiences with one of their very reasonably-priced photo backpacks might just be enough to change your mind.

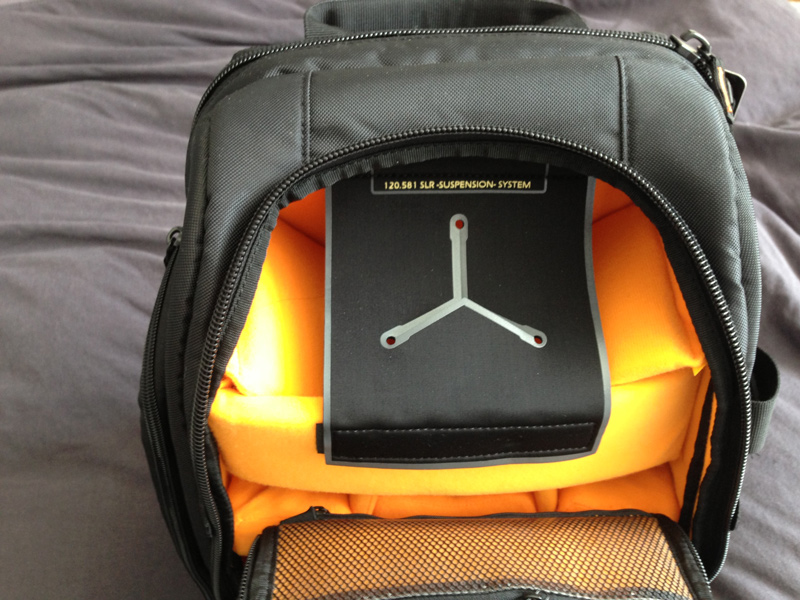
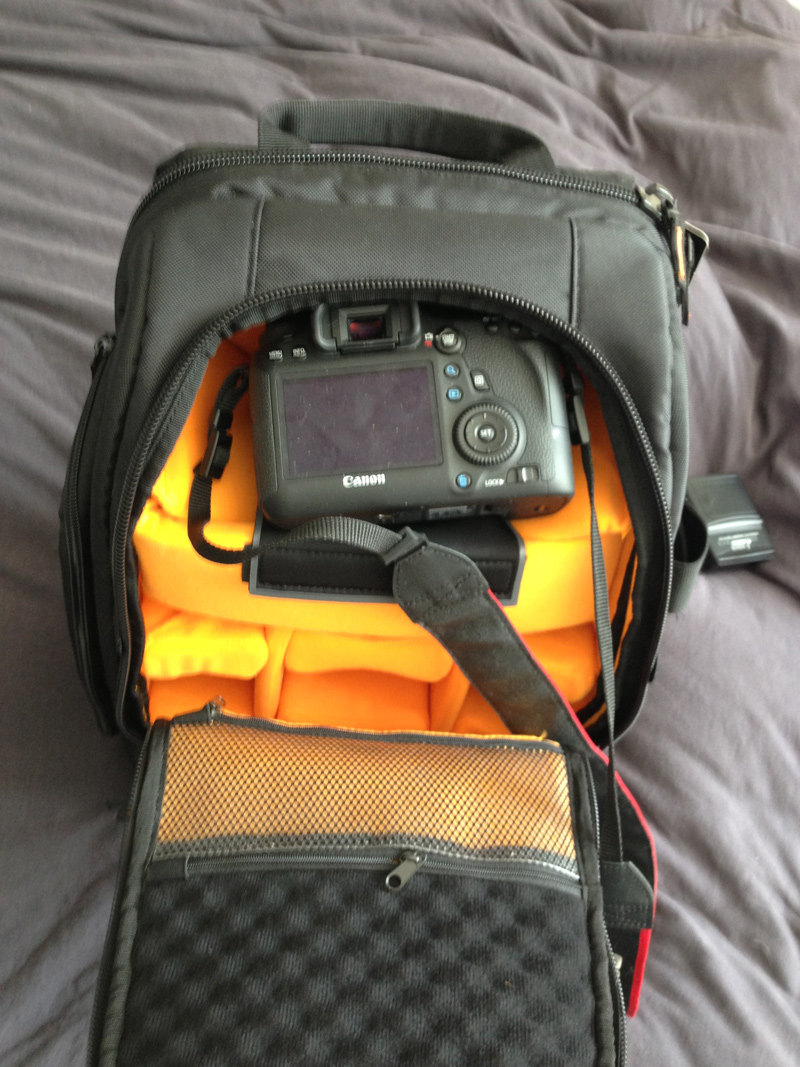
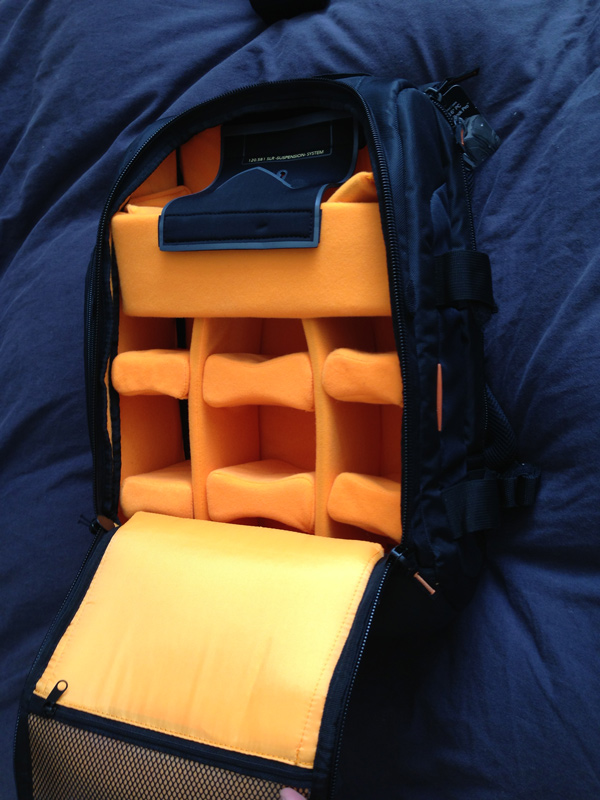
The not-really-that-creatively-named SLRC-206-BLACK is a good-looking bag that has a load of features I haven't seen on any camera bags in the past. For one thing, their 'SLR Suspension' system is incredibly clever: There are two straps of velcro that stop the zippers from opening beyond a certain point. If you open the bag like that, only the top part of the main compartment is available, and it has a clever 'suspension system' which enables you to put your camera away and grab it again in a matter of seconds. The main compartment of the backpack also has oodles of re-configurable space for lenses and other accessories. As you might expect, the bag also has several front- and side pockets for keeping filters, lens caps, and any other equipment you may be lugging around.

At the side of the bag, it has a couple of incredibly sturdy nylon straps for strapping down a tripod or similar. These are the biggest and most flexible I've ever seen on a camera bag, too - an absolute winner.

At the back, there's a large laptop pocket that should fit most laptops - and best of all, it's secured with zippers that make me confident of its water-resistance prowess.

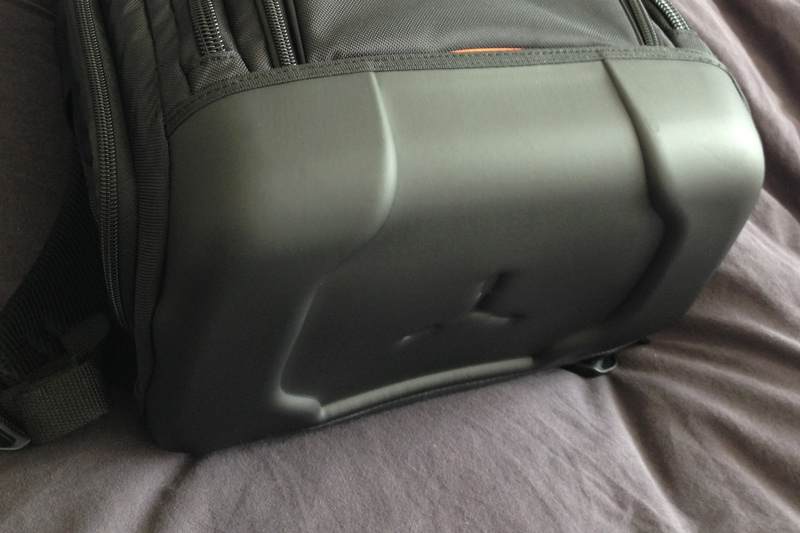
The final cleverness is the bottom of the bag - CaseLogic decided to envelope the bottom in a sturdy rubberised plastic, resulting in a base that is rock solid (even when loaded with only a heavy camera, it wouldn't topple over), and water-proof. Perfect for photographers on the go.

So is it all heaven and butterflies? Well, no. Personally, I'd have wished they had attached the shoulder straps to the other side of the zips, so you'd have to move the straps aside to access the laptop compartment. As it stands, the entire weight of your camera rests on a zip that is perhaps a little bit too good, so on one occasion it zipped itself open. Because the straps are attached to the 'loose' side, it means that if the zip opens, the entire laptop compartment is pulled open by the weight of your cameras and lenses, leaving it a big gaping rain-trap, with your laptop reaching for the heavens. It's a minor niggle, of course, but I was surprised that Case Logic had missed such a simple thing, when they were so incredibly careful with the design of the rest of the bag.

Anyway; As I mentioned in the beginning of the article, if there's one thing I've learned from this review, it's that Case Logic is worth a closer look; They have an extensive range range of camera bags and camera cases, and if the build quality (and price tag!) of this one is anything to go by, they may well be a force to be reckoned with.

The Camera Case

The SLR suspension system is really quite clever

Camera in its Special Place

Great lens storage compartment

Laptop case

Great waterproof bottom

What is a prime lens?

We've taken a jump over 'O' and landed directly on 'P' for the next part of the Photography Fundamentals series. Here, we'll be taking a look at prime lenses, what they are, and why you should have one. At least one. In fact, we reckon that until you've got a decent prime lens, you've not really lived, photographically speaking. Here's why.

Define prime

What's a prime lens? For once, it's a simple definition: it's a lens with a fixed focal length. They might be 35mm, 50mm, 85mm, 100mm, whatever, they just don't move. And yes, this can most definitely be a good thing.

A bit of history

Back in the infancy of photography, we never had anything but prime lenses. When you bought a camera body, you also had to buy a camera lens to go with it. A 50mm ƒ/1.8 was pretty much the slowest lens you could buy as a starter kit.

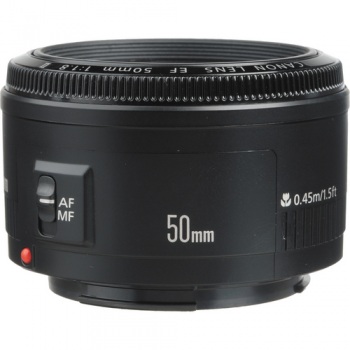
To this day, a 50mm ƒ/1.8 is the cheapest lens you can buy in the entire Canon EF lens arsenal. And if you don’t have one, you’re missing out.

Canon's 50mm ƒ/1.8 - a bargain at under £100

From your first prime, you move on. You might get a faster ‘normal’ prime, like a 50mm ƒ/1.4 or a ƒ/1.2 (or, if you’re intro your retro gear, the incredibly bright Canon 50mm ƒ/0.95. This lens is four times faster than the human eye, and is one of the fastest lenses in the world along with, for example, the lenses available for the Nikon 7 range finders in the early 1950s.)

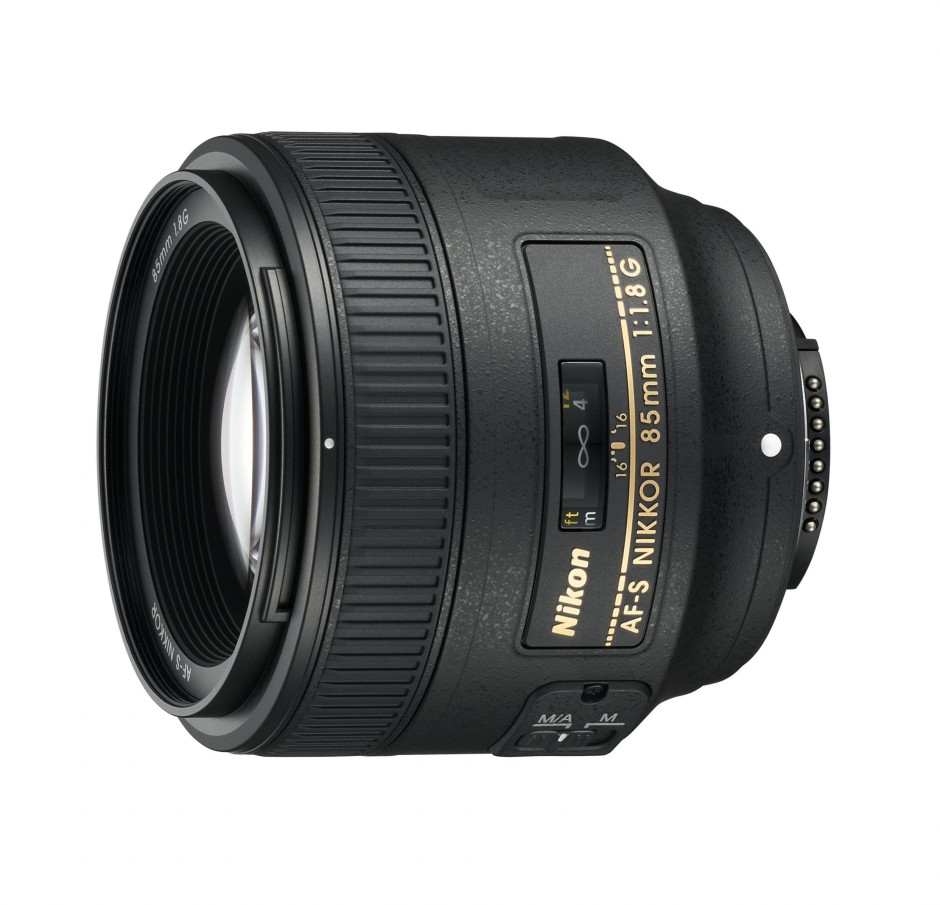
If you’re into landscapes, a 28mm would be the natural choice. 85mm, 100mm, and 135mm prime lenses became the de facto standard for portrait photography all ’round the world.

Nikon's 85mm ƒ1.8

The first zoom lenses were patented in the early 1900s, and the first commercial production of zoom lenses for stills photography started in the early 1960s. All of a sudden, zoom lenses were all the rage.

Why would you limit yourself to a single focal length, when you can cover a whole range? So, manufacturers shrugged, and started creating zoom lenses.

What’s going on now?

Nowadays, all ‘kit lenses’ (lenses you get bundled with camera bundles) are consumer-grade zoom lenses. My dad recently got suckered into buying an 18-55mm and a 55-200mm lens (after I explicitly told him to buy a Canon 28-135 ƒ/3.5 Image Stabilised lens… Tssk, doesn’t the lad know I run a photography blog, or something?), for example, and he isn’t stupid. It’s just too tempting to get a wider zoom range, in the hope that the increased flexibility will get you the photos you need.

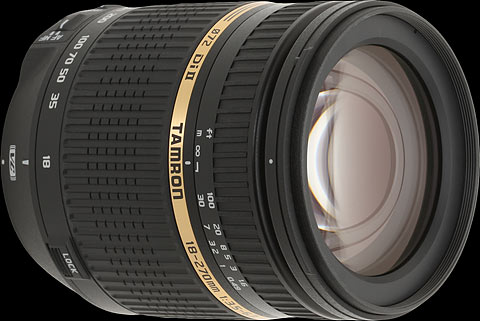
Tamron's 18-270mm offers a huge focal range, but is it as sharp as a prime lens?

The thing is, a zoom range is all good and well, but ultimately, it’s all about sharpness. Are your photos so crisp they jump out of the screen at you? If not, you’re probably doing something wrong. So what happens if I tell you that one of the sharpest lenses a consumer can buy is also the cheapest lens Canon makes? You’d be surprised, right? But it’s the truth. Time and time again, people are amazed when they review consumer-grade zooms against far cheaper prime lenses. But — as Tabaware explores — they aren’t even in the same league.

So why is this? Well, it’s damn simple, really… it’s far easier to mass produce a prime lens: Because it only has to be sharp at one focal length, the optics are a hell of a lot simpler. So they can concentrate on getting it to be really good, rather than just being good enough.

Why should I care?

It really depends, to be honest: What do you want out of your photography? If you are looking for convenience and holiday snaps, by all means, go for the first and best zoom lens. Hell, I've a few of them myself and love to use them, but still, there’s a certain feeling of zen about using prime lenses. They can be slightly limited, sure, but they’re also sharper than a surgeon’s scalpel, cheap as a bag of crisps, and they are just a better idea overall, especially as you are just learning about photography.

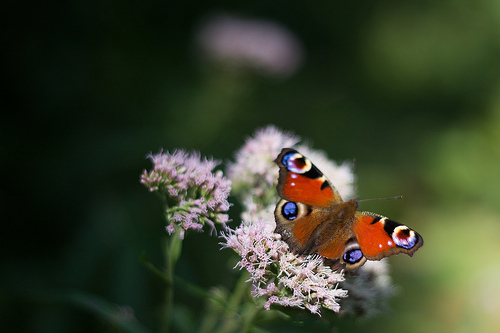
Peacock butterfly

So, if you’re in the market for a new camera, and the kit comes with some two-bit zoom lens, see if you can’t convince the salesperson to do you a deal. “So, you want to sell me this lens? How much does it normally cost? Interesting. I can see that you sell a 50mm ƒ/1.8 for less than that. Can you give me one of those instead?” Sure, money-wise, you’ll lose out. But your portfolio will thank you for it for years to come.

Are prime lenses really such a good idea?

Well, yes, I would argue so. I'm a frequent traveller and it isn't unusual for me to get on a plane with just my camera body, a 50mm ƒ/1.4, and Canon PowerShot S95.

Check out the gallery from one of my trips to Vietnam, or a bigger collection of my photos taken with the humble 50mm.

Convinced yet? Good. Head over to your favourite photographic retailer, and buy yourself a lovely little prime. Lazy? Okay then - Canon users, click here. Nikon users, click here. Pentax users, you can click here. Sony users, click here. And Olympus users, click here. You're welcome.

TL;DR

  • Prime lenses are lenses with fixed focal lengths
  • They are usually sharper than zoom lenses because they have fewer moving parts
  • And fewer moving parts also makes them cheaper to manufacture and less likely to suffer from a fault

Noise << Photography Fundamentals >> Quality versus quantity

Can you fix the focus on a blurry photo after the fact?

I seem to be on a roll this week, with finding incredibly interesting topics to write about over on Quora. In this case, the question was as simple as it was interesting: "Is it possible to focus an unfocused image with a computer program?".

Answer...

There are many technical challenges with focusing an image after the fact, and it depends heavily on how out-of-focus the original image is. It is possible to do some sharpening that gives the illusion of a photo being in better focus, but actually re-focusing the photo? Not so much.

Here's why...

Take an image like this for example (see the photo on my Flickr stream for a larger version):

Just chillin'

The bird in the foreground is in focus (well, more or less), but the plants in the background are not. Now, blurring this photo would be relatively trivial, because you are discarding information.

If your goal was to 're-focus' the photograph so the trees in the background were in focus, however, you're looking at a completely different problem, at least if your photo is taken with a conventional camera (Light-field cameras like the Lytro work differently)... The problem is that you're trying to re-generate information that simply isn't there.

Another example

Let's take another example. This photo, for example (see Flickr for a larger version):

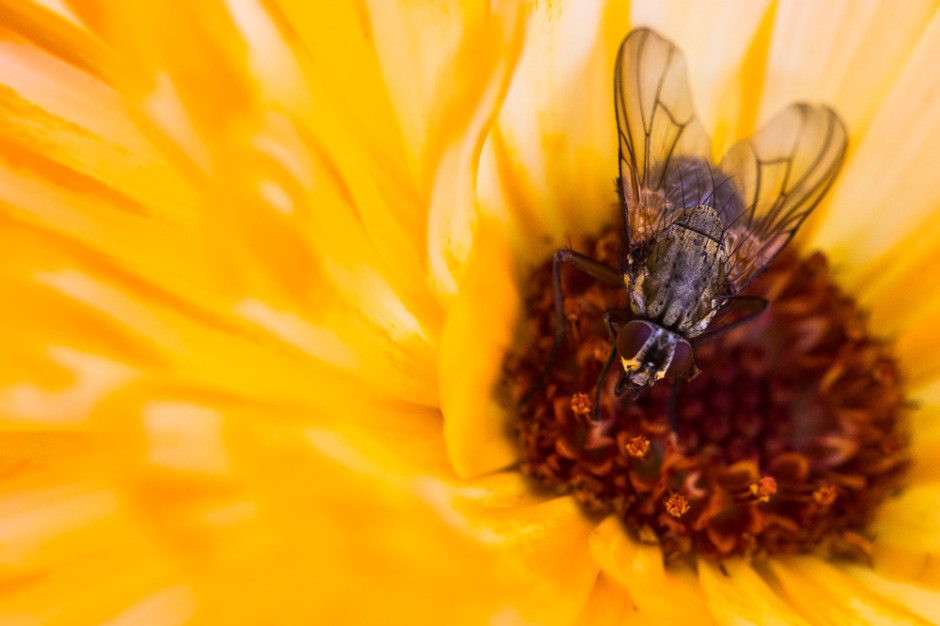
What big eyes you have...

In this photo, you have an extreme macro shot of a fly. You can see the individual facet eyes of the fly, and count the hairs on its back. However, it has very shallow depth of field, and if you look at the legs in the background of the photo, they are just blurry stalks. Now, the technology you are looking for, would somehow magically be able to find out the size, direction, and shape of each of the hairs on the fly's legs that are out of focus in the background.

It stands to reason that this information simply doesn't exist. I took the photo, and I have no idea what colour the hairs were, how many there were, and how evenly they were spaced. This photo is a pretty good document of the fly, of course, but it is physically impossible to recreate information that isn't there - unless you have a data source to base this information on.

On the other hand, Adobe is doing some really interesting stuff with their 'deblur' technology. This isn't the same as focus blur, however; the idea of Adobe's deblurring is to take a photo that was sharp to begin with, but suffers from motion blur. This means that, in theory, a lot of additional information exists in the image, it is just spread over an even surface. As such, it is possible to 'unblur' the image by throwing clever algorithms and a lot of computing power at the problem. Sadly, this is only possible in very limited cases. It's not possible to re-focus an image, but it is possible to evaluate the photo to remove certain image artefacts, much like noise reduction filters etc.

For further reading, check out the vaguely related concepts of Focus stacking (which uses focusing at several focus depths, and calculates an image with deeper depth of field), HDR (which does a similar thing, but for images with various exposures) and, of course, the Lytro camera, which is able to focus after the fact, but struggles with its own problems (including much lower final resolution than we are used to from our digital images).

TL;DR: No, you can't focus an image after the fact.

What is noise?

Photography Fundamentals has reached part 'N', for 'noise'. Digital noise is instantly recognisable in a photo, and we know that keeping your ISO low is the best way to avoid it, but why exactly does it happen? Why does your image quality go down the pan as soon as you touch that ISO dial? What's with all the digital noise?


In 2006, this was the reality of digital noise in photos ...

How does an imaging chip work?

Whether you use a CCD or a CMOS chip in your camera, the basic functioning of an imaging chip is pretty much the same: Imagine millions of tiny little light meters squashed into a tiny little chip the size of a postage stamp. How many million? Well that depends on the resolution of your camera, of course, but if you’ve bought yourself a Canon EOS 700D, you’ve got a 18.5 or so million pixels (of which 18 million are used). All of these pixels are somehow fitted on roughly 22mm by 16mm sized space – yes, that’s about the same area as the button on your average door-bell.

When you take a photograph, there are a set of shutter curtains which move aside – exposing the imaging chip for as little as one eight thousandth of a second – giving the sensor time to measure the light that falls on it. Then, the shutters close again, and the sensor sends the measurements to the camera’s cpu, which does some calculations, and then stores the whole thing as a digital file.

Where does ISO come into it?

Now you know pretty much how an imaging chip works – but where does ISO come into it? Well, all imaging chips operate at the lowest ISO your camera supports – usually ISO 100. In this mode, your camera takes its light measurements from its millions of tiny little light sensors, passes it directly to the brain of the camera, which then stores it.

When you crank up the ISO value to, say ISO 400, another step is added to the mix: Your camera still takes the same measurement, but in the CPU of the camera, the measured values are multiplied by 4, to get ISO 400. Or by 8 to get ISO 800. Or by 32 to get ISO 3200. Pretty straight-forward stuff, right?

So, er, Where does digital noise come from?
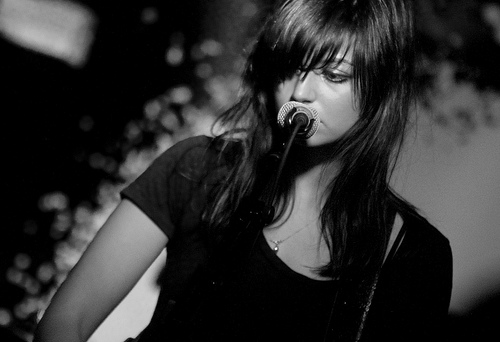
Silhouette in concert
Silhouette in Concert by yours truly – Also see the full-resolution image for an excellent example of digital noise in photography

Well, think about it: while chips have gotten much, much better in recent years, it’s still a case of 18 million tiny little sensors doing their thing in a space the size of your thumb nail.

The problem is that – as with all precision measuring instruments – they can only be so precise: all of them introduce a degree of measuring inaccuracy. The problem with imaging chips is that they are internally inconsistent, and they are unpredictable.

The inconsistency is a problem which can largely be resolved: The camera can take a photograph, and realises that if one particular pixel always reads a little bit higher than its immediate brethren, it can calibrate so that one pixel is adjusted down to fit better. This calibration is done before the camera leaves the factory, and it’s trivial for camera manufacturers to built-in calibration checks on an ongoing basis – it’s relatively trivial to detect a dead pixel, for example, and then interpolate what its likely value would have been from its surrounding neighbours; and because there are 18 million of them, and we rarely check each individual pixel of a photograph, you’d never know.

The unpredictability issue is different, however; imaging chips are sensitive to temperature, and the act of taking a photograph actually causes the chips to warm up a tiny little bit (there’s a lot of electronics in a camera, after all, including the battery, the CPU, and all the circuitry to tie it all together – all of which generates various amounts of heat). Some cameras have a ‘noise reduction’ feature where they take another photograph immediately after you take a long-shutter-time photograph – but with the shutters closed. The theory is that it should be recording perfect darkness, but in practice it records a variety of readings from all the sensors. By subtracting these readings from the original image, you reduce (some of) the digital noise in an image.

Imaging chips are precise enough that at ISO 100, the differences in readings introduced by digital noise are practically unnoticeable. The problem comes from the multiplication process.

A thought experiment

Imagine you take a photograph of a perfectly grey wall at ISO 100, ƒ/8.0 and 1/30 second exposure time. Three randomly selected pixels now read 100.5, 100 and 102. No problem; it looks great, and the stored values are within 2% of each other – the wall looks like a perfectly even, gorgeous grey wall.
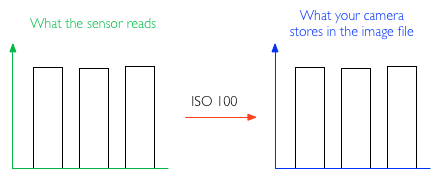
iso_100.png

Now, switch the camera settings ISO to 800, ƒ/8.0 and 1/240 second. The final result — in a perfect world — should be precisely the same: We’ve reduced the shutter speed to 1/8 of the original exposure, but the camera will multiply the exposure by 8 because we’ve changed the ISO. The same pixels now read 12.6, 12.5 and 15.5: The margins of error are the same as above. The camera multiplies it all by 8, and stores 101, 100 and 120 to the memory card. Suddenly, there’s a 20% discrepancy between the three values, which becomes very clear in the final image: What you’re seeing here is digital noise.
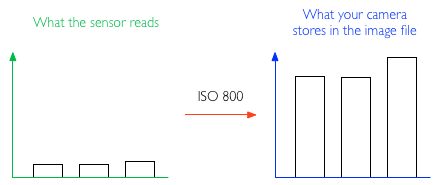
iso_800.png

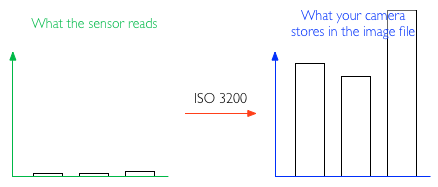
Now, imagine the same effect at ISO 3200: the pixels read 3.5406, 3.1250 and 5.1875, which the camera multiplies back up to 113, 100 and 166 – a far shot off from the 100, 100, 100 you’d get with a perfect imaging chip.
iso_3200.png

In reality, the metering tolerances in an imaging chip aren’t that pronounced; but the point is that if you multiply any meter reading by 32 (or much more, depending on how your ISO settings on your camera will take you), you’re talking about pretty serious discrepancies, and some pretty serious noise in your final image.

How can I reduce digital noise in my pictures?

Use as low ISO as you can get away with; Often, it’s better to use a tripod and a remote release cable combined with a longer shutter speed and lower ISO, than trying to shoot free-hand at shorter shutter speeds and higher ISO.

Use shorter shutter speeds; If you can, use shorter shutter speeds – the metering discrepancies will still be there, but less pronounced.

Keep your camera’s insides cool; when you take a lot of photos, you’re introducing more camera noise. Also, if your camera has a ‘Live View’ mode, it sucks battery, and means that the camera’s electronics are constantly working hard – which causes heat, and introduces more noise.

Use noise-reduction software; There’s a few options out there by now, but I've been consistently impressed by the RAW processor built into Lightroom - the before-and-after pics at the top of this article, for example, were processed with Adobe Lightroom. Personally, I quite like a bit of noise in my photos – it makes them look more accessible and ‘real’, I feel – but that might just be me.

noisynoisy.jpg

TL:DR;

A super-brief summary of all of the above, courtesy of Redditor IAmSparticles

When you increase the ISO setting on a digital camera, you're increasing the gain and magnifying any faults in the data from the sensor. It's like turning up the volume on a radio station with really bad reception. You can hear the faint signal better, but the static gets louder, too.

The problem is worse on smaller sensor chips (pocket cameras and phone cameras) because all the pixel sensors are packed together in a tighter space, causing more heat buildup and interference between them, and therefore more errors in the output.

Macro << Photography Fundamentals >> Prime lens
What is macro?

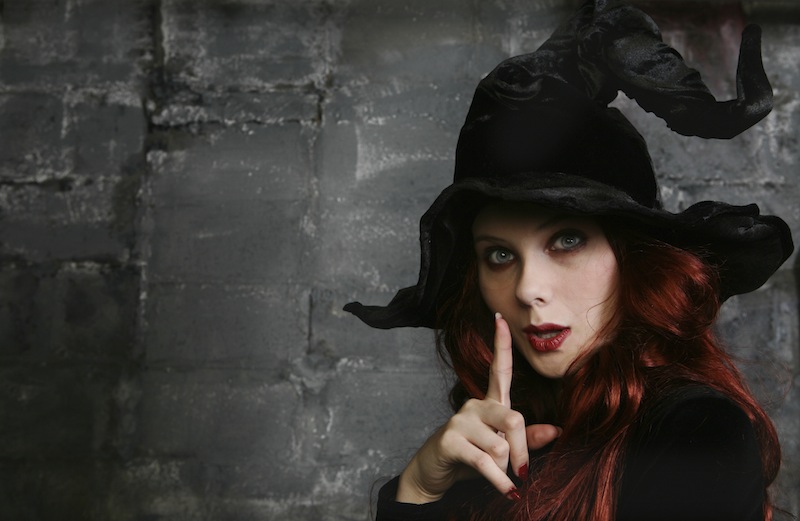
The Photography Fundamentals roadshow has reached stop 'M', where we're taking a very brief look at macro. We've kept it brief because otherwise it would become an incredibly detailed exploration of the subject that wouldn't so much be an introduction, which is the guiding principle behind the Photography Fundamentals series, but a tome. Although we think of macro photography as being the art of caprturing tiny things, it's not quite that. It's actually about capturing things very close. When you photograph little things, like ladybirds or lily pollen, you obviously want to get in close to fill your frame and get the best detail. This is probably why we associate 'macro' with 'small'. You could, however, have a macro shot of a skyscraper. It wouldn't be the entire skyscraper, but a very detailed, up-close section of it.

Reversed 28mm lens
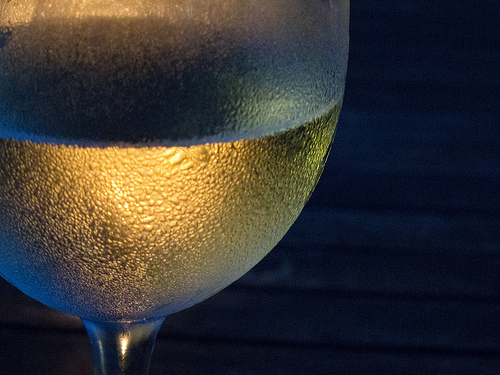
Getting this close usually requires a specialist macro lens to achieve a photo, although there are ways around this using extension tubes, bellows, reversing rings, and other bits of kit. As for a macro lens, the technical definition is of a lens that can record an image on a camera's sensor that's the same size as the object being photographed. It has a magnification of factor of 1:1. Similarly, if the image of the subject on the sensor were half the size of the actual subject, the magnification would be 1:2; if the image on the sensor were a quarter of the size of the actual subject, that would be a magnification of 1:4.
That strict definition of what it takes to produce a macro image has loosened over time and lots of people are happy to say that 1:10 magnification counts as macro. Simply: you're really close.

Que? (Macro)

All of that magnification means that macro photographs frequently have very shallow depths of field.
TL;DR

  • Macro photography is extremely close-up photography
  • The strict definition of macro photography is an image with a magnification factor of 1:1 - the subject will be at least the same size in real life as it is recorded on the sensor
  • The looser definition of macro photography is of images with a magnification of 1:10. It's still close!

Leading lines << Photography Fundamentals >> Noise

10 ways to break photographer's block

A spot of pinhole photography may help you break your photographer's block.

As a writer, I know the feeling all too well – with a sense of dread and a deep sense of apathy, I stare at the blinking cursor and the completely blank TextMate document. I have ten thousand thoughts and feelings and stories that are chomping at the bit to get told, but it’s just so difficult to get started… And the exact same thing can happen to me when I’m taking photos.

So… What can you do to get out there and beat photographer’s block? What can you do when your camera’s batteries are charged, your memory card is fresh, the weather is fabulous, and the light is reflecting tantalizingly off your expensive glass lenses, but your inspiration is just kicking it on a rocking chair on the porch with a cold ice tea, like a metaphor stretched to well beyond the sensible breaking point?

Fear ye not, my photo siblings… Here’s my Top 10 tips to breaking the photographers’ block.

1. The 100 step challenge

The 100 step challenge is one I’ve promoted here on Photocritic before – because it’s one of those things I’ve found work incredibly well indeed. It’s easy: Grab your camera, and start walking. Count your steps. After 100 steps, stop where you are, and where you’re standing, you have to take a photograph.

“But there won’t be anything there”, I hear you cry. Well, yes, but that’s the point. The idea behind the 100 step challenge is to force yourself to see scenes and to create pictures even if there’s nothing there to be seen. It’s kind of like free association writing, where you just start writing, and keep your hand moving even if you have nothing to say – sometimes, the greatest things are created when you’ve run out of things to say.

Even if you don’t get a single good photo out of your 100-step challenge, you’ll have had a nice walk out of it, right?

2. Recreate a photograph you love

Everyone has a photo that they really like. Hopefully, you’ve got a few hundred photos in mind – think about the great photographers who’ve lived before you, and pick one of their photos. Then go ahead and copy it – sure, it’ll be plagiarism, but you’ll learn something in the meantime.

The photo on the right is Still waiting (Yorgos III), from my Flickr stream. Click on it to see it bigger.

3. Learn from the greats

Only in the last few weeks, I’ve written about The top 50 photography websites and 50 amazing flickr streams. That’s 100 URLs worth of inspiration. Pick one at random, study their style, and either recreate one of their photos, or use the observations you’ve learned about style to create a photograph in a similar style.

Flickr especially tends to be open to questions, so if you’re struggling to recreate a style or a ‘feel’ – go ahead and post your best try to Flickr, and ask the photographer whose work you’re imitating where you went wrong…

4. Self Portraiture

The only model you’ll have consistently available is yourself – go ahead, do something awesome. Use make-up if you don’t usually use make-up. Wear girl’s clothes if you’re a boy, or vice-versa. Try to make a recognisable portrait of yourself without showing your face. Go crazy – here’s some inspiration.

Photo on the right: Self portrait sans self

5. Rapid Fire

120 minutes – 120 different photos. Related to the 100 step challenge, but more hectic. This works well with street photography especially – go ahead, shoot first and ask questions later. You may end up with 120 duds, of course, but hell, it’s a lot of fun to come up with them anyway, right?

6. Play the Random game

Play the Random Game – which you do by calling up a Wordsmith random word of the day. That’s the word you have to try to illustrate with a photograph.

If you’re struggling, plug the word into Google Image Search. If it comes up with something, then go ahead and try to copy it!

Bonus challenge: As I was writing this, the word that came up randomly was Bloviate. Illustrate that :)

7. Flickr’s Interestingness

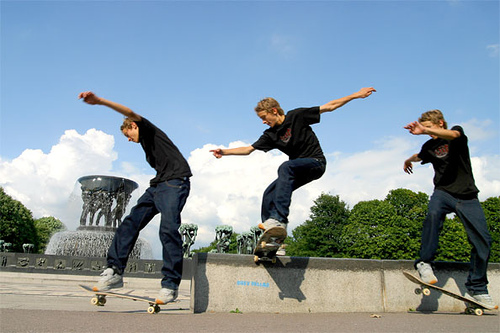
Skate-zo-phrenia-105.jpg

This is Skatezophrenia, from my Flickr stream. Click on it to see it bigger.

I keep telling people this, but if you manage to stay uninspired even after browsing Flickr’s Interesting in the last 7 days for half an hour, you may as well hang up your photographic spurs.

If you want to continue exploring, find the Flickr name of a photographer you admire (or one you’ve just discovered), and plug their name into the Flickr Scout tool from Big Huge Labs, sorting by Best Position – that’ll list a users ‘most interesting’ photos – a great way to get an introduction to a user’s most popular photographic work.

8. Try something new

Lamb of God at Sonisphere IPhotography generally comes in a ton of genres, and I bet you a lot of money that you’re not as conversant in all of them. So why not try to work on improving your work in one genre? For me personally, portraiture really clicked after I had done a load of animal and live band photography.

Not convinced? Well, then… Start a whacky project, like photographing only feet for a few days, or taking photos of toilet locks (see also). If that doesn't float your boat... Have you tried panoramas (see CleVR)? HDR (see our guide / HDR on Flickr)? Portraiture (see “Portraiture: Borrow their soul!” and Do It Yourself: Build A 1600W Studio Broadlight at Shutterbug)? Nude photography (see Renoux’ work and my own Nude photography 101: Photographing your girlfriend)?

How about macro photography (on Flickr)? Long exposure photography (on Flickr)? Photojournalistic photography? Astrophotography (on Flickr)? Street or candid photography (on Flickr, Wikipedia and Photo.net’s guide)? Paperazzi-style photography? Food photography (for all the icky tricks, read my article)? War photography (my modest contribution can be found in this Flickr set)?

Kite aerial photography? Lomography? Night photography? Infrared photography? The list is long, and this is only a small selection of ideas…

Surely, there’s one style or another where you feel that perhaps you could try it again, and improve a little?

Photo: Lamb of God at Sonisphere

9. Don’t take any photos

Perhaps if you don’t feel like taking photos, it means that you’re not ready to take any photos. Hey, it could happen.

Dig out your library, see if there’s any of your photos you’ve missed. Re-edit some photo sets. Re-upload some of your photos to Flickr, and see if you can’t get some inspiration from your old work.

10. Stop procrastinating

What are you doing reading these guides on the internet anyway? Grab your camera, get out there, do stuff. Stop moaning. No, seriously, outside. Or inside, for that matter. Just do it already!

11. Help your fellow photographers

Do you have something that breaks you out of a rotten spell of photography block every time? Or even just some of the time? Or perhaps just once? The tips above do it for me every time (especially 7, 5 and 2, to be honest, but I guess it’s more important to find something that works for you)… Go on, leave a comment and tell us how you broke your dry spell!

Hat tip to @karbassi on Twitter for the idea for this article!

What are leading lines?

The Photocritic Photography Fundamentals magical mystery tour has reached 'l', for 'leading lines'. It's time to join these vital compositional tools in their seductive tango. Lines, they're important things. Train lines get you from A to B (occasionally via Z), cricketers are always looking to bowl good lines, and in photography they can make or break your images. Lines can be confrontational and restrictive, creating borders and boundaries, but they can also be alluring and sultry, drawing you into an image and not letting you go. These are 'leading lines' and they're powerful tools in your photographic arsenal.

There are, broadly speaking, four types of leading lines that you can introduce to your photos to give them depth and interest. There are both naturally occurring and man-made leading lines, and as a general rule, once you've seen one, you can't un-see it.

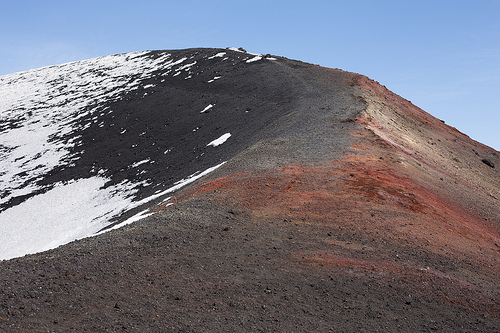
The first type of leading line is a path or roadway that creates a sense of depth in your photos. Parallel lines will naturally converge at a point owing to perspective, which means that any road will draw you into a photo and give you a sense of motion. These types of leading lines will make you feel as if you're going somewhere in your photo.

Etna ii

Next are leading lines that pull your eyes across the image and deposit you firmly at your subject. These lines don't have to be straight and they can be single or multiple, but they're just as effective as but more attractive than a neon sign flashing 'The subject is here!'

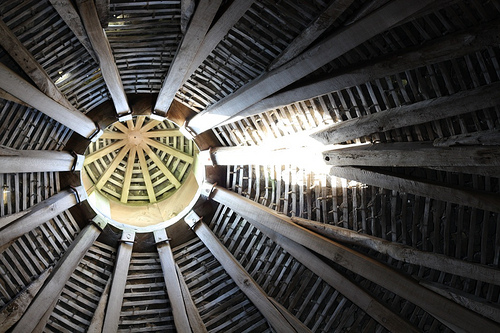
Dovecote

There are also lines that take you on a journey through an image, forming a narrative. These lines can be straight or curved as they lead you from one point to another.

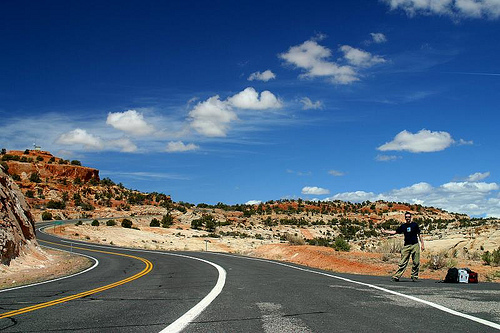
Arizona 2003

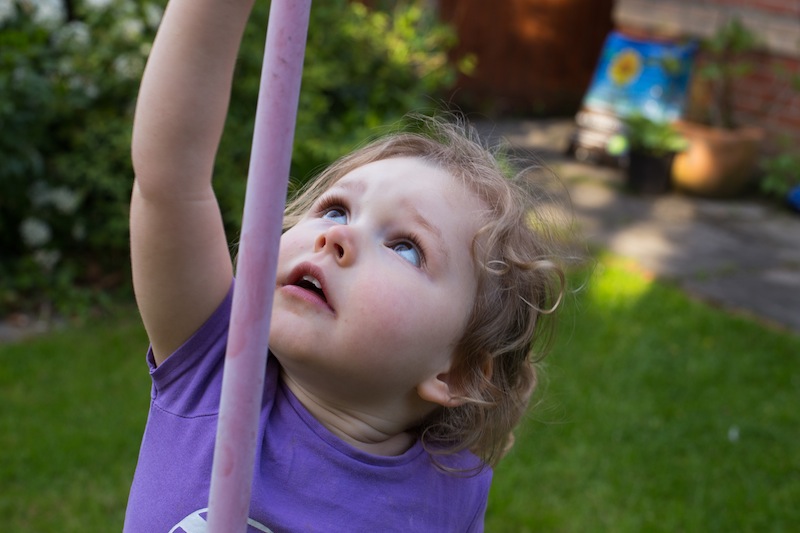
Finally, look out for invisible lines that send the viewer from one point to another. If that sounds a bit elusive, think of people's eyelines. Humans are curious by nature and once we've made eye contact with someone, we'll automatically look to where she or he is looking, too. If your subject isn't looking directly at the camera, the viewer will follow her or his eyeline to see what's so interesting.

7

Roads and paths form obvious leading lines, but so do walls and fences, bridges and bricks. Nature's leading lines are formed from rivers, branches, stems, shorelines, and light and shadow. Lines don't have to be unbroken, but can be formed from several points, for example lamp posts or trees.

Once you start to use them, you realise what a powerful compositional feature they are, directing the eye, joining the dots, and completing the narrative.

TL;DR

  • Leading lines are a compositional tool used to bring interest to your image
  • They can add depth and perspective to a photo
  • They can direct the eye to the photo's subject
  • They can lead the viewer on a narrative journey through the image
  • They can be implied lines, for example sightlines
  • Leading lines can be created both naturally and by man-made objects

Key << Photography Fundamentals >> Macro

What is key?

This week's Photography Fundamentals issue looks at key. Key is an element of the photography canon that crosses over with other artistic disciplines, most notably music and painting. I'm the least musically-talented person known to man, but even I manage to spot the similarities.

When we talk about the 'key' of an image we're talking about the range of tones or brightness that it comprises. Primarily we use it when we're describing images as being either 'high-key' or 'low-key', which are at the extremes of the range of brightness—light or dark respectively—and the feelings that these images convey. However, 'high-key' and 'low-key' can also be used to describe lighting set-ups, not just a style of photo.

High-key

High-key images are light and bright, either with upbeat and positive connotations or with dream-like, ethereal qualities. They will be low on contrast with very few, if no, shadows. If you look at a high-key image's histogram, it will exist mostly in the right half of the graph, with just about all of its pixels pushed above middle-grey and into the near-whites and whites.

The intensity of colours begins to fade as brightness increases, which means that high-key images are frequently black and white. If they are in colour, they tend towards pastels in tone. Or they could be the classic white-on-white.

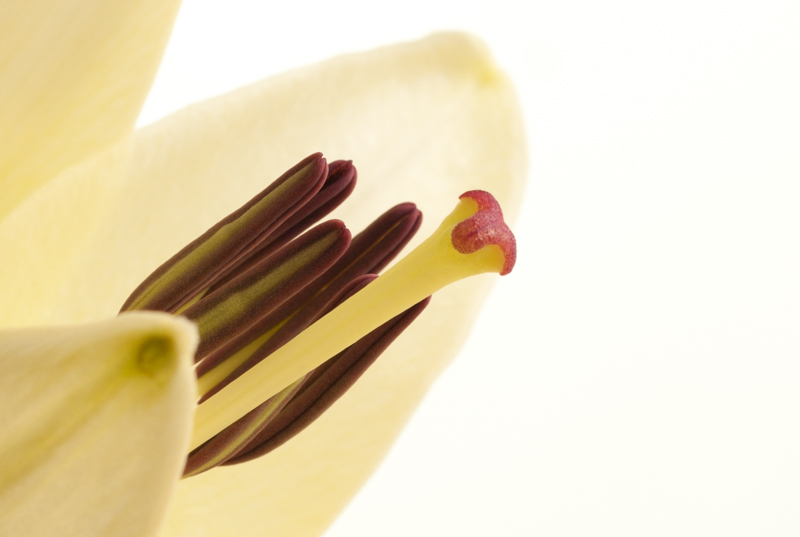
Lily

It's easy to think of high-images as being 'just over-exposed', but getting them right is a bit more complicated than simply setting some positive exposure compensation. To achieve a good high-key image you need to bathe your subject in even light and keep everything about the image on the pale side. Unless you have deliberately blown-out the background to get it bright white, and with the exception of specular highlights, there will still be detail across the image.

I like to think of high-key images as the photographic equivalent of reading Jane Austen, but you can pick your own literary metaphor. Music-wise, it'd be a song composed in the major key.

Low-key

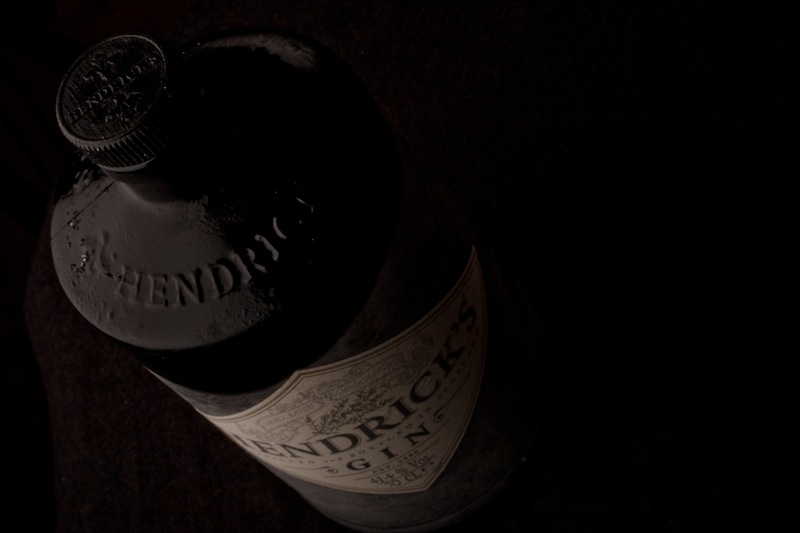
Low-key images evoke feelings that might be sombre or miserable, or even fearful or threatening. Like high-key images, they're low on contrast, but this time they are predominantly dark or black in tone and their histograms are clustered towards the left-hand side of the graph.

Hendricks

Anything that needs to be portrayed with a sense of impending doom is perfect low-key material. Just as high-key images aren't all about over-exposure, low-key images aren't focused on grisly under-exposure. There will still be detail in the shadows. If you don't want to be too purist about how your histograms look, having the odd bright area can strenghten the feel of a low-key image by re-inforcing just how dark the shadows are.

If you want a literary comparison, think gothic horror novels, or the minor-key for a musical equivalent.

High-key and low-key lighting

Cinematically, high-key or low-key lighting means something quite specific. High-key lighting has a low key-light to fill-light ratio that produces evenly lit scenes that are practically shadow-free. Low-key lighting, on the other hand, has a high key-light to fill-light ratio (yes, it's counter-intuitve) that creates pools of light and harsh shadows.

TL;DR

  • Key refers to overall tone of an image
  • High-key images are light and bright with a general sense of positivity
  • Low-key images are dark, brooding, and can even feel menacing
  • Although high-key and low-key images rely on technical over- or under-exposure to achieve them, this is controlled and does not negate details in the highlights or shadows respectively

ISO << Photography Fundamentals >> Leading lines