Feature Articles

Avoiding the evil of red-eye

red-eye

You have checked your camera, have extra memory cards and back up batteries, and are ready to shoot. You start blasting away capturing awesome moments with family and friends, only to be shocked by your photos days later. You slowly begin to think that everyone you know are evil aliens! Okay, so that joke is getting old, but I’m referring to red-eye.

Red-eye, in photography terms, is when the pupils of the eyes in people and some animals, appear red in photos. Since ’tis almost the season for many great holidays, and amazing photo opportunities, I thought I’d give you a gift of my own, so here it is, how to avoid this tragedy.

What is red-eye?

For starters, we first need to look at the underlying issue that causes red-eye. Without going into too much graphic detail, red-eye is caused by light from your flash; it enters your subjects’ eyes, reflects off the back of the their eyes (retinas), and then back out the eyes to your camera; all before they can blink! Amazing right?
You might be asking yourself, why the eyes actually appear red, and not white. Well that’s due to the blood that nourishes the insides of our eyes.

Red-eye occurs when light from the flash reflects straight back from the retina into the camera lens

Now that the biology of what causes red-eye is covered, let’s examine the technical side. Red-eye occurs more frequently in cameras the have flashes in close proximity of the lens, such as many compact flash digital cameras. Why? This is due to the fact that the flash and lens are almost on the same parallel plane with the eyes, enabling the light to bounce straight into the eyes and back into the lens.

There a number of editing programs with “red-eye fix” solutions, but don’t rely on that for solving your red eye issues.

What to do?

One of the easiest ways to avoid red-eye is to simply not use a flash, but let’s face it, that is not always an optimal choice. You could always make sure your subject is not looking directly into the camera. Although, this can create some amazing shots, this too may not always be practical or wanted option. If you have to use a flash, and want your subject looking at you, there are a number of ways to help eliminate the red-eye issue.

Red-eye reduction feature

Make the iris smaller and it'll help to reduce red-eye

If you are currently in the market, or recently purchased a camera, many cameras these days offer a feature generally referred to as, red-eye reduction. In most cases, the camera will emit two or more lower output flashes before taking the picture. The idea behind this is the lower output flashes will cause the eyes to constrict thus allowing less light in that could possibly be reflected.

By putting more distance between the flash and the lens, you can stop your victims looking like, ehm, victims.

Pop-up flashes

Another technological advancement are pop-up flashes. Here, the flash pops out of the top of the camera, creating more space between the lens and the flash. This can sometimes be used in conjunction with the red-eye reduction feature. Typically pop-up flashes will be found in higher end digital compact cameras, and lower-high end dSLRs.

Off-camera flashes

The best method, would be to get the flash completely off the camera, by using an off-camera flash. This is a more advanced option, but there are number of great ways to do this, from flash brackets, to stands, and everything in between. This not only allows you to eliminate red-eye issues, but also have better control over your lighting, creating more flattering photos.

Bring on the diffusers

Lastly, diffusing you flash lighting works for all cameras. Some methods may not work with your camera, but a few suggestion are bouncing your flash off walls, bounce cards, flash diffusers, filters, gel inserts, and tons of other professional products, and DIY ideas.

Quick red-eye-free summary

  • Red-eye is caused by light from the flash entering the eye, bouncing off the retina and returning to the camera lens.
  • It looks red because of the red blood cells in the eye.
  • You can avoid red-eye by putting more distance between the camera lens and the flash.
  • Diffusing the light from the flash will help, too!

Now go forth and take red-eye-less pictures over the party season!

15 fabulous photobooks

IMG_0064 copy

Whilst I was researching small gifts suitable for photographers, I ran into so many books that would make fabulous presents I decided that they deserved a post of their own. Oh yeah, this is it.

I’ve tried to include books that cut across different styles of photography, as well as suggest technical and coffee table books. Hopefully, there is something here to appeal to everyone, and if you’ve any burning suggestions, then please let us know!

The Art of Black and White Photography, by Torsten Andreas Hoffman

This book begins at the beginning, looking at cameras and equipment, and works right the way through different genres and styles of photography – including portraits, abstracts, and street photography – the technical elements of how to compose a picture, and ends with post-processing. It feels comprehensive but isn’t overwhelming; if you want to refer to one specific section, it’s easy enough to do that. And it is full of lots of lovely pictures.

Currently £22.43 on Amazon UK and $29.67 on Amazon US.

Auto Focus, by Susan Bright

How many different forms can self-portraiture take? Susan Bright looks at series of self-portraits shot by seventy-five photographers from across the world. They cover autobiography, they explore the human body, they consider portraiture as a performance, and they use masks and masquerade. It’s a fascinating exploration of identity and self-expression.

At present £23.80 from Amazon UK and $37.80 from Amazon US.

Decade, by Eamonn McCabe and Terence McNamee

This book charts the first decade of the 21st century in pictures, illustrating everything from pop sensations bouncing on stage to disembodied heads being toted as war trophies in some of the world’s most troubled countries. Sometimes it’s amusing, sometimes it’s shocking, but is a gorgeous retrospective of ten years of world events.

Currently £16.22 on Amazon UK and $26.37 on Amazon US.

The Hotshoe Diaries, by Joe McNally

If photography is all about painting with light, then we need at least one book that looks at lighting. And seeing as we can’t all afford big lighting rigs, this will take you through using SpeedLites to get the most out of your pictures. Maybe with the odd bedsheet or reflector thrown in for good measure. Not only do you get great pictures in this book, you also get diagrams, some of them drawn on napkins!

At the moment: £13 from Amazon UK and $26.39 from Amazon US.

In My Mind’s Eye, by Charlie Waite

This is a gorgeous collection of black and white photographs. Mostly they are landscapes and still lifes, but there are some portraits, too. Definitely something to flick through if you want to escape for a moment or ten.

£12.99 from Amazon UK or £17.96 from Amazon US.

Langford’s Basic Photography, by Michael Langford, Anna Fox, and Richard Sawdon Smith

There are so many ‘complete guides’ or ‘introductions’ to digital photography out there that it is quite overwhelming. If your camera isn’t already confusing you, the number of books telling you what you should be doing will. This book is now on its ninth edition, having first been released in 1965, and has shepherded many budding photographers through their early days. It must be doing something right.

£17.59 from Amazon UK or $28.76 from Amazon US.

Macro Photography Photo Workshop, by Haje Jan Kamps

You might call me biased, but this is the best introduction to macro photography out there. Whatever teeny-tiny things you want to photograph, from droplets to spiders to eyes, this book will take you through the process, giving you examples and exercises along the way.

Currently £10 from Amazon UK or $21.89 from Amazon US.

The New Antiquity, by Tim Davis

I’m a great believer in the value of seemingly mundane photographs: shards or fragments of the prosaic preserved for future generations to use as insights into our lives. This book examines just that: the slivers of our world that will one day form the record of what will then be our ancient existence.

£29.71 from Amazon UK or $30.40 from Amazon US at present.

Norman Parkinson: Portraits in Fashion, by Robin Muir

Ooh this book is full of deliciousness. It’s a retrospective of Parkinson’s work as a fashion photographer, from the 1940s to the 1980s. Every image is the perfect embodiment of its age, from 1960s pillbox hats and swing coats to 1980s loud eye makeup and shoulder pads. Mmm.

£9.74 from Amazon UK or $19.44 via Amazon US.

Photobox, by Roberto Koch

I suppose that the easiest way to describe this book is that it is an encyclopaedia of photographers. It’s divided into different genres, with photographers who practised that art form listed there with a short biography and an example of her or his work. It’s the sort of slightly geeky information-fest that appeals to me, I suppose.

Currently £12.97 from Amazon UK or $19.77 from Amazon US.

The Photographer’s Guide to Landscapes, by John Freeman

I looked at a lot of books that covered landscape photography, but this was the one that I would’ve taken home for myself. It’s divided into three sections. The first looks at the technical elements of landscape photography, from how to compose a picture, which lenses to use, and what sort of ISO and shutterspeed to worry about. Then it looks at actual landscapes, and how best to capture them, whether they feature water, sand, or sky, are urban or rural. Then it takes you through the post-processing malarky. Beginning to end landscapes.

£14.44 from Amazon UK or $19.95 from Amazon US.

Photographing People Like a Pro, by Rod Edwards

If I thought that there were a lot of landscape books out there, then I must’ve looked at them before I almost collapsed under the portraiture guides. Want to know why I rejected most of them? (If you don’t, I’m going to tell you anyway.) I didn’t like the pictures in them. Seriously, if I were to pay for a portrait session that came out like some of the pictures in those books, I’d be deeply unhappy. This book, though, I could get along with. I liked its simple format and its progressive nature. It started with equipment, it moved on to designing an image, then it examined light before looking at how to work with the people you’re photographing, and it finished with post-processing.

Roughly £34 from Amazon UK or $52 from Amazon US.

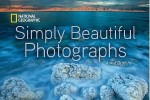
Simply Beautiful Photographs, by Annie Griffiths

The title says it all: this is 500 pages of beautiful photographs that have been compiled from the National Geographic archives by Annie Griffiths. I defy you not to find an image that will take away your breath.

£11.54 from Amazon UK or $23.10 from Amazon US.

The Visual Dictionary of Photography, by David Präkel

This book is a stroke of genius. Seeing as photography is a visual medium, it explains technical terms from ‘abstract’ to ‘zoom lens’ using pictures as well as words.

£9.72 from Amazon UK or $18.96 from Amazon US.

The Wild Side of Photography, by Cyrill Harnischmacher

Run out of inspiration? (Really?) Fancy trying underwater photography? How about aerial photography? Want to give a time-lapse a go? Ever felt the need to look for unusual print media for your images? This books has it all: written instructions, diagrams, and pictures. You won’t be uninspired for very much longer. Or perhaps you’re just a photographic dare-devil!

£16.09 from Amazon UK or $19.77 from Amazon US.

Now, all the prices were what Amazon was quoting when I wrote this. Of course, I can’t promise that they’ll stay that way.

Bigger gifts for the photographer in your life

IMG_0064 copy

We’ve looked at little gifts for photographers, we’ve had a peek at books for photographers, but what sort of thing could you splash out on for a much-beloved photographer if you’ve a little bit more to spend? I’ve come up with some ideas that range from around the £50-mark, to potentially into the £1,000s, and cover those new to photography and more experienced hands, as well. (And yes, if you’re reading, Ma, there are a couple of things here that I wouldn’t mind.)

Lenses

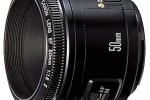
Buying lenses is a hugely personal thing. In fact, unless I were to be taken into a shop and asked, ‘Which lens would you like?’ I think there’s only one person on the planet I’d trust to give me a lens. That said, if your favourite photographer is not in possession of a 50mm prime lens, stop what you are doing right now and go buy her or him one. Really.

Lots of lovely prime lenses available from Amazon UK or Amazon US.

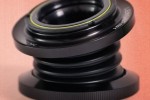
If your photographer is perhaps a bit more experienced and wants to try having some fun, then have a look at a lensbaby and be prepared for tilt-shift-a-go-go.

Lenbabies from, ehm, Lensbaby.

Tripod

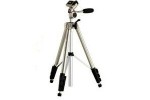
Swiftly following a prime lens, comes a tripod on the new photographer’s must-have list. There are quite a few different types out there: little ones, big ones, travel-weight ones, super-expensive ones, and fairly cheap ones. I’ve a Velbon 347. It cost me about £70. It isn’t super-tiny and it isn’t super-light. However, it does fit in my backpack and I can shlep it around. I’d recommend it. You can spend less if you want to, or you can spend more on a Giottos or a Manfrotto. This one’s middle-of-the-road.

Velbon 347 tripod about £60 from Amazon UK or around $130 from Amazon US.

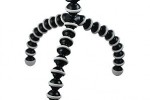
In addition to a tripod, a gorillapod is a genius piece of kit. You can wrap its legs around almost anything to secure it – and your camera – almost anywhere. They don’t weigh very much and they aren’t ludicrously expensive, either. Superb!

Gorillapod for dSLRs, around £30 from Amazon UK or $40-ish from Amazon US.

Camera bag

Sloop camera bag (via Photojojo)

Me, I don’t want my camera bag to look like a camera bag. I’d rather that the dodgy guy sitting opposite me on the Tube didn’t know that my bag contains a few thousand pounds-worth of camera kit. For that reason, I’m rather partial to bags by AHA, Sloop, and Timbuk2. No, they’re not cheap, but my kit is more expensive. (Alright, I admit it, my thing for bags is almost as serious as my thing for shoes, too.)

AHA camera bags from Amazon UK, around £40.
Sloop camera bags from Photojojo for $149.99
Timbuk2 camera bags around $130.

Remote shutter release with timer

Earlier this year, we published a tutorial on making a time-lapse. It’s not something that’s easy to accomplish without a timer, though. Having a remote shutter release (great for self-portraits, too) and timer is a rather nifty addition to the kit collection.

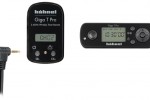
Hähnel Giga T Pro 2.4GHz Wireless Timer Remote for Canon (also covers Pentax and Samsung, according to website), Nikon, Olympus, or Sony, around £60 from Amazon UK.
Hähnel Giga T Pro 300′ Wireless Shutter Release Timer Remote for Canon (also covers Pentax and Samsung, according to website), Nikon, Olympus, or Sony, around $100 from Amazon US.

Editing software

We’ve done a few reviews of editing software here at Small Aperture. For the occasional photographer, using one of the free options is absolutely fine, but for someone who is more serious about her or his photography, it’s worth investing in some software. For Team Small Aperture, it’s all about Adobe Lightroom 3 (but other editing suites are available).

Adobe Lightroom 3 from £232.65 or $299.

Compact camera

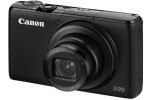
SLRs are wonderful, awesome, and amazing. But they’re not exactly pocket-sized. Having something that is pocket-sized is also wonderful, awesome, and amazing. The compact camera market is absolutely flooded right now, but if you want something that truly is pocket-sized and won’t leave a seasoned dSLR-user wanting to scratch out her or his eyes, then the Canon S95 seems to be a good pick.

Canon S95 available from Amazon UK for £302 at the moment, or Amazon US for $389!

Time away

One of the best presents that I’ve been given recently was a long weekend away with my best friend, our cameras, lots of fabulous food, and somewhere new to explore. We came home with awesome memories, fabulous experiences, and beautiful photographs. (And very full tummies, too.)

It’s the sort of present that can be organised for £250, or much, much more. Pick somewhere!

Any other suggestions? Let us know!

Small gifts for the photographer in your life

IMG_0064 copy

Oxford Street has its Christmas lights up, which means that people are probably beginning to think about presents for Christmas, or Chanukah, or Eid, or Midwinter, or Yule. If you’ve been wracking your brains to find a little gift or two for photographer loved-ones, don’t worry, so have I. It did however occur to me that keeping my findings to myself would be rather selfish, and seeing as I rarely give presents I wouldn’t want to receive, possibly counter-productive, too. So here we have it, Daniela’s guide to sub-£20 photography-related gifts.

Level Cube

A diddy little spirit level that slots into a camera’s hotshoe will make sure that tripod set-ups aren’t off-kilter and wonky. No matter how carefully I think that I’ve arranged my tripod, I still have to straighten up things in Lightroom afterwards. This should help.

Roughly £5 (US$7) available from Amazon UK and Amazon US.

Lens cleaning kit

Grubby lenses are not the best when it comes to taking beautiful pictures. Which is why a kit containing all the lens cleaning essentials is useful. The ones that I’ve found on Amazon UK and Amazon US are slightly different, but they should do the job all the same!

About £5 from Amazon UK or US$7 from Amazon US.

Cufflinks

Now don’t tell me that cufflinks are just for men. They’re not. Plenty of women’s shirts are cufflink-friendly, too. I think that these are both cute and stylish.

Somewhere around £8 from Wheesh.

Pinhole Camera Kit

If you reckon the notion of building her or his own pinhole camera from scratch is a bit too much for your beloved photographer, you could always buy a kit instead.

£8.50 from Mensgiftshop.com (no, I have no idea why it should be a man’s giftshop, either.)

Make-it-yourself Canvas Kit

Granted, you can always go to somewhere like Photobox and have them print a canvas professionally, but there is something so very satisfying about doing it yourself.

£10 (US$16), or close enough, from Photofuse.

Coloured Filter Keyring

Eight different coloured filters, neatly hooked together on a keyring. Now your photographer-friend can have wickedly coloured flashes illuminating photographs, and no more crumpled gels lurking at the bottom of a camera bag. And seeing as they’re on a keyring, they can be clipped somewhere useful, too.

About £12 from Gadgets.co.uk or US$15 from Photojojo.

Camera Strap

I happened to find these awesome camera straps from Souldier when I was looking for guitar straps for my brother. The recycled seat belt straps start at roughly £12.50, but you can of course look through their entire collection and spend a bit more.

Starting at roughly US$20 (roughly £12.50) from Souldier.

Tiny monster tripod

These Digidude tripods are only suitable for compact cameras, but they are too cute to leave out. They’re tiny tripods that look like monsters.

Available from Gadgets.co.uk for about £15 each, or Quirky for US$20 each.

Reflector

There are lots of places out there selling lots of different reflectors. I happened to alight upon this £15 reversible number that’s 22 inches in diameter. You can of course buy them bigger, and spend a bit more.

£15 or thereabouts from Jessops in the UK, or US$17 from Amazon US.

Flickr Pro Account

If your favourite photographer doesn’t yet have a Flickr Pro account, it is super-easy to organise. You just follow the instructions.

$24.95 (roughly £15) from Flickr.

There. And they’re all available online, so you don’t have to brave the High Street for them, either!

Lightroom's Graduated Filter - not just for skies!

Lightroom-Thumb

When you’re accustomed to using something, it’s easy to forget that its capabilities might stretch beyond just that for which you usually use it. You get into some sort of rut don’t explore whatever it is that you’re using, whether it is your food processor, your mixing desk, or your copy of Lightroom.

Jamie Gladden got in touch with us to tell us about a rather nifty way of putting Lightroom’s Graduated Filter to better use than just applying it to skies. Jamie, it’s over to you…

I recently posted an article on my blog describing some simple portrait retouching techniques using Adobe Photoshop Lightroom. A friend of mine later commented to me that he wasn’t that familiar with some of the Lightroom tools that I’d mentioned, so he’d go off, find some tutorials, and play around with these new toys. Great! There are loads of cool tutorials out there, and he’ll definitely learn some useful techniques which will improve his photo retouching skills.

One of the tools I wrote about was Lightroom’s Graduated Filter, which was introduced in version 2 and is very handy. If you do a Google search for this, you’ll find lots of useful tutorials explaining how to use the tool to pep up your landscape shots, darkening a bright sky to add more detail and produce a more even exposure without changing the area of land beneath the sky. Cool! So that’s a new technique we’ve learned, the Graduated Filter is used to even up the overall exposure of your landscape shots by darkening the skies, just like using a Neutral Density Graduated filter in front of the lens on your camera.

What if you don’t shoot that many landscapes? You’ll never need to use that filter, right? Maybe, maybe not. It’s easy sometimes to get stuck with the idea that some of the features serve one purpose only, but with a little experimentation, you can find new and unexpected things to do with them.

In my own photography, I tend to photograph bands and people more than I do landscapes. If I’m working in a studio, then I’ll have full control over the lighting, and the light goes mainly where I want it to go – most of the time! Sometimes, I’ll need to make minor post-production tweaks here and there to compensate for areas which are a little brighter or darker than I’d like.

From the studio to the Lightroom

Take a look at these two photos.

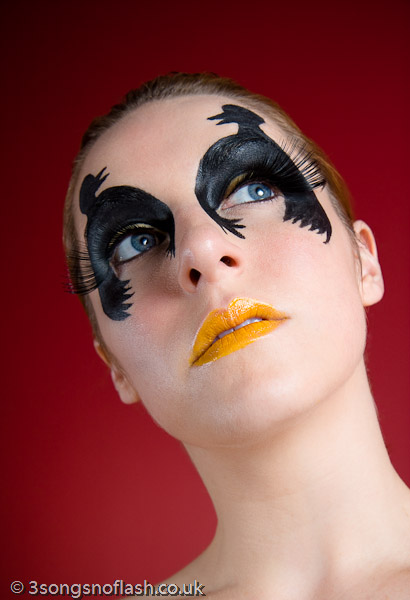
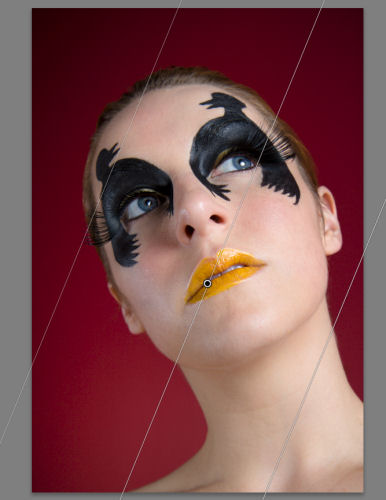
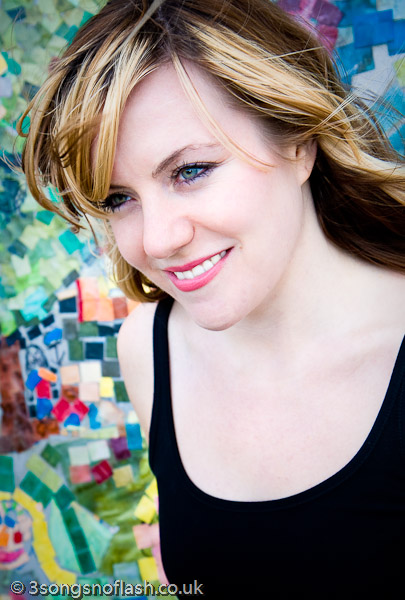
The top shot is complete up to the point at which I was happy with all the retouching and post-processing work I’d done, apart from one thing. I thought that the model was just a little too bright on the right side of her face and neck for my liking. The main light is coming in from camera right, and I had a fill light off to the left, and it’s the main light which is doing the damage.

I wanted to tone this down a little, but only on the slightly brighter area on the right side of her face. Decreasing the exposure or brightness isn’t really an option, because that would change the exposure/brightness of the whole shot, and that’s not what I wanted.

I could also have used the adjustment brush to paint over the too-bright areas, and then adjust the brightness level which would change only the area I’d painted over. That would certainly do the trick, and it does give you more control, but it can be a little fiddly sometimes, and would take more time.

But wait! What about the Graduated Filter? Couldn’t we use that to give us a subtle darkening of her skin on one side which is too bright without darkening the skin on the other side of her face? Definitely. The grad filter is perfect for that.

You can see the effect in the second photo. It’s quite a subtle difference, but for me it was necessary to fix it. After selecting the grad filter tool, I dragged the crosshair across the photo from right to left, stopping when I thought I’d arranged the markers in the correct position.

Then, I adjusted the grad tool’s exposure setting down to a level that evened up the lighting nicely, and I was happy.

Outdoors, but not about the sky

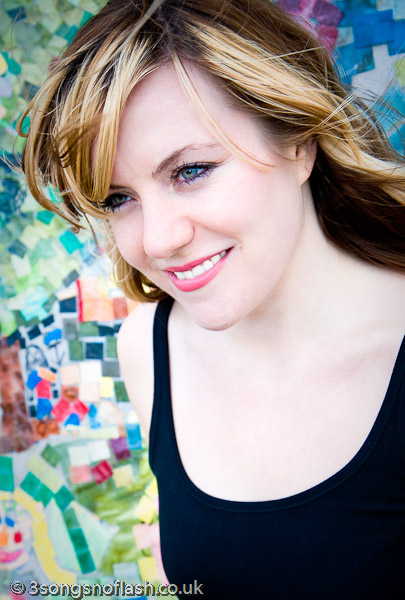
Here’s another example. This is Alice:

If you’re working outdoors with natural light, then it’s not so simple to move the light source to where you want it to be, so you have to work the light to your advantage, and maybe use a reflector or diffuser to shape the light how you want it. Again, there will usually be some tweaks needed in post-production.

In the first photo, the background in the bottom left is just a touch too bright for my taste, and I think it draws your eye away from her face. Just a quick application of the Graduated Filter, as before, and it was fixed. Simple and quick. Which leaves you more time to go out and take photos, rather than sitting at the computer.

And even for concert photography

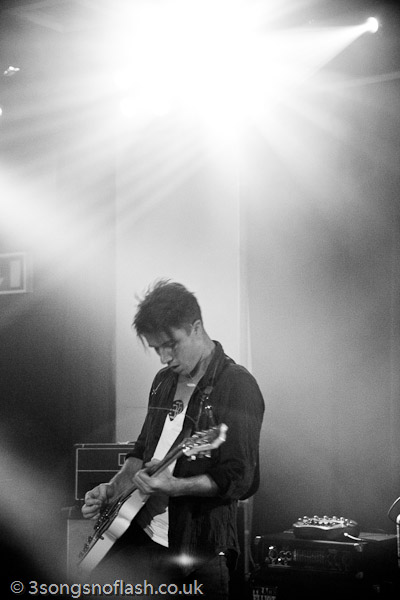
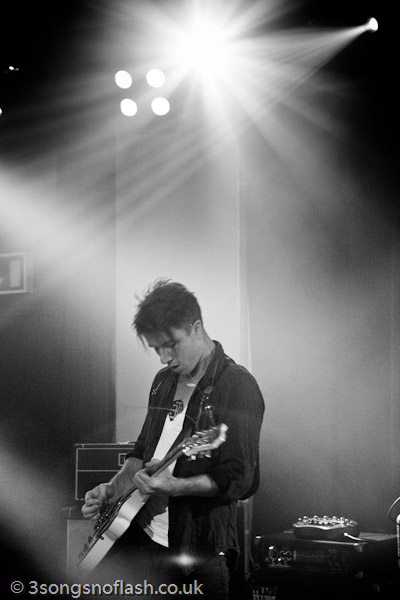
For a final, and more dramatic example, here’s a shot of Benjamin Curtis from the band School of Seven Bells:

When you’re shooting bands on stage, you’re totally at the mercy of the stage lights, which often change quite rapidly. Often, I like to make the lights a feature of my shots, rather than using them solely to illuminate the artist.

In the first photo, the lights are quite overpowering, and they detract from the shot, but by just simply adding a grad filter straight down from the top of the picture, we’ve toned it down a lot, and produced a really cool and striking effect from the stage lights.

So, there are just three examples of using Lightroom’s Graduated Filter, and not a single sky has been prodded. One of the real selling points of Lightroom for me is that it’s easy to experiment like this, safe in the knowledge that if it doesn’t work out, it’s so simple to go back to your original RAW file and start again.

About the author

This article was written by Jamie Gladden. Jamie’s a freelance photographer based in London, UK, with interests in music, fashion and portrait photography. He’s passionate about music and loves discovering new bands and artists. He reckons that there’s nothing better than seeing a really talented unsigned band in a cramped room above a pub. He’s similarly passionate about photography, and there’s no greater pleasure for him than being able to combine the two. Check out his site; 3 songs no flash.


Do you enjoy a smattering of random photography links? Well, squire, I welcome thee to join me on Twitter -

© Kamps Consulting Ltd. This article is licenced for use on Pixiq only. Please do not reproduce wholly or in part without a license. More info.

Cameras for kiddies

Starting early

Here at Small Aperture, we like to get them hooked on photography when they’re young. That’s hardly surprising given that I’ve been in love with photography since I was about five, when my father taught me how to use an Olympus Trip. Soon afterwards, I was given my own 118 film camera, and in fact, I still have the photos I took with it.

But entry-level cameras today are a touch different from those twenty-five years ago. So where would you start if you wanted to buy something for a photographically inclined little one? Well whaddya know? I’ve done some research, I’ve trawled the High Street, I’ve asked lots of questions, and I think that I have some answers. (Yes, just in time for Christmas.)

Now, first things first. I’m no more inclined to suggest that you buy a ‘children’s camera’ for a small person than I am likely to endorse feeding her or him reconstituted meat shaped into dinosaurs and covered with breadcrumbs. Some things in life are worth doing properly from the get-go, and food and photography are two of those. This also means I don’t think that there needs to be a lower age limit on when to give a little one a camera; if your nephew is showing photographic talent at six, let him run with it – using a proper camera.

All the same, a dSLR might not be exactly what he needs. So I based my cameras-for-kiddies selection on five criteria.

The Criteria

Price

There are plenty of decent point-and-shoot cameras out there for under £100, but none for under £50. Spending somewhere between the two seems reasonable, so that was my budget.

Build

If you give something to a kid, it needs to be able to withstand a few bumps and knocks. Even if she or he does treat it with respect, accidents can still happen. Hell, I managed to fling my iPhone across the pavement last week. I was looking for a camera that felt sturdy, durable, and would be comfortable in little hands.

Design

The layout needs to be simple, the controls can’t be fiddly, and it has to look shiny. I want my camera to be relatively easy to use; the same goes for a camera used by young ‘un. And if I can carry a metallic red point-and-shoot in my handbag, then my imaginary seven year old niece can have one, too.

Toys and features

Of course it needs toys. And video. Duh!

Image quality

If we’re encouraging kids to take photos, to enjoy the process, and to be proud of what they produce, the image quality needs to be decent. Eight megapixels is plenty and if we’re lucky enough to lay our grubby mitts on some image stabilisation or anti-blur technology, then so much the better.

So to which cameras did these criteria lead me?

The Yeses

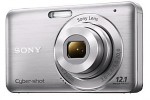
I saw a couple of cameras that I’d be prepared to buy for my imaginary niece. Despite its complete mouthful of a name, the Sony Cyber-shot DSC-W310S is shiny (in silver, black, or red), it has an easy-to-use interface, the layout is clear, it has image stabilisation goodness, and it has a film mode. It costs somewhere around £90.

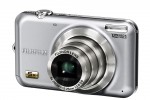
The Fujifilm JX200 hit all the buttons with a swish, sleek metal body, easy interface, 12 megapixel sensor, low-light sensitivity, 5x optical zoom, film mode, and image stabilisation prowess. What made it stand out from the crowd was its panorama mode. Stitched-together-pictures-R-Us! All for around £80.

There was one camera that I kept going back to, though. Admittedly it might have been because it was purple, but it might have been because of the groovy on-off mechanism. Sliding down the front panel reveals the lens and powers up the Fujifilm Z70. And no, I wasn’t overlooking any of the other criteria because I was captivated by its shiny purple slidiness. It makes films, it has auto-focus tracking, it has a 12 megapixel sensor, there’s image stabilisation, the layout was clear, and the screen was large. All for around £90. (And it comes in four colours other than purple.)

The Nos

There are heaps of cameras that didn’t make the cut, for various reasons. You’d be very bored if I listed them all. Still, two deserve a special mention, so that you can steer well clear of them.

The Vivitar X225. I was convinced that just by picking it up, I might break it. At around £50, it is cheap, but I can only conceive this as a false economy.

The Samsung ES25. The zoom button on this irritated me. I can’t think that a seven year old would be any less irritated, either.

The Maybes

The Canon Powershot A495 is a great camera, but I wasn’t convinced that its plastic build was sturdy enough, even if it is excellent value at around £70. If you really want a Canon and their range of intriguing colours, the Ixus 105 is coming in at just over £100. Shop around and you might be able to get a deal.

Not to be outdone by Canon, Nikon also have some impressively specced entry-level cameras. On paper, the Nikon L21 and L22 offer just about everything, and at around £70 they don’t cost the earth. However, I wasn’t convinced they’d be durable enough. And I wasn’t convinced by the colours, either, but that’s me.

The conclusion

There are a lot of cameras out there for under £100 that would be ideal to give to give to a young one to let her or him explore photography. There are some shockers, too. But I’m still loving the slidable on-off function on the Fujifilm Finepix Z70. That’d be my first option. Then you just wonder how long it’ll be before she or he is asking for an SLR.

With very many thanks to John Lewis on Oxford Street, and especially Andy in the Audio-visual department. With significantly fewer thanks to various other camera purveyors on Oxford Street who were far from helpful. (Yes, I braved Oxford Street for this. No wonder I’ve spent the weekend at the Small Aperture country retreat, recuperating.)

Stopping down a Canon EF lens

A stopped down lens should look a little bit like this. Or a lot like this, in fact. The size of the hole depends on how far you've stopped down your lens.

If you’re used to manual lenses, you know how easy it is to stop them down. If you are a little bit more advanced than that, and have ‘graduated’ to more advanced lenses, stopping down a lens (i.e making the aperture smaller) while it is not attached to a camera body can get a little problematic. There is a way to do it, however… 


All of Canon’s newer lenses (the whole EF and EF-S series) have electronically controlled aperture. Normally, that’s great, because you can select what aperture you want with the thumb wheel or via the camera’s menu system, instead of having to do it with a wheel on the lens itself.

There is a trick you can use to stop down lenses, however. Mind you, this is probably a bad, bad thing to do, and it may break stuff. Having said that, I have been doing this for years, and it seems to work fine, without any adverse effect.

A stopped down lens should look a little bit like this. Or a lot like this, in fact. The size of the hole depends on how far you've stopped down your lens.

Stopping down a lens is done by putting the lens on the camera, and setting the camera to either manual aperture (A or Av) or fully manual (M). Select the aperture you want. Then, press and hold the aperture preview button. If you don’t know where that button is, it is probably the one near the bottom of your lens, on the side. The one that you never use. Yes, that one. Press it, hold it, and then take the lens off the camera exactly like you would do normally.

If you have done it right, you are now holding the lens, which should still be stopped down. It should look approximately like in the picture with the red circle.

Finally, this trick for setting the aperture is not a “recommended” method (not that there really is one), but at worst the “ERR 99″ or “ERR 01″ it may produce on the camera can be cleared up by turning the camera off and back on.

So why would you bother?

Well, this trick will come in most useful when you’re using your lens detached from the camera, obviously. This would come in particularly useful in macro photography, such as if you are using non-electronically connected spacers between your lens, so your camera can’t send the right signals to the lens to make the aperture change.

If you are reversing your lens with a set of reversing rings (or using my nifty homemade lens extender), it would also be useful, if you want to use the lens at anything other than fully open.

And hey, it’s a nifty trick. Sometimes, that ‘s all you need, right?

Finally, if you like this post and want to learn more about macro photography, check out my book on macro photography (in the sidebar over there →).


Do you enjoy a smattering of random photography links? Well, squire, I welcome thee to join me on Twitter -

© Kamps Consulting Ltd. This article is licenced for use on Pixiq only. Please do not reproduce wholly or in part without a license. More info.

More foundation or more photoshop?

Waiting

High horses. I reckon that we’ve all got at least one stabled somewhere. I know that I have a couple that I take out for a gallop every now and again. But there was one issue over which I never really held such strident opinions, and for people who know me, it probably surprised them. It was about digitally manipulating images of models. There are plenty of groups with louder voices than mine to shout about the negative effects that flattening models’ tummies has on the self-esteem and body-image of young women (and in fact, of young men) without me wading in.

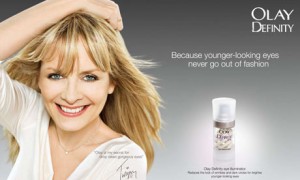
And what exactly would I be able to say to a group of people such as Real Women and their ‘Take Action Against Airbrushing’ campaign? They want to implement a system whereby any image of a model that has been digitally altered should bear a ‘kite mark’ indicating this. Would they want to listen to the moderate views of someone who has seen other photographers brush out spots or blemishes on her chin and is happy about this, giggles at Photoshop Disasters, and regularly bats away the statement: ‘Wow! Aren’t you thin!’? (Would anyone ever say: ‘My! You’re fat, aren’t you?’) I get the feeling I’m their problem, not their solution.

The Real Women group had this image banned on account of false advertising. The skin around Twiggy's eyes was made to look better than it is, using photoshoppery. Bit of a problem for an eye cream.

But here I am, having a rant on a Monday.

So what made me change my mind? It was a 19 year old pop star whom I saw on TV on Saturday evening. Her name is Pixie Lott. Her makeup left me temporarily speechless. Then I managed to find my voice. Then my friend had to put on the film we were supposed to be watching to stop me from losing my voice.

Pixie Lott, who started my rant

She didn’t look real. Her skin tone was so artificially translucent and even that she resembled a Barbie Doll. Who needs to brush out spots and blemishes when you can apply foundation an inch thick? I’m serious. We can introduce a system that flags up images that have been digitally altered, but what about the actual presentation of the model? Add another layer of makeup and request that she lose another kilo before her next photoshoot and we’re still conveying a manipulated, idealised image. We’ve not solved the problem. If anything, we’ve just made it worse because the unreality is being given the kite mark seal of approval.

The young people whom it was intended to protect from unrealistic, potentially unhealthy images have just been exposed to something definitely more insidious.

Before anyone wants to hold a stiletto to my throat, this doesn’t mean that I condone making models’ arms thinner and their boobs bigger with the use of a computer screen; what it means is that we have to be more realistic about why people choose to manipulate images, and what the effects of this are. A kite mark isn’t going to help.

Anne of Cleves, who was, in reality, scarred from Smallpox

You see, image manipulation isn’t new. The Roman emperor Augustus was an aficionado when it came to conveying a message and projecting an ideal through images. Henry VIII threw an enormous hissy fit when Anne of Cleves stepped off the boat to marry him and he realised that she looked nothing like the portrait he’d seen of her, painted by Hans Holbein. I’m pleased I wasn’t there. He ranted and raved and allegedly called the poor woman a ‘fat Flanders mare.’ Oliver Cromwell insisted that his official portrait show him ‘warts and all,’ knowing that they would be carefully omitted otherwise.

There’s a whole package of images out there that are manipulated in different ways, for different reasons, with myriad different consequences. Give people the tools to recognise this and analyse this for themselves. People seem to be far too willing to reduce difficult decisions to the lowest common denominator because this makes dealing with them easier. How about giving a difficult problem the difficult solution it deserves? In the long term, the results will be far more beneficial.

Photography is an art-form. Don’t let’s forget that. As photographers, we know that shooting in black and white will give a far more even skin tone in portraits. I suppose that we could always shoot in colour, instead. I’ll stop photographing someone I love very much only from her right side so that we can always see the extensive scarring on her left cheek. That’ll do wonders for her self-esteem, I’m sure. Maybe we should stop using gels and reflectors, too. Lighting isn’t important in photography, is it?

Teach young people how powerful images are; teach young people how images have been used across time; teach young people to paint, to draw, and to take photos; teach young people to recognise and to create their own beautiful things; teach young people to think for themselves. Stop applying sticking plasters to problems that have far deeper roots. Or, if you want another image-related analogy, stop powdering more arsenic and lead over your arsenic and lead-eroded skin.

Small Victories

no_pictures

You’ve probably noticed that the Small Aperture crew is pretty passionate about photographers’ rights. Whether we’re promoting your ability to be able to photographs in public places, ranting about peculiar photographic restrictions, or explaining what sort of authority you can exert over your own images, we’re pretty vocal about things. That’s hardly surprising: we love to take photos. And I doubt we’ll keep quiet until other people, from the police to shopping mall security guards to the general public, really begin to grasp what photographers can and can’t do.

The good news is, though, that over the past week two separate incidents have occurred, albeit over 3,000 miles apart, which have helped to promote photographers’ rights that little bit more.

Edinburgh, Scotland

Last week, in Edinburgh, photographer Stefan Karpa was harassed by security officers while taking photos at the Multrees Walk shopping district. Security had been beefed up recently as a result of several “ram-raiding” robberies. And while Multrees Walk is a privately-owned street, Karpa was photographing from the public highway, which is completely within his rights to do.

Karpa then posted a video of the confrontation to YouTube, and after making its rounds on Twitter, the response was huge.  A few days later, a small group of photographers decided to organise a flashmob at Multrees Walk to protest the incident. Police arrived and watched carefully, but the protest carried on peacefully.

Here’s the video to show you:

Photo Flash Mob on Edinburgh’s Multrees Walk from Tom Allan on Vimeo.

Later, Multrees Walk spokesman Stephen Spray stated that their blanket ban on photography would be reviewed. While not necessarily a legally-successful story, the fact that twenty photographers showed up to protest and photographed the store fronts on private property without being harassed by police and security shows that management is listening and perhaps willing to compromise with photographers.

New York City, USA

Meanwhile, across the Atlantic, photographer Antonio Musumeci reached a settlement with the U.S. Department of Homeland Security in regards to a lawsuit filed on his behalf. In 2009, Musumeci was arrested while filming another arrest of a protestor outside a New York City federal courthouse. The settlement states that members of the public have the “general right to photograph the exterior of federal courthouses from publicly accessible spaces.”

His primary camera had been confiscated at the time of his arrest, but a secondary camera captured the entire incident. Unlike many protesting photographers, Musumeci kept his cool the whole time, which I’m sure didn’t hurt his case.

While this is a more significant win for photographers than the Edinburgh case, both are equally important during this on-going clash for the right to shoot in public places. As more and more of these types of incidents end with favourable results, it’s only a matter of time before a compromise can be reached and photographers can continue to comfortably do what they do best… shoot pictures.

Photographing in the dark

The Magic Numbers, by Gareth Dutton

Photographing in the dark can seem a daunting and difficult task when encountering it for the first time, but here at Small Aperture we have a few quick pointers to help you out. Hopefully this article will, wait for it, shed some light on the subject (I’m so, so sorry). So what can we do to combat low light photography? There are, thankfully, several options available to us.

Use a larger aperture

I shot this at f/2.8 at ISO 1600 - the shutter speed needed to remain high.

One option is to work with a larger aperture. What is aperture, you ask? Well I’m shocked and appalled, quite frankly, that you haven’t already read up on our article about it. The bigger your aperture, the more light you’re going to be letting in. Of course, sometimes, you can’t afford to / don’t want to lower your aperture. Whatever shall we do? Well, you could always…

Increase your ISO

Increasing your ISO will increase your sensor’s sensitivity to light, which will help make the most of what little light you’ve got to work with. What are you talking about Gareth? What are these kooky letters you’re putting together? As always, we have it covered – nip over to our guide to ISO and then come back to me when you’re up to speed.

All done? Good. So, increasing your ISO can help you capture those precious, delicious slivers of light skulking around in the darkness. But what about all this horrid noise? It’s spotty and grainy and yucky – this won’t do at all. Well, how about we only increase the ISO a tad and look at changing some other settings?

and this one required all three - ISO 1600, aperture of f/2.8 and a shutter speed of 1/100. Take THAT, low light!

Lower your shutter speed

Lowering your shutter speed can also help your camera gather more light for when there is little to play with. Guess what? We have this one covered, too – take a look here. The longer we have the shutter open for, the more time light has to get in. Too low a shutter speed can lead to image blur, however, and unless you’re going for that look, images that aren’t sharp are, well, unsharp. Image still too dark? Well, I’m afraid that’s all your options exhausted. Bummer. Or is it…?

Get yourself a tripod

Go on, do it now. Open a new window in your browser, go to Amazon, and get it ordered. Unlike other things in your kit, a decent, sturdy tripod doesn’t really ever need to be replaced for a newer model and should still be useful for years and years to come. This means you’ll have to give it a name, of course. Mine’s called Trev. Trev the Tripod. Trev has always been there for me when I’ve needed him. The best thing about Trev is, when I need to lower my shutter speed to a duration for which I couldn’t possibly hold my camera still, I pop it on Trev and he keeps it perfectly still for the whole exposure.

Good old Trev.

You’ll mostly find a tripod useful for grabbing yourself some lovely sunset / late evening landscapes, which will afford you to work with a very small aperture AND a low ISO setting in order to get some lovely, low light landscapes.

Let’s summarise, then.

To defeat the low-light menace, try a combination of these factors:

  • Use a larger aperture
  • Increase your ISO
  • Lower your shutter speed and, if it’s too low for a sharp image…
  • …Use a tripod!

Depending on what sort of image you’re after, you’ll be using a combination of these for one image and maybe just altering a single factor for another. There is no greater teacher than experience, so get out there armed with this new-found knowledge and experiment! Seeing as it’s Friday, if your friends invite you to the pub just tell them ‘Can’t make it tonight, I’m afraid; I’m spending the evening in a field with Trev.’

Interview: Eric Cheng, underwater photographer

eric_camera_shooting_smaller

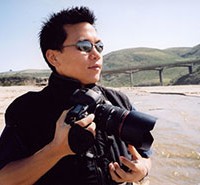
I’ve always had a huge fascination with marine life, so when I had a chance to interview a photographer that specializes in a unique genre, I immediately went after Eric Cheng, an underwater photographer based out of San Francisco. Shooting underwater since 2001, Eric is the winner of numerous awards and competitions, founder of an online community for underwater photographers, editor of a quarterly print magazine, and frequently organizes photography expeditions and workshops across the planet. He even has two degrees in computer science from Stanford and plays the cello. Talk about chick magnet. Unfortunately, the only chick he has time for these days is a 14-foot long Bahamian tiger shark named Emma.

SA: How did you get started in underwater photography?

EC: Although I have been interested in photography since high school, I was 25 years old when I discovered underwater photography. When I was 19 years old, I started a saltwater reef aquarium, which instilled a fascination within me for fish and other marine life. I became SCUBA certified not long after, but only did about 20 dives in the next six years. On a whim, I planned a dive trip to Palau—my first dive trip ever—and bought an Ikelite underwater housing for my Nikon Coolpix 990 digital camera. I was hooked – my interests in marine life and photography merged and changed my life!

SA: How much time do you spend on a boat these days? What’s a typical day in the life of an underwater photographer while on assignment?

EC: I spend about half of my time on boats. It’s funny – everyone thinks that I am “on vacation” all the time, but a typical day on assignment is long and tiring. We do between three and five dives a day, and with a surface interval between each dive, it pretty much takes up all of the hours between morning and evening. And because everyone now shoots using digital cameras, a great deal of time is spent downloading, backing up, organizing and editing. Still, it’s fun. At home, I’m constantly connected to the computers and the internet. Underwater photography takes me to some of the most remote locations on the planet; there is no internet access there, so the pace of life slows down, even with such a busy schedule.

SA: How different is underwater photography compared to another genre, such as landscape photography?

EC: In some ways, they are similar. Both genres require a connection to nature – an understanding that we are there to capture what nature might throw our way, and that it might take quite a bit of time for a particular event to happen. But underwater photographers immerse themselves into an incredibly harsh environment, one that is often filled with adrenaline and fast-moving spectacle. On a daily basis, underwater photographers deal with getting thrown around on the surface of the ocean before jumping into the same, rough ocean and being swept away by strong currents. Almost every reef animal in the ocean is venomous, and the ones that aren’t venomous are all trying to get away from us. We bring our own lighting underwater because light gets stripped away by water as it travels through it, but even with large, heavy strobes, a subject that is six feet from the camera is still too far away.

SA: What do you like the most about shooting underwater?

EC: Discovery. Despite its majority coverage on our planet, we really don’t know much about the ocean. I like that someone can do the same dive every day for years and still have a good chance of seeing something new.

SA: I’ve seen some of your shark photos. Is photographing sharks frightening or exciting, or perhaps both? Do you have any crazy shark stories?

EC: Remember how I said that nearly all of my best photos were taken within six feet of the subject? For sharks, it’s even closer. Most were taken within just a few feet.

Last week, I stuck a little GoPro helmet-cam into a shark’s mouth so I could get footage from inside. The footage looks scary, but that shark was only after the tiny bit of fish I used to entice it. If humans were a shark prey item, there would be many more than the five (average) killed each year (and in most cases, they aren’t eaten).

I do have some “crazy” shark stories. Here’s one. The most famous tiger shark in the world is named Emma. She lives in the Bahamas and is 12-14 feet long, depending on who you ask. I’ve been photographing her for nearly five years and can identify her by her markings and behavior. I’ve seen Emma get pregnant and slim down after giving birth, twice. Emma treats different individuals differently: she has favourites. Can you imagine that? She’ll come in and look for Jim, the captain of the boat, and will leave if he isn’t in the water. If he is in the water, she’ll stay, for days. Each encounter with Emma is special because it could be the last; tiger sharks are allowed to be killed in the Bahamas by recreational anglers. It would be tragic if Emma were killed, not only because of the bond we have formed with her, but because it would cost the Bahamas tens of thousands of dollars a year in lost tourism.

SA: The types of camera equipment you use in underwater photography must be completely different from most photographers’ kits. What pieces of gear are the most crucial to your line of work?

EC: All of the pieces of gear are the most crucial. Packing is an ordeal because I have hundreds of tiny little parts that have to go together in order for my gear to work properly. If even one doesn’t work, some critical feature of my camera or life-support equipment will no longer be available. Obviously, the most important ones are the o-rings, which seal the camera up to prevent water from getting inside. But other little parts allow access to the physical buttons on my camera and strobes. Also, electrical systems on boats tend to be quite primitive, so I travel with as many redundant parts as I can: spare chargers, spare batteries, spare cables, spare strobes, spare camera, etc.

Assuming all of the gear arrives undamaged, the most crucial skill is simply diving skill. Excellent buoyancy and body control in the water are absolute requirements for good underwater photography. If you’re crashing into the reef or thrashing around in place in order to stay in one place, you have little hope of capturing a great image.

SA: Underwater photography has taken you to many different ocean environments around the world. What place (or places) is the most memorable to you? Can you tell us a little about it?

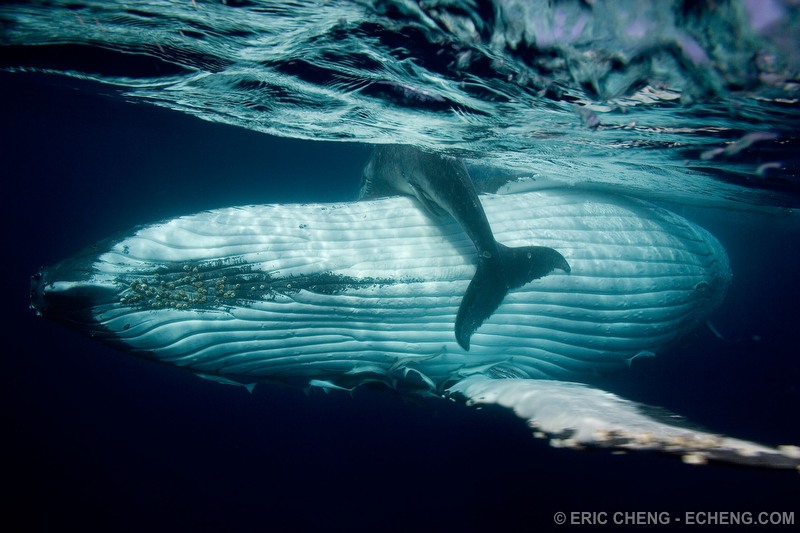
EC: I get asked this question all the time, and I never have a proper answer. Each place I go has something special that I am after, and there is no way to rank them! For example, I go to Indonesia, Papua New Guinea, and the Solomon Islands for marine diversity and healthy reefs; to the Bahamas, Galapagos, Cocos, and French Polynesia for sharks; to Dominica, Ogasawara (Japan), and Tonga for whales. It’s too hard to pick one that is the most memorable.

SA: You’re editor of a couple of important resources for underwater photographers. Can you tell us about them?

EC: Wetpixel.com is the premiere online community for underwater photographers and videographers. I’ve been running this site since 2001, and it has become incredibly rewarding to be a part of the community. Many underwater photographers find themselves to be the only person in their town or city with the interest, and Wetpixel is a place where they can go to find peers.

Wetpixel Quarterly is a quarterly print magazine featuring the best in underwater photography. I call it a “magazine,” but it is really a mini-coffee table book. It is universally acclaimed by marine enthusiasts because we put in beautiful, compelling images instead of images that will sell advertising.  Unfortunately, print seems to be going away, and we are in the process of figuring out how to keep a print product without breaking the bank.

SA: It seems that a lot of underwater photographers are also quite passionate about marine conservation. How important is photography to the success of ecological conservation?

EC: I’d like to think that photography is very important to the success of marine conservation. The vast majority of people on this planet will probably never set foot in the ocean. I live in coastal California, and most of my friends here have never done more than dip their feet. People are fascinated by it—and afraid—and no one really cares about what happens to the ocean because it’s just not a part of their everyday lives. Still, many of the people who have seen my images have written to say that it has made them think about ocean differently, and that pushes me to continue to share my work. But I still see them eating shrimp, so that makes it hard for me to be optimistic in the long term.

SA: What kind of advice can you give someone that’s looking to pursue a career in underwater photography? Other than moving to the beach, of course!

EC: I don’t really have any advice for people who want to pursue underwater photography as a career. It’s nearly impossible to do, and many folks out there who are frequently published struggle to make a living at it. Startup costs are extremely high, and if you start out in a dive-related industry, you’ll probably never make enough money to buy a decent underwater photography rig.

I always recommend getting a proper education. Study something useful and practical; hopefully, something you’re also interested in. Make enough money to buy a camera, lenses, underwater housing, strobes, and accessories, and start shooting in your spare time. Publish your work: post it on the web, and to sites like Wetpixel. If you’re good, you’ll get noticed, and opportunities will come to you!

Thanks to Eric for sharing his stories and bringing us into his vast underwater world of photography! Be sure to browse through more of his photos or visit www.echeng.com to learn more about Eric and his work.

Eric’s Gear:

  • Canon 5D Mark II
  • Canon 7D
  • Nauticam underwater housing
  • Ikelite and INON strobes
  • Light & Motion underwater lights
  • BS Kinetics 3D underwater video housing
  • Tokina 10-17mm fisheye zoom
  • Canon 15mm/2.8 fisheye
  • Sigma 20mm/1.8 prime
  • Canon EF-S 60mm macro
  • Canon 100mm macro
  • Kenko 1.4x, 2.0x teleconverters
  • INON “insect eye” endoscopic lens

Gallery exhibitions? I don't get 'em.

As computer screens get better, and the interactivity of photo sharing websites get better, this is becoming a less attractive way of exploring photography.

“Hey”, they’ll say, “You’re a photographer! We should go to this really great photography exhibition”. I stick on my best grin, nod with feigned enthusiasm, and go along. Over the years, I’ve grown to learn that (with a very few notable exceptions), I’ll regret that decision.

It’s not that I don’t like photography. Quite the exact opposite, in fact. I live, breathe, write and occasionally sing photography. I love looking at photographs, nothing makes me happier than seeing a friend (of which I have several thousand) achieving a new milestone in their development as a photographer, and I do a 1980s-style punch-the-air whenever I get a particularly good photo myself.

So why the disenfranchisificationated feeling about photo galleries and exhibitions?

As with all good stories, we’ll need to begin at the beginning. And that’s not why go to an exhibition, it’s why I take photos and love photography.

The things that drive me to take photos

Photos like these - holiday snaps - mean a lot to me; but I don't expect anyone else to get excited about them.

Truly, I would be the first to admit that I’m not that great a photographer. I occasionally get stuff in focus, and I guess I’ve developed an ‘eye’ over the years, but take a look at my Flickr gallery, and you’ll see that I still have a lot to learn.

The difference between myself and many other photographers is that, really, I’m a writer and technologist at heart. I take photos because it drives me to write. I learn new techniques because I’m deeply fascinated by the physics (and, as a subgenre, the optics) that are part of photography. I’m happiest when I’m exploring how to build a laser trigger for my camera, how to make my own macro lens, experimenting with studio lighting, or exploring how to photograph smoke.

So if being an inquisitive geek is what drives me to take photos, why do I want to look at other people’s photos?

I want to see photos I couldn’t have taken myself

My favourite type of photo is where I can't tell how the hell they've achieved the photo

So, as a technologist and amateur physicist and writer who has photography as a serious hobby, there’s no way I should be able to take the photos I see in galleries, right? Sadly, that’s not the case. I rather frequently see photos that are on par with – or not as good as – my own. It makes me uneasy, how big-shot photographers with big budgets and celebrity models deliver work which is, frankly, disheartening.

I suppose I’m in a strange position anyway; As a ghost writer, I write books for other photographers (there’s a different post in that, somewhere), which means that I’ve trained myself to ‘read’ photos. “Oh, in this photo they’ve used a soft light source from the top, a slight kicker from the left, and a gelled flash from the rear to highlight their hair, combined with a wind machine to give their hair a bit of motion”. I don’t even have to think anymore, stuff like that comes to me naturally.

Photos that really impress me are the ones where I can’t quite figure out what they’ve done; like this incredible portrait Gregory Heisler shot of NYC mayor Rudy Giuliani back in 2001. It’s an incredible shot that took several days worth of preparation. If you’re curious, Heisler explained how he did it in a YouTube video – a good way to spend six minutes of your life.

Gregory Crewdson. What a legend. (click to see more)

Another photographer who consistently impresses me is Gregory Crewdson – he frequently hires a full film crew to create deliciously elaborate photos; with so much attention to lighting and every detail in his photos, it’s inspirational stuff. And something I probably wouldn’t be able to recreate – certainly not with the same quality, vision, and sheer amazingness.

Anyway; in gallery-world, you often get photographers who – through hard work, dumb luck, or a delicious mélange of both – have caught someone’s eye in such a way that they have been invited to put on an exhibition.

I’m not bitter – I know my photography isn’t gallery-worthy; but the sad truth is that whenever I go look at photography exhibitions, I walk away with the impression that what I’ve just seen isn’t gallery-worthy either.

An analogy from another world

I would be hard pushed to cook something that tastes this nice; and if I could, it certainly wouldn't look this good. This way, a restaurant offers something beyond what I can do myself, and makes it worth my while. I expect the same from a gallery exhibition.

My good friend Daniela (who edits my Small Aperture site for me), points out that my take on photography is similar to her take on food. “I’m not a chef, but I’m pretty bloody damned competent in the kitchen. Not only do I have the technical skill to be able to pull off interesting feasts, but I’m blessed with a mind’s palate: I know what things will taste like in my head before I’ve even tried them,” she explains, in a way that is eerily close to my take on photography. “Not only do I know how to make ice cream, but I know what flavours will work well in the ice cream and I know what to pair with this ice cream to make the perfect dessert.”

Of course, being blessed with a gastronomical mind doesn’t come without its downsides. “Taking me out to eat is a minefield,” Daniela admits – and I can testify to the same. “I do not want to pay for food that I can make myself, and in many cases almost certainly make better than is presented to me on a plate,” she explains. “I never order risotto in a restaurant”.

With good reason. I’ve had her risotto. It’s epic.

Why gallery photos don’t stack up

So not only do I want to be looking at an exhibition of pictures that somehow inspire and intrigue me, and with which I have some emotional connection, there’s another important element that cannot be overlooked. Curation.

As computer screens get better, and the interactivity of photo sharing websites get better, this is becoming a less attractive way of exploring photography.

To all those exhibition curators out there: do it properly. I would much rather look at three very good photos that tell a short story together, than 30 so-so shots that embroider a full-length novel. I’m not the only one who thinks this: I’ve frequently seen my fellow photographer friends rip to shreds badly curated exhibitions, even if they contain individual photos containing much awesomeness.

I don’t think I’m lying if I say that I’m disappointed more often than I’m impressed by photo galleries and their exhibitions. Of course, it’s often very impressive what they are doing, but I think I may be spoiled. Between my 2,000+ Flickr contacts, Boston.com’s The Big Picture, and the hundreds of photos I come across via my 100-odd RSS feeds, I’m spoiled rotten.

Some would argue that these photographers wouldn’t be so good as they are if it hadn’t been for the great and famous photographers; the ones who invent new techniques, or perfect the old ones. That’s true, of course, but even when you turn to our great contemporary photographers, like Rankin and Liebowitz, I find that they fall short.

So what kind of photos do I want to look at?

Y’know, a while ago I started a photography course for newbies. I have to admit that I haven’t given it the attention it deserves recently, but the photos my complete n00bs have been creating have been impressive. They have been orders of magnitude less impressive (both technically and creatively) than the stuff Heisler, Liebowitz and Rankin do, of course, but that’s not the point: These are photographers I have a relationship with: I know them. I know what they are capable of, and I see them improve their photography as they progress through the course.

There’s something magical about seeing photos taken by people you know; I’m willing to forgive them for a lot of the things I’m complaining about above; much in the same way that you would tolerate sitting through your friend’s photos from on holiday, but you wouldn’t give two hoots about the vacation snaps from a complete stranger.

The lack of interactivity

The final problem I have with gallery shows is that there is no way to show your appreciation of a photo. On Flickr, I’ll favourite photos that impress me in one way or another. I’ll leave constructive criticism of pictures I feel could be improved. I’ll link to photos via my Twitter stream if they impress me extra much, to share them with the 8,000-odd people who follow me there.

Unless the photographer happens to be present (which happens only on opening night, generally), a gallery is a passive experience. “A time to reflect”, you might say, but I say bollocks to that – if a photographer has made a strange choice about framing or focus or lighting, I want to talk to them about it. I want to know whether it was done intentionally, and if so, why. I want to congratulate them on their finest works and – by means of exclusion – show them which photos I’m less impressed by. If they’re interested, I’ll even tell them why.

My 2000-odd favourites on Flickr are a pretty impressive photo collection; personal to me, full of the photos of my friends and people I admire. That's a gallery exhibit I'd go to in a heartbeat!

Don’t get me wrong; I understand that some people don’t give two flying fornicative efforts about what some random opinionated dude on the Internet has to say about their photos. Perhaps they’ve done everything in the photo exactly the way they planned; and that their slight under-exposure was intentional, to explain something or other about how society works. I totally get that. And it may work for others. But I don’t buy it anymore: my world has become too interactive to waste my time on one-way communication. It’s why I don’t watch television anymore; it’s why I rarely read paper newspapers. (The one outlier here is music and movies; I have no inclination to comment on music tracks or cinematic experiences: I suppose they’re too far removed from the bubble where I feel that my influence has any insightful meaning).

I think I’m going to give gallery shows a bit of a rest for now. I’ve been disappointed too often. Instead, I’m going to make Flickr my world-wide image gallery; it does everything I want and need from a photo-viewing experience.

And if I don’t like a photo, I can click on to the next one without feeling bad about it.

Maybe that’s the crux of the matter: Having to take physical action to walk away from (or straight past, with a sideways glance) a photograph. It feels as if you’re going out of your way to be left unimpressed by a photo in the way a quick click with a mouse doesn’t.


Do you enjoy a smattering of random photography links? Well, squire, I welcome thee to join me on Twitter -

© Kamps Consulting Ltd. This article is licenced for use on Pixiq only. Please do not reproduce wholly or in part without a license. More info.

The bright horizon of medium format

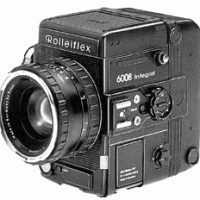
Rollei 6006

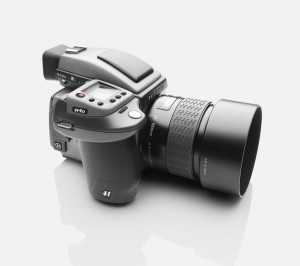
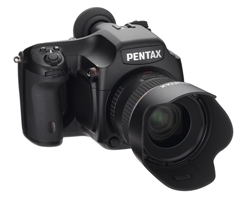
We’ve seen two entry-level medium format cameras released onto the market this week: the Pentax 645D and the Hasselblad H4D-31. Even at entry-level, we’re looking at £10,000 for the Pentax with a 55mm lens and €9995 + VAT (somewhere around £8,500) for the Hasselblad with an 80mm lens.

Do I need to remind you to breathe now? Glass of water? Tissue for your eyes? Okay. No, that’s not exactly cheap when you’re just dipping your toes in the water, but if you look at it in context of stepping up from 35mm, it isn’t quite so bad. But maybe you’re wondering what medium format is, and why it’s so special?

Are you sitting comfortably? Then I’ll begin.

Film

Hasselblad's entry-level medium format digital camera, the H4D-31

Way back when, in the days of dragons and film photography, there were lots of different types of film and film sizes. I could go into all the numbers, but you might die of boredom before I’d finished, and that’s not appealing, for me or for you. Film photography might’ve faded from most people’s consciousness now, but it hasn’t for quite a few photographers, including the medium format aficionados. Many of the old film sizes are no longer produced, but medium format is. It’s 120 or 220 film. It’s 6cm deep.

That means the film is almost twice as wide as film used in 35mm cameras. And this is critical: bigger film means more detail. If you’re looking to shoot high quality landscape shots, or make super-enormous enlargements of your pictures, the extra information afforded to you by the larger film size of the medium format is essential. For serious editorial work, medium format is where it’s at. In spades. (Or millimetres.)

If you want to think about this in terms of digital, the Pentax 645D has a 40 megapixel sensor; the Hasselblad H4D-31 (every time I type that I think it’s a new strain of avian influenza) a 31 megapixel sensor.

Medium format cameras comprise four essential elements: the body, the back, the viewfinder, and the lens. They’re all interchangeable. They’re the camera equivalent of Mr Potato Head.

Body

The body, unsurprisingly, is the HQ of your picture-taking. (The potato of your Mr Potato Head, if you’re keen on maintaining that analogy.) Add the relevant bits and pieces and you’re ready to go. There is, however, a slight quirk with medium format cameras: they’ll produce different image sizes depending on the camera type.

Pentax's 645D

The image will always be 6cm deep, because that’s the depth of the film, but the width will vary. It might be 4.5cm, or 6cm, or 7cm. The Pentax 645 produces images 6cm × 4.5cm. You might, however, have a 6 × 6 camera, whose images will be square. If you don’t want to fuss with portrait or landscape orientation, this is mighty useful.

Naturally, you’ll get more pictures out of your roll of film if your camera takes images 4.5cm wide (15 or 16 images from a roll of 120), as opposed to 7cm wide (10 images from a roll of 120). Use 220 film and you’ll double your number of shots.

Camera back

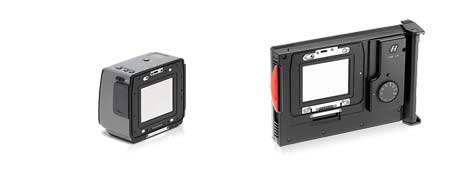
Continuing with the interchangeable theme, the camera back can be swapped for another one. This probably doesn’t seem quite so important until you know that the film is loaded into the camera back. Change the back and you can change the film. Black and white can switch to colour, which can change to a Polaroid back if you want an instant print, and then back again to the colour film. If you don’t fancy having to rotate your camera to move from portrait to landscape (unless you’re using a 6 × 6 camera when the image is square anyway), you can buy rotating backs, too.

Hasselblad interchangeable backs

Viewfinder

The viewfinder on a medium format camera can be either eye-level, through the clever use of a prism, or waist-level. With waist-level, you get to look down onto your image with both eyes. Auto-focusing is beginning to slip into the medium format world, but otherwise you’ll use your viewfinder in conjunction with a focusing screen. Mostly, it’ll be a matte screen, but as with all things medium-format they can be changed for different purposes.

Lenses

Pentax's standard 67 lens, the SMC 105mm, f/2.4

Finally, you have lenses. I suppose for a last reference to Mr Potato Head, these would have to be the eyes. Just as with 35mm photography, you can change from a wide-angle lens to a telephoto lens, or go arty with a fish eye. And just as with 35mm photography, you should go for the best glass that you can afford. Lenses tend to span a 40-500mm range, but your focal lengths will be different in medium format than in 35mm. You’ll need to remember that. But it’s the sort of thing that you’ll learn, just as you do with 35mm.

Finally

So that’s medium format in a nutshell, with its interchangeability and astonishing picture quality. If medium format digital cameras do become more affordable, which is entirely possible, how long do you think it’ll be before they are a serious consideration for high-end amateur photographers?

Where'd my mirror go?

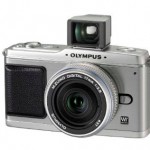
The Olympus Pen has an optional viewfinder attachment, turning it into the bastard lovechild of a SLR camera and a rangefinder. Which might not be such a bad thing, actually...

It’s early autumn so everyone has leapt aboard the Christmas juggernaut, God help us. Christmas isn’t just celebrating half-a-dozen similar but morally incompatible festivals of religious and secular nature.

If you create electronic equipment, it’s also (not to mention ‘mostly’) about making berkovets of cold, hard cash.  


Needless to say, the photographic world conforms to this standard. This week alone, four camera manufacturers released five different cameras. Nothing unusual there, then (however much I wish the festival frenzy was restricted to seven days immediately prior to 25 December). But take a second look at these cameras, and listen to the rumours coming out of both Canon and Nikon, and you’ll notice that there’s an interesting trend emerging: A movement away from the angelic (D)SLR – or (Digital) Single Reflex Camera we all know and love, and an elegant hop towards mirror-less, or EVIL (Electronic Viewfinder, Interchangeable Lens) camera bodies.

Trend? Whatyoumean trend? I see no trend!?

Some trends come in oddly-photographed packages

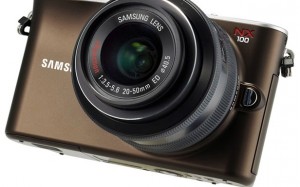
The observant amongst you will have spotted that only one of the five new cameras that were launched this week was of the mirror-less variety: namely the Samsung NX100. That’s hardly a trend, is it? Well, no. But some other interesting things have been going on. Olympus’ E-5 is its new flagship camera, but as I said over on Small Aperture, I don’t think that they’ve done justice to the camera that is supposed to be heading up their range. Nothing about it makes me go ‘Wow!’ and reach for my credit card. As a self-confessed camera geek, that’s pretty much the reaction I’m expecting when new camera equipment gets let loose. The Nikon D7000, released the same day, is far better value for money than Olympus’ new flagbearer.

It’s not just the uninspired E-5 that suggests Olympus will soon be ceasing production of SLRs, but squeaks from within the camp are saying something similar.

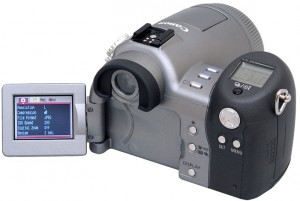
Quite apart from the retro-tastic tiny swivel-scrreen, the Pro90 used an EVF - or Electronic Viewfinder.

If the murmurings from ‘the other’ manufacturers aren’t convincing enough for you, listen to the rumours from Canon and Nikon. Neither of these behemoths of the optical world have produced current-generation mirror-less cameras yet (although both Canon and Nikon have created ELF – Electronic View Finder – cameras in the past, with varying success. Photocritic editor Haje notes that he had a Canon Pro90 about 10 years ago, but ended up trading up to a ‘true’ SLR, because it was ‘pro’ only in name – not in actual fact), but perhaps that could be about to change?

The intergoogles are awash with images of the Canon EVIL, and its prospective range name: EIS. There’s a strong hint that Nikon will announce a mirror-less camera, Q, at Photokina this month. So I’ll say it again: mirror-less cameras.

What is this mirror-less camera you speak of, Miss Bowker?

I should probably begin by saying that in a way, ‘mirror-less camera’ is a bit of a misnomer, after all, compact cameras do not have mirrors either. But the problem is that no one has been able to settle on a name or even an acronym for this other breed of magical-picture-making-machine that benefits from interchangeable lenses but doesn’t have the bulky mirror fandango of the SLR. You might hear them referred to as Mirror-less Interchangeable Lens Cameras (MILCs); Digital Interchangeable Lens cameras (DILs); Micro cameras; Single Lens Direct view cameras (SLDs); or my personal favourite: Electronic Viewfinder Interchangeable Lens cameras (EVILs). In the absence of any generally agreed term, I’ll stick with mirror-less camera.

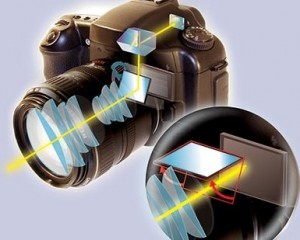
In order for the mirror to be able to flip out of the way, there has to be a gap between the imaging sensor and the lens. Mirrorless camera designs do away with this gap.

Anyway, if you want to know how a mirror-less camera works, you need to know how an SLR, or single lens reflex camera, works first. It’s pretty simple, actually. When you take a picture, you need to be able to see what your lens is seeing otherwise you’ll be decapitating your portrait subjects and accidentally omitting the most interesting feature of your Italian vista. With an SLR, there’s a mirror that redirects the light seen through the lens to your eye, via the optical viewfinder. When you press the shutter release button, the mirror flips out of the way and the sensor (or film, if you’re feeling retro) is exposed to the light and therefore the image. Tah-daa, there’s your picture.

As the term ‘mirror-less’ so aptly reflects, these cameras don’t have mirrors to redirect the image through to your eye via an optical viewfinder. Instead, you see the image on an LCD screen, or an electronic viewfinder, if you’re really lucky. The lack of the mirror malarky reduces the size of the mirror-less camera when compared to an SLR, yet you still get all the goodness of the flexibility of interchangeable lenses and a big sensor.

‘Awesome!’ people might be thinking. Muchly-flexible, muchly-smaller camera. Well, not quite.

Drawbacks of the mirror-less camera

We use SLRs because they give us so much control over the pictures that we shoot. It’s not just about the range of lenses, because, hell, the mirror-less cameras are offering that. It is about the mirror-less camera not autofocusing as fast and having a slower frame rate than an SLR. In addition – at least in our SLR-accustomed eyes, it is about the mirror-less camera being less comfortable, and less intuitive to use when composing pictures using an LCD screen.

In your SLR camera, you'll find the pentaprism in the 'hump' at the top of your camera, just by the eye-piece. It adds to the bulk of your camera (which is bad) but enables you to 'preview' what you are photographing, literally at the speed of light (which is good). If camera manufacturers instead had used a mirror (which would have taken up less space), you would be looking at the world upside down, which would have given a mighty confusing photography experience.

That screen adds an extra layer of communication between you and your image. If you’re a sports or wildlife photographer – or indeed a photographer with any interest in action shots – a mirror-less camera is just not going to be fast enough for you. With a mirror, you are optically connected with your subject, and you get the information you need at the speed of (dare I say it…) light. In other words: you need that mirror.

Compare a mirror-less camera to a high-end compact camera and you’ll notice that perhaps a mirror-less camera isn’t as small as you thought it was. Sure, there’s no more bulk from the mirror, and the pentaprism is absent, but the lens is going to add something significant that the compact does so well in hiding away. You’re never going to be able to pocket a mirror-less camera the same way that you can a Canon S95. This ‘smaller, more portable’ selling point is probably going to have to be re-thought.

In addition, I’m not completely convinced that sensor- and monitor technology is as far advanced as we need it to be. If you have a current-generation dSLR, you may have a feature known as ‘live view’ – this flips the mirror out of the way and lets you use the display on the back of the camera as a viewfinder. For some applications, this works great, but, well, not always.

“I decided to try shooting using only Live View on my 550D for a whole day”, says Haje, editor of this fair blog, “But I gave up after about an hour. I know the 550D probably isn’t the pinnacle of Live View / Electronic Viewfinder technology, but for the technology to become even remotely interesting, it has to be drastically improved. In three years, perhaps. Right now, I’ll stick with the speed of light, thanks.”

Positives for the mirror-less camera

Despite me clattering the mirror-less camera ideal, it does have at least one noticeable positive: lens flexibility. Historically, photographers have bought into a brand because they favour their lenses.

Canon lenses fit Canon bodies and Nikon lenses fit Nikon bodies. (Yes, you can buy generic brand lenses, too, but the mount will still be brand-specific.) Cross-over only happens with the use of an adapter, but the adapter can place the lens too far away from the body and that presents focusing problems. However, the smaller size of the mirror-less camera means that the adapter doesn’t place the lens so far from the body and focusing is no longer a problem. Say hello to lens cross-over, in the style of the moderately successful Four Thirds standard, where Kodak, Olympus, Fuji, Panasonic, Sanyo, Sigma, and, (with a camera manufactured under licence by Panasonic) Leica have joined forces to try to create an universal lens mount and pool their imaging sensors.

The Olympus Pen has an optional viewfinder attachment, turning it into the bastard lovechild of a SLR camera and a rangefinder. Which might not be such a bad thing, actually...

There are a few other cameras out there that do similar things. Digital rangefinders, like the Leica M8 and M9, for example, don’t have mirrors; they rely instead on a different camera design and educated guesswork to get the images the way you want them. Rangefinders, however, are usually met with a Marmite-like effect: You love them and you’ll sell your firstborn to be able to afford the ridiculous price-tag for a Leica M9, or you can’t get along with them, simply because they aren’t SLR cameras.

The mirror-less cameras may be at an advantage by taking the good things about rangefinders (the fact that the lenses can be closer to the sensors because there is no mirror between is a huge benefit, optically) and SLR cameras (much cheaper components, great, well-tested sensors, and an enormous range of lenses available), and merging them in a lovely, uniform package.

What does this mean for photographers?

You know, I don’t think that mirror-less cameras are going to have some great revolutionary impact on the industry or on photographers. Not really. They’re not efficient enough for some types of photography and they’re not small enough to present a serious challenge to high-end compacts. And I don’t think that lens cross-over is a big enough selling point on its own.

There probably is a place for mirrorless cameras in the photography landscape, but I don't see guys like this making the switch in the foreseeable future. (photo by Mike Baird, click to see full size)

Olympus might be leaving the SLR market behind, but if it does, it could well be that it is keen to try to carve itself out a niche after the brand has recognised – after a long and valiant battle – that they simply can’t compete with the rest of the marketplace.

Regardless of Olympus’ strategic direction, I don’t see Canon or Nikon abandoning SLR technology in a hurry, and neither do I see photographers deserting SLRs in droves. What the mirror-less camera does do, is to give consumers more choice and the manufacturers the impetus to push the boundaries with compacts and SLRs. Either way, I think it’s safe to say that mirrorless won’t be the revolution that’ll reduce the our humbe SLR servants to a niche equivalent to where we see film photography today.

And honestly, if the manufacturers want this one to catch on, they have to settle on a universally recognised name. Marketing is all about your consumers being able to identify with your product. At the moment, consumers can’t even make sense of what the product is, much less where it fits into their photographic arsenal.

This post was written by Daniela Bowker, who normally serves as my trusty side-kick as the editor of the Small Aperture photography blog, with a lot of input and second opinions from myself.


Do you enjoy a smattering of random photography links? Well, squire, I welcome thee to join me on Twitter -

© Kamps Consulting Ltd. This article is licenced for use on Pixiq only. Please do not reproduce wholly or in part without a license. More info.

What is shutter speed?

When we’re thinking about exposing our pictures correctly, there are three variables to consider – aperture, ISO, and shutter speed. All of these have an effect on how light or dark your picture is, as well as affecting other aspects of your photo. We have looked at the effects of aperture and ISO in previous articles, so it’s time to consider shutter speeds, and what lowering your shutter speed can do to your pictures.

What do you mean by shutter speed?

To get to grips with what shutter speed is, we need to know what a shutter is. And to do this, it helps to understand the very basics of how a camera works. Light enters a camera lens, travels into the camera body and is recorded as an image when it hits the sensor (or film) in the back of the camera. The amount of time the light is allowed to hit the sensor for is controlled by the shutter; a piece of metal or fabric that opens and closes when the picture is taken. The slower the shutter speed, the longer the shutter is open for. Get it? Okay.

What does this mean for your pictures?

Well, two things. First, the longer your shutter speed is, the longer that you’re letting light hit the sensor – which means that your picture will be brighter. This is great news for taking pictures at night, as you can correctly expose dark scenes without having to use flash. As long as you’re photographing still objects, that is – the second effect of slow shutter speeds is that whilst a shutter is open, all movement during this period is recorded. This means that photos of people in dark rooms can be out of focus if slow shutter speeds are used without flash.

Long Exposure

Long Exposure, by Danny Wartnaby

How can I control it?

Try changing your camera from Auto mode to either Shutter Priority mode (‘TV’ on a Canon camera; ‘S’ on a Nikon) or Program mode (P), and experiment! For most long shutter speed work, a tripod is necessary, as it allows you to ensure that your camera isn’t moving whilst you’re taking your pictures. This makes sure that any static objects in your photo remain in focus.

Be Creative

Using slow shutter speeds, you can get some amazing effects – I’ve always loved photos featuring light trails and more recently have become amazed by shots of star trails, which use exactly the same premise as capturing the trails left by car headlights. You can also use slow shutter speeds to create fantastic panning effects.

A Haunted Trail

A Haunted Trail, by Joshua Debner

I’ve chosen just a few examples, but there are plenty more ideas out there. So what are you waiting for?

All photos used in this article are used as ‘fair dealing‘. If you have strong reservations against your photos appearing on Small Aperture, please contact us, and we’ll get them taken down. Please support the artists creating these photos by clicking on the photos to take a closer look at their work!

Introduction to kite photography

Caption

Go fly a kite. No, seriously. Do it. Then tie a camera to the kite, and get some of the awesomest photos you’ve ever taken.

Sounds scary, eh? Well, there appear to be plenty of people who have had a go. The idea is simple: You take a kite, attach a camera, and take photos with a birds-eye view. It’s actually not entirely unlike what the world-famous French photographer Yann Arthus-Bertrand is doing, sans the ridiculously high costs of having to rent (or buy!) a helicopter.  


Kite aerial photography

A great example of kite-assisted photo by goodmolecules on Flickr

Kite photography, Kite Aerial Photography, or KAP, as it is known among friends, has been with us for absolute yonks – the first famous image I have been able to find out about was taken by a George Lawrence in the early 1900s. His early pioneering work in the field became particularly famous when he took a photo of the 1906 San Francisco earthquake.

He wasn’t the first, however, as commenter David Hunt (of kaper.us fame) points out – Apparently, the first kite aerial photograph was taken in 1889 by Frenchman Arthur Batut. The first American to take an aerial photograph was William Eddy – photos done by the both of them are available online.

There are a lot of different ways of pulling this off, though – from using a very simple compact or disposable camera with some sort of a trigger, to using an elaborate mechanism that allows you to control the imaging device with great precision from the ground.

If you prefer to start off small (may be a good idea), it makes sense to start with David Hunt’s article, explaining how you can introduce yourself to the genre for under US$20 – a reasonable introduction price to any hobby, we’d say.

Triggers

Picture-4.jpg

The first – and trickiest problem, I’m sure you’ll agree – is to find out how you can actually set off the camera: Every idiot can tie a camera to a kite, but how do you take the photo?

There are three ways, essentially: A preset timer takes a photo, you can use a timer that takes photos on intervals, or a remote control that lets you choose when to take a photo. The first option is cheapest: one solution is to use a thread and a storm match. You light the storm match, and you’ll have 5-6 seconds to get the kite as high as possible, as described on this page, but it isn’t a very flexible solution, and you’d end up sending the kite up again and again and again. Very tedious.

The second solution – intervals – is easiest done with digital cameras. Some digicams have a time-lapse feature built in (I remember one of my first cameras, the Casio QV-8000SX had this functionality built-in), but it is actually surprisingly rare. Cameras that accept a remote control can usually be quite easily adapted to do time-lapse photography, by creating your own remote control that sends signals to take photos at the intervals you choose, but this requires some electronics skills. If you are going to go to those lengths, you may as well go for solution #3 – us a radio-remote with an electronic trigger!

Picture-3.jpgOne of the easiest ways to use a radio remote, apparently, is GentLED, an universal camera remote system that weighs only 3 grammes, and can be set to control a wide array of different stills cameras and camcorders. The system has been developed especially for kite photography, but can also be used for other applications, obviously. They start at €20.

If you are hell-bent on not using any pre-fabricated items, our friends over at Engadget threw themselves into the mix head-first, and actually hacked a digital camera to do time-lapse photography. The idea is that once you set it to take pictures every minute (or whatever), you can just concentrate on flying the kite, and see what your camera comes back with.

More advanced stuff – Cradles, remote controls & getting high-tech

None of this is nearly hardcore enough, of course – we want proper stuff! What happens when you go all the way?

Well, Roy Latham explains:

Picture-22.jpg

The rig includes a Sutton Flowform 16 stickless kite with a long nylon fabric tail and the camera platform.


The camera platform uses a Yashica T4 camera and two Futaba servos. One servo controls pitch and the other actuates the shutter. Note that since we are mainly interested in straight down, there is no need for an azimuth servo.

We asked for an elevation control on the grounds that since we would have the kite aloft anyway, it would be irrestable to want to take some more conventional scenic pictures.

The Futaba radio control unit is a popular unit used for radio controlled model airplanes and the like. The framework for the camera platform was custom crafted of aluminum, with some nylon fittings.

Mounting a camera to a radio controllable cradle can help you aim the camera for each shot. There are many different cradle designs available, but Scott Haefner’s solutions seem to stand out as particularly elegant.

Other resources worth checking out:

Kaper.us, an Article on BBC about kite photography, Charles Benton’s KAP page, Scott Haefner’s KAP page, Peter Bults’ KAP encyclopedia and blog, 360° panoramas using KAP, KAPnet’s directory of KAP parts, Some of the best KAP photos on flickr… And finally, a fantastic article in Science News about the scientific application of kites and kite aerial photography.


Do you enjoy a smattering of random photography links? Well, squire, I welcome thee to join me on Twitter -

© Kamps Consulting Ltd. This article is licenced for use on Pixiq only. Please do not reproduce wholly or in part without a license. More info.

Making a time-lapse

Canter

Every photographer experiences a creative block at some time or another. So what do you do when this happens? I personally fall into a foetal position on the floor, kick my legs, and spin around in circles while crying like a six-year old. But what do YOU do? Well, here’s a thought. How about a time-lapse? If you have a dSLR and a sturdy tripod, then you already have most of the ingredients for this magnificent recipe. So let’s get started!

Equipment

While many dSLRs have an “interval shooting” feature built in already, some don’t, so you’ll also need a way to time and trigger your shutter release. There are several pieces of hardware available, but I like to use a Hähnel Giga T Pro. It’s the only one I’ve ever used, but it seems to work perfectly fine and is easy enough to figure out. Whatever you decide to go with, make sure it has an interval timer function and an exposure count control. Without these two features, you won’t be able to create your time-lapse.

Essential kit, if your camera doesn't have an 'interval shooting' function

For this tutorial, you’ll also need QuickTime software, which you can download here. (If you own a Mac and you’re running Snow Leopard, then you’ll notice that you have QuickTime X and can’t install QuickTime 7. Read this post by Apple to get around this problem.)

The location

You can shoot a time-lapse of just about anything you want. Obviously, it makes more sense to shoot a scene that has a lot of motion in it, such as fast-moving clouds, a busy city square, or a train station. Once you determine your scene, it’s time to get set up. Keep in mind that you’ll need to dedicate some time to this project, so bring along a book or something to keep you occupied while you shoot. ‘How long should I shoot,’ you ask? Well, that depends. And in order to figure that out, you’ll need to do some basic number crunching.

The maths

To determine the time required to shoot your time-lapse, you’ll have to work backwards. For simplicity’s sake, let’s say that we want our final video to be one minute in length. A normal time-lapse video will consist of 15 frames per second. So 15 frames times 60 seconds is 900 frames.

How smooth or choppy you want those 900 frames to flow is up to you. If you’re shooting clouds, then you’ll probably want a smoother effect, so you’ll want to shoot in shorter intervals, say every five seconds. So 900 frames taken every five seconds is 4500 seconds, divided by 60 seconds per minute, which comes out to 75 minutes, or an hour and 15 minutes worth of shooting. Phew!

So now that you have your location picked and how long you’ll be shooting for, let’s get set up.

The set-up

Place your tripod where you want and frame your shot. Make sure your tripod is as stable as you can get it. Any movement during your 900 shots will be very visible once you combine everything together in your final video. If you brought your camera bag with extra gear in it, the added weight could help with stabilisation, so try hooking it onto your tripod.

Get comfy whilst your time-lapse is shooting

Now check your camera for settings. Because you’re taking 900 frames, you’ll want to shoot in JPG to make sure they all fit on your memory card. Also, since your video will likely be used for web-friendly applications like Youtube or Vimeo, you don’t really need to have extra-large high resolution photos.

Make sure you focus your shot and then disable your auto-focus to ensure consistency across all of your frames. You’ll also want to shoot in either manual or aperture-priority mode. If you’re out in an open field during high noon with a lot of clouds in the sky, you’re bound to be in bright sunlight during some shots and darker shade during others, so aperture-priority will help ensure proper exposures throughout your time-lapse.

Once you’re all set up, program your interval timer to the correct settings and start shooting. Grab your book and get comfortable. You’ll be there for the next 75 minutes.

Creating Your Video

Once you’ve downloaded your photos to a folder on your computer, it’s time to put everything together. Open up QuickTime and click Open Image Sequence under the File menu. Select only the first image in your sequence and click Open. Next, you’ll want to select your frame rate. For our example, we’ll go with 15 frames per second. Click OK and QuickTime will do the rest for you.

You now have your master time-lapse video. Make sure to save it as is. You can then go back to the File menu and choose Export for Web to save the video as a more web-friendly version, ready for Youtubing.

Congratulations, you now have your first time-lapse video!

Extra Steps

While this tutorial simply covers the basics of time-lapse photography, there are plenty of other methods available to play with, so once you get some practice down, you can start experimenting a bit. For example, you may want to batch-edit your photos in Photoshop to create a more unusual time-lapse, such as one in monochrome.

If you’re shooting a busy street at night, you might want to use a slow shutter speed to make the car headlights streak throughout your video. Or you may want your time-lapse to pan across a large scene, a bit like this one, to give your video a wow factor. The options are endless.

Time-lapses can be a great way to create a fun and unique project on a lazy Sunday afternoon. Maybe you have things to do around the house, so you set up your gear in your backyard and shoot while you do your chores. Or maybe you’re at a cafe in a busy city square. Why not shoot a time-lapse of the buzz around you while you sip on a cappuccino and read a book? It’s simple to do and I’m sure you’ll be pleased with your results.

And just so that you know, this is my favourite time-lapse out there:

Hayaku: A Time Lapse Journey Through Japan from Brad Kremer on Vimeo.

Editing software doesn't have to cost the earth

Unedited Wow, that’s a really nice picture. It’s a shame about that big spot on her chin though. And she won’t thank you for that bit of hair she has on her lip there. Y’know, I think her hair is a slightly darker shade of red than that OH GOD IT’S WRONG IT’S ALL WRONG.

Now I admit, you can end up getting a bit OCD about image editing (see first paragraph). While this is true, take a portrait of anyone you know who is even the slightest bit vain and your vision of keeping them “just as they are”, complete with dark circles under the eyes from working late and that bit of spinach in the teeth from tonight’s dinner, might not be met with the standing ovation you were expecting.

Wouldn’t it be nice to be able to just tidy up those minor niggles that pop into your pictures sometimes? Wouldn’t it be nice to be able to do it without sacrificing central heating and eating nothing but rice and “no frills” tinned tomatoes for a month, just to save up enough money?

Well read on, budding image makers, for I have tried and tested four different lower-price solutions for you. (Cos, well, we’ve already looked at the free ones.) As a portraiture photographer first and foremost, I decided to take the same, straight out of camera, unedited image and try to get the most out of it using these four different packages:

  • Corel Paintshop Pro X3 – £79.00
  • Nikon Capture NX2 – £113.61
  • Portrait Professional – £69.95
  • Adobe Photoshop Elements 8 – £77.46

I’ll be testing each one using the same four criteria: exposure tweaking / editing, retouching and sharpening, black and white conversion, and toys and fun filters. Here’s the image I’ll be using:

Corel Paintshop Pro X3

Upon first loading up, Corel had a fairly easy and clear layout, arranged logically. It’s essentially an organiser and image editor in one. After a bit of fiddling, I worked out how to bring up my image and start messing with it in the editor.

Exposure tweaking/editing

I adjusted the colour balance to make the image cooler, then used curves to alter the shadows, midtones and highlights. I have to say, there was little subtlety in the changes in tone and exposure. Another thing I noticed was that there isn’t instant feedback to the changes you make in the preview pane — it takes a good second, as if it were the victim of satellite delay on a news programme. It might be my poor brain being a useless, pickled mess but by that time I’d pretty much forgotten what my image looked like before the tweak.

Corel with sharpening

Retouching and sharpening

I used the clone brush to even out the skin tones, bringing the opacity down to even out skin tones and remove bags from under the eyes. This was fairly effective, but again not as subtle as I would have liked. There is a “makeover” tool which is fairly effective for removing individual spots and blemishes.

When sharpening, the high pass sharpen wasn’t too bad, but left the picture a bit grainy. The unsharp mask (which is often used for a slightly more dramatic sharpen) was nowhere near as subtle as I’d have liked it to be, and bringing the slider up to any remotely significant amount was creating a weird ring around the iris; I’m quite sure that “weird ring around my irises” isn’t the first thing my clients ask for in their portraits.

Toys and fun filters

Your usual array of brush stroke effects and the like here but something I hadn’t seen before was quite a cool little feature called Time Machine. This runs you through a few different classic image making methods, from the Daguerrotype images of 1840 to a classic cross-processed look. And they don’t look half bad, to be fair. Plus there’s a paragraph explaining how each photographic method worked at the time, so you get a little history lesson, too!

Ooh, with toys!

Corel using even more toys!

You may have noticed that I didn’t include a black and white conversion section for Corel. That’s because there is a “black and white film” effect hidden away in the filters section, which oddly gives a much greater degree of control over black and white conversion than the other option on offer, which was a simple remove colour option. I found I made a better conversion using the black and white film filter.
Corel does black and white

Summary

A good variety of tools available for image editing, but not enough power and subtlety in the tools themselves. A bit like borrowing an old toolbox from your grandad ñ lots of stuff in there, but most of it isn’t worth using.

Portrait Professional

I will be putting all of the categories together for this one, as they all sort of happen at the same time. Plus, there are no fun toys or filters to speak of, nor are there any black and white conversion options, apart from sliding the saturation to 0. This piece of software is a little different from the others in that it is designed specifically for portrait images.

After loading up my JPEG image, I had to define where the eyes, nose, edges of the face, chin, sense of humour, likes, dislikes, opinion on Jedward all are in the subject’s face (some of those aren’t true, I’ll leave you to work out which they are), to create what can only be described as what might pass for a death mask in the TRON universe:
Portrait Professional

You are then taken to the editing suite, where everything is a slider. It felt a bit like create-a-character mode in a computer game, as I was able to adjust the shape of his mush in several ways, using a slider. None of them looked particularly natural, though.

The other sliders all deal with skin smoothness, wrinkle removal, spots and blotches, dark shadows under eyes and so on. Essentially, this program appears to be a piece of “quick fix” software to make portraits looks good. However, I’m really not sure who this software is aimed at – to professionally retouch an image requires a careful, complex level of attention, skill and patience, working on individual areas of the face for a significant period of time. There are no shortcuts, and this software can only do so much towards improving an image before the face you started with begins to look plastic and unreal.

Interestingly, I was also unable to save the image in the trial version. I decided to delve closer by zooming into the image and started to realise why they might not want us to save the image – the amount of detail lost when using the various sliders make the retouch job look amateurish.
Portrait Professional not doing such a great job

It looked like I had taken a wire wool scouring pad dipped in hydrochloric acid, held my subject down, and proceeded to scour his face until it was featureless and sterile. Actually, maybe that would save me time after the shoot in retouching – anyone fancy a free portrait session? No?

Like anything in life, there are no “quick fixes”. I personally would avoid this particular piece of software. If you’re serious about using photo editing software to get more out of your pics, there are much better programs out there for similar prices.

Nikon Capture NX2

What I immediately liked about NX2 was the fact that it didn’t take very long at all to load ñ it popped up on my screen and was ready and waiting without any fuss. I chose my photo and I was into the editing suite in seconds. There was a very clear and uncluttered layout and it almost felt like I had used it before. Each adjustment you made to the photo would be recorded as a “step”, so that could return to a step should you find it needed adjusting later on, which is a nice, non-destructive way of editing.

Exposure tweaking/editing

Editing exposure was very simple and effective. All was done from a simple “adjust” menu. The results were displayed very quickly, more quickly than in PaintShop Pro, which made it easier to make finer adjustments to the image. I was also impressed with the amount of fine control there was to be had over the exposure and other settings. As before, I used curves to edit the shadows, mids and lights and then altered the colour temperature to make the image cooler.
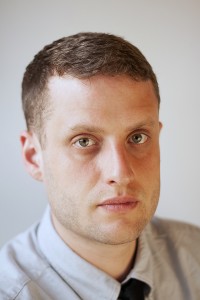
NX2 with sharpening

Retouching and sharpening

The auto retouch brush did a good job of removing blemishes without blurring the skin.Unfortunately, there was no clone brush I could use to smooth out skin tones. Looking in help, they suggested using a gaussian blur to smooth out skin tones. Unfortunately, this just gives you a picture of a dude with a blurry face. I used this in combination with the selection brush (works like a photoshop mask) in order to localise the blur to desired areas of the skin. Not the best solution, but it did help a little with skin tones and blemishes.

I used the same sharpening methods (high pass sharpen and an unsharp mask). There was a better fine level of control here than with Paintshop Pro but not as good as I’d have liked.

Black and white with NX2

Black and white conversion

There was a dedicated black and white conversion button, the sliders offering a good level of control again, although I felt the options were a little too simple. All in all, though, it was possible to get a good black and white conversion.

Toys and fun filters

None. Zip. Nuttin’. NX2 seems to be pushing itself as a very serious digital darkroom type thing, and you are very silly for wanting silly effects. Silly Billy.

Summary

To conclude, NX2 feels a bit like a beginner’s Adobe Lightroom, in a good way. It offers a decent level of fine control and immediate feedback. Both of these factors are very important when tweaking an image to get it just so. It’s a great place to start when learning how to get more out of your images. A few sessions learning with this program would definitely benefit your shots but at £113, are things getting a bit pricey?

Adobe Photoshop Elements 8

First Impressions

You knew it was coming, how could we not include Adobe? Photoshop Elements 8 (or PSE8 as I’ll call it from this point) is what you imagine it would be a sort of simplified, stripped down version of Photoshop. However, you are still able to make full use of a wide variety of tools and the layout was as clear and user-friendly as you would expect.

Exposure tweaking/editing
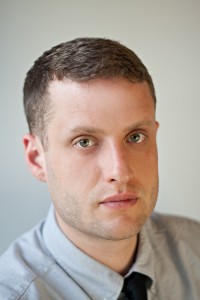
Retouched and sharpened with Elements 8

I initially loaded up my RAW file which loaded up Adobe camera RAW, a sort of pre-import tool that allows you to mess with colour balance, exposure etc before loading it up into the editing suite proper. There’s no mistaking the difference in the subtlety of changes you can make here, with instant feedback on how it’s looking.

Retouching and sharpening

Retouching was simple and effective. I used the clone stamp on various settings both to even out the skin tones and remove blemishes. Although there is a dedicated spot removal tool, I would recommend doing it manually with the clone stamp. No real complaints here. As before, I ran both a high pass filter and an unsharp mask on the image. Both were the most effective of all the packages. There really doesn’t seem to be any better software for portrait retouching and sharpening at this price.

Elements does black and white

Black and white conversion

As with its bigger brother, Elements has a dedicated convert to black and white tool. It’s slightly simplified but essentially very similar to the “full” version. It has some presets you can meddle with to see how different mixes harbour different results.

Toys and fun filters

An extensive range of fun toys and filters to mess with your photos, from various sketch / brush effects to turning your image into a mosaic and adding clouds (for when you need that clouds-over-a-mosaic look). In case you were wondering, here is that much sought-after look:
And Elements has toys, too!

Summary

To conclude, PSE8 has everything you need to start practicing enhancing and getting more from your images. The price is on a par with the other packages on offer here and it will give you a chance to see whether you really need the bigger, more feature packed full version, for a fraction of the price.

And the winner is…

It was probably something of a foregone conclusion, but it seems that PSE8 has it, at least it does for me. Nikon Capture NX2 does a valiant job of providing an alternative to Adobe Lightroom at a slightly cheaper price, but not much cheaper than Lightroom 2, so I’m not sure it’s particularly worth dropping your pennies on, especially at over £100. In addition, I feel you can do most of what NX2 offers in Photoshop Elements 8.

And because I should probably warn you, it’s worth mentioning a program I downloaded the trial of which was going for around £25, called Pixbuilder. It was essentially MSPaint with (very bad) layers and curves options thrown in. If you’re wondering “how cheap is too cheap for my image editing software?”, the answer is “that cheap”.

Spending money to make money

moneys

A couple of days ago, I did an article on making money via stock photography, and one of my eagle-eyed readers pointed out that you had to pay for the service I recommended.
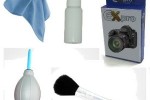
I had a bit of a think, and was trying to make up my mind if I should write something more about the topic, ‘if it is worth investing money into trying to make money off photography’. Obviously, in most business, you are dependent on making an investment in order to start earning anything, but can the same be said to be true for photography?

Before I had time to formulate my thoughts, one of my regular readers who is also an old friend dropped me an e-mail which pretty much sums up my opinions on the matter – I’m sure he doesn’t mind if I reproduce it here:

Yeah, you do have to pay, but the thing is, if you manage to sell a couple of images, you can make that money back easily. They seem to have one of the best systems out there, and it’s all about having faith in your product.

If you don’t think your photos are good enough that you will be able to sell them, then paying for the service is not for you. If you believe your pictures are good enough to compete, then you’ve got yourself a winner.

I’ve been able to make a profit from this website over the past 3 months, and I’ve had my account for about 7 months. In total, I’m running at a loss, but if the last 3 months are anything to go by, I’ll be running a profit overall from next month onwards.

I’m really excited, actually, it’s the first time I’m making money off my photos. Even if I end up not making much from this, I can say I’m making money of photography, which has been a life-long dream for me.

YMMV, of course, but I’ll stick with Photostockplus for as long as they’ll have me.

Thanks a lot for that, Tim.

Agree? Disagree? First, have a look at the original post, and let us know, below!


Do you enjoy a smattering of random photography links? Well, squire, I welcome thee to join me on Twitter -

© Kamps Consulting Ltd. This article is licenced for use on Pixiq only. Please do not reproduce wholly or in part without a license. More info.

Making money with your photos

To most photographers, Photography is – and always will be – a keen hobby. Some of us, however, are burning to take the hobby to the next level, and want to start making some cash from it. Perhaps not enough to buy a Ferrari, or even enough to pay the electricity bill, but at least enough to be able to buy a couple of photography toys along the way.

I worked as a photographer full-time for a couple of years, and ended up deciding that the lifestyle wasn’t for me. Even though I jacked in my career as a photographer, I’m still making money off my photos.

How? Well…

Over the years of working as a photographer, I built up a pretty sizable library of photographs. Some of them are covered by some sort of restriction (model release, contract, or otherwise), meaning that I cannot publish them further, and that means they are of no value to me further.

Where I do still make quite a bit of money, however, is by selling stock photos.

A stock photo is an image that someone could conceivably want to use for something. Imagine if you’ve taken a photo of a pretty girl holding a mobile phone to her shoulder, and typing on her laptop at the same time. If you have a model release for the picture (i.e if the model doesn’t mind her photo being used, and you’ve got a piece of paper confirming that), there are a thousand and one uses for the picture. A newspaper may be doing an article about stress. A magazine may need an image to illustrate the dangers of mobile phone use. An job advert might need to appeal to a female audience. The possibilities are endless, but key to all of this is your photo.

Now, think wider. Fabulous landscapes. Extreme macro photos. Portraits of people doing things. Photos you’ve taken of events, actions taken by police, and stuff like that. Let me give you a piece of advice right now: As someone who works in the automotive trade, I can never find enough photos of police making arrests of motorists, of speed cameras, and of speed humps. You’d think it was obvious, but I guess it’s not. Point being? Take pictures of everything around you – it costs very little to keep the pictures on-line, and you never know what people are going to need.

There are people out there making fortunes off photos they have taken of different types of boats, certain plants, and who have libraries of photos of different types of food. You’d be amazed.

Selling your pictures

So what do you need to do to get in on the action? Well, first of all you need to be a pretty good photographer, but that bit is easy – you’re reading the right blog, at least :) From there on, you need to find a way to sell your photos. At first, I used to sell my photos via my own website, being naive enough to think that there would be people out there who would find my photos. In reality, picture editors in newspapers, magazines, and books are two things: a) extremely busy and b) extremely lazy. If they spend 10 minutes to find a photo on a website, why should they trawl the web to find a different photo?

So essentially you need to find someone who can sell your photos for you. It’s slightly counter-intuitive, but think about it: The bigger a website is, the bigger the chances are that a picture editor can find an image right there and then. And more importantly, the bigger the chance is that they will end up buying from you.

I’ve tried a variety of different sites out there, but ultimately I ended up settling on Photo Stock Plus. For one thing, the website has a lot of functionality that others don’t, but most importantly, they took care of me right from the beginning.

You can sell stock photos, which is a big bonus to begin with, but you can also sell prints and gifts featuring your photos to friends and family via a slick eCommerce interface.

Bulk upload tools make uploading your photos easier, and if you decide to go with a pro account, you’ll get all sorts of fancy-arse possibilities, including your own URL, possibilities to pick from a stack of designs, getting special assignments from commissioning editors, good deals on business cards and flyers, and even a press pass (which, personally, I doubt will be worth jack, but then I’ve got a ‘real’ one, so I’ve never tried it).

No reason to be worried about your photos either – The site will watermark them all for you, and Photo Stock Pro keep full track of all of your photos for you. You can set your own prices too, which is exciting in itself – charge too high, and nobody buys, charge too low, and it won’t be worth your time – but I’ll be writing more about that in a future article.

And the really clever bit? They only take a 15% commission, which is next to nothing, compared to some of the other sites out there, and you can try it all for free before you decide if you like it or not. Give it a shot!