Photographing in the dark can seem a daunting and difficult task when encountering it for the first time, but here at Small Aperture we have a few quick pointers to help you out. Hopefully this article will, wait for it, shed some light on the subject (I’m so, so sorry). So what can we do to combat low light photography? There are, thankfully, several options available to us.
Use a larger aperture
One option is to work with a larger aperture. What is aperture, you ask? Well I’m shocked and appalled, quite frankly, that you haven’t already read up on our article about it. The bigger your aperture, the more light you’re going to be letting in. Of course, sometimes, you can’t afford to / don’t want to lower your aperture. Whatever shall we do? Well, you could always…
Increase your ISO
Increasing your ISO will increase your sensor’s sensitivity to light, which will help make the most of what little light you’ve got to work with. What are you talking about Gareth? What are these kooky letters you’re putting together? As always, we have it covered – nip over to our guide to ISO and then come back to me when you’re up to speed.
All done? Good. So, increasing your ISO can help you capture those precious, delicious slivers of light skulking around in the darkness. But what about all this horrid noise? It’s spotty and grainy and yucky – this won’t do at all. Well, how about we only increase the ISO a tad and look at changing some other settings?

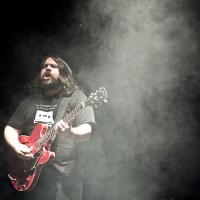
and this one required all three - ISO 1600, aperture of f/2.8 and a shutter speed of 1/100. Take THAT, low light!
Lower your shutter speed
Lowering your shutter speed can also help your camera gather more light for when there is little to play with. Guess what? We have this one covered, too – take a look here. The longer we have the shutter open for, the more time light has to get in. Too low a shutter speed can lead to image blur, however, and unless you’re going for that look, images that aren’t sharp are, well, unsharp. Image still too dark? Well, I’m afraid that’s all your options exhausted. Bummer. Or is it…?
Get yourself a tripod
Go on, do it now. Open a new window in your browser, go to Amazon, and get it ordered. Unlike other things in your kit, a decent, sturdy tripod doesn’t really ever need to be replaced for a newer model and should still be useful for years and years to come. This means you’ll have to give it a name, of course. Mine’s called Trev. Trev the Tripod. Trev has always been there for me when I’ve needed him. The best thing about Trev is, when I need to lower my shutter speed to a duration for which I couldn’t possibly hold my camera still, I pop it on Trev and he keeps it perfectly still for the whole exposure.
Good old Trev.
You’ll mostly find a tripod useful for grabbing yourself some lovely sunset / late evening landscapes, which will afford you to work with a very small aperture AND a low ISO setting in order to get some lovely, low light landscapes.
Let’s summarise, then.
To defeat the low-light menace, try a combination of these factors:
- Use a larger aperture
- Increase your ISO
- Lower your shutter speed and, if it’s too low for a sharp image…
- …Use a tripod!
Depending on what sort of image you’re after, you’ll be using a combination of these for one image and maybe just altering a single factor for another. There is no greater teacher than experience, so get out there armed with this new-found knowledge and experiment! Seeing as it’s Friday, if your friends invite you to the pub just tell them ‘Can’t make it tonight, I’m afraid; I’m spending the evening in a field with Trev.’

