A Closer Look: Anastasia Taylor-Lind

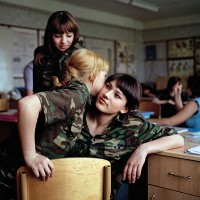
Anya Romanova (centre) and her Year 8 friends at Ataman Platov Cossack Cadet School. This image was featured in the Taylor Wessing Photo Prize 2010.

To continue my Closer Looks this week, I’m looking at the absolutely beautiful work of Anastasia Taylor-Lind. It’s important to look at a female photographer and her work because I personally feel that women are a little under-represented in photography. To follow through with this theme, then, I will be looking at Anastasia’s series “Women of the Cossack Resurgence” – a fascinating look at Cossack revivalism.

I won’t get too far into the ins and outs of the story and background of the series, for fear of making myself look a bit stupid and publishing inaccuracies. It would be much better if you scooted over to Anastasia’s site and had a look at the flavour text to fully acquaint yourself with the background behind the series. What I want to do with this article, as a portrait photographer, is attempt to get a bearing on just how she achieves such beautiful images.
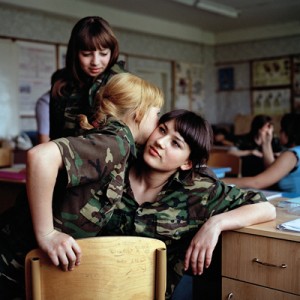
Anya Romanova (centre) and her Year 8 friends at Ataman Platov Cossack Cadet School. This image was featured in the Taylor Wessing Photo Prize 2010.

With portraiture (and photography in general) preparation is key. The image is not just the click of the shutter, it is all kinds of preparation approaching that moment. For these images, Anastasia spent a week in the school with the girls, attending their classes, sleeping in one of the dormitories, being one of them. The benefits of this were twofold. First, it would allow her to connect, identify with and get to know the girls, so that the resulting images more accurately portrayed their character. Second, it would mean her subjects would relax and be used to the camera.

Another preparation that was important here was kit preparation. Anastasia used a 6X6 Bronica with a waist-level viewfinder. Compared to your normal DSLR, this allowed Anastasia to take the camera away from the front of her face: now they were talking to her and not to a camera with someone hiding behind it.

Recently, I have often felt there is something of a barrier between myself and my subject when I raise the camera to take a shot. My own approach to alleviating this problem is to practice being able to effectively compose more quickly, making sure I take the camera away from my face as often as possible, to let my subject know I’m still there and haven’t been taken over by a large metal facehugger. That human connection is very important, in my opinion.

Many of the shots in the series explore the bond between the girls in the school. There are images of the girls dressing each other’s hair, embracing, spending time together in the dormitory at bedtime and, in one of my favourites of the series, possibly whispering secrets to each other. I feel as if these images have been included because they resonate with Anastasia as a woman.

I’m not saying that a male photographer wouldn’t have noticed this connection between the girls, but I wonder whether the moments would have been captured as intimately. Maybe I’m wrong, but I do think there is something to the idea that your best work is borne of an emotional connection of some form with the subject. Again, this reinforces the importance for me of Anastasia staying with the subjects of her portraiture for several days – it’s as much to prepare her for the images as it is to prepare them.

Galina Prokopenko, 75 year old great-grandmother and black-belt karate instructor.

To finish with, I want to look at an individual portrait from the series and tell you what I like about it. I honestly feel like going through every portrait in the series, because they’re all beautiful, but we all know how much of a waffle fiend I am (imagine having to sit and listen to me waffle – at least you can just close your browser when you get bored), so I’ll limit myself to one.

By which I mean two. I was torn between the image of Galina Prokopenko, the 75 year old Karate instructor and the basket-weaving class image. Aside from being allergic to concision, I chose these two images because they are stylistically similar and hold qualities that I, whilst not wishing to be overly gushing, find absolutely wonderful. Putting aside the fact that the subjects are both totally relaxed, natural and bursting with character, they share a compositional style that I am very interested in at the moment.

Anastasia manages to balance the image of the subject in the frame with background detail, without taking focus away from the subjects themselves. If we look at Galina first, there is a beautiful balance between her pose and positioning in the frame with the floral wallpaper. The table tells us a little more about Galina without being an intrusive object in the scene. The lighting appears to be natural window light and the gentle vignetting draws us to Galina (who is a striking enough character to be drawn to in the first place, to be fair to her).

There are similar elements at work in the basket weaving portrait. The positioning of the girl in the frame, combined with the angle of the basket and its outreaching strands, the bottom of a plant creeping in on the image and the small wooden ornament make for an interesting composition. The lighting is again quite beautiful, the face being the most prominently lit feature in the image, focusing our attention on her expression of concentration. There is just enough of a hint of attention in her expression to suggest to us that she is listening to instructions from a teacher to the right of the camera.

A basket weaving class at the Ataman Platov Cossack Cadet School

Although the qualities described above would be enough to class these two images as excellent examples of portraiture, the true magic for me comes from the way everything is subtly visually linked. In the portrait of Galina, the pink of the floral wallpaper links to Galina’s pink lipstick. Similarly, the floral pattern on the wall links through to the floral pattern on the teapot and to the one on the tablecloth. I love how this is contrasted by her military appearance: it shows us that the personas of great-grandmother and soldier can both exist in one person.

Similarly, there is a very strong visual theme of flora and nature running through the basket weaving image: the hanging leaves link to the leafy pattern on the wallpaper, which is linked to the floral ornament on the wall, which is wooden, linking us to the basket itself, linking us to the camouflage pattern of the girl sitting, which is of course intended to mimic colours found in nature.

These are the qualities that take these portraits to the next level. I will cease my trademark waffling now, I hope you have enjoyed looking at these portraits in depth as much as I have.

To wrap up on a personal note – I’m really very glad I’ve written these two “Closer Looks” on a couple of my favourite portrait photographers. My intention was to get you lovely readers geared up about portraiture but, as it happens, I’ve also reinvigorated myself on the subject. It can be all too easy to fall into the trap of only taking photos when you’ve been commissioned to do so: this is a mistake. I don’t know about you, but I’m off to set up some portrait sessions just for the love of it. I suggest you do the same.

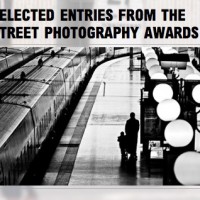
Street Photography Festival comes to London

Flying the flag of street photography

Currently there is no London-wide photography festival and no organisation in the UK dedicated to preserving street photography as an accessible art form, important tool for communication and method to document and reflect on society and human behaviour. Enter the London Street Photography Festival 2011, to change all that.

Aiming to give street photography a home in the UK and provide Londoners with a celebration of their city through the essential tradition of Street Photography, the festival will questions, supports and provides a platform for dialogue around street photography, raising the profile of photographers and their work.

Flying the flag of street photography

The London Street Photography Festival is an exciting new event in London’s cultural calendar which will champion the best contemporary street photographers, honour past masters and provide a space for discussion, debate and appreciation of the current relevance of this time-honored genre.

The festival takes place over 10 days (7-17 July) with a diverse programme of exhibitions, events, talks, walks and workshops.

There’s also a couple of competitions running, including a Student Award and an International Award. Unfortunately, it appears that the awards are run by Shoot Experience – who did the photographic treasure hunt which the editor and deputy editor of Small Aperture participated in back in 2008. ‘Unfortunately’, because the judging at the event we were at seemed haphazard at best, as described in a post from back then. Let’s hope they’ve improved their judging since then: if they haven’t, the cynical among us could conceivably start thinking that the £30 entry fee is simply a way of making a ton of cash…

Street Photography in London

Recently, I realised that while I do an awful lot of writing about photography, I’m not actually spending all that much time actually taking pictures myself anymore.

A sad state of affairs – especially as I bought a gorgeous Canon 50mm f/1.4 prime lens. (I could rant about prime lenses for hours, but I’ve done so in a previous post, which (if I may nest my parantheses and be so bold as to recommend one of my own articles) is well worth a read), and I have a fabulous city right on my doorstep.

Anyway, so I have never really done that much street photography before, but I figured it’d be a crying shame not to have a go at it - and I think I did pretty well – these are some of my favourites... I may even decide to enter them in the London International Film Festival, which starts in June 2011

Mean Fiddler

Mean Fiddler

This photo, Mean Fiddler by Photocritic.org on Flickr, was a lucky one indeed. Shot from the hip just as he was finishing playing a song, the colours came out magnificently, and I got quite lucky with the focussing as well – Seeing as how I was shooting from the hip at f/1.4, it wasn’t as if I had a lot of leeway with my depth of field.

Technical Details: Canon EOS 450D with a Canon 50mm f/1.4 prime lens. 1/320 second at f/1.4 and ISO 100, metered in Aperture-priority AE with a -2/3 stop EV bias. More tech info here.

"Is he taking a picture of me?"

"Is he taking a picture of me?"
This photo, "Is he taking a picture of me?" by Photocritic.org on Flickr, was taken in the midst of a St Patrick’s day parade on Trafalgar square. She was hanging out with some of her friends in front of a fountain, and the light kept catching her, so I figured I’d try and capture that. The back-lighting was quite tricky (and, considering that all of these photos were taken on a single attempt, with one shot at getting it right, I think I got lucky), and I’m happy that I was shooting this in RAW, because I needed to do a few adjustments to make the photo come out well.

Technical Details: Canon EOS 450D with a Canon 50mm f/1.4 prime lens. 1/1250 second at f/1.4 and ISO 100, metered in Aperture-priority AE with a -2/3 stop EV bias. More tech info here.

Dreaming over Coffee

Dreaming over Coffee
This particular shot, Dreaming over Coffee by Photocritic.org on Flickr, came about right at the beginning of the walkabout in London – I was in line for the queue at Nero coffee, and spotted this girl, who was sitting there, enjoying her coffee, and being rather blase about checking out the cute guys walking by – what is more summerly than that? When the moment came, I simply lifted the camera to my face, snapped the shot, and paid for my coffee. Simples.

Technical Details: Canon EOS 450D with a Canon 50mm f/1.4 prime lens. 1/200 second at f/1.4 and ISO 100, metered in Aperture-priority AE without EV bias. More tech info here.

Me too, brother. Me too.

Me to, brother. Me too.
This one, Me to, brother. Me too. by Photocritic.org on Flickr, was taken immediately after the girl above. We were sitting on the statue in the middle of Seven Sisters, and were watching the world go by. This fellow just showed up, stopped right next to me, and stared at the sky for a bit – His T-shirt made me laugh, so I couldn’t not take the shot.

Technical Details: Canon EOS 450D with a Canon 50mm f/1.4 prime lens. 1/200 second at f/2.8 and ISO 100, metered in Program-mode AE with a -2/3 stop EV bias. More tech info here.

MOAR!

If you want to se more, you can see the whole set on Flickr.

Also, if you haven’t seen many updates from me recently, it’s because I’m out of the country for a while, doing a load of photography and eating a lot of lovely food while visiting my parents in Mumbai, to be precise. When I come back, I’m finally moving back to London again – if I can find myself a place to stay, that is.


Do you enjoy a smattering of random photography links? Well, squire, I welcome thee to join me on Twitter -

© Kamps Consulting Ltd. This article is licenced for use on Pixiq only. Please do not reproduce wholly or in part without a license. More info.

Shoot Report

A 50mm prime was used for intense close-up shots

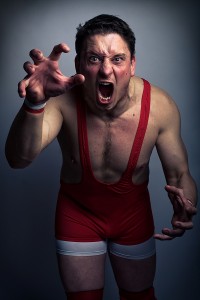
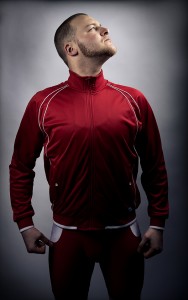
To ease us into the second half of the week, I thought I’d provide you with a little light relief (and, hopefully, a little entertainment) by writing a shoot report. Now I was perusing my recent shoots in an effort to decide which might provide the most entertainment. One of my corporate headshot gigs? Nah, too dry. Perhaps a published editorial portrait? The last couple ran too smoothly to be exciting (for a change). How about…men in spandex? No, really.

When I have the time and a paying client, I venture into the world of wrestling photography. Usually, this takes the form of busting out the studio lights to provide a series of portraits for use in programs, on flyers, posters and roster pages for websites, as well as photographing the show itself. While I can understand that most people wouldn’t even consider tackling this subject, I would argue that it is a really interesting, unusual challenge to set yourself.

A 50mm prime was used for intense close-up shots

Preparation

After seeing some of my previous work, I was contacted by my client with the request for a full day’s shooting. It was indeed to be a full day: up at 7am, home at midnight. I was commissioned to reshoot the promotional portraits for the entire roster and then shoot the show itself in the evening. I was given pretty much free reign to shoot the portraits as I saw fit, with the only requirement being to shoot them against a white or light background, for ease of cutting out for posters and the like in the future.

I spent the week prior to the shoot communicating with the promoter about each wrestler’s persona. This meant I would have my pose ideas in place beforehand, allowing me to work quickly. I purchased a new paper background in “Arctic White” (surely that’s just white? You can’t have shades of white), which I added to the expenses.

On the day of the shoot, I arrived and set up my background in a nice, big gym hall that was to be the changing room and general hanging-out area for before and after the wrestlers’ matches. I was acutely aware that adjusting lighting would take up a significant portion of my time over the day, so, to minimise that, I set a marker on the floor with a couple of pieces of sticky tape for the wrestlers to stand on, setting up my lighting based around that.

The Shoot

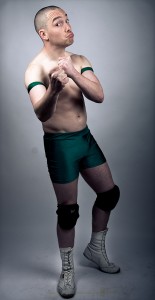
One of the less threatening members of the roster...

So far, so good. Except we hadn’t shot anyone yet. Wrestlers, whilst generally a good bunch of lads and lasses, aren’t models or professional posers, as it were, but generally aren’t nervous of the camera, either. This is both a blessing and a curse. It means they generally take direction fairly well, but if one of them turns up on set with this brilliant idea they have that will definitely look really cool and not at all silly and embarrassing, you have to handle that situation in a certain way.

I bring this up because it can apply to any posed portraiture session. Often, you may find that your subject suggests something that you either know won’t be used, due to the brief you have been given, or is just a horrible, horrible idea (it’s often the latter). It’s important that you indulge your subject at this point, within reason, because you want to keep them open and relaxed. If you listen to and try their ideas, it keeps the flow of the shoot going and makes them happier, even if you don’t use the shot. If you shut them down too often, they will most likely close themselves off to you: why should they try your ideas if you’re not willing to try theirs?

And no, “because I do this for a living” is not a fair point in their opinion.

To be fair, it’s always worth trying an idea your subject brings up: sometimes you can be surprised by how an idea which doesn’t sound so great on paper ends up looking great in practice. Your subject isn’t aware of the ‘rules’ of photography, so when they gleefully break them all without even realising, you sometimes get an unusual shot that actually works. Even if it’s not perfect, you can make suggestions to adjust the idea, explaining why you’re doing so, which will bring you to a great shot that you weren’t expecting to end up with.

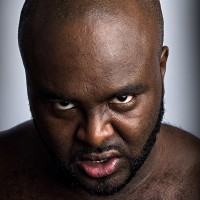
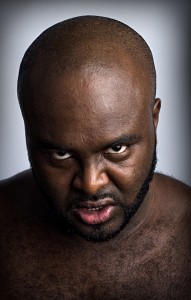
This man is frightening.

For this shoot, my plan was to grab the closest person, get them in front of camera, shoot a range of ideas, adjust the lighting as quickly as possible without compromising the quality, and move on to the next person, keeping a rough “10 minutes per person” time limit in my head.

Although these shoots can be manic, I love seeing the difference in reactions and approaches from person to person. Some come in with their own ideas because they know their own character well. This can go one of two ways – guy turns up, does a variety of entertaining poses, I let them get on with it and make sure the technical side is covered, they’re done in 3 minutes and we have a set of great shots. The other, bad way, is guy turns up, thinks he’s got it down, doesn’t need your help, strikes a series of terrible poses. It’s then down to me to adjust their approach without getting them bent out of shape (emotionally as well as physically), which is a case of dealing with fragile egos to get them a better image without crushing their confidence.

I feel an extreme case of the waffles coming on, so let me fast forward you through the 8 hour shoot with some snippets of choice moments.

Time Lapse of Events

  • “Please don’t backflip so close to my lights” *clunk*
  • “I don’t want to come across as a cartoon character” (said whilst wearing neon, multicoloured lycra with tassles and facepaint)
  • “I don’t need pose suggestions, I’m pretty good at this sort of thing” (guess what happened next)
  • “OK now give me a bit of a sneer. You’re a bad guy, so look mean. That’s….not really a sneer – that’s more of a kissy face”
  • “Right, really tense up now and snarl right into the camera, as intense as possible. Good, brilliant, more more more…OK stop now. No really, stop. I’m pretty sure you’re about to faint”

A bit more freedom with lighting and post-prod allows for more dramatic shots.

Wrapping up / Post Work

To finish up with a little technical detail, Lightroom saved me a heck of a lot of time here. I make my own presets based on the general setup of the lighting that day and apply them to a selection of images. The client then chooses their favourites and I run those through Photoshop for the full treatment, carefully editing and tweaking as much detail out of them as possible. With the wrestling promo shots, I tend to do quite a bit of post work, as the wrestlers need to look larger than life, like action heroes, so I’m a little more liberal with curves and sharpening than I usually would be, for that “movie poster” effect.

Finally, it’s a case of adding logos and sending to the client and we’re finished. One camera, one background, two lights and three hundred plus photographs of men in their pants: just another average working day.

International Day for Street Children

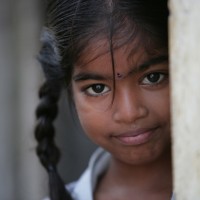
Renu, match factory worker, 5 years old, Tamil Nadu, India. By: Marcus Lyon.

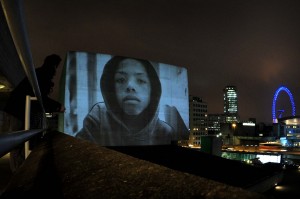
April 12th marks the global launch of the International Day for Street Children. The idea behind today is to show governments around the world that recognising the rights of street children is just as important a task as recognising the rights of children with homes. To celebrate the launch, cities across the world are doing a wide variety of things. In London, we’ll be using the power of photography to get the message across.

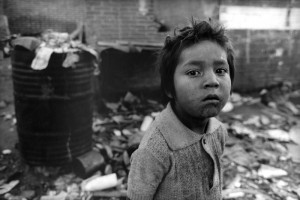
For one night only, there will be a photo exhibition marking the event. This one is a little different to your usual gallery viewing, however: the photographs will be projected onto the face of the National Theatre on the South Bank. The images themselves will highlight the daily struggle that street children across the world must live through every day.

Angel, Rag Picker, 6 years old, Mexico. Image credit: Marcus Lyon

The campaign is backed by Liverpool and England footballer Steven Gerrard, by Oscar winning Slumdog Millionaire director Danny Boyle and is supported by Aviva, whose Street to School programme aims to get 500,000 young people back into education or training by 2015.

So why is it important? Street children are those who sleep on the streets, work on the streets or spend a significant amount of time on the streets. They are some of the most vulnerable and marginalised children in the world and, as such, have no support or protection from the state or parents / families and, as a result, have no voice.

Slumdog Millionaire director Danny Boyle said:

“Filming Slumdog Millionaire opened my eyes to the horrendous conditions that street children in India are forced to endure on a day to day basis – an unimaginable mix of poverty, hardship, cruelty and abuse. That’s why I’m supporting the International Day for Street Children and the Louder Together campaign. These children need a voice and need to be heard by the international community I urge everyone to go online and pledge their support at www.streetchildren.org.uk.”

Photo by Dan Lynch. Projected image by Marcus Lyon.

So make a quick visit to www.streetchildren.org.uk today and grab a free ‘Louder Together’ Twibbon to pop on your Facebook or Twitter profile – it only takes a sec, it’s free, and it’ll help raise the awareness of International Day for Street Children.

Don’t forget to pop down to South Bank and watch the projection on the face of the National Theatre. It will take place today (12th April 2011) at approximately 7:30pm.

Two steps closer to the perfect photo


Breaking the rule of thirds works well often - especially in scenes like this

Few things confuse me more than someone asking me what camera I use. I understand the question, but I can't help but wonder why the answer would tell them anything about me as a photographer. After all - a painter is rarely asked about what brand of brushes she uses, nor do people care much about which word processor a novelist used.

Great photographs aren't made by a camera-and-lens combination; the equipment you hold in your hands and the tools you use to take the image from RAW file to final JPEG are completely irrelevant to most discussions about photography as an art form. Why? Because none of these things are the wall that stands between you and your yet-to-be-taken masterpieces.

A great photograph needs two things: It needs a creative vision, backed up by a solid set of technical skills. A photo that has one of these two things nailed can be good - but it won't be great.

Step 1: The technical side

The technical side of photography has myriad different elements to it, and a good photographer has to juggle all of them to create the perfect photograph. Getting a photograph is an equation of lighting, shutter speed, aperture, ISO, focal length, depth of field, focus, blurring (or the absence thereof), and a whole boatload of other variables. As a photographer, you are akin to a scientist using a sophisticated optical instrument, measuring the world around you, one fraction of a second at the time.

Photographers who are just starting out tend to have the biggest problems with the technical side of photography: Over- or under-exposure were the arch-nemeses of many a fledgling snapper. The challenges of avoiding focus blur, camera blur, and subject motion blur... You name it, we've all been there.

Most photography classes (forgive the pun) focus on photography as a technical challenge. In a way, that makes sense: It's the first hurdle that causes many to stumble out of the starting blocks. Sadly, by making photography into science, many new photographers are turned off - there are only so many diatribes about f-stops a right-minded human being can take before they wander off and reach for the Playstation controller.

More depressingly, many photography teachers stop when their students have finally figured out how to get a classroom printer to vomit up a reasonably well-exposed, moderately in-focus image, forgetting what photography was meant to be all about. But I'm getting ahead of myself...

Over time, people learn their tools and what can be done with them. They'll pick up rules, tips and tricks that help them compose well-exposed, correctly white-balanced images that are tack-sharp, well lit, and generally attractive-looking, realistic and accurate depictions of the world.

As you become a more experienced photographer, it's likely that the technical side of photography becomes second nature. Your camera and lens become extensions of your brain, your fingers glide effortlessly over the buttons, and you find yourself tickling the settings to perfection every time. When the time comes to buy a new camera body, you feel that sinking, forlorn feeling of having to re-adjust after the manufacturer moved the buttons around by a fraction of a centimetre on the new version of the camera.

Whilst being able to take technically perfect photos is a surprisingly rare skill, a technically proficient photographer is still merely a technician. Granted, there are places where photographic technicians have a place (archeology, to pick an example at random), but in most cases, merely getting a photo in focus and correctly exposed is not enough.

Step 2: The creative side

Personally, I got started in photography because the technical side of it was interesting to me. Freezing motion with fast shutter speeds - or the exact opposite - was a thrill. Gradually, as I started getting better at the science side of things, I started realising there was more to photography. I started looking at masterpieces by well-known photographers, and after an embarrassingly long time, it dawned on me why their photography was so much better than mine: They had a story to tell.

You've probably been at a party where someone is telling a story and it seems as if everybody is clinging on to the storyteller's every word. The onlookers are practically cheering the narrator on to continue with the incredible tale. I'm willing to bet that this particular raconteur could make any mundane, trivial topic come to life.

If the technical side of photography is the 'how', then the creative side is the 'why'. A great photograph isn't the absence of blur or the perfect exposure: It is telling a visual story, and telling it in such a way that the viewer can't tear themselves away.

Whereas the technical discipline of photography has shutter speeds and ISO choices in its war chest, the creative camp has an impressive array of weapons tucked away, too. The crop of an image, angle, choice of colours, taking the photograph at the decisive moment, being in the right place at the right time, patience, persistence, and the ability to pre-visualise the perfect shot are all aspects of capturing the perfect creative shot.

If a technically proficient photographer without creative insight is a technician, the opposite - a creative snapper without technical skills - would be a whiney art student. You know the type: They'll have an extensive portfolio of 'artfully out of focus' shots that have been photoshopped, textured and filtered to within an inch of their miserable photographic lives.

Don't get me wrong - I don't have a problem with people who bend the 'rules' of photography for creative effect. Quite the opposite, in fact. I do, however, encourage people to understand the photographic principles they are flaunting. Break all the rules you like, but as a creative photographer, you have to know why and how you are throwing convention to the wind.

When I am teaching, I am secretly more excited about students who come brimming with ideas but no photography skills, than the ones who know a lot about photography but haven't had an original thought in their skulls: The challenge with the creative perspective of the photographic quandary is that creativity is bone-cursingly difficult to teach. Which is a shame, because whilst most photographers eventually become proficient with their equipment, only a few go on to use those technical skills with amazing outcome - and all of that is down to creativity. 

Putting it all together: Becoming a better photographer.

Picasso, it is said, once drew a sketch on a piece of paper for someone, and then charged them a lot of money for it. "Hey, that only took you 10 minutes", the potential buyer reportedly said. "No, that drawing took me 30 years", was the retort. If we assume for a moment that this anecdote is true, I'm completely with Picasso on this one: A photo can less than a thousandth of a second to make, but nobody learns photography in a day.

To improve your photography, the key is to know where your weakness lies. Easier said than done, but I found that adding an extra step to my photographic workflow has been of immense value: For every photo (even if I'm about to bin it for any reason), I make a mental note of two things: A technical, and a creative thing I could do to improve that particular photograph. If, at the end of the photo editing session, it turns out I have made a lot of mental notes about focus, then perhaps the time is ripe to pencil in a practice session. If I seem to forget to leverage the angles of my photography to the best effect, then - guess what - perhaps that's what needs to be worked on.

The great thing about self-evaluation is that this technique works well to improve both your creative process and the technical side of your photography. For every shot you're looking at, the question is simple: What could I have done to make this better? Especially for the photos you are most happy with, the answers are going to be valuable additions to your mental checklist the next time you're out and about with your photography kit. Baby-step by baby-step, you'll get closer to that ever-elusive Perfect Photo.

Gallery: First Steps into an Underwater World


Looking up can occasionally reveal some incredible sights

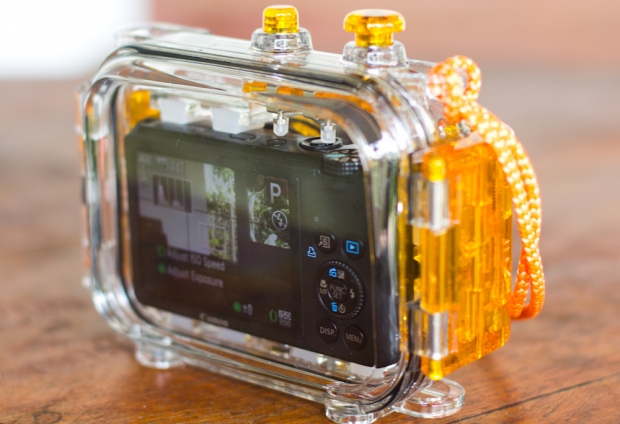
This week, I will be certified as a SSI Master Diver, and a PADI Divemaster, all at once. If you're not really into diving, don't worry about it: The two certifications basically just mean that I've been spending a silly amount of time under water... Some of that time, I've been playing with my Canon Powershot S95 and a SeaShell SS-1 underwater housing (the latter of which I reviewed here on Pixiq a few days ago)

It turns out that the S95 is a great tool for the job - especially because it has a brilliant imaging sensor, and stores the images in RAW - perfect for teasing out the reds that get lost at depth.

So, without further ado - an image gallery of some of my recent underwater photos - all taken at dive sites near Koh Tao, Thailand.

©


Do you enjoy a smattering of random photography links? Well, squire, I welcome thee to join me on Twitter -

© Kamps Consulting Ltd. This article is licenced for use on Pixiq only. Please do not reproduce wholly or in part without a license. More info.

A Closer Look: David Chancellor

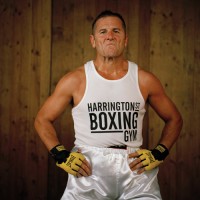
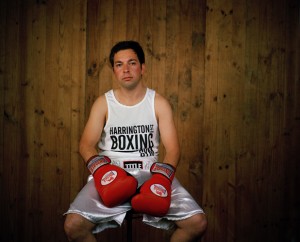
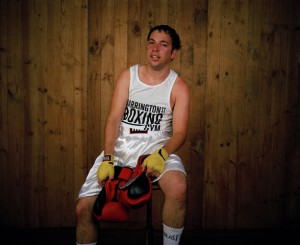
Steve 'the paratrooper' Burke, from the series boxers, before and after.

The more observant of Small Aperture’s loyal readers may have noticed that my blogging on Small Aperture has increased as of late. Well I have further bad news for you: I’ll be looking after our dear litle blogging site for the whole week. As a portrait photographer, I’m kicking off the week by looking at one of many portrait photographers whose work I enjoy, in the hope to inspire you, help you get more out of portraits and, ultimately, explain to you and to myself why I am particularly attracted to looking at and creating portraiture.

David Chancellor was the winner of 2010′s Taylor Wessing National Portrait Gallery Photo Prize – a wonderful exhibition which was displayed in, you guessed it, London’s National Portrait Gallery. I’m not going to look at his winning entry, “huntress with buck” – instead I’ll be looking at a portrait series of his, entitled “Boxers”.

Daniel 'the mover' Avenir #I, from the series boxers, before and after

What I love about “Boxers” is the simplicity at the heart of the idea. It has that “why didn’t I think of that?” appeal to it. On the basic level, it’s a “before and after” spot the difference affair, showing each fighter just before their fight and immediately after their fight. This series has a quality that I see in many excellent pieces of portraiture (and any photography, for that matter): a simple, strong idea that has been executed exceptionally well.

From a technical perspective, they are absolutely beautiful – the lighting separates the boxers from the background so that they are especially prominent in the image. Another important detail is that the boxers are situated in the same position in the frame in their before and after shots (or, at least, those who were still able to sit up straight afterwards are!) which adds to the intensity of the “after” shot, as it almost seems like no time at all has passed between the two images, as they don’t appear to have moved anywhere in the interim.

So we’ve briefly examined the setup of the shots, but what takes a portrait from a pretty picture to something that holds your attention and gets you thinking beyond what you can initially see? To achieve this, we need a story.

The boxers in these images are not professionals. They are part of a phenomenon in South Africa known as “White Collar Boxing”, where men and women who have white collar jobs train for around three months to take part in a special boxing event against others of the same background. Not only that, but the boxers in this series are about to have their very first fight. Armed with this knowledge, whole new areas of intrigue are opened up to us, and this is where a well-lit, professionally composed image begins to turn into a real piece of portraiture.

Daniel 'the mover' Avenir #II, from the series boxers, before and after.

Now, we are scrutinising their expressions prior to their fights. You can see the nervous energy they are harbouring under the surface, the kind that only builds up prior to a tense situation such as a physical fight, especially your first ever fight. Look at how some try harder to hide that nervousness, or indeed tackle it head on, especially for the camera. In a way, to point a camera at you the moment before your fight is the non-verbal equivalent of someone saying “how are you feeling about your first fight?” to which they answer non-verbally. I know that sounds a little pretentious, but go back and look at them with that idea in mind – they’re answering the question for you with their expression. Isn’t that just magical?

The “after” shots are similarly rich with story and intrigue. Did they win, or lose? What injuries do they have? Some of the boxers look so utterly exhausted, it gives across a feeling of relief and release, especially when compared to their “before” images, packed with nervous energy. My personal favourite is Steve “the paratrooper” Burke: the expression of absolute defiance and confidence combined with the pose is incredibly imposing and powerful.

I’m pretty sure he won.

The final sign of a great portrait or series of portraits is what it leaves you with, or what questions it makes you ask that go beyond the initial image. What fascinated me is considering what drives these “ordinary”, office job people to step into the ring and do something that, in my opinion, is incredibly daunting and frightening. Were some attracted to the thrill of the idea and the danger involved? Was it a result of feeling bored and stuck in a 9 to 5 driving the need to do something different? Was it the need to challenge themselves to instil a sense of progress and improvement in their lives? Bearing in mind that David tells us that White Collar Boxing is hugely popular across South Africa, it brings you to ask questions about the human condition, about what drives us.

Steve 'the paratrooper' Burke, from the series boxers, before and after.

David allows us to come to these conclusions and ask these questions ourselves, which is an important distinction to make. I’m all for setting up a series of portraits with a little bit of flavour text to tell you what you’re looking at, but it’s important to strike a balance. I have an intense dislike for photo projects where the photographer has written three pages of text to accompany the photographs, telling you what colour schemes to look out for, how the images all link to each other and which of your preconceptions will be challenged. This should all come across in the image: you shouldn’t be told how to feel (or what your prejudices and preconceptions are, for that matter).

And that, dear readers, is why I love “Boxers” and why I love portraiture. I’ll be taking a look at another portrait story later in the week.

We’ve included a couple of David’s “Boxers” images in this article purely for editorial and critique purposes. I hope my article has already moved you to do so, but please go and explore the full set on David’s site. Here’s a direct link – http://www.davidchancellor.com/docs/photos.php?id=3:5

March Photo Winner Chitty-Chat

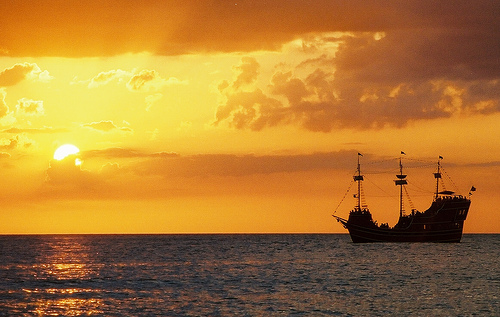
Joe's winning entry

As I’m sure you all know, loyal readers, April’s photo competition is well and truly under way. In an effort to inspire you, the Small Aperture team caught up with March’s photo competition winner Joe Russo, for a bit of a prattle and to give you a mini-insight into the person behind the photo. Here’s what our Joe (as I’m calling him now) had to say for himself.

  • Small Aperture: So Joe, tell us a little about yourself
  • Joe Russo: My name is Joe Russo, and I am an amateur photographer from Baltimore, Maryland. I started shooting about seven years ago, when an uncle gave me an old 35mm camera, and later a 35mm SLR.
  • SA: Who / where / what (when?) do you shoot? Any current projects?
  • JR: I am primarily a landscape/cityscape photographer and in the last year or so I have been working on my technique in panoramic images. Most of my photography takes place in and around the Baltimore area, with some travel photography mixed in here and there. For a long time, I’ve wanted to photograph the architecture in Europe, and this summer my wife and I are fortunate enough to be able to take a trip that will give me the opportunity to do that.

Joe's winning entry

  • SA: Onto the winning photo itself, then. Tell us how this shot came about.
  • JR: It was taken a few years ago in Clearwater Beach, Florida with an Olympus 35mm film camera. There was a pirate ship cruise that took tourists out on the Gulf and fired cannons, attracting a lot of attention. I was on the beach taking pictures of the sunset, and saw this as a great opportunity for a silhouette.
  • SA: Well we think it’s a beautiful shot. Thanks for chatting with us Joe.
  • JR: Thanks again for selecting my picture, it means a lot to me. Winning a photography contest is very motivating.

Remember, April’s competition is open for submissions now, so if you want to be as chuffed as our Joe here (and win one of your own pictures printed on glass, courtesy of Fracture) then check out this month’s theme and rules here. Good luck!

Review: SeaShell SS-1 Underwater Housing


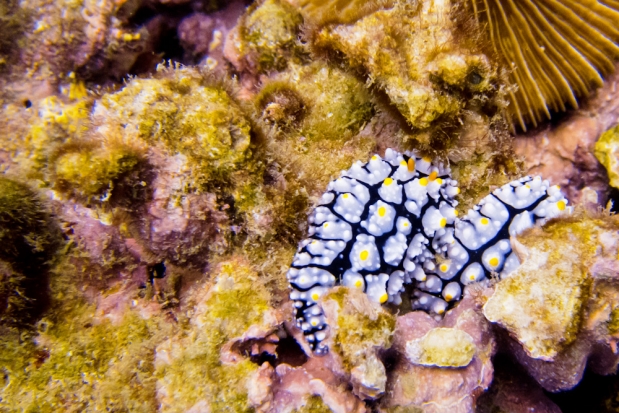
A nudibranch (colourful sea slugs!)

Life, as most of us are all-too-well aware, can be rather surprising and unpredictable at times. A great example of this was exactly two months ago, when my girlfriend and I left Bangkok to go to Koh Tao - a tiny island in the bay of Thailand - to go do our Open Water dive certification.

Long story short - it's two months, nearly 70 dives, and a whole lot of exams later, we're still on Koh Tao, and I am about to complete my PADI Divemaster certification. Needless to say, I sort of fell for this diving malarkey.

So, what is a poor photographer to do, when you rock up on a little island that doesn't do internet deliveries, and only has a limited number of camera shops? You try your damndest to get the best photos you can with the equipment you have available. In my case, I had a beautiful Canon PowerShot S95, but no underwater housing...

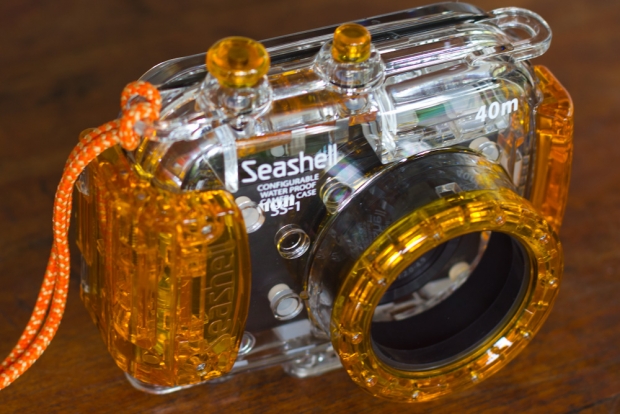
The local shop did have a curious little creature, though: An 'universal' camera housing for compact cameras, made by a company I'd never heard of: SeaShell.

haje_jan_kamps_20110228_img_5166.jpg

How it works

I was rather sceptical at first... Was I really going to put my several-hundred-dollar highly cherished camera at risk by shoving it into an 'universal' camera body? I decided that yes, it would be worth a shot, so I bought the housing for 6,800 Thai Baht (Around £140 / US$225).

The first thing I did was to close the housing and take it to 18 meters for about 15 minutes. It turns out it was as water proof as I had dared hope for... So it was time to put my camera inside.

The SeaShell SS-1 only has two buttons, and both are at the top. It allows you to control a power button and the shutter, only. It sounds very limiting, but it turns out that, just to snap some snapshots under water, it's all you need. This two-button limitation is also the reason why about 25% of cameras don't work in the housing: If the power button is a slider, or is placed too far away from the shutter release button, the camera housing's little rods can't move it (or reach it).

Setting up the housing

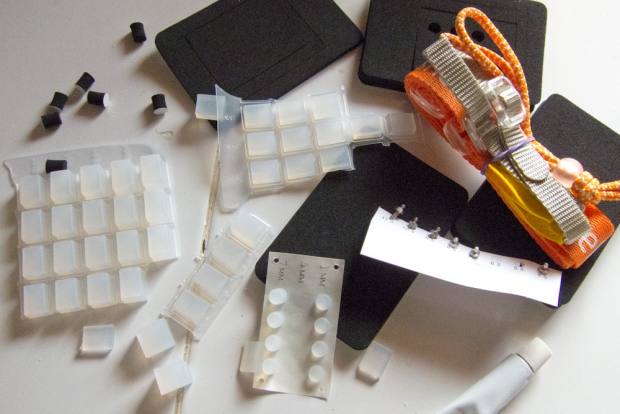
Before you can use the housing, you have to set it up. That sounds like it should be easy, but the manual is next to completely bloody useless, and instead I resorted to trial and error. The SS-1 comes with a metric boatload of little rubber feet of different thicknesses. You have to use 12 different rubber feet (2 at the front of the camera, 2 on each side) to attempt to make your camera fit snugly inside the camera housing.

haje_jan_kamps_20110228_img_0868.jpg

Next, you need to adjust the buttons so the camera housing's buttons align with the buttons on your camera, by using a tiny little wrench and a nut to move the button pistons left, right, and front and back. It all seems just a little bit fragile, and fiddly to set up, but - as we'll see in just a minute, it does actually work pretty well.

In use

In underwater photography, you're taking photos in a medium that's 800 times more dense than air, and that robs your subjects of their color. Reds start disappearing at about 5 meters, and are all but gone a few meters deeper - depending on how turbid the water is etc. As such, you want to get as close as possible to your subject, to ensure there the light has to travel as little as possible before it hits your camera's sensor.

haje_jan_kamps_20110228_img_5167.jpg

Imagine, for example, that you are 5 meters down, and 2 meters away from your subject - suddenly, light has to travel 7 meters before you can capture it, and your reds are just about gone.

Having to get really close is the main reason why this housing works pretty well: You won't have access to your zoom buttons, but who cares: The Canon Powershot S95 has better apertures when zoomed fully out anyway - so you may as well leave it zoomed out, and get close.

Of course, since you'll be spending most of your time under half a meter from the things you're trying to photograph, you have to be a pretty good diver. It's bad practice to touch the corals and wildlife, so perfect buoyancy control and good control underwater in general is an absolute must - but then that's true for any underwater photography.

The biggest downfall with the SS-1 in combination with the Canon S95, is that the S95 has a flash that pops up, but the housing is too small for the flash to have enough space to do so. This means that you're limited to natural light photography, which turned out to be a blessing and a curse.

It's a lot harder to get photos that look 'correct' without using a flash, but I ended up writing a camera profile for Lightroom that matches the Canon S95's underwater profile, and the fact that the S95 shoots in RAW helped hugely - I was able to recover the reds even from relatively deep depths (12-16 meters), where the human eye can't see them, but the camera somehow managed to record the colors anyway.

Compared with an official housing

I met someone here on the island who had a S95 as well, and he had the original Canon underwater housing for the camera. Whilst I was envious of his additional control and the ability to use flash, it did look as if my photos were as good as his - and in some cases better.

Verdict

I'll be honest with you - the Canon WP-DC38 (the official underwater camera housing) doesn't cost that much more than the SeaShell SS-1 (list price is $240, you should be able to find them much cheaper - on Amazon, they're currently going for $180), and if I had the choice of one or the other, I would have put down the extra cash to buy the official housing.

On the other hand, the SS-1 can be reconfigured to fit any number of digital compacts, and whereas the official housing would be useless with another camera, the SS-1 would probably still fit, and you can keep snapping pictures.

The truth of the matter is that there was no way the official housing was going to be available on a little island like Koh Tao. Realistically, the choice wasn't between an official housing and the SS-1, but between the SS-1, and not being able to take any photos at all. Seen from that point of view, I'm pretty happy I bought the SS-1. It kept my camera safe under water, and the quality of the pictures I was able to capture


Do you enjoy a smattering of random photography links? Well, squire, I welcome thee to join me on Twitter -

© Kamps Consulting Ltd. This article is licenced for use on Pixiq only. Please do not reproduce wholly or in part without a license. More info.

Improving your post-event sales with PicsCliq

PicsCliq Logo

If photography is your job, the world of wedding photography can be tricky to break into, especially if you’re looking for it to be your main source of income. Maybe you’re great at shooting the stuff but have no idea how to get decent sales from what you produce. All those wedding guests are potential customers: if only you could interest them all in a getting a print of their own. Basically, we’re talking about post-event sales and how PicsCliq can help boost those sales.

So, how do you get the most out of your post-event sales? Now I don’t do weddings but, as far as I know, barricading the church door and only letting people out once they’ve bought a print is frowned upon and considered “a bit unprofessional”. A big frustration of many event and wedding photographers is that they find it hard to connect with their potential customer base once they leave the venue.

This is where PicsCliq comes in. PicsCliq is, essentially, a service designed to drive sales for your work following an event by taking advantage of social media sites such as Facebook and Twitter. A service like Facebook is handy for increasing awareness of the images because, it can be safely assumed, a large chunk of the attendees of the wedding will have an interest in looking at the wedding photos put up by the happy couple. The downside of Facebook is that once a photographer uploads their work, it’s hard to control how and where it is used.

My wedding portrait of a (sickeningly photogenic) chum of mine.

PicsCliq integrates with Facebook, filling in what is missing from uploading on your own: control of the images and, most importantly, sales options for those who are viewing the image. This is the gap that PicsCliq is looking to fill, allowing you to take proper advantage of the exposure social media can offer you. PicsCliq refer to themselves as a “full service solution”, as they handle everything, from the initial generation of traffic, right through to the printing, packaging and shipping of the work.

It’s free to sign up and upload your images to PicsCliq and they only make money if they actually generate sales for you, so it’s certainly worth a punt.

Personally, I think this is ideal for new professionals looking to start making money from photography. Although PicsCliq are currently focusing on weddings, they do plan to expand into all kinds of events in the near future.

Go and find out more at www.picscliq.com.

March photo competition winner!

Champagne copy

Ladies and Gentlemen, you made it very hard for us in March. Very hard indeed. With so many awesome entries, Haje and I tossed potential winners back and forth across the globe for a week. You impressed us with the variety of your horizons; from dawns to moons, cityscapes to rural desertion. There were silhouettes and HDR, and very clever interpretations of the theme. Eventually, though, we found a victor. So please, raise your glasses (or maybe it should be tots of rum) to March’s winning picture:

Sailing into the Sunset

Many congratulations to Joe for his gloriously warm horizon, Sailing into the Sunset. Please drop me an email so that I can put you in touch with the marvellous people at Fracture, to sort out your prize.

Thank you to everyone who entered; you’ve done yourselves proud. April’s competition is coming up very soon, and we’re really looking forward to seeing what you guys submit to that.

Our April photo competition

Fingers

Portraits make great photos, but the human body can produce some of the most intriguing, inspiring, and delicious pictures, too. Hands can tell a story, hips can be sensual, and even feet can be made to look elegant. So that’s what we’re looking for this month: pictures of the human body. (Absolutely no dead ones, ya hear?) If you manage to produce the winning picture of a smouldering neckline or a marvellous macro of an eye, the super dudes over at Fracture will be giving you one of your pictures printed on glass.

We’ll accept submissions (one per person) from today – Wednesday 6 April 2011 – until Wednesday 27 April. They need to be added to the Small Aperture Flickr pool.

Any questions? No? Well you know where to find me if you do have any. And here are The Rules, in case.

The Rules

  • If you decide to enter, you agree to The Rules.
  • You can’t have written for Small Aperture or be related to either me or Haje to enter.
  • One entry per person – so choose your best!
  • Entries need to be submitted to the right place, which is the Small Aperture Flickr group.
  • There’s a closing date for entries, so make sure you’ve submitted before then.
  • You have to own the copyright to your entry and be at liberty to submit it to a competition. Using other people’s photos is most uncool.
  • It probably goes without saying, but entries do need to be photographs. It’d be a bit of strange photo competition otherwise.
  • Don’t do anything icky – you know, be obscene or defame someone or sell your granny to get the photo.
  • We (that being me and Haje) get to choose the winner and we’ll do our best to do so within a week of the competition closing.
  • You get to keep all the rights to your images. We just want to be able to show off the winners (and maybe some honourable mentions) here on Small Aperture.
  • Entry is at your own risk. I can’t see us eating you or anything, but we can’t be responsible for anything that happens to you because you submit a photo to our competition.
  • We are allowed to change The Rules, or even suspend or end the competition, if we want or need to. Obviously we’ll try not to, but just so that you know.

New Nikon dSLR: The Nikon D5100


New SLR from Nikon!

This one came a little bit out of nowhere, but Nikon is adding a new dSLR to its arsenal - the D5100. It's got a nifty swivel screen (that Nikon loves to call 'Vari-angle'), and a full 1080p HD movie mode.

The D5100 replaces the rather fabulous D5000. The big thing Nikon are shouting about in this launch is the Vari-Angle screen, and continues the march of making SLR cameras more useable when using the increasingly useful Live View mode. The screen has nearly 1 megapixel worth of resolution (921k, if you wanna get picky), and is a whopping 3 inches across. Groovetastic.

A newbie-magnet?

It seems as Nikon are pandering to the n00bs with the D5100 - they've added a special effects mode to shoot "amazingly unique pictures" and HD movies. ("Amazingly unique?" Really? I thought they hired proper PR people these days...). The special effects mode are a choice of seven different effects, including selective colour, where you select up to three colours to appear in the still or movie while other areas are monochrome, and miniature effect, which makes "an image appear like a view of miniature scale" (so, basically, a digital approximation of a tilt-shift link). You can select which special effect to shoot in and they are directly accessible via the mode dial on the top of the camera. Personally, I think it's a load of wank, but hey - it may float your boat.

Built-in HDR function

The D5100 inherits a whole load of features from its bigger brother, the Nikon D7000, including a wicked 16.2 megapixel CMOS sensor, and the new(ish), image-processing engine, EXPEED 2. Adding to this the D5100 has an expanded sensitivity range to further help capture better images in challenging light conditions – the ISO ranges from 100 to 6400 and can be raised to ISO 25600 at Hi 2. Pretty cool - and a strong sign to Canon that they really need to step up their game.
The D5100 also introduces a built-in 2-shot High Dynamic Range (HDR) function, which are combined to produce a single image with a wider dynamic range. Pretty cool!

I don't think D5000 owners should run to the shops quite yet, but if you're looking to upgrade an older entry-level Nikon camera and you've got a decent array of lenses already... This does look like a pretty damn attractive piece of kit!


Do you enjoy a smattering of random photography links? Well, squire, I welcome thee to join me on Twitter -

© Kamps Consulting Ltd. This article is licenced for use on Pixiq only. Please do not reproduce wholly or in part without a license. More info.

Use #3,194 for your iPhone camera - calorie counting

Meal Snap

And now for something completely different, Ladies and Gentlemen: an iPhone app that tells you how many calories there are in your chicken and salad sandwich, or your macaroni cheese, or your handful of dried apricots. You snap a picture, send it off to the magical world of Meal Snap, and they respond giving you an approximation of how many calories it contains.

They don’t enlighten us as to exactly how they calculate the calories in your bowl of porridge or roast beef and Yorkshire pudding. It’s all down to magic. And the photo from your iPhone.

Did I ever think that there were so many uses for an iPhone camera. Nope! Will I be using it myself? Not a hope in hell. I’ve never counted a calorie in my life. But I bet I know some people who’ll be falling over themselves to try it out.

£1.79 or $2.99 from the App Store.

(Headsup to TechCrunch.)

Trading Tottenham for Tanzania - photographic safaris for families

FAM_THEME_SAFARI_PARA1-Chobe cruise (cropped)

A photographic safari for kids. That’s a real safari – you know, with elephants and buffalo and antelope – in Tanzania, designed for families, that comes with a photography tutor. I’m sold. (We’ll ignore the minor point that I don’t have any children and haven’t been on anything that resembles an organised holiday since my Art and Visual Culture lecturer took me and 21 other classicists to Pompeii in 2002.)

The trips, organised by The Adventure Company, last 11 days, have maximum numbers of 16, and take in the Mikumi and Saadani National Parks as well as a bit of Zanzibar. They reckon that they’re suitable for children six and upwards, but the photography tuition follows the GCSE curriculum. I’m sure that it’ll be a lot more exciting than anything taught in a classroom, though. Tanzania definitely beats Tottenham.

I asked Small Aperture’s resident travel advisor (that being Mummy Bowker) if she thought that at £2,649 for an adult and £2,489 for a child was good value. Her opinion: ‘It’s never going to be a cheap trip, but I don’t think that it’s terrible either. It covers all your travel and accommodation and most of your meals.’ And taking kids on safari? ‘Well, I would’ve happily taken you from the age of six, but it depends on the child.’

Of course it isn’t going to be for everyone, but travel and getting kids involved in photography? I think it’s a great idea.

Lots more information on Safari and Spice trips are available on The Adventure Company’s website.

Version 1 of Oloneo's PhotoEngine is almost ready for release

Screen shot 2011-03-31 at 13.15.15

In July last year we featured PhotoEngine, a piece of post-production software by French company Oloneo that allows you to make adjustments to the exposure of your pictures in real-time. The production team listened to the feedback from its beta testers and have come up with a revised beta. They reckon that version 1 will be available very soon.

The new beta allows for a natural HDR processing mode, a bundle of presets that you can apply to your pictures, the ability to create your own presets, a batch processing option, EXIF preservation (that seems like a good idea), and drag-and-drop support when you’re importing images.

As a thank you to beta testers, Oloneo is offering a discount on version 1 if you sign-up to the PhotoEngine newsletter before its release. They’ve not given a release date yet, so if you are interested, you’re probably best to do so sooner rather than later. You can sign-up on the Oloneo website.
Making your pictures last forever

IMG_1528

How best to store and preserve information isn’t exactly a new problem. Yes, right now the question is more prescient because there’s more information floating around our world than there ever has been, but history bears out that information storage and loss is something that we’ve battled with for millennia, for as long as we’ve had language, in fact.

The Minoans might’ve thought that they’d done a great job of recording their society using the Linear A script on clay tablets, except that the language died out and we can’t decipher it. We’ve still got the tablets, but not a clue what they say. You never know, the key to Linear A might have been in the Great Library at Alexandria, but the library’s contents, mostly written on papyrus and parchment and almost certainly including works that we don’t even know about, were lost in a massive conflagration. In one instance we have the data but not the language; in another we still have the language, but not the data.

In the age of digital media, those same two problems still present themselves. We might lose the data, or we might lose the ability to decode it. You never know, we might lose both.

There’s been oodles of column-space devoted to discussing the most secure methods for storing digital images, and how many backups you need and in how many forms; I’ve recently embarked on archiving a not-insubstantial project, and one of the first discussions that I had with the records office concerned the most appropriate format in which to save the information; the conundrum of what to do about artefacts that are on deteriorating original media and we’re struggling to preserve owing to copyright concerns needs to be solved pretty quickly. Chances of a simple, easy solution to these problems? I’d put the odds at slim-to-none.

So when I read the following statement in a press release, I couldn’t help but feel that it was a bit disingenuous: ‘…customers will now have the option to take their media from analog to digital to the [insert company name here] cloud, ensuring that photos and videos truly last forever.’ No, it wasn’t just PR hyperbole; at least not when it was followed by ‘… [insert company name here] can give you the peace of mind that your photos and videos are secure and always accessible.’

I remember seven inch floppy discs from when I was in primary school, about 25 years ago; since then we’ve raced through three-and-half inch floppies, CDs, USB sticks, and now we’re into cloud storage. Do we really think that this is where it ends? I’m not convinced.

Forever is a very long time.

And it was only today that a British on-line image storage company, Fotopic, went into liquidation. No one seems to know for sure how many images are now trapped in the aether, inaccessible to the people who stored them there, but estimates are between 30,000 and 70,000. One hopes that these customers had the good sense to make backups elsewhere.

So forgive me, perhaps, if I’m a bit sceptical about the security of on-line or cloud-based information storage firms and if I have a moment of nostalgia for analogue cameras, which give you the original and the backup as soon as you develop the film. Even so, they’ll end up as dust one day, just as the gorgeous frescoes excavated from the ash and mud at Pompeii and Herculaneum will, too.

What it comes down to is that I don’t think that you can make your pictures last forever; it’s not the way that the universe works. Empires come and go and languages fade away; the best that you can do is to give them as many opportunities to survive fire and theft and hard drive failure and loss of language and format shifts and magnetic electron realignment as you can. So have them printed, burn them to disc, save them on two separate hard drives, email them to yourself, and hope for the best.

You see, nothing lasts forever.

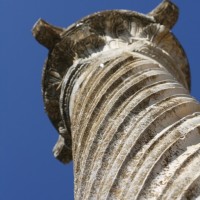
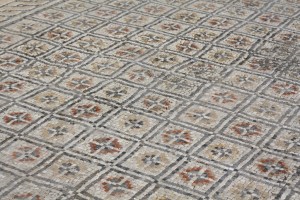
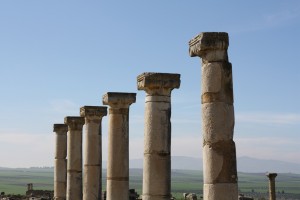
(All the images were taken at the remains of the Roman city of Volubilis in Morocco.)

Fancy that? Fancy photo-sharing facilities from Flickr

Flickr new share

Noticed anything slightly different about Flickr? (Assuming of course that you frequent the Flickr-verse. It’s be a bit hard to notice if you don’t.) They’ve changed their ‘Share’ facility. It’s now a one-stop-shop to share your pixels of perfections via FaceBook, Twitter, Tumblr, and Blogger. That’s all a bit easier and more web-functional than having just the option of email.

If you’re logged-in, you can share your photos, whether individually as a set, in groups, or even your entire photostream to FaceBook. If you don’t want to make all of your photos public on Flickr but do want to share them with your FaceBook friends, that’s all perfectly possible. And you can set things up to automatically share your public Flickr feed to FaceBook.

If you’re not signed-in, you can still share your public photos via Twitter and Facebook in one click, from the now-drop-down share panel conveniently located at the top left of a photo.

There are more changes in the works, too.

All you ever wanted to know about photosharing on Flickr is on their blog.

A fabulous 40 gigapixels

3

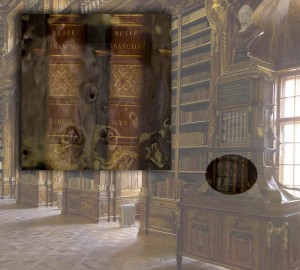
Do you remember the 80 gigapixel panorama of London that we featured in November? (No? Here’s a reminder.) Well, the guy behind it, Jeffrey Martin, has just unveiled a 40 gigapixel picture taken of the Philosophical Library of the Strahov Monastery in Prague, Czech Republic. This, apparently, makes it the largest ever indoor picture. Forty gigapixels is a lot of pixels, people. If it were printed out, the picture would be 23 long and 12 metres tall. Nope, that won’t fit in the Small Aperture Mansion.

The picture – okay, 2,947 images that have been stitched together – was shot on a Canon 550D with a 200mm lens. It took five days to capture. I don’t want to think about how long it took to edit. You want to know? Deep breath, then: over 110 hours. I go goggle-eyed after a just a few hours of editing. The detail on it is so fine that you can see the brushstrokes on the ceiling’s Baroque fresco and the creases in the spines of the library’s 40,000-odd volumes.

I think I might’ve just lost a chunk of my evening dedicated to zooming in and zooming out of this. You can do so, too, on the 360cities website.

(Headsup to TechCrunch.)