Help Portrait 2011

Screen Shot 2011-11-01 at 00.10.42

Seeing someone’s reaction when they look at a potrait of her or himself is always so cool, especially if she or he isn’t that confident being photographed. There’s this kind of rush you get from making them feel good about themselves. I reckon that doing that for someone who could really do with that sort of confidence boost, or someone showing an interest in them, or spending time with them, would be pretty fantastic, which makes me think that Help Portrait is one awesome idea.

People with cameras, whether they’re pros or not and wherever they are, spend a day taking photos of people who are in some way in need. This year that day is 10 December. Reckon you could help?

Help Portrait is now in its third year. It was founded by Jeremy Cowart and it’s probably best if you hear what he has to say about it in his own words.

If you want to find out even more, like how to get involved, wander over to the Help Portrait website and see what you can do.

Cheap Magnum seminar places thanks to IdeasTap

IdeasTap Logo BLACK

Aged between 16 and 25? Photographer? Fancy getting some awesome career guidance from some of the best in the business? The guys at IdeasTap are offering 10 subsidised places at Magnum’s Professional Practice seminar in Birmingham over the first weekend in December.

The line-up includes Tony Bell, the Picture Editor of the Observer; Client Engagement Manager of 24 Productions, Rhiannon Reid; Head of Photographs of Birmingham Central Library, Peter James; Dewi Lewis of Dewi Lewis Publishing; Cultural and Education Manager of Magnum Photos, Fiona Rogers; and Head of International Picture Desk of ActionAid, Laurence Watts.

Places on these seminars usually cost £250+ VAT and are normally heavily over-subscribed. If you’re an IdeasTap member, however, you can apply to skip the queue and pay just £50 (+ VAT), instead. You’ll need to submit five photos to your IdeasTap portfolio and 100 words or fewer stating your case for a place. You’ve until 17:00 on 17 November to do so.

The seminar is taking place at the Photography Department of Birmingham City University, Saturday 3 and Sunday 4 December 2011. Both days’ sessions begin at 09:30 and end at 17:00.

Full details and the application process are over on the IdeasTap website.

Book Crossing meets photography - the Disposable Memory Project

Autosave-File vom d-lab2/3 der AgfaPhoto GmbH

I’ve found my favourite photography project of the week, almost certainly of the month, and given that we’re almost in November, probably of the year, too.

Take a bundle of disposable cameras, leave them places across the globe, ask people to snap a picture or two before passing on the camera, and see – quite literally when (or if) the film is developed – where the camera travelled. It’s the Disposable Memory Project.

Matthew Knight dreamed up the idea back in 2008, when he was standing in a dry cleaners somewhere in the scary metropolis that’s London and spotted a cheap single use camera for sale. (Don’t tell me that you’ve not had an astonishing idea in a most incongruous place.) If he set one free with a message on it, a unique URL to enable its progress to be tracked, and a return address so that the film can be developed and uploaded to the project’s website, what would happen? It was a slow art project that fused analogue and digital and rather piqued his fancy. (And now mine, too, for that matter.)

A few years on, over 350 cameras have been released into the wild and 30 have made it home to date. They’ve visited 70 different countries, including the South Pole, Everest’s Base Camp, and the Gambia, and travelled over 440,000 miles, which is to the moon and back. Speaking of the moon, they’re hoping to get a camera into space at some point in the near future, so if anyone can help them out there, let them know!

The Disposable Memory Project has 1600 members, all of whom have been brought together by a randomly distributed camera and the marvel that’s the Intergoogles. If you’d like to send your own camera off on its journey, buy a disposable camera, and then head over to the Disposable Memory Project website for the instructions to generate a unique URL and a camera-leaving kit.

How long do they anticipate the project continuing? For as long as they can fund it, and disposable cameras remain available for purchase. I hope that’s a while yet. It’s a damn cool project and I’m off to leave a camera somewhere.

You can see more of the project’s pictures on the website, and you can follow their cameras’ adventures on Twitter as @FoundACam, too!

Curioser and curioser at Olympus

Olympus

Here’s the latest instalment in the saga of Olympus and the mysterious take-over fees: chairman Tsuyoshi Kikukawa has resigned. He’s going to become a director without executive rights and Shuichi Takayama will replace him. The plan is that these changes can bring some stability to a company that hasn’t been out of the news for over two weeks, and whose share price has plummeted by 56% since 13 October this year.

As for the story so far, here’s a quick recap because it’s far too good to ignore. First, Michael Woodford was sacked as CEO two weeks after assuming the post and commissioning a report that asked why Olympus had paid a 36% fee to a Cayman Islands-based middleman when Olympus took over Gyrus around 2007. Next, Olympus denied that they’d paid the fee. Woodford, meanwhile, took his dossier to the Serious Fraud Office in London.

Then, Olympus recanted and said that, yes, actually, really, it had paid about $687 million to the middleman, but didn’t actually consider it excessive. The Japanese government doesn’t seem too sure about that, though. Tsutomu Okubo, deputy policy chief of the Democratic Party of Japan has come out and said ‘At least the fees were outlandish. The company must explain the whole circumstances behind the incident.’

Oh, and don’t forget that Woodford has sought police protection and there have even been allegations of some kind of underworld involvement.

This one has all the makings of a blockbusting thriller, let alone a soap opera.

(More information from the BBC, Reuters, and the Wall Street Journal.)

Photo Critique V: Portrait


Peter's original image...

It's time for another round of video photo critiques! This week, it's Portrait by Peter Dahlgren. He has helpfully done a blog entry on the photo as well, to help you get a feel for how he's done it. 

So, check out the critique below, and if you want to have one of your own photos critiqued, check out this post!


Hero2 helmet cam can record heroic exploits with bikes, cars, and surfboards

hero2

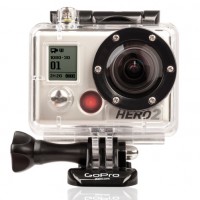
If my Ma had her way, she’d strap one of these things to my helmet whilst I’m racing around London on my bicycle so that she can yell at drivers when they cut me up and yell at me when I zip in and out of traffic. (My bicycle is called Elspeth, by the way.) It’s the GoPro HD Hero2 helmet cam; the super-improved replacement for Go-Pro’s already rather wonderful original Hero helmet camera that records your awesome adventures as you go careening around race tracks and tumbling through waves so that you can relive them with mates and beer whilst you nurse your bruises.

It captures 1080p HD video and 11 megapixel photos. That’s a bit of upgrade from the previous five megapixels, eh? The new lens should be better in low-light, too. Come the winter, you’ll even be able to stream your exploits live via Wifi (if there’s an available Wifi connection, obviously). And the interface has been redesigned so that you should, in theory, be able to use it without the need for destructions.

You can select from three different angles of view: narrow (90º), medium (127º), and wide (170º) for your video, or there’s medium or wide for your timelapse photos that you can set for every half second.

The Hero2 comes in three flavours – outdoor, motorsport, and surf – and is retailing at $299.99. There’s more info from GoPro.

No Ma, if you’re reading this, I’m not getting one. But I’d love to see someone’s exploits as they hurtle down a mountainside with one attached to their helmet.

Adding a protective UV filter to your Fuji X100

Nobody will ever be able to straight-facedly claim that Fujifilm's X100 is without its flaws, but by jove, is it turning it into one of my fave cameras nonetheless. One problem with this little peach is that the lens is exposed, and non-interchangeable - so if you, like me, tend to throw your camera over your shoulder, there's danger abound if you knock it into something.

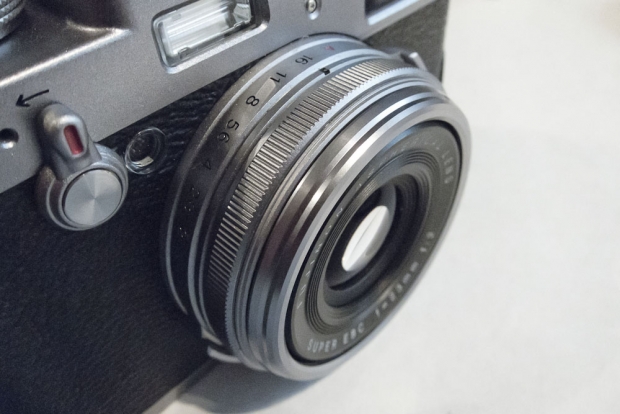
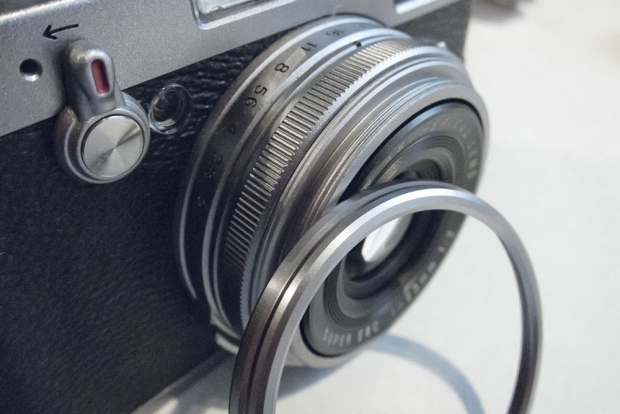
20111012_img_0089_1000px.jpgAs a double bonus hazard, the camera doesn't have a filter thread, so it's impossible to put an UV filter on the lens for protection. Or is it? It turns out that it does, indeed, have a filter thread, but it's 'backwards' - instead of having the threads facing inwards, like on most cameras, on the X100, the threading is facing out.

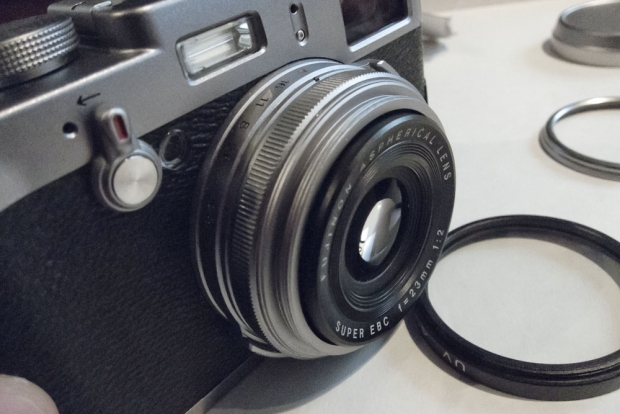
"Ah, but that's no problem", I hear you say - "Filters have threading both ways, you can just mount it on the camera backwards!". Well, that's true, but there's a second snag with the X100: Because the inner lens barrel comes quite far out of the camera body, if you simply mount a filter, the lens is liable to get stuck (if you're lucky), or be damaged (if you're less lucky).

So, how to solve this conundrum?

Easy, if a little convoluted.

You need to buy two 49-mm filters, and be prepared to sacrifice one of them to The Cause. What we're going to do, is to stack a couple of 49mm filters, in reverse, on the lens.

Step by step:

Step 1

Take off the ornamental ring

20111012_img_0090_1000px.jpg

Step 2

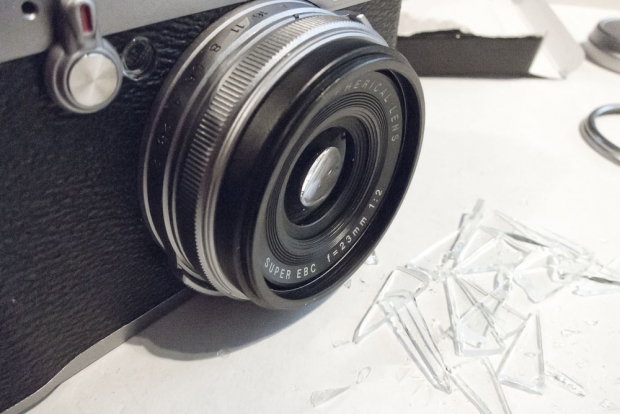
This image shows the problem we are facing: See how far that lens extends? Just attaching a filter would cause trouble...

20111012_img_0093_1000px.jpg

Step 3

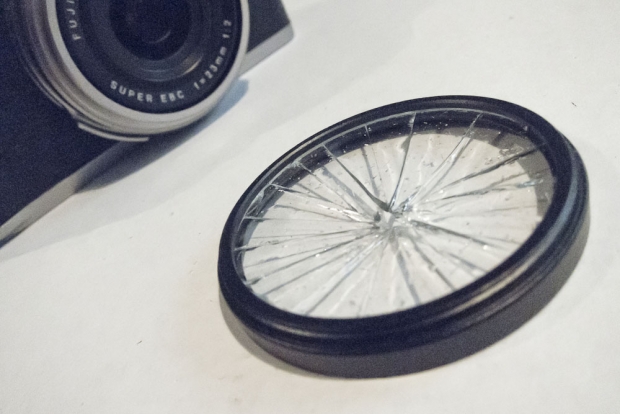
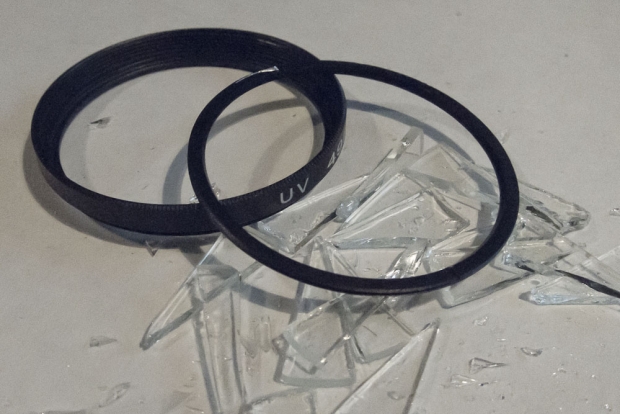
Now, the easiest way to take the glass out of a filter would be to unscrew the retaining ring in the filter. However, these can often be extremely well-attached; if you don't have a special tool, they can be very difficult to loosen. I got frustrated with my filter, and took a violent approach.

20111012_img_0094_1000px.jpg

Step 4

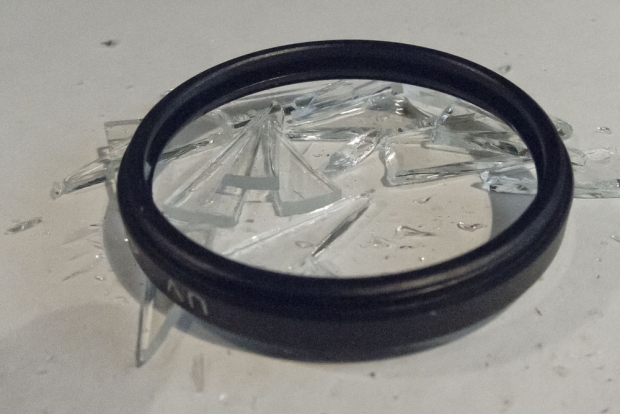
By giving the filter a sharp blow with a screwdriver, and then carefully removing the shards, I was able to take most of the glass out

20111012_img_0095_1000px.jpg

Step 5

Of course, with most of the glass removed, it was possible to take the retaining ring out. I took out the rest of the glass, and made sure there weren't any fragments left.

20111012_img_0096_1000px.jpg

Step 6

Mount the empty filter threading on your lens

20111012_img_0097_1000px.jpg

Step 7

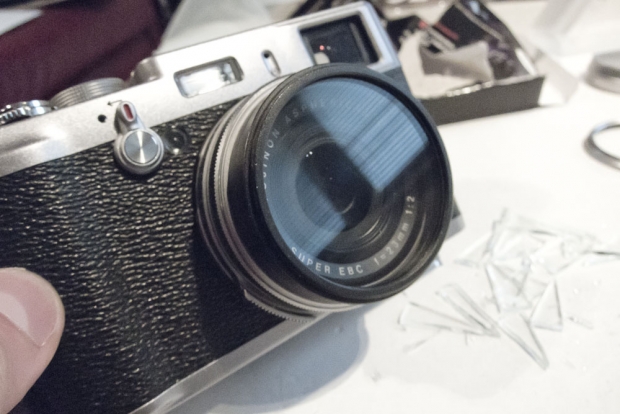
Loosely attach the second filter to the first filter. Then, operate the camera. See how close the lens gets to the filter. Slowly tighten the filter little by little, and keep experimenting with your lens. Be aware that some low-profile filters may not be thick enough to give you enough distance, so being careful at this step is a very good idea indeed.

20111012_img_0099_1000px.jpg

Step 8

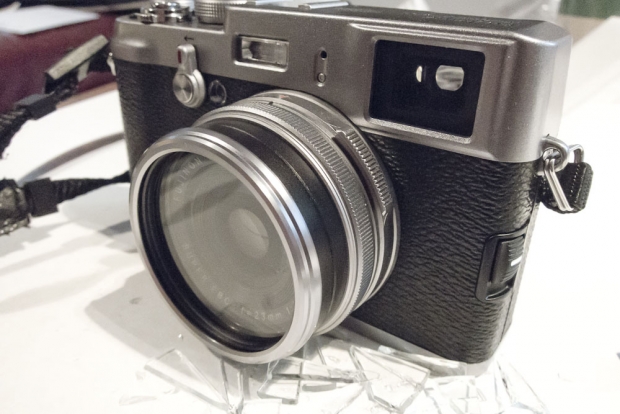
Remember the ornamental ring we took off in step 1? Put it back on, if you like!

20111012_img_0100_1000px.jpg

That's it!

So, that's how you can mount a filter on your X100 camera. Easy once you know how!

Rihanna and LaChapelle settle out of court

Rihanna S&M

It seems that a bucket of out-of-court settlement cold water has doused the artistic cat-fight between photographer David LaChapelle and singer Rihanna. Shame, really, as this one could have been interesting.

Rihanna has agreed to pay LaChapelle an undisclosed sum after he sought $1 million in damages from her, citing copyright infringement. LaChapelle thought that some scenes in Rihanna’s S&M video looked suspiciously similar to a set of his photos that had appeared in Italian Vogue.

LaChapelle claimed that Rihanna had copied everything from his images that appeared in the magazine, from the poses to the ligting set-up; Rihanna countered that he was ‘trying to monopolise a whole genre’ of sado-masochistic images. When it went before New York Judge Shira A Scheindlin in July, to decide if he did have a claim at all, she agreed: ‘An ordinary observer may well overlook any differences and regard the aesthetic appeal of “Striped Face” and the “Pink Room Scene” as the same.’

From LaChapelle’s point of view, he has got what he wanted. ‘Musicians commonly pay to sample music or use someone’s beats and there should be no difference when sampling an artist’s visuals.’ He’s happy with the settlement.

As for Rihanna, she might want to consider her next video a bit more carefully. So far she has managed to upset two photographers and a conservative Northern Irish farmer when shooting them. Is anyone opening a book on her next line of attack?

(Headsup to the Guardian)

Focus and re-focus after the event with Lytro

I get asked what I think the next big thing in photography will be, or what direction technology will take, quite a bit. It’s one of those things that you can’t really answer. Not until you’re actually living in that imagined future does it seem possible. So if you’d asked me a few years ago if a camera that would allow you to focus and re-focus your image as much as you wanted to after you’d captured it was on the cards, I’d've probably shrugged my shoulders. But it’s here now. It’s the Lytro.  

The idea behind the Lytro is that it captures all of the light rays in a given scene. According to Lytro, it captures a scene in four dimensions by recording the colour, intensity, and the direction of every ray of light that hits the light field sensor in the camera. And what does it do with all this information? It processes it using a light field engine so that you can re-focus pictures directly on the camera. If you want to share your images on-line, this light field engine will travel will them, allowing anyone to interact with them from any device, from mobile phones to desktop computers. No special software required.

I’ve had a play with some sample images: you click on the area where you want to focus and… tah-daa!… the focus will shift there in a second or so. It’s simple and quite good fun. You can mess around there, too.

Despite the technology involved, Lytro wants to keep their cameras sleek and simple. There are just two buttons on the camera – on/off and the shutter – and everything else is achieved through a touchscreen. As for the design, I can’t help but think it looks a bit like something I would’ve made using mirrors and cardboard when I was seven, but perhaps I was weirdly ahead of my time. Still, it’s small, light, and comes in blue, red, or graphite.

The lens has a constant aperture of f/2.0 and an 8× optical zoom. With no need to focus, it’s pretty speedy; and as it captures all of the available light in a scene, it should have pretty good low-light capability, too.

The Lytro comes in two sizes, an 8GB model in blue or graphite that stores 350 photos, or a 16GB version in red that holds 750 images. They cost $399 and $499 respectively. If you’re one of Lytro’s first customers, they'll provide you with free storage for your light field images uploaded to Lytro.com, too. They should be shipping come the new year.

You can learn more from Lytro.

Keeping your nude photos safe from prying eyes


Birds and bees and all that.

I recently received an e-mail from a reader with the following question: "I have taken a series of nude photos of my wife. I enjoy having them, but our daughter is getting old enough to use my computer, and I am not sure how to keep her from finding them by accident. What would you recommend?"

It can come across a little bit funny, perhaps (Nude photos of your wife? Are you sure you're just not trying to hide your porn stash from your wife and kids?), but it's a fair enough question: Whether it's photos, videos, or other sensitive files, we all have items on our computers that we'd rather others didn't interfere with.

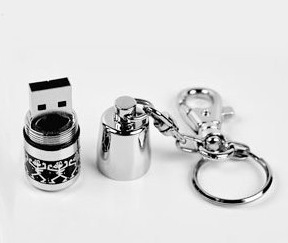
thumbdrive.jpgThe obvious solution, of course, would be to stick everything on a USB thumb drive (They have a whole category dedicated to USB thumb drives in Amazon.com and .co.uk.) and hide that somewhere; Thumb drives come in small packages with enormous storage capacities these days, so that should be easy enough. But what if you want to keep the data safe also if they're on a thumb drive?

I can't speak for the Windows world, as I haven't used a Windows PC for years (and I'd love to keep it that way, if I can help it), but on the mac, there are a few clever tricks you can try.

Creating a virtual drive

Personally, I think the best solution for sensitive documents is to use Disk Utility to create a virtual drive. I've created a little video showing you how:

(video not showing up? Look at this post in its original location!)

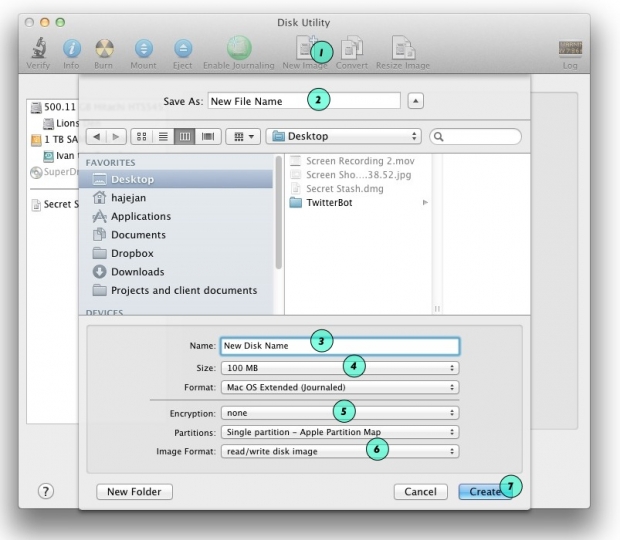
If you can't be bothered with the video, the steps are as follows:

screen_shot_2011_09_28_at_144119.jpg

  1. Open Disk Utility (from the /Applications/Utilities folder)
  2. Click New Image (1)
  3. Give the new file a name (2)
  4. Give the new virtual disk a name (3)
  5. Choose the size of your new virtual disk (4)
  6. Choose your encryption (256-bit encryption is military-grade, and should be more than sufficient)
  7. Choose your Image format (6). At this step, you can either choose read/write disk image. This will create a file that's the same size as you selected as your 'size' in (4), above. This is useful if you don't want to show how much data you have in your file. Whether the disk is "empty" or "full", it'll always be the same size. The other option is Sparse Disk Image. This file will be slightly bigger than the files you've saved inside it, but it means that the virtual drive takes up less space on your harddrive. Of course, if someone were to monitor the file, they can see it growing or shrinking in size, indicating that you are adding or removing files to it - which one you choose depends on practicality and exactly how paranoid you are being.
  8. Click create (7)

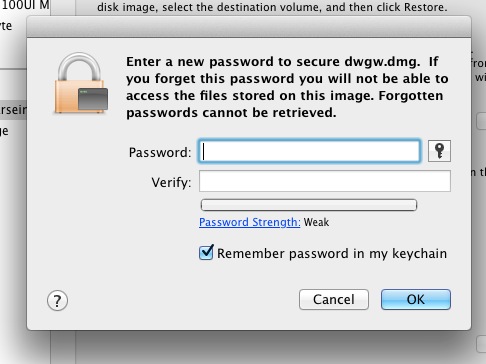
You will now be asked to enter a password:

screen_shot_2011_09_28_at_144704.jpg

Enter it twice, make sure you untick the "remember password in my keychain" tickbox, and click OK. Now, it's absolutely imperative that you remember this password: If you don't, your files are going to be inaccessible forever: There is no 'back door', and the encryption is hard-core enough that it's virtually uncrackable with current technology. Forget your password, and you may as well delete the virtual drive: You'll never see your files again.

To use the drive

To use the drive, you'd use it much like you would use a DVD or a CD - or an external drive.

  1. Double-click the drive image file
  2. Use the files as usual - you can open them, edit them, delete them, or add additional files to the drive. You can use folders etc, the same way as you could with any other drive.
  3. Unmount your drive by dragging it to the trash. The files will now be safe, and nobody can get to them without knowing your password. Nifty, eh?

Photo credit: The photo in the top of this post was licenced from iStockphoto.

Some very odd goings-on at Olympus

Olympus

Oh Olympus, you’re supposed to be in the news for developing exciting camera technology, not for sacking your newly appointed British CEO, issuing contradictory statements about financial transactions, behaving in a way that could generally be perceived as a bit unusual, and seeing your share prices drop by 40% because of it all. But that, in a nutshell, is what’s happened. And it has all happened very quickly. So here’s a potted history of the Japanese camera giant, the British CEO, and the alleged financial irregularities.

Just over two weeks ago Michael Woodford was appointed CEO of Olympus. He was already the company’s President and he’d worked for them for over 30 years. So when they sacked him on Friday, citing a cash of management styles, it seemed a bit, well, odd. I mean, you might think that they’d have known how he operated after so long with them, wouldn’t you? And if his management style were so problematic, how had he managed to rise so high and then be appointed CEO? Perhaps something else was going on?

According to Woodford, yes, something else was going on. And it was very odd. Woodford had noticed some accounting irregularities and asked auditors PriceWaterhouseCoopers to take a closer look. He’d spotted that a payment made to a Cayman Islands-based company as part of the take-over deal of Gyrus (a medical imaging company) was on the excessive side. According to Woodford, it’s usual to pay a fee of 1 or 2% of the total sale price to the broker when a takeover happens. Olympus paid about $2billion for Gyrus, and around $675m in fees to the mysterious Cayman Islands company. So in this instance the fee paid was 36%; he thought that this deserved investigation.

It seems that everyone else at Olympus wasn’t quite so convinced that it needed further investigation and maybe this was the clash of management styles to which they were referring, rather than that he’d uncovered something that he shouldn’t have? Sort of like, not washing the company’s dirty linen in public. Whatever, Woodford was summarily dismissed, told to hand over the keys to his flat (of which he owned 51%), and informed that his driver wouldn’t be able to take him to the airport.

Yesterday, Woodford turned up at the Serious Fraud Office in London and presented them with all of the evidence that he’d accumulated associated with what he regarded as Olympus’ not-quite-okay dealings. In return, Olympus has said that it plans to take legal action against Woodford. It has also denied and confirmed making an excessive payment to the Cayman Islands company.

Since Friday, when Woodford was dismissed, Olympus’ shares have plummeted by about 40%. That’s swiped $3.2 billion off of its market value. That’s a super high price to pay for a divergent management style, isn’t it?

Woodford has given quite a few interviews since his return to the UK. You can hear his own explanation of things to both Channel 4, embedded below, and to the BBC.

This murky and convoluted story is one that could run for a while yet. It’ll be very interesting to see how it unfolds.

Sweet lens filter coasters

coasters

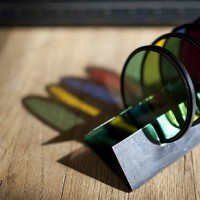
If I weren’t actively attempting to divest myself of belongings in preparation for spending six months overseas next year, I would already have pledged some money towards Joel Malone’s current Kickstarter project to produce sets of lens filter coasters. Then I would have told you guys about it. He’s looking for $10,000 before 6 December this year; you’ll get a stylish photography-related living room accessory in exchange for your financial support.

Pledge $40 and you get four 86mm UV filters in a swanky steel holder. If you’d prefer coloured filter coasters – red, blue, green, and yellow – that’ll set you back $50. Fancy both sets? Then you’ll need add $85 into the pot. If you’re feeling extra rich and have $170 to spare, you’ll get four sets, two UV and two coloured. Maybe you don’t want 16 coasters, but you might have a few photographer mates who’d appreciate a set.

There are no plans to develop these for retail, which means that you’ll have to stump up the cash now, and things are bit more expensive for international shipping, too.

You can go grab yours from the Kickstarter page.

Your favourite rules of photography


There are many ways to learn photography - one of the easiest ways is to learn a set of 'rules' that work like a shortcut toward getting awesome photos. You'll have heard of a lot of them before; there's the Rule of Thirds, for example, the golden mean, or simpler rules, too: Such as "get your photos in focus" and all the rules-of-thumb to do with equivalent exposures etc.

Do you know of any other “rules” for photography? Which rules to you stick to most of the times, and what rules do you love to break for best effect? Leave a comment below!

From Pixels to Postcards


I've done a lot of travelling over the past year (In fact, I'll only be in London for about 100 days in all of 2011 - how's that for a crazy travel schedule), but of course, the People Back Home™ want to know what I've been up to. I do post all my stuff to Flickr as I go along, but sometimes you want to send them a postcard when you're out and about.

There are a slurry of Take-a-photo-send-a-postcard services out there, but some are absolutely useless. The worst failure of the lot is ShootIt, which didn't manage to get any of my postcards to my dying grandmother. Suffice to say that I don't have a lot of time for them.

After I posted the ShootIt post, the lovely people from TouchNote got in touch, with a simple message: "Sorry for your loss, give us a try". I figured 'what the hell', and went for it.

I'll be honest with you, I haven't looked back: The postcards are of fantastic quality, the service is easy to use, and they keep their promises: Postcards are sent out by first class mail the next day, and they arrive promptly most of the time.

Testing the iPhone app

The only hiccup with the service was that their iPhone app wasn't really all that easy to use. No problem, of course, but if you're on the road, it's nifty to be able to take a photo with your iPhone, edit it in Photoshop Express, and then send it as a real postcard to your friends or family. The great news is that they've just updated their app, making it super easy to use.

The service isn't limited only to iPhones, by the way; It's available on iPhone, Android, Windows Phone 7, and Palm devices, and apparently they have managed to convince Sony Ericsson to pre-install their app on millions of phones starting next year, so suffice to say that it seems they've got the economy of scale working for them.

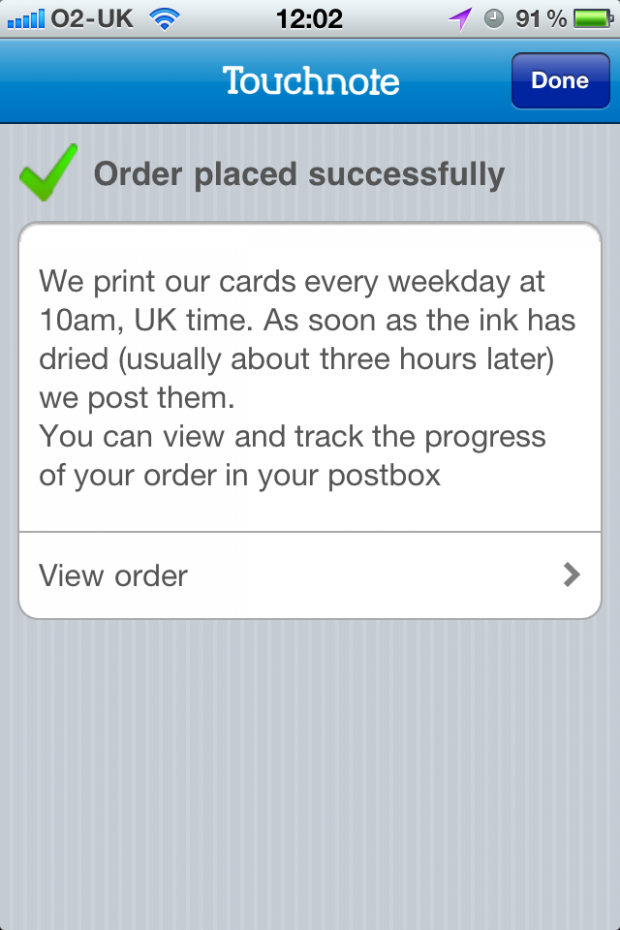
Anyway... The iPhone app. It is so easy to use, in fact, that I can just post a series of images, and you'll see exactly how it all works:

img_0917.PNG

img_0918.PNG

img_0919.PNG

img_0921.PNG

img_0922.PNG

img_0924.PNG

img_0925.PNG

And that was it. Easy, eh? Of course, I did already go to the web-site to add 'credits' (that's 'postcards' to you and me) to my account, which makes it all a little bit smoother.

How much does it cost?

Touchnote charge 1.49 for their postcards. "One fourty-nine what, I hear you cry" - well, anything. It's £1.49 if you're in the UK, $1.49 in the US, and €1.49 in Euroland. Obviously, you're better off paying in Dollars, but whatever currency you're paying, it's a pretty good deal: Here in the UK, at least, you'll frequently find yourself paying £1 for a post-card (and losing your will to live in the process).

Of course, you can also buy more credits in one go, which saves you a nice chunk of cash in the process:

screen_shot_2011_09_29_at_122421.jpg

Conclusions

I love technology. I love photography. I love being able to send post-cards directly from my iPhone. The idea is such a no-brainer, that it's no wonder that there's plenty of people out there offering the service. All they have to do to do it well, is to offer a great service at a good price. In my mind, that's where Touchnote have got their product bang on the money. Competitively priced, great quality, easy to use, and just all-around lovely.

The only downside, I suppose, is that your postcards lose that "ooh, look, a foreign stamp" exotica that you get from getting a postcard sent from a far-flung corner of the world. On the other hand, if you're anything like me, you'll probably forget to post it until you get home and end up sticking a UK stamp on it anyway, so that hardly makes much of a difference.

So - Touchnote. It's highly recommended, and you should definitely give them a shot. Literally.

Master Photography Awards winners

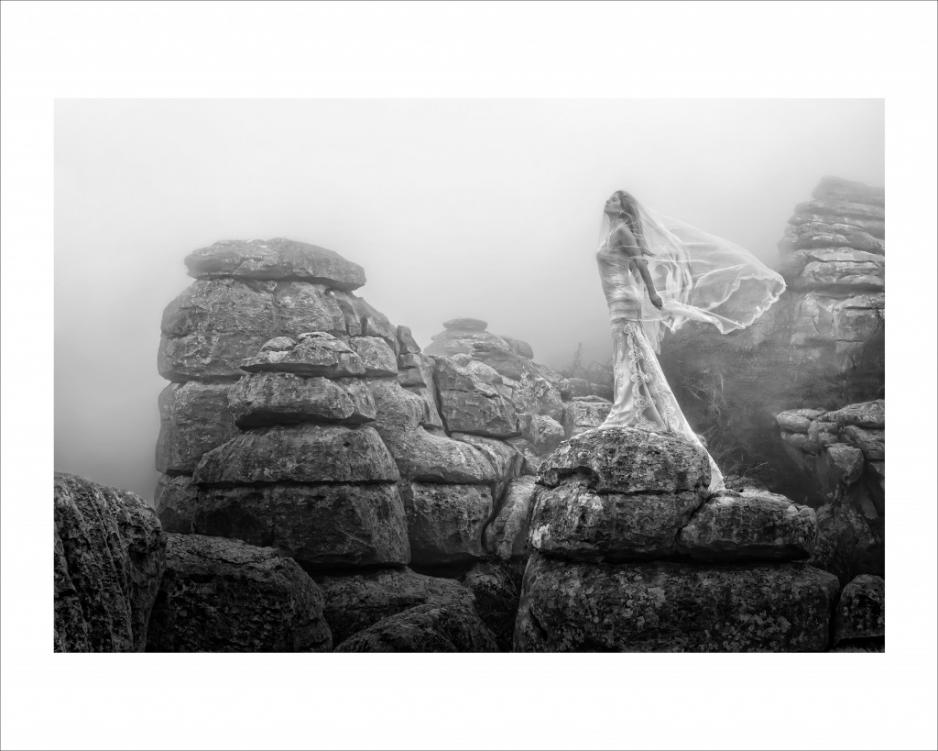
Jose Luis Guardia Vazquez

Seeing as the AoP awards received a bit of (not entirely unwarranted) criticism for their choice of winners, shall we see if the Master Photography Awards can do any better? The Masters awards have a vast array of different categories that cover wedding, commerical, and portrait photography. There are prizes for UK and overseas photographers. Winners are judged on the impact, composition, colour management, and workmanship of their photographs.

This year, the International Photographer of the Year was named as Jose Luis Guardia Vazquez. His work also happened to bag him Overseas Best Image and European Portfolio. Clare Louise was judged the winner of the UK Portfolio prize, whilst the Rest of World Portfolio award went to Keda Z. Feng. James Crockford was honoured with the UK Best Image prize.

Jose Luis Guardia Vazquez

Colin Buck, the chief executive of the Master Photographers Association had this to say about the winners: ‘Huge congratulations go to all our major winners. The competition was especially fierce this year and it seems that, once again, the bar has been raised in terms of imagination and technical expertise. The creativity displayed by the top level of photographers is truly amazing and I’m sure it must act as a huge inspiration for the rest of the industry.’

You can check out the rest of the winners on the MPA website.

Photomonth East London

Colour 9 - okay

For the past five years, there’s been a bit of a thing going on every autumn in East London that aims to bring photography to as many people as possible. It’s the East London photomonth, with exhibitions, events, and activities taking place throughout October and November at a host of venues in places whose London postcodes begin ‘E’. Yes, they have called it ‘photomonth’ and it does span October and November. Interesting.

There is, however, so much going on that I can possibly forgive the organisers their somewhat loose definition of a month. You can sign up for a photowalk; have your portfolio reviewed by a bundle of professionals; attend a seminar or ten; buy some prints for charity; develop your skills at a workshop; or take a look at one of the literally hundreds of exhibitions that are being held in cafes, galleries, museums, libraries, pubs, and even record shops across the City, Hackney, and Tower Hamlets.

The exhibitions tend to be free, but if you’re dropping into Lock 7 to look at the photos of Dhaka’s rickshaw riders or having a browse of the Pictures of the Day at Tina, We Salute You (yes, that really is the name of a cafe), do have a coffee. On the other hand, the photowalks are about £20 and the lectures and seminars vary in price; the black and white processing and printing course is £85; a beginner’s guide to digital photography is £40.

Still, there’s nothing to stop you from taking a look at Julia Margaret Cameron’s photographs of children at the Bethnal Green Museum of Childhood, the exhibition of photos documenting the Battle of Cable Street that’s in the Tower Hamlets Local History Library, or Hackney Observed at the Hackney Museum.

For the full run down, head over to the photomonth website, pick a day, and hit East London. (It’s not nearly as scary over here as you might think.)

Making your own grey cards


BEFORE: The Apple iPhone 4 has a great camera, but it's struggling with white balance. By using a grey card, I can fix it...

Most cameras are capable of creating 'acceptably good' white balance on your photos. And even if they're failing, you can make a pretty decent guess for what you think the white balance should have been in post production.

But what if you want to take the guesswork out of the equation, and get perfect white balance every time? The professionals use something called a 'gray card' (or 'grey card', depending on where in the world you learned to write English). The name says it all: it's a gray piece of card or plastic that you can use to balance your photographs.

Finding yourself a gray card

img_0875.JPGDoes that sounds a bit high tech? Well, it really isn't - and the great news is that you can use just about anything that is neutrally coloured. Of course, without advanced colour calibration equipment, it's hard to find something that's actually perfectly neutral. For our purposes, however, you don't need to do that: anything that's just about gray will do. Why? Because once you have your photos balanced consistently, it's easy to make sure they are all well-balanced.
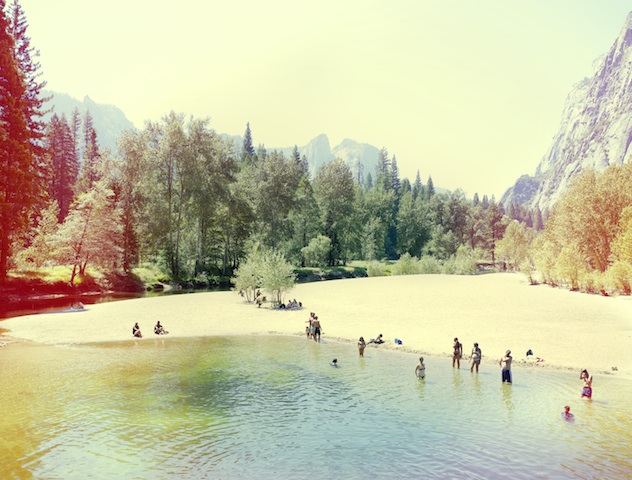
You can use anything that is neutrally coloured, but we would recommend using something that's light gray - it gives the camera the best colour reading, and it makes it easier to do your balancing in post production, too. The lids on coffee cups tend to work pretty well, and personally, I've been using my Macbook. The matt, light silver material is relatively neutral, and since I tend to bring my laptop on photo shoots with me, it's always there when I need it.

Printing off a gray card

If you know what printer you are going to be using to print your images, you could create your own gray card as follows:

1. Open up a photo taken with your camera in Photoshop. This ensures that the correct color profiles are in your image file.

2. Delete the image, and fill the frame with 18% gray.

3. Send the file to your printer, and take it with you on shoots.

The key thing here is that your 'gray card' may not be perfectly neutral, but the important thing is that your printer thinks it is neutral - so if you colour balance your photographs to this particular card, your images should come out neutral when you print them next. Clever, eh?

It could be argued, of course, that if you're serious enough about white balance that you are going to use a gray card, then you may as well buy a set of gray cards that are definitely perfectly colour balanced, but having a home-made set of cards is much better than shooting without anything, so it's a great place to start.

How do you use a gray card? - Whatever you've decided to use as your gray card, the way you use it is pretty simple, and I've covered the process as a video and how-to article; How to use a grey card.

Getting a professional-grade gray card

Of course, you could just decide to go full hog and get a professional gray card. It just so happens that I'm selling some lovely A6-sized cards 

AoP Awards winners

aopawards_photo_4col

In case you missed it, the Association of Photographers held their annual awards last week, which honours professional photographers and their work – both commissioned and non-commissioned – across genres including advertising, portraits, and editorial. So as to keep up with the changes that are being made to cameras, and specifically to cover video capability, the AoP introduced the Moving Image category this year, too.

Almost 3,000 images and videos were submitted by nearly 400 entrants. There were 17 ‘Best in Categories’ and three Gold awards. A few of them are here for your perusal. Enjoy!

Nick Meek – Best in Catergory and Gold winner for the Environment series

Allan Stone – Best in Category and Gold winner for the Object series

To take a look at the other winners, head over to the AoP Awards website!

(All images are, of course, copyright their respective photographers.)

Photo Critique IV: Eagle


It's time for another round of video photo critiques! This week, it's Eagle, by Latrell Olner that's going on the proverbial chopping block. 

So, check out the critique below, and if you want to have one of your own photos critiqued, check out this post!

Enjoy!