Practice

We're going on a roadtrip - grab your camera and drive-lapse

I'm meant to be driving to Edinburgh tomorrow—good health permitting—and if my car weren't due to be crammed to the gunwales with my brother's belongings, I might've considered turning it into a drive-lapse. Or a time-lapse of the journey. It would be possible to do this using a common-or-garden time-lapse technique, but if I were to find myself stuck in a traffic jam (heaven forfend), we'd have shot after shot of my car stationary on the A1, which isn't so thrilling. The clever people at Triggertrap have developed a way around this problem, however: distancelapse mode. Rather than triggering your camera to take a photo at timed intervals, it exploits your smartphone's GPS to take a photo at specific distance intervals. How very nifty!

Safety first

Shooting a drive-lapse will necessitate mounting your camera and triggering device securely in your car, with a decent view of where you're going. While this might seem simple, whatever means you choose to mount your camera in your vehicle, you must do it safely. Laws will vary from country to country, but the primary consideration is that your kit mustn't obscure the driver's vision and neither must it be a distraction. Do be sure of the regulations before you go anywhere.

Selecting a mounting option

You have a few options to mount your camera in your car. A superclamp attached to the passenger seat's headrest stalks is ideal: it won't obscure the driver's vision and the camera has a great view. Alternatively, you could opt for a suction cup on the windscreen or a tripod wedged in the backseat. Remember: it's about being safe.

Aperture priority mode or Manual?

Choosing your preferred shooting mode for a drive-lapse can be a bit of a conundrum. If you're likely to encounter changes in the weather conditions or light throughout the duration of your journey, manual mode will leave some shots over-exposed and other under-exposed. Aperture priority mode can solve the exposure issue, but leave you with a flicker problem. You're going to have to weigh up which mode will suit your journey, and therefore your final video, best.

Time and space considerations

If you're going on an especially long journey, you'll need to make provision for this, in terms of your personal needs and your kit's. Your memory card will require sufficient space and you might need an external charger for your phone, too.

Drive time!

With all of these considerations, ehm, considered, it's time to do this!

Mount your camera

As we've already discussed, your camera needs to be mounted legally and securely. You don't want it wobbling about if you encounter potholes or sleeping policemen.
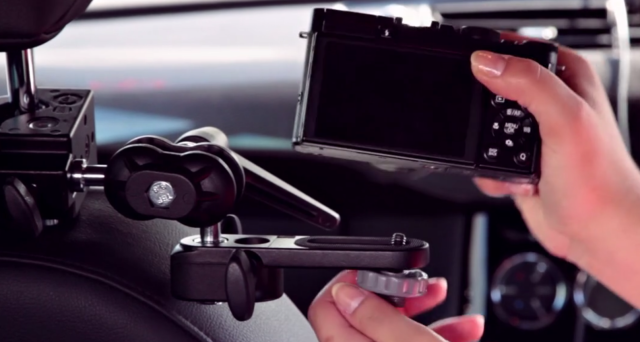
This was a Manfrotto clamp, for the record

Camera, meet Triggertrap

Hook up your camera to the Triggertrap dongle and the dongle to your smartphone. Secure your smartphone, too, as you don't want that moving about.
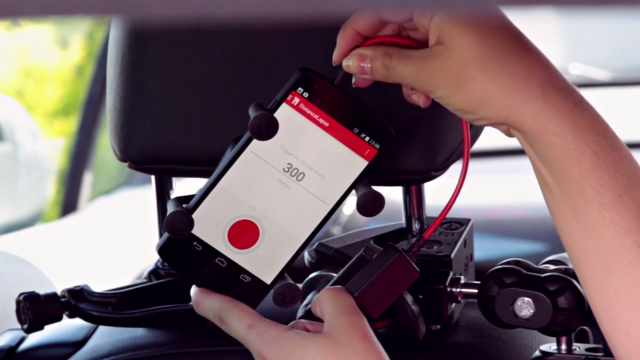
You could do this as an ordinary time-lapse, but if you get caught in traffic, it could prove a bit dull

Set your camera

Your camera needs to be in manual focus mode in order for Triggertrap to function, so if it isn't already, switch it to manual focus and adjust to get the image sharp. You also need to choose between aperture priority and manual exposure modes, and set your exposure accordingly.

Let Distancelapse take the strain

Open up the Triggertrap app and select the Distancelapse mode. If you're driving on the motorway, 300 metres is a good interval. Hit the big red button, allow the GPS to settle, and then off you go!
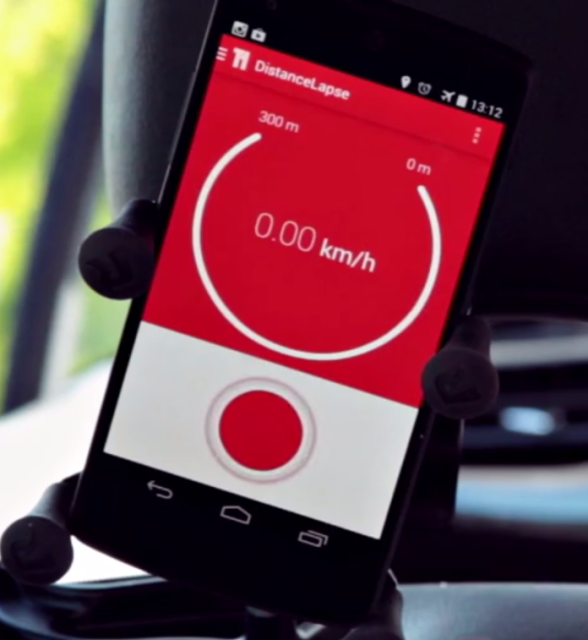
300 metres should do the job

Putting together your video

When you've completed your journey and have all your images, it's time to compile them into a video. We'll save that for another article, but this one should get you started. Then you get to relive the journey, in shortened form.


Much of this, including all the images, is based on the fantastic How to shoot a road trip timelapse tutorial found on Triggertrap's How-To microsite, and it's reproduced with permission. Triggertrap How-To is full of great content for making the most of your camera. You should take a look.

Shooting star trails

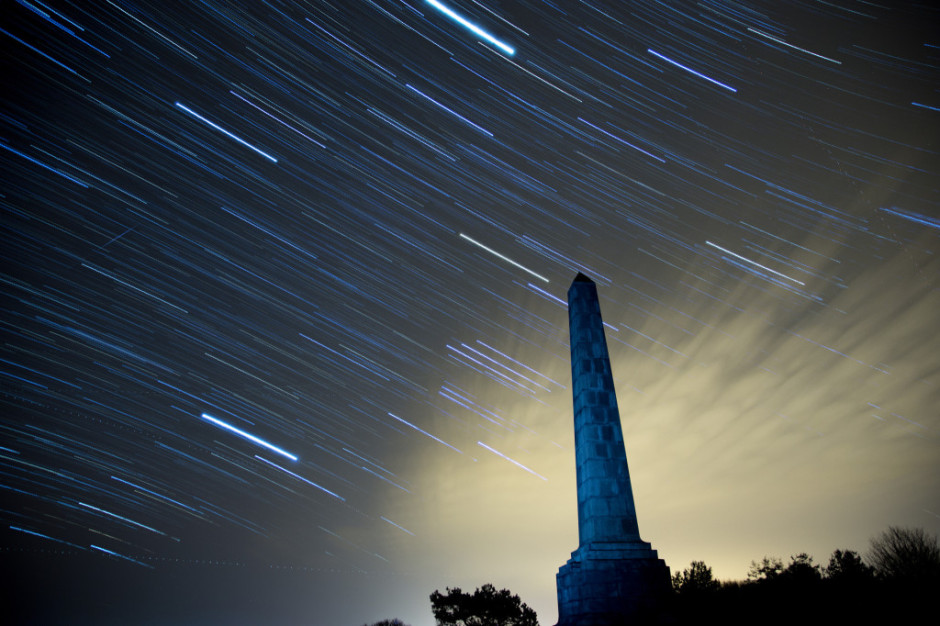
Star trail photos can be incredibly compelling and while they take time to produce, they're probably not as difficult as you might think they are. In fact, there are two methods that you can use to capture the night sky with the stars streaking across it: a single long exposure or what effectively amounts to a time-lapse composited into a single image. This is our guide to shooting star trails. Star trails by Thomas Langley (thanks to Triggertrap)

Location

Light pollution can be a pain when you're attempting to shoot a star trail photo. If you're not able to see the stars, your camera won't be able to, either. Should you live in a city, this means looking for a location that's suitably isolated to give you a view of the sky, but isn't so isolated that you make yourself vulnerable. And if you don't live in a city, you still need to be somewhere accessible.

You also want to think about your scene. You might find that having something of interest in the foreground of your shot will improve it. Barns, dilapidated or otherwise, obelisks, and rock formations are all good starting points.

By finding Polaris and focusing on that, you'll produce a circular star trail; point your camera somewhere else in the sky and your trails will be more linear.

Timing

The best time of year for shooting star trails is definitely dependent on personal preference. How long you can manage safely in the cold is probably your primary concern. But you do need to be shooting on a cloudless night with no or little moon.

Setting up

Once you've decided on your location and set up camp with warm clothes, thick boots, and a thermos flask, it's time to set up your camera.

Camera

Set your camera on its tripod; place it in manual mode and switch the lens, preferably a wide-angle one to get as much sky in the shot as possible, to manual focus, too. Frame your shot—ideally with something of interest in the foreground—with the lens focused to infinity.

When it comes to exposure, you need to be in bulb mode, the aperture should be as wide as possible, and try ISO 1,600.

Take a test shot with a exposure time of 30 seconds; if the stars are bright and clear, you're ready to go. If it looks a little dark, adjust the exposure time until you're happy.

Camera trigger

If you're using an intervalometer, you need to set it to record as you would for a time-lapse video, using the exposure time you tested for.

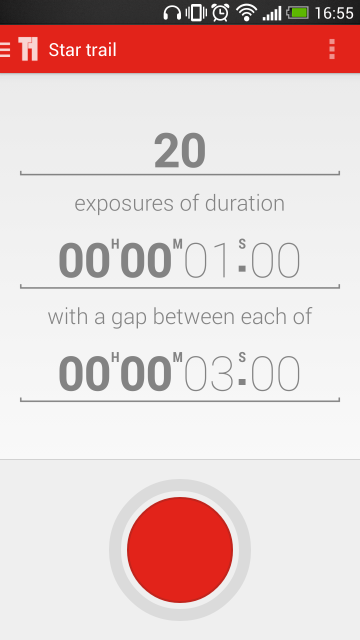
Choose your exposure time, number of exposures, and the intrval between them

If you're using Triggertrap Mobile with its star trail mode, set the exposure time that you established in testing with a two second interval between frames, and select the number of frames you want to take. You can choose a huge number of frames and stop after half an hour or 45 minutes of shooting if you're not certain how long you need to be out there for.

Hit go!

That should be about it. Hit go and wait for your camera and the universe to work its magic. Do remember to keep warm and safe!

Compilation

When you've accumulated all the images that you need, it's time to compile them into a single image with the help of some software. If you have Photoshop, that's perfect. If you don't, there are other options including the star-trail-specific StarStax.

A stack of images

Transfer your images from the memory card to your harddrive, keeping them in a single folder with their original file numbers. Whichever programme you use, this is important to ensure that the images don't get out-of-synch. The rest of this tutorial uses Photoshop to assemble your star trail shot, but you should be able to extrapolate the process to any other programme.

Import your images

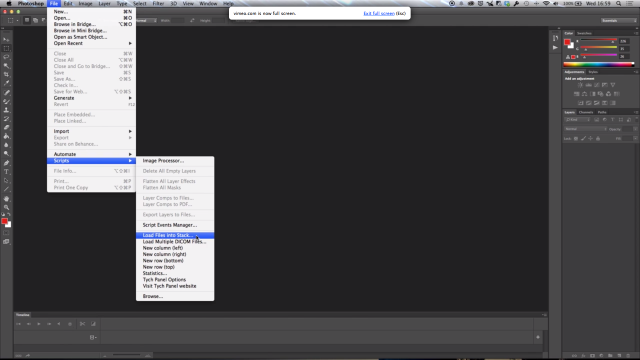
Open Photoshop and import your star trail images using File –> Scripts –> Load Files into Stack. Select your folder of star trails photos, highlight all of the photos, and then select Open followed by OK.

Stack importation makes life easy (Image thanks to Triggertrap)

Blending

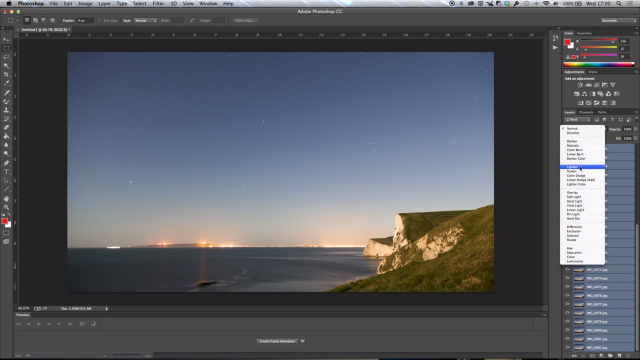
When all of your photos have made their way into Photoshop, select all of them in the Layers panel, and then in Blending Mode select Lighten. Tah-da! You should have a star trail composite.

Blend them together for your final image (Image thanks to Triggertrap)

You can make adjustments to individual layers if you want, but otherwise, you're done and it's a case of saving. (You might want to save an unflattened PSD file and a flattened JPEG version.)


Much of this, including all the images, is based on the fantastic How to capture a star trail tutorial found on Triggertrap's How-To microsite, and it's reproduced with permission. Triggertrap How-To is full of great content for making the most of your camera. You should take a look.

What do football, copyright, and Vine have in common? A lot of money and a lot of confusion

The English Premier League kicks off tomorrow and in addition to last minute transfer news, shock managerial sackings, and managerial press conferences, copyright and broadcasting rights and the use of tablets inside Old Trafford have made headlines, too. The issue of tablets and laptops inside Old Trafford is fairly self-explanatory: Manchester United has prohibited bringing them inside the grounds owing to security reasons. The copyright issue seems to have people in more of a flap. And heavens, this isn't the first time it's happened. The Premier League has stated that it will be taking action against people who compile and share Vines of goals that they record from live broadcasts of matches. Being able to live-pause broadcasts makes this relatively straightforward technologically, but it's a breach of copyright.

This has thrown up a few interesting questions, not least from the BBC's Technology Correspondent, Rory Cellan-Jones, who wondered if his Google Glass recording of Brentford matches would violate copyright.

I'm fairly certain it wouldn't violate copyright, but it could well infringe on other rights. So if everyone will be please calm down, and preferably sit down, I'll explain what (I think) the situation is.

Copyright

Copyright is the right to make copies of someone else's creative endeavours. When I click the shutter on my camera, I own the copyright to the image that creates. When BT Sport or Sky Sports record and broadcast a football match, they own the copyright to the broadcast. That is, the producer decides on which cameras to use and how to put together their sequence of use, which constitutes the original work. The football match itself isn't copyrightable, it's the broadcast of it that is.

As well as charging their subscribers a fee to watch the matches, BT Sport or Sky Sports can charge other broadcasters to use these images or they can keep them all theirselves. Their pictures; they decide.

When someone sitting at home on the their sofa and watching a football match compiles a Vine of the goals using pictures transmitted by BT Sport or Sky, they're violating BT Sport's or Sky's copyright. They are taking BT Sport's and Sky's work and using it without permission and without paying for it.

When you read that BT Sport and Sky Sports are complaining about their copyright being violated, this is what they mean.

Broadcast rights

When BT Sport and Sky Sports won the contracts to televise Premier League matches, they paid an excruciating sum of money for broadcast rights, or the opportunity to transmit live pictures from the game. The BBC holds the broadcast rights to highlights of the Premiership matches. They paid a fair whack for that, but not quite as much as BT Sport and Sky Sports. This season The Sun and The Times have the online rights; this is big business and it's this money, paid to the Premier League, which has made it into the financial behemoth that it is.

Turning up at Old Trafford or Stamford Bridge and taking photos or video of a match would get you into a different type of trouble, therefore. If you were to try to stream the match live from your seat, you wouldn't be very popular with a gaggle of corporate lawyers for infringing on broadcast rights. Not to mention you'd likely upset the fans sitting around you if you obstructed their view. Whether or not you can take a camera into a football stadium and take some photos for personal use seems to be open to clubs' interpretation. It's worth checking what it says on the ticket. Some might be happy for you to take a photo to remind yourself of the day; others might want to throw you out for just having a camera.

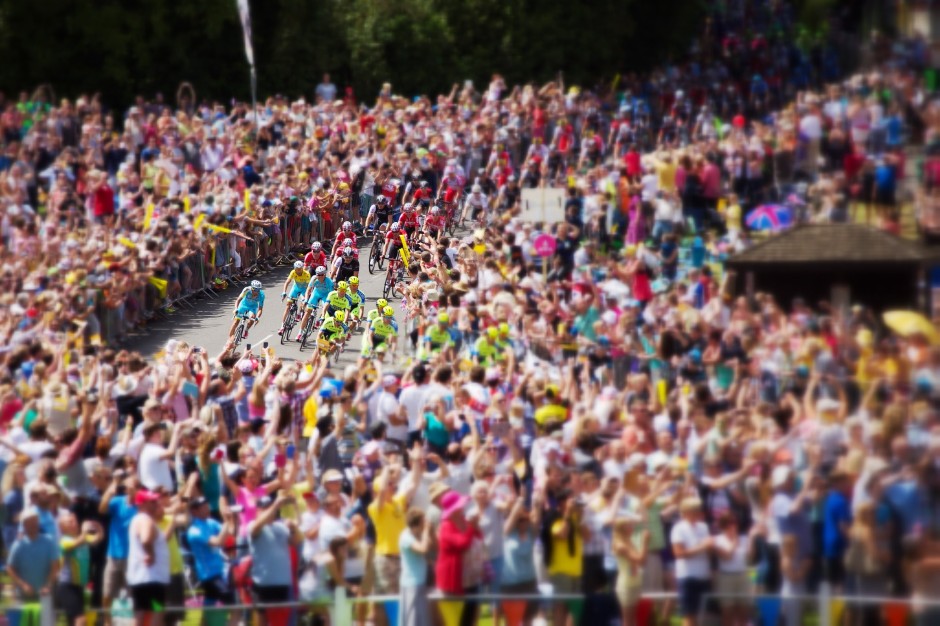
I have no football photos, so have one of the Tour de France instead

Broadcast rights and copyright are different beasts, but from the same genus. You'd own the copyright to any images you were fortunate enough to make inside a stadium, because you'd made them. What you wouldn't own are the broadcast rights to let you redistribute them. Not unless you'd paid an eye-wateringly large sum of money for the privilege and you probably don't have enough kidneys for that.

Performers' rights

Back to Rory Cellan-Jones and his tweet asking about copyright violations at Brentford, someone asked if it wouldn't breach performers' rights. No. As far as I can tell, performers' rights don't extend to sporting events, at least not in the UK, so there would be no infringement there.

Tablets

Now we get onto Manchester United's prohibition against tablets and laptops inside Old Trafford, which was announced earlier this week. According to officials there, the decision to ban larger devices, including iPad Minis, was made in response to security concerns. They're worried someone might want to pack a bomb into a device, much like airlines are. The ban doesn't extend to smartphones, provided that their dimensions are no larger than 15 centimetres by 10 centimetres (5.9 inches by 3.9 inches). Seeing as smartphones have not been banned and they're still capable of taking photos, we'll take this one at face value. And quite frankly, if it stops people obscuring others' view with when they're recording with the iPads, so much the better.

In conclusion

Please remember that I'm not a lawyer. I'm a writer who takes a fiendish interest in copyright and I've applied a healthy dose of common sense to its ramefications, together with a bit of research.

If you want to take photos or video at any sporting event, I suggest that you check with the stadium before you turn up with any manner of kit. You don't want to forfeit your ticket or have your gear confiscated. Speaking from experience, just go and enjoy the game. Fiddling about with electronic equipment detracts from the atmosphere and what's happening in front of you - the reason why you're there. But maybe that's for another article.

When it comes to making Vines from what you can see on TV - don't. Protecting intellectual property applies to little guys as much as it does to big guys. If we don't want them stealing our content from social media sites and using it for free, best not to infringe their copyright either.

Standing out in the crowd - or how to take meaningful photos among lots of people

'Tis the summer (here in the northern hemisphere). 'Tis the season for festivals and fairs and fetes. 'Tis the season when people might want to capture crowd scenes with their cameras. Shooting crowd scenes is easy, yes? There's so much going on that all you have to do is raise your camera, point it in the right direction, and shoot to produce an interesting photo, yes? Ehm... no. Anyone who's ever tried to take a compelling crowd scene photo will appreciate that it's far harder to get it right than it is to get it wrong. Frequently, crowd photos emerge as amorphous collections of strangers with no clear narrative or obvious focal point. Anyone whose attention doesn't wander irretrievably will be left asking 'So it's a photo of what?' But mostly the eye will scan over an ordinary crowd scene shot, fail to find anything of interest and be drawn into the story, and move on to the next shiny thing. Your audience is gone.

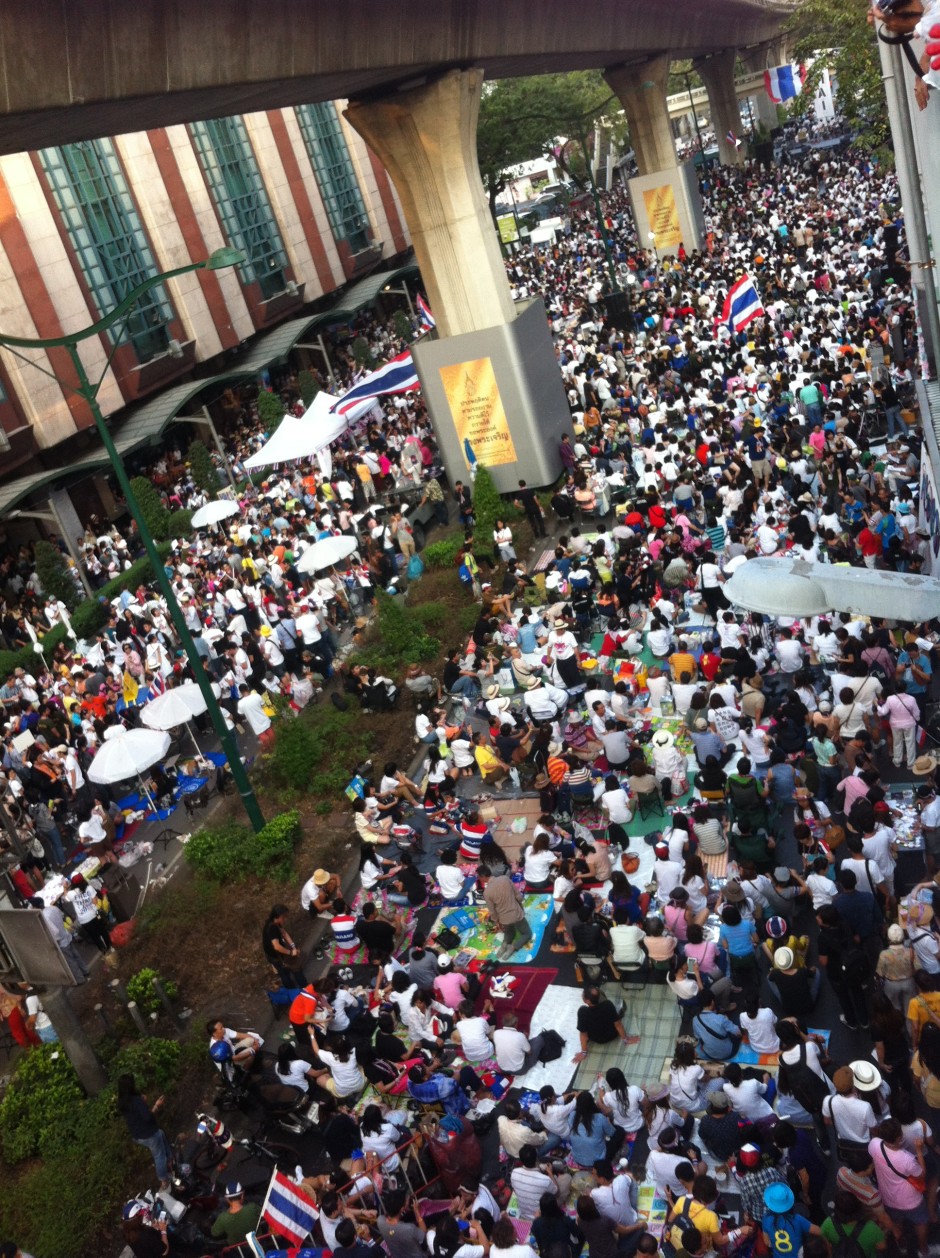
It's a crowd. And a large one. But where is it going? What is it doing?

What makes crowd photos so difficult? The very fact that there is so much going on in these scenes is usually their undoing. Every photo must tell a story. (Along with 'Get closer!' and 'Just because it's on the Intergoogles, it doesn't mean it's free to use!' it forms the third edge of the Photocritic mantra triumvirate.) Rather than expecting your audience to determine what the story might be among the tens, maybe even hundreds, of people, you have to set about deciding on what the story is and composing an image that conveys that.

When you're thrust amongst a crowd, or are perhaps looking down upon one, ask yourself: 'What am I trying to relate here? What's the story?'

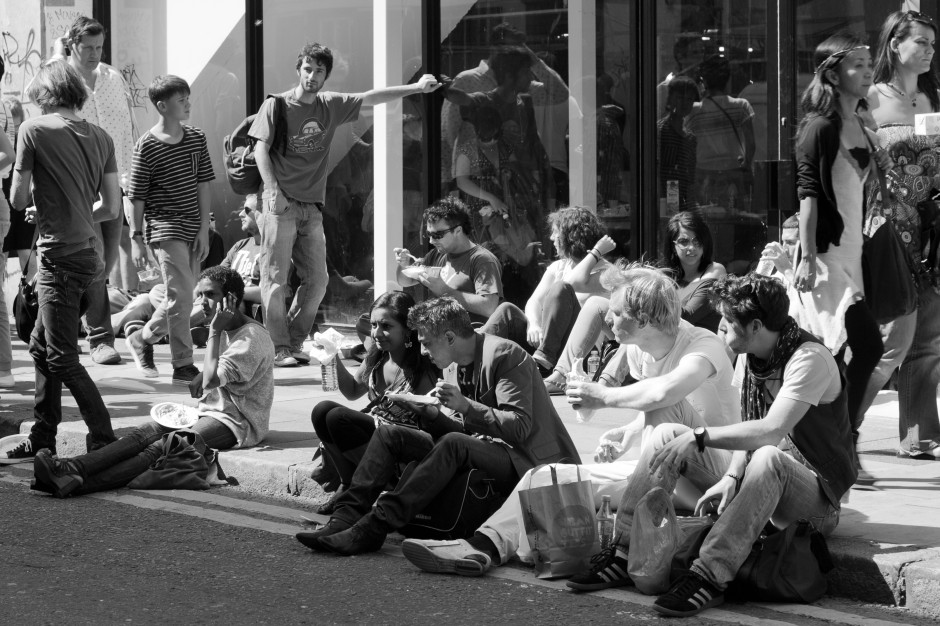
Sunday. Corner of Brick Lane and Hanbury Street. It's always crowded. Look for the lull, the change, the aberration. The guy leaning, and watching, and waiting.

Perhaps it's the sheer number of people? Maybe it's the focus of thousands of individuals on one figure on a stage? Is it a solitary red shirt in a sea of blue? Sometimes it's a case of waiting patiently for that moment: a sting of eye contact, a dropped doll, a wearied pause. Define the story and you're halfway to creating a compelling image.

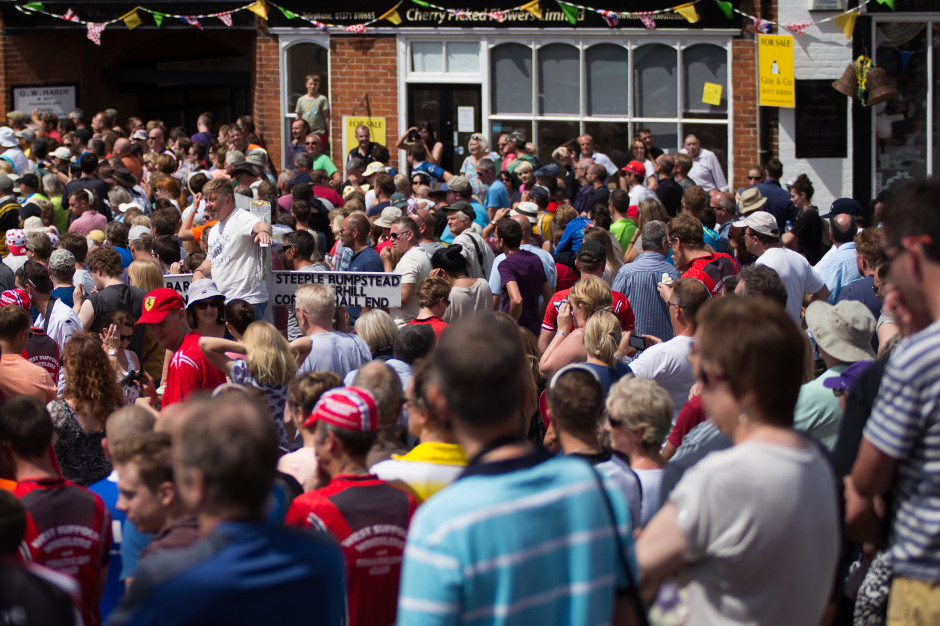
Finchingfield, July 2014, waiting for the Tour de France. The village was heaving and when people are sitting a-top fingerposts, you know it's crowded.

Now, ask yourself: 'What can I do to convey this?' How you compose and expose your photo will ensure that your audience can grasp what you're trying to say and will help them to connect with it.

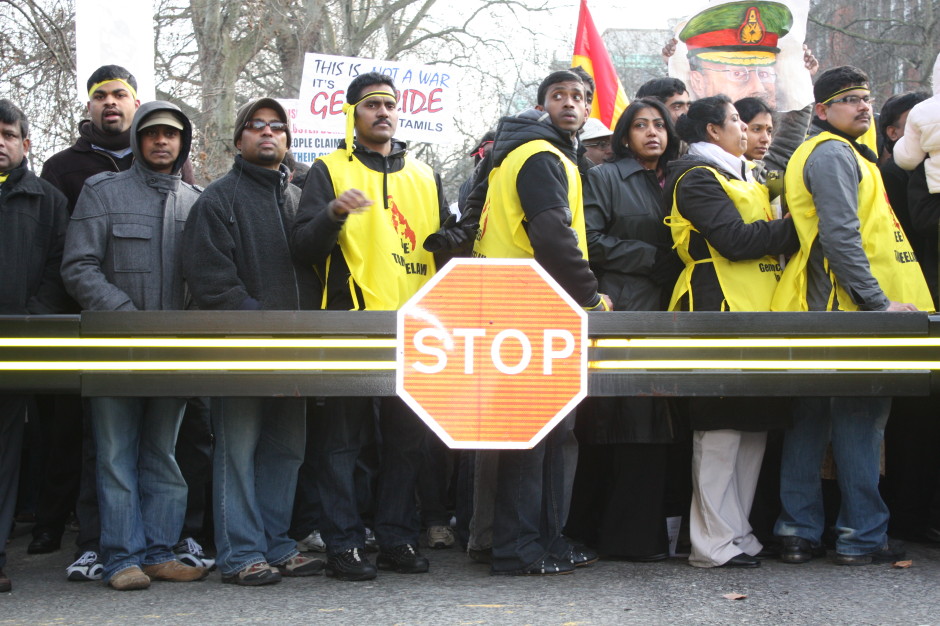
Tamil protestors, London, February 2009. The crush behind the barrier, the emptiness before the barrier, and the 'Stop' sign.

When you're trying to express numbers, find a point of juxtaposition to emphasise them: look for something small or noticeable that stands out and contrasts against the heaving mass. When a horde is focused on one thing, use lines to direct the viewers' eyes and channel them into the moment. For an aberration in the flow of things, try to isolate the rogue figure and plant it amongst the norm.

Rather than point and shoot, hoping that you'll produce an image that people will find interesting, draw on your compositional skills—the rule of thirds, leading lines, colour theory, pattern and repetition—together with your technical knowledge—focal length, aperture, shutter speed, and metering—to tell a story. Then you'll capture the crowd.

Manual flash - not as scary as you might think

Once you've got a proper handle on your camera and what it's capable of, and you've built up an understanding of your lenses, you might find that you want to extend your photographic experimentations to flash so that you can create alien space lemons and bright and breezy high-key portraits. It's probably easiest to start out using through-the-lens (TTL; iTTL; or eTTL) metering, but much the same as you progress and take more control over your camera, there will probably come a point when you need to exert more control over your flashes and have to change the mode to manual. Adding a new variable into any mix can be a daunting prospect, but don't let it put you off. It's another skill to master and put to use.

Through the lens metering

TTL stands for through the lens metering. Rather than you dictating how much power your flash puts out, your camera and your flash will combine to make the calculation. It does this by emitting a small pre-flash to determine how much light is required for the scene and your camera settings.

The primary advantage of TTL metering is that you don't need to think too hard, so when you're photographing an event or something fast-moving, you won't miss your shot for need of fiddling.

But if you need consistency in your exposure between shots, then TTL isn't very useful. You'll have to switch to manual mode.

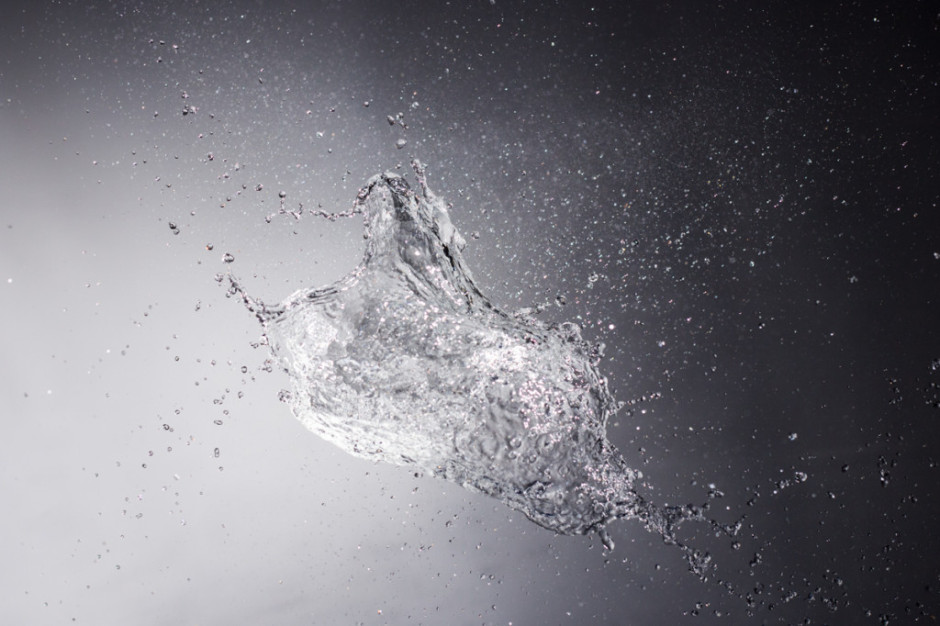
Splat! (Image thanks to Triggertrap)

The advantage of manual flash

Much like using manual mode on your camera gives you complete control over your exposure, manual mode on your flash gives you complete control over the power it emits. Between them, they will provide you with consistency.

Understanding the power out-put

The power out-put on a flash is typically displayed as fractions. Full power is 1/1; the least powerful setting is usually 1/128.

Don't forget that if you set your flash to full power, it'll be working at its hardest and will take longer to refresh in between shots.

When you're experimenting with your flash, you might want to set the power to 1/16, which is roughly half-power. You won't have too far to move in either direction if you need to make adjustments.

Sync speed

Your camera and flash need to synchronise in order for the sensor to be able to detect the flash. Open the shutter for too short a period of time and it won't be able to catch the flash, rendering the entire process futile. Cameras, therefore, have a maximum shutter speed that can be used in conjunction with an off-camera flash; it's known as the sync speed. The maximum sync speed tends to be 1/125 second, but do check your camera's manual to be sure.

The exposure triangle

Seeing as you'll be using manual mode on your camera, you'll need to be certain of the impact that altering shutter speed, aperture, and ISO will have on your exposure.

First: changing your shutter speed will not have an impact on your flash exposure. Shutter speed will have an impact on ambient light. Want more ambient light? Use a slower shutter speed.

Second: adjusting your aperture will have an impact on your flash exposure.

Third: ISO has an effect on both flash and ambient exposure.

Actually doing this

Now that the theory is in place, how about some practical photography?

Step 1: Set up the flash

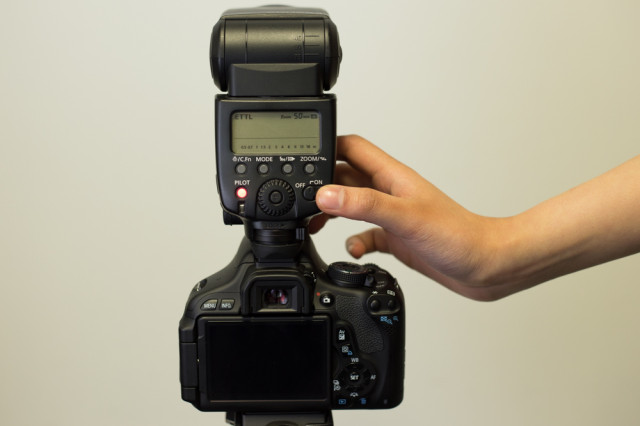
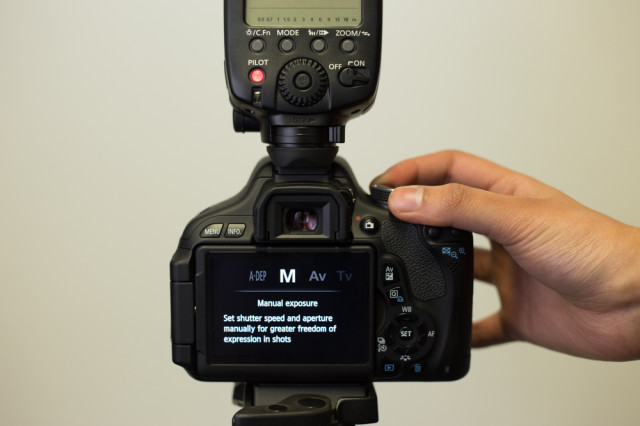
Turn on the flash and set it to manual. This is normally achieved by cycling through the MODE button on most flashes. If you’re not sure about this bit, check the information in your flash manual.

Select manual

Step 2: Adjust the power

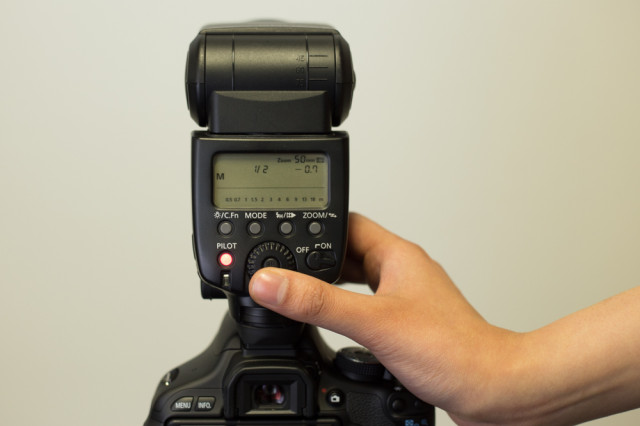
Now you can adjust the power by pressing the arrow keys. 1/1 is full power, and each click down will decrease the power.

Adjust the power. 1/1 is full power.

Step 3: Set the camera

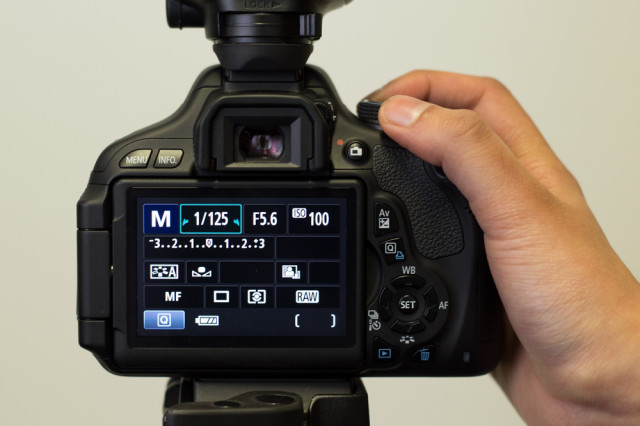
Place the flash on the hotshoe of the camera, or attach the lead or radio trigger if you're using either of those, and switch on the camera. In manual mode, set the shutter speed to 1/125 second and adjust your aperture and ISO.

Select manual mode for your camera

Step 4: Incremental adjustments

Take some photos!

If your images are too bright you can:

  • Decrease the flash power
  • Increase the aperture
  • Decrease the ISO

If your images are too dark, do the opposite!

Adjust as necessary!

Experiment with different combinations of flash power, aperture, and ISO to get a feel for what you can achieve with flash photography. After that, the world is your playground!

For a video version of this tutorial, here's Team Triggertrap explaining things:


Much of this, including all the images, is based on the fantastic How to use manual flash tutorial found on Triggertrap's How-To microsite, and it's reproduced with permission. Triggertrap How-To is full of great content for making the most of your camera. You should take a look.

Adding some va-va-voom with vibrance

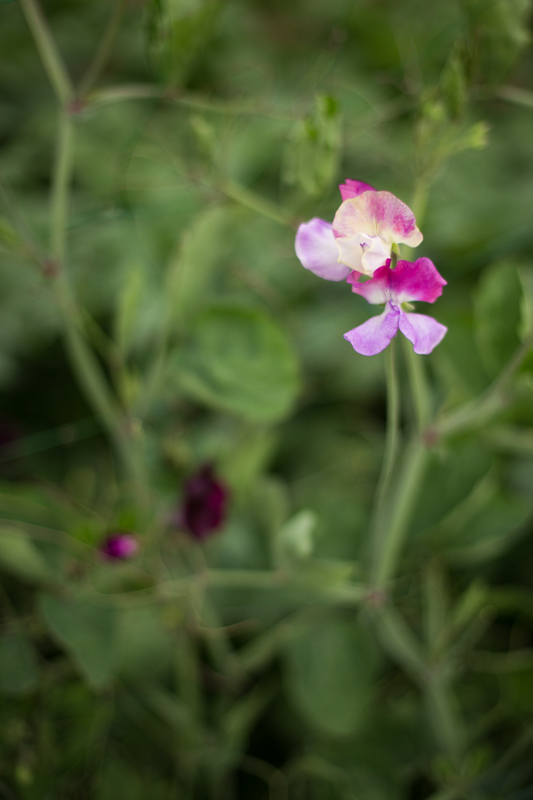
A few weeks back, we took a peruse around Lightroom's clarity slider, to see what it does to your photos and how you can get the best out of your photos by giving it a gentle nudge here and there. This week, it's the turn of the vibrance slider—clarity's bed-fellow—to come under the Photocritic microscope. With the vibrance pushed to +20, the greens look more alive, but the sweetpea petals aren't overcooked

Much the same as the clarity slider has its most pronounced effect on the mid-tones of your images, the vibrance slider is also a 'smart slider' and applies its effects selectively. Rather than adjusting the contrast in the mid-tones, a la clarity, vibrance takes hold of the more muted tones in your photo and gives them some oompf. It's a selective saturation slider, if you will.

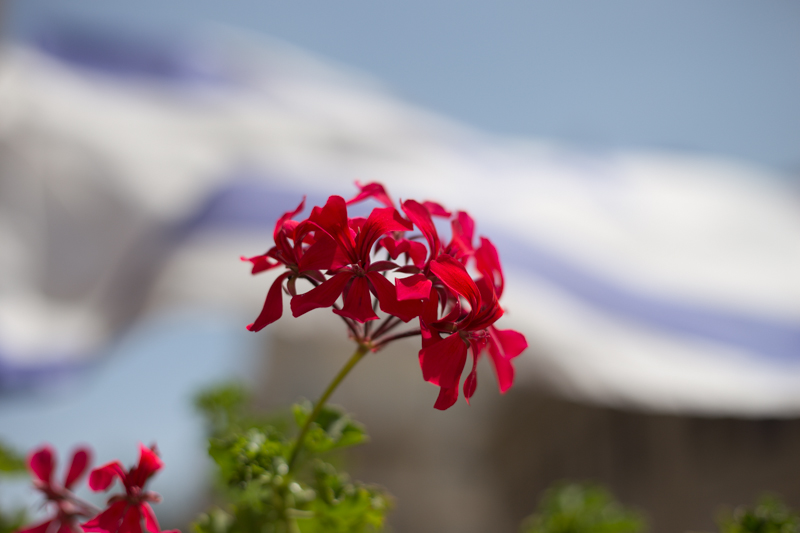
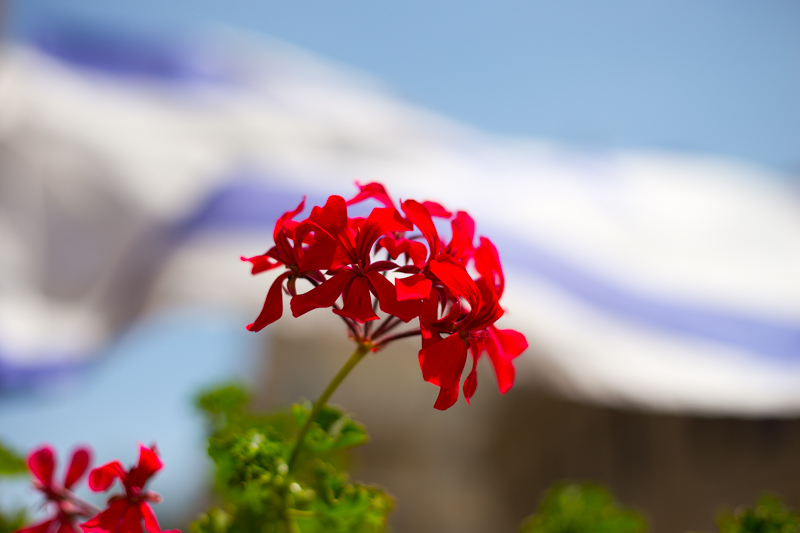
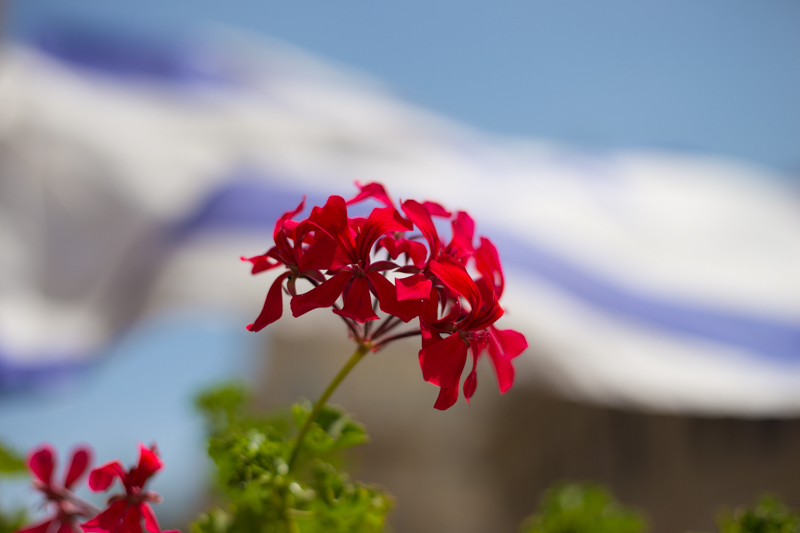
This is where this balcony-dwelling geranium started out

With the saturation at +50, it's too much

... but with vibrance increased, the sky looks bluer while the reds aren't overdone

More often than not, vibrance will pick up on the blues and greens in a photo but go easier on the reds and oranges. This is great for bringing out the intensity of a sky or making a lawn look that bit more inviting while not letting your portrait subjects look as if they've been tangoed. I've heard some people refer to vibrance as being like 'fill light for colours'.

I've tweaked the contrast and white balance here, but vibrance and saturation are, as yet, untouched

You can see that with +60 on the saturation, my brother's skintone is odd, although the sky looks intense...

... increasing the vibrance, however, gives Josh a better skin tone and the sky a more intense colour. Much better! (Although I'd probably not go as far as +60, as I did here.)

With the exception of the sweetpea, I've not been exactly subtle with either the vibrance or the saturation in any of my examples here, but that's to give you a clear illustration of the difference between them. Usually, I'd be far more reserved and I'm sure you would be, too. But at least you know what vibrance does now, and can begin using it to intensify your colours without feeling you've chucked a red wash over your photos.

The Pre-Photography Checklist


So, you're ready to do a photo shoot? No, seriously, are you really ready for your shoot?

A while ago, I was challenged with creating a pre-shoot checklist for photographers - I figured it'd be rude not to, so I gave it a whirl.

Before you press the shutter button...

  • Check your settings – Is your camera set to the mode you planned to use? Is the ISO set to a useful setting?
  • Fill the frame – Does your subject fill the frame? If not, get in closer, either by walking closer, or by zooming in.
  • Pre-focus – When you press your shutter button half-way, your camera will focus and measure the light. Use that functionality every time
  • Check your focus! – If you’re taking a photo of something with eyes, make sure you have the eyes in focus. If not – well, try to get the important bits in focus.
  • Compose – Keep the shutter button pressed half-way, and re-compose your image so everything you want in your photo shows up the way you want it.
  • Check your edges – Before you press the shutter all the way down, run your eyes along the edges of the frame. Is there anything along the edges that shouldn’t be there? If so – re-compose your shot and try again!
  • Check the background – New photographers are so focused on what’s happening in the foreground, that they fail to notice the huge dog taking a poo in the background. You laugh, but I’ve seen it happen
  • Deep breath – Hold your breath whilst you very slowly press the shutter button all the way down. This helps eliminate camera shake when you are taking the photo.

Best of all, if you want a handy, keep-in-your-pocket version of this checklist, it's printed on the back of my super-handy Photocritic Grey Cards. Spiffing. 


Time-lapses aren't just for videos

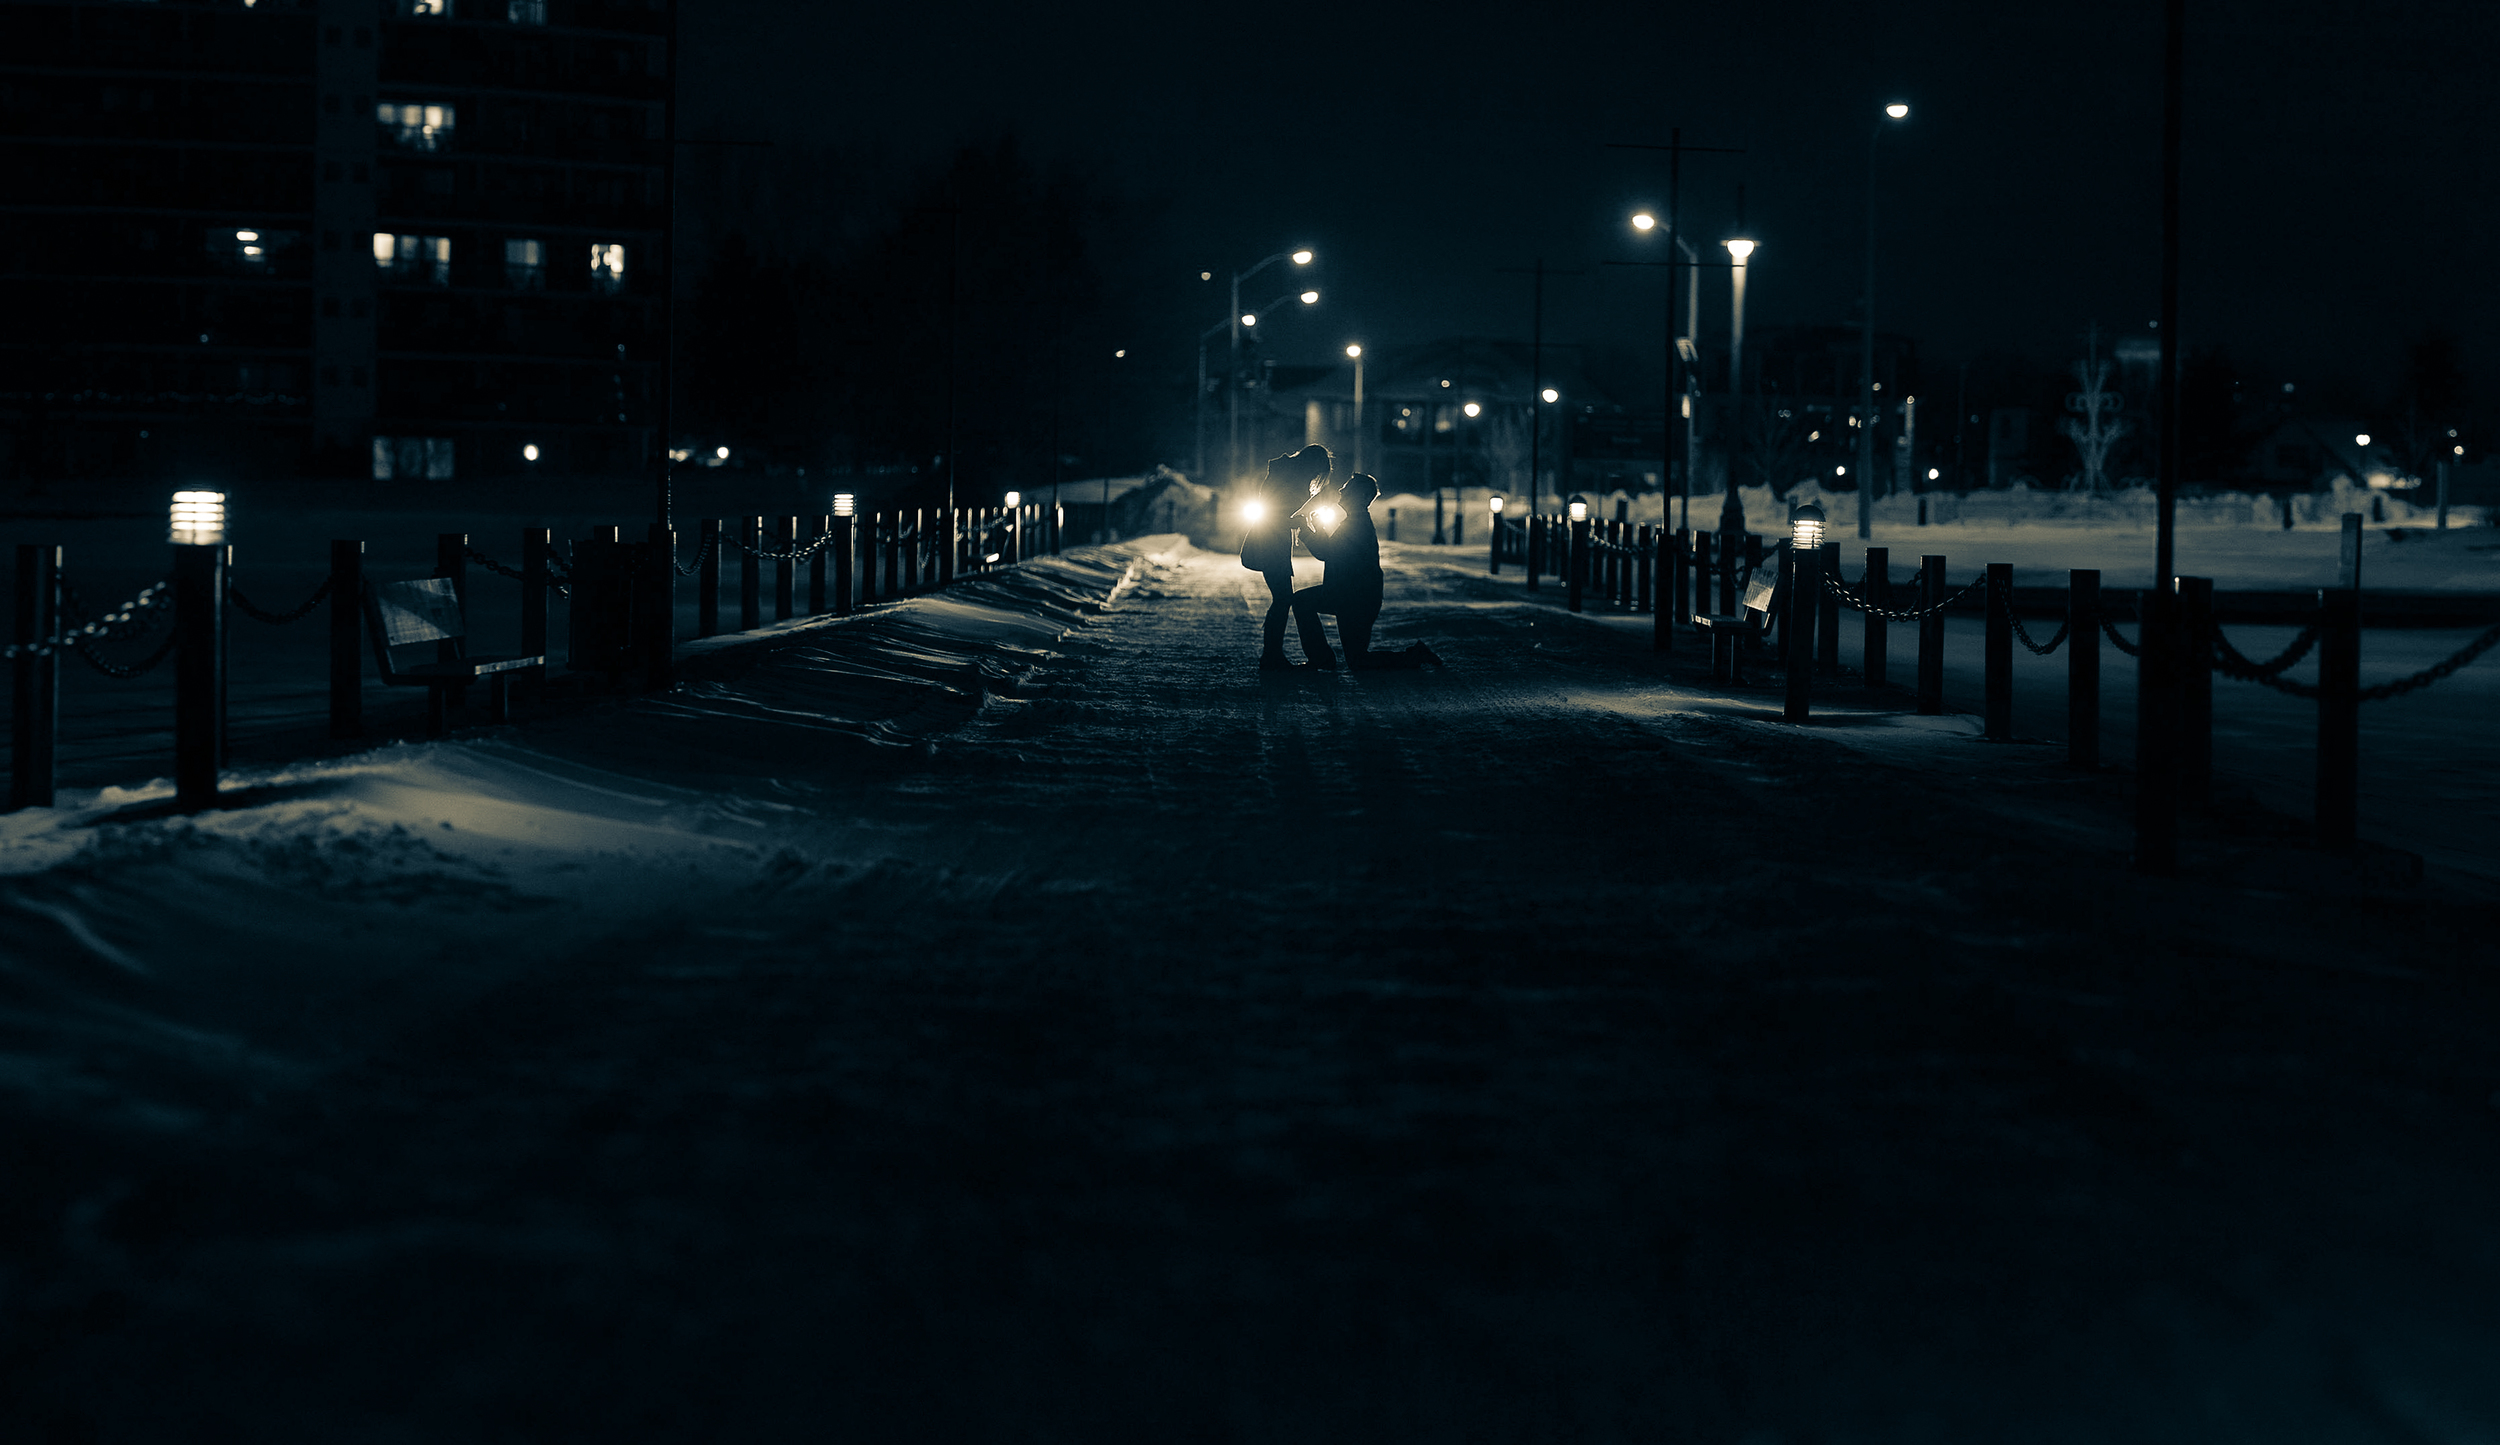
If you were under the impression that time-lapse sequences are the preserve of condensing the observation of periods of slow change into something that can be watched in a few minutes, photographer Mike Bons might encourage you to think again. He used the time-lapse technique to capture the precise moment that he proposed marriage to his girlfriend Erin: a single moment of immense change. Given that Erin said yes, I suppose we should call her Mike's fiancée now!

Mike succeeded in setting up the proposal and shoot with only a marginal amount of deception. Being a photographer, Erin and Mike don't tend to have very many photos of them together: someone is always behind the camera. By suggesting a photoshoot of the two of them together, he had every opportunity to capture the moment without giving away the game and getting some photos of them together. By creating a time-lapse of the proposal, he wouldn't need to worry about getting his timing right, either. Cunning!

Having bought the ring and settled on St Valentine's Day as D-Day, it was time to do the deed at Meyer’s Pier, in Belleville, Ontario, with their car's headlights backlighting the scene.

Mike set up his Canon 6D with a 70-200mm lens set at 175mm, manually focused on the point they'd be standing, and an exposure of 1/80 second, ƒ/3.2, ISO 3200. He set his time-lapse device to record one photo every second, and then it was a case of getting Erin out of the car, where she was keeping warm, and getting down on one knee.

The next step was all in Erin's hands!

After she'd said yes, and they'd got all the photos they wanted, I rather hope that they spent a romantic evening together before he embarked on his post-processing.

To create the final image, Mike selected his favourite shot from the time-lapse sequence and stitched it together with some panorama shots that he'd taken when he was setting up. This was to ensure that he achieved the field-of-view that he wanted along with the depth-of-field that he wanted from his settings of 175mm and ƒ/3.2.

Tah-daa! One life-changing instant captured by time-lapse. And many felicitations to Mike and Erin.

Oh, and seeing as Mike is a photographer, you might want to check out his website for his other photos that don't necessarily involve proposing to his girlfriend.

(Headsup to Triggertrap)

ExpoExpress: guerilla photo exhibiting

With so many photos being taken every day, and only a fraction of those making onto Facebook or Flickr or 500px, and even fewer of those really being looked at, how can we give our images a better chance of being seen? Especially by people who don't necessarily hang around the usual photo-sharing sites. It was a question that was puzzling Sydney-based photographer Manuel Caminero. He also wanted to make better use of an 18-hour lay-over in Dubai when he'd already seen most of the sites. (I'd take an abra over the creek into old Dubai to explore the backstreets and pick up some street food. Always worthwhile.)

# ExpoExpress from Manuel Caminero on Vimeo.

His solution? A sort of guerilla photo exhibition. He printed out a selection of his Australian lifestyle images and stuck them up (temporarily) in a public place in Dubai. Then he waited and watched. To his surprise, there was a generally positive reaction to his little project. People would stop and take a look, and when he had a word with them, they liked it. So he did it again. And again. And again.

And he reckons that you should give it a go, too. He calls it ExpoExpress: Print off a compelling series of images, find a place to pin them up in public, and then observe people's reactions to your work.

Just make sure that you don't litter. Or menace. Or cause any kind of obstruction.

Elbows in, people!

The picture-taking world appears to have been struck by an unfortunate bodily malfunction pandemic that is having an unnecessarily detrimental impact on the quality of photos the globe over. The malfunction affects camera users indiscriminately, with dSLR and CoSyCa owners, smartphoneographers, and compact camera users all under threat of its effects. It manifests itself as an inability for the camera user to hold her or his arms tight into the body when taking a photo, and instead standing with elbows projecting from the body, perpendicular to the torso. These unfortunately afflicted photographers resemble chickens attempting to flap their miserably clipped wings. Symptoms of this malfunction present themselves as camera-shake and unsalvageably blurry images, brought about by the inability to hold the camera steady. It leads to the records of hundreds, thousands of precious moments being consigned to the digital dustbin, notably those involving candles and birthday cakes, because the subjects are unclear, fuzzy, or even in double. Consequently, the emotional impact of the condition is thought to be quite distressing. If caught early, the condition is entirely treatable, but without speedy rectification there is no hope for affected photos.

The impact on photos taken by smartphoneographers is regarded as especially severe, as the reduced size and weight of these devices makes them inherently more difficult to stabilise.

Treatment involves a very simple modification of the body when holding a camera in preparation for taking a photo: the elbows need to be tucked into the abdomen and the arms held close to the torso. This enables the photo-taker to hold the camera with greater security and thereby minimise the chances of a photo obscured by blur and shake. In combination with other techniques, such as holding ones breath and taking a firm stance or leaning against something secure, positive results are anticipated.

Should photo-takers find it especially difficult to modify their stances, or should conditions be suggestive of camera-shake, it is recommended that a tripod or other stabilisation device is employed.

It is hoped that a general information campaign encouraging photo-takers to move their elbows down and in will see an overall improvement in the quality of photos taken and a reduction in people mimicking poultry.

Top tips for terrific travel photos

Seeing as Daniela is currently gallivanting somewhere in Thailand, we thought it presented us with the perfect opportunity to give you our travel photography tips. We've accumulated them from thousands of miles on the road through tens of countries. They might be useful for someone other than ourselves.

1. Be prepared

Like every good Boy Scout and Girl Guide, you need to be well prepared, before you go and when you're away. As contrary as it might sound, even if you favour spontaneous, moment-to-moment travel, a bit of planning will make sure that you get the pictures you deserve. You need to be ready for anything.

Buying supplies at the souq in Tangiers, before taking the train to Fes

Being prepared comes in three parts.

  1. First: Have an idea of what you want to see, do, and experience before you arrive. It doesn't have to be a minute-by-schedule, a wish-list is sufficient. It will help to ensure you see as much as you can and still have the chance to unwind and prevent being overwhelmed and accomplishing next to nothing.
  2. If you know roughly what you're planning on doing, it'll help when you pack your kit. Why take with lenses that you probably won't use at the expense of those you will? Trust me, I schlepped four lenses around the world and used only two of them.
  3. Finally: when you're out and about with your camera, be ready. Remember to re-set your ISO and shutter speed after a night shoot. Have you camera to hand on a bus or train, not in the luggage compartment. And have a smartphone or compact camera with you when you pop out for a bottle of water. You never know what you might see!

2. Tell the story

Every photo tells a story, and the photos from your travels should tell the story of your trip. That means it isn't just about capturing the monuments and the famous views, but about recording the little things that matter, that make a difference, that bring a trip to life.

Bar decorations in Bali, before I got sick

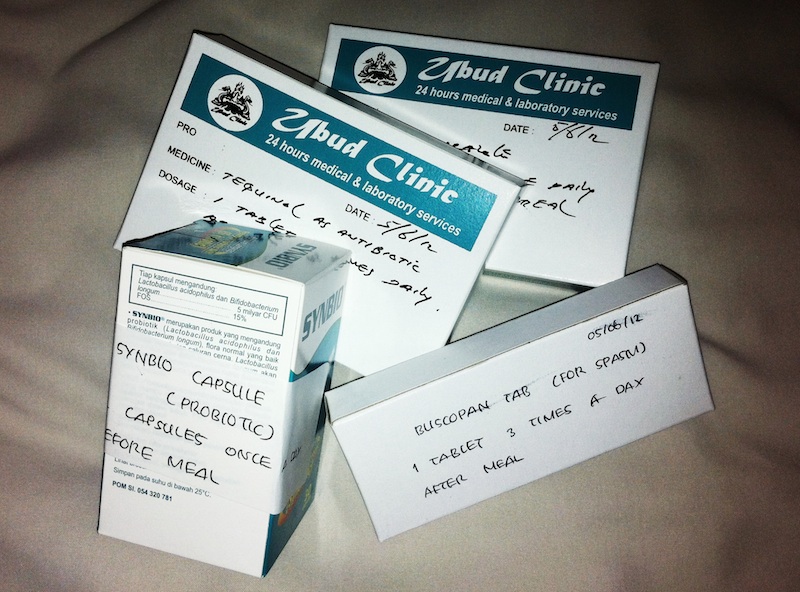
When you look at your travel photos you want to be transported back to the hustle and bustle of the souq in Dubai; your friends and family who weren't there need to sense the crush, the smell, the heat. My photos from Bali include stone lions guarding temples, the bottles of petrol you see for sale by the side of the road, and the pile of medicine I was prescribed when I fell ill. My time there is charted in pictures, big to small.

Sick. Very sick, in Bali

3. Get off the beaten track

I'm a huge advocate of eating in local restaurants and taking the bus to the isolated villages half way up the mountain. It all adds to the experience. But I mean something more when it comes to photos. When you're looking to photograph famous monuments and well-known vistas, look for a fresh approach, an unusual angle, a different feel.

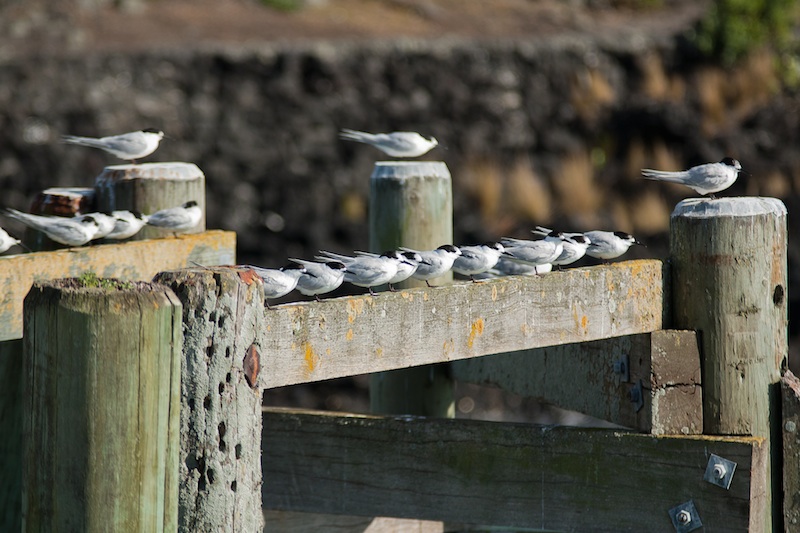
Birds in a row, Rangitoto harbour

4. Take good care

When I first used a mandolin (one to prep vegetables, not the musical instrument) I was advised that carrots are cheaper than fingers. I've a similar approach to taking photos. I'm worth more than my kit; and my safety is worth more than a photo. This means that I don't wander blithely into insalubrious parts of town flashing my camera and I don't ignore the signs telling me that landslips are likely owing to recent heavy rain.

There was a certain element of risk in getting this photo, but it wasn't off-limits

I also make a point of regularly rotating my memory cards, so that if my kit does succumb to theft or failure, I won't have lost all my photos. And if I travel with my laptop, I backup my photos to a hard drive, and if possible a cloud drive, at the end of every day.

The key thing is, your photos are worth more than your kit and you're worth more than both of those.

5. Know 'the rules'

Yes, we would like you to know the rules of photography and we would like you to know when to break them. But that's not quite the point here. We mean the local rules, customs, and mores. Can you take photos of people? Are camera allowed at religious sites? Are certain places out-of-bounds at particular times of the day? Make sure that you know what you can and cannot do; you don't want to offend anyone where you're a guest and you don't want to get into trouble. However far these customs and protocols might seem from your life, they still need to be respected.

A nod to your camera and a smile can establish if photos are permitted

6. Set your alarm

Sunrise and sunset might present you with the best lighting opportunities for your photos, with sizzling stone, luscious landscapes, and perfect portraits, but early in the morning will show you a different side to where you're staying. And you'll escape the tourist crowds, too.

Sun coming up, Bay of Islands

7. Remember to put down your camera

Travel is about a whole lot more than your photos. It's a wealth of experiences and encounters. When you're constantly holding a camera to your face, it means that you can miss out on people, whether your family or anyone new. Remember to put down your camera from time to time, and just enjoy.

Of course, this is just the beginning, the basic principles. Haje covers travel photography in far more depth and detail in his gorgeous Focus on the Fundamentals: Travel book!

Giving your pictures a toy camera makeover

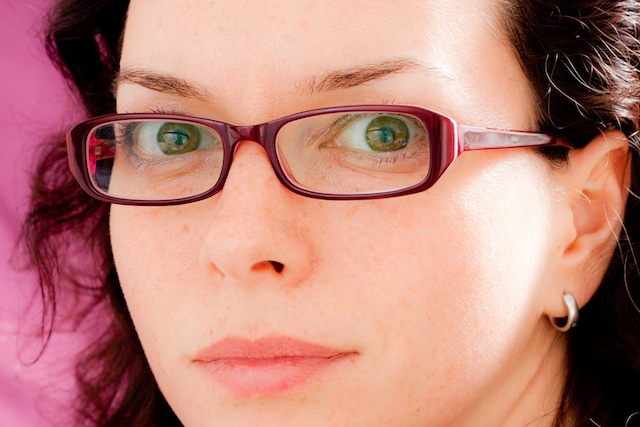
In the interests of knowing how it was done and not wishing to rely on filters or presets (or on dodgy film development practices) I had a go at converting one of my self-portraits into a toy-camera looky-likey. I doubt that it's a process I'll do too often, but for the record and because I'm sure other people might be intrigued, here's how I went about it. Before you start playing with the tonal curves and adding vignettes to your photos to make them look as if they stepped out of 1976 and were bathed in the wrong chemicals, it’s useful to know what to look for in a toy camera-esque image.

  1. Exposure: the light meters in toy cameras tend to be on the inaccurate side of calibrated, leading to badly exposed images
  2. Light leaks: sealing on toy cameras is virtually non-existent, presenting you with huge streaks of light smeared across your photos
  3. Aberrations: Cheap plastic-y lenses mean distortions and vignetting
  4. Cross-processed look: processing film in the wrong chemicals will give images odd colour casts

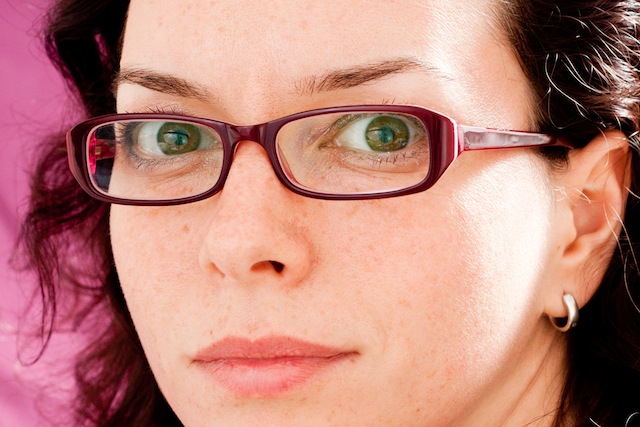
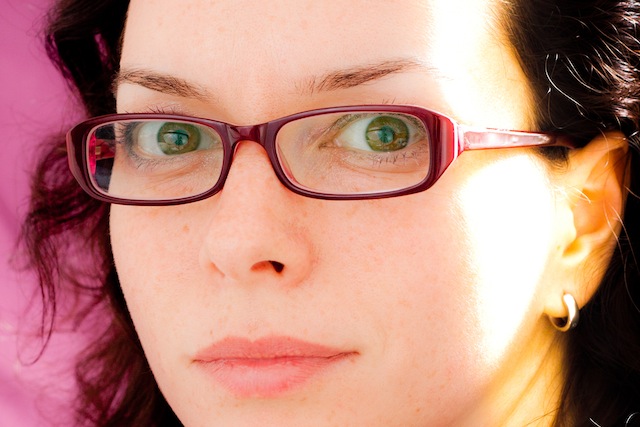
This is my recipe for a toy-camera flavoured photo. It's fairly subtle because I'd rather not feel as if my eyes are being assaulted by a sweet shop, but you can of course ramp up the numbers to get the effect that you want. We'll start with a studio shot of me. It was part of a series I took when I was getting accustomed to wearing glasses.

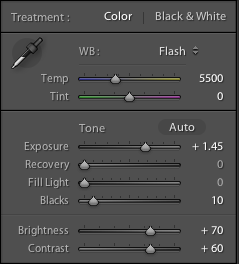
1. Exposure

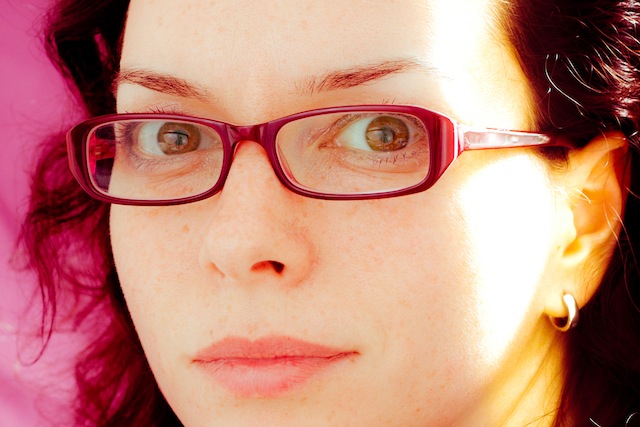
Go over the top with the exposure My first move is to increase the exposure, add some depth to the blacks, and then go overboard with the brightness and contrast. It'll look like a cartoon at this stage, but it's a base on which to build. My exact settings, for the record
2. Clarity

I pushed the clarity slider to -45 By nudging the clarity slider to the left it helps to recreate the soft mushiness of a cheap plastic lens.
3. Light leak

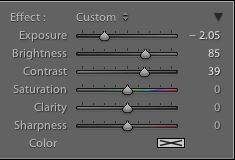
One light leak. Feel free to choose your own position. Use a pair of graduated filters to add a light leak. I placed one to the left of my ear and another right with roughly opposite settings. This produced a yellow-y smear. Settings for one graduated filter
4. Split toning

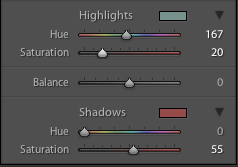
If you want, you can spend hours messing with the split toning sliders to achieve wildly varying looks that could all pass for cross-processing. It'll be a case of finding what you prefer, and placing more emphasis on the reds and purples or the greens and yellows.

My chosen split tone look

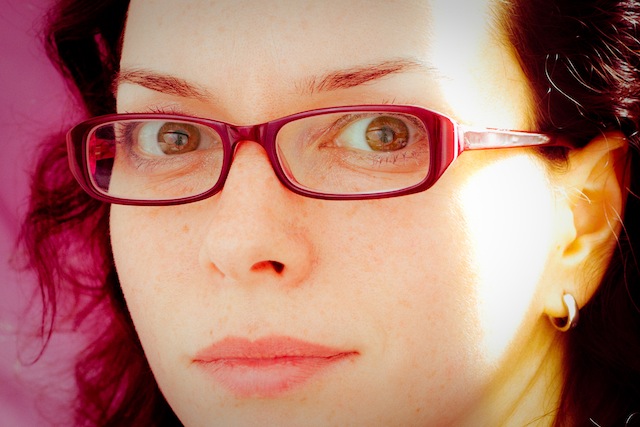
I tried this image with a yellow-y green look initially, but swapped it for a more pinky-red version. You can play around a great deal with split toning

5. Vignette

Without knocking myself over the head with a plastic picture-taking-device, I add a touch of vignette, too.

6. Grain

Finally, add a hint of grain to help recreate the film feel of a toy camera. Tah-dah!

Et voila – from studious studio self-portrait to tricksy toy camera creation.

Quick and dirty infrared photography

We're accustomed to taking photos with what is somewhat uninspiringly referred to as 'visible light', or the part of the spectrum whose wavelengths measure roughly 400 nanometres (violet) to 750 nanometres (deep red). However, there's an awful lot more to light than just the wavelengths we're able to discern with the naked eye, and it's possible to take photos using that 'invisible light'. In particular we can make use of infrared light (IR), which picks up at 750 nanometres, where visible light drops off, and stretching to approximately 20,0000 nanometres. Lots of people think that IR photography is the preserve of specialist infrared adapted cameras, with 'normal' cameras being insensitive to IR light owing to the 'hot mirror' that sits just before the sensor. However, these hot mirrors aren't 100% effective, and with the help of an IR pass filter, you can capture images made with infrared light.

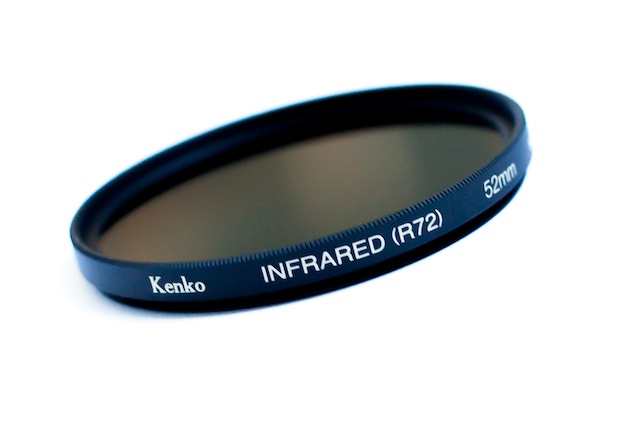
The most common filter is probably the Hoya R72, which is easy to pick up in a camera shop or over the Intergoogles. It won't allow you to capture IR waves at more than 1,300 nanometres, but that should be enough to start. You can always invest in an IR-adapted camera if you find that it really floats your boat.

R72 filter

Got your IR pass filter? Want to give it a shot? Off we go!

IR photography will present you with several hurdles: focusing, exposure, and post-processing. Overcoming all of them is more a case of trial-and-error than hard-and-fast rules and to be fair, that's half of the fun!

1. Choosing a scene

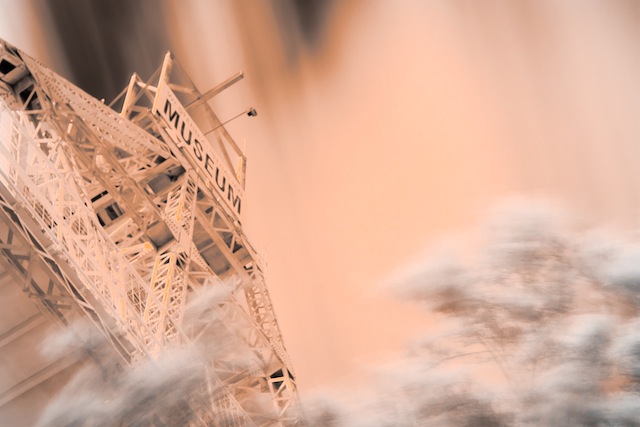
Okay, so you can pretty much photograph anything in IR, provided that there's some light around. However, the most stunning IR images tend to involve foliage, which comes out as bright white, and blue skies or water, which look deeply intense. But that's all after a bit of fiddling. More on that in a moment.

Achieved by adjusting the red hue and orange luminance sliders

Whatever you choose to photograph, it's not going to be a quick process, so you need to be somewhere that won't put you in people's way or get you into mischief. And it needs to be suitable for a tripod, too.

2. Focusing

The difficulty that you’ll encounter with focusing comes as a result of the IR filter; it blocks out the majority of visible light passing through the lens, leaving you with a dark viewfinder. You don’t have anything to work with when you’re focusing your lens. This means that you have to put your camera into manual focus and set up your shot before placing the IR filter over your lens.

Setting up your shot and then placing the filter over your lens is a bit of a faff, but seeing as you’ll be using a tripod anyway (more on that in a moment), it shouldn’t be too infuriating.

3. Exposure

As for exposure, you’re going to need to use a slow shutter speed, probably between ten and 30 seconds, to allow enough IR light to reach the sensor to expose it sufficiently. This is where your tripod comes in, obviously, as you’ll never manage to hold your camera steady for that length of time. Long exposures also have a tendency to noisiness, so use as low an ISO as you can manage, too.

4. False colour

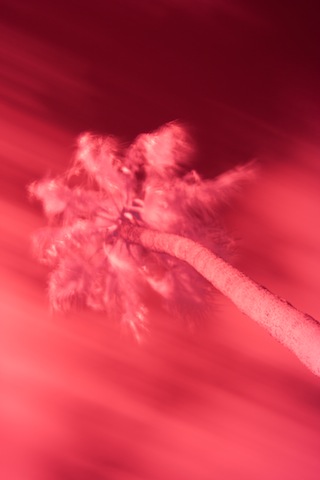
Don’t be surprised if your infrared photos emerge from your camera with strong red or magenta casts; this is known as false colour. It’s normal and it’s a simple fix in Photoshop to produce a 'traditional' looking infrared photo. If there is such a thing. It involves shifting the white balance to 2000 Kelvin and then flipping the levels in the blue and red channels. In short: open the blue channel and slide 'Red' to 100% and 'Blue' to 0%; in the red channel, 'Blue' needs to be at 100% and 'Red' at 0%. You might want to adjust the contrast and brightness, but that's the basics.

IR images come out with strong 'false colour' casts

5. You don't have to use Photoshop

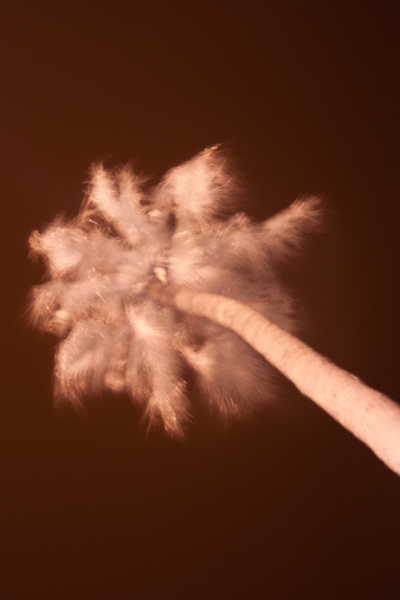
After playing with the white balance However, there's a lot of fun to be had by simply playing around with other editing packages to produce ethereal-looking images. With something like Lightroom you might want to try:
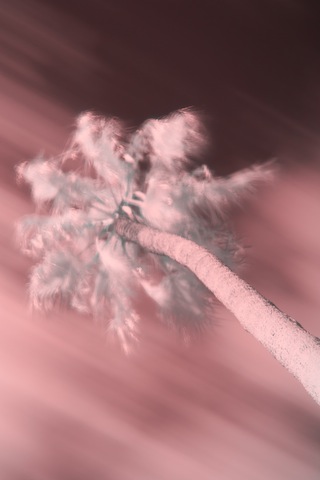
  • Fiddling with the white balance and tint sliders to produce subtle pink or flaming orange images, and everything in between
  • Playing with the hue and luminance sliders to alter the colour mix of the photo
  • Converting to black and white and using the black and white mix sliders to adjust the look of the image

Really, there's no right or wrong and the range of impact that you can have with an infrared image is enormous. It's a lot of fun.

6. Hotspots

Some lenses are prone to producing ‘hot spots’, or patches of much brighter exposure that are usually, and most inconveniently, in the centre of the image. There’s very little that you can do about this in camera except to try a different lens. Prime lenses seem to be less prone to hot spots, but there are no guarantees, and using a smaller aperture will reduce its size. It's possible to try to correct it in post-processing, too.

What are you waiting for?

Orange and red saturation adjustments

Emergency smartphone support: a piece of string!

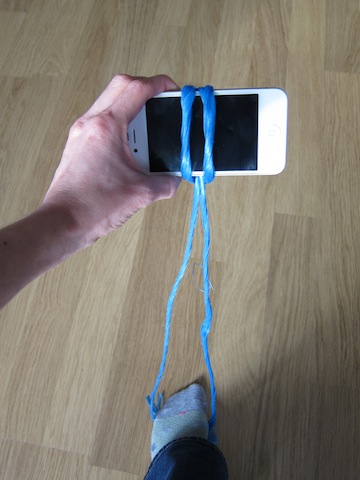
It's a truth universally acknowledged that the steadier you can keep your camera, the better your photos will be. Keeping your smartphone steady can be a bit tricky because it's small and light. Sure there are smartphone specialist supports, but there has to be a cheaper, lighter way that's in-keeping with the pocket-sized nature of smartphone photography, no? I'm not entirely sure why I decided that I needed to modify an emergency string tripod for use with a smartphone, but obviously I was channeling MacGyver somewhere, so I gave it a go. If you've never used an emergency string tripod, it's a loop of string secured to your camera to help keep it steady. You might've heard of it as a chainpod.

For my proof-of-concept smartphone stringpod, I used baling twine. It's not the ideal material because it's too coarse and too slippery against the phone's casing; however, we have an abundance of it and I just needed to prove my idea. A thinner string with a less shiny finish, like kitchen string, would be better.

Take a length of string that's at least double your height and tie together the ends to form a loop.

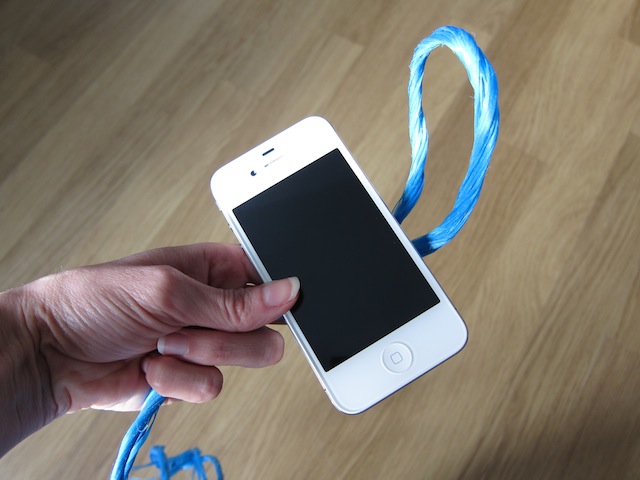
Take a loop of string and secure it around your smartphone in girth hitch

Use the loop to secure a girth hitch around your smartphone. Girth hitch: the technical name for a simple knot made with a loop. You can see better distructions here.

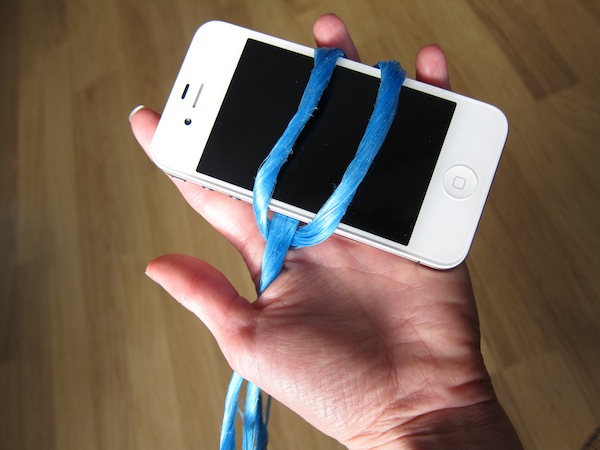
You should now have your string looped around your smartphone, and the rest of the loop hanging down from it.

Smartphone held in a loop

Place your foot (or feet) through the loop and pull your smartphone to taughten the string.

Stabilise your smartphone using your feet to taughten the string

That should stabilise your smartphone on the vertical axis, meaning that you can concentrate on horizontal stability. You should have a better chance of taking wobble-less landscapes and shake-free selfies now.

If you need to shorten the loop, just put a twist in it and secure it with your feet on the twist. Also: don't forget to keep your elbows in when you're taking a photo, no flapping around like chicken, thank you!

How's that for a camera stabilisation device that costs pennies and fits in your pocket?

Christmas is coming: zoom bursting!

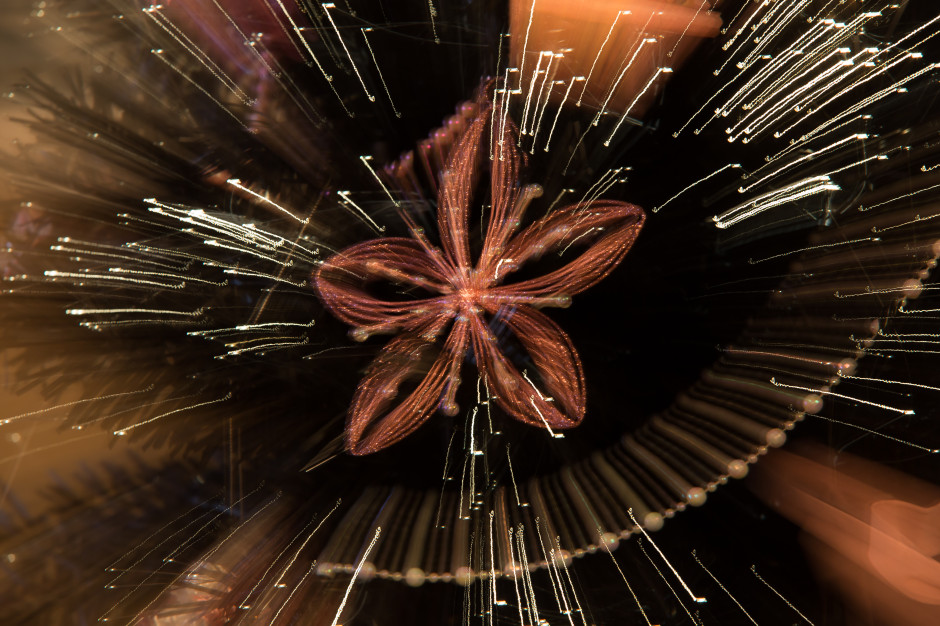
The twinkling lights and glittering decorations of our Christmas tree are always far too good a photographic opportunity to pass up. Last year they were my testing ground for a Pentax X-5 that I had to review. This year, I decided to play around with zoom bursting, to make it appear as if the lights are bursting out of the image. While the abstract motion effect of a zoom burst might look as if it's a pain to achieve, it actually isn't that hard. You definitely need a zoom lens on your camera and preferably a tripod; then you just need a bit of patience to get it right.

Compose your frame and focus on your subject. It's actually one occasion when centre-focusing really does work and doesn't leave your composition feeling flat and dull. But of course, it's whatever works for your photo. You'll probably find it easiest to zoom in as close as you can and then lock your focus or set it manually.

In order to achieve the motion effect you'll need a slow shutter speed, so that you have sufficient time to turn the zoom ring on your lens. If you're not confident using full manual control, do flick your camera into Shutter Priority (S or Tv) mode. For this series of photos I experimented with exposure times ranging from one-and-half seconds to ten seconds. The optimal speed seemed to be five seconds, but of course it is going to to vary depending on your subject.

Christmas is coming

I kept the aperture fairly small and the ISO relatively low. Being a long exposure shot, there was a strong possibility that it would come out over-exposed if I adhered precisely to the camera's meter, so I under-exposed by a stop-and-half. If I'd been shooting in Shutter Priority mode, I would have achieved the same effect by applying exposure compensation.

When you're ready, depress your shutter button, or use a remote release to help avoid camera shake, and then steadily zoom out throughout the course of the exposure. If you'd like to ensure a little more definition for your subject, don't begin to move the zoom ring immediately, but let it rest for about a quarter of the exposure time and then start to move it.

In most cases, you will probably want to zoom out to give the impression of the subject bursting forth from the image. I also played around with zooming in and rather liked the effect. It's all going to depend on what works for your photo.

Once you have the basics down, it'll be a case of playing around to see what looks best. Have fun!

How to clean your dSLR sensor

One of the students in the Photocritic Photography School asked us how to deal with a dirty sensor not long ago. Many cameras clean their sensors with a bit of vibration each time that you switch them on or off. That's fine for dust, but it isn't so effective if for dirty splotches. Thankfully, there are ways of dealing with those, too! sensorcleaning-2

So you have spent thousands on your camera and you’re wondering how to clean it? Well it’s a good question to ask; a dirty sensor will impact every single one of your images, as it is – quite literally – the focal point of all the camera’s technology. That’s right, your hard earned dollars reduced to the mercy of the elements. Scary thought eh? Despair thee not, young padawan, help is at hand…

Your goal is to remove dust (and possibly moisture) off the sensor. You want to do this as carefully and easily as you can. There are myriad people who are delighted to take your money off you to help you do this, so let’s start by picking some of the best:

Sensor Swab

Sensor Swab‘ is the preferred method and for a very good reason; it’s a mighty fine product which is recommended by quite a few of the camera manufacturers to boot. Sensor Swab is a wet solution which is applied to the sensor by a, well, swab.

For around $45 you can get yourself a kit and that will remove both wet and dry dust. It is 99.9% effective when done properly and even offers a guarantee in case of damage to the sensor – which is handy, because replacing a damaged sensor is filthy expensive. The downside is that it can’t be shipped by air and is illegal in some countries (due to containing methanol). If you’ve got a decent camera shop nearby, however, they probably stock some – go talk to your friendly neighbourhood lenspeddler to find out.

Brush

Here is the old fashion method. Offering multiple uses and a straight forward method the brush definitely has some advantages. Brushes generally use a method that utilizes static allowing the brush fibers to remove stubborn dust. A brush is also very transportable.

Down sides include the fact that the brush cannot be cleaned and can’t remove wet dust or moisture. A standard brush will cost about $25 while the ‘Brush Off‘ brand (which is more effective) will set you back about $50.

Blower

Using an air blower – like the Giottos Air Rocket – is what your manual will recommend, the reason for this is there is no contact required with the sensor, which reduces the risk of anything going wrong. Unfortunately the downside is that the blower is not that effective, and doesn’t actually remove the dust from the inside of your camera; it merely shuffles it about a bit. In addition, it will struggle to remove dust with a static charge and anything with moisture.

Despite its downsides, using an air blower is often the easiest thing to do when you’re in the field – it’s easy to transport, relatively cheap, and gets rid of the worst dust in a quick and capable way.

Time for a spring clean!

sensor-1 Every once and again, you need to clean your sensor properly; depends on how much you use your camera, but for me, it’s approximately every 2-3 months or so, a process which involves several of the products above. Here’s how to do it:
Charge the Battery – If your battery dies at any point this can be very bad news and step 2 explains why.

Open Shutter – This is different for all cameras but most have a ‘sensor cleaning mode’ which will open the shutter and move the mirror aside so you can access the sensor for cleaning. If the battery dies during this phase will close and possible take the swab with it which will probably cause damage to the inside of your camera.

Blow out excess dust – Look for a dust free environment and begin blowing, this removes the big particles of dust. Never use compressed air in a ‘spray can’ for this (it leaves a residue) – get one of the bellow-style blowers like the Giottos Air Rocket described earlier in this article. This is extremely important because if this isn’t done at a later stage you can be dragging particles around with the swab, causing scratches and more problems than you had before. (NOTE: Some people will suggest using a foot pump because your hands are free, DO NOT DO THIS. Reason being a foot pump has too much power and sits on the floor drawing in dust and dirt)

Take a look – Use a small torch/flashlight (the little single-LED torches are great for this) to spot exactly where there are dust particles on your sensor

Swab – Use as little swabbing liquid as you can while swabbing and apply with the pressure of the pen. Use one side of the swab for the liquid solution, and the other to wipe when complete – whatever you do, don’t touch the swab itself.

Do some test shots – the easiest way to do this is to take a photo of a blue sky or similar even, bright surface, and look at your image at 100% magnification on your computer. If you still see problems, it’s back to point 1 for a second try.

Now comes the trickiest bit; going back out there and taking shots so awesome that they’re worthy of your freshly cleaned imaging sensor. Good luck and have fun!

Ten top tips for fantastic food photography

Today, 14 November 2013, is International Food Photography Day. I'm not sure that I really need any type of excuse to take photos of many things at all, especially food, but it's definitely a good excuse to brush up on the necessary skills.

Photographing food so that it looks good enough to eat isn't necessarily as intuitive as you think it might be. But, it also isn't that hard, either. Ten simple tips later, and you should have some fabulous food photos.

1. Choose your food carefully

It doesn't matter how tasty your lentil soup actually is, because it is a muddy yellow-brown colour and has a bog-like consistency, it is never going to look as appealing as a strawberry-topped, floaty-light sponge cake.

Stick to foods that are visually appealing - bright, glossy, and with interesting textures - unless you really have to photograph the aubergine paté. If that's the case, try to introduce some contrasting colours, say a garnish, and use an interesting setting, like unusually shaped crockery, to help you out.

2. Use natural lighting

Flashes do horrible things to food, like give them ugly shiny patches. Where you can, photograph food close to a window with plenty of sunlight. Of course, that's not always going to be practical - midnight sun is a bit hard to come by unless you happen to be around either of the poles in high summer - so if you do have to resort to a flash, try to bounce it off a wall or use a diffuser to soften the effect.

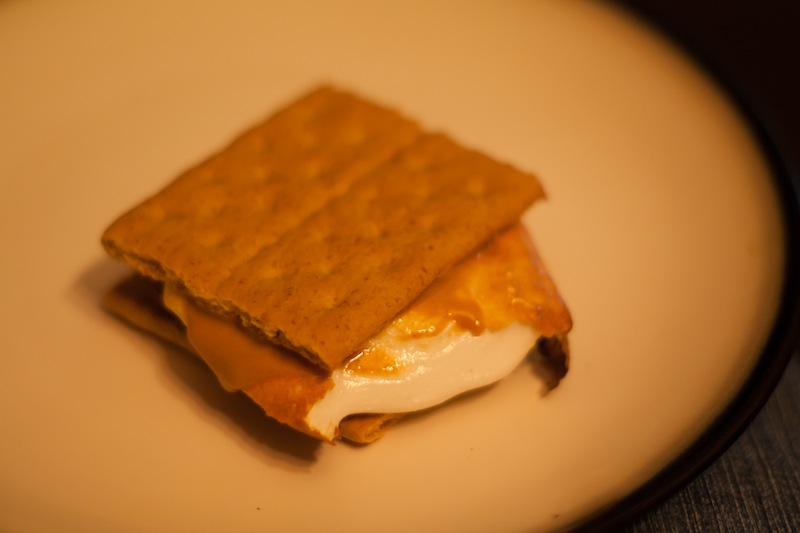
The ISO was through the roof, but it meant that I didn't need to use flash for this fire-lit smore

3. It's all about the angles

Experiment with as many different angles as you can manage: from below, from above, from the side and slightly down, side-ways on. Snap, snap, snap!

4. Consider your depth-of-field

If you're shooting from a lower angle, looking over or across your food, you'll probably find that a shallower depth-of-field is preferable. You'll want a ratio of food-in-focus to background blur that lets the subject stand out.

Think about your angles and your depth of field

On the other hand, if you're taking overhead shots, a smaller aperture will be your friend so that everything looks crisp.

5. Get your white balance right

Blue-tinged cream or a green cast on meat is going to look just grim, so get your white balance right for your lighting conditions. (Unless of course the photos are for an article on food poisoning, then maybe you do want everything to look off.)

6. Get close. No, that's not close enough. Closer still.

Food photography is about making things lush and tempting. Get in as close as you can so that when you look at the photograph, you feel as if you can practically reach through it and sneak a cherry from the top of the trifle, and smell the zest from the lemons.

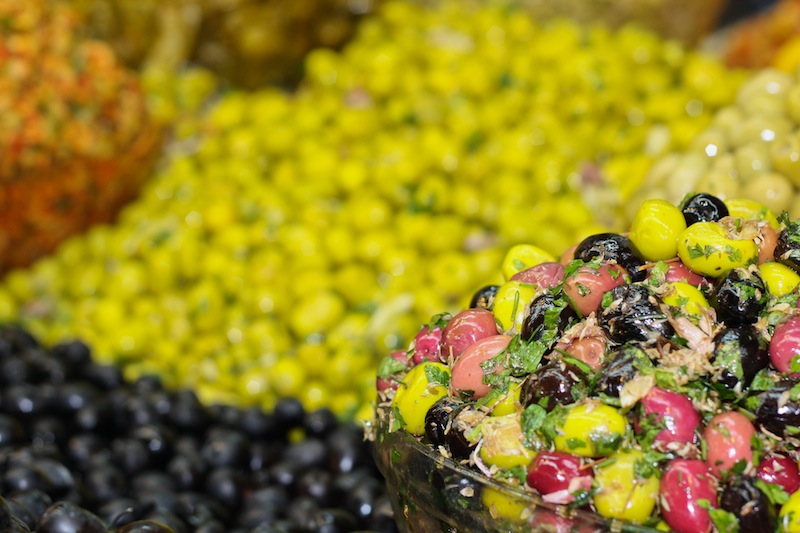
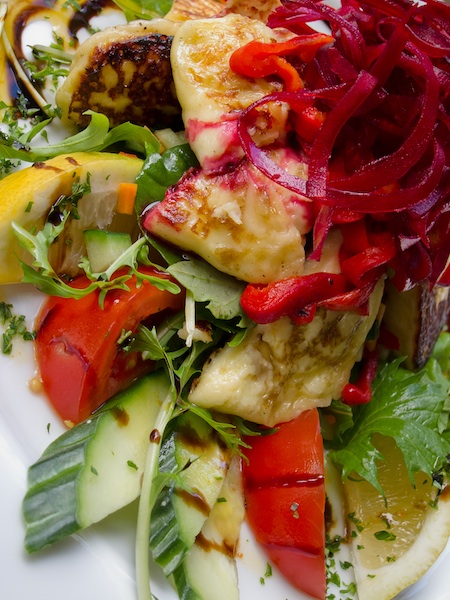
Nothing but olives

7. De-clutter

You don't want anything ugly or distracting in the photo; you want the food to shine. Okay, so this is a given for just about any type of photography, but it's easy for salt and pepper cruets to sneak into a shot when they shouldn't be there, or for a puddle of spilled orange juice to seep across the background. A quick bit of repositioning can do wonders.

8. Make sure the crockery and cutlery is clean

No, you don't want smears of sauce smattering the brim of the plate or thumbprints on the knife.

9. Do you want to style it?

If you're photographing your meal in a restaurant, then it is already going to have been styled. The presentation will be perfect and the crockery will work with the table setting. But if you're doing it at home, then it's worth thinking about the crockery you use, whether or not you need or want a table cloth, and just where you shoot.

Crown Derby china is not going to do very much to show off your seared scallops and for heaven's sake, a boudoir with red velvet curtains is not the ideal setting for a Toy Story birthday cake. But wouldn't that work a treat for red velvet cupcakes?

10. It's not just about the finished product

There's a whole heap of work that goes into preparing something as beautiful as a wedding cake and a whole heap of enjoyment that goes into eating it, so documenting that is just as rewarding as photographing the finished product.

It's not just about the finished product

When I - for my sins - baked my cousin's wedding cake, I photographed the entire process, starting with the ingredients assembled on the kitchen counter and ending with the last crumbs left on the cake stand. It made a great photobook gift for the happy couple, too.

What are you waiting for? Muster your baking pans and set up your tripod!

What do beards, witches, and fathers have in common?

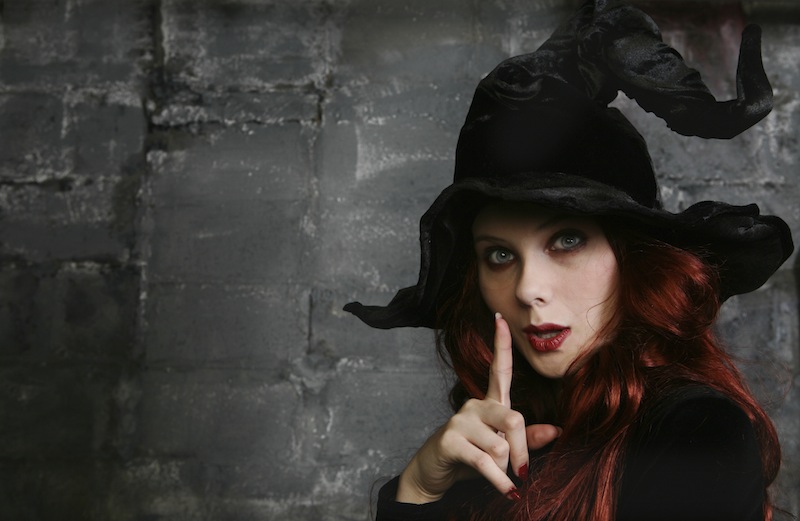
What do beards, witches, and fathers have in common? Witches often come with beards in folklore? Some dads have beards? Ehm... According to stock house iStock, we can expect to see all three of them at the vanguard of visual trends in the coming months. Move over vampires, the covern is on the rise. It doesn't have to be all eye of toad and wing of bat, either. Think swishing black taffeta and piercing eyes for our 21st century witches.

Witch hat - bobbieo #9722956, via iStock by Getty

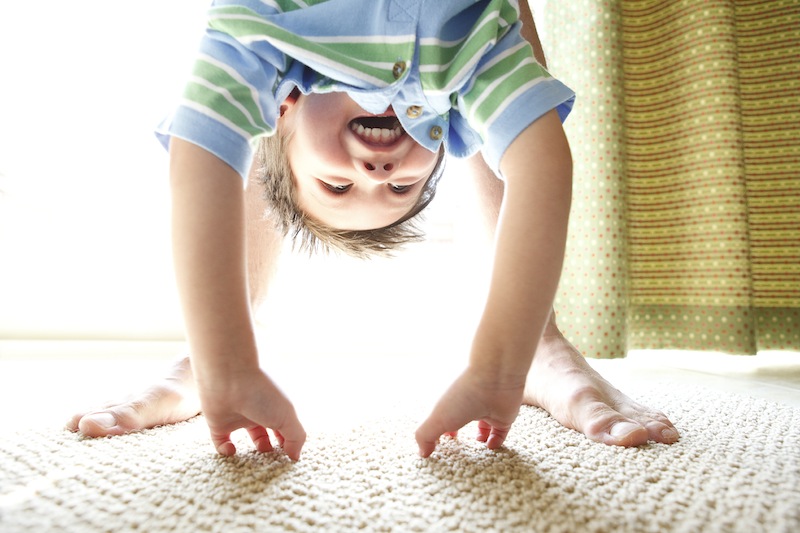
Do you remember 'that' poster of the topless man cradling a baby? Just a vague recollection of it hanging in the window of Athena or plastered to the wall of teenaged girl's bedroom? It was taken by Spencer Rowell in 1986 for the poster shop Athena and it's supposedly the biggest-selling poster in British history. While that might've heraled the 'New Man' aesthetic, this season you'll be looking at dads having all the fun with their children.

Little boy - LifeSizeImages #20428785, via iStock by Getty

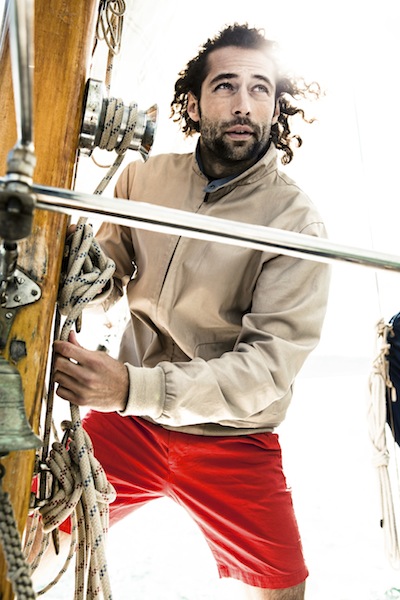
Beards. We're going to be seeing a lot more beards. They were all the rage on the Paris, London, and New York catwalks, I'm told. Something to do with 'geek chic'. I bet that the male half of team Photocritic never thought of himself as a fashion icon!

Beared sailor - Alija #24912776, via iStock by Getty

Five free and easy ways to back-up your smartphone photos

According to a piece of research conducted by the printing company SnapBox, which I initially read about on the Amateur Photographer website, 36% of the people they questioned had lost 'precious picture memories' from their smartphones; 28% because they'd dropped or damaged their smartphones. That's a lot of pixels that've disappeared into the aether and quite a few slightly downcast individuals. It doesn't have to be this way. Snapbox reckons that you should print out your smartphone photos to keep them safe. It would; it's a printing company. I'm also a fan of printing and I periodically have sets of images printed. But I'm a bigger fan of backing up your data. And the truth of the matter is: it can be both free and easy.

Here are five options to auto-upload images from your smartphone to the Cloud, and until you hit their data limits, none of them will cost a penny.

Amazon app logo

1. Amazon Cloud Drive

Set up an Amazon Cloud Drive account, download the Amazon Cloud Drive Photos app, flick the Auto-Save function to 'On' and you're up-and-running.

5GB for free, more GB with payment. iOS and Android.


Dropbox logo

2. Dropbox

Dropbox gives you 2GB of free cloud storage when you sign-up. There's a free app for iOS and Android devices. When you've downloaded it, head to Settings and the Camera Upload option. Flip the toggle from 'Off' to 'On' and you're done.

2GB for free, more GB with payment. iOS and Android.

Flickr logo

3. Flickr

When Flickr updated its app for iOS 7, it included an auto-upload feature that will back-up your camera roll images to your Flickr account and keep them private until you're ready to share them. If you want to share them at all.

With Flickr offering 1TB of free storage, you have to take a lot of mobile images to come close to exhausting your limit. However, you do need to be running iOS 7 for this feature.

Google+ logo

4. Google+

You might not have any interest in a Google+ account, but it does have a free and rather nifty benefit. It allows you to auto-upload all of your smartphone images to a private album from its app. Provided that you upload them as standard sized images, so 2048 pixels on the longest edge, they won't count towards your Google Drive quota, either. Go to Settings > Camera and Photos > Auto Backup and then switch the toggle from 'Off' to 'On'.

A Google+ account is free, the app is free download, and you get 15GB of free Google Drive storage. Storage of 'standard sized' image is unlimited. iOS and Android compatible.

Loom logo

5. Loom

Loom is designed to collate all of your images from all of your devices in one place, and make them accessible from anywhere. In order to make this easy it has integrated auto-upload functions, including one from your iPhone. When you first establish your account, you can power upload everything on your camera roll to Loom in one sitting. After that, it's a case of opening up the app to let it synch.

5GB for free, more GB with payment. Loom is iOS-only at the moment, but an Android version is planned.

Told you: easy. And don't forget that you can set your iPhone to store your images in the iCloud, too. No more lost photos and videos now, mmkay?

Five ways to liven up your autumn photos

This is a guest post by Danny Groner, who is the manager of blogger partnerships and outreach at Shutterstock. Here in the northern hemisphere, autumn is upon us, which means that we've already started to see some of the red, orange, and yellow colours of the season crop up. Marketers and advertisers know how to appeal to our autumnal eye, sprinkling these bright colours everywhere possible. For photographers looking to cover the autumn season, that poses a challenge: How do you shoot these natural settings in new, innovative, and vibrant ways? Here are five suggestions for how to add some flavour to the autumn season:

Apply traditional colours unconventionally

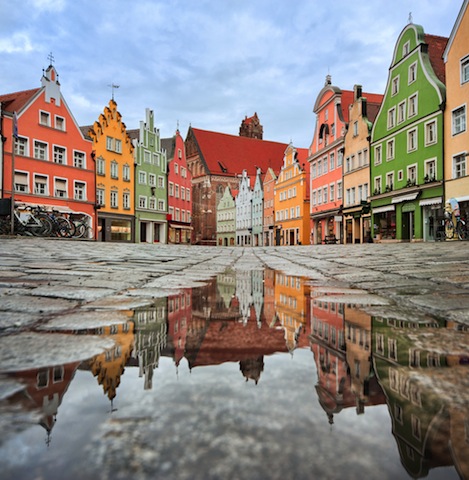
House image via Shutterstock

Keep close to what is proven to work this time of year, but adapt your style to show these colours in another way. For instance, a row of houses, instead of forestry, might offer the same feelings of seasonal foliage without leaves piling up. It's about the season after all. Discover an urban forest beyond the trees.

Bring it indoors

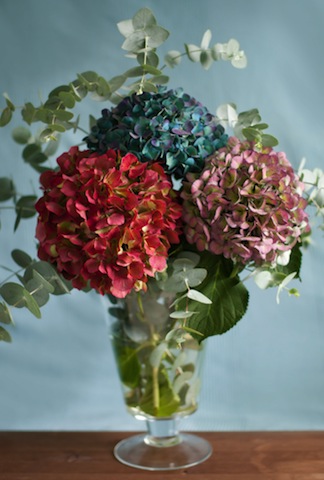
Flowers image via Shutterstock

Flowers and plantlife may grow predominately outdoors, but that doesn't mean that you can't bring their vivacity inside. A well-placed bouquet, taken with the right light and proper angle, can give the same punch as inside its more natural setting. Moreover, solid colored walls can complement the flowers, adding a nice backdrop to your pictures.

Go minimal

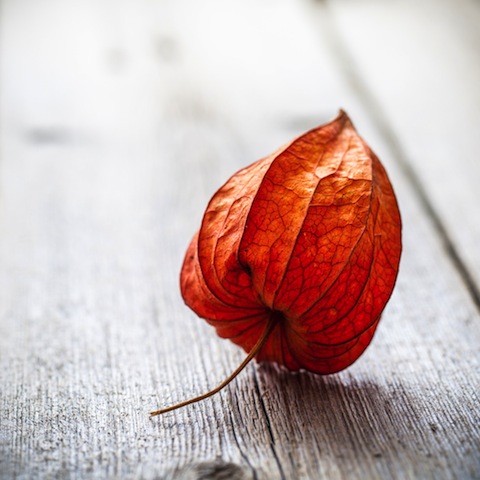
Leaf image via Shutterstock

If you do decide to use leaves to help tell your story, you don't have to do it with so many. Sometimes, less is more. In this case, you can see more expression from a lone leaf than you may find inside of a pile of them. It's a living being, and focusing on one will help convey some emotion that can get lost in transit otherwise.

Be abstract

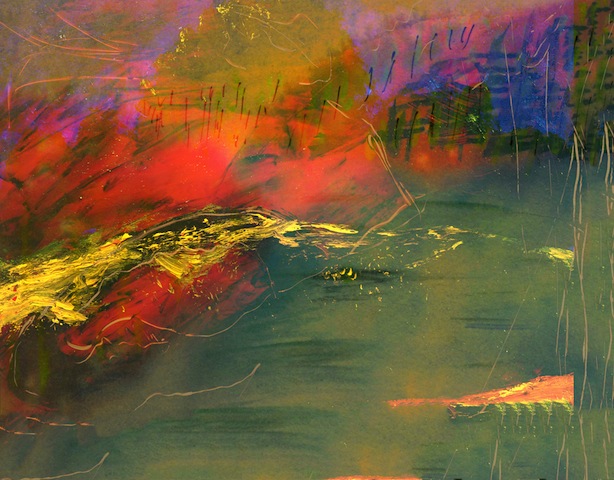
Abstract image via Shutterstock

Your favourite colours can go further if you allow them to blend and dance. Inside pieces of artwork, there's more flexibility and movement than what is naturally created. Reds and oranges can look and feel remarkably louder when paired with some darker colors. Art and photography have a similar relationship worth exploring.

Use non-traditional colours

Snail image via Shutterstock

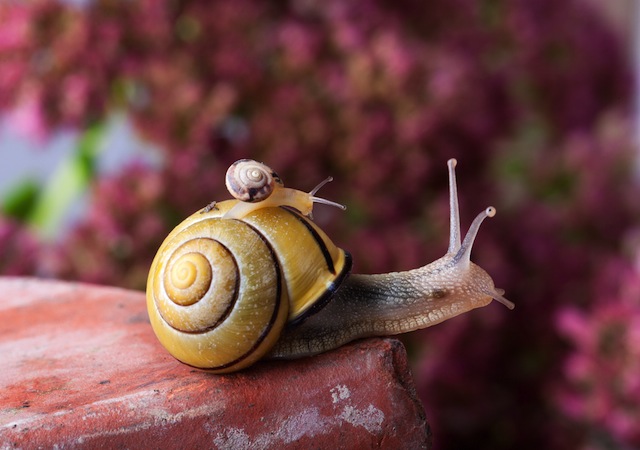
Nature has so much more to offer than the most traditional colours. Surprise your audience with some other colours, like purples, that show up this time of year but may take a little more digging. It's worth pursuing a shot through a slightly different lens. Even if you don't know what you're looking for as you trudge through piles of leaves, you'll recognise it when you see it. It may not look as familiar at first, but it'll surely be at peace with the season at hand.