Feature Articles

Your pictures; your rights, redux

Beads

In the immediate aftermath of the TwitPic photo-selling furore it became clear that there can be a great deal of confusion regarding terms and conditions (T&C), terms of service (ToS), terms of use (ToU), or any other terms that you have to agree to when you sign up to any kind of photo-sharing oojimaflip.

When it comes to ToS, the devil is most definitely in the detail, and at one of our reader’s request, I’ve put together a guide to what to look for. As ever, I have to state that I’m not a lawyer; all I have to go on here is my own experience of using photo-sharing sites and, heaven help me, previous experience of drafting ToS.

Copyright and licensing rights

The first thing to get straight is that there’s a difference between copyright and licensing rights. If you take a photo (or compose a song, or write a story… you get the picture) you own the copyright to it. That means you have the right to have that photo attributed to you and you can say how, where, and when you want it reproduced, if at all.

On very rare occasions, you can sign away your copyright to your creation – and in fact I did this quite recently when the copyright of a project that I wrote was attributed to the company for whom I completed the contract, not to me as an individual – but it’s usually in very specific circumstances.

Licensing rights, on the other hand, are what you, as the copyright holder, use to allow people to use your images (or your words or your music &c). If someone wants to publish your photo, you provide them with a licence to do so. There are a plethora of different types of licence out there, which serve different purposes, allow different things, and have different implications for you as a copyright holder. Hence the confusion.

Why you need a licence, part I

You’ve been away on holiday to Mauritius and you have a selection of the most incredible photos showing the places that you visited, the food that you ate, and the sights that you saw. You want to share them with your family, your friends, and to be honest, anyone who wants to take a look because you’re really proud of a few of them. So you sign up to the photo-sharing website SooperPix that’ll let the world at large marvel at your artistic genius.

You have to sign a licence. You own the copyright to these pictures, which means that you have to grant SooperPix the right to display them on your behalf. If you didn’t, it wouldn’t be able to host them on the website and let the world look on awestruck at your awesomeness.

The issue of course is what type of licence SooperPix asks you to sign.

Licences of Awesome

If SooperPix is actually SooperDooperPix, it’ll use a licence that’s similar to Flickr’s (who recently reconfirmed their users’ rights), or Mobypicture’s, or Focussion’s, or 500px’s, or in fact a lot of other cool photo-sharing places out there. It’ll say that you grant it a licence for the purpose of displaying them on the website. The licence might even specifically state that it won’t sell your images. Here are the examples of the licences from those four websites I mentioned:

Flickr:

With respect to Content you elect to post for inclusion in publicly accessible areas of Yahoo! Groups or that consists of photos or other graphics you elect to post to any other publicly accessible area of the Services, you grant Yahoo! a world-wide, royalty free and non-exclusive licence to reproduce, modify, adapt and publish such Content on the Services solely for the purpose of displaying, distributing and promoting the specific Yahoo! Group to which such Content was submitted, or, in the case of photos or graphics, solely for the purpose for which such photo or graphic was submitted to the Services. This licence exists only for as long as you elect to continue to include such Content on the Services and shall be terminated at the time you delete such Content from the Services.

Amongst all the legalese, the key phrase here is ‘solely for the purpose for which such photo or graphic was submitted to the Services.’ You submitted the photo to share it publicly. That’s all that Flickr will do with it. (When it mentions modifying or adapting, that concerns how the image is encoded, and being able to see it in different sized versions.) It’s not going to sell on your photo.

Mobypicture:

All rights of uploaded content by our users remain the property of our users and those rights can in no means be sold or used in a commercial way by Mobypicture or affiliated third party partners without consent from the user.

Focussion:

Your photographs are (and should be) your own, you keep all your rights on them. By using our site, you give Focussion a license to use your work for the functioning of this site (e.g. to display the pictures to our visitors, and to enable comments on them).

500px:

By submitting photographic or graphic works to 500px at Upload page to your profile you agree that this content fully or partially may be used on 500px web-site for promotional reasons (such as photos at home page). By doing so, 500px will comply with the Canadian Copyright Act, which means your work will be properly attributed or quoted. No photographic content, emails, and other private information will be sold for any reasons by 500px.

Those last three sets of ToS are pretty clear I think.

Licences of Evil

However, if SooperPix is just a masquerade for SooperEvilPix that really wants to be able to sell your images and not let you profit from that sale, the licence will read slightly differently. It’ll probably say that you’ve granted SooperEvilPix, and maybe its devil-spawn affiliates and its unwashed friends as well, a licence to reproduce your images. There won’t be a caveat about ‘for the functioning of the site’, ‘the purposes for which you uploaded them’, or explicitly state that it won’t sell on your pictures. TwitPic’s ToS is a great example of this:

You retain all ownership rights to Content uploaded to Twitpic. However, by submitting Content to Twitpic, you hereby grant Twitpic a worldwide, non-exclusive, royalty-free, sublicenseable and transferable license to use, reproduce, distribute, prepare derivative works of, display, and perform the Content in connection with the Service and Twitpic’s (and its successors’ and affiliates’) business, including without limitation for promoting and redistributing part or all of the Service (and derivative works thereof) in any media formats and through any media channels.

Yes, you keep your copyright, but you’ve lost out on your licensing rights. It, and pretty much anyone else it chooses, can sell your image to anyone it likes and take the proceeds from it. You’ll be acknowledged as the copyright holder, but you won’t see a penny for your creativity. As far as I am concerned, this takes advantage of people and their creative pursuits. It’s most uncool.

An example of a website that we all know, but perhaps don’t all love, which has a ToS that’s open to interpretation is FaceBook:

For content that is covered by intellectual property rights, like photos and videos (“IP content”), you specifically give us the following permission, subject to your privacy and application settings: you grant us a non-exclusive, transferable, sub-licensable, royalty-free, worldwide license to use any IP content that you post on or in connection with Facebook (“IP License”). This IP License ends when you delete your IP content or your account unless your content has been shared with others, and they have not deleted it.

I’m not keen on that statement, which is why I don’t have any images on my practically-never-updated and very-infrequently-visited FaceBook page. The chances of one of my images landing itself on a billboard as part of a nation-wide campaign advertising probiotic yoghurt are virtually nil, but dammit, if it does, I’d quite like to profit from it, thankyouverymuch.

Why you need a licence, part II

After reading the ToS, you signed up to SooperDooperPix and gave them the licence to show off your photos to the world. Life is great: your memories are there to relive and for your loved-ones to enjoy. Things get even better when WorldsAway Luxury Holidays spots one of your idyllic holiday sunset photos, and wants to use it to headline its campaign encouraging everyone to visit Mauritius. (Aren’t you pleased that you went before the ad campaign?) They contact you and ask if they can use the photo.

You agree to terms that lets them use your photo. What you’ve done is grant them a licence. It’s a different licence to the one you granted to SooperDooperPix. This licence can take lots of different forms (how they can use the image, for how long, those sorts of things) – and you might want to get a lawyer to take a look at it – but what you’re doing here is giving WorldsAway Luxury Holidays permission to use the photo in return for payment. If you didn’t grant them a licence they’d have to look elsewhere for a picture.

If you’d actually signed-up to SooperEvilPix, the situation would be a bit different because you’ve given SooperEvilPix a different licence. WorldsAway Luxury Holidays wouldn’t approach you for a licence to use the picture; they’d approach SooperEvilPix. You wouldn’t be involved at all. You wouldn’t agree the terms and you wouldn’t see any money out of it. Yes, you hold the copyright, but in this instance not the licensing rights.

It’s all a bit biblical, because licences beget licences, but hopefully you get the picture. (Ahem.)

Finally

The key thing here is to read ToS carefully and give away as little as possible. You want to hold on to as much authority governing your creations as you can. If you’re not sure of how the terms can be interpreted, don’t sign up to them. There are plenty of good guys out there who do want you to profit from your own creativity, so you’ll find a site that meets your needs.

Please note: all of the information and quotations here were correct when I published this. Things change, just like TwitPic’s ToS did. And I’ve not gone into Creative Commons. That’s a whole other essay and this one is epic enough.

When not to use your flash

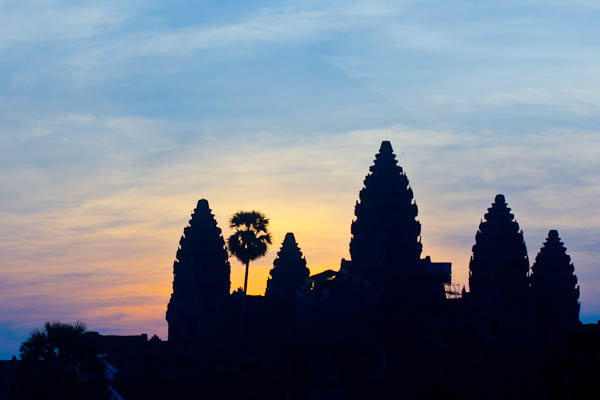
It always amazes me how often people just leave their flashes turned on all the time – or, more accurately, how great people’s faith is in the camera’s ‘automatic’ setting. To wit: I recently had the pleasure of dragging myself out at bed before dawn to photograph the sunrise at the legendary Angkor Wat temple in Cambodia. Now, this temple is famous for being beautiful and facing west, which makes it great for sunrises. Multiply that with the fact that Angkor Wat is a tourist trap of epic proportions at the quietest of days, and you might imagine that the place attracts a fair few people.

20110506_img_5760_5184_x_3456.jpg

I got to the location by the light of my flashlight – and slowly the sky started changing colors, as the sun was climbing its slow ascent past the horizon. Unsurprisingly, lots of my fellow tourists were taking photos of the sunset. Surprisingly, a huge proportion of them were taking photos with a flash.

When is a flash useful?

All flashes have a ‘guide number’. This is a number given in feet and meters, and gives a good indication for how far away you can expect the flash to reach. Typically, for a compact camera, the flash range will be 5-7 meters (16-23 ft). The pop-up flash built into an SLR camera can have a range of 10-15 meters (32-49 ft) at the most, and EVIL cameras tend to fall in between the compact cameras.

20110328_img_1481_3648_x_2736.jpg

A flash having to be fully charged and fired at full power isn’t great for your camera’s battery life, and it takes a relatively long time to cycle the power (i.e. from taking a photo, until your camera is ready to take another shot), which isn’t all that helpful when you’re standing around waiting for your camera so you can take another picture.

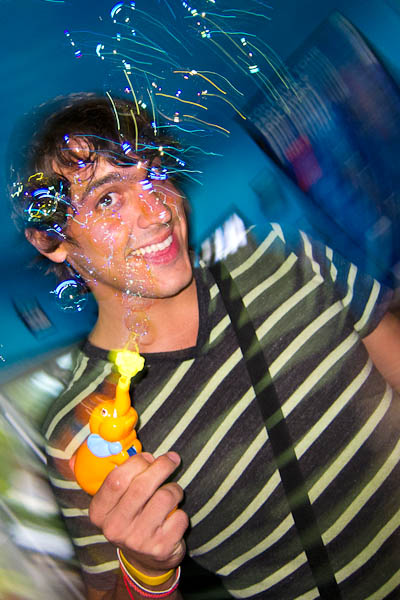
In general, it’s recommended to try to keep your flash at around 50-70% of its output – this tends to be a nice balance between flash charge time, and battery usage. This means that on a compact camera, you should only expect about 3 meters (10 ft) of useable flash range. That’s perfect for indoor snapshot portraits when it’s dark, and not for a lot else.

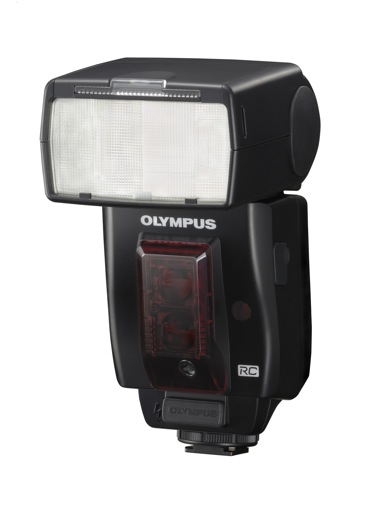
If you want a flash that charges faster and has significantly more power, start looking for an accessory flash.

ch2_fl_50r.jpeg

When’s the flash not useful?

The built-in flash isn’t very powerful – so unless you are taking a photo of someone that’s close enough that you can throw a stuffed animal at them, turn off your flash.

Whatever you do, don’t be one of the hundreds and hundreds people at a famous landmark after sunset, taking photos with your compact camera with the built-in flash turned on: There’s no way your flash is going to reach that building 600 yards away, so you may as well save your battery…


Do you enjoy a smattering of random photography links? Well, squire, I welcome thee to join me on Twitter -

© Kamps Consulting Ltd. This article is licenced for use on Pixiq only. Please do not reproduce wholly or in part without a license. More info.

No TwitPic, licensing grabs are not okay

Screen shot 2011-05-11 at 21.38.06

If I had a TwitPic account, which I don’t, I’d be feeling somewhat on the angry side right about now. Following a sly amendment to its terms of service and a deal it has just done with WENN news agency, if you upload an image to TwitPic, you also grant it a licence to sell your images. Charming. Oh, TwitPic is very keen to point out that you get to keep your copyright, which is all fine and dandy. But selling your work and taking all the proceeds from it is not.

In case you want some clarification on that, here’s the relevant guff from the terms of service:

However, by submitting Content to Twitpic, you hereby grant Twitpic a worldwide, non-exclusive, royalty-free, sublicenseable and transferable license to use, reproduce, distribute, prepare derivative works of, display, and perform the Content in connection with the Service and Twitpic’s (and its successors’ and affiliates’) business, including without limitation for promoting and redistributing part or all of the Service (and derivative works thereof) in any media formats and through any media channels.

No, that’s very, very not good.

There is, however, some hope.

A much more user-friendly Mobypicture

Have you heard of MobyPicture? No? Well you have now. It does pretty much the same thing as TwitPic – in fact it probably does more as it lets you upload pictures to FaceBook, Flickr, and a few more sites besides, in addition to Twitter – but it has a much more user-friendly terms of service:

All rights of uploaded content by our users remain the property of our users and those rights can in no means be sold or used in a commercial way by Mobypicture or affiliated third party partners without consent from the user.

Move over TwitPic, Mobypicture is heading your way.

A zoom lens is never wide or long enough


I was taking photos at Angkor Wat in Cambodia yesterday with my Olympus E-P1, and noticed something about my pattern of taking photos: Most of the time, I'm taking pictures either fully zoomed in, or fully zoomed out. It was annoying me, because I figured that showed a weakness in the lens: Basically, it was never wide - or long - enough for the photos I really wanted to take.

Then I continued thinking, and I was wondering - isn't that true whenever I take photos with a zoom lens? So I thought up a little test - by going through my Lightroom library and doing a spot of statistical analysis.

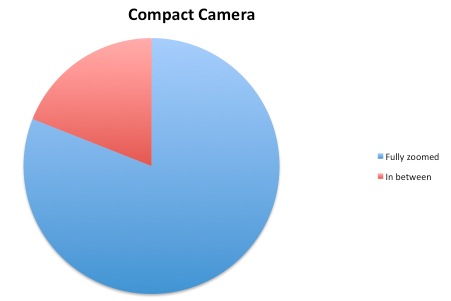
Compact cameras: 81% fully zoomed in or out

screen_shot_2011_05_05_at_130056.jpg

When I analysed my images, I realised that my compact camera images, especially, were prone to shooting at full zoom. 75% of my photos are shot fully zoomed out - which makes sense, and is probably a conscious choice: All my compact cameras have variable aperture lenses, so they are brighter when it's at full wide angle. I didn't realise quite how often I shoot at fully wide, however, and a full three-quarters of my images were a surprise to me.

I guess a corollary of the above explains how only a measly 6% of my compact camera images are taken at full zoom.

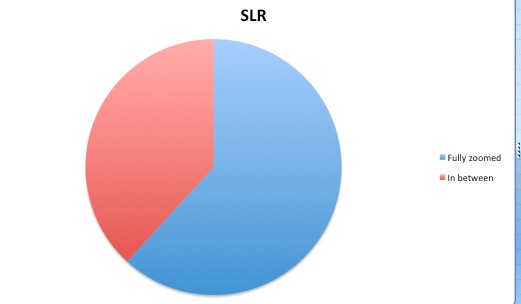
SLR images: 62% fully zoomed in or out

screen_shot_2011_05_05_at_130028.jpg

The difference for SLR images was slightly less than that for my compact images. 44% of the photos are taken fully zoomed out, 18% are shot at full zoom, and a more reasonable 38% are taken somewhere in between.

Of course, I make no secret of my love for prime lenses - and a huge amount of the images in my library are taken with primes. I decided to exclude them from the statistical data, but if they were included, obviously the results would have been skewed significantly towards 'at the end of the zoom range'.

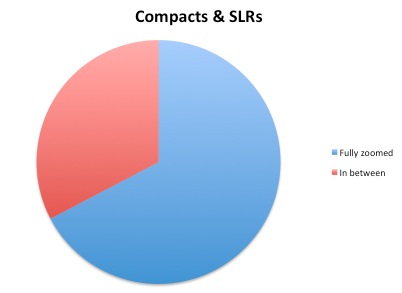
But what does it mean?

screen_shot_2011_05_05_at_125923.jpg

The idea I had is that whenever I shoot at one of the extremes of my zoom lens, it means that I brought the wrong lens. If I was shooting with a 28-135mm lens, and 'perfect' exposure was at 44mm, I would shoot at 44mm, right? Similarly, if I shoot at 30mm or 130mm, I'm still inside the zoom range, so I chose to shoot at that particular focal lengths. When I end up taking pictures at the extremes of the zoom lens, it probably means that I didn't choose the focal length: it was made for me, by the focal length limitations of the lens.

I have no idea if I'm a typical photographer or not, so I don't know if my finding is universally applicable, or if it's just a quirk in my photo style, but none the less...

It dawned on me then, that I'm often more frustrated when I use a zoom lens than when I'm shooting with a prime. Perhaps the main difference is that when I'm taking photos with a prime lens, I've grown used to the limitation - it takes the challenge of zooming out of the equation, and if the 'perfect' focal lengths is outside the very limited 'range' of my prime, I am happy with the fact that I made this choice. Whereas when I'm taking photos with a zoom lens, the limitations are my own dumb fault, for picking the wrong zoom range.

Just goes to show, I suppose, that sometimes you can feel more free with greater limitations than with greater freedom...

Methodology

In my library of more than 15,000 photos, a lot of them were taken with my Canon Powershot S95 in an underwater housing. Because the underwater housing doesn't have any zoom settings, they were per definition taken at fully zoomed out, so that discounted nearly 1,000 photos from this data. In addition, a lot of my photos are taken with prime lenses - 50mm or 100mm primes, mostly - so I took them out as well (although some might argue that a prime lens is per definition 'fully zoomed out', and could be counted). I then wrote a little script that checks whether each photo is taken within 1mm of the extremes of the zoom range of each lens. (so, for a 70-200mm lens, it checked for photos taken at wider than 71mm and narrower than 199mm).

The resulting data, I dumped into a spreadsheet for analysis. The sample size is 4,913 images, taken with 10 different zoom lenses. 71% of the images were taken with SLR cameras, and the remaining images were taken with a series of different compact cameras.


produce wholly or in part without a license. More info.


Do you enjoy a smattering of random photography links? Well, squire, I welcome thee to join me on Twitter -

© Kamps Consulting Ltd. This article is licenced for use on Pixiq only. Please do not reproduce wholly or in part without a license. More info.

The quest for perfect droplets

One of the strengths of photography has always been its ability to freeze time. Before the advent of photography, it was impossible to see how a hummingbird moves its wings, how a tennis ball deforms as it is served, or what it looks like when a bullet hits an apple at the speed of sound.

In the microcosmos explored by macro photographers, there are hundreds of similar quick-moving phenomena that lay unexplored. I have a fascination with falling water and the way matches flare up as you strike them, so I decided to take a closer look.

Falling droplets

Edgerton nearly drove himself to despair trying to capture this one photograph

Edgerton nearly drove himself to despair trying to capture this one photograph

There are photographers out there who have driven themselves to the brink of insanity trying to capture the perfect droplet photo. Harold Edgerton, for example, worked several years of his life in the mid-1950s the hope of one day capturing the perfect corona—the splash impact of a droplet in a layer of liquid transforming into a perfect crown of droplets thrown back from the liquid. Eventually, through years of trial and error, he managed to capture his droplet.

Today, photographers have the advantage of being able to share experience online. Because most photographers work with digital cameras, the experimentation time also decreases drastically. Imagine the poor people who had to wait for an hour for their film to develop properly, just so they could see if they had finally captured the perfect corona!

This photo, by Mattheu Collomp, shows an alternative way of photographing droplets - click the image for a bigger version!

This photo, by Mattheu Collomp, shows an alternative way of photographing droplets - click the image for a bigger version!

Despite the fact that the technical side of capturing droplets is a lot easier, it is still a labor- and time-intensive mission on which to embark. There is something unique about seeing liquids and their motion frozen in time, however, and as a macro photography project, it is excellent.

I have tried capturing droplets on impact on many occasions throughout my photography lifetime, and every time, I did it a little differently. On the first few attempts, I tried it with an old flash unit connected to a Kodak DC4800 with a PC lead (the same type of connection that connects cameras to studio flashes). The results were not terrible, but the limitations of a digital compact camera turned out to be prohibitive of capturing the photos I wanted. The second time I gave it a shot, I had graduated from digital compacts and was using my first dSLR—one of the first Canon EOS D60s, bought on the very day it was released. The result wasn’t too bad — but it wasn’t great either.

My first attempts at photographing droplets weren't, exactly, what you'd call successful (click on image for larger version on Flickr)

My first attempts at photographing droplets weren't, exactly, what you'd call successful (click on image for larger version on Flickr)

With my shiny new dSLR, I was trapped indoors in a typical miserable rainy day. What could I do other than try to capture some more droplets? This time, I decided to give continuous lighting a try, and I lined up a pair of 600w work lights. Although the light was blindingly bright, in retrospect, there still wasn’t enough light: Even the best of my shots that day had a slight tinge of motion blur on them. Although I did get some spectacular photographs, the blur meant that they weren’t as perfect as I would have liked.

Throughout my experimentation, however, I did discover one thing: The translucency of water makes it difficult to capture the true dynamic of the fluid. If only there was a purely coloured, perfectly opaque liquid I could use—and paint would have created such a mess. My esteemed photography assistant Katherine came up with the idea of using milk, which turned out to be a terrible idea. The hot lamps made the milk turn sour within half an hour, and the smell in my make-shift photo studio stayed for weeks. I’ve since discovered the perfect liquid: long-life coffee creamer! This liquid is slightly thicker than water, doesn’t go bad as easily as milk, and makes a wonderful splash, too!

It took hundreds and hundreds of attempts before I started getting images I started to be happy with. This wasnt one of em.

It took hundreds and hundreds of attempts before I started getting images I started to be happy with. This wasn't one of 'em.

When I started writing my macro book (from which this article is a small extract), I decided it was time to revisit the droplet experiment. Armed with a few containers of coffee creamer and using a 28-135mm macro lens with a 25mm extension tube and the Canon Twin Lite macro flash, I started experimenting again.

There are many ways to capture droplets, all depending on your taste. It’s possible to create tranquil photos, like the one Matthieu Collump shot above, but personally, I prefer the drama of liquid hitting liquid.

For my droplet shots, I used a large, flat surface with a very thin layer of coffee creamer in the bottom. I then used an eyedropper to let droplets of creamer fall into the film of creamer. (If you don’t have an eyedropper, you should be able to buy one inexpensively at a photography store or pharmacy.)

After a few photos, I started getting the knack of the timing, so that I took the photo a fraction of a second after the droplet impacted. From then on, it was four hours of patience, changing the batteries in the flash and camera, and refilling the eyedropper.

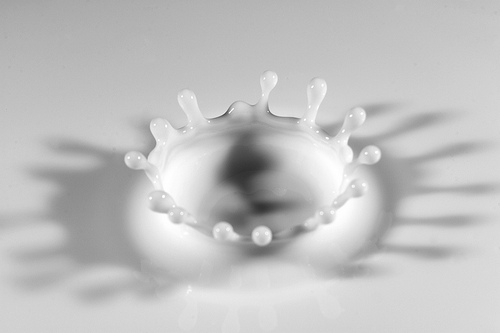
A nearly perfect corona. But only nearly.

A nearly perfect corona. But only nearly.

It is the kind of activity that makes your family and friends question your sanity, no doubt about it, but in the end, I was left with about half a dozen photos I’m very fond of, including the photo above, which is nearly a perfect corona.

But only nearly…

Learn more about macro photography

One of the best books about macro photography ever written. I should know, I wrote it.

My book!

This is an extract from chapter 4: The Macro in Everyday Objects, published by Wiley Publishing, and written by yours truly.

Obviously, I’m biased, but I highly recommend you get hold of a copy of my book, because it’s awesome. You can get it from Amazon in the US and in the UK, and most other good bookstores around the world.

It’s also available in Polish, Czech and Chinese, so if you prefer reading one of those languages, nip along to your local bookstore or book-peddling interwebsiteshop.

Paid-for photo competitions

The blog you’re currently reading is relatively high profile. I have written about photography competitions in the past (including the inspiredly-named ‘How to win photography competitions‘, which, if you haven’t read it, is worth a peek, if I may say so myself, and I may, because, well, this is my website, and I happen to quite like promoting my own articles in ridiculously long run-on sentences in parantheses when I really ought to be writing about completely different things, like the actual topic of this article, and I hope that you might in time forgive me for wasting your time with this aside). Anyway, as a result, I frequently get approached to help people judge their photography competitions.

Recently, however, I’ve received a series of e-mails (about ten in the past few months!) asking if I would pretty please judge their paid-for-contests. The idea is that aspiring photographers pay an entry fee (anything from $10 per photo via a $500 site membership to a $100 per photo fee structure). They then get entered into a photography contest, and the best photo wins.

Personally, I think paid-for photography competitions are absolute shite. Why? Well, for one thing, there are plenty of free photography competitions out there – witness the site ran by my good friend Will (of Earthshots fame), and there’s no way that you should be paying silly money to enter a competition.

Goldmines for the organisers

Okay, so this photo has nothing to do with this article, but how do you illustrate something like this anyway? Click on it for my recent gallery of photos from Vietnam.

Look at the maths – at some of these competitions, they charge $100 per photo entered (!) and offer prize values of about $10,000. I imagine the ‘values’ are retail values, which means that they can pick them up for cheaper, either as gray imports, or via discount retailers, for about $8,000 or so. That means to break even, they have to get only 80 entries into the competition. Of course, to get enough people entering, they need to get a lot of photographers to enter. And how do they do that? By approaching high-profile bloggers to be competition judges, in the hope that the judges will blog, tweet, and promote their competitions for free.

Where it gets really sinister, however, is that several of the people who have contacted me recently, have also offered me a commission for each person entering the competition – so in effect, they’re not even trying to be sneaky about it: They just want to make a crapton of money, and are willing to give the judges money (!) based on how many people they manage to get involved in the competitions. Most recently, they said they would “like to offer you $10-$20 per every person signing up through your link. $10 for the first 5 participants, and if you bring more than 5, we will pay you $20 per each participant including the first 5″

Only 50% spent on prizes

Next, they made the mistake of apologising for the low kick-back – and revealing how much money they are making off these competitions: “I know [$10-20] doesn’t sound much with the entry fee being a $100, though please bare [sic] in mind that 50% out of it will go to prizes.”.

So the business model is like this: Profit = Entrants * $100 * 40%. So 100 entries into the competition is a $4000 clean profit, $1000 paid back as commissions, and $5000 spent on prizes. With numbers like these, no wonder these paid-for competition sites are popping up all over the place.

Finally, many of these competitions will make you pay money to enter and try to grab your copyright off you at the same time (more about this in my Be Careful what you Sign article), making it doubly sinister.

So there we have it. The honourable, exciting activity of photography competitions reduced to a simple, affiliate-driven business model. Is it just me, or is that bloody appalling?

Get the eyes in focus.

The very first thing you need to know about getting people to look awesome, is that their eyes have to be in focus. This is absolutely, completely non-negotiable. If they have their eyes open, get them in focus. If they have them closed – get them in focus. Is your model wearing sunglasses? Well, get them in focus. You see where I'm going with this.

The reason for focusing on the eyes is simple: Whatever your photo, this is really where you want your audience to be looking. In a good portrait, the eyes are a window into the soul, and if you want to move people with your shots, it's important to get (make) that 'connection'.

As you are starting out on your journey of improving your portraiture concentrate 100% on getting the eyes right. Trust me: everything else will eventually fall into place.

Focusing and composing your portraits

If the eyes are so incredibly important, how can you ensure that you get them in focus? Taking a photo is a multi-step process. First of all, check your camera settings. Is your camera in the right file format? Are you in the correct auto-focus mode? Is your camera in the camera mode you were planning to use? Is your ISO set correctly?

Next, Check your exposure. If you're shooting in Program, Aperture-priority or shutter-priority mode, you need to ensure that you haven't changed the exposure bias. If you have ventured into manual exposure, you should check whether you've dialed in a useful aperture. And if you are in a fully automatic mode, you should buy my book and turn to chapter 3 - and be deeply ashamed of yourself.

The final steps are to focus and compose your image:

Step 1

04_05_20030625_img_2487_v1.jpg

The first step to get your focus right is to zoom in all the way on the eyes of your subject. This helps the camera's focusing mechanism get the focus right, and it reduces the risk of the camera focusing on the wrong thing. Obviously, if you are shooting with a prime lens (i.e. a non-zoom lens), this step doesn’t apply.

Step 2

04_06_20030625_img_2487_v2.jpg

Now, half-press your shutter button. Your lens will attempt to focus. Since you've zoomed all the way in, it will be very clear when your subject is properly in focus. If your lens gets it wrong somehow, let go of the shutter button and half-press it one more time. Once your subject is in focus, keep the shutter half-pressed.

Step 3

04_07_20030625_img_2487_v3.jpg

Now, whilst keeping the shutter button half-way down, you can zoom back out, and compose your photo. Take your time, there's no rush.

Step 4

04_08_20030625_img_2487_v4.jpg

When you're happy with the way your photo looks through the viewfinder, all you need to do is to press the shutter all the way down, and your camera will take the photo.

Finally, you edit your photo to your liking, and bonza - you're ready to go. How you can edit your portraits for best effect is, of course, also covered in Focus on Photographing People.

Like this quick tip?

If you enjoyed this quick tip, there's loads more where this came from. My newest book, Focus on Photographing People, is chocker-block with hundreds of photos, tons of tips, and fist-fulls of advice: All to help you become a better Photographer of People. Find out more about the book on my website, and then head to your nearest brick-and-mortar or online bookshop to buy yourself a copy!


Do you enjoy a smattering of random photography links? Well, squire, I welcome thee to join me on Twitter -

© Kamps Consulting Ltd. This article is licenced for use on Pixiq only. Please do not reproduce wholly or in part without a license. More info.

Attracting better feedback

As photographers in this Internet age we read about photography, and share our work, in hopes of honing our craft. You could be pursuing a career as a wedding photographer or a sports shooter and either way you’re searching for articles, subscribing to photography blogs, and participating in photo forums in hopes that there are gems of knowledge that will take your photographic prowess to the next level.

What most photographers, especially those that didn’t do any formal art training, are missing from their arsenal of learning tools, is the art of critique.

Defining Art Criticism

Sometimes, it can be fiercely difficult to know what's missing in a photograph. The easiest way to get a bit of help is simply to ask for it - but you've got to do it right.

Simply put: Art criticism is the discussion of the evaluation of art.

And having your peers, especially those whom you respect, evaluate your photography in a constructive manner will make you a better photographer.

And yes… it can seem scary.

We often think of critiques as negative and judgmental. They don’t have to be. And if they are…well, you just shrug it off. Chalk it up to the learning process.

There is an alternative.

You could upload your images to Flickr and join groups where they require comments and post badges and prizes galore! You’ll be inundated with happy unicorns and shiny gold medals. Comments like “Wow!” and “Nice!” will flood your comments sections and you’ll be able to see through rose coloured glasses for days!

While that may be okay for the occasional ego-boost I’d argue that those kind of groups are doing you more harm than good.

I mean, let’s get real for a second…did you actually learn anything from those kinds of comments? Did you become a better photographer because you got a scripted response from someone else looking for tons of comments filled with other scripted responses?

I didn’t think so.

Get Better Photo Critiques

I know from experience that there's nothing more difficult than getting harsh critique or a ton of suggestions for improvement on a photo you're particularly proud of. But stand tall and take it like a (wo)man - it's the fastest way to get better.

Getting better photo critiques starts by going to the right places (hint: you’re already at one of them).

  • You may already know that Photocritic does photo critiques and I highly recommend adding your photos to his queue.
  • Flickr has a rather large assortment of groups that are dedicated to criticism and critique. Simply search Flickr for “critique” and find the one that best suits your tastes and style of photography.
  • DeviantArt also has groups dedicated to criticism. What’s unique about DeviantArt is that you’ll get critiques from artists of varying mediums, not just photographers, which can add a different perspective and unique insights.
  • Photography forums often have sections dedicated to critiques. You’re probably already part of a photography forum, or know of a good one, so search for critique threads.

So you found a place that does critiques. Now what?

  • Upload some of your photographs then submit or post them to the groups or threads in the critiques section.
  • Participate! When you join a new group or forum you’ll likely get ignored for a little while in the beginning. Don’t worry, this is natural in every social setting. You need to be pro-active and start conversations. Critique other photographs. When you start critiquing other people’s photographs you are essentially inviting them to critique your work as well.
  • Keep the conversation going. After someone has left a critique of your work it’s a good idea to thank them for their time and/or insight. This simple act of “conversation” will encourage more participation from others who may be sitting on the sidelines.

Keep it constructive or you won’t really gain much.

The day you think there's nothing left to learn, you may as well eBay all your camera equipment and give up. Trust me; that day will never come. And if you think it has, you're wrong.

  • Feel free to set guidelines on your work. Not everyone will pay attention, but many will. On every image I post on my flickr account I add “While your comments are greatly appreciated, your presence is enough reward. Please do not post awards or banners, leave a comment or a thought instead. I know you can!” in the description box. Think about how you could set guidelines on your work to get the best comments and critiques that you can.
  • Make friends with photographers that you respect. Keep in contact with those that do constructive criticisms and maintain a conversation with them.
  • Give the best critiques you can give by avoiding annoying and overused comments and critiques and other’s will more likely reciprocate.
  • Be as objective as you can. You aren’t going to agree with all of the comments and criticisms you get and they’re not all going to be right. One of my best selling photographs got slaughtered in two separate critiques (one group critique and one published *yikes!* critique).
  • Research. If someone calls your photograph out for not having or overdoing a certain artistic element you need to look it up (especially if you think you know what it means) before you disagree with them in an open platform. Otherwise you alienate anyone else from leaving critiques
  • Be gracious and objective. This can’t be stated enough!

Following these guidelines will help you garner better critiques and comments on your photographs. You’ll learn how others look at your photographs and you’ll learn whether or not you are achieving your goals as a visual story teller. Did I miss anything? Do you actively pursue critiques?

About the Author:

I’m a huge fan of Damien Franco’s work. He’s obviously exploring; finding his feet as a photographer, but more importantly, he’s always ready to share what he knows. He works as a contemporary fine art photographer working in West Texas and writes photography tutorials when he’s not fighting tumble weeds, cactus, and oil tycoons. You could do a lot worse than following him on that there Flickr thing.


Do you enjoy a smattering of random photography links? Well, squire, I welcome thee to join me on Twitter -

© Kamps Consulting Ltd. This article is licenced for use on Pixiq only. Please do not reproduce wholly or in part without a license. More info.

A Closer Look: Rania Matar

RM3

As of late, I’ve become more and more drawn to portraiture which makes extensive use of the surrounding environment to tell us more about the subject themselves, to the extent that it is now creeping into my own work. Although I love the intensity that an intimate close up portrait can bring, the creative freedom that is afforded to you in an environmental portrait allows you to tell a story, to show more of the subject and who they are. This, amongst other reasons I will explore in this Closer Look, is what drew me to Rania Matar’s beautiful portrait series “A Girl and Her Room”.

Last week, I looked at Anastasia Taylor-Lind’s Women of the Cossack Resurgence – a look at a female-dominated society, photographed by a female photographer. I wanted to further explore this area with Rania’s work. Much of Rania’s work is focused on women and women’s issues, “A Girl and Her Room” being one such project. The project examines those difficult teenage years, looking at the strains associated with the transition from childhood into adulthood and the various pressures experienced by girls growing up in today’s society. One the one hand, they are children. On the other, there is pressure from peers, media and popular culture to move into adulthood.

Geneva, 22, Brookline MA, 2010

The series is excellent at exploring that confusing period of your life, where half of you desperately wants to grow up and be taken seriously as an adult and the other half doesn’t want to fully let go of childhood. Rania often portrays this in the series by juxtaposing themes of adulthood with themes of childhood. This is sometimes reflected in the subject’s choice of clothing, which indicate physical and social maturity – “going out” dresses, evening gowns and the like. Sometimes, it is reflected in their surroundings – a shelf full of various make-up, bags, shoes and posters of models and bands. In the same glance across the image, you notice paraphernalia associated with childhood: stuffed toys, bunk beds, colourful drawings and photos of themselves as a younger girl.

The very first image you encounter in the series – “Siena 17, Brookline MA, 2009″ – implements this juxtaposition extremely well. Siena’s wall is plastered with posters of models in bikinis and adverts for fragrance and cars, whereas her bedsheets are patterned with pictures of farmyard animals and a large stuffed teddy rests in front of her.

Siena 17, Brookline MA, 2009

There’s just so much to talk about here, I’m finding it hard to be concise (surprise surprise), but what I find really wonderful about the images is the different degrees of maturity and each girl’s unique response to growing up. Girls the ages of 12 through to 21 and 22 are photographed and it’s fascinating to see what items incrementally change in the room – a sort of battle for room space between objects of the past and objects of the future. It’s also interesting to note that there is no hard and fast rule to what stage of maturity a girl is at relative to her age – everyone goes through that change at their own pace, and this is demonstrated by the incredibly diverse personalities on display.

There are many themes running through the images: the extensive inclusion of the mirror and how it reflects the subject’s preoccupation and concerns with self-image: the inclusion of pregnant girls and the even greater gulf between being forced to grow up and accept responsibility and the desire to remain a child: the subjects who live in other countries whose rooms, although initially seemingly different, follow the same patterns and reflect the same anxieties, concerns and desires as those of the North American girls.

Aside from being rich in thematic detail, the individual images are also rich in physical detail. Rania includes dozens of little touches in each image. Initially, I consider the subject and her expression, then my eyes move around the room at every little detail, then back to the subject again. What is truly magic about Rania’s work is her composition – some of the rooms are absolutely packed with bits and pieces yet Rania manages to include all this without losing the subject herself in the background. That incredibly clever use of space is the master stroke that sets these portraits apart, as it would be all too easy for them to feel too busy and overloaded.

Shannon 21, Boston, MA, 2010

The series has inspired me to really look at and develop my own environmental portraiture, paying very careful attention to use of space. I urge you to go and look at the “A Girl and Her Room” project as a whole – it’s important to view the featured images here as part of the whole series, because not only is a story told in each picture, but a story is told as you progress through each image. Plus, they’re great, so why wouldn’t you go and look at them all?

http://www.raniamatar.com/portfolio/recent/girl-room.php#girl-room/1-01.jpg

The Golden Hour

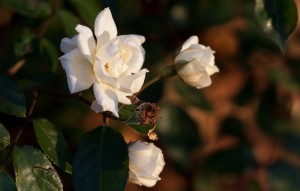
A lovely Golden Hour Winter Rose, taken by our very own Daniela

It’s that time of the month again – Photography Concept on Friday (remember to refer to it as ” PCoF ” to look cool in front of your friends) looks at the Golden Hour. The Golden Hour is sometimes referred to as the Magic Hour. It’s not to be confused with Happy Hour, although they do share similarities – it’s the one hour of the day you should look to take advantage of as much as possible.

To further confuse you, the Golden Hour occurs twice a day, so technically it’s the Golden Two Hours. It is essentially the first hour of light around dawn and the last hour of light around dusk. For outdoor photography, these hours are special, because the light is of a particularly beautiful quality. Tones are warmer, the light is softer and the shadows are longer.

A lovely Golden Hour winter rose, taken by our very own Daniela

Now for a little bit of science (and I mean “a little bit”). The reason the light is of a different quality at this time of day is due to the positioning of the sun. The closer the sun is to the horizon, the farther the light has to travel through the Earth’s atmosphere. This reduces the intensity of direct light, such as the kind you might see at high noon (think duels in Wild West films). During Golden Hour, more of the light comes from indirect light from the sky.

Contrast is less pronounced during the Golden Hour, so in landscape photography, shadows are less dark and highlights are less likely to be overexposed. Golden Hour is great for everything, in fact – portraits benefit from the beautiful, dramatic lighting, as the diffuse, soft, warm nature of the light is kind to skin tones.

My advice would be to get creative with the Golden Hour: don’t just limit it to landscapes and portraits. The most mundane of objects and grottiest of side streets can be transformed into beautiful scenes. Go and find something that you know has almost no photographic potential and see how it looks, quite literally, in a different light. Heck, take your own objects outside and set up a still life out in the park.

So instead of taking advantage of the Happy Hour this Friday evening, why not take advantage of the Golden Hour? I use The Golden Hour Calculator to find out exactly when the Golden Hour begins and ends. It’s absolutely brilliant – it shows you exactly when the Golden Hour starts and ends each day. For all you London types, the Golden Hour this evening starts at 7:12pm and ends at 8:32pm.

Go forth, dear readers, and discover a whole new, beautifully lit world.

A Closer Look: Anastasia Taylor-Lind

Anya Romanova (centre) and her Year 8 friends at Ataman Platov Cossack Cadet School. This image was featured in the Taylor Wessing Photo Prize 2010.

To continue my Closer Looks this week, I’m looking at the absolutely beautiful work of Anastasia Taylor-Lind. It’s important to look at a female photographer and her work because I personally feel that women are a little under-represented in photography. To follow through with this theme, then, I will be looking at Anastasia’s series “Women of the Cossack Resurgence” – a fascinating look at Cossack revivalism.

I won’t get too far into the ins and outs of the story and background of the series, for fear of making myself look a bit stupid and publishing inaccuracies. It would be much better if you scooted over to Anastasia’s site and had a look at the flavour text to fully acquaint yourself with the background behind the series. What I want to do with this article, as a portrait photographer, is attempt to get a bearing on just how she achieves such beautiful images.

Anya Romanova (centre) and her Year 8 friends at Ataman Platov Cossack Cadet School. This image was featured in the Taylor Wessing Photo Prize 2010.

With portraiture (and photography in general) preparation is key. The image is not just the click of the shutter, it is all kinds of preparation approaching that moment. For these images, Anastasia spent a week in the school with the girls, attending their classes, sleeping in one of the dormitories, being one of them. The benefits of this were twofold. First, it would allow her to connect, identify with and get to know the girls, so that the resulting images more accurately portrayed their character. Second, it would mean her subjects would relax and be used to the camera.

Another preparation that was important here was kit preparation. Anastasia used a 6X6 Bronica with a waist-level viewfinder. Compared to your normal DSLR, this allowed Anastasia to take the camera away from the front of her face: now they were talking to her and not to a camera with someone hiding behind it.

Recently, I have often felt there is something of a barrier between myself and my subject when I raise the camera to take a shot. My own approach to alleviating this problem is to practice being able to effectively compose more quickly, making sure I take the camera away from my face as often as possible, to let my subject know I’m still there and haven’t been taken over by a large metal facehugger. That human connection is very important, in my opinion.

Many of the shots in the series explore the bond between the girls in the school. There are images of the girls dressing each other’s hair, embracing, spending time together in the dormitory at bedtime and, in one of my favourites of the series, possibly whispering secrets to each other. I feel as if these images have been included because they resonate with Anastasia as a woman.

I’m not saying that a male photographer wouldn’t have noticed this connection between the girls, but I wonder whether the moments would have been captured as intimately. Maybe I’m wrong, but I do think there is something to the idea that your best work is borne of an emotional connection of some form with the subject. Again, this reinforces the importance for me of Anastasia staying with the subjects of her portraiture for several days – it’s as much to prepare her for the images as it is to prepare them.

Galina Prokopenko, 75 year old great-grandmother and black-belt karate instructor.

To finish with, I want to look at an individual portrait from the series and tell you what I like about it. I honestly feel like going through every portrait in the series, because they’re all beautiful, but we all know how much of a waffle fiend I am (imagine having to sit and listen to me waffle – at least you can just close your browser when you get bored), so I’ll limit myself to one.

By which I mean two. I was torn between the image of Galina Prokopenko, the 75 year old Karate instructor and the basket-weaving class image. Aside from being allergic to concision, I chose these two images because they are stylistically similar and hold qualities that I, whilst not wishing to be overly gushing, find absolutely wonderful. Putting aside the fact that the subjects are both totally relaxed, natural and bursting with character, they share a compositional style that I am very interested in at the moment.

Anastasia manages to balance the image of the subject in the frame with background detail, without taking focus away from the subjects themselves. If we look at Galina first, there is a beautiful balance between her pose and positioning in the frame with the floral wallpaper. The table tells us a little more about Galina without being an intrusive object in the scene. The lighting appears to be natural window light and the gentle vignetting draws us to Galina (who is a striking enough character to be drawn to in the first place, to be fair to her).

There are similar elements at work in the basket weaving portrait. The positioning of the girl in the frame, combined with the angle of the basket and its outreaching strands, the bottom of a plant creeping in on the image and the small wooden ornament make for an interesting composition. The lighting is again quite beautiful, the face being the most prominently lit feature in the image, focusing our attention on her expression of concentration. There is just enough of a hint of attention in her expression to suggest to us that she is listening to instructions from a teacher to the right of the camera.

A basket weaving class at the Ataman Platov Cossack Cadet School

Although the qualities described above would be enough to class these two images as excellent examples of portraiture, the true magic for me comes from the way everything is subtly visually linked. In the portrait of Galina, the pink of the floral wallpaper links to Galina’s pink lipstick. Similarly, the floral pattern on the wall links through to the floral pattern on the teapot and to the one on the tablecloth. I love how this is contrasted by her military appearance: it shows us that the personas of great-grandmother and soldier can both exist in one person.

Similarly, there is a very strong visual theme of flora and nature running through the basket weaving image: the hanging leaves link to the leafy pattern on the wallpaper, which is linked to the floral ornament on the wall, which is wooden, linking us to the basket itself, linking us to the camouflage pattern of the girl sitting, which is of course intended to mimic colours found in nature.

These are the qualities that take these portraits to the next level. I will cease my trademark waffling now, I hope you have enjoyed looking at these portraits in depth as much as I have.

To wrap up on a personal note – I’m really very glad I’ve written these two “Closer Looks” on a couple of my favourite portrait photographers. My intention was to get you lovely readers geared up about portraiture but, as it happens, I’ve also reinvigorated myself on the subject. It can be all too easy to fall into the trap of only taking photos when you’ve been commissioned to do so: this is a mistake. I don’t know about you, but I’m off to set up some portrait sessions just for the love of it. I suggest you do the same.

Two steps closer to the perfect photo


Breaking the rule of thirds works well often - especially in scenes like this

Few things confuse me more than someone asking me what camera I use. I understand the question, but I can't help but wonder why the answer would tell them anything about me as a photographer. After all - a painter is rarely asked about what brand of brushes she uses, nor do people care much about which word processor a novelist used.

Great photographs aren't made by a camera-and-lens combination; the equipment you hold in your hands and the tools you use to take the image from RAW file to final JPEG are completely irrelevant to most discussions about photography as an art form. Why? Because none of these things are the wall that stands between you and your yet-to-be-taken masterpieces.

A great photograph needs two things: It needs a creative vision, backed up by a solid set of technical skills. A photo that has one of these two things nailed can be good - but it won't be great.

Step 1: The technical side

The technical side of photography has myriad different elements to it, and a good photographer has to juggle all of them to create the perfect photograph. Getting a photograph is an equation of lighting, shutter speed, aperture, ISO, focal length, depth of field, focus, blurring (or the absence thereof), and a whole boatload of other variables. As a photographer, you are akin to a scientist using a sophisticated optical instrument, measuring the world around you, one fraction of a second at the time.

Photographers who are just starting out tend to have the biggest problems with the technical side of photography: Over- or under-exposure were the arch-nemeses of many a fledgling snapper. The challenges of avoiding focus blur, camera blur, and subject motion blur... You name it, we've all been there.

Most photography classes (forgive the pun) focus on photography as a technical challenge. In a way, that makes sense: It's the first hurdle that causes many to stumble out of the starting blocks. Sadly, by making photography into science, many new photographers are turned off - there are only so many diatribes about f-stops a right-minded human being can take before they wander off and reach for the Playstation controller.

More depressingly, many photography teachers stop when their students have finally figured out how to get a classroom printer to vomit up a reasonably well-exposed, moderately in-focus image, forgetting what photography was meant to be all about. But I'm getting ahead of myself...

Over time, people learn their tools and what can be done with them. They'll pick up rules, tips and tricks that help them compose well-exposed, correctly white-balanced images that are tack-sharp, well lit, and generally attractive-looking, realistic and accurate depictions of the world.

As you become a more experienced photographer, it's likely that the technical side of photography becomes second nature. Your camera and lens become extensions of your brain, your fingers glide effortlessly over the buttons, and you find yourself tickling the settings to perfection every time. When the time comes to buy a new camera body, you feel that sinking, forlorn feeling of having to re-adjust after the manufacturer moved the buttons around by a fraction of a centimetre on the new version of the camera.

Whilst being able to take technically perfect photos is a surprisingly rare skill, a technically proficient photographer is still merely a technician. Granted, there are places where photographic technicians have a place (archeology, to pick an example at random), but in most cases, merely getting a photo in focus and correctly exposed is not enough.

Step 2: The creative side

Personally, I got started in photography because the technical side of it was interesting to me. Freezing motion with fast shutter speeds - or the exact opposite - was a thrill. Gradually, as I started getting better at the science side of things, I started realising there was more to photography. I started looking at masterpieces by well-known photographers, and after an embarrassingly long time, it dawned on me why their photography was so much better than mine: They had a story to tell.

You've probably been at a party where someone is telling a story and it seems as if everybody is clinging on to the storyteller's every word. The onlookers are practically cheering the narrator on to continue with the incredible tale. I'm willing to bet that this particular raconteur could make any mundane, trivial topic come to life.

If the technical side of photography is the 'how', then the creative side is the 'why'. A great photograph isn't the absence of blur or the perfect exposure: It is telling a visual story, and telling it in such a way that the viewer can't tear themselves away.

Whereas the technical discipline of photography has shutter speeds and ISO choices in its war chest, the creative camp has an impressive array of weapons tucked away, too. The crop of an image, angle, choice of colours, taking the photograph at the decisive moment, being in the right place at the right time, patience, persistence, and the ability to pre-visualise the perfect shot are all aspects of capturing the perfect creative shot.

If a technically proficient photographer without creative insight is a technician, the opposite - a creative snapper without technical skills - would be a whiney art student. You know the type: They'll have an extensive portfolio of 'artfully out of focus' shots that have been photoshopped, textured and filtered to within an inch of their miserable photographic lives.

Don't get me wrong - I don't have a problem with people who bend the 'rules' of photography for creative effect. Quite the opposite, in fact. I do, however, encourage people to understand the photographic principles they are flaunting. Break all the rules you like, but as a creative photographer, you have to know why and how you are throwing convention to the wind.

When I am teaching, I am secretly more excited about students who come brimming with ideas but no photography skills, than the ones who know a lot about photography but haven't had an original thought in their skulls: The challenge with the creative perspective of the photographic quandary is that creativity is bone-cursingly difficult to teach. Which is a shame, because whilst most photographers eventually become proficient with their equipment, only a few go on to use those technical skills with amazing outcome - and all of that is down to creativity. 

Putting it all together: Becoming a better photographer.

Picasso, it is said, once drew a sketch on a piece of paper for someone, and then charged them a lot of money for it. "Hey, that only took you 10 minutes", the potential buyer reportedly said. "No, that drawing took me 30 years", was the retort. If we assume for a moment that this anecdote is true, I'm completely with Picasso on this one: A photo can less than a thousandth of a second to make, but nobody learns photography in a day.

To improve your photography, the key is to know where your weakness lies. Easier said than done, but I found that adding an extra step to my photographic workflow has been of immense value: For every photo (even if I'm about to bin it for any reason), I make a mental note of two things: A technical, and a creative thing I could do to improve that particular photograph. If, at the end of the photo editing session, it turns out I have made a lot of mental notes about focus, then perhaps the time is ripe to pencil in a practice session. If I seem to forget to leverage the angles of my photography to the best effect, then - guess what - perhaps that's what needs to be worked on.

The great thing about self-evaluation is that this technique works well to improve both your creative process and the technical side of your photography. For every shot you're looking at, the question is simple: What could I have done to make this better? Especially for the photos you are most happy with, the answers are going to be valuable additions to your mental checklist the next time you're out and about with your photography kit. Baby-step by baby-step, you'll get closer to that ever-elusive Perfect Photo.

A Closer Look: David Chancellor

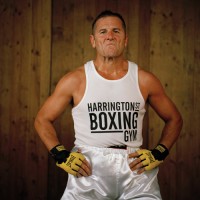
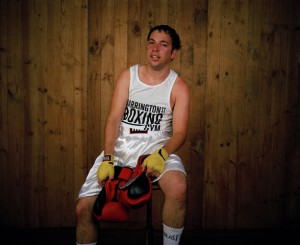
Steve 'the paratrooper' Burke, from the series boxers, before and after.

The more observant of Small Aperture’s loyal readers may have noticed that my blogging on Small Aperture has increased as of late. Well I have further bad news for you: I’ll be looking after our dear litle blogging site for the whole week. As a portrait photographer, I’m kicking off the week by looking at one of many portrait photographers whose work I enjoy, in the hope to inspire you, help you get more out of portraits and, ultimately, explain to you and to myself why I am particularly attracted to looking at and creating portraiture.

David Chancellor was the winner of 2010′s Taylor Wessing National Portrait Gallery Photo Prize – a wonderful exhibition which was displayed in, you guessed it, London’s National Portrait Gallery. I’m not going to look at his winning entry, “huntress with buck” – instead I’ll be looking at a portrait series of his, entitled “Boxers”.

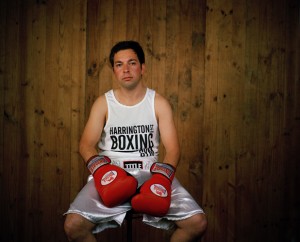
Daniel 'the mover' Avenir #I, from the series boxers, before and after

What I love about “Boxers” is the simplicity at the heart of the idea. It has that “why didn’t I think of that?” appeal to it. On the basic level, it’s a “before and after” spot the difference affair, showing each fighter just before their fight and immediately after their fight. This series has a quality that I see in many excellent pieces of portraiture (and any photography, for that matter): a simple, strong idea that has been executed exceptionally well.

From a technical perspective, they are absolutely beautiful – the lighting separates the boxers from the background so that they are especially prominent in the image. Another important detail is that the boxers are situated in the same position in the frame in their before and after shots (or, at least, those who were still able to sit up straight afterwards are!) which adds to the intensity of the “after” shot, as it almost seems like no time at all has passed between the two images, as they don’t appear to have moved anywhere in the interim.

So we’ve briefly examined the setup of the shots, but what takes a portrait from a pretty picture to something that holds your attention and gets you thinking beyond what you can initially see? To achieve this, we need a story.

The boxers in these images are not professionals. They are part of a phenomenon in South Africa known as “White Collar Boxing”, where men and women who have white collar jobs train for around three months to take part in a special boxing event against others of the same background. Not only that, but the boxers in this series are about to have their very first fight. Armed with this knowledge, whole new areas of intrigue are opened up to us, and this is where a well-lit, professionally composed image begins to turn into a real piece of portraiture.

Daniel 'the mover' Avenir #II, from the series boxers, before and after.

Now, we are scrutinising their expressions prior to their fights. You can see the nervous energy they are harbouring under the surface, the kind that only builds up prior to a tense situation such as a physical fight, especially your first ever fight. Look at how some try harder to hide that nervousness, or indeed tackle it head on, especially for the camera. In a way, to point a camera at you the moment before your fight is the non-verbal equivalent of someone saying “how are you feeling about your first fight?” to which they answer non-verbally. I know that sounds a little pretentious, but go back and look at them with that idea in mind – they’re answering the question for you with their expression. Isn’t that just magical?

The “after” shots are similarly rich with story and intrigue. Did they win, or lose? What injuries do they have? Some of the boxers look so utterly exhausted, it gives across a feeling of relief and release, especially when compared to their “before” images, packed with nervous energy. My personal favourite is Steve “the paratrooper” Burke: the expression of absolute defiance and confidence combined with the pose is incredibly imposing and powerful.

I’m pretty sure he won.

The final sign of a great portrait or series of portraits is what it leaves you with, or what questions it makes you ask that go beyond the initial image. What fascinated me is considering what drives these “ordinary”, office job people to step into the ring and do something that, in my opinion, is incredibly daunting and frightening. Were some attracted to the thrill of the idea and the danger involved? Was it a result of feeling bored and stuck in a 9 to 5 driving the need to do something different? Was it the need to challenge themselves to instil a sense of progress and improvement in their lives? Bearing in mind that David tells us that White Collar Boxing is hugely popular across South Africa, it brings you to ask questions about the human condition, about what drives us.

Steve 'the paratrooper' Burke, from the series boxers, before and after.

David allows us to come to these conclusions and ask these questions ourselves, which is an important distinction to make. I’m all for setting up a series of portraits with a little bit of flavour text to tell you what you’re looking at, but it’s important to strike a balance. I have an intense dislike for photo projects where the photographer has written three pages of text to accompany the photographs, telling you what colour schemes to look out for, how the images all link to each other and which of your preconceptions will be challenged. This should all come across in the image: you shouldn’t be told how to feel (or what your prejudices and preconceptions are, for that matter).

And that, dear readers, is why I love “Boxers” and why I love portraiture. I’ll be taking a look at another portrait story later in the week.

We’ve included a couple of David’s “Boxers” images in this article purely for editorial and critique purposes. I hope my article has already moved you to do so, but please go and explore the full set on David’s site. Here’s a direct link – http://www.davidchancellor.com/docs/photos.php?id=3:5

Making your pictures last forever

IMG_1528

How best to store and preserve information isn’t exactly a new problem. Yes, right now the question is more prescient because there’s more information floating around our world than there ever has been, but history bears out that information storage and loss is something that we’ve battled with for millennia, for as long as we’ve had language, in fact.

The Minoans might’ve thought that they’d done a great job of recording their society using the Linear A script on clay tablets, except that the language died out and we can’t decipher it. We’ve still got the tablets, but not a clue what they say. You never know, the key to Linear A might have been in the Great Library at Alexandria, but the library’s contents, mostly written on papyrus and parchment and almost certainly including works that we don’t even know about, were lost in a massive conflagration. In one instance we have the data but not the language; in another we still have the language, but not the data.

In the age of digital media, those same two problems still present themselves. We might lose the data, or we might lose the ability to decode it. You never know, we might lose both.

There’s been oodles of column-space devoted to discussing the most secure methods for storing digital images, and how many backups you need and in how many forms; I’ve recently embarked on archiving a not-insubstantial project, and one of the first discussions that I had with the records office concerned the most appropriate format in which to save the information; the conundrum of what to do about artefacts that are on deteriorating original media and we’re struggling to preserve owing to copyright concerns needs to be solved pretty quickly. Chances of a simple, easy solution to these problems? I’d put the odds at slim-to-none.

So when I read the following statement in a press release, I couldn’t help but feel that it was a bit disingenuous: ‘…customers will now have the option to take their media from analog to digital to the [insert company name here] cloud, ensuring that photos and videos truly last forever.’ No, it wasn’t just PR hyperbole; at least not when it was followed by ‘… [insert company name here] can give you the peace of mind that your photos and videos are secure and always accessible.’

I remember seven inch floppy discs from when I was in primary school, about 25 years ago; since then we’ve raced through three-and-half inch floppies, CDs, USB sticks, and now we’re into cloud storage. Do we really think that this is where it ends? I’m not convinced.

Forever is a very long time.

And it was only today that a British on-line image storage company, Fotopic, went into liquidation. No one seems to know for sure how many images are now trapped in the aether, inaccessible to the people who stored them there, but estimates are between 30,000 and 70,000. One hopes that these customers had the good sense to make backups elsewhere.

So forgive me, perhaps, if I’m a bit sceptical about the security of on-line or cloud-based information storage firms and if I have a moment of nostalgia for analogue cameras, which give you the original and the backup as soon as you develop the film. Even so, they’ll end up as dust one day, just as the gorgeous frescoes excavated from the ash and mud at Pompeii and Herculaneum will, too.

What it comes down to is that I don’t think that you can make your pictures last forever; it’s not the way that the universe works. Empires come and go and languages fade away; the best that you can do is to give them as many opportunities to survive fire and theft and hard drive failure and loss of language and format shifts and magnetic electron realignment as you can. So have them printed, burn them to disc, save them on two separate hard drives, email them to yourself, and hope for the best.

You see, nothing lasts forever.

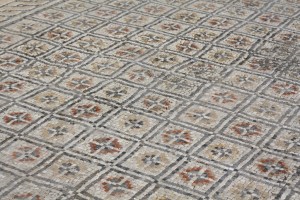
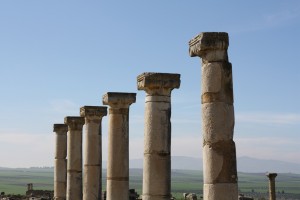
(All the images were taken at the remains of the Roman city of Volubilis in Morocco.)

A brief introduction to white balance?

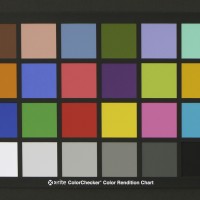
Photograph of X-Rite ColorChecker Color Rendition Chart

If you’re a new recruit to the digital photography vanguard, white balance might not mean very much more to you than a button on your camera. For veterans of the analogue campaigns, white balance is something much more familiar. However, knowing what white balance is and how it affects your pictures could help to make them a whole lot better. Thus we present to you the Small Aperture guide to white balance, in technicolour.

Light temperature

What we think of as white light isn’t really white. It’s actually the spectrum (red, orange, yellow, green, blue, indigo, and violet) mashed together. Light that comes from different sources – the sun, tungsten bulbs, fluorescent bulbs, candles – is made up of different proportions of the spectrum, and is said to have a different colour temperature (measured in Kelvins). Warmer light temperatures comprise more blue tones whilst cooler light temperatures makes things seem more orangey-yellow. (Yes, it seems counter-intuitive, but it’s about the energy in the light.)

Midday sunlight on a clear day is pretty evenly balanced across the spectrum and has a temperature about 5,000K, but light from tungsten bulbs has more red wavelengths in it, so will give your pictures a yellow or orange cast. Light on a cloudy day, on the other hand, is made up of more blue wavelengths. Unsurprisingly, this can give pictures a bluish tinge.

Auto White Balance

By the awesomeness that is nature, our eyes automatically adjust to these warmer or cooler temperatures of light, so things will always look as they should. Things that are white will look white, not a bit jaundiced or dying of cold.

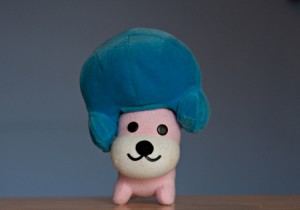
Afro-Ken, taken with auto white balance

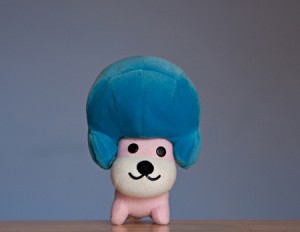
Now, digital cameras usually have an Auto White Balance (AWB) setting that overall does a pretty good job of compensating for the variations in light temperatures. But unlike our eyes, it doesn’t always get it quite right and pictures can come out a bit blue or yellow. In which case, you’ll find that there are a few options to help you out.

Presets

My camera has six presets – daylight, shade, cloudy, tungsten (incandescent) light, white fluorescent light, and flash – in addition to AWB and a custom setting.

If I’m shooting inside under incandescent lights (3,200K) and my pictures are coming out a bit yellow, I can try switching to the tungsten setting. It’ll balance things out with some blue tones.

Outside on a cloudy day the light will be warmer in temperature (perhaps 8,000K), so might give everything a blue hue. If I apply the cloudy setting: tah-daa! Less blue, better balanced pictures.

Afro-Ken photographed using the daylight setting

If you hadn’t already guessed, blue and amber filters would have done (and indeed still do) the job of these different white balance settings for film cameras.

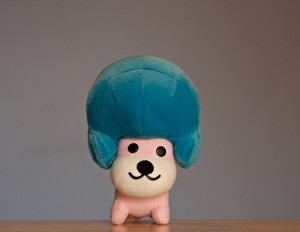
See how much more yellow-y he looks in the 'shade' setting?

Custom white balance and RAW

I also mentioned that I’ve a custom white balance setting on my camera. This can be really useful if, for example, you’re photographing something that is predominantly red. Your camera might mistake all those red tones for light that’s cool in temperature and make things a bit too blue. If your picture has two different light sources in it, one warm and one cool, custom white balance can make sure you get the picture that you want, not what your camera thinks that you want.

When you set the custom white balance, you’ll need something that is white to act as a point of reference for your camera, so it knows what ‘white’ should look like.

Of course, if you shoot in RAW, you can always adjust the white balance in post-processing. If nothing else, it’s a fun five minutes to make a sunset glow blue.

In summation

  • Light comes in different temperatures: sometimes with more red wavelengths (lower temperature), sometimes more blue (warmer temperature)
  • Our eyes adjust to these different versions of ‘white’
  • Differences in light temperature can make our pictures look too blue or too yellow
  • In the film days, these differences were fixed using filters, now cameras have an auto white balance (AWB)
  • Sometimes, AWB doesn’t get it quite right, so you can adjust your camera to the light’s temperature using some preset white balances, or you can customise the white balance
  • If you need to, you can correct the white balance of a picture in post-processing

Experiment! Play around with the different settings to see what the effects are. You never know, you might decide that you quite like green sunrises!

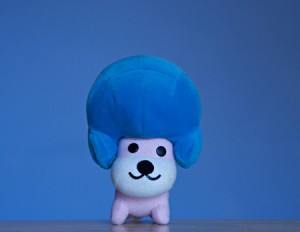
For a giggle, here's Afro-Ken made to glow blue by using the tungsten setting without any tungsten lights

Implied nudity in portraiture

Implied Nudity - part 2

It doesn’t take much of a brain to fathom what a ‘nude’ photo is. If bits that are normally covered up on the beach are on display, then it’s a nude.

Similarly, a ‘non-nude’ photo is pretty straightforward: There are no hoo-hoos, wee-wees or breasticles on display.

So, what is all this ‘implied nudity’ stuff all about? Well, it turns out that there’s an ‘in-between’ stage of nude photography: Implied nudity. Used creatively, it can add an interesting dimension to your portraiture. Here’s how and 

Right: Not a terrible portrait, but it isn't exactly super exciting ever. But there seems to be a lot of skin on display. Hmm, I wonder if I can make this photo more interesting... (click the picture to see it bigger, on Flickr...)

Put very simply, implied nudity happens in one of two ways: The model is dressed, but the photo is shot in a way where it looks as if she might not be. Or the model might be in some state of undress, but the photo is shot in such a way (through lighting, perhaps, or by the model’s position), where you can’t be sure whether or not they are naked.

So, er, what’s the point?

Humans are funny creatures: our minds constantly play tricks on us. When pieces of information are missing, our minds tend to ‘fill in’ the information. When you read smthng lk ths sntnce, your mind doesn’t really struggle to fill in the missing letters, for example – the same happens in photography. In a photo where a model is covering up her breasts, your mind will automatically ‘fill in’ the missing bits.

With this in mind, you can use that to your advantage as a photographer: By hiding your model’s dangly, bouncy, or naughty bits, you can sometimes create a photo which is even more allusive and erotic that one where it’s all on display.

Right: Now that's more like it. All it took was to de-saturate the image, fiddle with the contrast a little, and do a tighter crop, which in effect hides all her clothes.

There are a few different situations where this works extremely well. In the past, I have been known to do ‘nude’ sessions with models (especially models who aren’t that experienced), and then taken photos only of their face or head-and-shoulders. Some people relax (or tense up) in a completely unique way when they are not wearing clothes – which gets reflected in their face.

unfurled_1.jpg

Another great example of implied nudity by Emily - see the full version on Flickr.

I think I’ve taken some of my best portraits this way – simply because the model was concentrating on making their bodies look good, so they forgot to worry about their face. The result? Beautiful, intimate portraits where you would never have known the model wasn’t wearing clothes.

The opposite is also true, of course: You might well find yourself working with a model who would love to do nudes, but is too shy to actually strip off. Using these techniques, you can create the illusion of nudity.

Showing more by hiding more

Right: You can use implied nudity to create tension in a photograph... She's in a graveyard. Surely, she's not naked. Is she? (clicky for bigger)

We all have different tastes and preferences for what we think is attractive. Combine this with the afore-discussed tendency for people to ‘fill in the blanks’, and you can see what might happen: In a photo where something is hidden, it gives the viewer the opportunity to read as much (or as little) into the scene as they want to.

The great thing is that the viewer tends to ‘fill in’ the blanks with whatever their own fantasies or beauty ideals are, which means that by tapping into the fantasy world of your viewers, you can actually make your model more attractive: After all, your viewers are going to be attracted to whatever their fantasies cook up!

You can't see much (is she wearing a bra? Is she not?) - but it's the implication of nudity which makes this photo. (clicky for bigger)

So – a rather long and picture-heavy post to make a rather simple point: If you haven’t experimented with implying nudity in portraiture before, why not give it a shot – you might like what you come up with!

The magic of fill light


Lightroom is magic - and as photographers, we've never had it this good.

There you are, after a long day of shooting, and you realise that some of your favourite photos are too contrasty, with parts of the image bathing in darkness. Adobe Lightroom to the rescue...

I was playing around with my brand new Canon EF 100mm f/2.8 macro lens in my kitchen on a rainy day, and was experimenting with a new reflector I was building (it works great, but more about that in another post). Some of the photos that didn't work out so well ended up on my camera, and then on my computer, and then in Adobe Lightroom. I figured I'd see if I couldn't edit one of them into shape a little, and was (re-)astonished by the fantasticness of Lightroom's Fill Light slider.

Starting with this photo:

haje_jan_kamps_20110317_img_5209.jpg

I started experimenting with various settings. You can crank up the exposure to make the rest of the image brighter, of course, but that would over-expose the already bright highlight on the right of this Hershey's Kiss.

So, by instead adjusting the Fill Light slider:

screen_shot_2011_03_18_at_083717.jpg

I was able to recover the shadows remarkably well:

haje_jan_kamps_20110317_img_5209_2.jpg

A closer look at the image shows that you do gain a bit of digital noise:

20110317_img_5209_5184_x_3456.jpg

But it's possible to reduce it quite a bit by using Lightroom's rather phenomenal noise filters:

20110317_img_5209_5184_x_3456_2.jpg

Of course, as always, it's much better to ensure that you get your lighting right when you take the photo; you get less noise, higher quality, and more precise control about what the hell you're doing. And yet, it's rather fantastic to see how photographers are given a lifeline if you balls things up just a little bit too much.

How did we ever survive without Lightroom?


Do you enjoy a smattering of random photography links? Well, squire, I welcome thee to join me on Twitter -

© Kamps Consulting Ltd. This article is licenced for use on Pixiq only. Please do not reproduce wholly or in part without a license. More info.

45 inspirational nude photos

Nude photography is a genre most photographers dabble in every now and again. I've often thought of nude photography as a natural extension of portraiture; if you're going to spend so much time on trying to capture the 'essence' of who somebody is, in some cases shedding any barriers between the model and the camera (such as clothes) is the next logical step. One thing that can be a challenge, is to translate portraiture techniques into nudes. For right or wrong, there are still a few social taboos around nudity - and even in relation to photographing nudes - and I often receive e-mails from people who want to give it a right good go, but can't quite figure out how to get started.

screen_shot_2011_11_30_at_152846.jpgGet the book

I am often asked where people who are interested in nude photography should start - and after a bit of research, I've finally found a great one-stop shop for all the information you could need about nude photography.

The book is called True Confessions of Nude Photography, and was written by A.K Nicholas.

You can find it on Amazon UK or Amazon.com.

Where to begin?

I've written about the topic before, and you could do a lot worse than having a look at Try Nude Photography; my interview with nude photographer Pascal Renoux who is also featured in this list of inspirational nudes), Adding Passion to Nude Photography, and Nude Photography 101.

You may also be interested in the short piece by Brigitte I posted on nude self portraiture. And, of course, if you're not 100% sure about taking it all the way, there's always the deeply titillating art of implied nudity in portraiture.

I need some inspiration!

The reason I decided to create this post is two-fold; A lot of photographers are posting their first few steps in nude portraiture to Flickr, but many of them don't get the exposure they deserve. This list (with a very few notable examples) consists mainly of photos that I found to be inspirational (in some cases; aspirational), but that haven't had that many views and/or comments. The great thing about this is that even if you are a Flickr veteran, there's likely to be a load of photos in this list that you haven't come across before.

The other way of using this list is for 'imitation as inspiration'. If you're only just starting out in nude portraiture, it may be a useful exercise to pick some of the photos you like best, and plagiarise them. See if you can recreate them as closely as possible, and learn as much as you can about the process. Obviously, I wouldn't necessarily recommend posting the copies to Flickr (or, indeed, anywhere); but imitation can be a great way to get more familiar with a model, with directing your subjects, and getting a 'feel' for what works and what doesn't in nude portraiture. Once you're comfortable, turn off the 'copying' switch, tune in to your own creative vibe, and start creating your own masterpieces.

I did promise you some inspiration, though, and so far it's only been me babbling on... Let's get started!

1 - Call Girl by Glen Flower

3394715458_62430bbdc2_o

From the title, you’d expect something a little more audacious to live up to what we know as a call girl. This photo stands out by going against that predictable notion and taking a more playful tone by use of bright colors and lighting, an eye-catching pattern of characters and a simple yet effective pose.

See Call Girl by Glen Flower in full res on Flickr

2 - Nude 2 by Andy Hassall

4368160757_01350acb69_b

The first thing that draws my eye to this photo is the glow around the woman’s figure. Not only is it flattering to accentuate the curves, more importantly it adds an ethereal story to the image. Soft and delicate is a woman...

See Nude 2 by Andy Hassall in full res on Flickr

3 - Untitled by canarinomannaro

It's very obviously a nude, but there is nothing to see. It's intriguing and alluring, almost beguiling. The grains and the black and white do nothing but complement.

See Untitled by canarinomannaro in full res on Flickr

4 - Desnudo Simple by Alberto Ibarra Glez

desnudo simple

There's something pure, innocent, and powerful about this nude; the model isn't without flaws, and the shot itself isn't perfect either - but that's where the beauty comes from. The relaxed pose and the peaceful look means it doesn't really matter. A lovely example of the nude photography genre indeed!

See Desnudo Simple by Alberto Ibarra Glez in full res on Flickr

5 - Day 235: Scar Beneath the Surface. by Brigid Marz

scar

The fear of reality is the attraction of this shot. Wet hair suggests vulnerability. Parted lips infer loss of breath and words. The hand on her breast declares a longing for comfort.

See Day 235: Scar Beneath the Surface. by Brigid Marz in full res on Flickr

6 - Untitled by Jenn

untitled

There is a serene beauty when you look at this woman. The pose is almost heartbreaking as she stares out the window and the light soflty hits her skin and her surroundings. The only color in the room is the pink flowers on the wall, which implies that the subject is not sad, but only hushed.

See Untitled by Jenn in full res on Flickr

7 - H.E.A.T by Nausika Bongard-Bonjour

heat

Raw is the word. It is only human to feel heat and the artist has created a "real" representation of this. Her treatment speaks of grit by having the close appearance of an instamatic or polaroid camera. The ice is not foreign either whether we'd like to admit it or not.

See H.E.A.T by Nausika Bongard-Bonjour in full res on Flickr

8 - Bathtub racer by Jaybird

racer

The fun use of lines and color in the composition reminds me of when we were kids. The way our imagination worked during moments of lull is what the image captures - just proof that even as adults, our imagination still runs away with us.

See Bathtub racer by Jaybird in full res on Flickr

9 - Spiderwoman by Rod Monkey

spider

The minimalism of this nude is an effective delight. I can't help but enjoy the pose - the model on her tiptoes and the bones of her shoulders make the shot and help us appreciate the supple human body.

See Spiderwoman by Rod Monkey in full res on Flickr

10 - Varina & Jiz by Maxwell Lander

varina jiz

I'll be frank with you: There's nothing attractive about this photo; but that's also not the point. It has raw emotion, and a veritable overload of attitude, passion, and even a touch of anger. Bloody awesome work. The rest of Maxwell's work is worth a peek as well; he's one of those photographers who is able to surprise me (in good ways) rather consistently.

See Varina & Jiz by Maxwell Lander in full res on Flickr

11 - Grow by Meta-morphosis

grow

The artist attempts to portray power and strength, that which is intrinsic in a stripped down "real" man. Roots of a tree as a metaphor to the latter are elementally strong and able to withstand nature's (maybe even all) challenges.

See Grow by Meta-morphosis in full res on Flickr

12 - Untitled by Yami Ya

yami

The photo is haunting as the model's spine presses against her skin. The peculiar spine is what catches the viewer's eye and arrests them to linger on nothing else. The mood is solidified by the predominant grey tones.

See Untitled by Yami Ya in full res on Flickr

13 - 112/365 by Lys

112

The image emits a whimsical feel to its viewers. The different hands clutching the woman's back can be interpreted in many different ways and perhaps different emotions. For example: the hand with red nail polish represents lust by use of color and the hand's slightly stronger grip on the skin.

See 112/365 by Lys in full res on Flickr

14 - No heels, no shirt, no skirt...All im in is just skin...All I want to see you in is just skin. by Lauren


just skinThe model's eyes hold the power of this shot. You stare at her as she stares back at you with a brutal sense of honesty. This shot seems simple, but it's far from it when beyond the eyes you start to notice the curious shape of the body, the flaws of the skin and the odd proportions. I guess it's like looking in the mirror.

See No heels, no shirt, no skirt...All im in is just skin...All I want to see you in is just skin. by Lauren in full res on Flickr

15 - Tina Nude by Haje Jan Kamps

tina nude

I did a photo shoot with Tina many years ago, in 2003; I loved the innocence that shone through in many of her photos. A few years later, she became a glamour model - but I like to think that it was these shots that got the ball rolling (It probably wasn't...)

See Tina Nude by Haje Jan Kamps in full res on Flickr

16 - Untitled by Marko Matus

untitled 2

There are so many things one can say about this photo. The texture is lovely. The light adds depth. Your eyes can fool you - it takes a while to notice what you're really looking at in this photo. This nude is brilliant and unique (and maybe even painful).

See Untitled by Marko Matus in full res on Flickr

17 - Morning by LightDream 7

morning

The warm subdued colors give the photo a Sunday morning vibe. The mood is lazy and grateful as you think about the weekend. What makes this photo real is the detail of the hair on the model's buttocks, the light that hits the crack perfectly and the little bokkeh beside it. Wonderfully lethargic!

See Morning by LightDream 7 in full res on Flickr

18 - Nude by Fran Rivero

This sultry, alluring nude is terribly suggestive, but that's because of her eyes. They're drawing you into the shot, whatever of her body is on display.

See Nude by Fran Rivero in full res on Flickr

19 - Sunshine in the Water by Andreas Müller

sunshine

This is an enjoyably light-hearted nude. An offshoot from the expression "the sun shines out your ass," the photo deserves recognition for successfully providing humor to its viewers by using the human form. Smooth lines are an added element to the visual appeal of the photo.

See Sunshine in the Water by Andreas Müller in full res on Flickr

20 - Untitled by Dario Torre

untitled 3

The photo somehow teases and thrills. This nude shot doesn't expose much, except the backside of the model, however the attraction is the model's gaze in his reflection in the mirror. It's just enough to make you wonder how the rest of his body looks and what he could be thinking about you.

See Untitled by Dario Torre in full res on Flickr

21 - Untitled by Kvn

kvn

The photo is a visual craft of highlights and shadows. Though the shadows envelope a majority of the photo, it doesn't darken the message of the image, but it adds to the charisma of what little highlights there are, as they dance around the subject. She looks almost angelic.

See Untitled by Kvn in full res on Flickr

22 - let it flow away by Eleina Priede

let it flow away

There is a beautiful angry desperation to this photo. She holds a knife, but looks as if she doesn't have the strength to use it. Curled up, hugging herself, she holds on in restraint. The light plays well on her weapon of choice, which she may never use.

See let it flow away by Eleina Priede in full res on Flickr

23 - Alex Oller by Ronaldo Donizeti

alex

All I see is a solid canvas in this shot. The subject is flattered and paraded as a work of art, not because of the ink, but because of the texture of his body and the natural peaks and valleys. The details are excellent.

See Alex Oller by Ronaldo Donizeti in full res on Flickr

24 - BS 14 by Marco Villani

bs 14

Minimalism is beautifully portrayed in this nude. Smooth clean lines and duotones work for this piece as they help put our attention on the real focus, imprefect bumps of the subject's skin. There is also an amusing ambiguity to the composition that draws you in.

See BS 14 by Marco Villani in full res on Flickr

25 - Z by Don Pasquella

z

The androgyny of the model, combined with the otherworldly, almost sculpturesque quality of this photo is astounding. It's a nude, for sure, but subtly so, and extremely well executed. Well worth a closer look!

See Z by Don Pasquella in full res on Flickr

26 - Power by Imitable at Least

imitable

Power is truly the message that this capture speaks. The seated pose with his arms raised up and his head humbly down exemplifies the aforementioned power and also achievement. The perfectly strong contrast between the black and white tones complement such as well.

See Power by Imitable at Least in full res on Flickr

27 - Pastel Time_93 by Fabienne Chemin

pastel

"I sleep to dream" is my first thought when admiring this nude. The man without clothes as he sleeps puts one in a very naturally relaxed state that trumps all states of relaxation. The artist comforts us even more with the use of very light colors and textures, maybe hinting that the dreams we dream can be nothing but sweet.

See Pastel Time_93 by Fabienne Chemin in full res on Flickr

28 - Chimera by Jason Skinner

chimera

Complexity is this artist's game. There is nothing more mesmerizingly complicated than the human body, what more when intertwined with another's (metaphorically and literally). It's a riddle unsolved. The balance, highlights and shadows work wonderfully to make the art three dimensional and labyrinthian.

See Chimera by Jason Skinner in full res on Flickr

29 - Haunted by her by Sharlene Shappart i

haunted

Fear overwhelms me as I look at this photo. I take a glimpse and look away as I'm haunted by her stare. The sheer of the cloth on the woman's breast is perhaps the only vulnerability that can be grasped. The nude figure is subtly but effectively used by doing so.

See Haunted by her by Sharlene Shappart i in full res on Flickr

30 - Yolande soft nude 4 by Julio Cristian Ruiz Molinero

The eye travels from head to midriff to the tips of her toes and then back again. The composition urges you to take in everything, before maybe settling on the in-focus nipples, or perhaps on her hands. See Yolande soft nude 4 by Julio Cristian Ruiz Molinero in full res on Flickr

31 - Dune by Lindy Barbosa

dune

Allan Teger is a wildly talented photographer who did a great series of photos called 'Bodyscapes', where little characters would do everyday things in landscape made of a human body. 'Dune' is an imitation of one of Teger's shots, showing how it adds fun and creativity to an oft-overdone shot.

See Dune by Lindy Barbosa in full res on Flickr

32 - Helping Hand by Neo Geodesy

helping hand

There's no doubt about what's going on in this photo, and whilst the subject is undoubtedly verging on the pornographic, the treatment is sensual, intimate, and beautiful. Masterful lighting and great use of depth of field nail this one home. Awesome.

See Helping Hand by Neo Geodesy in full res on Flickr

33 - Tubside by Imre Kissik

tub side

Another great example of 'no clothes, but showing not-a-lot', this warm-tones feast-for-the-eyes by Imre is a cascade of class and finesse. Having her eyelashes in focus is a lovely touch, too.

See Tubside by Imre Kissik in full res on Flickr

34 - Intimate by Luca Gualtieri

intimate

Naked like the day she was born, and yet casually covered up. The touch of light on her eyes pulls my vision to her face; and her relaxed yet slightly anticipatory expression adds just the right amount of tension to the shot. Absolutely lovely.

See Intimate by Luca Gualtieri in full res on Flickr

35 - Untitled by Jorge Carrion

jorge

I adore how this portrait comes across as a battle between humans and their surrounding elements. There's something brutal, yet serene about this photograph that I can't quite put my finger on - which is why I keep coming back for more, I suppose.

See Untitled by Jorge Carrion in full res on Flickr

36 - Untitled by The Girl Behind the Lens

girl behind

In this photo, you can barely tell what it is a photo of; to me, the first thing I noticed was the sheet in the background, which led me to think we are looking at a bed. Only then did I realise what the photo was on. A masterful study in subtlety that appears to be all too rare in the genre of nude photography

See Untitled by The Girl Behind the Lens in full res on Flickr

37 - Morning Bell by Kristaps B

morning bell

High key photography is something that lends itself well to portraiture, and nude portraiture is no exception. A feeling of innocence, purity, and simplicity is projected onto the viewer - and the soft lighting helps make the model seem approachable. A delightful shot!

See Morning Bell by Kristaps B in full res on Flickr

38 - v2 by Hans Proppe

hans proppe

I know this photo has a nude body in it, but it took me quite a while to figure out quite how. That, in itself, is enough reason to include this image in the list, I believe; the abstraction of nudity is something that really appeals to me; the intrigue, intricate textures and delicious lighting - perfect!

See v2 by Hans Proppe in full res on Flickr

39 - Naakt by Klaas v/d Pijl

naakt

Some nude photography has a whole other layer of nudity in it; an innocence, a complete and infallible belief that there's nothing wrong with not wearing clothes. This photo, to me, is an excellent example of just that. Yeah, the girl is nude, but there's just something about her calm facial expression which shows that she doesn't do shy. A simple shot, for sure, but worth recreating for its zen-like calm when you're working in the studio

See Naakt by Klaas v/d Pijl in full res on Flickr

40 - Assembly of Shadows by Dreamography

shadows

The title of this photo speaks to me. Sure, there's a nude person in the frame, but it's incidental; this image is all about the interplay of light and shadows, and about the mystique of it all.

See Assembly of Shadows by Dreamography in full res on Flickr

41 - Venus by Artemisia Artex

venus

Nude portraiture is hard, I won't lie about it. Nude self portraiture is a whole other level of hard, but 'Artemisia' pulls it off beautifully. Gorgeous lighting, a look that really locks with the viewer, and the fiery red hair make sure all the image comes together beautifully.

See Venus by Artemisia Artex in full res on Flickr

42 - Can't you almost hear her thoughts by Sol Lang

thoughts

Whereas some nudes stand for pride, strength, and self-confidence, this photo is almost the exact opposite. The model's facial expression is reserved - afraid, almost - which makes her vulnerability shine through. Her body might be nude, but I can't help but feel that in this photo, we are also staring at a bared soul.
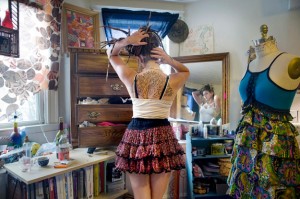
See Can't you almost hear her thoughts by Sol Lang in full res on Flickr

43 - Te Ofrezco by Manuel Orero

te ofrezco

There is a long history of nude photography and pregnancy, and frankly, it's curse-worthy hard to come up with a new take on the topic... but this image does it gorgeously. A pair of baby shoes, and an out-of-focus mother-to-be? Fabulous. Okay, so she isn't actually completely nude; but as far as a cool idea for a shot goes? A definite winner.

See Te Ofrezco by Manuel Orero in full res on Flickr

44 - Disappearing by Brigid Marz

disappearing

I've been a huge fan of Brigid's work for a long time, and this photo is a great example of why; she often manages to convey a vulnerable strength - or is that a strong vulnerability - in her subjects. Strong poses, powerful lighting and great post-production - take a look at the rest of her portfolio as well!

See Disappearing by Brigid Marz in full res on Flickr

45 - Brooke (plage 2) by Pascal Renoux

6308561585_14252bb53a_m Pascal Renoux' work often has a sense of wonderment about it - a playfulness that goes far beyond what many other photographers are able to offer up. There's an intimacy in that playfulness; an incidental, rather than elaborate, sense of nudity, which makes his work stand out. Fantastic stuff.

See Brooke (plage 2) by Pascal Renoux in full res on Flickr

And finally, a few words about copyright

Most of the images used in this post are used without explicit permission from the photographers, however, they are used under the 'criticism and review' sections of UK copyright legislation. The photos in this article are used in reduced resolution, and I warmly recommend that you visit them in their full-resolution glory in Flickr. Remember to comment and favourite images you like on Flickr to show the photographers your appreciation. If you are the photographer of any of the works in this write-up, and you had rather I didn't include your image, please let me know.

Giving a good photo critique

Giving feed-back on something is really easy. Giving useful feedback on a subjective matter — such as photography — is, in fact, extremely difficult. That’s why I’ve created sort of a check-list with some tips as to how I like to do critiques.

Myself, I’ve spent a lot of my days critiqueing stuff. Back in the day, when I did a lot of writing, I went to Folkehøgskole. (kind of like an artistic boarding school where you faff about for a year while you decide what to do with your life. As far as I know, it’s a Scandiwegian concept — I’ve written more about the folkehøgskole over on Everything2.com). Part of the school's idea for improving its writers was to give each other feed-back on writings done in class.

Since then, I've given hundreds (if not thousands) of photography critiques (hence my old blog name, 'Photocritic'), and over the years I've slowly developed a template of sorts that means it takes as little time as possible to do a critique, whilst giving the photographer as much useful information they can use to become better photographers as possible.

Valencia
Photo: Valencia by Photocritic.org, on Flickr

Why?

The first question you have to consider is this: “Why are you doing a photo critique?”. After all, by the time you’re doing the critique, the photo has been taken. It might be hours, days, even months or years since the photo was taken. Perhaps it was taken abroad, or in a situation where the photographer will never be again. In other words, it is important to remember that a photo critique isn’t about a single photo: it’s about how a photographer can develop as a snapper, both technically and artistically.

“I like this photo, the contrast is cool” means nothing to the photographer, it only means that you like this particular photo, and that you feel that contrast is a good thing. “I like this photo, because it shows you’ve thought about the lighting, and the increased contrast adds to the overall impression of the amount of time you’ve put into lighting this item”, for example, would encourage the photographer to continue putting more work into their lighting. They’re on the right track, and you're pushing them along. It's easy to understand which of the two is most useful!

Photos in context

So, when you’re writing a photo critique, try to break away from the single photograph, and try to take a wider approach to the way you look at photos by a particular photographer.

Also remember that there’s no right or wrong in photography. Gross technical errors (vast exposure problems, for example) can be universally wrong, but artistic considerations are not universal. Personally, I have a strong affinity for tightly cropped black and white photos. I have a friend who loves to do landscapes in colour, and I find it really difficult to give him useful critiques, because it’s not my style of photography…

Finally, if you’re the photographer getting critique, don’t get defensive. If fact, just shut the hell up. Getting people to talk to you about your photos is a rare opportunity, so don’t waste it. Let people talk (even if you think they’re full of shit), it’s their opinion, and your target audience should be important to you. Let them rant, and if you really have to, defend yourself afterward, once it’s all finished. Although — honestly — if you feel you have to defend yourself, you might want to take a step back and consider why :-)

Valencia
Photo: Valencia II by Photocritic.org, on Flickr

Right, so how can you do a photo critique?

1) Look

First of all, take a close look at the photograph. Let your eyes scan it closely: Make sure that you’ve caught every possible detail of the photo. If something jumps out at you as being really good or really bad, note it, but don’t say anything
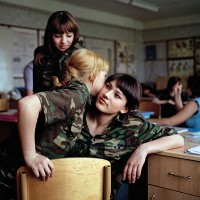
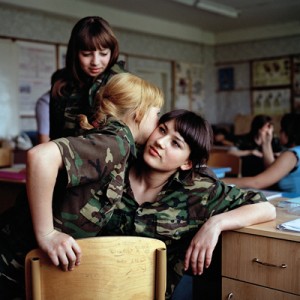
2) Interpretation

Now, talk about the photo for a little bit. This is the thing that is most frequently overlooked when doing critiques, but is actually one of the most useful things you can do to a photographer. For the interpretation, start off by saying “When I look at this photo, I feel…”. Explain what sort of emotional response the photo raises in you. Follow up with “I think this photo is about…”. Any symbolism you spot, tell the photographer. If you aren’t sure, let them know that.

3) Technical points

The next thing to take care of, is the technical points. Is the photograph technically okay? Did you spot dust, is the exposure okay, is there any unwanted blur (wrong focus, motion blur, zoom blur etc)? Are the colours accurately represented? What’s the contrast like? Could the photographer have used lighting differently? Would a bigger or smaller aperture have been beneficial?

4) Artistic points

What do you think about the crop and aspect ratio? If the photo is in black and white, should it have been in colour and vice-versa? Is there a good balance between the foreground and the background? Would the photo have worked better with a different prop / model?

5) Good points

This is where you point out what you like about the photograph, and why. The why bit is most important: If you can’t tell why you like X, Y, or Z, there’s no point in mentioning it. “I like the sky” is useless. “I like the colour of the sky” is better. “I like the deep blue colour of the sky because it contrasts nicely with the yellows and reds in the photo” is perfect. Put some thought into this.

6) Points worth improving

This point is saved for last, because you’ve made the photographer more confident about their photograph by now. It is still important to remember that the photo has been taken, and that this photo can’t really be changed anymore. As such, there’s no point in slating people for their photographs. Tell them one or two specific points that could be improved on this particular photo (‘clean up dust’ and ‘turn into black and white’ are useful suggestions, as they can done in the darkroom), and perhaps one or two points that you would have done differently, if you were the one taking the photograph.

Orange tree in Valencia
Photo: Orange tree in Valencia by Photocritic.org on Flickr

7) Overall

How did this photo appear to you overall?

An example critique

Take Untitled, by Solofotones on Flickr, for example:

solo_original.jpg

When I look at this photo, it makes me think of... street performers everywhere.

I think this photo is about... the people who go out of their way to inject some random into your life, and who, in the process, remind you why you're alive; it's not just to trudge through it all, it's to be surprised, amused, and bemused by the world. This photo illustrates all of this

Technically... I think this photo is weaker than some of your others. His hand is in perfect focus, but his face is just a big haze of blurriness. The shallow DOF is very important in this photo - otherwise the background would be a mess of impressions, fighting for your attention

What I like about this photo... is the archaic hat-tip the young gentleman is doing, and the feeling of him being an outcast in a world that is raging around him. He clearly doesn't give a damn, which makes him awesome.

If I were to improve or change anything, I would... tweak this photo quite a bit. His face is too hazy for my liking, which is obviously a very subjective thing, but in my opinion, street photography is all about people - their eyes and faces are the be-all and end-all of street photography, and if you haven't captured it properly, then - no matter how awesome the photo is otherwise - it doesn't cut it.

Of course, I don't have access to your original negatives or prints, so I had to make do with the Large file - I made a few changes: I ramped up the contrast a lot, I removed the lamp which is hovering in thin ear next to his head (and a couple of bright white dust spots, too, because I was out there with with the clone tool anyway), and re-cropped the photo to give it a different focus. I'm not 100% happy, but I think it illustrates that if you go back to the source material, there's a lot of potential for this shot

solo_re_edit.jpg


Does it have the X-factor? Overall... I think this photo has a lot of charm and intensity - The suggested changes are very subjective, obviously, and you might not agree with the ascertations. The shot itself is a gem, though, and I think a slight re-edit could do wonders to make it as good as it deserves to be. Give it a shot!

Your turn!

Right, now you've got a taste for one way you can do a photo critique (although obviously you can adapt it to suit your critique style and the photo you are critiqueing) along with an example... Why not pick a photo by your favourite Flickr friend, and give it a good thorough critique?

Finally, you may be interested in Attracting Better Feedback and Dealing with Negative critiques - you never know when those skills may come in handy!

PS: You may have seen an earlier version of this write-up before on my blog (I first posted it in February 2007). The version you have just read is vastly expanded (it's nearly twice as long), and I have changed my mind about some aspects of doing photo critiques in the meantime - so consider this version 2.0 of this blog post. Enjoy!

High speed flash sync: Photo-geekery at its finest


This photo was taken at broad daylight. Because I used flash and a fast shutter speed, it comes out looking like this...

I am a photo geek. I admit it. I love photography technology - especially the crazy high-tech stuff the camera manufacturers come up with. One of the most incredible pieces of electronic engineering you can buy in the photography world today is a humble flash. I'll tell you why...

In most circumstances, your flash can sync with your camera up to a certain shutter speed. back in the dawn of photography, this 'sync speed' used to be 1/60 second on most cameras. When you buy a SLR camera and a flashgun today these days, standard flash sync is 1/200th or 1/250th of a second for almost all makes and models of camera equipment.

But then, the camera boffins came up with something deeply awesome: High-speed flash sync. To understand why you need it, and to explain how and why it works we need to take a look at how flashes work normally.

How a flash works

shutters_1.jpg

Inside your camera, there are two pieces of black fabric (known as 'curtains' - this is also where the expression 'second curtain flash' comes from) that move across the sensor at very high speed. Think of this whole set-up as a window that has two curtains that go all the way across the window. When you press the button, one curtain is pulled from left to right, and at the end of the exposure, the second curtain is pulled across to cover the window again. Once the exposure is complete, both curtains are returned to their original position on the left, ready for the next exposure.

Only a few years ago, when we were shooting on film cameras that had a manual advance lever, these curtains were on springs. When you were pulling the thumb lever to forward to the next frame on your roll of film, you would also pulling the two curtains back in preparation for the next exposure.

When your flash is in normal flash mode, the following happens: You press the shutter. The first curtain of the shutter opens fully, and the camera sends a signal to the flashes, and the flashes fire. At the end of the exposure (whether the exposure is short or long), the second curtain is pulled across to finish the exposure. If you had your camera set to 'second curtain' sync, the flash would trigger just before the closing curtain gets pulled back to cover the sensor.

Flash at higher speeds

When you start talking about very fast exposures - like the 1/8000 second exposure offered by cutting-edge SLR cameras - but basically at any speed faster than the camera's flash sync speed, something interesting happens.

shutters_2.jpg

The shutter curtains themselves move incredibly fast, but when you're talking about extremely fast shutter speeds, the speed of the shutters starts to become a factor: As the shutter has to be open for such a brief period of time, the closing shutter actually starts moving before the opening shutter has finished moving. The effect is that the whole imaging chip does get the same amount of light, but the imaging sensor is never exposed all at the same time.

If you're shooting in natural light, this isn't a problem at all, but if you want to add a flash to the mix, it becomes tricky: If the shutter is never fully open, when do you fire the flashes?

The ingenious solution

Flash manufacturers realised that people still wanted to use flash even at high shutter speeds, came up with an ingenious solution: High speed sync mode, which changes the way your flash works, enabling you to take photos at much higher shutter speeds.

When the flash is set to high-speed mode, instead of a single flash once the shutter opens, the flash actually sends lots of tiny flash pulses for the duration of the exposure. This ensures that the subject is evenly lit as the shutter curtains move across the sensor: Perfect exposures even though the sensor is never open all at once!

So, is there a downside? Well, in High Speed sync mode, your flashes do take significantly more power, so you drain the batteries much faster. On the other hand, if you need it, use it: The effects can be incredible, and it gives you a lot more flexibility in your flash photography!

Now in video form!

I did a video for Gizmodo UK about high speed flash sync; in all its poorly-animated glory here:

So what can you use it for?

You can use high speed flash sync for lots of things - but start by having a look at Darkening a Room by Adding Light - that should bring you a few ideas!


Do you enjoy a smattering of random photography links? Well, squire, I welcome thee to join me on Twitter -

© Kamps Consulting Ltd. This article is licenced for use on Pixiq only. Please do not reproduce wholly or in part without a license. More info.