Feature Articles

10 essentials for your kit bag

IMG_1978

There’s heaps written about what every photographer should have in her or his kit bag: camera bodies that can sink battleships, a range of lenses to bankrupt the Sultan of Brunei, flashes enough to illuminate the Sahara on a moonless night. And really, we know about this sort of stuff; we’d not be taking very many pictures without any of it.

There are other kit bag essentials, though; the little things that you learn about from your friends, the bits that you only realise should always be in your bag after the event. Between us, we’ve accumulated a few suggestions, so we thought that we’d share the sum of Small Aperture’s collective kit bag wisdom.

  1. Gaffer tape. I grew up in a rural community, where most anything could be fixed using baling twine, lolly sticks, and gaffer tape. It has stood me in good stead.
  2. Spare memory cards. I can’t think why.
  3. Spare batteries, of all varieties: for your camera, for your flashes, for your brain.
  4. Business cards. Seriously, you don’t have any business cards? Go to Moo and get some. Now.
  5. Torch. I don’t know about you, but my night vision isn’t that good.
  6. Something to fasten or secure things: string, cable ties, tie-twists, elastic bands. (Or baling twine, even.) Don’t forget that string can double as an emergency tripod.
  7. Microfibre cloth. Shiny!
  8. At least one plastic bag; preferably several in a few different sizes.
  9. Some kind of multi-tool business, you know, Swiss Army Knife, or Leatherman.
  10. Notebook and pencil or pen. Yes, we all have mobile phones capable of taking notes now, but you never know when you might need to actually write down something.

Anyway, this is what we schlep around with us, pretty much. Is there anything that you’d like to add to our mix?

Fisheye: speciality or everyday lens?

DSC_4555_small

Every photographer has a favourite lens. Maybe it’s an 18-200mm zoom or a 50mm prime. Maybe it’s a wide angle zoom. Heck, maybe it’s your kit lens. But it’s a lens that you count on day in and day out. It’s an everyday lens that you take with you every time you pack your camera bag and walk out the door. It’s a lens that you know you can rely on in most situations you’ll encounter. And in most cases, it’s a standard type of lens. Nothing too crazy.

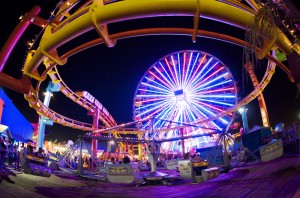
So why, then, is my Nikon 10.5mm fisheye lens one of the three that I carry in my bag every day?

When I first got into photography, I spent countless hours debating about what lenses I would spend my money on. Of course, I needed a standard zoom to cover the basics, but what else? I perused countless portfolios and tried to guess what lenses were used on my favorite photographs. I always caught myself stopping at photos taken with a fisheye lens. There was just something so powerful about those fisheye photos. The 180 degree angle, the distortion, the amount of information within a scene that was shown. It was love at first sight. Soon enough, I dropped the cash and picked up my first and only fisheye lens.

At first, it was just… fun. I took the cliché fisheye pictures of my friends and their dogs’ noses. But once I started figuring out what kinds of photography I enjoyed shooting the most, I found myself using the lens more and more. A calm and surreal view of the ocean in Florida. Fisheye. A long exposure of an Atlanta skyline at night. Fisheye. A motion-blurred black and white shot of a subway train as it passed through the station. Fisheye.

I became obsessed with this lens and it eventually got itself promoted from a box on a shelf to my camera bag. It’s now one of my two favorite lenses (the other being my 50mm f/1.4) and my portfolio wouldn’t be the same without it.

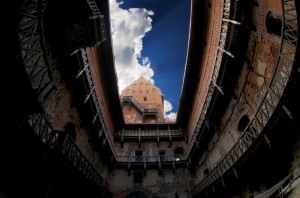
Unfortunately, the fisheye lens has gained a reputation for being a gimmicky, kooky, just-for-fun lens. I think it deserves more credit than that. I can’t count how many photos I’ve been able to take with that lens that I could have taken otherwise. And they aren’t just-for-fun photographs either. They can distort architecture to give an amazing perspective; they can give landscapes some feeling of other-worldliness.

Granted, you may not want all of your photos to be taken with a fisheye lens, but I highly recommend adding one to your repertoire. If you do any sort of landscape, cityscape, or architectural photography at all, I’m confident that you’ll enjoy seeing things differently through a fish’s eye. And if you need a touch of inspiration to get you started, why not take a look here?

You don't have to shoot weddings

WillAndrews

Freelancing. You love photography but you’re not a hardcore businessman. You’re still figuring out what sort of photography you do. After being introduced by a mutual friend, a new acquaintance at a party politely enquires ‘Oh, you’re a photographer? What do you photograph?’ to which you can only respond with ‘Uhhh, anything, really…’

Then comes the age-old question; ‘Do you do weddings?’ At this point, you should make yourself as tall and wide as you possibly can, puff out your chest and shout ‘NO! NO I DO NOT!’ Unless you are a wedding photographer, obviously, as this would make for a lousy business model.

In essence, wedding photography is as much about being able to organise and herd people as it is about being able to take photos. I think if I did weddings (I do not do weddings), I’d bring a sheepdog with me.

I attended a friend’s wedding recently. The photographer was much more into band photography and this was obviously a sideline to keep the pennies rolling in. Now he did a fine job on the day, but the expression of mental anguish on his face when he was trying to organise a group of 80 or so people to pose on the lawn outside the church was distressingly apparent. He might as well have taken a marker pen and written ‘Oh god, why did I agree to this?’ across his forehead.

Well I have news for you, budding photographers, you don’t have to shoot weddings! If a sharp chill zithers down your spine at the idea of your work turning into a photo factory, churning out nightmarishly similar images of close-ups of wedding rings, monochrome babies’ toes with a shallow DOF, tightly cropped images of the backs of wedding corsets being tied up, I’m here to tell you that it doesn’t have to be that way.

But you need to do at least a bit of it for the money, right? Nope.

Try this now; google for photographers in your area. Go on, I’ll wait here until you get back. See how many people are offering baby / pregnancy / wedding type shoots? See how similar they are? Your first reaction may be that this is the way to go if you want to stay afloat. I would argue that this market is ludicrously saturated and, if you want to photograph stuff for a living and enjoy it, you have to carve your niche.

To clarify, I’m not knocking this kind of photography, despite the slightly snide tone; people are photographers for different reasons. This is to those of you who want to do it for a living for more reasons than just for money.

So, what kind of photography is profitable if it’s not wedding photography? The answer is any kind. I earn my keep through a rather unusual mix of magazine work, promotional portraiture (for actors, singers, comedians, whatever) and pro wrestling photography. Yep, pro wrestling.

So what about you, what do you enjoy the most? Are you an architecture sort of person? Does portraiture excite you? Do you love trekking up mountains at dawn to catch a spectacular landscape? Sports? Abstract? Macro? Heck, you might even be genuinely excited by perfectly lit product photography – it’s not for me to judge (you nutter). You need to shoot what you love, and love what you shoot. That way, it doesn’t feel like work, and you’re much more likely to create something really special, because you care about the end product. The phrase ‘that’ll do’ shouldn’t be in your repertoire.

It’s going well – you undertake photography that interests you, in a style that you particularly enjoy. This creates an environment of self-motivated improvement – you like your stuff, you want to make it better. And better. And better. Now when someone asks ‘What do you photograph?’ or, more importantly, when you send emails to potential customers (you are sending out lots of emails, right?) you can explain what you do with conviction and with passion – ‘I mainly shoot architectural stuff, especially abandoned buildings or uninhabited places. I love the textures and shapes and looking for that perfect composition.’ Or ‘I specialise in portraiture, more specifically fashion-style shoots. I tend to do a lot of clean, high-key type stuff because I love the way it looks.’

Sounds better than ‘anything, really…’ or ‘whatever’, doesn’t it? Photography is everywhere, find a gap and fill it. Make sure you love what you do, because people will see that enthusiasm and get on board with you – it’s infectious.

And not a wedding in sight.

Playing with your pictures

sketchafter

So taking photos should be fun, right? Right! And sometimes we want to have a bit of fun with our photos themselves, right? Right! So, ehm, what can we do with our photos to play around with them a bit more? Well, we’ve been pooling braincells over here at the Small Aperture mansion, and just before they expired from over-use, we came up with the following.

First of all, you could go out and buy yourself a toy camera. But maybe you don’t really want to. Perhaps you’d rather fiddle with photos you’ve already taken with your top-of-the-range dSLR. In which case, Photocritic has the perfect tutorial for creating your own post-processing pre-sets in Lightroom.

Or perhaps you’d prefer to go the vintage route? Take a look at Photojojo’s four ways to vintage-ify your pics. This one covers all sorts, from post-processing ideas to tips such as vaseline on the lens or shooting through an old stocking.

Over at befunky.com they’ve what feel like hundreds of different effects that you can apply to your pictures. My personal favourite would be the speech bubbles, though.

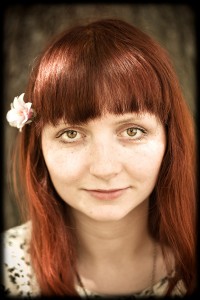
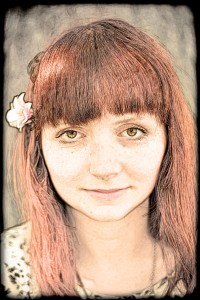
And Gareth, a member of the Small Aperture Scriptorium, has this easy method to cartoon-ify your pictures. Begin by selecting an image. How about this one?

And then:

  • Open said selected image in Photoshop
  • Create a duplicate layer
  • Turn that layer to black and white using desaturate (Image>Adjustments>Desaturate)
  • Duplicate the black and white layer and invert it (Image>Adjustments>Invert)
  • In the layers panel, set the blend mode to Colour Dodge
  • You should now have three layers. Select the top layer, the inverted one, and go to Filter>Other>Minimum to add the sketch effect. The higher the value of the pixel radius, the more pronounced the sketch effect.
  • If you want to re-add colour, duplicate the bottom layer (the non-black-and-white one) and add it to the top of the stack. Set the blend mode to Colour.

Tad-dah!

I’m off to do silly things with photos now.

Found: Tips for aspiring food snappers

food-om-nom

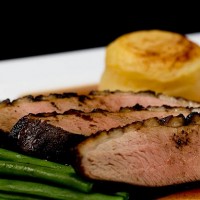
Great photography makes you hungry. You want to tear into the food like a bear tears into, er, food.

Not all food photographers have the most tasteful of practices, as witnessed in my Dirty Tricks of Food Photographers post over on Photocritic. Of course, there are still plenty of delicious ways of photographing food without resorting to motor oil and nail polish. I’d hope that my food photography portfolio (all of natural foods!) stands testament to that.

Anyway, I just found some awesome tips for food photographers over on the Digital Photography School: 7 Tips for aspiring food pornographers. Yum indeed. Check it out, be inspired, and get snapping.

Found: 5 Landscape Photography Tips

arizona-landscape

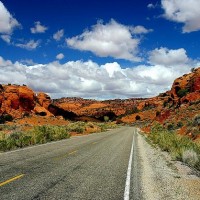
Ah, landscape photography, why do you taunt us so? There’s something beautiful about capturing the world around you, but it’s bloody frustrating.

After all, you can see all the beauty around you, but why won’t your bloody camera capture it all?

There’s a lot to think about when doing landscapes. What lens should you use? How do you make it all come together? Is my horizon straight? Why won’t that cursed tree stop swaying in the wind?

Beyond Megapixels has five great tips on how to make your landscapes come to life, along with some dishy examples of gorgeous landscapes. G’won, give it a shot.

The 10 Second Pre-Shoot Camera Check

settings

I’ve been there many times – half way through a photo shoot you suddenly stop and think. “Oh… no.. I did a photo shoot in the dark yesterday. Please don’t tell me my ISO is still set to 800″… And some times, it turns out that yes, I really am that stupid.

A pre-shoot camera check makes a lot of sense, but what should you check before you run off to do a shoot? Myself, I’ve gotten in the habit of taking a single photo. If the camera shows me the photo afterwards, it means that I’ve remembered to put a memory card in the camera, I’ve got my battery, and there’s a lens attached (No, I don’t forget attaching a lens very often. But, to my gravest of shame, it has happened once that I rocked up at a shoot without a lens. Luckily, I did have one in my camera bag. That could’ve gotten very very embarrassing.)

Anyway, there’s a small list of stuff worth checking before you get all snapper-happy, and my good mate Brian Auer is more than happy to run us through it..

Read the full 10-second camera check over on Epic Edits!

Banning photographers from photography events

_48667099_summerfieldscorescopy

If you’ve ever been to the UK (or, indeed, anywhere in Europe), you know that football (as we like to call soccer over here, since it’s played with your feet and all that) is a pretty big deal. The sports sections thrive on covering the sport, it’s all over the news, and the fans lap it all up.

One football club decided they wanted to let only a single photography company take photos at their matches (presumably in return for a lot of money), effectively banning all other media outlets from sending their own photographers. Needless to say, it caused a bit of a stink.

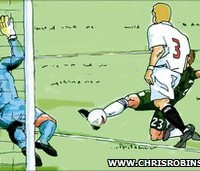
The Plymouth Herald (relevant because the game was Plymouth versus Southampton – the latter being the photography-banning jokesters) resorted to reporting on the story using hand-drawn cartoons instead of actual photographs.

The Sun newspaper, which I normally despise on principle for being a load of mind-numbing populist hogwash, ran the rather witty “Opposition 0, Plymouth 1″ headline, and then proceeded to report on the game without mentioning the ‘opposition’ team name once.

I have a feeling Southampton FC will overturn their daft move pretty soon…

Pictures at an exhibition

IMG_1416

You’re going to think that I’m obsessed with photographers’ rights and am heading up a mission—with a camera in one hand, a light sabre in the other, and Flickr as my shield—to defend the average photographer and prove that cameras won’t irreparably damage anyone’s souls. But please, indulge me this post and then I’ll return to the scheduled programme of camera releases and software updates. (For a while, anyway.)

I follow A Don’s Life, the blog written by Cambridge classicist Mary Beard. Yes, she can be rabidly controversial, but she’s also amusing and thought-provoking and I recommend her musings for your weekly edification. And earlier this week she raised the issue of taking photos in museums. Obviously my ears pricked up.

The book that started it all

Specifically, Beard was ranting about the fee she was charged to include a photograph taken at the Acropolis Museum in Athens in the reprint of her book, Parthenon. Her husband had taken the photo, the museum wanted €400, and the print run for the book is only 7,500. But that wasn’t what really caught my attention. It was that shortly after her husband had visited, the museum had imposed a complete ban on photography, whether you were professional, amateur, or seven years old.

What was that all about? It’s not as if anyone needs to contact the spirit of Pheidias to ask his permission; the dude died around 430 BCE. What’s left of the Parthenon has survived nearly 2,500 years, numerous invasions, use as a munitions store, an explosion, being dismantled and shipped to London, and a current tug-of-war between the British Museum and the Acropolis Museum. A few photos are not going to hurt it now.

Intrigued, I wondered about the photography policies of some of the other big museums across the globe. And when I say big museums, I mean those housing artefacts that are regarded as national treasures, whose original makers are generally long dead, and sometimes have slightly dodgy provenances to boot. These are institutions ostensibly run for the cultural betterment of society. Letting visitors take a few snaps shouldn’t be a big deal.

Not in a museum, but old enough to be

So off I toddled and checked out what the British Museum in London, the Met in New York, the Louvre in Paris, the Rijksmuseum in Amsterdam, the Uffizi in Florence, the National Archaeological Museum in Naples, the National Archaeological Museum in Athens, the Israel Museum in Jerusalem, the Hermitage in St Petersburg, and the National Museum of Australia in Canberra had to say.

I was pleasantly surprised: one banned photography outright (the Rijksmuseum), one demanded a permit (the Hermitage), two didn’t make it obvious from their websites (the Uffizi and the Israel Museum) and the rest had a fairly standard approach. No flashes, no tripods, not in the special exhibitions, and personal use only. If you want to use them commercially, speak with them first and they’ll see what they can do.

What’s so hard about that?

I suppose that we just have to hope that they don’t make the arbitrary distinction that anyone using a dSLR is a professional.

Framing in portraiture

Well will you look at that, miss moneypenny! This time, I'm on the right of the picture! It's pure unadulterated magic. MAGIC, I TELL YOU!

I spend a lot of time giving feedback on photos. One of the comments that pops up again and again is that I’ll feel as if an image is framed awkwardly.

Some times, I’ll find that an image is nigh-on perfect, but it fails to make the mark because it’s difficult to understand the motivation of the photographer: What are they trying to achieve with this photo?

It’s true for all photography, of course, but it’s more complicated with portraiture, as it isn’t necessarily very intuitive. How, after all, can you connect a story to the way a portrait is framed?  


This is not a tutorial. Hell, it isn’t even much of a rant. Just some thoughts. Use of it what you will, and ignore (with great prejudice and much glee) everything you deem to be complete and utter bollocks. There will probably be some of both.

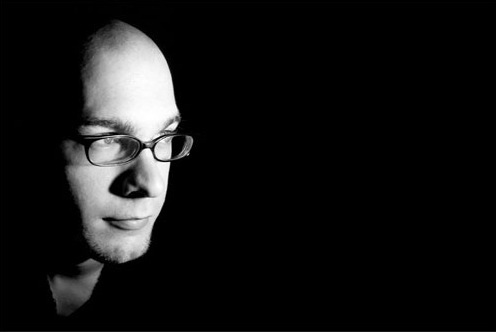
In this image (of myself. because I’m too lazy to dig through my backlog of umpteen million photos to find another one), the subject is dead centre in the image. The quality of the photo itself is unimpressive, and the lighting needs work, but that’s beside the point – we’re talking about framing here.

Centre-framing

Framed dead centre. Not very attractive. Nor is the framing.

In this image, the vast blackness on both sides of my ugly mug means that I’m surrounded by… something. But we can’t see it If I had a fear-struck look on my face, instead of looking smug, this composition may have helped to hint at something I was afraid of. perhaps something lurking in the shadows. But I’m looking vaguely content, so that doesn’t make any sense. In fact, the image has very little impact at all.

Looking into the frame

Cropped so I am looking 'into' the frame.

Fear and Loathing in East London

For my next book, I'll probably use something like this as my author photo. Because I've come a long way as a portrait photographer since my 'steeped in blackness' mysterious stranger days. (clicky for bigger)

So instead. it is recropped like this. Suddenly. I’m looking across a vast nothingness. Into… into what? I’m looking at something just outside the frame, lire image doesn’t hint at movement, nor does it show any particular emotion, so whatever is off frame isn’t engaging me.

Perhaps I’m watching television. Or I may just be at ease with myself. Due to the framing, the image has very little tension, and serves only to show off my face – great for the jacket-cover of that book I wrote, perhaps (Lo and behold, this is actually the photo I ended up using in my macro book.

This image is vaguely better than the one above. because it has some purpose. It draws the eyes the left, but simultaneously leaves you wondering what it is I’m looking at – And why it is so far away from me.

Looking “out” of the frame

Well will you look at that, miss moneypenny! This time, I'm on the right of the picture! It's pure unadulterated magic. MAGIC, I TELL YOU!

In this image, suddenly something else happens. I’m closer to the edge. Closer to action. Am I about to move towards the light? Am I dead, moving towards the light? At the very least, I appear more curious. And I’ve left a wasteland of darkness behind me. Or perhaps I’m just the first one to step out of the shadows?

This image has the sense of movement, somehow – a dynamic property, which wasn’t there in the previous image – even though the only difference is a net of black pixels.

So, er, what’s the point of all this, Haje?

Well, the main message, I suppose, is test it out, and keep the rule of thirds in the back of your mind.

Take an image, crop it in different ways. See how it impacts the photo, and see if it becomes more interesting. Think about what message you are trying to convey, and see if the image is actually supporting that message. If it is: Great! flit isn’t, perhaps a re-crop, or even a re-shoot would solve the problem.


Do you enjoy a smattering of random photography links? Well, squire, I welcome thee to join me on Twitter -

© Kamps Consulting Ltd. This article is licenced for use on Pixiq only. Please do not reproduce wholly or in part without a license. More info.

Your pictures; your rights

I've turned this one into a card. Pretty, no?

I have to admit, I’ve been giggling to myself at some of the comments that are popping up on the sites that have covered the Vampire Weekend image controversy. There seems to be confusion in monumental proportions regarding who owns the rights to a picture, to people’s images in a picture, and what you can—or can’t—do with a picture that you own. Confused much? We’ve put together the Small Aperture Quick and Dirty Guide to Photographs, People’s Images, and Rights. Just remember that we’re not lawyers.

Copyright

This one's mine!

If you shoot a picture, you own the copyright to it*. No one can reproduce it or otherwise make use of it without your permission.

*) The only exception is if you have explicitly signed away your rights. This might be part of your job contract at work – for example if you are taking photos for work, during work hours. In the UK at least, you can only sign away your copyright in writing, and you have to sign the document where you do so. Ticking a box on a website wouldn’t be sufficient.

Moral rights

You also own the moral rights to pictures that you take. In short, that means that your pictures should be attributed to you, and you can ‘protect their integrity’, or stop people from manipulating and distorting them.

Images of people: commercial, editorial, and personal use

If the picture features a person or people who are easily identifiable, you will require a model release, which is essentially that person’s or people’s consent, to use the picture for commercial purposes. If the picture of a yak farmer leading his herd down the mountain is just going to sit on your Flickr stream as part of your holiday snaps from Outer Mongolia, you don’t have to worry. Sell the picture to the publishers of the Encyclopaedic Guide to Mountain Yak Rearing, you’ll need a model release.

But, there are some exceptions to this. Inevitably.

Caveat number 1: Crowd scenes and itty-bitty people on the horizon whom you can’t make out properly (or similar)

You’re standing amongst the crowd at the London Marathon and you manage to snap the perfect shot of hundreds of spectators standing at Canary Wharf, cheering on the runners. It’s so perfect that Nike wants to use it in a commercial campaign. Do you need model releases from everyone in it? Not if they aren’t recognisable individually (even if someone says ‘But I knew I stood right next to that lamp-post all day’), in this instance it wouldn’t be reasonable.

These guys manning a laminating stand (in the middle of the street in Fez, at about 10pm) are probably obscure enough for me to get away with this shot. Probably.

Caveat number 2: Famous people doing famous-people things

It’s pretty much a given that famous people’s pictures taken when they are doing famous-people things, such as tripping the light fantastic up the red carpet at film premieres, opening yet another megalithic shopping centre with a false smile affixed to their faces, or taking an amazing catch at a cricket match, are fair game. But that’s only for personal (i.e. Flickr or your portfolio site) or editorial (i.e. news reporting or reviewing related to the picture) use.

You couldn’t use a photo of Tom Cruise attending a movie premiere to advertise toothpaste—no matter how shiny his teeth are—without a specific model release. And as far as Tom Cruise is concerned – good luck getting one of those.

Caveat number 3: Famous people doing stupid-people things

You’re out having a quiet meal with your best friend when you spot Cruella Manningly-Kneesup, Secretary of State for Juggling, Air Guitar, and Space Cadets locked in a passionate embrace with someone definitely not her husband. In fact, it’s Marco Poloco, whose company was recently awarded the government contract to supply rocket launchers and hover cars to the Space Cadet programme. Hmm. Is something fishy going on? Maybe! Obviously neither of these two is going to give you a model release for the picture that you snap with your ever-handy compact camera, but publishing it would be in the national interest – so you wouldn’t have to worry about privacy or libel too much.

Still the same applies as above: you couldn’t use the same picture of Manningly-Kneesup and Poloco in an advert for birth control. As much as you would like to.

Ownership of rights vs ownership of an artefact

I've turned this one into a card. Pretty, no?

Selling a copy of a picture is different to selling the rights to a picture. I use some of the photos that I take to make greetings cards. Mostly, I make them to send to my friends and family, but every now and then a misguided soul will ask me if they can buy one to send to their great aunt Marjory. I might’ve sold this person a copy of one of my pictures, but that’s it. All they own is the physical artefact, nothing else. They can’t reproduce it or make derivative works from it. Come to think of it, the same goes for the people to whom I give these cards.

Selling rights

Selling the rights to a picture means selling the rights to use a picture. There are different ways of selling the rights to use your pictures, because the number of times it can be used, and how, and where, will be dependent on the contract you agree, and that’s not really for this post. But the simple explanation is that if anyone wants to use a picture that you took, they have to at the very least ask your permission first. Then you can ask them for some money to do so. Okay?

And finally

Remember that you’re allowed to take pictures in UK public places without let or hindrance, and that we’re not solicitors, so all of this is for general guidance only, mkay?

When is a camera a professional camera?

Concert shot

I’ve just come home from a great weekend of music, poetry, and theatre at the Latitude music festival. There were heaps of cameras floating around Henham Park, from 8 year olds with disposable ones that you can buy in Boots for a few pounds to Nikon D3Ss toted by the press, via mobile phones and all shades of compact camera. But if you were an ordinary paying member of the public, you weren’t allowed to bring in a dSLR.

You see the powers-that-be at Festival Republic—organisers of Latitude and several other big name festivals—had deemed dSLRs as ‘professional’, and that makes them forbidden. If you want the exact text from the website, it’s this: ‘Cameras are normally permitted for personal use. Cameras with detachable telephoto lenses will not be allowed through the three arena entrances. Professional cameras and video/audio equipment are strictly prohibited. Live video/audio recordings made without the permission of the artiste/promoter are prohibited.’

It got me thinking: what exactly is Festival Republic’s logic here?

It seems as if Festival Republic want to protect their professional interests by preventing the commercial sale of images from the festival. In order to do that, they’ve felt that they’ve had to draw a line in the sand regarding what constitutes ‘professional’ equipment. Their distinction is a dSLR camera. I can understand that, to a certain degree: their security personnel can’t be expected to know a zoom from a prime lens or a Canon 1D from a Nikon D3000, so it’s easiest to say dSLRs aren’t allowed. But in many respects, they are doing themselves a huge disservice.

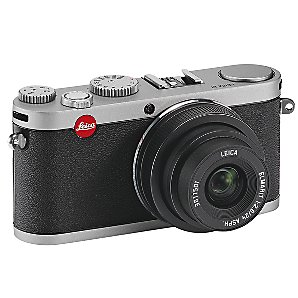
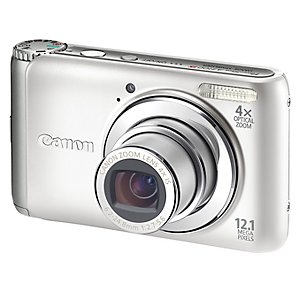
For a start, have they checked out the zoom capabilities on a high-end compact camera? Or even on a lower-end camera, for that matter. Yeah, they have pretty impressive specs.

So this camera would be allowed.

Have they considered that using a dSLR is going to cause less disturbance to performers than common-or-garden variety cameras because the flash doesn’t need to fire to produce an image in low-light settings?

Plenty of compact cameras are able to shoot videos. In fact, I saw a good number of people doing that over the weekend, despite it being prohibited.

This one takes video, but that's still okay.

There are plenty of people out there using dSLR cameras because that’s what they prefer to use. They’re not professional and they don’t even hope to become professional. Their cameras are for personal use. Find a better distinction; realise that a dSLR camera doesn’t make someone a professional, and a professional doesn’t always use a dSLR.

I wonder what would happen if someone tried to use a manual SLR?

What went wrong?

Flying without wings

A good friend of me recently posted on a social media site that a recent photo shoot he had done had gone horribly wrong; sure, some of the photos came out all right, but none of them fulfilled the ‘vision’ he was hoping for from his shoot.

It’s heartbreaking when a lot of effort doesn’t pay off – but all you can do is to chalk it up as a writing experience. Analyse what went wrong, and then don’t do that again. It’s a slow way of learning things, of course, but things learned the hard way are generally learned properly – so there is a bit of a silver lining after all.

What can you do when you feel as if you’re properly starting to get the hang of photography, but you still want to learn more? There’s a simple trick you can use… And it really works, trust me.  


Even photos that come out very well deserve a second thought. If I was in this situation again, what would I do differently? (click for full size)

Some of you might know that I’ve spent a lot of time working towards my advanced motorcycle licence with the Institute for Advanced Motoring. It’s bloody hard work, but it’s awesome as well: It serves to illustrate that even though I’ve got my full motorcycle licence, I didn’t really have much of an idea about how to keep myself in one piece on two wheels.

The IAM course (which, incidentally, is built on the Police system for Motorcycle Control. Check out Motorcycle Roadcraft or Roadcraft, the car version. It’s a bit of a revelation) teaches you to become psychic on the roads; I find myself slowing down for hazards that don’t even exist yet, I change lanes instinctively before something dangerous happens in my line, and I do overtakes on split-second decisions. And I can control my motorcycle better than I thought ever possible. It feels bloody awesome.

Haje, I didn’t come here to read about your two-wheeled prowess…

Because studio work is generally repeatable, it's a great candidate for constant improvement.

Okay, okay, my apologies. But trust me, there is a link here: All the things that are relevant to learning how to control a motorcycle at speed are relevant to photography as well; the ‘psychic’ element comes in when you’re working with studio work, for example – once you understand your equipment well enough, you can visualise what happens if you just add a smidge of power to your fill light, or add a slight warming filter to your main.

And, like riding a motorcycle, it feels flippin’ brilliant when you know something is going to happen. Then you do it. And then you check what happened. And it worked. It makes you feel great about yourself. Only recently, I was standing next to a photographer who was struggling to get the shot they wanted. Without even looking at their settings, I surmised they were shooting in Program mode, when what they wanted was a particular shutter speed to get a panning shot right. So I told them that a 1/45 second shutter time might be easier. They looked at me, changed their setting, and rammed home the shot. And bought me a pint, which I thought was a nice touch.

Once bitten, twice shy: If you can't learn from other people's mistakes, you've got to learn from your own. No, I agree, this caption doesn't really make sense, but I don't really have anything to say about this photo.

Anyway – I’m not the greatest of photographers, but the trick about getting much better at what you do, is to do everything consciously – even things that are instinctive. What I mean by that is that if you feel you need to change a setting or a lens, go ahead and do it. But the important bit is to go back to it later. Find out why you felt that way. ‘Because it was the right thing to do’ is not a valid reason – there was something that made you ‘feel’ that you could improve your photo in one way or another.

That feeling is extremely valuable. That’s your experience talking, and you have to talk back: It’s a skill, but more importantly, it is a skill you can develop with practice. So, if it’s practicable, stop right there and then, and have a think. Why are you making a choice to make a change? What is wrong with the photos you are getting, and what will the effect be of making the change? The answer to those questions will help you develop and become a better photographer. But you have to be conscious about it. Write it down, add it to your Flickr notes, tell other photographers about your choices. It doesn’t matter how you do it, but make sure you vocalise it. The next time you’re in the same situation, the perfect photo will roll out effortlessly.

Oh who are we fooling, I’ve never taken a perfect photo. And nor will you in your lifetime. But that’s the point: You become a better photographer by polishing one aspect of a photograph every time – and hopefully, the photos you take will be closer and closer to perfect for every day of shooting.

Didn’t you mention a simple tip?

God, I don’t half ramble on, don’t I? Do forgive me, I get very excited about photography. And motorcycling, for that matter.

It's worth re-visiting your photos after some time. This one, for example, sat in my archives for five years before I realised it was actually sort of a wicked shot - all it took was some Lightroom magic to make it sparkle.

Anyway: The real reason I started burbling along about motorcycling is that this is a tip I learned as part of my IAM training. Replace ‘ride’ or ‘drive’ with ‘photo shoot’ below, and you get the gist of the tip.

After every photo shoot, spend one minute to think about one thing you would improve about your most recent shoot. Don’t worry if you made lots of mistakes. Don’t worry if everything went wrong. Pick one thing you would improve. And think about how you could improve it.

The great thing about picking just one thing is that it’s bite-sized. You can process one thing, and you can come up with a plan with avoiding it next time. Missed the sunrise? Get up earlier. Didn’t get the photo of the soccer goal? Stand somewhere different. Scene too bright? Bring neutral density filter. Got your camera equipment stolen? Buy a big Rottweiler. Couldn’t get the toddler to smile? Bring that hyper-colourful hawaii shirt your wife hates so much. It’ll make the kids smile, trust me.

Eventually, you become good enough a photographer that most of your development will come from your own experience and the fact that you are challenging yourself. Always remember, though: There is always something you can improve. But only if you’re consciously working on it.


Do you enjoy a smattering of random photography links? Well, squire, I welcome thee to join me on Twitter -

© Kamps Consulting Ltd. This article is licenced for use on Pixiq only. Please do not reproduce wholly or in part without a license. More info.

Low-light action photography

David's website is worth a peek!

Low-light photography is something that often confuses the metric bejesus out of photographers: It’s very tricky to get right, and even if you do everything 100% correctly, often-time you’ll find that your photos still don’t come out as you dreamed of. Now, multiply that with the trickyness of photographing action, and you’ve got yourself a true cluster-copulation of Whiskey Tango Foxtrot.

Everybody will sooner or later end up in a situation where you’re photographing moving things in the dark. To concert, event and dance photographers, it’s part and parcel of their chosen photography work.

I’ll be honest: I don’t consider myself a very good low-light photographer (with the exception, perhaps, of my concert photography portfolio, but in those circumstances you’ve got an entirely different set of challenges.

Today, though, I’ve got a wicked treat for yourselves: One of my colleagues and friends in Australia, David Wyatt, agreed to share some of his observations of low-light action photography with us. He’s a scholar, a gentleman, a legend, and a bloody great photographer… Take it away, David!  


Dance and stage photography are two areas of photography that often intertwine with each other. They can be wonderful to watch: They’re full of dramatic moments that can include moving silhouetted outlines of dancers or actors performing while being back-lit by a single strobe light – which is a great effect from the viewpoint of the audience, but which can make life for you, the photographer, incredibly frustrating!

The following notes are simply intended as a guide only to ways of coping with low light photography, particularly for photographers just starting out in or thinking about trying dance or stage photography – practice is the only effective way to develop experience and increase your photography skills, and there are thousands of great sources out there providing methods of increasing your photography knowledge, depending on the area of photography that you enjoy.

Equipment

My camera bag looks a bit like this: I use a Nikon D700 with a 70-200mm and a 17-55mm f2.8 Nikon lenses, and have recently upgraded from a Nikon D300. I also sometimes use an SB-800 flash unit for posed shots, and never use flash during dance or stage performances, unless I’ve previously received permission from the event or performance directors to do so.

I started taking photographs of dance and stage performances eighteen months ago, and love it. There’s nothing like capturing a shot of a dramatic moment on stage, or of a passionate glance between a couple dancing together, and knowing that the same moment captured within your camera will never occur ever again in precisely that same way.

The lighting challenge

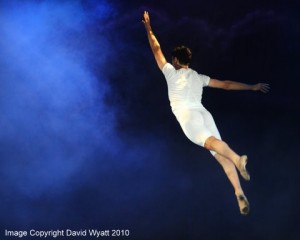
Up, up, and and away: The more dynamic the photos, the better they tend to be! © David Wyatt

Dance and stage performances can often have scenes or components which are entirely under-lit or which have fluctuating lighting levels, and sometimes fast movement at the same time, which together can make it very difficult to balance between a shutter speed that will be slow enough to let sufficient light into the camera to illuminate the image, while using a shutter speed that will be fast enough to freeze the movement. On the other hand, slower shutter speeds can also be used to amazing artistic effect with tripods or monopods through blurring the movement of dancers to give an impression of high speed in the photograph. (If you’re confused about exposure, check out How Exposure Works).

One of the main aspects of low-light dance photography in particular is that having faster glass will always makes a large difference in the kinds of shots that can be achieved. With an f3.5-5.6 lens, you can try to compromise in low-lit venues by lowering the shutter speed and opening the aperture as widely as possible using manual control settings on the camera, but chances are that those setting may still not be enough to freeze motion without using flash if the action is fast-moving, particularly if you may be wishing to capture the background as well as nearby action through using a smaller aperture for greater depth of focus (i.e., f5.6 – f11).

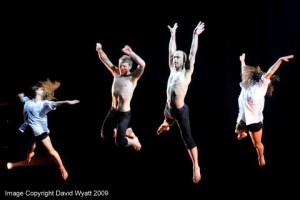
It's difficult to get too much energy into a dance shot - but you can try, if you want! © David Wyatt

Increasing the ISO levels can help with taking shots at a fast enough shutter speed to try to freeze the motion, though depending on the kind of camera you use, grain in the images at higher ISO levels can tend to become a problem, especially between ISO 1600 to 3200. While the f2.8 lenses more suited to low-light work are quite expensive, some of the f1.8 prime lenses are much more affordable and fantastic quality lenses for low-light performances, especially for photographers on a budget. The downside with prime lenses is that they require footwork to move around to frame the image properly, and without footwork or mobility, can require extensive post-shoot cropping for composition requirements, which is the compromise that offsets the price of the f2.8 lenses with zoom capabilities.

There will always be a dance or stage performance in low-light where you may not be able to capture the action effectively purely because of the low lighting that may be involved, or because of the distance placed between yourself and the dancers/performers. If that happens, it may simply be a matter of needing to upgrade your equipment if that’s an option, trying to use a slower shutter speed with a tripod or monopod (shooting at 1/40 and 1/60 shutter speeds with a monopod can still capture stationary non-moving images very well, when there may be a pause in the action), or checking if you can use flash at those events, which may sometimes also be an option.

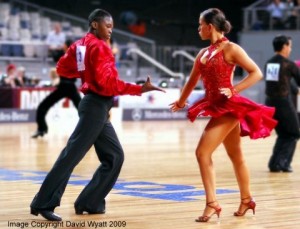
Colour, motion, passion; what more could you want from a photo? © David Wyatt

There is also some excellent free software out there for image editing (including brightness and light levels adjustment) and for noise reduction in images, including GIMP, Picasa, and Neat Image. Neat Image is a nifty piece of software great for reducing noise/grain in images that may have been taken using a high ISO, though using noise reduction can substantially decrease the quality of images it has been applied to. Images with a large amount of noise reduction applied may still be fine for website display at small-medium size, though trying to print those same images may be a different story entirely due to the loss of detail through the noise reduction process. The new Lightroom 3 has some pretty awesome noise reduction algorithms built in, as well – so if you’re using LR, don’t forget to give that a shot, too!

What I’ve written here is a snippet of my own experience of low-light photography through dance and stage work, and I’m still continually learning as I go along. I base my abilities to a higher degree on the quality of the photographs that I’m yet to take at future performances, and to a lesser degree on my previous work. A bit like the acting adage that actors are only ever as good as their next performance.

Dance and stage photography in low-light environments are both some of the most difficult kinds of photography to capture effectively, although both forms also have some of the most beautiful and dramatic human moments that can be captured on film, which make the hard work infinitely worth it!

David's website is worth a peek!

About the author

David Wyatt is a dance and stage photographer based in Melbourne, Australia, with a wicked eye for a good photo. Check out his website over on Capturing Images.

He loves a bit of feedback, and is available for assignments – contact details are on his site, so knock yourself out!


Do you enjoy a smattering of random photography links? Well, squire, I welcome thee to join me on Twitter -

© Kamps Consulting Ltd. This article is licenced for use on Pixiq only. Please do not reproduce wholly or in part without a license. More info.

The Canons of Navarone

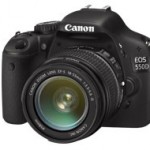
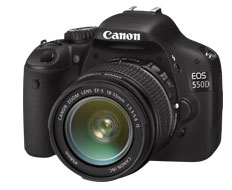
A very tasty camera indeed.

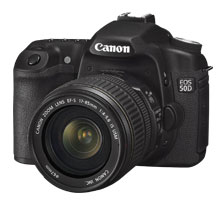
Something interesting has happened in the world of photography: Canon currently have two cameras on the market, at basically exactly the same price point. The Canon 550D (EOS Rebel T2i) costs £705 in the UK and $799 in the US, whilst the Canon EOS 50D costs £726 / $850.

Shop around further afield than Amazon, and the prices are so similar that they are practically identically priced. Which is a curious and interesting situation. The question, then, is as follows: You will buy one of them, but which one would you choose?  


Comparing the specs

When you compare the specifications side by side (made a lot easier by using dpreview’s fantastic side-by-side comparison tool of the two cameras), there ain’t much between them. The 50D is slightly faster, the 550D has a slightly better screen and higher resolution.

Some would argue that the 550D makes more sense because I have the memory cards already (HD/SD), but the 550D generates massive files, and I probably have to buy new, bigger memory cards anyway, so that point is moot.

In favour of the 550D

A very tasty camera indeed.

The 550D has a full-HD movie mode, which isn’t something I generally look for in a stills camera, but I have seen some beautiful results, and I’m tempted to give it a go.

The 50D doesn’t have particularly good high-ISO results in some tests, which is a downer, while the 550D appears to have inherited the absolutely epic low-light skills from the 7D camera.

Resolution means nothing, and the difference between 15 or 18 megapixels is practically non-existent. Having said that, having a little bit higher resolution can’t harm, but the key thing is that imaging chips in general are slowly getting better – seeing what the 7D has been able to do with a ‘very similar’ imaging chip, I’m leaning towards the 550D based on its innards

In favour of the 50D

A very tasty camera indeed.

I’ve owned many cameras in the xxD series in the past – the 60D, 10D, 20D, 30D, and 40D have all been in my possession at some point, and I trust Canon to do a good job on it. They’re a lot more solidly built than the xxxD series, so that’s a huge advantage if you mistreat your camera (which I generally don’t).

The 50D is also faster in general: It starts faster, it takes photos in continuous mode faster, etc.

What would you do?

n

So, the 550D and the 50D cost practically the same, and have different advantages. Which one would you buy?

View Results

It’s an interesting (and fiercely difficult) choice to have to make; choosing between these two, very similar-yet-different cameras. I know which one I am leaning towards, but I’m very curious to hear what you would choose – and why. Vote above, comment below, make it good!


Do you enjoy a smattering of random photography links? Well, squire, I welcome thee to join me on Twitter -

© Kamps Consulting Ltd. This article is licenced for use on Pixiq only. Please do not reproduce wholly or in part without a license. More info.

In photography, rules aren't laws.

You will never take my Coffee away from me!!

The internet is absolutely full of guides about things you should and shouldn’t do to take ‘good photos’. Don’t over-expose. Remember the rule of thirds. Don’t cut people’s heads off. Watch your background. Use a shallow DOF in portraits to throw the backgrounds out of focus. 3-point lighting for portraiture, etc.

A lot of us just take all these rules for given, as if they are hard-and-fast rules that you have to stick to, because if you don’t, you’ll fail as a photographer. Break these rules, and you won’t take a good photo in your life. Your cat will die, your children will hate you, and your significant other will divorce you.  


Truth, as you might expect, is slightly different. Don’t get me wrong, most of the time the ‘rules’ (which in any case should be seen as mere guidelines) make a lot of sense. Of course it looks silly if you cut people’s heads off. Of course your photos won’t look conventional if they are harshly over- or under-exposed.

Rules aren’t laws. You can break them unpunished

Grossly over-exposing a photo doesn't have to mean it won't look good. (click for bigger on Flickr)

Read the sentence above. That’s all I really wanted to say with this article. So if you’re in a rush, or you think I use too many words to say something simple, then read that sentence a few times, and go check out XKCD for a while.

What I’m trying to say is that while the guidelines are there to help you, there’s no point in following any rules or guidelines unless you fully understand (or grok, if you’re geeky and/or well-read enough to be familiar with that concept) why.

The best reason to understand why a rule is there, is to break it. Some times, you might find that your photos actually come out more interesting – better, even, perhaps – when you break the rules. Other times, you’ll try to take the same photo twice; once whilst following the rule, and once whilst breaking it, and you’ll realise why it’s a good idea.

Just remember: Never follow a rule just because you’ve read somewhere that it’s the ‘right’ thing to do. Follow it because you understand it, and because you know what happens when you don’t.

Break these rules

Contrary to popular belief, your foreground doesn't have to be in focus (clicky for bigger)

A couple of examples

DO cut their heads off at the top if it makes for more interesting and intimate photos (click for bigger on Flickr)

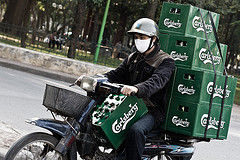
The Carlsberg Express: Of course your horizon doesn't have to be straight, if a non-straight horizon gives you better results! (click for bigger on Flickr)

Sometimes, getting in closer makes a photo more intimate. Don't be afraid to crop into people's faces.

The horizontals aren't horizontal. The verticals aren't vertical. The background is a mess. How could this photo ever be any good? But it is... (click for bigger on Flickr)

White balance? Hah? I spit on your white balance. (click for bigger)

Some times, the background adds to a photo - don't throw it out of focus on principle just because you have a nice, fast lens.


Do you enjoy a smattering of random photography links? Well, squire, I welcome thee to join me on Twitter -

© Kamps Consulting Ltd. This article is licenced for use on Pixiq only. Please do not reproduce wholly or in part without a license. More info.

Building a laser trigger for your camera

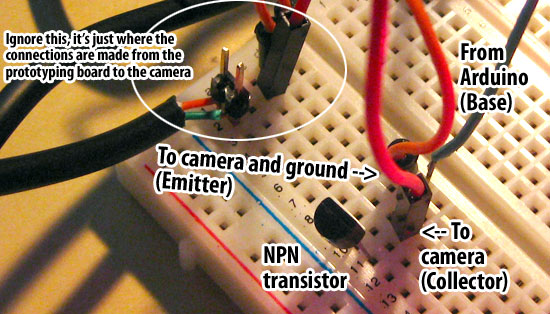
Forgive the rubbish picture - I was prototyping, so it's less than clear what's going on here. The important bits are in the schematic above. Honest, it's piss easy.

There are loads of reasons for why you could want to trigger your camera remotely – to avoid camera shake, for example, or to be able to take a photograph of yourself without having to rely on a timer. If you want to build more ambitious projects, however, you may have to consider getting more exotic.

I recently built a little device which triggers my camera whenever a laser beam is broken. It is about as simple an electronics project as you can pull off, but it’s going to form the base of a couple of other cool projects I’ll be working on going forward (stay tuned…), so I figured I’d do a quick post explaining how I did this.  


Talking to the camera

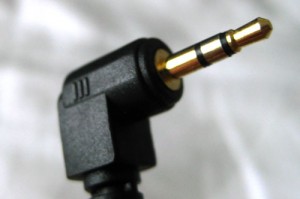
This looks a lot like a headphone jack, but it is not - headphone jacks are 3.5mm, this is 2.5mm.

Even though it isn’t strictly necessary, I decided to use my Arduino (check out Arduino.cc) as the base for this project.

I say ‘not necessary’ because you can build this project using just electronic components, which makes it all a lot simpler – however, what I really wanted to do is to build a base on which I can build further in the future. If you want to get more advanced, it becomes a lot easier to use a programmable micro-controller like the Arduino, so I figured I may as well start where I mean to continue.

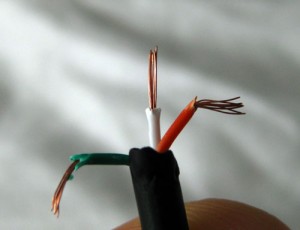
I stripped the wires from the remote lead. Connecting green and red triggers the camera.

To interface with the camera, I decided to keep things as simple as possible, and I used the 2.5mm jack port on the side of my Canon EOS 450D. If your camera has a different remote control port, you should still be able to use the tips described in this post, but you’ll have to source the actual plug yourself.

Using the remote control port has several advantages, the biggest of which is that it’s really easy to trigger the camera this way. All you need to do is to make a connection between two wires! I bought a couple of cheap remote controls from China and used one of ‘em to interface with my camera, but you can go into your local electronics store to pick up a 2.5mm jack for next to no money…

Triggering the camera with the Arduino

This is the most important part of this mini-project: As soon as you can trigger the camera with the Arduino, only your imagination will stop you from coming up with ways of using this. Because the Arduino will accept input from any number of sources, you can program it to take photos in just about any circumstance imaginable. Just a few ideas:

  • Motion sensor (trigger the camera when it senses movement)
  • Heat sensor (take a picture when the)
  • Sound sensor (take a picture when the dog barks or the phone rings)
  • Telephone trigger (Hook up the arduino to a mobile phone. Call or SMS the mobile phone to take a picture)
  • Timelapse photography (Program the Arduino to take a photo every minute)

There are a few different ways you can use the Arduino to trigger the camera – I considered using a relay, but the problem is that even very fast relays are quite slow, so I decided to use a transistor instead:

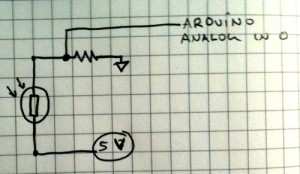
You! At the back! no sniggering at my atroceous schematic drawing skills!

The Arduino sends a signal to the transistor, which connects the two leads leading to the camera, which triggers the camera.

Forgive the rubbish picture - I was prototyping, so it's less than clear what's going on here. The important bits are in the schematic above. Honest, it's piss easy.

Getting the laser trigger to work

I hooked up a LDR (Light-dependent resistor) with a pull-down resistor to ensure that it wouldn’t trigger randomly to the analog sensor pin 0 on the Arduino. The programme uploaded to the Arduino is as follows:

 int sensorPin = 0;  int sensorValue = 0;  int cameraTrigger =  13;    void setup() {    pinMode (cameraTrigger, OUTPUT); }   void loop() {    sensorValue = analogRead(sensorPin);    if (sensorValue > 700) { // trigger is quite low, might need to be higher in daylight      digitalWrite (cameraTrigger, LOW);    }    else    {      digitalWrite (cameraTrigger, HIGH);      delay(10);      digitalWrite (cameraTrigger, LOW); 	 delay(1000); // Take max 1 pic per second    }  } 


Pull-down resistor to ensure true readings, and a LDR to do the actual light measuring.

With the arduino all programmed, I just had to add the LDR.

Now, I rigged up a laser module aimed at the LDR, and I checked what the common sensor values were – turns out that it drops to about 200 when the laser beam wasn’t hitting the sensor, and goes up to about 900 or so when it is hitting the sensor. I set the sensor trigger to about 700 to give me some leeway.

In the above snippet of code, the interesting stuff happens in the loop: Basically, it checks if the sensor has gone ‘dark’. If it hasn’t, it simply checks again.

The bright pink bit in the photo here is the laser beam hitting the LDR.

If the Arduino detects that the sensor has gone ‘dark’, it triggers the camera for 10 milliseconds, then untriggers it. This is to ensure that the camera doesn’t continue taking photos for the duration of the beam being broken – I have my camera set to ‘one shot’ anyway, but by adding this line of code, it should still work if the camera is set to continuous shooting when the shutter button is held down.

When the Arduino detects a broken beam, it takes a photo, then waits for a second, before checking for a broken beam again. If it’s still broken, it’ll take another photo and then waits another second.

Does it even work?

Yup. But a video says more than a thousand words so check ‘er out:

(forgive the crummy video quality, but you get the idea)

So, er, what the hell can you use this for?

It’s all a little bit theoretical at this point, because I haven’t actually used the trigger for anything useful yet. For one thing, it’s not very portable yet, but I’m planning to take a version of this and solder it all together so it’s a bit more sturdy. At least I know it works, which was the purpose of the exercise.

I have a couple of fantastic ideas for how I can create some pretty cool projects where the camera can just stand there and take photos automatically. Think birds on a bird-feeder, people walking through a doorway, balls in flight, etc.

If you plan to use the kit to take people by surprise, you may have to hide the lasers away a bit better. In a cleanish room, the red laser is pretty much invisible anyway (although it shows up in specs of dust etc), but if you want the sensor to be completely invisible, you can just use an IR laser instead – it’ll make it invisible to the naked eye.

Disclaimer

I haven’t broken my own camera equipment doing any of this, but if you balls things up, there’s a good chance you might. Be careful, know what you’re doing, and don’t come running to me if you blow up your camera, please!


Do you enjoy a smattering of random photography links? Well, squire, I welcome thee to join me on Twitter -

© Kamps Consulting Ltd. This article is licenced for use on Pixiq only. Please do not reproduce wholly or in part without a license. More info.

Protecting your copyright in a digital world

Part 2 of 2. You may be interested in reading part 1, "What is copyright, and how do infringements harm you?", first.

I've spoken at great length about why I have such a problem with people stealing my content in part 1 of this article... But what can you do about it?

Finding infringing content

Unique strings of text – It turns out that most people who nick my content with malicious intent are doing so via the RSS feed. Probably because, in addition to being immoral, they are lazy. I decided to turn this to my advantage: I inserted a unique string and a date-stamp into my RSS feeds.

In theory, because this unique string only exists in my RSS feed, it should never show up in Bing, Yahoo, Google or, well, anywhere on the internet, really. If/when it does, I know someone is doing something they aren’t supposed to. Searching for this unique string should ideally result in zero search results. Invariably, however, it never does.

Copyright web services

Apart from inserting a unique string, you can use a service like Copyscape to scan for infringing content. Their Copyscape Premium service is fantastic: Point it at your site map, and for only $0.05 per page, it will take all your pages and compare them to the internet. They score your content against other content. High-scoring content obviously is likely to be plagiarised or infringing in one way or another, so you can take action.

Of course, Copyscape only works for textual content. For photographers wanting to track whether their images have been ‘borrowed’, there is Tineye, and their more hard-core PixID service.

Dealing with infringing sites: Start easy!

If you think that someone has used your content by accident, or out of ignorance, there’s no point in chucking the book of the law at them. A friendly e-mail (cc’d to yourself so you remember to follow it up in a week or so) is usually more than enough to get them to take the content down.

I have found that the number 1 reason for the ‘friendly e-mail’ approach failing is that there isn’t an easy way of contacting the owner of the site… I’m not being difficult, but if it takes me more than about 10 seconds to find the contact e-mail address (check the header, sidebar and footer for anything that reads ‘about us’, ‘contact us’, or similar) or a feedback form, they’ve already wasted enough of my time. On to step 2:

Finding contact details

One of the big problems with many websites is that it is difficult to find out how to contact people. If their ‘About Me’ page or ‘contact us’ pages are absent, broken, or just hopelessly convoluted to use, you have to get clever. I tend to use a site called Domain Whitepages, which will give you 3 pieces of information: Who registered the domain, Who is the domain registrar, and who hosts the domain.

The person who registered the domain is usually the person you want – but many people have made this information private, or it might be out of date.

Your next point of call is the web host. These are the people who own and run the physical server on which the website is running. Look up the host’s website, and do a search for ‘copyright’ and ‘dmca’. If you can’t find either, look for ‘abuse’ or ‘report an issue’. Most web hosts have a mechanism for contacting them with abuse-related e-mails. If you sent a DMCA notice (more about that below) to the host, they will generally respond extremely quickly – I often had responses within an hour – anything longer than 12 hours is quite rare.

If you really can’t figure out who is hosting the server, your last option is to go for the domain registrar: This is the people who have registered the internet domain (like ‘photocritic.org’ or ‘google.com’). If you have to serve a DMCA notice to them, things will take a little bit longer, but if they can’t contact the owner, they’ll pull the plug on the whole domain, which tends to get the owner’s attention really quickly.

Fighting back with the DMCA

After your e-mail, the Digital Millennium Copyright Act – or DMCA – is going to be your second response to any issue of copyright. The DMCA is an US piece of legislation which doesn’t apply in any country except the USA, but I’ve sent DMCA notices to all sorts of countries (including, interestingly the UK, although the appropriate document in this country would be a ‘Notice and Take Down, or a NTD document), and while the legalese on the DMCA notice might be incorrect for, say, Germany, copyright law tends to be similar in most countries, and they’re not going to split hairs over receiving the wrong form: The important thing is that someone is breaking a law, somewhere.

To use a DMCA notice, you need the following: Your details, the details of the original and infringing content, and two particular snippets of legalese which swears on pain of death (ok, not quite – but nearly) that you’re convinced that you are in the right and they are in the wrong. Below is an example of the form letter I have been using.

Example DMCA notice

I have been using the following format for my DMCA notices to great effect:

[your address]
[today's date]

DMCA Notice of Copyright Infringement

Dear Sir or Madam: Upon a routine copyright check, I discovered that the example.com site infringes on my copyright.

The copyrighted work at issue is the text and images appearing on my site here:
- http://photocritic.org/nude-girlfriend-photography/

The URLs infringing on our copyrighted material include:
- http://example.com/nude-girlfriend

Please ensure that the infringing content is taken down within 48 hours.

You can reach me at [e-mail address] if you require further information or clarification.

I have a good faith belief that use of the copyrighted materials described above as allegedly infringing is not authorized by the copyright owner, its agent, or the law.

I swear, under penalty of perjury, that the information in the notification is accurate and that I am the copyright owner of an exclusive right that is allegedly infringed.

[my signature]

Mr [my name]

If the person you are sending the notice to demands the notice to be sent in by fax (surprisingly many do, actually), check out Interfax – they let you e-mail them a PDF document, and they fax it on for you. Fantastic, because, well, who even has a fax these days?

In the above, it is important to add your full mailing address near the top of the document. Create a list of all the article originals, and then the corresponding list of the articles on the infringing site.

First off, send this to the contact e-mail for the site. If that fails to get the content removed, send the same thing to the web host’s copyright or abuse team a week later. If that fails again, send the same thing to the domain registrar after another week. Do add a note to the letter stating whom and when you sent the notices to before, because the host might want to know before they decide to shut down a server.

But… Does it work?
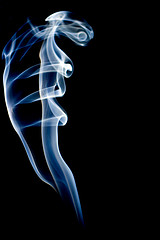
Here, have a random photo I took this week-end. I'm quite proud of it. And this post is nearly 4,500 words long or so, so I figured you needed a break for a few seconds. Enjoy.

The DMCA form is incredibly effective. In the past year, I have sent out around 50 formal notices to people infringing on my copyrighted content, and all but two of these infringements have been taken down. One of them is in Vietnam (which doesn’t have any meaningful copyright legislation, so I’m out of luck, basically) and India (which does have legislation, but is notoriously lack at enforcing it, and the site owner is simply ignoring me. Particularly annoying because it looks like it might be a pretty high-profile site). I am still looking into how I might convince them to take the articles down, but I fear it might take more time than it is worth to me.

Out of the fifty or so, the hosts deleted the articles most of the time. Some times they placed a block on the pages (so the pages would result in a 403 forbidden page), some times they deleted it from the database (causing a 500 internal server error when trying to access the page), some times they shut down the whole site (showing a ‘if you own this site, please contact the host immediately’ message), and other times they found more elegant solutions.

In at least three cases, the site owner never contacted the host, and the whole site was taken down. In one case, the domain registrar decided to take the domain name offline, which means that while the domain itself is still available via its IP address, most of its users were unable to get to it.

What if the DMCA notification doesn’t work?

Excellent question. You could seek further legal help, but be warned: things often get complicated really quickly: The person infringing might be based in Romania, using a server in Russia on a Chinese domain name. If that happens, you’ve drawn the short straw: Where do you begin?

The best approach: If there is any aspect of the business which is operated out of the US (Say, they use Google Adsense, in which case, fill the AdSense DMCA complaint – the content will continue to exist, but at least you can send a message). Especially check the domain registrar – you’ll often find that even ‘foreign’ domains can be registered via an US registrar, and they should be susceptible to a sternly written DMCA notice.

From personal experience, I’d say that the DMCA approach is effective in well over 90% of cases, and I decided I didn’t have enough energy (or hours in the day!) to try to go beyond that.

What if there is a particularly rampant infringement?

In theory, you could start a lawsuit whenever someone steals a single piece of content from you. In practice, you’d me mad to do so, and honestly, it is a lot of hassle to go to court. Sometimes, however, you come across a case where you can’t see any other option.

I’ve had a couple of cases where the site in question wasn’t just copying my content, but went very, very far beyond that as well. One of them had ‘borrowed’ around 50 of my articles, the other one had systematically ‘borrowed’ every single one of my articles, all the way back to the start of Photocritic – yes, nearly 400 articles.

Let’s just say that I thought they were taking the proverbial piss. So, in addition to my standard DMCA letters, I included invoices for unauthorised use (number of articles multiplied by how much I would have charged to write those articles as a freelancer) with the letter and started talking to a solicitor. I can’t go into details about either of the cases, but suffice to say that both companies ended up paying significant amounts of money for their infringements.

Dragging people to court is not necessarily an approach I would recommend: litigation can be very expensive, but when things get just a little bit too silly, getting the legal system involved early on can ensure that people sit up and pay attention.

Disclaimer

I have rudimentary legal training in UK media law, but my training is several years old, and you’d be insane to take legal advice from some random bloke off the internet anyway. Nothing in this post is meant as actual legal advice – talk to your solicitor, that’s what they are there for!

Further Reading

This is part of a 4-story series:

  1. What is copyright, and how do infringements harm you?
  2. Protecting your copyright in a Digital World (this article)
  3. Just because it's in my RSS feed, doesn't mean you get to steal it
  4. Ignorance is no excuse

In addition, you might enjoy Police Fail: Copyright, what is that? and Even Schools Don't Care About Copyright...
When RAW is not enough

4150358922_e5af95be9e

One of the first pieces advice I give to people who wonder where to start getting their photos to become better, is to shoot in RAW. There’s many obvious reasons for why this is a good idea.

With RAW, the final result can be sharper, you have better control over white balance, you get wider dynamic range, you can do HDR photography, and, well, it’s what all the cool kids done. Recently, however, I have moved away from shooting in RAW for several reasons. Or, to be precise, I have started shooting in RAW+JPG.

Here are some compelling arguments for why you should do the same… 


Becoming a better photographer

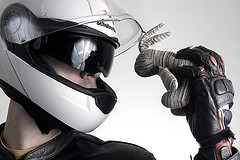
Holding a bunny to your face while wearing full Motorcycle protective gear is a great way to become a better photographer. Aw, c'mon, give me a break, what would YOU use to illustrate this article? (clicky for bigger)

RAW is great because it is lenient – you can over-expose a photo quite significantly, and still rescue the highlights, because you have significantly higher bit-depth (and more information) than you would do with JPGs.

This is a life-saver for press, event, and action photographers: The fact that you aren’t completely buggered even if you’ve screwed up the exposure a fraction is a godsent!

The problem is that I’ve recently talked to a lot of photographer of the ‘new garde’. People who have rarely – or never – shot on film, and are unaware of how often RAW is helping them out of a hole. There’s two ways of looking at this: Either, use the extra flexibility RAW gives you on a regular basis, and accept that we’re now in the digital age. Or shoot as if you’re still shooting on film, and use the extra flexibility as a safety buffer.

Bunny is sad because his compact camera doesn't take photos in RAW. (clicky for bigger)

I’m a strong believer in the latter: Ultimately, when you present your photos, you have to save them as 8-bit colour anyway, so you’re in fact re-compressing the image back into a lower bit depth. This isn’t a bad thing: the human eye can’t really cope with more than 8 bits anyway.

The problem is that it’s difficult to estimate how much of the photo is over-exposed when you’re relying on RAW to save you – and there will come a day where you are relying on it, and you’re off. There’s only so much recovery you can do of a photograph, and if you miscalculate, you don’t have a safety buffer anymore.

Personally, I’ve become a huge fan of trying to take perfect exposures out of the camera: Shoot as if the JPEG is your film. Get the white balance right. Get the exposure right. Sharpen the JPG in-camera. Set the saturation and contrast you like. In short; Make your JPEGs be as perfect straight out of the camera as possible. In addition to making you a much better and more conscious photographer, this has several benefits. To wit:

Better previews

Getting the white balance right on shots like this is challenging, but hellasatisfying. It's good to know you can fall back on RAW if you did make a hash of it after all (clicky for bigger)

RAW photos are unsharpened out of the camera. This is a blessing, because as we discussed in the article on how you can sharpen your photos, you should never sharpen your photos twice. Your JPGs are sharpened in-camera, which means that if you sharpen them on your computer, you’re not getting as high quality as you could. Not a good thing.

In situations where you're taking lots of photos (like when snapping gigs), it's a relief to have JPG preview - it saves you from opening hundreds (or even thousands) of RAW files to find out which ones turned out well.

The flopside of this, however, is that RAW photos can look flat and lack energy. The photos that really zing are the ones that are tack-sharp – and if you’re only looking at RAW photos, you may actually miss the photo that is sharpest, because it hasn’t been sharpened to its full potential.

When you shoot RAW+JPG and your JPEGs are perfectly exposed and whitebalanced, they are the ultimate previewing tool: Full resolution previews, beautifully sharp, which your computer can deal with very quickly. Even better, if you need to e-mail or upload previews of a shoot anywhere, it’s an order of magnitude faster to resize and compress JPGs than RAW files.

So, Shoot with JPG, keep them, and use them for previewing purposes. If you decide to edit any of ‘em, use the RAW files, but at least you’ll have a much better picture (har har) of the potential of your photos

Submitting photos to magazines

Enough with the useful captions already. Here's a picture of a guy in Vietnam with 10 (yes! Ten!) cases of beer on his motorbike. (clicky for bigger)

So you occasionally shoot paperazzi stuff? You do events? You shoot news? Honestly, you don’t want to piss off the picture editors: if you send them a photo they’ll have to do a lot of work on, you’ll need to have a damn fine explanation… And find yourself some other customers, because they won’t use you again.

They’re on extremely tight deadlines, and they prefer photos they can just drop into their page layouts without fiddling with them too much. Shoot perfect JPGs, and that’s usually good enough for magazine use.

Let them know that you have a RAW file if they need it, of course, but 99 times out of a hundred and twenty two, they won’t want it – they don’t need the hassle.

Workflow speed

My university professor stole a wise saying from someone else once: Work smarter, not harder. This saying really is eminently applicable here.

I don’t care how fast your computer is – RAW will slow you down in one way or another. If you organise your photos so you can preview the JPGs, you’re making your life a lot easier.

If the JPG looks out of focus, the RAW will be too – that’ll save you a few seconds opening the RAW file to check. Multiply that by 300 photos, and you’ve saved yourself 10 minutes. Presto!

There’s no reason not to

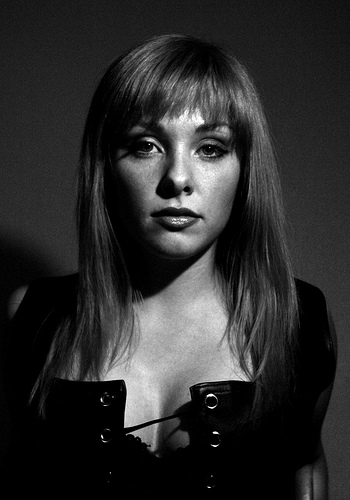
This model wants you to shoot RAW+JPG. Just look at how stern she looks. Would you dare not to? Thought so. Grab your camera right now and change your settings. (clicky for bigger)

Set your camera to RAW+JPG, and bring plenty of memory cards. They cost next to nothing these days, and if you do a shoot where you know you don’t need to keep the JPGs, you can always trash them after you’ve downloaded them – sort ‘em by size (the RAW files tend to be 3-4 times bigger than the JPGs) and delete half the smallest files. Or sort ‘em by type and delete all the JPGs. Whatever you prefer.

If you have enough memory cards (and you should. Really. If you don’t, head over to Amazon and be Amazed (groan) at how cheap they are), there really is no reason not to shoot in RAW+JPG.

Go on. Give it a shot. And let me know how much time you’re saving :-)


Do you enjoy a smattering of random photography links? Well, squire, I welcome thee to join me on Twitter -

© Kamps Consulting Ltd. This article is licenced for use on Pixiq only. Please do not reproduce wholly or in part without a license. More info.

Learning by example

Photos that Inspire is one of the few books I'm aware of that goes into detail about the individual photos, with how, why, where and when they were taken - perfect to start learning

Some people learn best when they start at the basics: This is a camera. Press this button to make it go ‘click’, and it takes a picture. Change the aperture to… etc. Me, I like to work the other way around – I learned a long time ago that photography – like computers, cars, etc – is interesting mostly for its results, rather than for its technology. Who cares if your camera can do 1/4,000 second or 1/12,000 second shutter times… Unless, of course, you need the faster shutter time to achieve something.  


Learning by example, then, is the act of starting at the other end of the learning process: Find a photograph you like, or come up with a crazy idea, and then start stepping backwards: What do I need to do to create the photograph I have seen / imagined / come up with.

What’s the point?

Boats on Ha Long Bay in Vietnam. Taken with a Canon Digital IXUS at ISO 200, f/8 and 1/30 second exposure, at widest possible zoom

Boats on Ha Long Bay in Vietnam. Taken with a Canon Digital IXUS at ISO 200, f/8 and 1/30 second exposure, at widest possible zoom

The interesting thing of learning by example is that there’s a pretty good chance you miss whole fields of photography. If ISO or lens length isn’t relevant to the shots you’re taking, you’ll never have to learn them… It’s kind of like mathematics: I could never wrap my head around calculus. Not because I don’t have the brain capacity (or, at least, I would like to think), but because I never saw the point. Just like I never saw the point of geometry, until someone managed to bring it to life by explaining how I could apply it to my life – suddenly, I had a need for a bit of knowledge, so I went out to acquire the necessary information and understanding, and was able to do the calculations I needed.

I’m a strong believer in doing the same thing with photography: If you don’t think you need something, well, you probably don’t. You’ll eventually find out that the techniques you’re using at the moment are limiting you – or making the things you’re trying to achieve more difficult – but that’ll be new motivation to learn something new again.

So, how do you do it?

My sister in Vietnam. Taken at ISO 100 with a 50mm f/1.4 prime lens stopped wide open, aperture mode. Shutter time was whatever the camera suggested. Slightly desaturated the RAW file to get a more timeless feel

My sister in Vietnam. Taken at ISO 100 with a 50mm f/1.4 prime lens stopped wide open, aperture mode. Shutter time was whatever the camera suggested. Slightly desaturated the RAW file to get a more timeless 'feel'

Well, it’s easy: Find a source of inspiration. Personally, I use all sorts of sources: Magazines are a great starting point (especially amateur photography magazines like Digital Camera Magazine or similar – also check out PhotoRadar). Flickr, of course, is a marvellous source as well. The problem with on-line, however, is the nature of computer screens. Call me old-fashioned, but I really prefer the high-resolution way of looking at photography: Prints, books, magazines, etc.

The other problem is that, even on Flickr, not that many photographers take you through their way of thinking, or their technique for getting the shot (I love the idea of the How I Took It group, but so far, only 22 photos have been posted, which seems like a huge shame). Luckily, you can often ask questions, and many are good enough to help you along, but that’s still not an ideal way of getting tucked in. (Of course, I’m also guilty of this, but if you find any photos in my photo stream which you’d like explained and deconstructed, I’d be more than happy to – leave a comment and I’ll dig out the info!)

Using books for inspiration

Photos that Inspire is one of the few books I'm aware of that goes into detail about the individual photos, with how, why, where and when they were taken - perfect to start learning

Photos that Inspire is one of the few books I'm aware of that goes into detail about the individual photos, with how, why, where and when they were taken - perfect to start learning

There are a lot of fantastic photography books out there, but many of them are by a single photographer – the problem with that is that they have only a limited number of styles, and most of them say nothing about how the photos were taken – you’re expected to enjoy them as art, rather than as part of a learning experience. As you get better, this is a sensible approach, but when you’re starting out, it can be mighty frustrating.

The best one I’ve found that does things a little differently is Photos that Inspire (Amazon US / Amazon UK) is in the same series as my macro book – the Photo Workshop series published by Wiley – and it’s a peach.

For one thing, it has a couple of my photos in there (which obviously makes it a much better book already) but the important bit is that it contains tons of photographs taken by professional photographers – who explain why and how the shots were taken. It’s like a small art gallery with a personal guide by each of the individual photographers – and a fantastic place to start learning, of course.

How do you learn?

So, that’s my take on it – How do you prefer to learn about photography? Where do you get your inspiration? There’s a comment box down there somewhere…


Do you enjoy a smattering of random photography links? Well, squire, I welcome thee to join me on Twitter -

© Kamps Consulting Ltd. This article is licenced for use on Pixiq only. Please do not reproduce wholly or in part without a license. More info.