Aspect ratio: what it is and why it matters

Did you go to see Wes Anderson's glorious fondant fancy of film The Grand Budapest Hotel? Did you notice how the size of the picture varied depended on the era being portrayed in the story? As the story moved between 1985, 1968, and 1932, the aspect ratio, or size of the image, jumped from 1.85:1 to 2.35:1 to 'Academy Ratio'. This was part of Anderson's story-telling technique: the aspect ratio provided viewers with a visual cue for each period of the narrative. It's also a reflection of the changes to aspect ratio that film and television have experienced over the years. But what about photographers? Where does aspect ratio come into stills?

Frame size

Maybe we need to back-track and establish precisely what we mean by 'aspect ratio' first. It's the size of the image expressed as a ratio, width to height. You'll often see film-making aspect ratios expressed as a value to 1 (like to 2.35:1 and 1.85:1 mentioned earlier), whereas the most common photography aspect ratios are 3:2, 4:3, and 1:1, although there are plenty more besides. If your image has an aspect ratio of 3:2, it will be three units wide and two high. When you come to print it, you might choose a 6×4" or a 12×8" print.

The entire rectangle is 3:2 (900 by 600); the red zone represents 4:3 (800 by 600); and the purple zone is 1:1 (600 by 600).

Originally, these aspect ratios were as a result of our film sizes. Lots of medium format cameras produced square, or 1:1, images; 35mm cameras used film that measured 36 by 24 millimetres, giving an aspect ratio of 3:2. What's referred to in the film-making world as 'Academy Ratio' is very close to 4:3. It's also the common aspect ratio you'll find in smartphone cameras as well as Micro Four Thirds and some medium format cameras. 16:9 is usual for recording video.

While our digital sensors might preserve these aspect ratios in their physical dimensions, at the press of a button I can switch between 3:2, 4:3, 16:9, and 1:1 on my camera. And when I import an image into Lightroom or edit it in Snapseed, I can select from 1:1, 3:2, 4:3, 5:4, 7:5, 8.5:11, 16:9, or settle upon an entirely idiosyncratic free-styled aspect ratio. But why would I want to?

Composing the frame

It's about composition, and dividing and filling your frame.

Photographers talk a lot about subject placement, about the different rules that can be used to divide the frame, and about negative space. All of these elements contribute to creating visually appealing, dynamic images that draw the eye. It follows, then, that the dimensions of the frame will have an impact on composition: on where you place your subject and how much space surrounds it and how you divide your frame.

Different rectangles

We've already written about the square crop here on Photocritic, and how the eye has a tendency to move around a square frame, as opposed to across it, which it does with a rectangular crop. When changing between 3:2 and 4:3 crops, are there any considerations that need to be made?

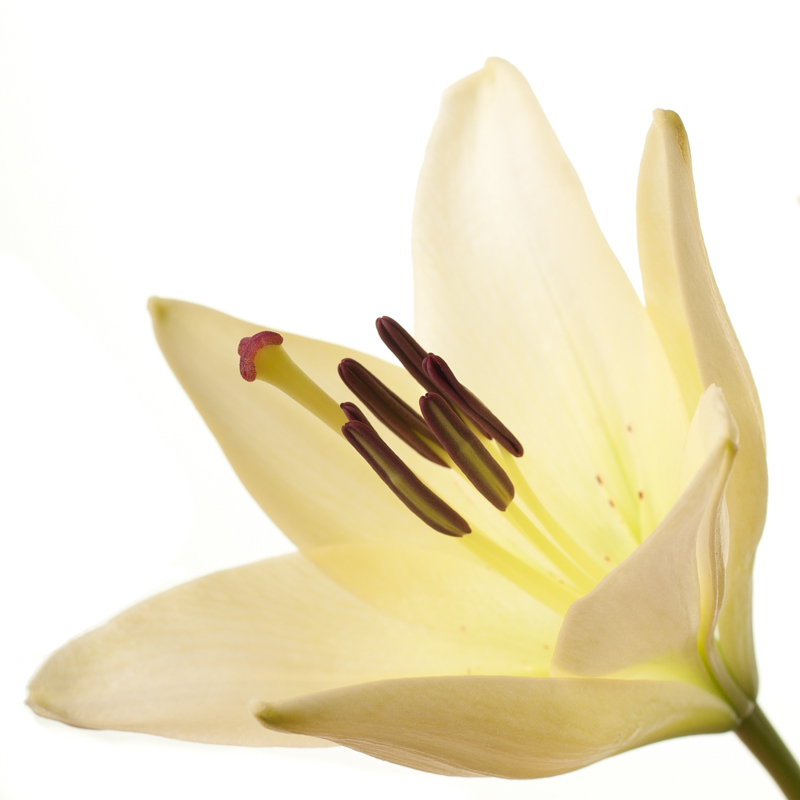
Lily square

At its simplest, you have more space to fill with a 3:2 frame. Depending on your style and your subject, this can mean your subject has more room to breathe compared to a 4:3 crop. But it can also mean your subject has that bit too much space and feels a touch lost. You certainly need to be aware of this when you're shooting; and indeed if you intend to have prints made.

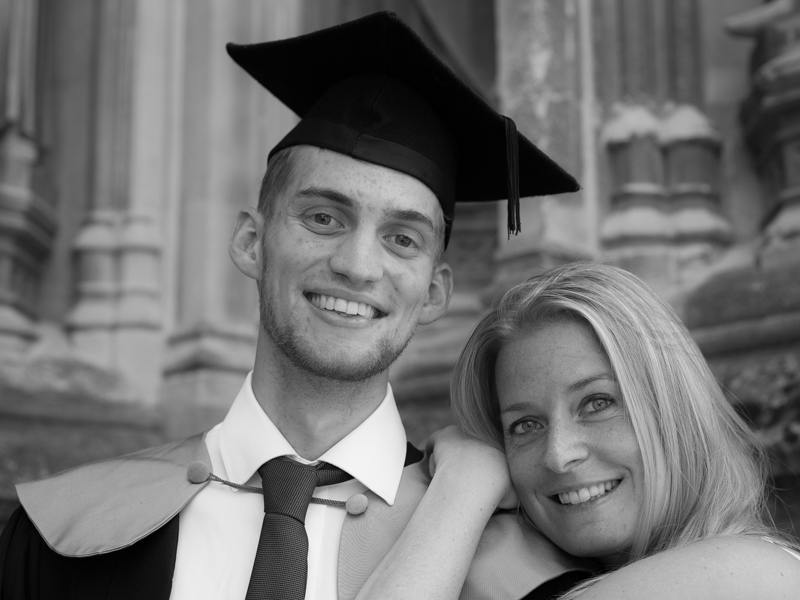
When I photographed my cousin on his graduation day, I adhered to my preferred 3:2 aspect ratio. It was how I approached filling the frame on the day and, consequently, how I processed the images afterwards. However, when my aunt had her prints made, she opted for a 24×18 canvas. I had to re-crop her favourite shot in a hurry. You can see both of them here. Can you see why I prefer the 3:2 aspect ratio in this instance? It doesn't feel nearly as squashed as the 4:3 version does.

My preferred 3:2 ratio - a little wider, with more room for the subjects to breathe

What my aunt needed for her print: 4:3 ratio. I think it looks more squashed. (Image measures 800 by 600 pixels.)

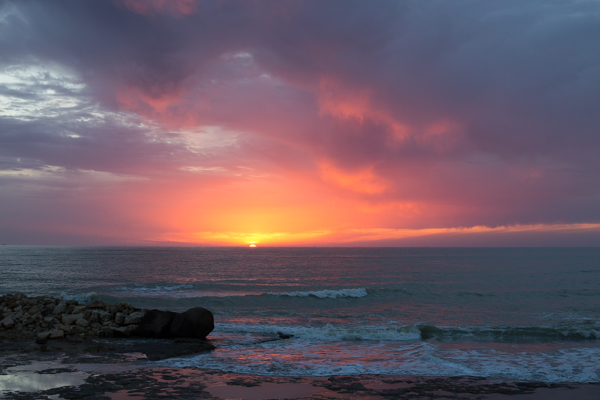
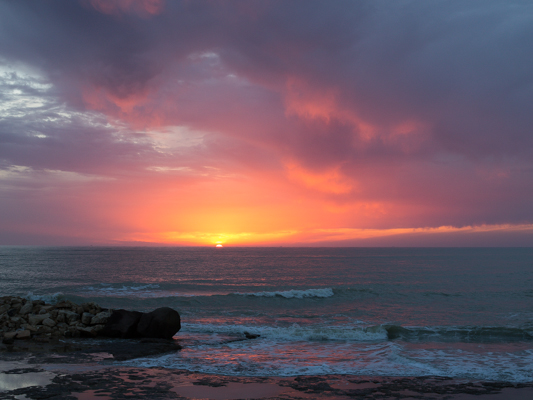
If you compare these sunset photos, you can see how much of the view the 4:3 version loses when compared with the 3:2 aspect ratio. It can prove difficult to fill the extra space in a landscape shot, but sometimes you need it, too.

Sunset, 3:2. (Image 600 by 400 pixels.)

Sunset, 4:3. (Image 533 by 400 pixels.)

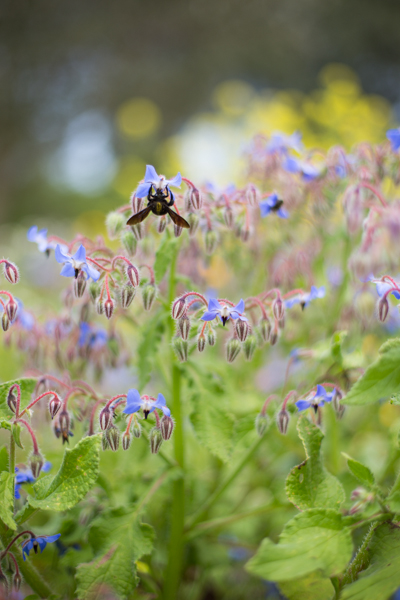
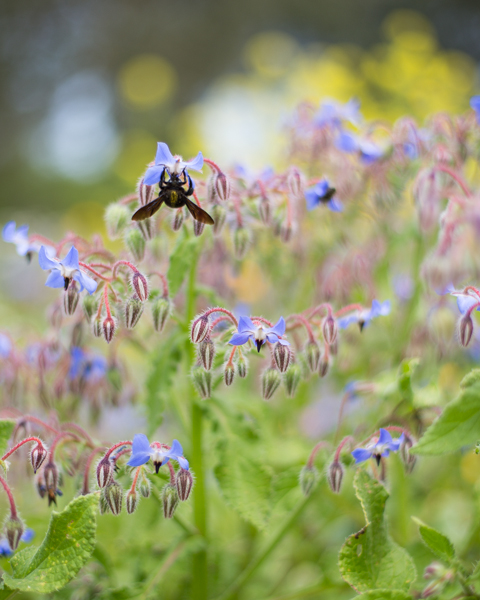
Of course, you don't have to adhere to 3:2 or 4:3 aspect ratios. I decided that 4:5 worked best for this bee enjoying the Sicilian springtime flowers. The more compact frame focused attention on the bee better than the larger 2:3 version.

The original 2:3 version

A more compact, and focused, 4:5 version

Don't forget, if you switch from landscape to portrait orientation, then the aspect ratio will alter format accordingly. Width always goes first, thus 3:2 will change to 2:3 and 4:3 becomes 3:4. Or in the case of the bee, it's 4:5.

Opting for a different aspect ratio doesn't necessarily mean that you need to use a different compositional rule; however, in some circumstances, you might find the Golden Ratio preferable to the rule of thirds. It depends on your vision for the image. But do think about how much space you need around your subject. If you're struggling to fill it, think of trying 4:3; if it looks squashed, consider 3:2. Or try something else. Try not to feel too constrained by the constraints of aspect ratio.

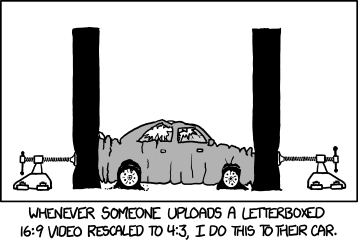
But I will leave you with closing thoughts from xkcd. Who could put it better?

Adobe has acquired Aviary. Good or bad?

When I saw last night that image editing start-up Aviary had been acquired by image editing behemoth Adobe my initial reaction was 'Hmm. Great for the Aviary team; but I'm not sure it's so great for consumers.' Fifteen or so hours on from that, and my opinion hasn't changed considerably. I'd probably augment it with 'Smart move by Adobe.' Using the term 'start-up' to describe Aviary might not be entirely accurate, but it's a question of interpretation, I suppose. It has been around since 2007 and its code has been used to edit over 10 billion photos. Even if you don't use its smartphone app to adjust your images, you might well have come across its editing tools that have been built into platforms such as Flickr and Mailchimp using its software development kit.

Great for Aviary

If part of the definition of 'start-up' is the intention to see your company acquired by another one, then Aviary at least meets that criterion. Judging by Aviary CEO Tobias Peggs' effusive blog post announcing the acquisition, this is all their Christmases, Chanukahs, and Eids rolled into one. And that's even without the agreed fee being disclosed.

Screen Shot 2014-09-23 at 14.29.41

The Aviary offices are close to those of Behance, which was acquired by Adobe in 2013. Their proximity meant the Aviary people talked a lot with Scott Belsky, Behance's co-founder who now serves as Adobe's VP of Products and Community, and 'it became obvious that we shared a strong vision for mobile creativity. It became even more obvious that we should join forces, accelerate combined efforts and better serve even more app developers and even more people wanting to be creative on mobile.' Aviary is all about allowing people to be creative, through its own apps and through its SDK. It thinks it can better do this by partnering with Adobe.

Smart move by Adobe

Apart from Aviary's app being a peach and Adobe being keen to expand its mobile prowess, Aviary's SDK is well established. Adobe's isn't: it launched as a beta in June. According to Scott Belsky: 'We have high hopes for the Creative SDK and are thrilled that Aviary will infuse wisdom, technology, and reach to new developers.' Provided that the likes of Flickr, Mailchimp, and Shopify don't run screaming, Adobe has made a calculated acquisition to expand itself into a market where it didn't have a strong foothold. For anyone familiar with the English Premier League, it feels a little like accusations of Manchester City buying its way to football titles rather than building its own team. If you can't beat the opposition, buy it.

Not so great for consumers?

We know that I'm cynical; it says so in my Twitter bio. Thus from my cynical consumer standpoint, I wonder how beneficial this is for Aviary's users. The Aviary and Adobe teams are enthusiastic for what they can build together, but in trying to merge two company's visions into one coherent strategy how much creativity will be sacrificed and how much will consumer choice suffer? To what degree might smaller company 'Let's do this!' mentality be eclipsed by corporate hierarchy? Might Aviary become less accessible as it is absorbed into Adobe's Creative Cloud?
My visceral reaction is that while there are potential benefits to be harnessed from the acquisition, there are plenty of pitfalls, too. I'd like to be proved wrong. I hate the see a good thing fail and I really like Aviary.

However, whether Aviary was 'right' to sell or not isn't within my purview, not really. It's a company, it's not the NHS. It acts in its best interests, not mine. I wish them all the best.

Patience is a virtue - a long exposure photo competition

Good things come to those who wait, or at least good things come to those with the requisite degree of patience required to capture a scintillating long exposure shot. Not only do you land yourself with a fabulous photo, but for this competition, rewards also come in the form of five gift cards valued at £40 to spend in the Triggertrap shop! We're on the look-out for the five best long exposure shots produced by you lovely lot. That's not the royal or editorial 'we', by the way, but Haje, Tom, who's Triggertrap's Head of Photography, and me. We don't mind what kind of long exposure shot you try: from urban scenes to light painting to smoothed waterfalls. What we want to see is a longer-than-expected shutter speed being used to creative effect to tell a story. We want to see images that leave us giddy with admiration.

Follow the points of light

Flickr is providing the image-hosting power for the competition; all you need to do is share your photos—up to five per entrant—in the Patience is a virtue Flickr pool before British Summer Time ends. So that's 01:59 (BST) on 26 October 2014. Consider it preparation for longer nights if you're in the northern hemisphere. We'll do the rest, and hope to have the results by Guy Fawkes Night. (Or 5 November 2014.)

(Un)Usual rules apply: you need to own the copyright to the images you submit; you shouldn't have done anything icky to achieve them (like sell your granny); you keep the copyright but we (that being Photocritic and Triggertrap) will want to be able to display it in conjunction with the competition; the prizes are non-transferable and can't be redeemed for cash; you can't be associated with Photocritic or Triggertrap to enter; the judges' decision is final; entry is at your own risk (quite what might happen to you because you enter I'm not sure, it's not like we're cannibals threatening to eat you, but we can't be held responsible all the same); photos have to be submitted to the Flickr pool before the closing date of 01:59 (BST) on 26 October 2014; and it's our competition so if we need to change the way it operates or the rules or heaven forfend chuck you out, we can.

That's about that. But if you need any advice on long exposures, you might want to check out our articles on shutter speed, bulb mode, zoom bursting, and light painting. Good luck: we can't wait to see what you produce!


And the results are in! You can see them here.

The great Photokina 2014 round-up

Keeping track of everything new that's announced at Photokina can feel like something of a labour of Sisyphus. So rather than cover every new product with an individual article and drive everyone to distraction, we've opted to summarise as many as we can in one place. This is Photokina 2014. Enjoy!

Canon

After what amounts to years of speculation, Canon has finally announced the EOS 7D mark II. The basic spec: APS-C, 20 megapixel sensor; ISO 100 to 16,000 but expandable to 51,200; dual DIGIC 6 processors; 65-point auto-focus; top shooting speed of 10 frames-per-second; and built-in GPS. All for $1,800, body-only.

The Canon EOS 7D mark II. At last.

Three new lenses have joined the line-up, too: an EF-S 24mm ƒ/2.8 STM for $149.00; an EF 24-105mm ƒ/4.0L IS STM for $599; and the EF 400mm ƒ/4.0L DO-IS II (USM) at $6,899.

There are also three new compact cameras. The premium G7X with its 1", 20 megapixel sensor and DIGIC 6 processor; top sensitivity of ISO 12,800; and a 24 to 100mm lens with a maximum aperture of ƒ/1.8 at its widest and ƒ/2.8 at the telephoto end, for $700. The SX60 superzoom with its 65× optical zoom for $550. And the N2, which, like the Powershot N, leaves me baffled.

The G7X

Fujifilm

Fujifilm announced an update to its much-loved X100-series; the X100T. This one comes with an improved hybrid viewfinder, enhanced controls, and faster shuttre speeds. All for $1,300, in either black or silver.

The X100T with a silver finish

The X20 has been upgraded to the X30. The improvements to Fuji's point-and-shoot focus on a new viewfinder and a tilting 3" high-res LCD. You can order one for £600.

Fujifilm X30 compact

There were also two new lenses: the X-F 56mm ƒ/1.2 R APD (85mm quivalent in 35mm format) for $1,500. (APD is apodisation. It is designed to give even smoother bokeh than the normal XF56. Great for portrait work.) And the weather resistant 50-140mm ƒ/2.8 R LM OIS WR at £1,600.

And don't forget the graphite-look X-T1 for $1,500 body-only.

Joby

Roll-up, roll-up, get your suction cups from Joby! Adding to its range of twisty, bendy, go-anywhere camera support devices, Joby has unveiled two suction cups, designed to provide industrial-strength hold on all types of smooth, clean, and non-porous surfaces. One has a locking arm, that's best for use in vibration-prone situations, such as in cars or on board boats (£33). The other has a Gorilla-pod arm, a quick-twist, flexible option that's better for windows, walls, and inside cars (£25).

[gallery columns="2" ids="6976,6975"]

There's also the Pro Sling Strap, designed for dSLRs, to keep your camera close to your body but easy to pull up to your eye (£57); the GorillaPod Focus + Ballhead X is the strongest and largest GorillaPod to date (£140); and the Flash Clamp and Locking Arm, which helps to transform everyday objects into lighting assistants with the two articulating ball joints that let you position your flash at any angle (£35).

[gallery ids="6979,6978,6977"]

Leica

Leica announced a laundry list of new cameras at Photokina:

  • Leica M 60 Edition - an LCD-less camera, limited to 600 units, and costing $18,500 with a 35 Summilux stainless steel lens
  • M-A
  • X - Type 113; and X-E
  • S - Type 007; and S-E
  • V-Lux - Type 114
  • D-Lux - Type 109, basically a Panasonic LX100

And a goodly selection of lenses, too. Leica enthusiasts couldn't have known which way to look first!

Nikon

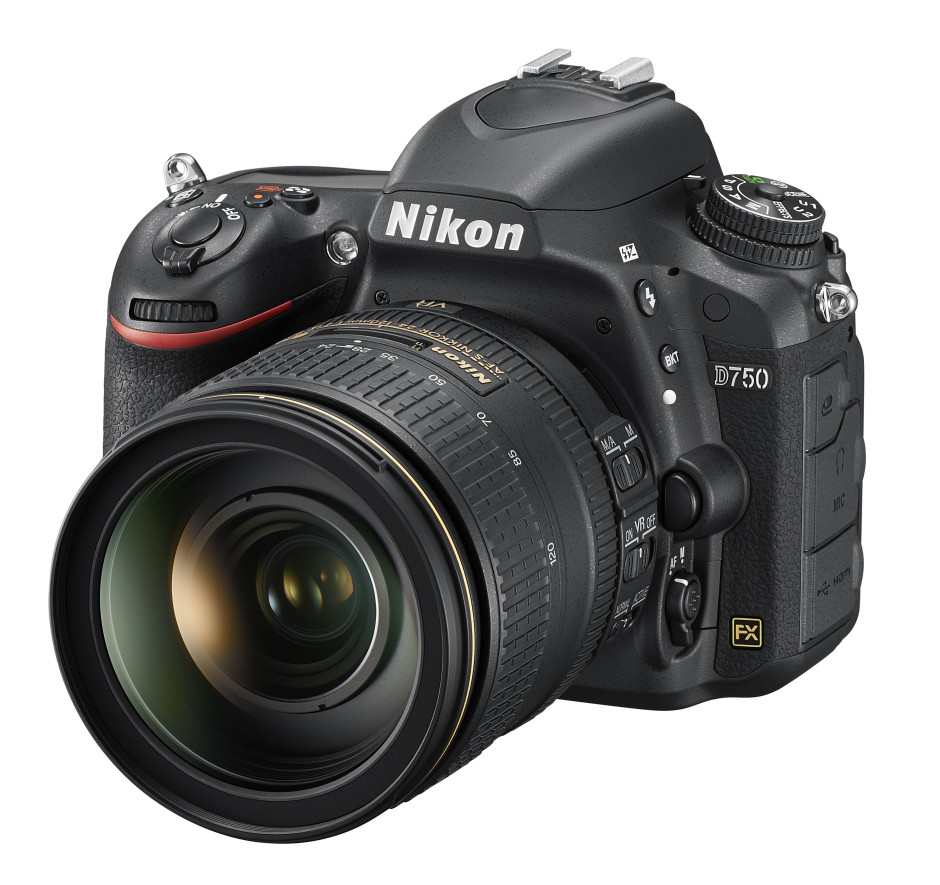
Nikon's big announcement was the D750: an FX-format camera with 24 megapixel sensor and EXPEED 4 processor, 51-point autofocus system, sensitivity ranging from ISO 100 to 12,800, a tilting LCD, built-in wi-fi, all crammed into a smaller-than-expected body. For $2,300, body-only.

Nikon's new D750

There was also the new Nikkor AF-S 20mm ƒ/1.8G ED and the SB-500 Speedlight.

Olympus

[gallery ids="6969,6968,6967"]

As well as announcing the E-PL7, Olympus brought out its E-M1 in silver (body-only for $1,400) and a new 40-150mm ƒ/2.8 lens for $1,500.

Panasonic

Panasonic came up with two new cameras and a new lens, together with the re-branded Leica cameras under the V-Lux and D-Lux badges.

[gallery ids="6966,6965,6964"]

The new LX100 camera is available for $900. It has a Micro Four Thirds sensor, a 4-75mm Leica DC lens (ƒ/1.7-2.8), and comes with an external flash. The GM5 mirror-less camera comes in black or red, with a 12-32mm lens, for $900.

And there's also the Panasonic G Vario 35-100mm ƒ/4.0-5.6 ASPH lens for G-series cameras, costing about $400.

Samsung

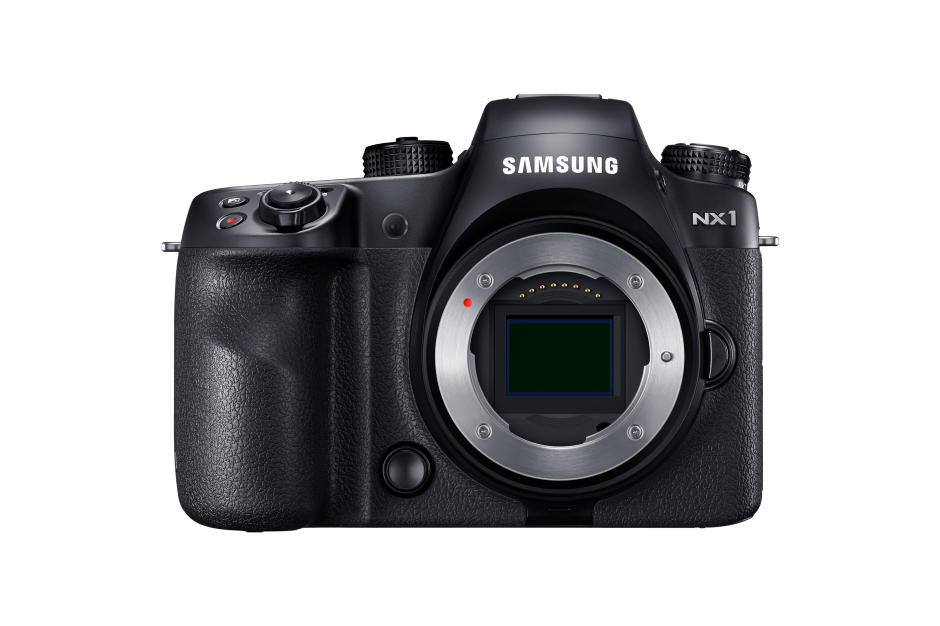
Samsung let loose a new camera, lens, grip, battery, and charger on the public in Köln. The camera is the 4K-video-enabled 28 megapixel NX1 for $1,500 body-only and the lens the 50-150mm S.

4K-video-enabled, for under $1,500

Samyang

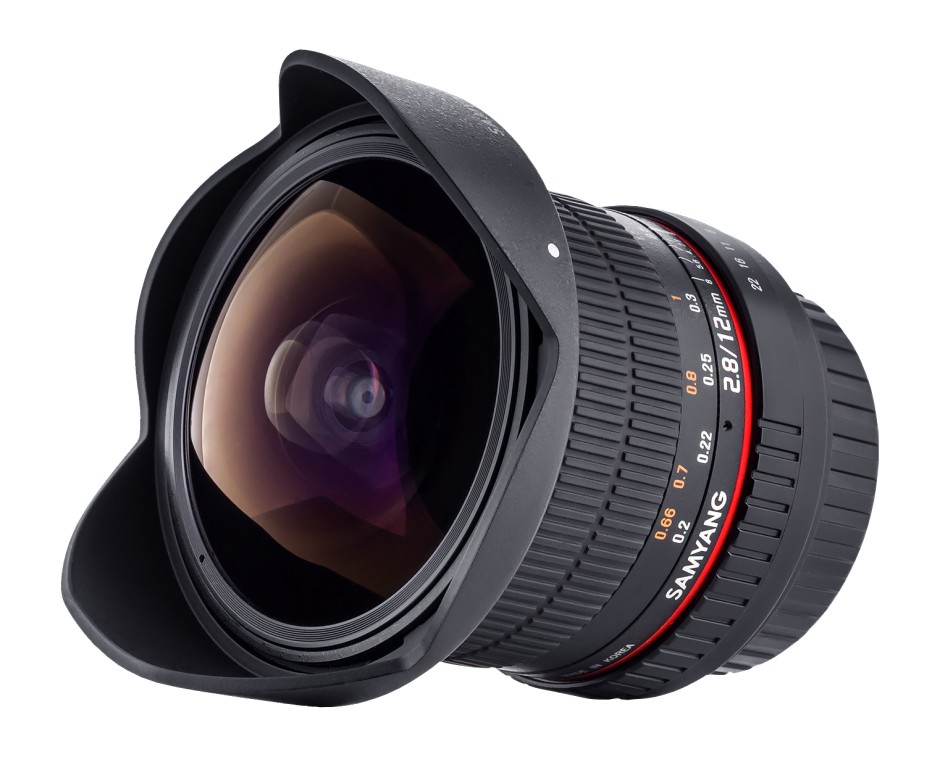
As well as the 50 mm T1.5 AS UMC cine lens, Samyang also announced its 12 mm ƒ/2.8 ED AS NCS fish-eye lens, which has been designed for full-frame cameras. We don't have a price or release date yet for it, but I am looking forward to seeing it.

There's no price or release date yet for Samyang's full-frame fish-eye

Sigma

Sigma announced its dp1 Quattro camera, with a Foveon direct image sensor that is similar to traditional colour film in that its multiple layers capture all of the information that visible light transmits. It also announced two different versions of the same lens: the 150-600mm F/5-6.3 DG OS HSM Sports and the 150-600mm F/5-6.3 DG OS HSM Contemporary. The sports version is, probably quite obviously aimed at sports and wildlife photographers. The contemporary label is more compact and portable.

Both 150-600mm, one bigger, one smaller

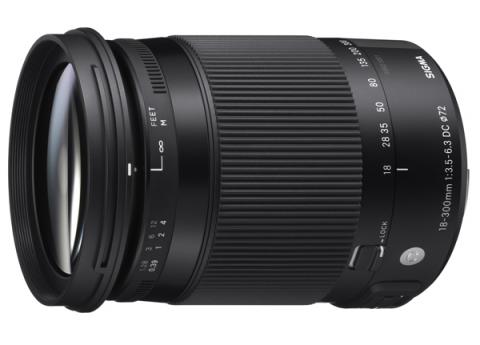
There was also the 18-300mm F/3.5-6.3 DC Macro OS HSM Contemporary lens.

A new macro lens from Sigma

Sony

Just before Photokina, Sony announced two new lens units, to attach to smartphones. These were the QX1 and QX30. During Photokina, a slew of camcorders, video cameras, and accessories were unveiled, too. The things that caught my eye was the flash unit, the HVL-F32M for $300.

Trying the golden triangle

One of the first compositional rules that we learn is the rule of thirds. It's relatively simple but definitely effective: divide the frame into three, horizontally and vertically, and use the divisions to place your subject. But rules are made to be broken—once you understand them properly, that is—or at least adapted and challenged. If you're looking to leave behind the rule of thirds but still want place your faith in geometrically validated subject-placement, try the golden triangle. Look closely...

Determining the golden triangle

Draw an imaginary diagonal line across your frame. Now draw imaginary lines from the other two corners, which each meet the long line at right angles. It should look something like this:

Where the lines meet: your points-of-interest

Your points-of-interest are where the lines meet. Use them to place your focal point, for example the eyes in portraits, and use the lines to divide your frame and draw the eye to the focal point to help create dynamic images.

Why use the golden triangle?

On a mundane and practical level, it's easier for some people to visualise the triangle than it is the rule of thirds. Moving towards a more creative purpose, by using triangles to compose your frame you're introducing a strong compositional shape to it with a great sense of balance pitted against a precarious point. And triangles have a nifty way of retaining the attention of the eye within the frame: the eye moves from one point to another in a continuous loop.

[gallery ids="6953,6954,6955"]

Quite specifically with the golden triangle, you give yourself a means of dividing the frame in a way that is frequently more pleasing to the eye than a horizontal or vertical split. As well as using the lines to draw the eye to focal points, the use of triangles in the frame brings balance to the image. Think of one half as blue and the other as yellow. Or shadow versus light.

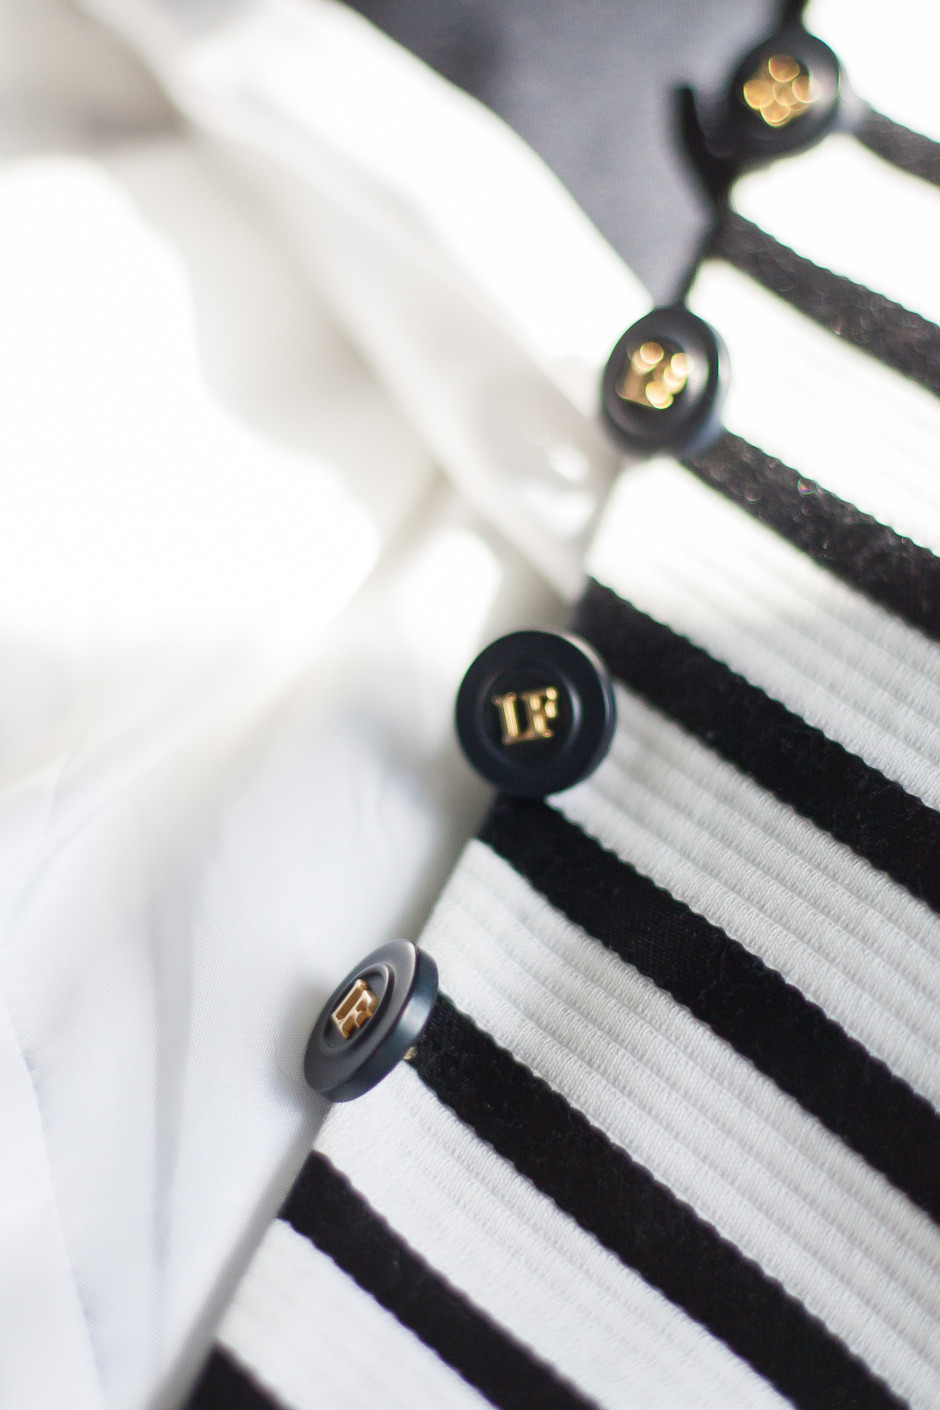
White against stripe

By counter-poising the two points-of-interest against each other, you can enhance the sense of balance in the frame. You get dynamism and balance in one go: brilliant.

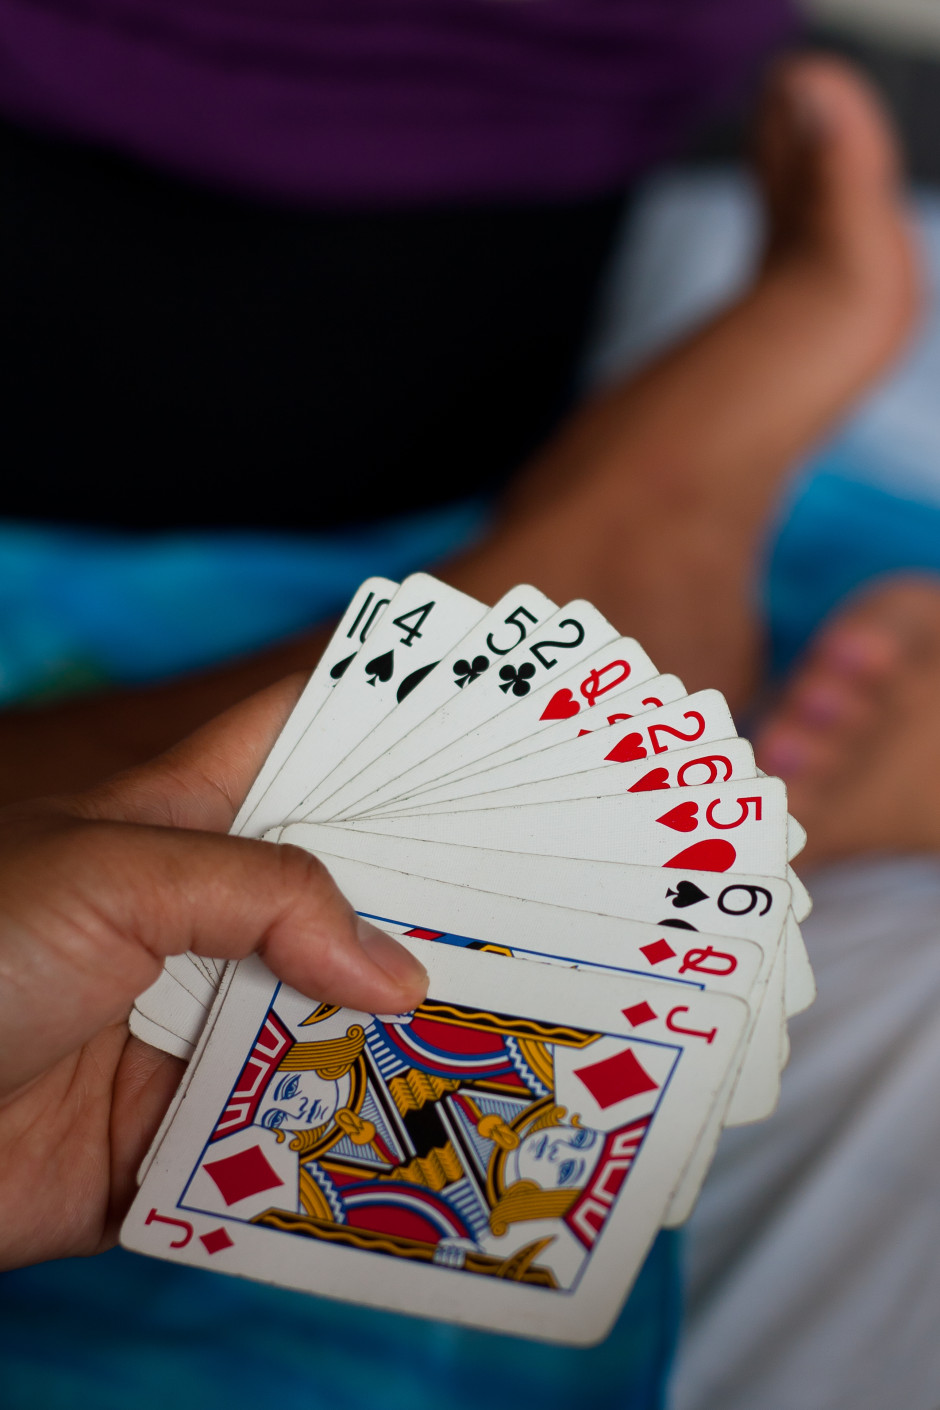
Cards balanced against foot

Putting it into practice

It's all very well knowing the theory - what about the practice? Try portraits with your subject leaning into the frame and the eyes on a point-of-interest. Use the rule to place bridges in your frame, and have the eye travel along them to a focal point. Just give it a try - you never know!

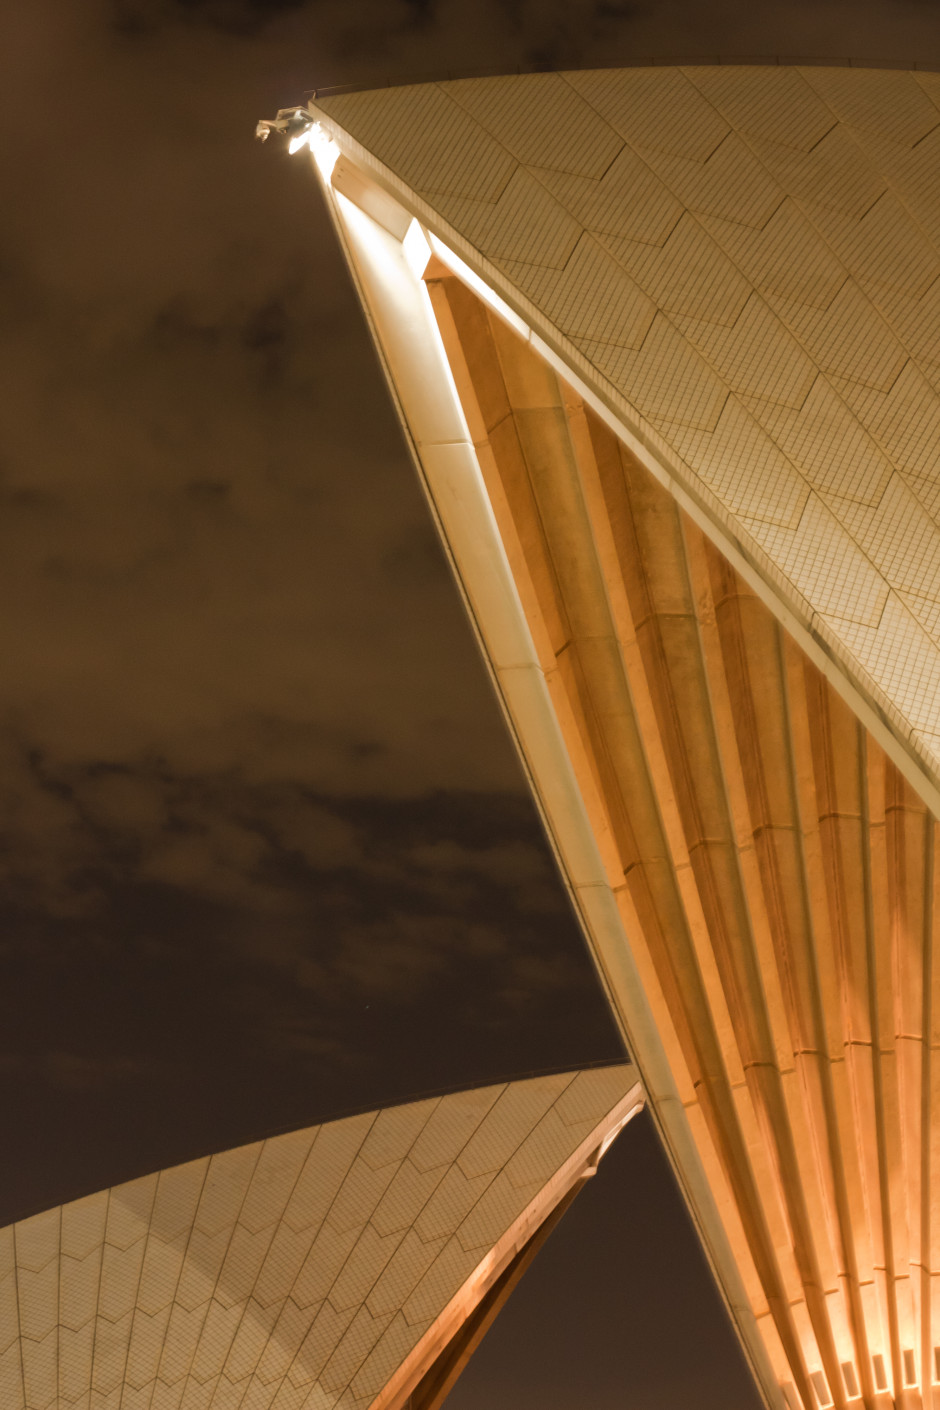
Triangles galore!

Riding the waves to smooth water images

Photos that feature milky-smooth flowing water seem to have a Marmite effect on people: they're either loved or hated. I'm often rather ambivalent towards them, but it doesn't mean that it isn't a useful technique to have up your sleeve if you're faced with a weir or waterfall and you want to capture an image with smooth-looking water that has a sense of flow to it. Image thanks to Tom at Triggertrap

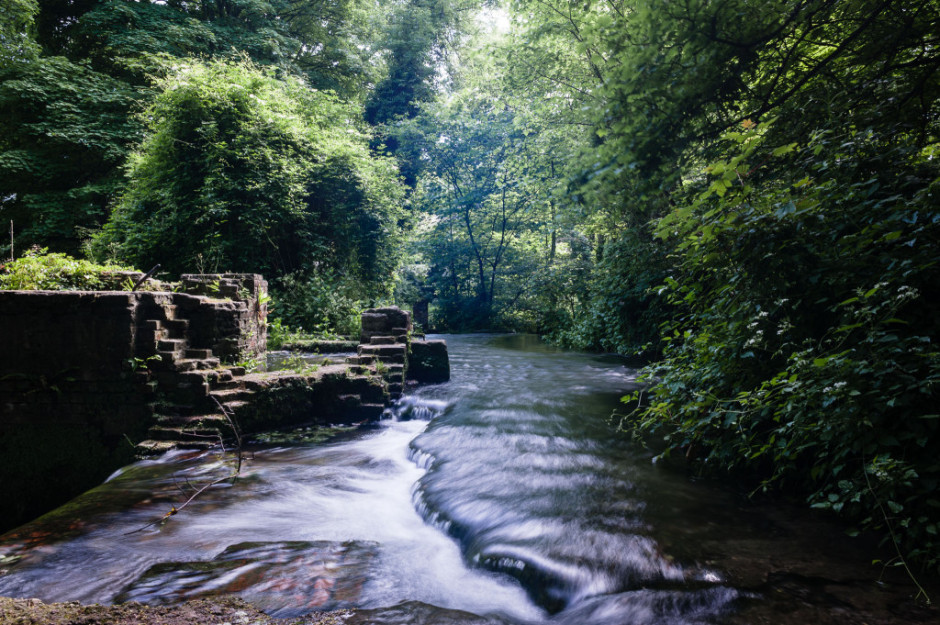
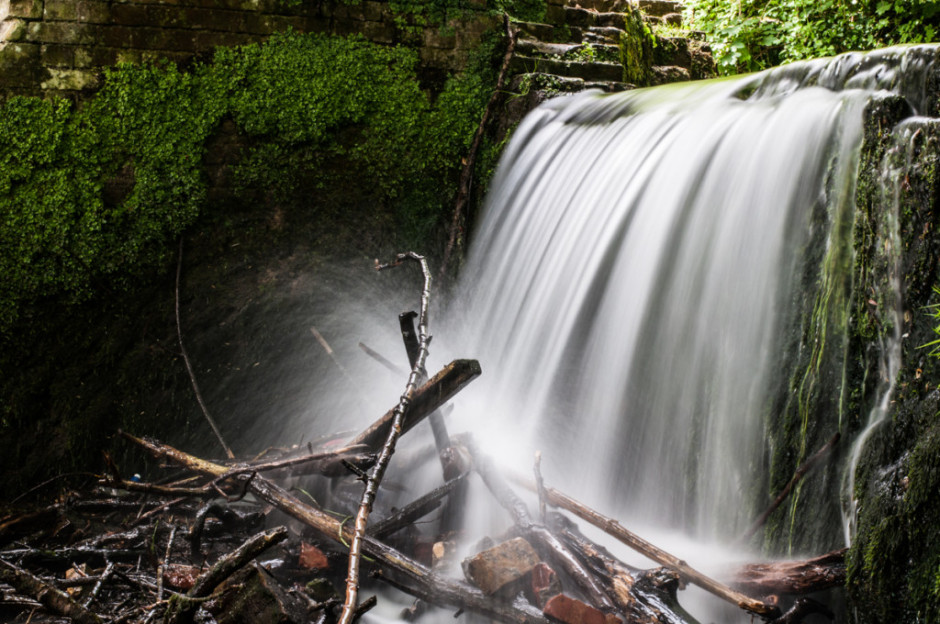
There's no great secret to shooting a photo that has water flowing through it that looks smooth: it's done using a long exposure. The slow shutter speed captures the the water as it moves, making it blurred. The blur, in this instance, gives the water a smooth appearance.

Shooting long exposures in daylight hours comes with an inherent problem, however. Over-exposure. Our cameras' sensors are capable of detecting far more light than we think they are, and even using the lowest possible ISO and smallest available aperture, a long exposure can result in an over-exposed photo when taking during the day. To get around this irritation, you might want to try a neutral density (ND) filter over your lens.

APL0719-1024x681

ND filters are grey filters that cut down the amount of light that enters your lens without affecting the colour of your images. They come in different grades, or densities, blocking out between one stop and 12 stops of light. Screw one over your lens and you'll give yourself a great deal more flexibility when it comes to shooting daytime long exposures.

Then of course you'll need a tripod. You might want to capture the motion blur of the water, but you'll want to avoid camera-shake and the rest of the scene getting the wobbles. Even though you'll be using a very small aperture with an enormous depth-of-field, still think carefully about your framing of the shot and its point-of-focus. Make sure it's telling a story.

Image thanks to Tom at Triggertrap

Obviously you'll need to have your camera in manual mode to ensure that you can adjust the shutter speed, ISO, and aperture to get the photo that you want. Almost certainly you will need to use the lowest ISO and smallest aperture avalable. When it comes to shutter speed, you might find that you need to venture into bulb mode to get the shutter speed you need. And we recommend that you use a remote shutter release to prevent jolting your camera on its tripod and shifting its focus, too.

Then it's a case of hitting the cable release and leaving the camera to do its thing.


All images are courtesy of Triggertrap. You can learn more about using remote releases on the awesome Triggertrap How-to site!

How to create an image gallery in Wordpress

We spend quite a bit of time discussing sharing our images here, there, and yon on Facebook, Twitter, and Instagram, as well as on custom-built platforms such as Photoswarm or Photoshelter, but we don't tend to talk so much, if at all, about good old Wordpress. I've no idea why we tend to overlook CMSs—perhaps because there's an assumption that you should know what you're doing if you have one—but at least for once, I thought we'd change that. [gallery ids="6934,6938,6939,6935,6936"]

Wordpress benefits from a huge number of plugins that you can use to augment your website-running experience, from free ones to premium ones, to plugins that block spam to those that manage your editorial calendar. But if you want to insert a simple gallery of images into a Wordpress post, there's no plugin required. You can manage it directly the Add Media function. It's not the most glamorous of galleries—it doesn't offer a carousel, for example—but it does allow you to sample a selection of images.

Create a new post

That's an obvious place to start. Give it a title, add the text that you want, create some tags; all the usual.

Meta

Hit the Add Media button

Go to add images just as you usually would. Hit the Add Media button towards the top left of the page.

Select Create Gallery

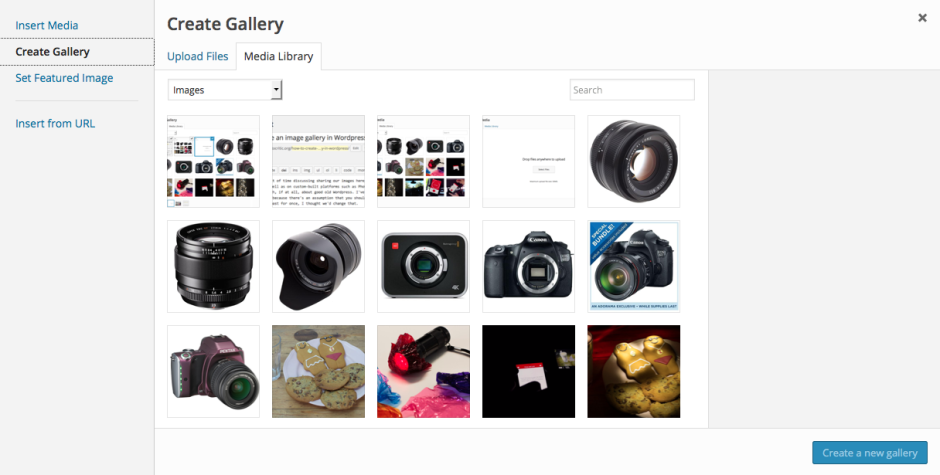
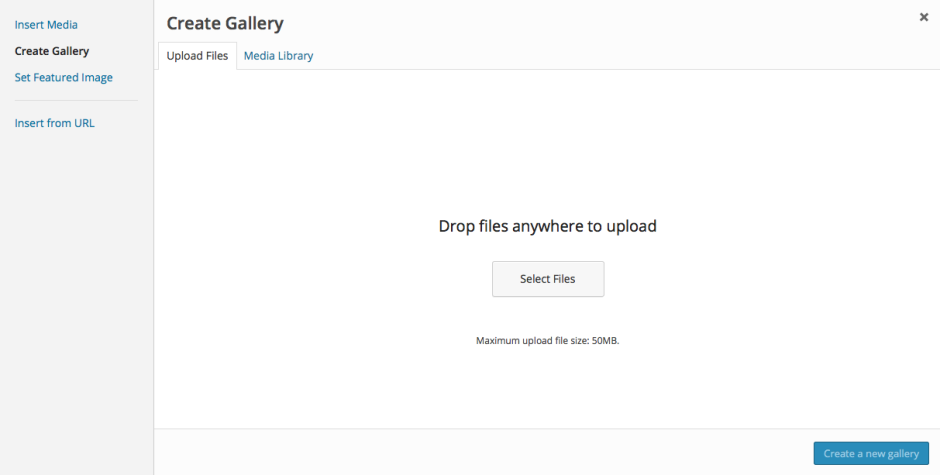
You'll automatically find yourself on the Insert Media panel. On its top left you'll see three options: Insert Media, where you already are; Create Gallery; and Set Featured Image. (There's Insert from URL just below those, too.) Choose Create Gallery.

A bit more meta

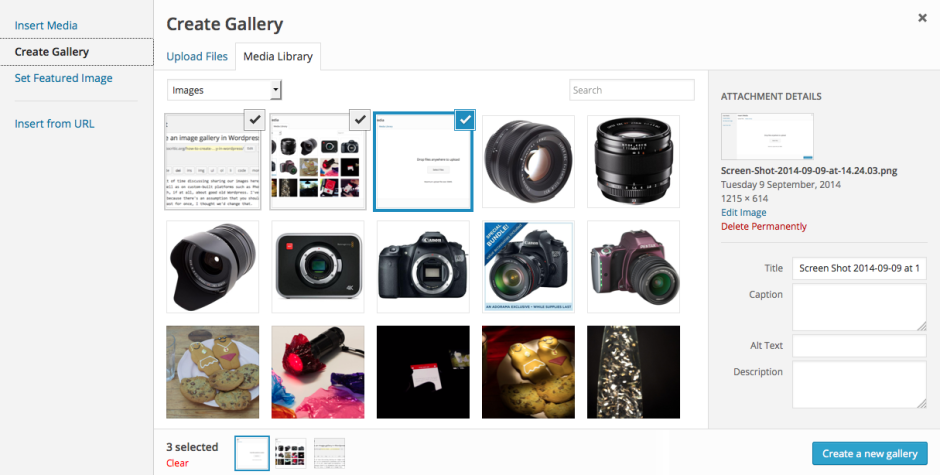
Upload or select your images

If you've already uploaded the images to your Media Library, go ahead and select them now. Otherwise choose the Upload Files tab and go ahead and upload your chosen images from your computer as you usually would.

Increasingly meta

Create your gallery

When you've selected your images, press the 'Create a new gallery' button at the bottom right of the page.

Does this get any more meta?

Now you get to organise your gallery, deciding on the order in which you want the images to appear (drag-and-drop to re-arrange them), in how many columns you'd like them arranged, and whether you'd like the images to link through to an attachment page when a viewer clicks on them. Don't forget to add captions if you need them, too. Do that beneath each image. Tap Insert Gallery and you're done!

Meta-overload

If you'd like to try a carousel of images, you might want to check out the Jetpack plugin, but otherwise, this should keep you in image galleries for the moment.

Painting with light - a how-to to get you started

If you'd like to try a more unusual approach to lighting a photo, whether that's because you want to experiment or because you don't have access to studio lights, you might want to consider light painting. This isn't the type of light painting when you make patterns and shapes and designs with light sources to create your image, but using light sources to illuminate your scene during a long exposure. At its simplest, it involves outing the lights, setting your camera to bulb mode, and using a torch to 'paint' light onto your subject. Want to give it a go? Read on!

Paited with light (image thanks to Triggertrap)

Kit

You don't need anything especially fancy for light painting: a camera on a tripod, a scene that you want to illuminate, and a torch are the minimum requirements. You might find it easier to control your camera's shutter using a cable release for flexibility and when you're more confident you might want to try some more advanced techniques, but let's start here.

Imagining your scene

Before embarking on your light painting adventure, it's best to think about the scene that you want to illuminate and the story that you want to tell. While you might herald some impressive results from waving your torch about in random formations, that's unlkely to result in the image that you anticipated. Take a little time to consider your subject and how you want to light it.

Tasty, but not necessarily interesting. Wait until we let some torches loose on it, though! (Image thanks to Triggertrap)

Camera!

Scene set and lighting scenarios imagined, you need to secure your camera on your tripod and select your exposure. For light painting, try bulb mode controlled by a cable release, a low ISO, and an aperture that gives you the look you want. You'll need to manually focus on your subject, too!

Lights!

Turn out the lights and start your long exposure.

Lights! Camera! Action!

Action!

Use your torch to begin to paint light over your subject. There's going to be some trial and error involved in getting the effect that you want, but that's half of the fun! Not keen on what you see? Try it again!

Stretching your creativity

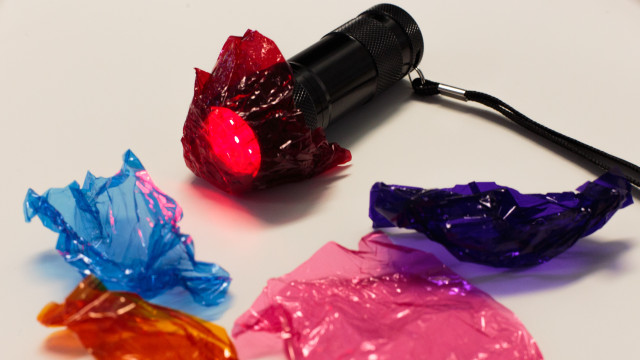
When you've mastered the basics, you can push your experimentations further. Try introducing coloured light to your images by covering your torch with coloured gels, or even sweetie wrappers. You can make cut-out filters to shape your light. Or direct your light more accurately with a snoot manufactured from cardboard and gaffer tape. You're not limited to inside, either. Try light painting buildings and monuments or flower pots - whatever takes your fancy and you've sufficient fire-power to illuminate!

Sweetie wrappers will do in the absence of gels (image thanks to Triggertrap)

This is something that doesn't have to cost the earth but can render some fabulous results.


Much of this, including all the images, is based on the fantastic How to paint a still life with light tutorial found on Triggertrap's How-To microsite, and it's reproduced with permission. Triggertrap How-To is full of great content for making the most of your camera. You should take a look.

We're going on a roadtrip - grab your camera and drive-lapse

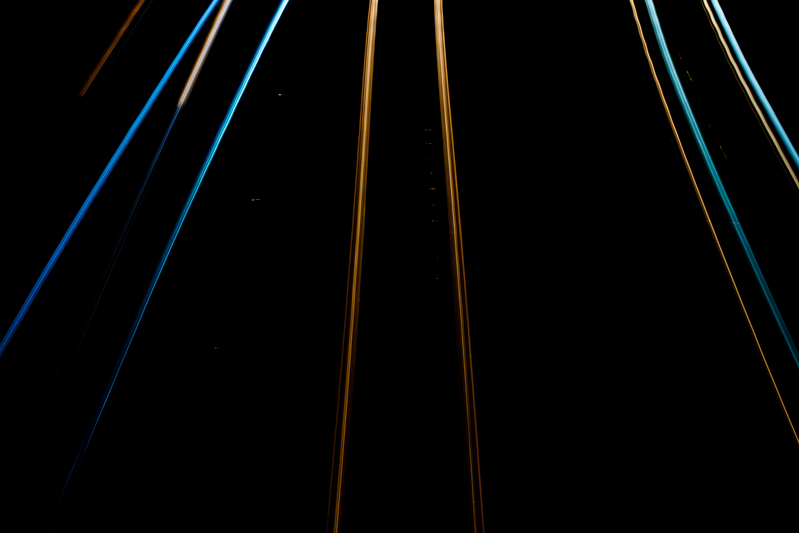
I'm meant to be driving to Edinburgh tomorrow—good health permitting—and if my car weren't due to be crammed to the gunwales with my brother's belongings, I might've considered turning it into a drive-lapse. Or a time-lapse of the journey. It would be possible to do this using a common-or-garden time-lapse technique, but if I were to find myself stuck in a traffic jam (heaven forfend), we'd have shot after shot of my car stationary on the A1, which isn't so thrilling. The clever people at Triggertrap have developed a way around this problem, however: distancelapse mode. Rather than triggering your camera to take a photo at timed intervals, it exploits your smartphone's GPS to take a photo at specific distance intervals. How very nifty!

Safety first

Shooting a drive-lapse will necessitate mounting your camera and triggering device securely in your car, with a decent view of where you're going. While this might seem simple, whatever means you choose to mount your camera in your vehicle, you must do it safely. Laws will vary from country to country, but the primary consideration is that your kit mustn't obscure the driver's vision and neither must it be a distraction. Do be sure of the regulations before you go anywhere.

Selecting a mounting option

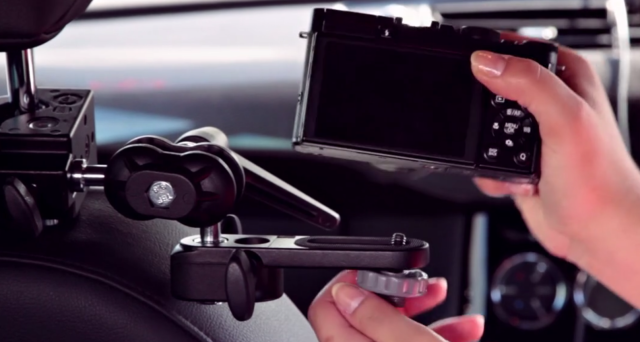
You have a few options to mount your camera in your car. A superclamp attached to the passenger seat's headrest stalks is ideal: it won't obscure the driver's vision and the camera has a great view. Alternatively, you could opt for a suction cup on the windscreen or a tripod wedged in the backseat. Remember: it's about being safe.

Aperture priority mode or Manual?

Choosing your preferred shooting mode for a drive-lapse can be a bit of a conundrum. If you're likely to encounter changes in the weather conditions or light throughout the duration of your journey, manual mode will leave some shots over-exposed and other under-exposed. Aperture priority mode can solve the exposure issue, but leave you with a flicker problem. You're going to have to weigh up which mode will suit your journey, and therefore your final video, best.

Time and space considerations

If you're going on an especially long journey, you'll need to make provision for this, in terms of your personal needs and your kit's. Your memory card will require sufficient space and you might need an external charger for your phone, too.

Drive time!

With all of these considerations, ehm, considered, it's time to do this!

Mount your camera

As we've already discussed, your camera needs to be mounted legally and securely. You don't want it wobbling about if you encounter potholes or sleeping policemen.

This was a Manfrotto clamp, for the record

Camera, meet Triggertrap

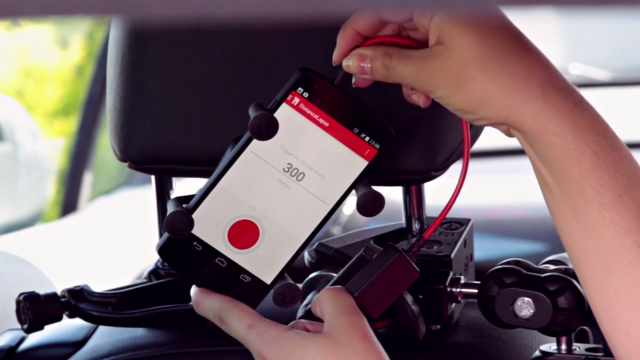
Hook up your camera to the Triggertrap dongle and the dongle to your smartphone. Secure your smartphone, too, as you don't want that moving about.

You could do this as an ordinary time-lapse, but if you get caught in traffic, it could prove a bit dull

Set your camera

Your camera needs to be in manual focus mode in order for Triggertrap to function, so if it isn't already, switch it to manual focus and adjust to get the image sharp. You also need to choose between aperture priority and manual exposure modes, and set your exposure accordingly.

Let Distancelapse take the strain

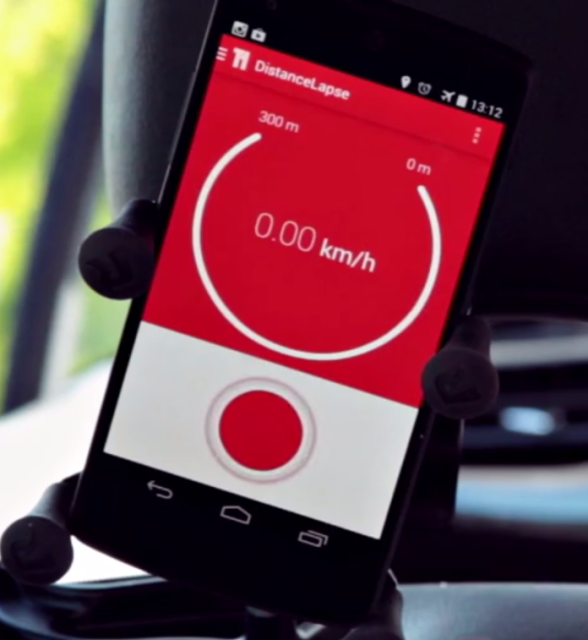
Open up the Triggertrap app and select the Distancelapse mode. If you're driving on the motorway, 300 metres is a good interval. Hit the big red button, allow the GPS to settle, and then off you go!

300 metres should do the job

Putting together your video

When you've completed your journey and have all your images, it's time to compile them into a video. We'll save that for another article, but this one should get you started. Then you get to relive the journey, in shortened form.


Much of this, including all the images, is based on the fantastic How to shoot a road trip timelapse tutorial found on Triggertrap's How-To microsite, and it's reproduced with permission. Triggertrap How-To is full of great content for making the most of your camera. You should take a look.

Shooting star trails

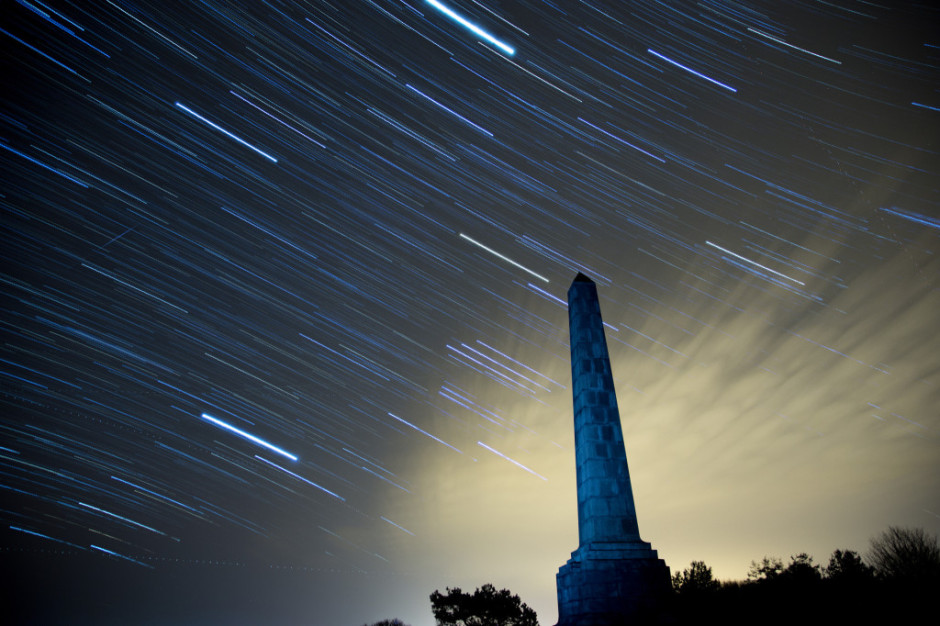
Star trail photos can be incredibly compelling and while they take time to produce, they're probably not as difficult as you might think they are. In fact, there are two methods that you can use to capture the night sky with the stars streaking across it: a single long exposure or what effectively amounts to a time-lapse composited into a single image. This is our guide to shooting star trails. Star trails by Thomas Langley (thanks to Triggertrap)

Location

Light pollution can be a pain when you're attempting to shoot a star trail photo. If you're not able to see the stars, your camera won't be able to, either. Should you live in a city, this means looking for a location that's suitably isolated to give you a view of the sky, but isn't so isolated that you make yourself vulnerable. And if you don't live in a city, you still need to be somewhere accessible.

You also want to think about your scene. You might find that having something of interest in the foreground of your shot will improve it. Barns, dilapidated or otherwise, obelisks, and rock formations are all good starting points.

By finding Polaris and focusing on that, you'll produce a circular star trail; point your camera somewhere else in the sky and your trails will be more linear.

Timing

The best time of year for shooting star trails is definitely dependent on personal preference. How long you can manage safely in the cold is probably your primary concern. But you do need to be shooting on a cloudless night with no or little moon.

Setting up

Once you've decided on your location and set up camp with warm clothes, thick boots, and a thermos flask, it's time to set up your camera.

Camera

Set your camera on its tripod; place it in manual mode and switch the lens, preferably a wide-angle one to get as much sky in the shot as possible, to manual focus, too. Frame your shot—ideally with something of interest in the foreground—with the lens focused to infinity.

When it comes to exposure, you need to be in bulb mode, the aperture should be as wide as possible, and try ISO 1,600.

Take a test shot with a exposure time of 30 seconds; if the stars are bright and clear, you're ready to go. If it looks a little dark, adjust the exposure time until you're happy.

Camera trigger

If you're using an intervalometer, you need to set it to record as you would for a time-lapse video, using the exposure time you tested for.

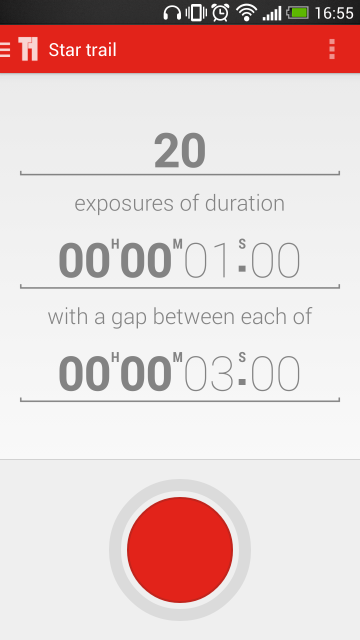
Choose your exposure time, number of exposures, and the intrval between them

If you're using Triggertrap Mobile with its star trail mode, set the exposure time that you established in testing with a two second interval between frames, and select the number of frames you want to take. You can choose a huge number of frames and stop after half an hour or 45 minutes of shooting if you're not certain how long you need to be out there for.

Hit go!

That should be about it. Hit go and wait for your camera and the universe to work its magic. Do remember to keep warm and safe!

Compilation

When you've accumulated all the images that you need, it's time to compile them into a single image with the help of some software. If you have Photoshop, that's perfect. If you don't, there are other options including the star-trail-specific StarStax.

A stack of images

Transfer your images from the memory card to your harddrive, keeping them in a single folder with their original file numbers. Whichever programme you use, this is important to ensure that the images don't get out-of-synch. The rest of this tutorial uses Photoshop to assemble your star trail shot, but you should be able to extrapolate the process to any other programme.

Import your images

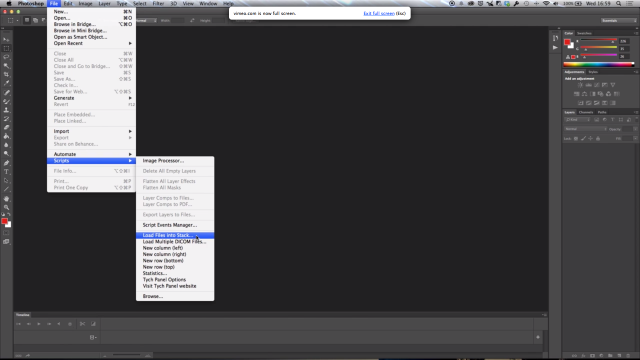
Open Photoshop and import your star trail images using File –> Scripts –> Load Files into Stack. Select your folder of star trails photos, highlight all of the photos, and then select Open followed by OK.

Stack importation makes life easy (Image thanks to Triggertrap)

Blending

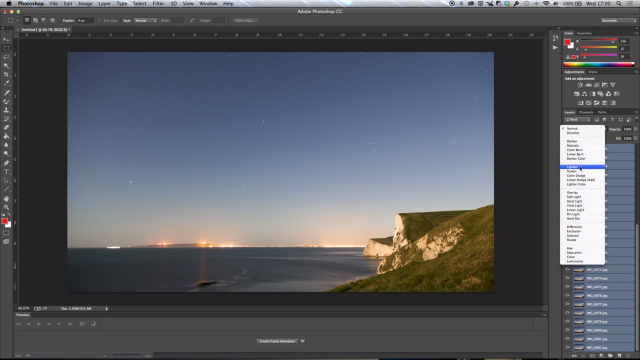
When all of your photos have made their way into Photoshop, select all of them in the Layers panel, and then in Blending Mode select Lighten. Tah-da! You should have a star trail composite.

Blend them together for your final image (Image thanks to Triggertrap)

You can make adjustments to individual layers if you want, but otherwise, you're done and it's a case of saving. (You might want to save an unflattened PSD file and a flattened JPEG version.)


Much of this, including all the images, is based on the fantastic How to capture a star trail tutorial found on Triggertrap's How-To microsite, and it's reproduced with permission. Triggertrap How-To is full of great content for making the most of your camera. You should take a look.

Today's World Photo Day! What are you going to do to mark it?

Today is World Photo Day. If you're wondering how a 2009-invented celebration of the visual medium came to be on 19 August, it's because that's the day in 1839 when the French government announced that it had purchased the patent to the daguerreotype method and made it a gift 'free to the world'. Armed with that snippet of information, the pressing question is, what are you going to do to mark it? For anyone in need of a little inspiration, here are some Photocritic suggestions to mark World Photo Day.

1. Try something new

Photography is a learning curve. There's always something new to try or with which to experiment, so pick something you've not done before and give it a go.

Crazy-shallow depth-of-field with a macro lens

May we recommend, in no particular order and certainly far from exhaustive:

2. Go back to basics

The technological wonders that we can perform with our cameras today can sometimes obfuscate the simplicity of photography. It's painting with light. So why not go back to basics: pick up a pinhole camera and rediscover the perfection of capturing light in a box.

The ONDU pinhole in action

3. Have a print made

How many of your photos are hanging on your walls and how many are stuffed away on hard drives as binary files that never see the light of day? Do justice to your skills: pick your favourite image and have it printed to hang on your wall.

4. Set yourself a challenge

We can't all be good at everything. But we can try to improve. Which aspect of photography do you find challenging? What would you like to do better, but find a struggle? Maybe your landscapes come across as flat and dull? Perhaps your portraits fail to capture your subject's spirit? Is your food photography not exactly good enough to eat?

Decide on a point of focus and challenge yourself to improve over the course of the coming year. Read. Practise. Try. Maybe fail. Definitely try again. Keep a record of your experimentations. Come World Photo Day 2015, you can measure your progress.

5. Teach a child to take a photo

There's no better way to share your passion for something than to teach it to someone else. So why not help to develop the next generation of photographers by teaching them how to take photos. It doesn't have to be complicated or difficult, just the basics. We've even got a tutorial to help you.

Sony's A5100 is available to pre-order from Adorama

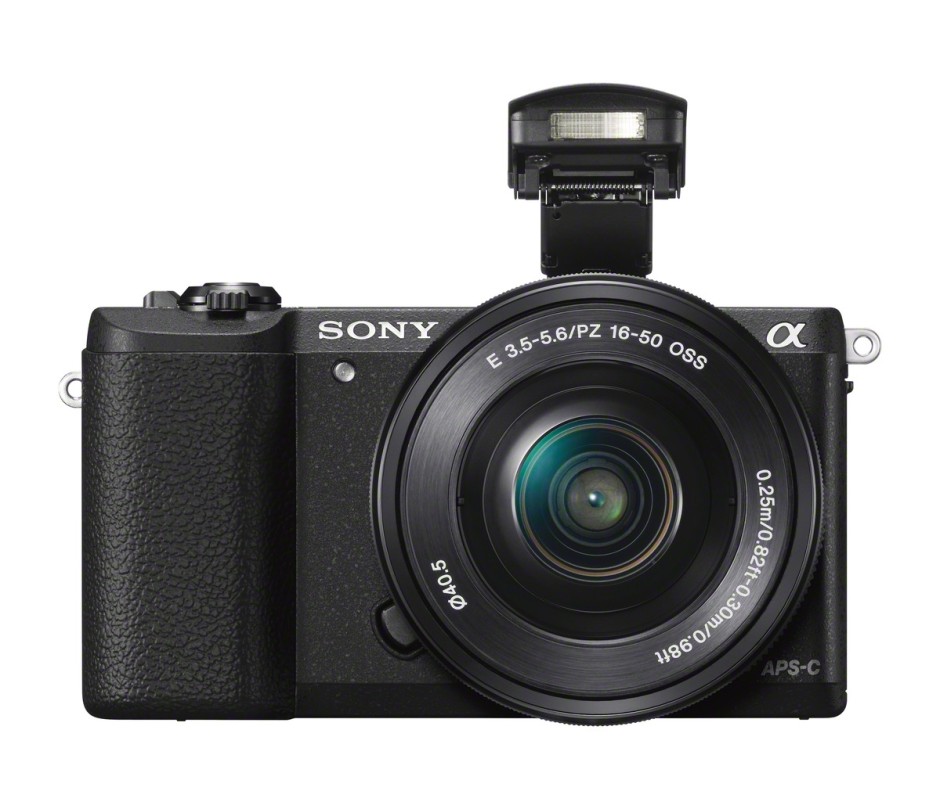
Sony announced its A5100 yesterday. It has been referred to as both a replacement for the NEX-5T and as a camera sitting between the A6000 and the A5000. It has a 24.3 mepagixel CMOS sensor, auto-focus that's been described as 'lightning fast' (although not quite as fast as the A6000), upper sensitivity of ISO 25,600, a pop-up flash, wi-fi, and a touchscreen. But there's no EVF. ILCE-5100_wSELP1650_pop_up_black-1200

It'll come in black or white and Adorama has them available for pre-order. Body-only, it'll cost $550; if you'd prefer an A5100 with the 16-50mm lens, that'll be $700.

Owning a camera doesn't make you a photographer; neither does a camera bag

I'm not certain how the tweet ended up in my Twitter timeline. I don't follow the company in question. Possibly it was as a result of Twitter's new-fangled algorithm that it implemented recently. It shares tweets with you that have been favourited by people whom you follow. However I came to read it, it left me feeling marginally despondent.

No my darlings. I don't agree. It's neither my camera nor my camera bag that makes me a photographer. It's me. I make me a photographer. I'm sure you did this with the best of intentions and you just wanted to draw attention to your range of camera bags with a quirky slogan and a pretty picture. However, you've overlooked an important detail: you've just denigrated the very people to whom you're attempting to sell your product. By suggesting that being a photographer is down to kit, you've ignored the skill and craft that photographers hone, the hard work that they dedicate to making each picture better than the last.

I suppose it's an easy mistake to make. Ask any photographer how often they've heard 'You're a photographer? You must have a really great camera!' and you'll be met with any combination of head-shaking, teeth-gnashing, or groaning and a reponse along the lines of 'Too many!' But as a company that's meant to work with and support photographers, it's terribly disappointing. I thought that you guys might've understood.
It doesn't matter which craft you practise—whether you're a photographer or a saddler or a dancer—the principal factor behind anyone's success is her or himself. It is about skill and dedication and a willingness to learn, to experiment, to try, to fail, and to try again. It's about a constant desire to improve. Kit? That's always way, way down the list.

What do football, copyright, and Vine have in common? A lot of money and a lot of confusion

The English Premier League kicks off tomorrow and in addition to last minute transfer news, shock managerial sackings, and managerial press conferences, copyright and broadcasting rights and the use of tablets inside Old Trafford have made headlines, too. The issue of tablets and laptops inside Old Trafford is fairly self-explanatory: Manchester United has prohibited bringing them inside the grounds owing to security reasons. The copyright issue seems to have people in more of a flap. And heavens, this isn't the first time it's happened. The Premier League has stated that it will be taking action against people who compile and share Vines of goals that they record from live broadcasts of matches. Being able to live-pause broadcasts makes this relatively straightforward technologically, but it's a breach of copyright.

This has thrown up a few interesting questions, not least from the BBC's Technology Correspondent, Rory Cellan-Jones, who wondered if his Google Glass recording of Brentford matches would violate copyright.

I'm fairly certain it wouldn't violate copyright, but it could well infringe on other rights. So if everyone will be please calm down, and preferably sit down, I'll explain what (I think) the situation is.

Copyright

Copyright is the right to make copies of someone else's creative endeavours. When I click the shutter on my camera, I own the copyright to the image that creates. When BT Sport or Sky Sports record and broadcast a football match, they own the copyright to the broadcast. That is, the producer decides on which cameras to use and how to put together their sequence of use, which constitutes the original work. The football match itself isn't copyrightable, it's the broadcast of it that is.

As well as charging their subscribers a fee to watch the matches, BT Sport or Sky Sports can charge other broadcasters to use these images or they can keep them all theirselves. Their pictures; they decide.

When someone sitting at home on the their sofa and watching a football match compiles a Vine of the goals using pictures transmitted by BT Sport or Sky, they're violating BT Sport's or Sky's copyright. They are taking BT Sport's and Sky's work and using it without permission and without paying for it.

When you read that BT Sport and Sky Sports are complaining about their copyright being violated, this is what they mean.

Broadcast rights

When BT Sport and Sky Sports won the contracts to televise Premier League matches, they paid an excruciating sum of money for broadcast rights, or the opportunity to transmit live pictures from the game. The BBC holds the broadcast rights to highlights of the Premiership matches. They paid a fair whack for that, but not quite as much as BT Sport and Sky Sports. This season The Sun and The Times have the online rights; this is big business and it's this money, paid to the Premier League, which has made it into the financial behemoth that it is.

Turning up at Old Trafford or Stamford Bridge and taking photos or video of a match would get you into a different type of trouble, therefore. If you were to try to stream the match live from your seat, you wouldn't be very popular with a gaggle of corporate lawyers for infringing on broadcast rights. Not to mention you'd likely upset the fans sitting around you if you obstructed their view. Whether or not you can take a camera into a football stadium and take some photos for personal use seems to be open to clubs' interpretation. It's worth checking what it says on the ticket. Some might be happy for you to take a photo to remind yourself of the day; others might want to throw you out for just having a camera.

I have no football photos, so have one of the Tour de France instead

Broadcast rights and copyright are different beasts, but from the same genus. You'd own the copyright to any images you were fortunate enough to make inside a stadium, because you'd made them. What you wouldn't own are the broadcast rights to let you redistribute them. Not unless you'd paid an eye-wateringly large sum of money for the privilege and you probably don't have enough kidneys for that.

Performers' rights

Back to Rory Cellan-Jones and his tweet asking about copyright violations at Brentford, someone asked if it wouldn't breach performers' rights. No. As far as I can tell, performers' rights don't extend to sporting events, at least not in the UK, so there would be no infringement there.

Tablets

Now we get onto Manchester United's prohibition against tablets and laptops inside Old Trafford, which was announced earlier this week. According to officials there, the decision to ban larger devices, including iPad Minis, was made in response to security concerns. They're worried someone might want to pack a bomb into a device, much like airlines are. The ban doesn't extend to smartphones, provided that their dimensions are no larger than 15 centimetres by 10 centimetres (5.9 inches by 3.9 inches). Seeing as smartphones have not been banned and they're still capable of taking photos, we'll take this one at face value. And quite frankly, if it stops people obscuring others' view with when they're recording with the iPads, so much the better.

In conclusion

Please remember that I'm not a lawyer. I'm a writer who takes a fiendish interest in copyright and I've applied a healthy dose of common sense to its ramefications, together with a bit of research.

If you want to take photos or video at any sporting event, I suggest that you check with the stadium before you turn up with any manner of kit. You don't want to forfeit your ticket or have your gear confiscated. Speaking from experience, just go and enjoy the game. Fiddling about with electronic equipment detracts from the atmosphere and what's happening in front of you - the reason why you're there. But maybe that's for another article.

When it comes to making Vines from what you can see on TV - don't. Protecting intellectual property applies to little guys as much as it does to big guys. If we don't want them stealing our content from social media sites and using it for free, best not to infringe their copyright either.

Dare to stray into bulb mode

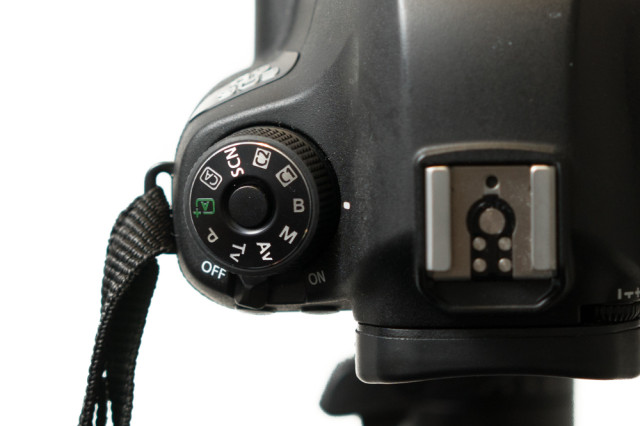
When setting your shutter speed, have you ever wound the adjustment wheel so far into long exposure that you've gone past seconds and found 'B' or 'Bulb' on your screen? Or maybe you've noticed that you have a 'B' option on your mode wheel, somewhere between Manual and Custom settings? This is bulb mode, and it allows you to control the duration of the exposure for precisely as long as you would like. It's perfect for exposures in excess of the 30 seconds that most cameras have as their longest shutter speed, or for when you need to be in control, for example if you're practising high-speed photography. First, a quick word on why it's known as 'bulb' mode. Haje has a much more thorough explanation here, but it doesn't have anything to do with light bulbs. It's from back in the day when you could control your shutter speed using an air bulb connected to your camera.

'B'? What the hell does that do? (Picture thanks to Triggertrap.)

When your camera is in bulb mode, you open the shutter by depressing the shutter release button; as soon as you raise your finger off of the button, the shutter will close. Seeing as it isn't terribly convenient to stand with your finger on your shutter release button for minutes or even hours on end—and it's not fabulous for camera-shake, either—most people use bulb mode in conjunction with a remote shutter release. And a tripod, but that's probably quite obvious.

Plenty of remote shutter releases come with a locking mechanism, so that you don't need to hold your finger down there, either. However, if you go for something such as our much-beloved Triggertrap, you can select from a variety of different modes to control your super-long exposure, including a timed release that lets you set the duration of your exposure down to fractions of a second, a star-trails setting, and even a bulb-ramping option to fine-tune exposure during very long time-lapse recordings.

Late night in East London

Even if you're shooting at night, your camera's sensor will be able to detect far more light than you think it can, especially with a very long exposure. Consequently, using a small aperture is recommended. If you're photographing during the day, you might benefit from a neutral density filter to prevent unavoidably over-exposing your images, too.

It is worth bearing in mind that using bulb mode can drain your battery enormously. Don't set off to capture star trails with a less-than-fully-charged battery. Take a spare if you have one, too. It's a complete waste to maroon yourself in the middle of nowhere with limited light pollution only for your camera to keel over halfway into the exposure.

Waterfalls, shot using bulb mode. (Picture thanks to Triggertrap.)

Now that you know what bulb is, what can you do with it? Perhaps you'd like to try some long exposures of landscapes? Or maybe capture some smooth, milky-looking water tumbling from a fall. You might want to try your hand at a star trail, or have a go at light painting. You could even grab a flash adapter and have a crack at some high-speed photography and burst some water balloons. So many options presented to you with so much time from bulb mode!

Depth-of-field in greater detail

We're probably all familiar with the notion of aperture controlling the depth-of-field in our photos. By using a faster aperture, you create a shallower depth-of-field. To keep more of your image in focus, you need to use a smaller aperture. But there's a whole lot more to depth-of-field than adjusting your aperture to get more or less of the scene in focus.

'Acceptably sharp'

Let's start with setting out what we mean by depth-of-field. It's the range of distance in a photo that is considered to be 'acceptably sharp', or what we would regard as 'in focus'. Only the actual point of focus in a photograph is definitively sharp and 'in focus'; depth-of-field describes the zone of acceptable sharpness either side of it. A wider band of 'acceptable sharpness' running through an image equates to a greater depth-of-field. To introduce more blur into your photos you would want a shallower depth-of-field with a narrower band that's 'acceptably sharp'.

A shallow depth-of-field with a gradual fall-off

It's worth remembering that there's no sudden transtition from 'sharp' to 'unsharp': focus falls off gently on either side of the plane of focus, regardless of the aperture you use. It is fair to say, though, that larger apertures have a more rapid transition from in- to out-of-focus than larger apertures.

[gallery ids="6855,6856,6857"]

Controlling the depth-of-field in an image is achieved primarily by adjusting your aperture—a smaller aperture for a greater depth-of-field; a larger aperture for a shallower depth-of-field—however, there are other factors that affect it, too.

Focal length

You'll often hear people say that telephoto lenses have a shallower depth-of-field than wider angled lenses. This isn’t strictly true. It’s more accurate to say that because telephoto lenses are mostly used to magnify subjects, and the subject will then fill more of the frame relative to the background, the depth-of-field appears to be shallower.

200mm; ƒ/3.2

All the same, it's worth capitalising on the magnifying effect from telephoto lenses to pick out your subjects and surround them with blurred foregounds and backgrounds.

Subject-to-lens proximity

If you've ever practised macro photography, you'll appreciate how getting closer to your subject makes it harder to get it all sharp. The closer that you position your subject to your lens, the shallower your depth-of-field will be. Choose a subject further into the background and you'll find that the depth-of-field surrounding it is larger.

Crazy-shallow depth-of-field with a macro lens

Distribution of acceptable sharpness

Depending on the focal length you use, you will find that the depth-of-field isn't divided equally in front of and behind the plane of focus. Instead, the area of acceptable sharpness behind the point of focus is generally larger than that extending in front of the focal plane. As focal length increases, so too does the distribution of the depth-of-field in front of the subject.

When you shoot with a focal length of 15mm about two thirds of the depth-of-field will be behind the subject and one third in front of it. When you get to 400mm it's closer to a fifty-fifty divide.

Depth-of-field: not just about aperture.

Standing out in the crowd - or how to take meaningful photos among lots of people

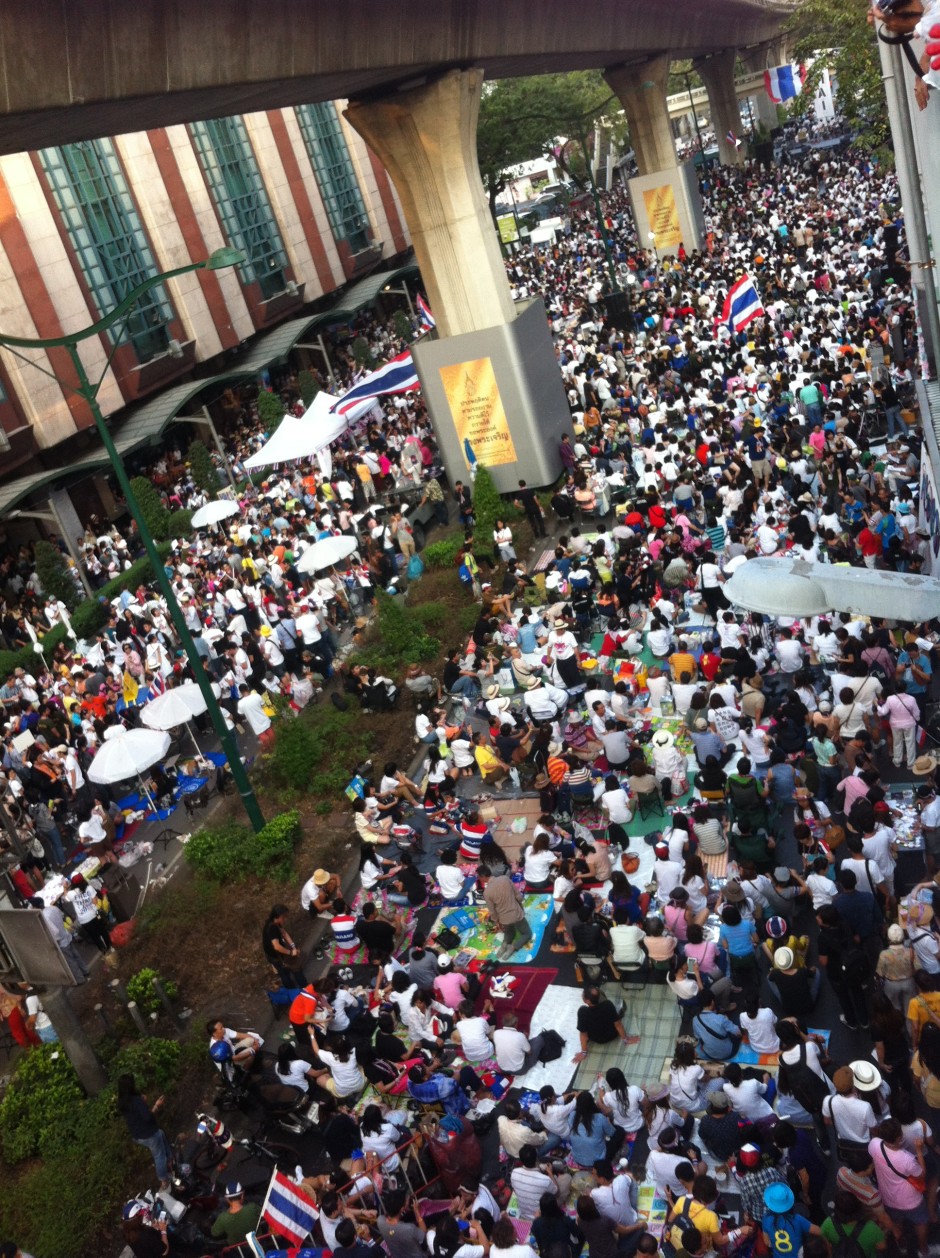
'Tis the summer (here in the northern hemisphere). 'Tis the season for festivals and fairs and fetes. 'Tis the season when people might want to capture crowd scenes with their cameras. Shooting crowd scenes is easy, yes? There's so much going on that all you have to do is raise your camera, point it in the right direction, and shoot to produce an interesting photo, yes? Ehm... no. Anyone who's ever tried to take a compelling crowd scene photo will appreciate that it's far harder to get it right than it is to get it wrong. Frequently, crowd photos emerge as amorphous collections of strangers with no clear narrative or obvious focal point. Anyone whose attention doesn't wander irretrievably will be left asking 'So it's a photo of what?' But mostly the eye will scan over an ordinary crowd scene shot, fail to find anything of interest and be drawn into the story, and move on to the next shiny thing. Your audience is gone.

It's a crowd. And a large one. But where is it going? What is it doing?

What makes crowd photos so difficult? The very fact that there is so much going on in these scenes is usually their undoing. Every photo must tell a story. (Along with 'Get closer!' and 'Just because it's on the Intergoogles, it doesn't mean it's free to use!' it forms the third edge of the Photocritic mantra triumvirate.) Rather than expecting your audience to determine what the story might be among the tens, maybe even hundreds, of people, you have to set about deciding on what the story is and composing an image that conveys that.

When you're thrust amongst a crowd, or are perhaps looking down upon one, ask yourself: 'What am I trying to relate here? What's the story?'

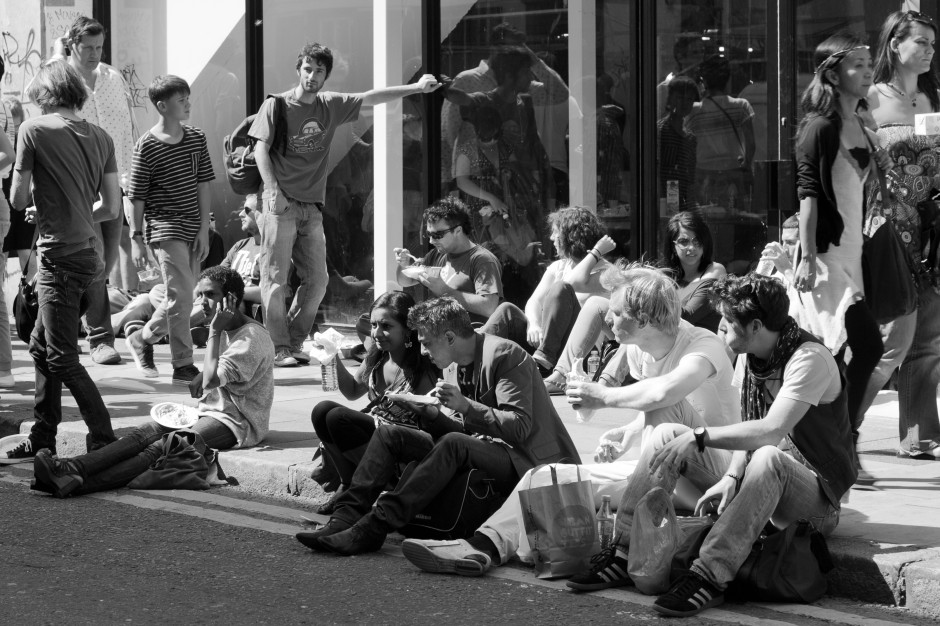
Sunday. Corner of Brick Lane and Hanbury Street. It's always crowded. Look for the lull, the change, the aberration. The guy leaning, and watching, and waiting.

Perhaps it's the sheer number of people? Maybe it's the focus of thousands of individuals on one figure on a stage? Is it a solitary red shirt in a sea of blue? Sometimes it's a case of waiting patiently for that moment: a sting of eye contact, a dropped doll, a wearied pause. Define the story and you're halfway to creating a compelling image.

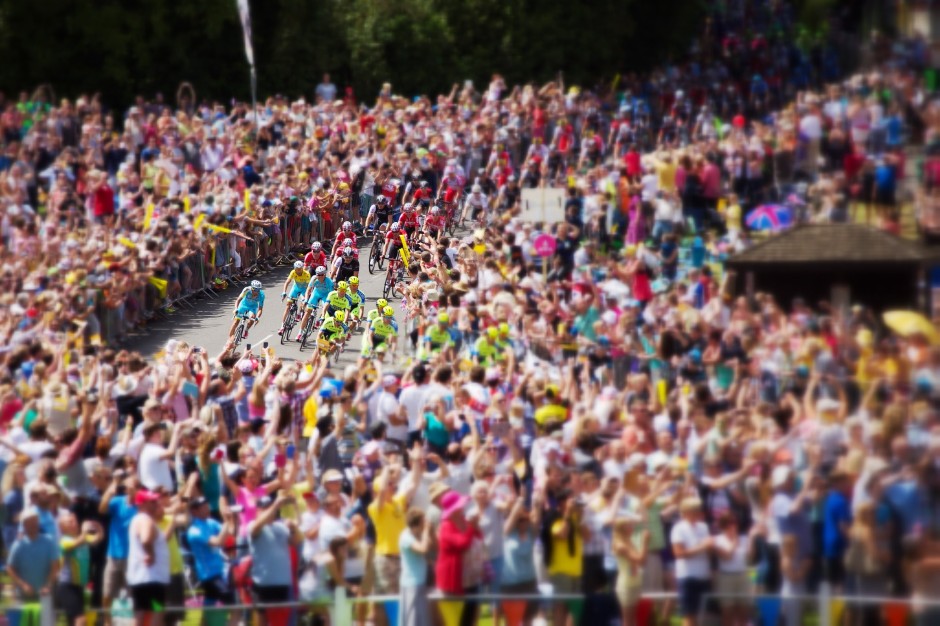
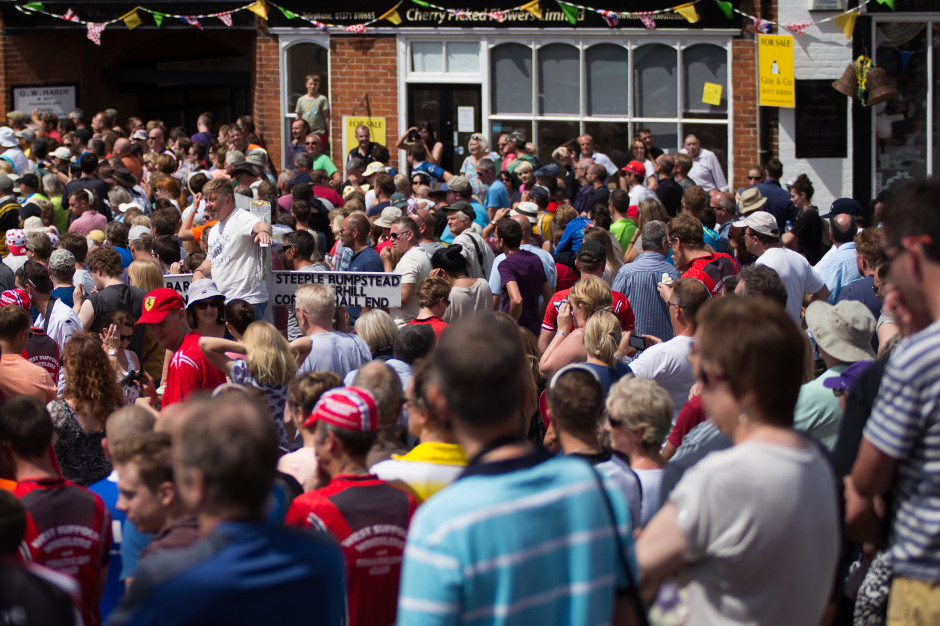
Finchingfield, July 2014, waiting for the Tour de France. The village was heaving and when people are sitting a-top fingerposts, you know it's crowded.

Now, ask yourself: 'What can I do to convey this?' How you compose and expose your photo will ensure that your audience can grasp what you're trying to say and will help them to connect with it.

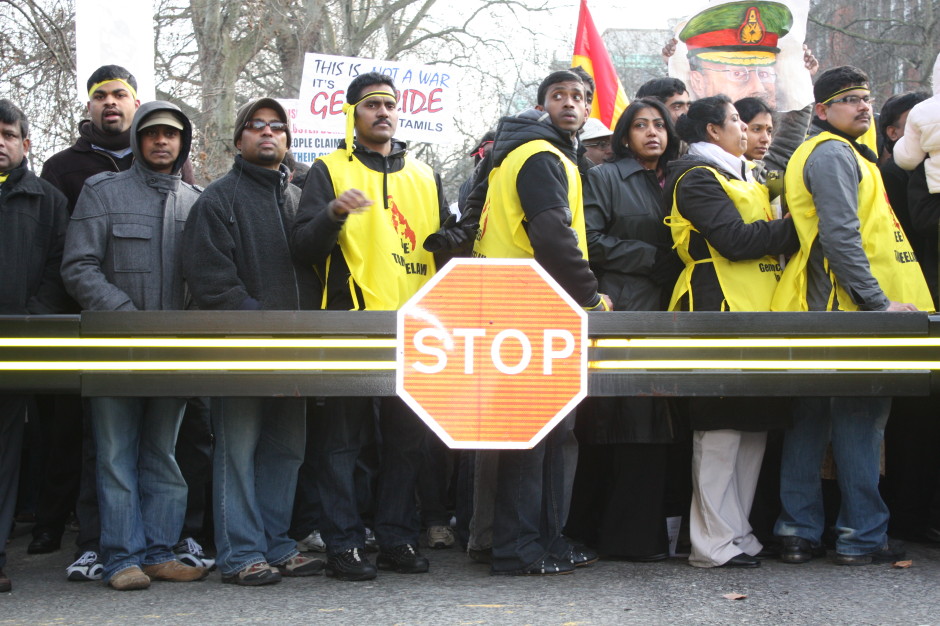
Tamil protestors, London, February 2009. The crush behind the barrier, the emptiness before the barrier, and the 'Stop' sign.

When you're trying to express numbers, find a point of juxtaposition to emphasise them: look for something small or noticeable that stands out and contrasts against the heaving mass. When a horde is focused on one thing, use lines to direct the viewers' eyes and channel them into the moment. For an aberration in the flow of things, try to isolate the rogue figure and plant it amongst the norm.

Rather than point and shoot, hoping that you'll produce an image that people will find interesting, draw on your compositional skills—the rule of thirds, leading lines, colour theory, pattern and repetition—together with your technical knowledge—focal length, aperture, shutter speed, and metering—to tell a story. Then you'll capture the crowd.

Just because you found it on the Intergoogles it doesn't mean it's free to use

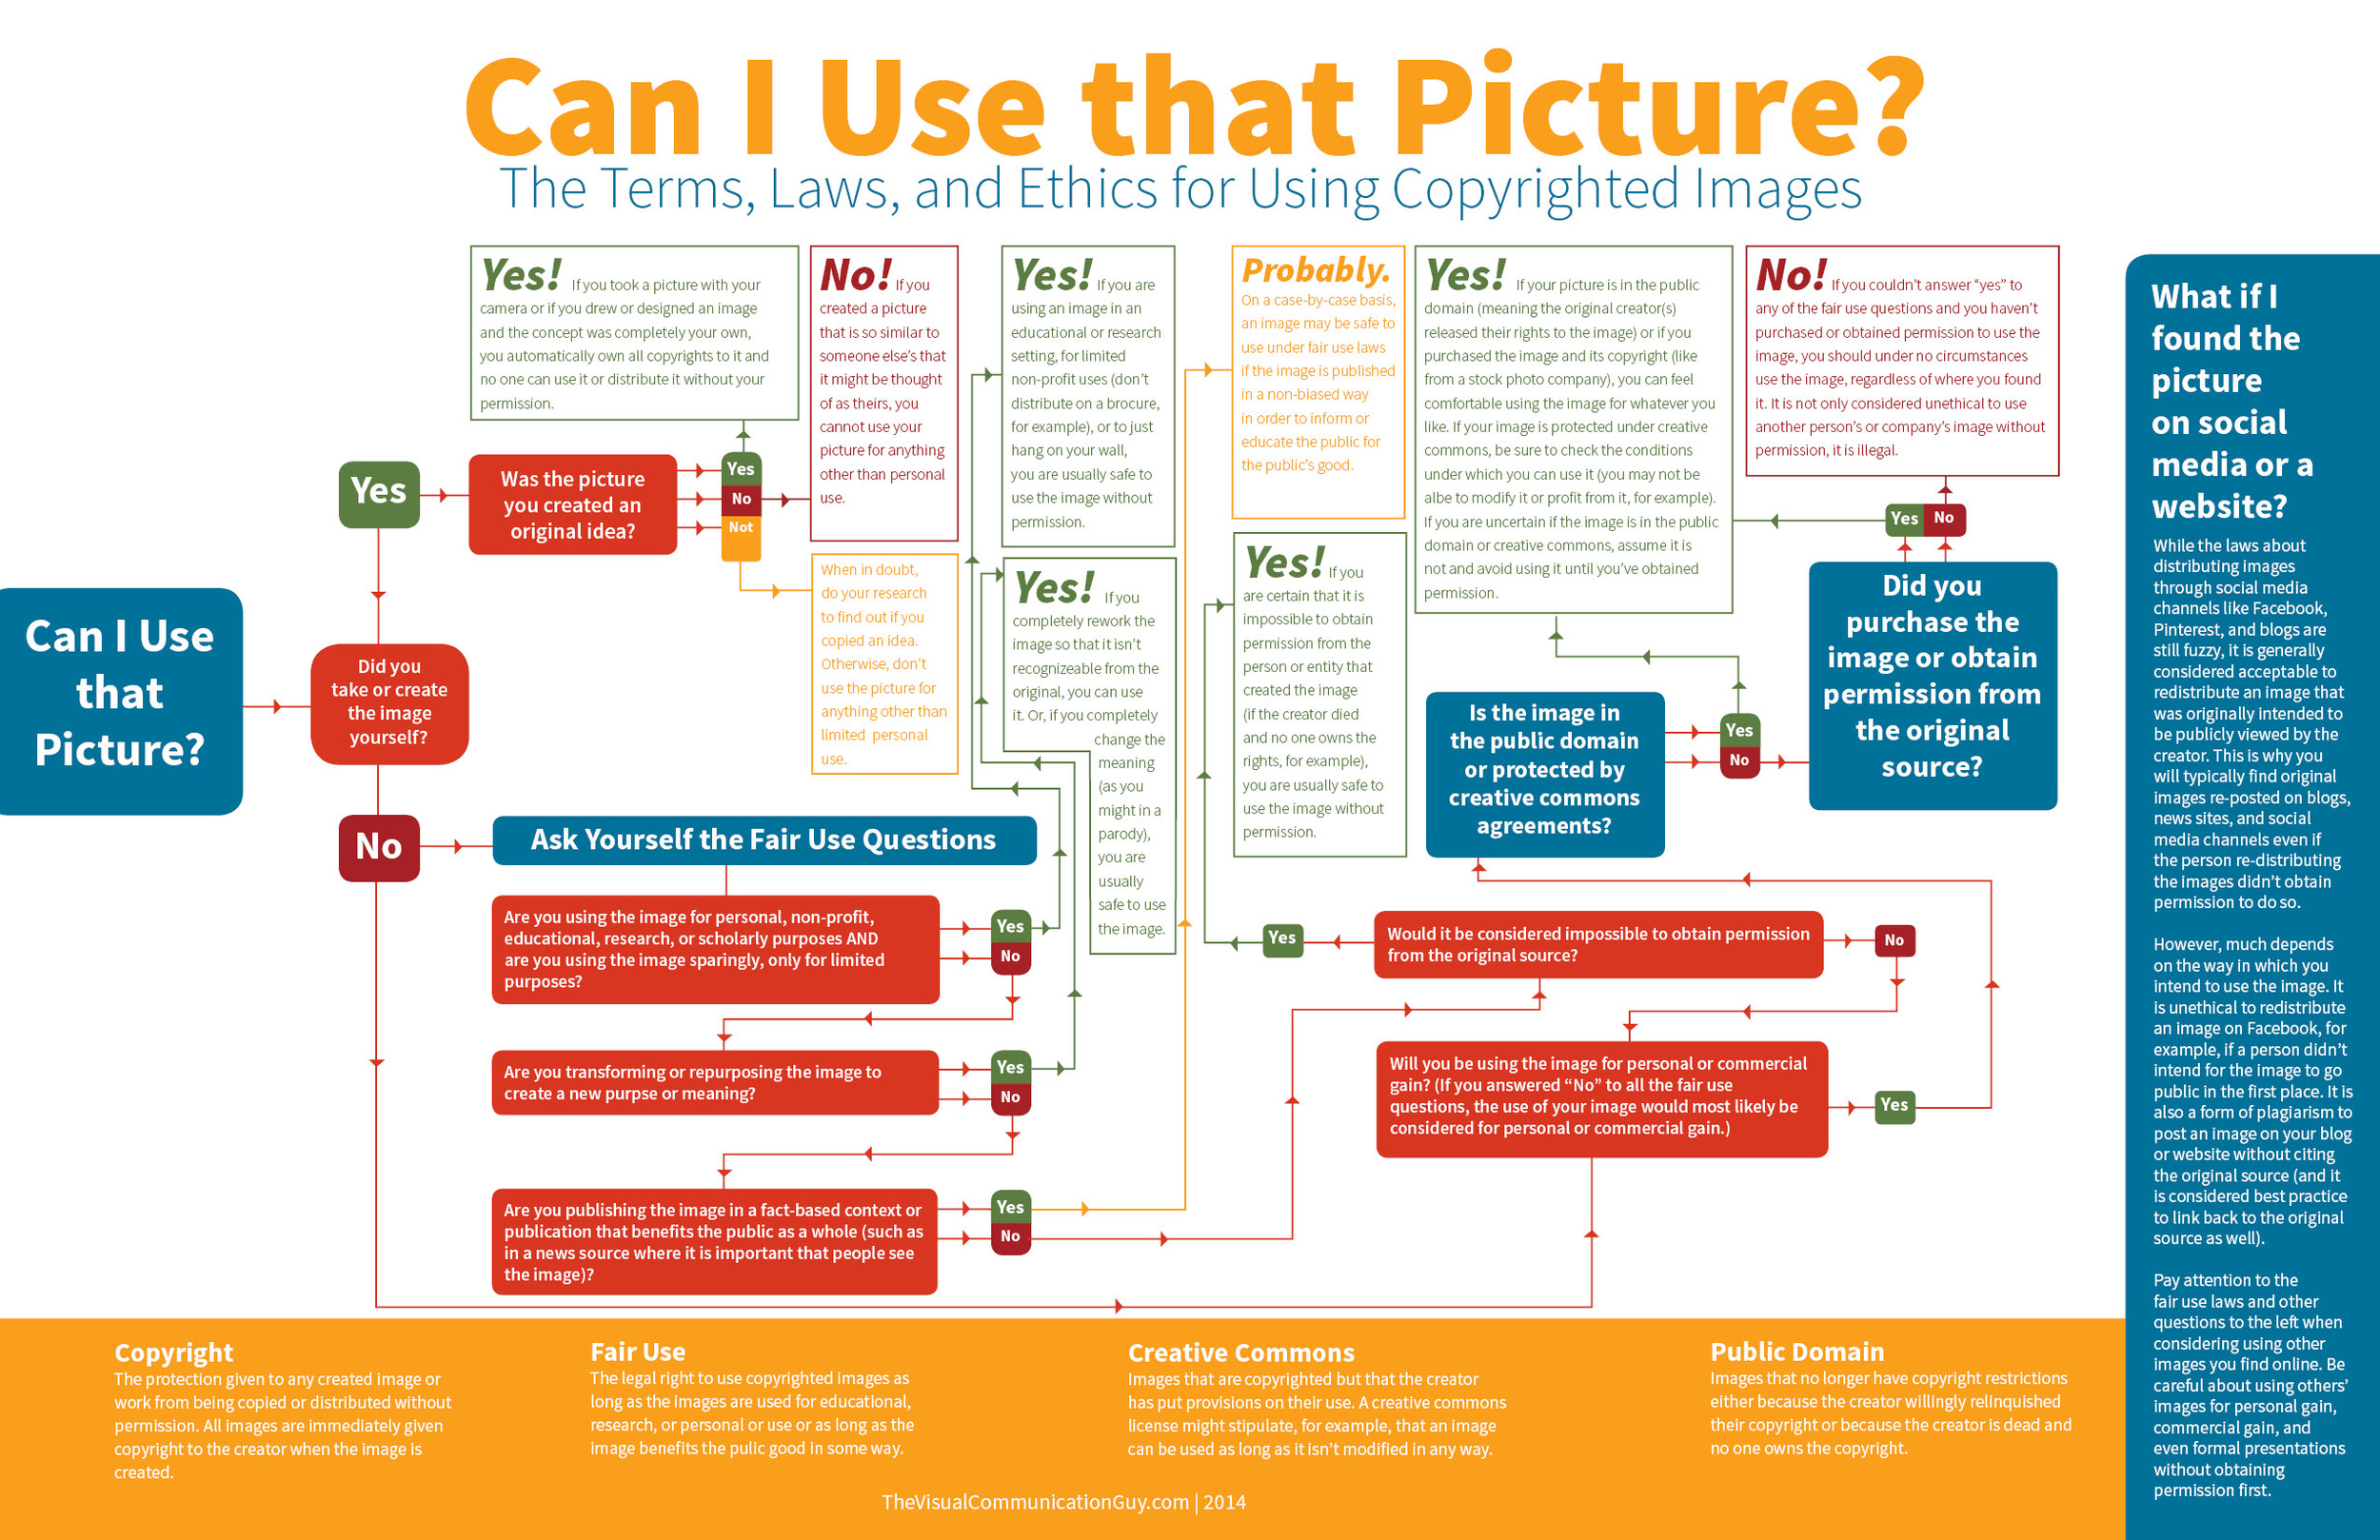
I was having a fairly good morning, until I took my lunchtime peruse of Feedly to see if anything interesting or exciting had dropped into it. Apart from a new post by my favourite film critic, nothing was outstanding until I reached Lifehacker. The Lifehacker team has just posted a link to a visual media usage rights flowchart created by The Visual Communication Guy. Excellent! Ignorance is no excuse when it comes to image theft and unauthorised use and reproduction of photos. While we're all perfectly aware that when you place something on Facebook, Flickr, or your personal version of Frankie's Funky Photos, there's a real chance that someone will try to use it improperly, the more that we can educate people about the right way to do things, the better. This one, however, was not quite so excellent.

You'll find the original here and the Lifehacker article here.

If you're wondering, I can reproduce it here under fair dealing: criticism and review use.

Apart from the fact that it's far too dense and word-heavy, it contains at least one humongous, glaring, verging on the unforgiveable fault for something that purports to advise on usage rights. Take a look and tell me if you can see it. (And tell me how many others you can see. There are plenty.)

Found it?

If you haven't, because it's a horrid thing to read, here it is:

While the laws about distributing images through social media channels like Facebook, Pinterest, and blogs are still fuzzy, it is generally considered acceptable to redistribute an image that was intended to be viewed publicly by the creator. This is why you will typically find original images re-posted on blogs, news sites, and social media channels even if the person re-distributing the images didn't receive permission to do so.

No, no, no, no, no, no. And for good meaure I'll say it again. No.

Images that are shared on social media aren't free for redistribution unless the creator has expressly said so. I put my images on Flickr and use them here on Photocritic and put them on my personal website to display them, to illustrate concepts, to tell stories. I do not put them on the Intergoogles so that anyone else can make use of them. And you should never assume that anyone else does, either.

The law regarding this is hardly fuzzy about the situation, either. There's been at least one monumental court case that supports this opinion, when photographer Daniel Morel sued AFP and Getty Images after they redistributed his images from the Haitian earthquake, which he'd shared via Twitter, without his permission.

Copyright exists from the moment that someone creates something, whether it's a photograph, a tune, a poem, or a piece of prose. It doesn't matter how a creator wishes to share her or his creation with the world, unless she or he has definitely signed away the rights to it, the rights remain theirs.

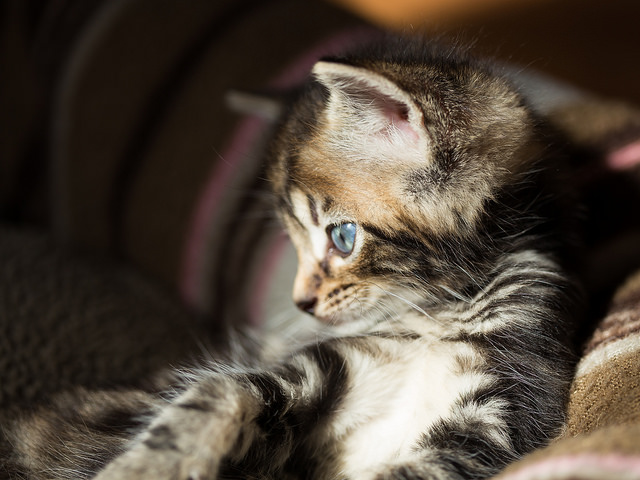
Mine! All mine! Now sod off!  Actually, this was one of Haje's foster kittens. The photo's mine and the kitten is now someone else's. But it's a kitten on the Internet. I couldn't think of a more appropriate image for this article.

To be fair to the Visual Communications Guy, he does state 'My rule above all else? Ask permission to use all images. If in doubt, don’t use the image!' in the post that accompanies the flowchart, but that's not really good enough. It's the flowchart that people are going to share and see, not the article. When incorrect information such as this gains traction, we all suffer. Suddenly what's not right becomes commonly accepted. Or people who were doing their best to not be ignorant are in the wrong when they thought they were doing right.

So I'll say the mantra and everyone can repeat it after me: 'Just because I found it on the Internet, it doesn't mean it's free to use.'

Is the new Pentax Q-S1 all fur coat and no knickers?

When the press release for Ricoh's newest camera fell into my inbox yesterday, I felt overcome by a sense of deja-vu as I scanned down it. The specification for the Pentax Q-S1, a pocket-sized EVIL camera, seemed very familiar: 12 megapixel 1/1.7" CMOS sensor; ISO 12,800, 5 frames-per-second; DR II dust removal mechanism; and Eye-Fi wireless LAN SD memory card compatibility. Isn't that the Pentax Q7 in all but name? Looks-wise the Q-S1 didn't appear exactly ground-breaking either. That might sound contradictory for a camera that comes with five different body colours (black, gunmetal, pure white, champagne gold, bright silver) and eight grip colours (charcoal black, cream, carmine red, canary yellow, khaki green, royal blue, burgundy, pale pink), but Pentax is famed for its swap-shop approach and the design is making the retro-but-not overtures that feel almost inescapable right now. It has very similar dimensions to and weighs almost the same as the Q7.

Q-S1_40colors

Try as I might, I couldn't pin-point any significant differences, save for the physical appearance, between the Q7 and the Q-S1. The Q-S1 is supposed to have a slightly improved auto-focusing system and has updated filters, but that's about it. Improved autofocus is always appreciated and quite frankly I can take or leave filters and toys, but I'm still scratching my head. What's the point of the Q-S1?

If Ricoh is of the opinion that the Q-S1 is there to offer consumers more aesthetic options and choices, that's a grimly disappointing approach to selling cameras. I admit that I have been known to go weak at the knees owing to the sumptuous design of a camera on occasion, but I part with my money because of their guts and performance. Cameras are tools, not fashion accessories and what truly interests me are technological developments that make a difference. Dressing up the Q7 with its tiny sensor that suffers from noise issues won't make it a better camera.

Pentax Q-S1: £300 body-only, or £380 with a 5-15mm lens; £550 with both the 5-15mm and 15-45mm lenses

I'm desperately hoping that camera buyers aren't so superficial that everything rests of the look of the box that lets in light and not how well it allows the photographer to control and manipulate that light, or how well it records that light. I can't be sure but I blinking well hope that isn't the case.

So Ricoh and the Pentax people who work there, if you're listening, I'm sure that you can do better than this. There's the Pentax 645D on your roll, after all. And people who buy cameras: it's about making beautiful things, how your magical picture-making box looks isn't all that important. Not in the grand scheme of things.

Introducing Photocritic &c

Have you noticed anything a little different about Photocritic recently? Maybe that we're reporting fewer news stories? Or that the front page looks slightly different? Don't worry; you don't have to answer, but trust us when we tell you that things have changed around here. We set out with the intention of making Photocritic a resource of everything that you should know about photography. It even says so up there. If you think that sounds like an enormous undertaking, you wouldn't be wrong. But in addition to the mountainous workload, the scope of 'everything' carries with it the threat of the insignificant drowning out the significant and the ephemera overwhelming the fundamentals. This is of no benefit at all to you, and it's a waste of our time. Hence we've decided to make some changes.

We're diversifying our presence but consolidating our coverage. No, I'm still not sure how I came up with that statement. Too many press releases, probably.

Let's start here, with the Photocritic website. This will be for the everything that makes you a better photographer. And for everything that deserves analysis and commentary within the photography industry. It will be for tutorials and explainers, for reviews and op-eds. This is for long-tail writing.

PC etc

For the everything that encompasses quirky news stories, exhibition announcements, competition calls for entries, and information about books written by people who aren't us, we've set up Photocritic &c. It's a Tumblr for the sort of everything that won’t necessarily be interesting in six months’ time, but is interesting now. It's more of a rolling news feed.

We've put a link to Photocritic &c in the navigation bar, there's also one in our social bar, you should be able to subscribe via your RSS feed, and if you've a Tumblr account, you can subscribe there.

And of course, there's the Photocritic Twitter account. That covers everything that you should know about photography in 140 characters. (Don't be shy of following Daniela on Twitter, either. She's @SmallAperture.)

We think this is a change for the better: a smoother, less cluttered Photocritic experience. We hope that you think so, too.

Finally, if there's anything specific that you'd like us to cover, please ask us. We have an extensive editorial calendar, but we want to know what you want to read. Do drop us an email.