10 essentials for your kit bag

IMG_1978

There’s heaps written about what every photographer should have in her or his kit bag: camera bodies that can sink battleships, a range of lenses to bankrupt the Sultan of Brunei, flashes enough to illuminate the Sahara on a moonless night. And really, we know about this sort of stuff; we’d not be taking very many pictures without any of it.

There are other kit bag essentials, though; the little things that you learn about from your friends, the bits that you only realise should always be in your bag after the event. Between us, we’ve accumulated a few suggestions, so we thought that we’d share the sum of Small Aperture’s collective kit bag wisdom.

  1. Gaffer tape. I grew up in a rural community, where most anything could be fixed using baling twine, lolly sticks, and gaffer tape. It has stood me in good stead.
  2. Spare memory cards. I can’t think why.
  3. Spare batteries, of all varieties: for your camera, for your flashes, for your brain.
  4. Business cards. Seriously, you don’t have any business cards? Go to Moo and get some. Now.
  5. Torch. I don’t know about you, but my night vision isn’t that good.
  6. Something to fasten or secure things: string, cable ties, tie-twists, elastic bands. (Or baling twine, even.) Don’t forget that string can double as an emergency tripod.
  7. Microfibre cloth. Shiny!
  8. At least one plastic bag; preferably several in a few different sizes.
  9. Some kind of multi-tool business, you know, Swiss Army Knife, or Leatherman.
  10. Notebook and pencil or pen. Yes, we all have mobile phones capable of taking notes now, but you never know when you might need to actually write down something.

Anyway, this is what we schlep around with us, pretty much. Is there anything that you’d like to add to our mix?

Kodachrome projects galore!

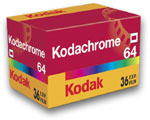
Kodachrome

Since June 2009, when Kodak announced that they were ceasing to manufacture their legendary Kodachrome film, Kodachrome projects have been popping up left, right, and centre. Well, it’s hardly surprising: photographers have wanted to make the most of the last of the film that was first manufactured 75 years ago, and brought high-quality colour photography to the masses.

Shooting on film is all about making every shot count: you’ve only as many pictures as there are on your reel, and when they’re gone, they’re gone. And whilst so much of photography is reliant on being able to react quickly and capture a flicker in time, using film instills a particular type of patience in you. You wait for the right moment, there’s no instant feedback from your screen, and then you wait a little longer for the picture to be developed.

The Kodachrome projects are, therefore, all the more pertinent. When the Kodachrome is gone it has gone for good. So what’s out there for our delectation? I’ve been taking a poke about the intergoogles.

Kicking off things, we have The Kodachrome Project. It’s run by Dan Bayer and celebrates the life of, and life in, Kodachrome film. As he puts it, Kodachrome’s age rivals that of the average human and he believes that it has been the most influential colour film ever produced. He wants people to experience and learn from shooting on film before it’s too late. Go take a look.

At 64×64, you can see the images that Phil Coomes, a photojournalist who works for the BBC, has been taking. There’s one picture a day for 64 weeks, taken on Kodachrome 64, taken for the sake of taking pictures.

I’ve really enjoyed Pontus Wallsten’s A Year of Kodachrome. It has some wonderful flower shots, which really bring home the colour quality of Kodachrome.

Jeff Jacobson’s book The Last Roll was shot on Kodachrome as he was undergoing and recovering from chemotherapy. You can take a look at some of the pictures and listen to him speak about the genesis of his project here.

There aren’t yet any pictures available from Steve McCurry’s Kodachrome journey, which started in New York and ended in Parsons, Kansas—at Dwayne’s, the only lab still capable of processing Kodachrome film—via India, using the last roll of Kodachrome to come off the production line. The journey was documented by National Geographic and will doubtless be televised at some point, whilst the stills will be presented to George Eastman House. It’s one to keep an eye on.

Kodak has its own Kodachrome gallery on its website. The shot of the windsurfers left me salivating and that of the fishermen balancing on poles breathless. Take a look for yourself.

Of course, Flickr is hosting a small army of Kodachrome projects, too. Some of them a group pools, others are individuals documenting their final shots on the film. You can spend hours wandering amongst them.

There are countless Kodachrome projects that have brought together collections of pictures that span generations. Okay, so they might not be directly fulfiling the brief of making the most of a finite medium, but they are worth browsing. Start with In Celebration of Kodachrome, on photo.net.

Whatever you feel about Kodak ceasing production of the film, or even film itself, it has spawned some inspired and fervent picture-taking. Yes, I have been tempted to dig out my film camera and dust it off. I admit it.

Fisheye: speciality or everyday lens?

DSC_4555_small

Every photographer has a favourite lens. Maybe it’s an 18-200mm zoom or a 50mm prime. Maybe it’s a wide angle zoom. Heck, maybe it’s your kit lens. But it’s a lens that you count on day in and day out. It’s an everyday lens that you take with you every time you pack your camera bag and walk out the door. It’s a lens that you know you can rely on in most situations you’ll encounter. And in most cases, it’s a standard type of lens. Nothing too crazy.

So why, then, is my Nikon 10.5mm fisheye lens one of the three that I carry in my bag every day?

When I first got into photography, I spent countless hours debating about what lenses I would spend my money on. Of course, I needed a standard zoom to cover the basics, but what else? I perused countless portfolios and tried to guess what lenses were used on my favorite photographs. I always caught myself stopping at photos taken with a fisheye lens. There was just something so powerful about those fisheye photos. The 180 degree angle, the distortion, the amount of information within a scene that was shown. It was love at first sight. Soon enough, I dropped the cash and picked up my first and only fisheye lens.

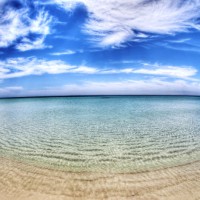
At first, it was just… fun. I took the cliché fisheye pictures of my friends and their dogs’ noses. But once I started figuring out what kinds of photography I enjoyed shooting the most, I found myself using the lens more and more. A calm and surreal view of the ocean in Florida. Fisheye. A long exposure of an Atlanta skyline at night. Fisheye. A motion-blurred black and white shot of a subway train as it passed through the station. Fisheye.

I became obsessed with this lens and it eventually got itself promoted from a box on a shelf to my camera bag. It’s now one of my two favorite lenses (the other being my 50mm f/1.4) and my portfolio wouldn’t be the same without it.

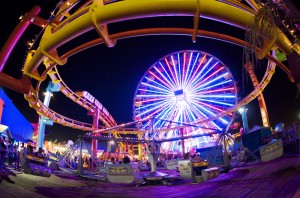
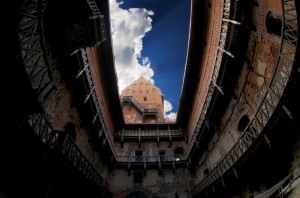
Unfortunately, the fisheye lens has gained a reputation for being a gimmicky, kooky, just-for-fun lens. I think it deserves more credit than that. I can’t count how many photos I’ve been able to take with that lens that I could have taken otherwise. And they aren’t just-for-fun photographs either. They can distort architecture to give an amazing perspective; they can give landscapes some feeling of other-worldliness.

Granted, you may not want all of your photos to be taken with a fisheye lens, but I highly recommend adding one to your repertoire. If you do any sort of landscape, cityscape, or architectural photography at all, I’m confident that you’ll enjoy seeing things differently through a fish’s eye. And if you need a touch of inspiration to get you started, why not take a look here?

You don't have to shoot weddings

WillAndrews

Freelancing. You love photography but you’re not a hardcore businessman. You’re still figuring out what sort of photography you do. After being introduced by a mutual friend, a new acquaintance at a party politely enquires ‘Oh, you’re a photographer? What do you photograph?’ to which you can only respond with ‘Uhhh, anything, really…’

Then comes the age-old question; ‘Do you do weddings?’ At this point, you should make yourself as tall and wide as you possibly can, puff out your chest and shout ‘NO! NO I DO NOT!’ Unless you are a wedding photographer, obviously, as this would make for a lousy business model.

In essence, wedding photography is as much about being able to organise and herd people as it is about being able to take photos. I think if I did weddings (I do not do weddings), I’d bring a sheepdog with me.

I attended a friend’s wedding recently. The photographer was much more into band photography and this was obviously a sideline to keep the pennies rolling in. Now he did a fine job on the day, but the expression of mental anguish on his face when he was trying to organise a group of 80 or so people to pose on the lawn outside the church was distressingly apparent. He might as well have taken a marker pen and written ‘Oh god, why did I agree to this?’ across his forehead.

Well I have news for you, budding photographers, you don’t have to shoot weddings! If a sharp chill zithers down your spine at the idea of your work turning into a photo factory, churning out nightmarishly similar images of close-ups of wedding rings, monochrome babies’ toes with a shallow DOF, tightly cropped images of the backs of wedding corsets being tied up, I’m here to tell you that it doesn’t have to be that way.

But you need to do at least a bit of it for the money, right? Nope.

Try this now; google for photographers in your area. Go on, I’ll wait here until you get back. See how many people are offering baby / pregnancy / wedding type shoots? See how similar they are? Your first reaction may be that this is the way to go if you want to stay afloat. I would argue that this market is ludicrously saturated and, if you want to photograph stuff for a living and enjoy it, you have to carve your niche.

To clarify, I’m not knocking this kind of photography, despite the slightly snide tone; people are photographers for different reasons. This is to those of you who want to do it for a living for more reasons than just for money.

So, what kind of photography is profitable if it’s not wedding photography? The answer is any kind. I earn my keep through a rather unusual mix of magazine work, promotional portraiture (for actors, singers, comedians, whatever) and pro wrestling photography. Yep, pro wrestling.

So what about you, what do you enjoy the most? Are you an architecture sort of person? Does portraiture excite you? Do you love trekking up mountains at dawn to catch a spectacular landscape? Sports? Abstract? Macro? Heck, you might even be genuinely excited by perfectly lit product photography – it’s not for me to judge (you nutter). You need to shoot what you love, and love what you shoot. That way, it doesn’t feel like work, and you’re much more likely to create something really special, because you care about the end product. The phrase ‘that’ll do’ shouldn’t be in your repertoire.

It’s going well – you undertake photography that interests you, in a style that you particularly enjoy. This creates an environment of self-motivated improvement – you like your stuff, you want to make it better. And better. And better. Now when someone asks ‘What do you photograph?’ or, more importantly, when you send emails to potential customers (you are sending out lots of emails, right?) you can explain what you do with conviction and with passion – ‘I mainly shoot architectural stuff, especially abandoned buildings or uninhabited places. I love the textures and shapes and looking for that perfect composition.’ Or ‘I specialise in portraiture, more specifically fashion-style shoots. I tend to do a lot of clean, high-key type stuff because I love the way it looks.’

Sounds better than ‘anything, really…’ or ‘whatever’, doesn’t it? Photography is everywhere, find a gap and fill it. Make sure you love what you do, because people will see that enthusiasm and get on board with you – it’s infectious.

And not a wedding in sight.

Armchair travel

Dhow and Minaret iii

It’s raining here in London and it’s making me feel a little bit down. In an attempt to make my world seem a little less bleary, I thought I’d go looking for travel photos. Whether or not this has actually cheered me up, or just made me want to fling a random selection of clothes in a bag and grab my passport, I’ve not quite decided. But here are some of the best travel photography sites that I wandered onto on my world trip, conducted from the comfort of the Small Aperture mansion.

My favourite has to be Photoburst. It’s a daily travel photo competition. One photo from however many daily submissions is selected and exhibited. You can check back at retrospective winners and explore the globe, but when you land on the home page you’re confronted with one, large, beautiful image.

Travelblog shows 30 thirty different photos every ten minutes. Some of them might not be that terrific, but the variety means that you’ll probably stumble over something that really appeals or inspires. And if you don’t, check back in ten minutes’ time!

I spent far too long just clicking through the gallery at Travellerspoint. The initial interface doesn’t do much to showcase pictures, but once you’re into the gallery-proper, you’ll be absorbed as you fly from Ireland to Bolivia to Nepal, via the Democratic Republic of the Congo.

Of course, National Geographic has an awesome collection of pictures. You can browse by country or by theme, or there’s the photograph of the day.

And finally there’s TrekEarth. There’s so much to choose from that just for browsing you might be overwhelmed—TrekEarth is a travel photo community that aims to improve photographers’ work through constructive criticism—but do go and look at the travelogues, where members submit a series of pictures to tell the story of a trip.

It’s still raining here. Ah well. Do you have any particular favourites to share?

10 of the best: iPhone apps

Feet at the station

Did you know that since Apple launched the iPhone, over 200,000 apps of all kinds have been released? Just a few, then. From navigation to games, sports scores to language lessons, there aren’t many applications you can’t find in the AppStore.

However, photography apps have taken the market by storm and there are currently over 2,700 available for iPhoneographers across the globe. David here has installed fifteen of them. With so many to choose from, finding the right apps can get a little tricky. Let us save you some time and with David Smith’s help, show you a few of the best ones we’ve come across.

Photo-editing and camera apps

Hipstamatic

£1.19/$1.99

Hipstamatic is one of the better toy camera apps available in the AppStore. The developers really tried to make this app feel like you are holding a camera in your hands instead of a phone. The design is sleek with a simple but unique UI, complete with virtual shutter and flash buttons. Users are also given the option to swap virtual lenses, films, and flashes to provide numerous possible combinations, giving Hipstamatic exposures a very distinct look.

There are, though, some downsides. First of all, you can’t edit photos that are already in your camera roll. Second, the small virtual viewfinder makes it difficult to know exactly what’s fitting into the frame of your shot.

Lo-Mob

£1.19/$1.99

A solid film simulation and experimentation app, Lo-Mob has 39 preset ‘filters’ to choose from. While not necessarily the most options to play with, the filters that are provided are very clean and high quality. Lo-Mob is a good app to have when you don’t want to waste too much time fumbling through countless filters and films to edit your shot.

Take a photo (or import one from your camera roll), select one of the preset filters, save the new photo back to your camera roll, and you’re off and running.

Film Lab

£0.59/$0.99

Just as the name might suggest, this app’s emphasis is on film simulation. Film Lab provides users with 13 popular film brands, such as Kodak and Ilford, along with several types of film under each make. A simple toolbox allows you to adjust brightness, contrast, sharpness, hue, and saturation through the use of sliders.

Best Camera

£1.79/$2.99

Best Camera may not have the greatest variety of effects and filters to apply to your photos, but where the app shines is through its online sharing community. Like most photo apps, users are able to share their work via Twitter, Facebook, and Flickr, but Best Camera brings their app to a new level by displaying a live-stream of images on their website, TheBestCamera.com.

Users can not only create an online portfolio, but can also browse and rate other photos taken with the app, as well as see what effects were used to create those photos. The talent seen in Best Camera’s live-stream is brilliant, and if you don’t want to pay the sticky price for the app, at least check out the most popular uploaded images here.

Adobe Photoshop Express

Free!

The world’s most popular photo-editing software has arrived in mobile form. While the original Photoshop app was released some time ago, a completely upgraded version hit the AppStore earlier this month. PS Express gives users a strong selection of editing features to choose from, including crops, color control, contrast, sharpening, borders, and several preset effects. Each adjustment can be made with the use of sliders, a familiar feature to all Photoshop users. An all-around solid app on its own, and the price tag makes it a must-have for all iPhoneographers.

Speciality photography apps

Flickr

Free!

For photographers, one of the greatest things about smartphones is the ability to whip out your portfolio in seconds, right there in the palm of your hand. The Flickr app for iPhone makes this simple to do. Users can browse their own photostreams and view recent activity on their accounts, as well as search for photos within the entire Flickr community. It’s a free app and if you have a Flickr account, there’s no reason to not have it on your iPhone.

Project 365

Free or £0.59/$0.99 for Pro version

The idea of this app is simple: “Take a picture every day of the year, become a better photographer and never forget a day in your life.” Project 365 allows users to attach one image to each day of the year, giving them a colorful calendar of photos to look at. Not only is it good practice for photographers, but it’s also fun to go back and look at the pictures you took six months ago that you’ve already forgotten about.

iTimeLapse Pro

£1.79/$2.99

I’ve always been fascinated with time lapse photography, so when I saw this one in the AppStore, I had to get it. I have to admit that I was a bit sceptical about how well it would work. But it surprisingly worked very smoothly and did exactly what it said it would.

Granted, you’ll need some sort of support method to keep your iPhone perfectly still, as well as a good hour or longer to kill. You’ll also want to make sure you disable the auto-lock feature as it seemed to kill the app when my phone went into sleep mode. Phone calls, text messages, and battery warnings will also stop the time lapse process, so putting your phone in ‘airport mode’ is a must. Minus the few inconveniences, this app makes for a fun project on a boring Sunday afternoon.

Just for fun

FatBooth

£0.59/$0.99

My sister showed me this app a while back by sending me a picture of what looked like me after eating a dozen of these.

While this may not be the most useful photo-editing app out there, it’s still fun to see pictures of your friends weighing 300 pounds and then embarrass them by posting the pics on their Facebook walls. And if you don’t have any friends, you can always spend a few enjoyable minutes fattening up George Clooney a little.

App of the Dead

£1.19/$1.99

If you’re anything like me, you enjoy a nice cappuccino at your neighborhood cafe, taking your two-year old nephew to the zoo, summer trips to the beach, and watching mindless flesh-eating zombies tear the limbs off unaware bystanders during an end-of-the-world zombie apocalypse.

App of the Dead was created in part to help promote famous zombie-flick director George A. Romero’s latest film, Survival of the Dead. Like FatBooth, this app essentially alters a portrait of you and your friends, but instead of adding a hundred pounds to your face, this one adds soulless eyes and rotting flesh, turning you into one of the walking dead. The effects are pretty decent and although a bit pricey for such a one-dimensional app, it’s quite fun for any of you flesh-eater fans out there.

And finally

There is almost an app out there for anything you want. If you’ve come across one that has revolutionised your life, or perhaps gives you a good giggle, please let us know!
Playing with your pictures

sketchafter

So taking photos should be fun, right? Right! And sometimes we want to have a bit of fun with our photos themselves, right? Right! So, ehm, what can we do with our photos to play around with them a bit more? Well, we’ve been pooling braincells over here at the Small Aperture mansion, and just before they expired from over-use, we came up with the following.

First of all, you could go out and buy yourself a toy camera. But maybe you don’t really want to. Perhaps you’d rather fiddle with photos you’ve already taken with your top-of-the-range dSLR. In which case, Photocritic has the perfect tutorial for creating your own post-processing pre-sets in Lightroom.

Or perhaps you’d prefer to go the vintage route? Take a look at Photojojo’s four ways to vintage-ify your pics. This one covers all sorts, from post-processing ideas to tips such as vaseline on the lens or shooting through an old stocking.

Over at befunky.com they’ve what feel like hundreds of different effects that you can apply to your pictures. My personal favourite would be the speech bubbles, though.

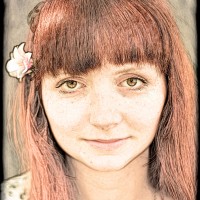
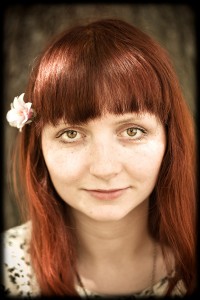
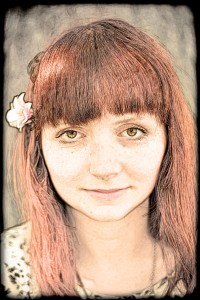
And Gareth, a member of the Small Aperture Scriptorium, has this easy method to cartoon-ify your pictures. Begin by selecting an image. How about this one?

And then:

  • Open said selected image in Photoshop
  • Create a duplicate layer
  • Turn that layer to black and white using desaturate (Image>Adjustments>Desaturate)
  • Duplicate the black and white layer and invert it (Image>Adjustments>Invert)
  • In the layers panel, set the blend mode to Colour Dodge
  • You should now have three layers. Select the top layer, the inverted one, and go to Filter>Other>Minimum to add the sketch effect. The higher the value of the pixel radius, the more pronounced the sketch effect.
  • If you want to re-add colour, duplicate the bottom layer (the non-black-and-white one) and add it to the top of the stack. Set the blend mode to Colour.

Tad-dah!

I’m off to do silly things with photos now.

Blacked Out

Blacked out 2

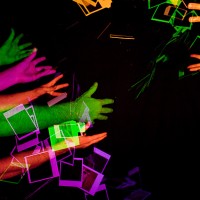
As part of my terribly glamorous lifestyle, which yesterday included writing a story-telling workshop for a theatre company and doing my laundry, I also attended the opening of the Blacked Out exhibition, held in an old railway arch in south London.

The exhibition features the work of eight artists, all of whom explore the interplay of light in a blacked out, urban space. There’s everything from a mirrored tunnel to an installation that uses glow-sticks. But it was of course the photographs that grabbed my attention the most. Okay, no, it was the glow-sticks. I admit it. How could I resist a neon Minnie Mouse hairband?

Convulsion Compulsion, by Sally Butcher

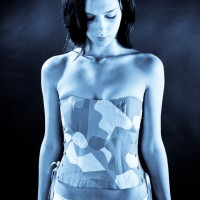
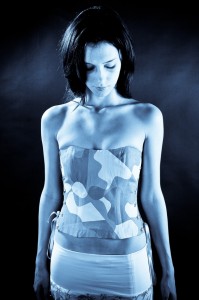
However, I was drawn to Sally Butcher’s beautiful photographic prints that layered delicately lit different aspects of the female body. Their subtlety was almost unnerving, but I found myself captivated by their strange contrast of tension and ethereality. And this contrast was taken up a few notches by the prints being in black and white, and the strange lighting of the venue.

If you’re in or around London, and the London Bridge area in particular, it’s worth an hour of your time. (And not just to play with the glow-sticks.)

Blacked Out runs from 21 to 28 August, 13:00 to 18:30, at Arch 897, Holyrood Street, London, SE1 2EL.

Found: Tips for aspiring food snappers

food-om-nom

Great photography makes you hungry. You want to tear into the food like a bear tears into, er, food.

Not all food photographers have the most tasteful of practices, as witnessed in my Dirty Tricks of Food Photographers post over on Photocritic. Of course, there are still plenty of delicious ways of photographing food without resorting to motor oil and nail polish. I’d hope that my food photography portfolio (all of natural foods!) stands testament to that.

Anyway, I just found some awesome tips for food photographers over on the Digital Photography School: 7 Tips for aspiring food pornographers. Yum indeed. Check it out, be inspired, and get snapping.

Make your own reflector

With a reflector

After writing about saving money on your photography a while back, we thought that perhaps you’d actually appreciate having a look at some of the suggestions that we made in a bit more detail. A good place to start is with a reflector. Duncan Howsley will tell you all that you need to know!

So you have bought a dSLR and a lens (or two). You have been taking portraits of friends and family. Whilst they look good, they don’t quite match up to your expectations: the lighting is not quite right and there are shadows in odd places. Or maybe you have been reading about off-camera lighting and want to experiment with using light in new ways; maybe you just want to take your pictures to the next level.

This is lit from the right with a reflector helping to light her face on the left

Unfortunately, buying a lighting set up can be both very expensive and complicated. Okay, so the recent popularity of the Strobist movement has increased awareness of affordable and DIY solutions to this problem, but investing in these systems is still a big step, it doesn’t matter if you’re still wet behind the ears with your dSLR or are a veteran of the manual campaigns. Fear not, however, as other solutions are available!
One of the most simple and affordable ways of controlling light is using reflectors. As if the name didn’t already give it away, they allow you to manipulate the light that’s available by reflecting it at the subject. If you want to splash out and buy a reflector, there are plenty on offer. Most take the form of a large, collapsible disc with both gold and silver faces. These two faces allow for control over the light temperature—essentially, the colour of the light—on the subject. The gold side providing warmer tones.

You can use a reflector with both artificial light and natural light. You can also use them in the same way as fill flash, allowing you to light up the subject’s eyes as well as removing shadows under the nose and chin. Pretty useful.

So, are you ready to get into primary-school-teacher-mode, dig out the scissors and glue and have a go yourself? I thought that you were. You’ll need a roll of aluminium foil, some cardboard, glue, and scissors to make a perfectly sufficient, if not slightly unwieldy, DIY reflector.

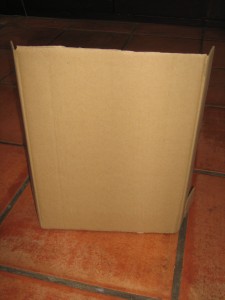
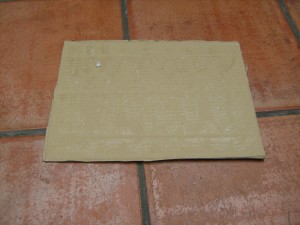
First, select your piece of cardboard. However big it is will be the size of your reflector. A cereal packet will make a cereal-packet-sized reflector, whilst the box that your new vacuum cleaner came in will make a fairly epic sized reflector.

Plain cardboard, still with side flaps at this point

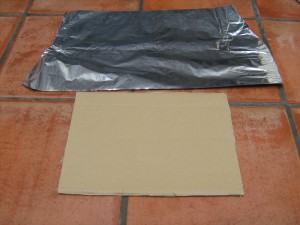
Second, lay out your aluminium foil. It needs to be larger than your piece of cardboard. Foil not as wide as your cardboard? No problem! Use several pieces.

Third, apply glue to your cardboard. (Spray adhesive is probably easiest, but remember to do it somewhere well-ventilated and take adequate precautions.)

There is glue on this. Honest.

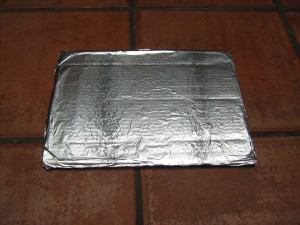
Fourth, stick your foil to your cardboard. Avoid sticking yourself to the cardboard. That’s messy. Fold the overhanging foil around the back of the cardboard and stick it down to make it look tidy, et voila! One reflector!

Tah-dah!

No go forth and take beautifully lit shots knowing that your reflector cost you practically nothing.

If primary-school-teacher-mode isn’t quite doing it for you and you want to advance to secondary school DT level, this blog shows you how to make a rather more snazzy reflector.

Book review: How to Photograph Nudes Like a Professional

How to Photograph Nudes

Photographing people without any clothes on. It’s pretty popular. (Mmhmm, people really are interested in getting it right; Try Nude Photography is one of Photocritic’s most popular articles.) It takes lots of different forms and if you’re good at it, there’s money to be made from it. But, like many things, it can be hard to get right, which is why Ashley Karyl, a photographer with 25 years’ experience taking pictures of people wearing nothing, has published his book How to Photograph Nudes Like a Professional.

Wanna know what I thought of it? Sure? Okay then!

Technical, practical, and philosophical

At 328 pages, this book contains masses of information. It covers the technical: cameras, lenses, lighting, editing, and retouching. The merits of colour or black and white are compared. The superiority of digital over film is debated. It tells you everything you need to know about lighting a shoot with candles. And it gives you lots of post-processing information.

It looks at the practical: finding and working with models, comparing shooting on location with in a studio, makeup and hair, and printing. You get anecdotes about the models Karyl’s worked with as well as guidance to find the right model for the job. There are some very helpful tips for shooting on location. You’re reminded not to interfere with the makeup artists and hair stylists because they’re professionals, too.

It even gets philosophical and talks about photography as a medium and a profession. Some of his advice here doesn’t relate to the photography world alone, it is sound for anyone who works as a freelancer. (Yes, it reminded me when I was working past midnight that I ought to be in bed, or at least not working.)

And all of this is backed up by Karyl’s experience in the business.

Personal but not so practical?

It is aimed at amateurs who are on the verge of turning professional or professionals at the beginnings of their careers, but in many respects it reads much like Karyl’s autobiography. Karyl talks you through how he came to nude photography, how it has changed over the years, the people and the projects he’s worked on, and what he has experienced and learned through this. It’s full of anecdotes and observations which give the book a personal feel. In fact, he prefers to think of it as being a conversation with him because he didn’t want to write a step-by-step guide.

Unfortunately for me, this is where I think that the book falls down. It contains so much information that its largely unstructured and unsystematic form makes it unwieldy. A step-by-step guide might not be what he wanted to create, but his information still needs to be accessible to the reader. Karyl is a photographer, not a writer, and it shows. He has a great deal to relate and would have benefited from the guidance of a ruthless editor to help him express it all. Ironic, really, considering that he covers editing ones photos so extensively.

And despite it already being 328 pages, the book could do with more pictures. There are barren wastelands of pages with no images. It’s a book about photography, after all.

And finally

So what do I think overall? I want to like this book. I want the gems of information and the anecdotes to sparkle. I want an editor to take to it with a scalpel so it can live up to its potential. And I want more pictures.

How to Photograph Nudes Like a Professional, by Ashley Karyl. Available for download at nudeprophoto.com at $29.

Found: 5 Landscape Photography Tips

arizona-landscape

Ah, landscape photography, why do you taunt us so? There’s something beautiful about capturing the world around you, but it’s bloody frustrating.

After all, you can see all the beauty around you, but why won’t your bloody camera capture it all?

There’s a lot to think about when doing landscapes. What lens should you use? How do you make it all come together? Is my horizon straight? Why won’t that cursed tree stop swaying in the wind?

Beyond Megapixels has five great tips on how to make your landscapes come to life, along with some dishy examples of gorgeous landscapes. G’won, give it a shot.

The 10 Second Pre-Shoot Camera Check

settings

I’ve been there many times – half way through a photo shoot you suddenly stop and think. “Oh… no.. I did a photo shoot in the dark yesterday. Please don’t tell me my ISO is still set to 800″… And some times, it turns out that yes, I really am that stupid.

A pre-shoot camera check makes a lot of sense, but what should you check before you run off to do a shoot? Myself, I’ve gotten in the habit of taking a single photo. If the camera shows me the photo afterwards, it means that I’ve remembered to put a memory card in the camera, I’ve got my battery, and there’s a lens attached (No, I don’t forget attaching a lens very often. But, to my gravest of shame, it has happened once that I rocked up at a shoot without a lens. Luckily, I did have one in my camera bag. That could’ve gotten very very embarrassing.)

Anyway, there’s a small list of stuff worth checking before you get all snapper-happy, and my good mate Brian Auer is more than happy to run us through it..

Read the full 10-second camera check over on Epic Edits!

Found: Cheap strobist flash review

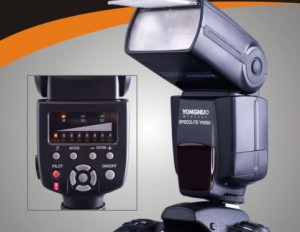
It looks a bit cheap, and the LED interface can be tricky to wrap your head around, but who cares: it's all about the light you get out of the flashgun.

If you’re an aspiring strobist, you might be shocked by the amount of cash you have to plonk down for a few Canon EX-580s. To get a decent set-up, you’ll need 3 of them, at least. And at $450 a pop, you’re not going to be much richer for it, really.

Luckily, there is a way out: The Chinese company Yongnuo makes some absolutely bargainous flashguns: the YN-560s are nearly as powerful as the 580s, and have a few clever tricks up their sleeve.

At $85 per flashgun, they’re also a fifth of the price of the Canon equivalent – but does it stack up?

It looks a bit cheap, and the LED interface can be tricky to wrap your head around, but who cares: it's all about the light you get out of the flashgun.

The legendary flasher David Hobby, of Strobist fame, got his paws on a production model YN-560 speedlight.

He found that the production quality was solid, but the Quality Assurance left quite a bit to be desired:

I so wanted to love you, YN-560. Now you hit me with a second, non-working feature. The absence of which essentially makes the flash unusable for me, necessitating a round-trip return to China.

On the one hand, this is why I strongly suggest buying direct. On the other hand, I would also suggest that Yongnuo join LumoPro in hand-checking each unit before it goes out. It is only a wasted effort if your quality control is hitting 100%. And you are not there yet, Yongnuo.

Then again, for $85, you can afford to buy a few extra ones, and keep sending the defective ones back to China for replacement under their 1-year warrantee, can’t you?

You can read the Strobist’s full test drive over on the Strobist blog.

Sharing mobile phone photos with EYE'EM

EYE'EM

Do you have a camera phone? Do you use it all? Ever wonder what to do with your pictures? As the mobile photography movement continues to gain popularity, various methods of sharing these phoneography masterpieces have popped up across the scene. David Smith tells us about more about one of the latest to appear.

It’s called EYE’EM, a Berlin-based mobile photography platform that allows users to upload their photos and share them with the rest of the world. Founded in January 2010, EYE’EM hit the ground running and launched their first competition in March, receiving more than 3000 entries. The winning images were displayed at an exhibition at Schlechtriem Brothers gallery in Berlin, with finalists also having their work featured in the EYE’EM Annual, a book dedicated to the world’s most talented mobile photographers.

How it works

EYE’EM streams users’ photos in real-time as they’re uploaded to the site. Simply create a user profile and click on the site’s uploader to begin sharing your work with the invite-only community. You can tag your photos, comment on others’, and even share via Twitter and Facebook. EYE’EM is currently working on mobile apps for multiple devices to make uploading photos even easier.

What’s next for EYE’EM?

Following the success of their first competition in March, EYE’EM has recently announced their Second Mobile Photography Exhibition of 2010, this September in New York City at the renowned Openhouse Gallery. The exhibition will feature fine prints as well as digital screens displaying the crème de la crème of all photos submitted to EYE’EM’s platform.

The featured submissions will be selected by an international panel of photographers and other creatives, as well as by the EYE’EM community through the ability to like, comment, and share photos. Also included will be images from select NYC mobile photographers that have made an impact on the scene over the last few years. Submission deadline is 5 September. All you have to do to is upload your best mobile shots: the EYE’EM community will take care of the rest!

Just the beginning

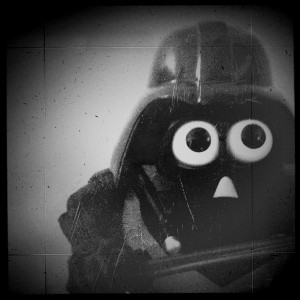
Darth Tater. David's prize-winning entry?

With continuous advances in mobile phone cameras and software applications, you can be sure to see more competitions and websites like EYE’EM to help mobile photography gain acceptance as a legitimate art form. More and more photographers are using their mobile phones everyday to add an alternative lineup to their portfolios, as can be seen on EYE’EM’s live-stream.

EYE’EM is an invitation-only community, but they’ve given us 30 invites. So if you feel like having a go, first 30 comments will win the goodies. (Just remember to put your e-mail address in the e-mail field. We won’t publish it, but if you don’t, we won’t be able to contact you!)

But now, I think I’ll go upload my latest iPhone masterpiece: “Darth Tater.”

Found: Translocation - animals in unusual places

Translocation

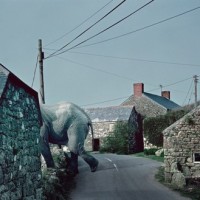
Whilst Basil Fawlty was convinced that herds of wildebeest could not be seen sweeping majestically through Torquay, Scottish photographer George Logan has created a series of great photos that show a host of beautiful African animals in the unlikeliest of places.

Rhinos standing at a Highland dry-stone wall? Warthogs congregating on a cobbled street? Giraffes grazing in the shade of windmills? Mongooses at a bus stop? They’re all part of the Translocation project, a collaboration between Logan, the Born Free Foundation, and Hewlett Packard Indigo, which aims to raise funds for the construction of Ensessakotteh, a conservation centre near Addis Ababa in Ethiopia.

The website is great, but I bet that the book looks even better. You should go take a peek.

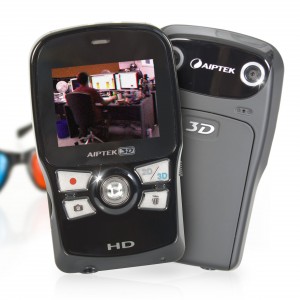
3D video camera on the cheap

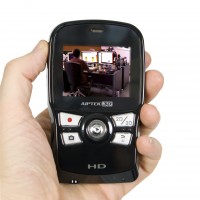
Okay so it looks a bit My-First-Camera, but who cares, if the final results look good.

With Toy Story 3 earning just shy of £40million during the first two weeks of its release, geeks still reeling from the beauty of Avatar, and all of Hollywood being a-flutter about 3D, you’d almost think there’s some sort of trend going on, or something.

It’s not just in the cinemas the revolution is raging: Sky is announcing the arrival of a new 3D channel later this year. It seems 3D has taken over our cinemas and is now making its way into our living rooms.

Okay so it looks a bit My-First-Camera, but who cares, if the final results look good.

Firebox is jumping on the bandwagon, and is giving mere slobs chance to get a piece of the action, with a HD 3-D Camera priced only £199.99. Awesome stuff.

This sleek, portable camera has been developed by the German technology firm Aiptek. It’ll have you recording in 3D super easily, without breaking the bank – sure as hell a lot more affordable than the $2,000 version from Panasonic

The little gem uses two separate lenses and image sensors to record videos in 3D.

Watching it couldn’t be easier: You can playback your recording immediately on the device, upload it straight onto YouTube 3D using the embedded USB connector and 3D glasses (included), or watch it on your fancy-pants 3D TV, through the supplied HDMI cable.

The battery will last for up to 1.5 hours and has an expandable memory suited for 32GB SD cards.

The Aiptek 3D Camera is available now from Firebox.com, and will set you back the princely sum of £199.99.

Colour filters on a keyring

Photojojo filters 2

Colour filters: love them. The crinkled mess they always seem to end up in, no matter how carefully I store them: not so much.

If only someone would find an easy-to-store, easy-to-use solution for creased and wrinkled gels. ‘But Daniela,’ goes an email that has just dropped into my inbox, ‘we have!’

Those clever people over at Photojojo have put eight colour filters onto a keyring. So you get the entire spectrum, plus a double helping of green, in one easy-to-use place. Not only will they stay wherever you attach them, being on a keyring and all, but because they’re made from acrylic they won’t crumple either. Huzzah!

Now you can turn your whole world sky-blue-pink with a filter or eight over your lens, or just bits of your world lime-green-orange by using a handy-dandy elastic band to secure a filter over your flash. Not keen on lime-green-orange? Try imperial-purple-yellow with scarlet spots instead.

Available from Photojojo for US$15.

Banning photographers from photography events

_48667099_summerfieldscorescopy

If you’ve ever been to the UK (or, indeed, anywhere in Europe), you know that football (as we like to call soccer over here, since it’s played with your feet and all that) is a pretty big deal. The sports sections thrive on covering the sport, it’s all over the news, and the fans lap it all up.

One football club decided they wanted to let only a single photography company take photos at their matches (presumably in return for a lot of money), effectively banning all other media outlets from sending their own photographers. Needless to say, it caused a bit of a stink.

The Plymouth Herald (relevant because the game was Plymouth versus Southampton – the latter being the photography-banning jokesters) resorted to reporting on the story using hand-drawn cartoons instead of actual photographs.

The Sun newspaper, which I normally despise on principle for being a load of mind-numbing populist hogwash, ran the rather witty “Opposition 0, Plymouth 1″ headline, and then proceeded to report on the game without mentioning the ‘opposition’ team name once.

I have a feeling Southampton FC will overturn their daft move pretty soon…

Found: Misadventures by Matt Sartain

sartian1

Some times, you get some hellacool projects happening here and there. “Misadventures”, by San Francisco-based photographer Matt Sartain explores individuals on long and epic journeys through dreamlike landscapes.

A fantastic collection of photos – and well worth a peek!

Check it out: Matt Sartain via PetaPixel