Feature Articles

8 tips for better Smartphone photographs


Taken with an iPhone 4

Forgive me for stating the obvious: You get much better photos with a camera than without one. So, whilst I would much rather always be taking photos with SLR body with a sharp Prime lens, the truth of the matter is that you'll sometimes come across moments where you're just bursting to take a photo - and you may not have a 'real' camera handy.

If you're a hard-core photographer, you'll probably have a reasonably recent smart-phone. Great news: The phone comes with a surprisingly capable camera built-in.

It's not without limitations, of course, but here's eight tips to get the most out of your mobile phone snaps...

1) Clean your lens

Mobile phones are usually subjected to all sorts of abuse. Mine lives in my hand and my pocket; neither of which is the greatest environment for a clean lens.

Fingerprints, grease, or pocket fluff are the #1 reason for rubbish smart-phone photos, so check it, and clean it before shooting!

2) Shine a light

Modern mobile phones often come with impressive ISO ranges so you can take photos even in low light; but that doesn't mean you should: The small sensor size introduces a lot of noise, which isn't very nice, and certainly isn't conducive to awesome snaps.

Turn up the lights in the room, or go outside in daylight for the best photos.

3) Rez it up

If your camera has several settings, use 'em! As a general rule, the higher the resolution of your mobile camera, the clearer your photographs will be.

Bear in mind, though, that the higher the resolution of your photo, the larger its file size will be, so if you're e-mailing them, try to make them smaller before you kill your grandma's 28.8 kbit/s modem.

4) Nix the digi-zoom

Using digital zoom to zero in on your subject is fun if you want to use your mobile phone instead of binoculars, but it ain't much good if you're wanting to take photos. For photography, keep it zoomed all the way out, and crop the images later instead.

5) Steady now

When taking photographs, the more steady your camera is, the clearer your picture will be. Simples. If you can, lean your elbows on a sturdy surface, or place the phone against a lamp-post or similar for extra crispness.

6) Don't lose your (white) balance

If your mobile phone has the option of adjusting the camera using white balance, go ahead and experiment how the different settings impact on your photographs.

7) Get closer. No, even closer

To avoid having to zoom in or crop your shots later, ensure that your subject fills your viewfinder.

8) Sprinkle some editing magic

Even though your phone may have built-in editing features out of the box, consider editing them with a separate app instead.

For the iPhone, my favourite editing apps are Snapseed and Photoshop Express - Try 'em out, and use the filters and editing tools to add a bit of sizzle.

Got that? Great. Now go snap some photos you're proud of. Oh, and post them in the comments, I'd love to see what you guys come up with!

What is ISO?

We know that exposure is controlled by the holy triumvirate of shutter speed, aperture, and ISO. You give with one and take with another until the light hitting your sensor is just right for the image that you want. We also know that whilst these guardians of our sensors have practical applications, they can be creative. Aperture has already been cross-examined in our Photography Fundamentals series; this week it's the turn of ISO.

Sensitivity to light

Once upon a time, in days of old, when we shot on film and had to fend off dragons simultaneously, we also had to choose the ISO of our film when we bought it. 100? 200? 400? Huh? Now it's just a button on our cameras and we can change it every shot. But that doesn't mean that ISO is any less significant now than it was then. In fact, changes to ISO have been one of the major breakthroughs in modern photographic technology.

Back in those old film days, ISO referred to how sensitive a film was to light. Depending on the conditions that you thought you'd be shooting in primarily, you'd have to select the ISO of your film and be done with. (If you want to really geek out on ISO trivia, Haje has you covered.) Now you can push a button and see it increase from roughly 100 to anything as high as 102,400 (but that's extreme). That's a lot of numbers but they still mean the same thing: it's how sensitive your sensor is to light. (Or, technically, how much the signal from each pixel on your sensor is amplified.)

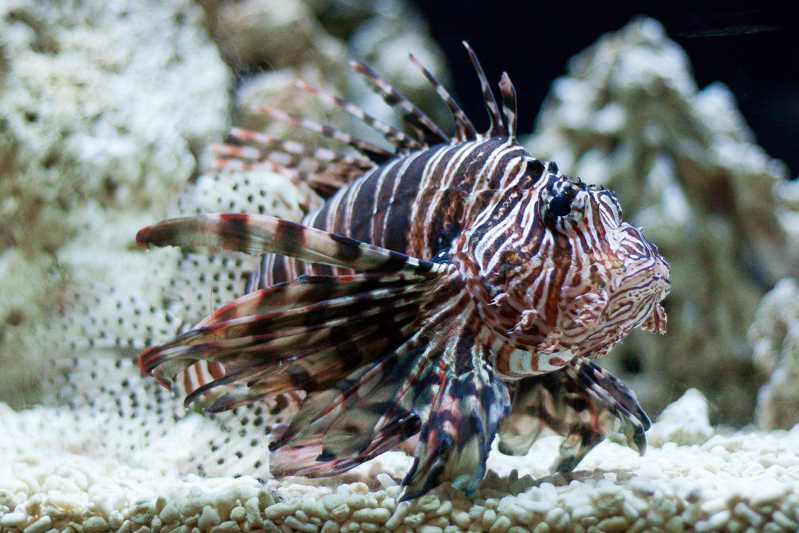
Flash in an aquarium? Bad plan. ISO 800? Gets the shot!

The higher the number, the greater the sensitivity to light.

Low vs High

The general rule is that the brighter the conditions, the lower you want your ISO to be. As conditions become dimmer, you can increase sensitivity to help you get a good exposure. However, even if it's a low-light situation, you still want your ISO to be as low as possible.

There's a trade-off, you see. As you increase sensitivity, you also increase the tendency towards digital noise, or the graininess you see in some photos. Now we do have a full Photography Fundamental on noise lined up for you but the low-down is that too much noise can make images look poor. It's best to avoid too much of it.

Whilst too much noise does give me a headache, I'm more than prepared to sacrifice a bit of image quality in order to secure my shot. Yes, I'll take a smidge of noise over motion blur almost any day. (Unless I really want motion blur, that is.)

Yes, it is a bit noisy, but I'd rather the noise than no photo

Which ISO to use

Well, seeing as ISO forms part of the mighty triumvirate with aperture and shutter speed, you'll need to consider those in order to get the exposure that you desire. But do stick with the rule I mentioned earlier: as low as you can get away with.

Equivalent exposures

It's really easy to leave your camera to automatically select the ISO for your shots, but it is a really useful tool. And the more control that you take over your own images, the better. Don't just concentrate on aperture and shutter speed.

TL;DR

  • ISO refers to the sensitivity to light of film or the digital camera's sensor.
  • The higher the number, the greater the sensitivity.
  • A low ISO generally offers the best image quality, and great for brightly lit situations.
  • A high ISO setting may be required to capture images in low light situations, but can cause noise to show up in your photos

Histograms << Photography Fundamentals >> Key

The Photo Man - a trader in found photos

Mark Kologi buys and sells found photographs. If not millions, then many thousands of old pictures have passed through his hands over the years. Forgotten bits of people's lives move from one place to another, one life to another. He speaks about his trade, and whether or not he takes liberties with people's lives, in this video made by Ben Kitnick and Saxon Richardson.

The Photo Man from Ben Kitnick on Vimeo.

As someone who has pondered the fate of old photographs, in my possession but not taken by me, his musing that it's better they find new homes rather than be binned struck a chord. I do wonder how I might feel if I found a photo I'd taken, or a photo of me or someone I know, amongst his stock. You?

(And remember, don't use a found photo for commercial purposes, you could end up in a Vampire Weekend of trouble.)

What is a histogram?

H is for histogram! This week's Photography Fundamentals installment explains the graph that you can draw up on your camera for each image, or appears in the top right corner of your workspace in Lightroom or Photoshop. What does it depict and how is it useful?

It's a graph

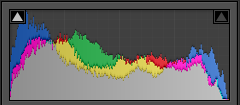
A histogram is a graph that shows the tonal range, or the distribution of brightness, of an image's pixels. On its X-axis it runs from black to white, 0 to 255. On its Y-axis it charts the number of pixels at any brightness value.

Screen Shot 2013-07-17 at 17.21.13

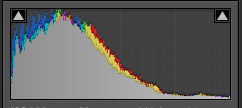
Lots towards the left, but a few specular highlights, too

By looking at a histogram you'll have a feel for the exposure of an image. If the majority of the pixels are sitting in the left-hand side of the histogram, the image will have a lot of darker tones. An image with plenty of bright tones will have a histogram that's predominantly situated in the right-hand side.

A perfect histogram?

There's no such thing as a perfect histogram. Instead, you need to use it as a tool to help you judge if you've exposed your image how you want it exposed. Sure, if your image has a histogram that's concentrated towards the left, it might be under-exposed. It might also be a low-key image with predominantly dark tones.

However, the majority of images will have histograms that peak around the centre, in the mid-tones, but taper out towards the blacks and the whites.

Screen Shot 2013-07-17 at 18.52.27

A broad sweep from left to right

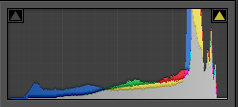
If you've any 'blown highlights' or catasrophically over-exposed pixels that are pure white and don't contain any detail, you'll see those peaking right up against the right-hand side. These are sometimes called 'clipped highlights'. You can expect to see some if you've the sun in the frame, or specular reflections on water or metal, so don't think that they're always a bad thing!

And contrast?

Histograms also indicate the contrast found in a scene, too. A narrow peak will mean a lower contrast image; a broader peak is indicative of an image with high contrast.

Screen Shot 2013-07-17 at 18.44.17

A narrow peak towards the right hand side - lots of brights and not much contrast

Where to find a histogram

All dSLRs and EVIL cameras will have a histogram included in their menu functions; higher end compacts often have them, too. On my Canon it's just a case of viewing an image in playback and then hitting the Info button twice.

When you're editing, the histogram is usually in the top right corner of your screen, but it will depend on your programme, obviously.

TL;DR

  • A histogram is a graph displaying the distributon in brightness of an image's pixels
  • There's no 'perfect' histogram; they're tools to help you assess exposure and contrast in an image
  • Darker images will have histograms with data concentrated towards the left hand side of the graph
  • Brighter images will have histograms with data concentrated towards the graph's right hand side
  • High contrast images will have broad peaks in their histograms; low contrast images will have narrower peak

Golden hour << Photography Fundamentals >> ISO

Photographing people who wear glasses

My brother has worn glasses full time for absolutely years, which has meant that I learned how to photograph him wearing them to avoid hideous green glare rather intuitively. I probably did have to think about it at some point, but I don't really remember and now I just seem to do it. That was until this week, when one of the students at Photocritic Photography School piped up and asked me what he should do when he has a portrait subject who wears glasses. For lots of reasons, the answer is never 'Ask your subject to remove them,' so what do you do?

Look at the light

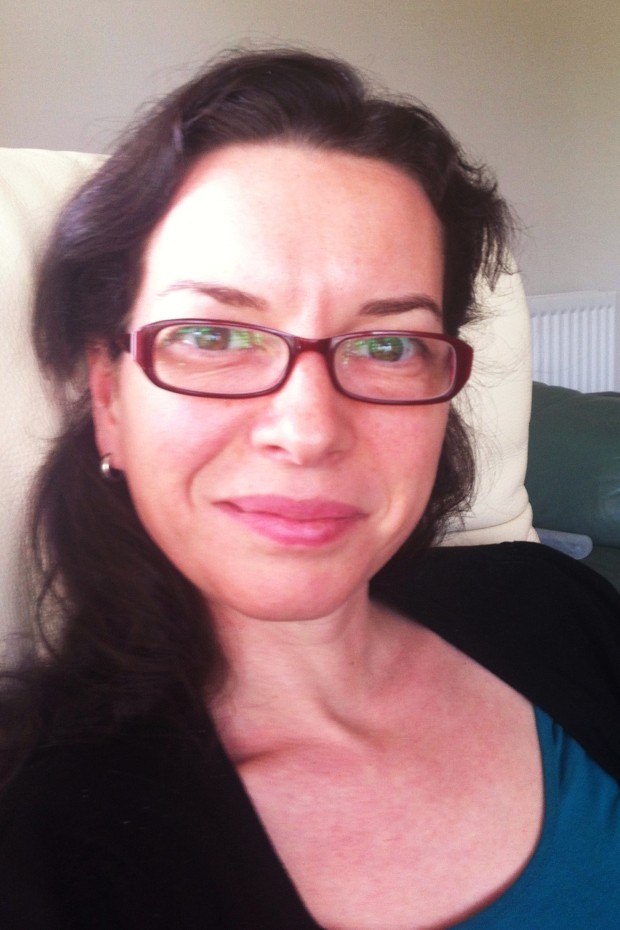
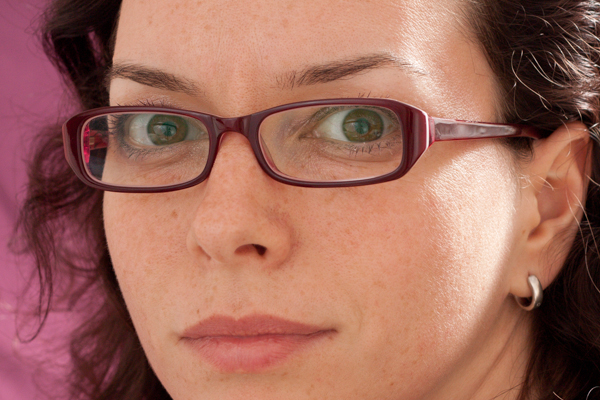
Me and some wonderful green glare, taken with an iPhone

The most obvious problem that glasses will present to you is that they reflect light. Instead of seeing straight through spectacles' lenses and into your subject's eyes, you'll have a unpleasant, usually green-tinged, reflection glaring back at you.

Going back to GCSE physics, we know that the angle of incidence (or the angle at which light will hit someone's glasses) is equal to the angle of reflection (or the angle at which the light will bounce back off the glasses). If light is coming in at an angle of 31° to the normal of your subject's glasses, it'll bounce off at 31° on the other side of the normal*. There's a helpful diagram here.

Consequently, if your light source is too close to your camera the light has a much greater chance of bouncing straight off your subject's spectacles and into your camera's lens. And if the light is coming from straight behind the camera and your subject is looking straight back at the camera, you haven't got a cat's chance in hell. But the upshot is: know where your light is coming from.

* The normal is an imaginary line running perpendicular to the plane of the glasses.

Altering angles

Minimising glare is easiest by one of three means:

  • move your light source
  • move your subject
  • or move your camera

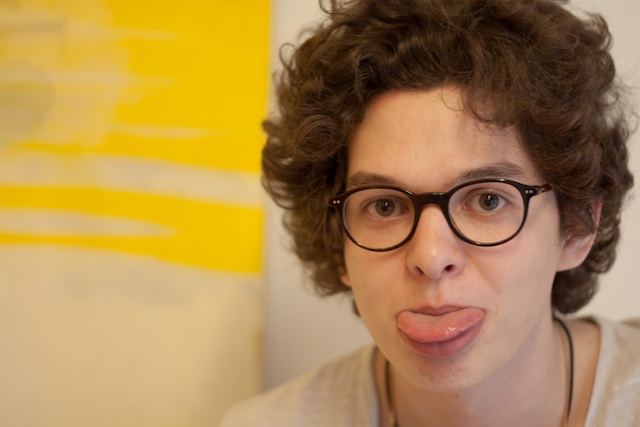
Pokey-out tongue copy

By shifting your light source or yourself, you can alter either the angle of incidence, and therefore reflection, or take your camera out of the firing line. Sometimes, though, your light source can't be shifted (say, when it's the sun) and you moving might not be an option. Then it's down to your subject.

Tilting and turning

If your subject tilts her or his head downwards, just by a few degrees, not by much, it'll be sufficient to adjust the angle of the light and prevent a reflection bouncing back into the camera lens. Or she or he could turn fractionally away from the light source; not enough to wreak havoc with your shadows, but enough to prevent that horrible glare.

Me, angled away from the light

When you ask subjects to tilt their heads or change the angle of their shoulders, you might find that their spectacle frames begin to encroach into the view of eye. At this point it becomes a trade-off between reflection obfuscation and frame obfuscation. You need to decide where your tipping point is.

Quit posing

If you opt for more candid shots, you'll be able to capture your subjects looking away or looking down and doing it naturally but still without any nasty reflections.

Downward tilt, candidly snapped.

Go with it

Sometimes, you just have say that the glare is there and it's better to have a photo with a reflection than no photo at all!

What is the golden hour?

The chances are that you've heard of the golden hour (or magic hour, it's sometimes known as that, too), and you know that photos taken during this magical time slot are blessed with a sizzling, glowing quality that gives them a spectacular edge. But when exactly is it? And what makes it so special? This week's Photography Fundamentals is here to explain all!

When is it?

Early morning oranges iii

First up, golden hour can last between 45 and 90 minutes, and it happens twice day, around sunrise and sunset. The closer that you are to the equator, the shorter the period it lasts. Yes, it does mean that at the Poles, at certain times of the year, the Golden Hour can last nearly all day, too. I suppose that the 'Golden 90 minutes to three hours, or sometimes even all day' doesn't sound quite so catchy, does it?

Why does it happen?

When the sun appears to be closest to the horizon, its lightwaves have to travel further than when they're overhead, as happens during the middle of the day. This softens and diffuses them, as they bounce around more and don't hit their subjects directly. You're left with gorgeous soft lighting, gentle, long shadows, and less chance of over-exposing your highlights.

Golden Hour light is typically much warmer in hue, too. The blue light waves are scattered further, leaving your subjects to pick up more of the red and orange tones, and bask in their warmth.

Winter Rose

All of this means that just about any type of photography you can accomplish outdoors will benefit from the Golden Hour: portraits, landscapes, architectural, and street.

What's its effect?

Portraits will take on gorgeous, even skin tones and there won't be any harsh shadows appearing beneath your subjects' eyes and nose, which is never really an attractive look, I'm sure that you'll agree.

Tanya

Landscapes sizzle with soft light, unusual shadows, and saturated colours.

Buildings look as if they're glowing during the Golden Hour, especially stone ones. It appears that rather than reflect harsh midday light, they absorb the softer early morning or late afternoon rays.

Tower wide-angle

You won't benefit from just the glowing stone of the Leaning Tower of Pisa if you capture it early in the morning, you'll avoid the crowds, too.

And somehow, during the Golden Hour, even the most insalubrious of streets can appear a touch more charming than they really are, whilst anyone or anything in them will be flattered by the sun's golden tones.

To help you go forth a shoot beautiful, radiant images, there's even a handy golden hour calculator.

TL;DR

  • The golden hour happens twice each day, around sunrise and sunset
  • It lasts roughly 90 minutes
  • As the sun is at its furthest point from the earth, its light is softer and more diffuse, having had to travel further
  • Photographs take on a warm glow and shadows are softer during the golden hour

Focal length << Photography Fundamentals >> Histogram

Setting up a scream-triggered photobooth - because whyever not?

If anyone had wandered along to the Maker Faire in the Elephant and Castle area of London (yes, it's really real; no, there are neither castles nor freely roaming elephants but both would be a vast improvement) on Saturday they would have found me, and the London division of Team Triggertrap, asking people if they wouldn't mind awfully screaming at the top of their lungs for us. Seriously.

You see, we'd set up the Triggertrap ScreamGrab studio because we reckoned that people summoning the exhaustive energy to scream like bellows, and then releasing it in one extended Aiouuuuuuu! would make for fantastic portraiture. And it would give Triggertrap with the sound threshold set to Very Loud Indeed™ a rather good workout. We weren't wrong!

Have a look at these if you need convincing:

And the rest you can see on Triggertrap Flickr stream.

Inspired? Want to know how we did it, so that you can give it a go yourselves? Read on!

The basics

At the least, what you need to do is to get an audio trigger that will take a photo when the volume hits a certain level, and a camera. In our case, we decided to use the Triggertrap Mobile app, but we discovered to our horror that the app itself was way too sensitive: Even with the sensitivity threshold all the way to the top, you didn’t really have to put your back into the scream to trigger the camera (in fact, speaking normally was loud enough to snap a shot). Uh-oh.

In the Android version of the app, there’s a separate slider for sensitivity, but we don’t have that level of control over the iOS app (and I did want to use the iPod Touch I had brought along, so that I wouldn’t have to tie up my phone all day).

After a spot of last-minute panicking, we discovered that there was a very simple, and delightfully low-tech solution to this: I simply stuck a small piece of packaging tape over the microphone on the iPod Touch. Hacky? Well, yes, but who cares – it did the trick!

With the tape in place, we were able to use the sensitivity slider to fine-adjust the triggering threshold. Perfect for what we were trying to do!

In theory, with the app configured and hooked up to the camera using a connection kit, that’s all you need to get the photo. Stick it on a tripod, and you’re good to go – really, everything else is showmanship. But to turn this into a far more fun experience, for us and for our sacrificial victims, we turned it into much more of a show.

The kit

For the ultimate ScreamGrab experience, I set up with the following:

  • Canon EOS 6D set to manual exposure & manual focus
  • Tripod
  • Triggertrap Mobile Dongle + connection cable
  • iPod Touch (connected to power, to make sure it didn't die)
  • Tripodclamps clamp to hold the iPod Touch in place (so that your screamers can see how loud they need to scream)
  • Canon ST-E2 flash trigger
  • 2x Canon Speedlite 580EX II flashes
  • 2x light stands
  • 2x white umbrellas

What I did

Let's start with the lighting: I added a Canon ST-E2 infra-red flash transmitter to the camera’s hotshoe, and I set up a couple of Canon EX580 II flashes on super-cheap lighting stands with umbrellas. I fired the flashes on manual output (1/16 each), then set up the camera in manual exposure (1/180 second and f/10, ISO 640) and manual focus. This meant that all the shots were completely repeatable, and I wouldn’t have to make any adjustments throughout the day.

In fact, if it hadn’t been for people being different heights, there wouldn’t have been any reason to touch the set-up at all: even the batteries in the flashes, the flash transmitter, and the camera, lasted all day long. Impressive stuff – but then, battery consumption was the chief reason why I only set the flashes to 1/16 output – in my experience, in modern cameras, you may as well let the ISO do the work, and give your flashguns a break.

Finally, I wanted to ensure that the iPod Touch was clearly visible, so people would be able to see the black ‘needle’ move on the app – so they knew how loud they had to shout to trigger the camera. To achieve that, I used a Tripodclamps clamp. It’s simple: It bolts to the tripod, then squeezes the smartphone firmly to hold it in place. It looks good, and it makes it easy to demo the device, too, which is a bonus.

Someone check for the Four Horsemen of Apocalyspe - I shot in JPEG!

I should also mention at this point that the camera was shooting JPEGs rather than in RAW. The Canon 6D shoots enormous RAW files, and since I had a fully controllable lighting situation, I didn’t expect I’d need to do a lot of adjusting the images. More importantly, the JPEGs are much much faster to download via the tethered connection, faster to process in Lighroom, and it meant that my poor little MacBook Air didn’t slump to its knees. Having said all that, I do generally recommend shooting in Raw. Here is why, and I also wrote an article about why this particular situation (controllable light, need for speed) is an exception where JPEG is acceptable. Because, yes, I’m an insufferable nerd about this sort of stuff.

Turning it into a show

To show off the images, I decided I had to shoot ‘tethered’. I was in luck; my Canon camera comes with a piece of software called EOS Utility, which enables tethered shooting. In this case, I hooked up a27″ monitor to my MacBook Air. I made sure that all photos that were taken were shown on the audience-facing big screen as soon they were shot. Great for instant gratification – even the most reluctant screamers giggled their heads off when they saw their mugs on the big screen.

Instant publishing

I anticipated (correctly) that people would want a copy of their photos – but how do you go about doing that? Quite a few people used Instagram and took a photo of their photo on the big monitor, but obviously we wanted something a little bit better than that. So, I devised a workflow.

I was running Lightroom 4, using the ‘auto import’ feature. In this way, the photos would be downloaded by the Canon EOS Utility to a folder, and Lightroom 4 would automatically import them from that folder into a library. The import script applied a preset to the image (white-balance, some vignetting, some extra contrast and some colour effects to make the photos pop out more). It also applied a description and title to the images, so it would be as quick as possible to publish them online.

From there, I only did one edit to each photo: A quick crop. This was necessary because we didn’t have a lot of time to frame people properly, and besides, a lot of people either jumped or hunched over as they were howling at the camera, so the framing was almost always off anyway.

After cropping, we just dragged the photo to the Flickr publishing tool within Lightroom, and hit the ‘publish’ button. With one person manning the computer, that meant that from squeal to Flickr, it could take as little as a minute or so, including the processing, resizing, and uploading.

We also had an IFTTT set-up, so that we could auto-tweet our ScreamGrabs. Except that Twitter sent us to Twitter Jail for too many tweets!

Other ideas?

It would really have been awesome if we could have had a printer there, and printed out people’s ScreamGrabs as they were taken – but we didn’t really know how many people to expect, and we only had two people at our little stand at any time, so I suppose we wouldn’t really have had time to deal with the logistics of printing anyway — but it would have been amazingly good fun, so perhaps that’s something we’ll do next time.

The other idea that came up, was that perhaps we should have been recording people’s screams! Playing the screams, along with a slide-show of all the photos, would have been a fantastic project, I think – but it didn’t come up as an idea until someone mentioned it to us about half-way through the day. Again, I have no idea how you’d deal with the logistics of matching up the sounds to the pictures… But it would have been great.

In the Triggertrap ScreamGrab booth, everyone can see you scream!

A surreally good competition winner

It's been a little while coming, we know, but Haje and I have finally settled on the winner and runner-up for our surreal-inspired photo competition. It was a very close call between the two, but we're delighted to announce that the spoils go to: Phantom Lake Phantom Lake, by They call me Alex.

Screen Shot 2013-07-04 at 18.58.39

and The Grind, by Hooker771

What appealed to us about both these photos was that neither relies on extensive manipulation. They're in-camera surreal creations. And they look terrific, in particular because of their gorgeous use of colour.

Congratulations both Hooker771 and They call me Alex!
The Ilex Press has very kindly provided a copy of my newest book, Surreal Photography: Creating the Impossible, for the winner. I hope that you enjoy it!

As an aside, that was the last competition that we'll be running for the forseeable future. It was a great deal of fun to dream up themes and watch you complete the briefs with such enthusiasm, but we thought that we'd quit while we're ahead. Thank you to anyone who ever entered and to those who generously provided prizes, too.

What is focal length?

Having made it through a, c, d, and e (we skipped b), the photography fundamentals cruise ship's next port-of-call is f, where we'll be exploring focal length. There's a lot to take in here, so I hope that you're wearing comfortable walking boots.

Your camera's lens works by refracting the light from what it can 'see' and converging it at a single point, the focal point, to create an image. Just how much the lens is able to 'see' depends on its focal length.

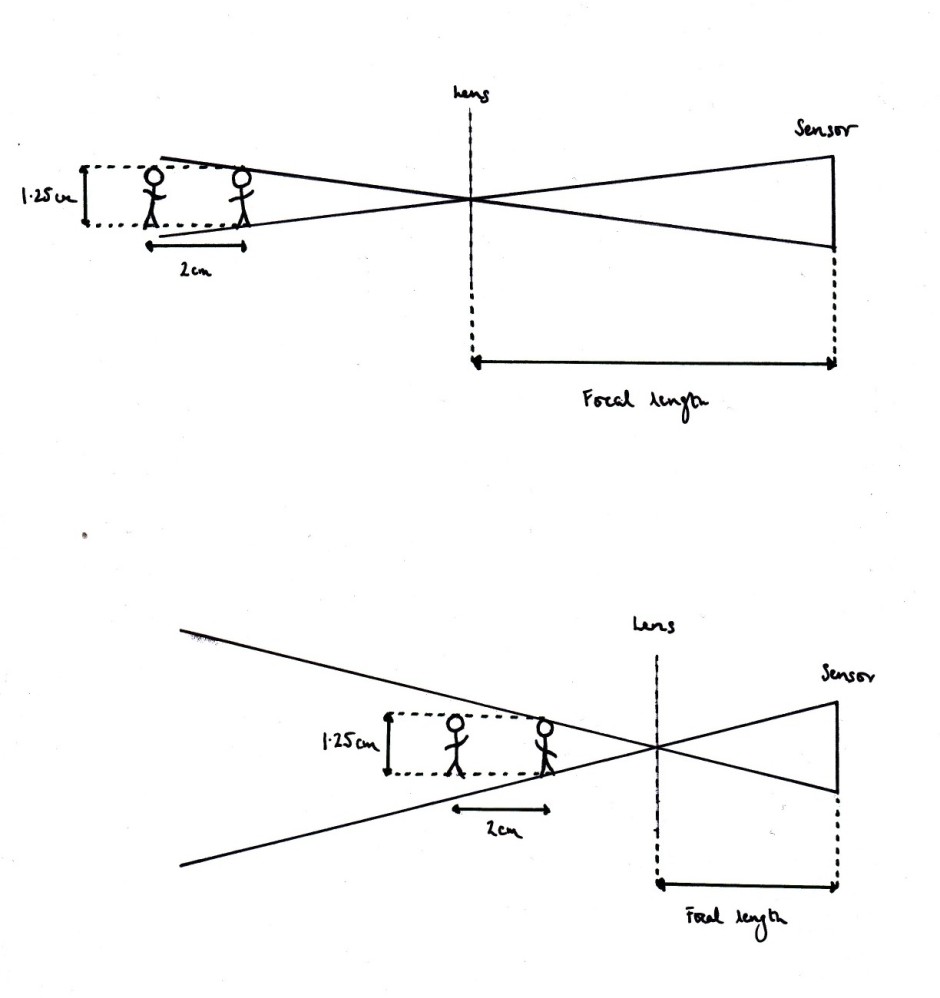
The distance between the lens and the imaging sensor (or film, if you're old school) is what determines focal length. It's measured in millimetres.* A shorter focal length means a wider angle of view, so the lens 'sees' more. These are called, somewhat unoriginally, wide-angle lenses. By the same token, increase the focal length and the angle of view decreases and pulls you closer to your subject. Lenses with larger focal lengths, roughly over 135mm, are known as telephoto lenses. Those in between, around the 50mm mark, are 'normal' lenses.

focal_4.png

Here you have a wider angle of view that takes in more of the scene.

focal_5.png

A narrower angle of view draws you closer to your subject.

* Long lenses don't really measure 20, 30, or 40cm; they create the telephoto effect by a complex series of elements thatwork together to create that same effect.

The crop factor

When we talk about focal length, we're usually doing it with reference to a 35mm, or full-frame, sensor camera. If you're using a camera that has a sensor smaller than full-frame, for example a Nikon D5100 with an APS-C sensor or an Olympus PEN with a Four Thirds sensor, it will have a magnifying impact on the focal length of your lenses. The smaller sensor is only able to detect a portion of the entire field of view, making it appear as if you're closer to your subject.

This is known as the crop factor. Multiply the sensor's crop factor (for example 1.5 for a Nikon APS-C sensor) by the lens' given focal length and you'll have the effective focal length. (It doesn't actually change the focal length, but it looks that way.)

This can be very useful when you use a telephoto lens, because your 200mm lens on your Nikon D5100 suddenly becomes the equivalent of 300mm; but it can be a bit of a pain when you're using wide-angle lenses as they will lose some of the impact of their increased angle of view.

So that we're all straight, I'm going to be referring to focal lengths as if they apply to a full-frame sensor.

Rough-and-ready guide to focal lengths

  • 22-35mm - Wide-angle - Landscapes
  • 35-70mm - Standard or normal - Street, documentary, some portraiture
  • 70-135mm - Medium telephoto - Portraiture
  • >135mm - Telephoto - Sports and wildlife

Wide-angle lenses are good for...

Wide-angle lenses might be the go-to lens for landscapes, but there's more to them than that!

3255378073_6c6f44d3df

Emphasising the foreground

You’ve probably noticed that if you take a portrait with a wide-angle lens, the subject’s nose looks comically large and her or his chin juts out further than Brighton pier. Why? Well, the lens' wide angle of view means that in order to get in close enough to fill the frame with your subject, you have to get in very close. The closer that you get, the larger whatever is in the foreground will appear. As those objects are likely to be a nose and a chin, in a portrait, they are going to look huge compared to the rest of the face.

Tower_wide_angle

If you were to photograph a building close-to and from below, this same foreground-emphasising effect would make the base of the building look stupidly large and the entire structure ridiculously tall. Being close, the foreground is emphasised and the lens' wide angle of view gives the entire scene the illusion of somehow being stretched or exaggerated.

Enclosed spaces

When you're taking photos in an enclosed space, using a wide-angle lens will ensure that you can include everything in your scene that you want to be there. This is why estate agents use wide-angle lenses to photograph inside properties, so that the rooms can be shown in their entirety.

Converging verticals

Whatever lens you use, including your own eye, perspective means that parallel lines will appear to converge eventually. Just think of train tracks coming to a point as they streak away into the distance. When you use a wide-angle lens, this convergence happens faster than it would with a normal or telephoto lens.

You can use this convergence effect creatively, to envelop people in trees or give buildings an odd look. But of course, you might not always want your buildings to tip backwards or their parallel walls to converge. Standing further back from your subject and not tilting your camera upwards can help to overcome the problem, but sometimes this isn't always possible. I don't know about you, but I find that standing in the middle of a busy road to take a photo doesn't do me many favours. Thankfully, there are lens correction effects available in most editing suites!

Telephoto lenses are good for...

You might associate telephoto lenses with hardened sports photographers and weather-beaten wildlife photographers, but they're good for a whole lot more.

Kites_again

Normalising

Having a narrower angle of view means that the subjects fill the frame more; giving the impression of being closer together and closer in size.

Focal length diagram 2 copy

Instead of objects in the foreground looking larger, as would happen with a wide-angle lens, telephoto lenses make their background objects appear comparatively larger. It's because of the narrow angle of view: things in the background take up proportionally more of the frame, which makes them look closer in size to things in the foreground. It's called the normalising effect.

This then is why portrait photographers prefer longer lenses, often around 85mm.

Density

By giving the impression of compressing scenes and bringing subjects closer together, you can use a telephoto lens to make it look as if more is happening in your image, and that it is somehow more dense. For example, a moderately busy street scene could become bustling when shot through a telephoto lens.

Layering

Classically, it's a wide-angle lens that is used for landscape shots, so that everything in a sweeping vista gets in the frame. However, I've taken some of my favourite landscape photos with a telephoto lens. They have this beautiful stacked look that can emphasise the different layers in the environment.

Depth-of-field

You often hear it said that telephoto lenses have a shallower depth-of-field. This isn't strictly true. It would be more accurate to say that because telephoto lenses are mostly used to magnify subjects, and the subject will then fill more of the frame, the depth-of-field appears to be shallower. Not that there's anything wrong with that; it allows you pick out your subject from a beautifully blurred background.

6839779191_fbb311c4c6

TL;DR

    • Focal length is the distance between the lens and the sensor
    • It is measured in millimetres
    • Shorter focal lengths produce wider angles of view, that capture large scenes
    • Longer focal lengths bring you closer to your subject and have a magnifying effect

Exposure << Photography Fundamentals >> Golden hour

What is exposure?

The next stop in our (mostly) alphabetical journey through photography's fundamental principles is at 'e', for 'exposure'. Are you ready? Excellent! Onwards!

Exposure

Without an exposure, we wouldn't have an image (that's how fundamental this principle is) because it's the action of revealing your sensor, or your film if you're old-school, to light in order to record an image. Introducing too much light to your sensor will result in over-exposure and a too-bright image. Conversely, under-exposure is the result of not exposing the sensor to enough light, rendering a too-dark image.

Under-exposed to the left; over-exposed to the right; just right in the middle. (Image by Haje)

So far, so simple.

ExposureTriangle

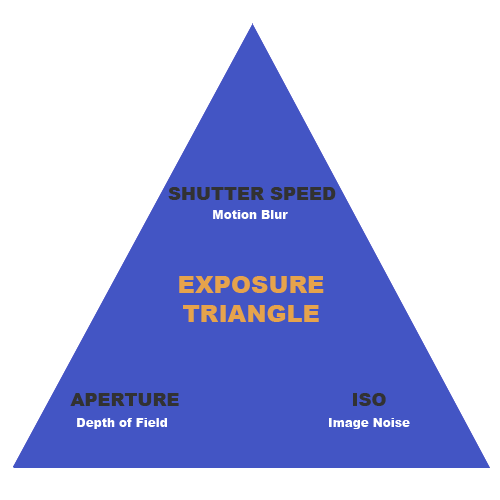
Exposure is measured in 'stops' and controlled by three variables in your camera: aperture, shutter speed, and ISO. As well as determining how light or dark your images will be, they all have other aesthetic effects on your images, which is why you need to understand and be able to manipulate them to produce the images that you want. We started this series with aperture, which controls depth of field. We'll get to shutter speed and ISO and their respective abilities to freeze or blur motion and to introduce noise into our pictures. But for now, we'll concentrate on the impact of varying aperture, shutter speed, and ISO on exposure.

Equivalent Exposures

By giving and taking from aperture, shutter speed, and ISO, you can keep your relative exposure the same, but change how your image looks.

You might've set up shot to get a 'good' exposure, but you decide that you want a greater depth of field so need to use a smaller aperture. A smaller aperture allows less light to hit the sensor, so if you change only the aperture, your photo would be under-exposed. How can we solve this? You can use the other two adjustments to compensate for the lack of light captured by using a smaller aperture: maybe you want to use a slower shutter speed, to expose the sensor for longer? Or perhaps increase the ISO to make the sensor more sensitive? You could even do a bit of both.

Equivalent exposures

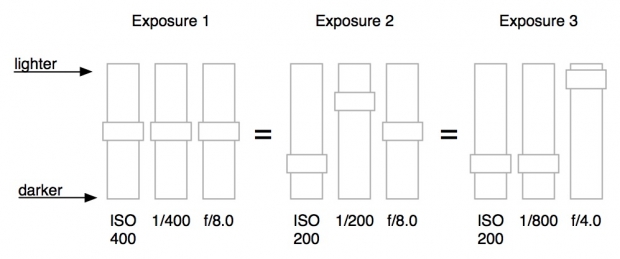
Let's look at an example with some numbers. We’ll start with an exposure of 1/200 second, ƒ/8.0, and ISO 400. What would happen if you were to change your shutter speed to 1/100 second? That would let twice the amount of light into your camera compared with 1/200 second, because the shutter was open for twice as long. Your photo will now be brighter.

Now you change your ISO to 200. This halves the sensitivity of the sensor, and the photo will come out looking like it is the same overall exposure. The photo won’t be identical, but from the point of view of brightness, it will be about the same. It’s possible to change any of the settings to compensate for any of the other settings.

A faster shutter speed can make up for a larger aperture, a lower ISO can make up for a slower shutter speed, and a smaller aperture can make up for a higher ISO. They’re all related.

TL;DR

  • 'An exposure' is the action of revealing your sensor (or film) to light to create an image
  • Too much light results in an over-exposed, too bright image; too little light produces an under-exposed, too dark image
  • Exposure is controlled by three variables: aperture, shutter speed, and ISO
  • Exposure is measured in 'stops'

Dynamic Range << Photography Fundamentals >> Focal length

What is dynamic range?

The Photocritic Photography Fundamentals series continues with dynamic range. No, we're not talking about high dynamic range (HDR) photography here, we're going back a step. Dynamic range and HDR are linked but before you can have HDR you need to have dynamic range, and whilst HDR is a tool, dynamic range is a basic principle that underpins photography.

Not just about photography

Dynamic range isn't a concept that's restricted to photography. It's something that we make use of every day, with our eyes and our ears. It's what allows us to hear someone mounting the stairs at the same time as listening to the radio, or be able to see both the sunny and shady areas of a garden simultaneously. Being a 'range' it does have its limits, though: when you're in a dark room that has a brightly lit window, you won't be able to see the view through the window and the room interior simultaneously. One will be over- or under-exposed when the other is properly exposed. The tipping point is the extent of your eyes' dynamic range.

Dynamic range is the maximum difference between bright and dark or high and low that you're able to absorb simultaneously.

So it relates to photography how?

In photography terms, dynamic range is how much difference in contrast your camera is able to record. If you imagine a landscape picture with bright white clouds that are almost over-exposed, the more detail you are able to detect in the shadows is indicative of a wider dynamic range. It follows then that a camera with a wider dynamic range will be of more use than a camera with a narrower dynamic range: it has the ability to record more data and therefore produce images with more detail.

Being able to see highlight and shadow detail is down to dynamic range

Measuring dynamic range

There's no strict measurement for dynamic range in cameras. Sometimes you'll see it referred to as 'EV', sometimes as 'stops'–as in ƒ/stops–and even as 'bits'. In fact, you often won't find it referred to on a camera's specification and you have to go to independent testing and review websites to get a dynamic range measurement.

If you're anything like Team Photocritic and like amassing geeky facts, you'll want to know that the dynamic range of the human eye is approximately 24 stops; cameras have a dynamic range of between ten and 15 stops.

Making the most of your camera's dynamic range

The huge caveat to dynamic range is that you can only make the best of it if you shoot in Raw. Shooting in Raw records vast amounts more data than if you shoot in JPEG and allow your camera to make decisions about what information should be kept and what should be discarded. The bucket-loads of data and the accompanying flexibility that comes in a Raw file is as a result of your camera's dynamic range. Shoot in JPEG and you'll miss out.

TL;DR

  • Dynamic range is the maximum difference between bright and dark (or high and low acoustically) that you can absorb simultaneously
  • Photographically, dynamic range is the maximum degree of contrast that your camera can record
  • Dynamic range can be measured in 'EV', sometimes as 'stops'–as in ƒ/stops–and even as 'bits'
  • To make the most of your camera's dynamic range, you need to shoot in Raw

Contrast << Photography Fundamentals >> Exposure

What is aperture?

Learning anything new comes with a whole spectrum of principles, terminology, and practices that have the potential to boil your brain, leave you mildly confused, or anywhere in between whilst you're getting to grips with them. Photography definitely comes with its own theories, vocabulary, and conventions and not knowing what people are talking about when they refer to 'noise' or 'speed' can make you feel about a pixel tall. To try to ease people's paths in photography and prevent eye-swivelling, mind-frying, and either mild or acute embarrassment, we're running a series on photography fundamentals, throwing a bit more light on the things you need to know. I could say that we're starting with aperture because it begins with a, but I'd be lying. We're starting with aperture because it was the first thing that sprang to mind.

Aperture: it might be basic, but it can also be a bit of a stumbling block for people who are just beginning in photography. For a start, altering aperture doesn't have a single effect on your images, but a dual one. As if that isn't enough to confound people, its scale isn't exactly intuitive. Still, understanding aperture is critical for both exposure and composition—the bedrock of photography—so we'd best crack on.

Aperture and light

Aperture means ‘hole’ or ‘opening’. In a photography sense, the aperture is the gap that allows light to pass through the lens. The bigger the opening, or the aperture, the more light passes through. That’s pretty intuitive. When you’re taking pictures in low-light settings, a bigger aperture will help you to take a photo where you can see something.

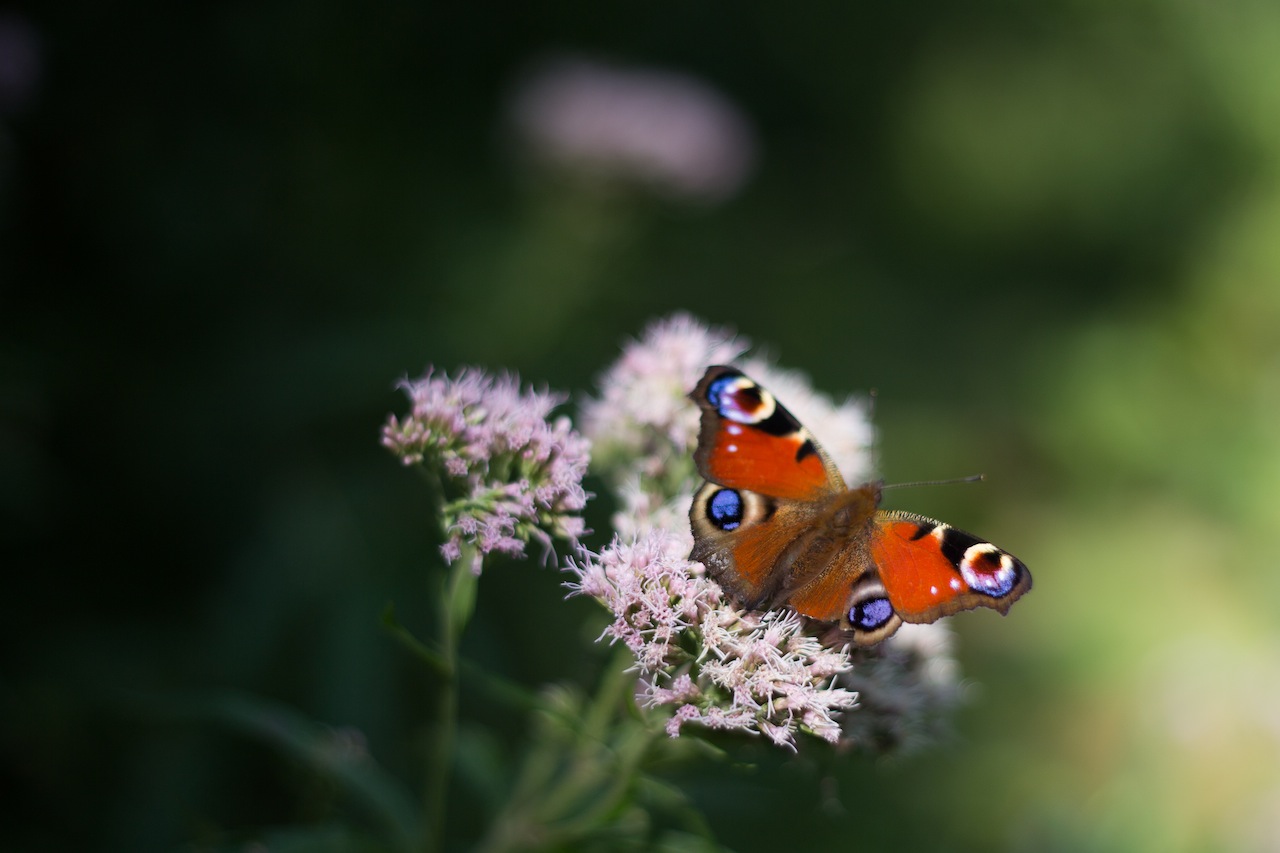
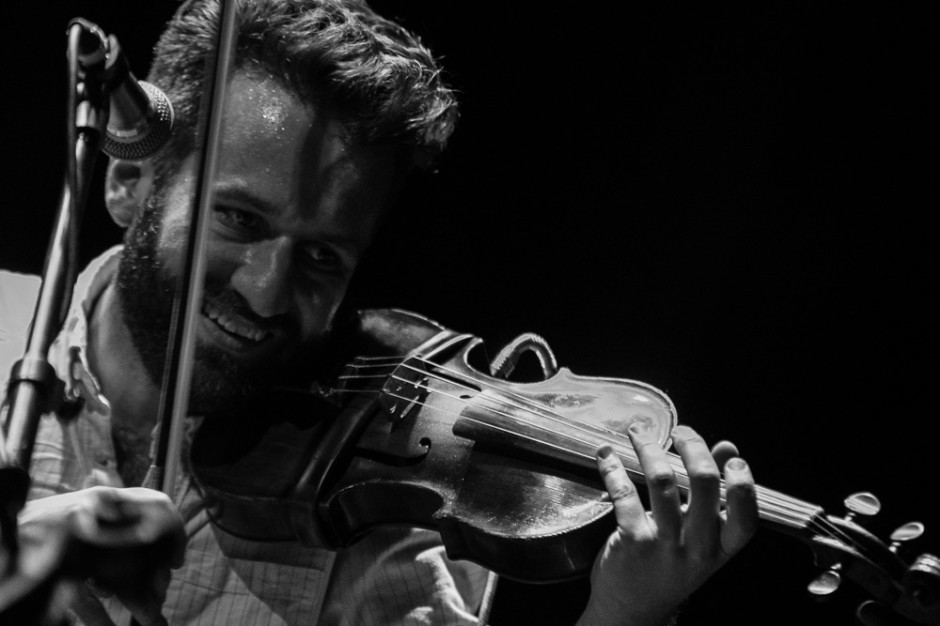
In order to get enough light onto my sensor, I used an aperture of ƒ/1.8 here

If you’re taking pictures in bright sunlight, using a smaller aperture will help to prevent the image being one mass of white.

Aperture and depth of field

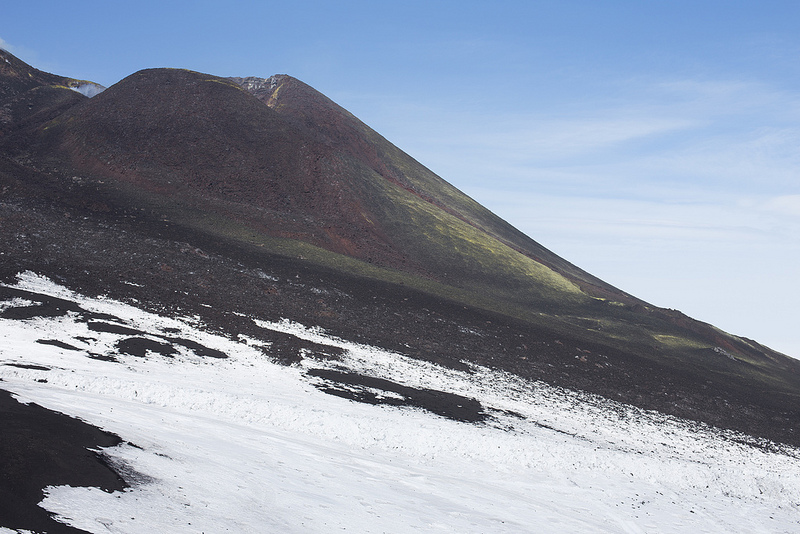
The second effect that aperture has on photographs concerns depth of field, or how much of an image is in focus. If you use a small aperture, you will notice that the depth of field in your photos will increase: more things in the background and foreground will be in focus. Landscapes often benefit from small apertures. In this case, ƒ/11 was used to photograph Mount Etna

Conversely, by increasing the size of your aperture (and allowing more light to reach your sensor), you will decrease the depth of field in an image. That means that less of the scene will be in focus.

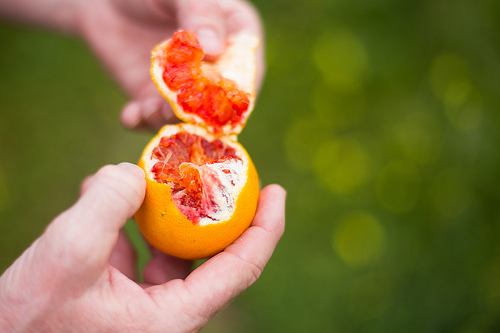
Sanguinello

An aperture of ƒ/1.8 meant only a sliver of this blood orange was in sharp focus

Measuring aperture

When you hear people throwing around numbers such as ƒ/1.8, or ƒ/22, they are referring to aperture. Aperture is measured in ƒ-stops, with ƒ/1.4 being a very big aperture and ƒ/22 a very small aperture.

That the large number represents a small aperture and the small number indicates a large aperture can be more than a bit confusing. It will probably help to think of the ƒ-stop scale like this: those numbers correspond to fractions; the fraction being how big the aperture—or the opening—is. Thus ƒ/4 corresponds to a quarter and ƒ/8 to an eighth. An eighth is obviously smaller than a quarter; this means that it is a smaller aperture, it lets in less light and it gives a greater depth of field.

Finally, perhaps you're wondering what those fractions are fractions of? They’re fractions of the length of the lens you’re using. The aperture of a 28mm lens at ƒ/1 will be 28mm. Similarly, the aperture of a 50mm lens at ƒ/4 will be 12.5mm. The bigger the ƒ-stop, the smaller the aperture.

TL;DR

  • Aperture means hole, gap, or opening
  • A smaller aperture lets in less light, good for shooting on sunny days; a larger aperture lets in more light, good for shooting when it's dim
  • A smaller aperture gives a greater depth of field, bringing more of the background into focus; a larger aperture gives a shallower depth of field with less in focus
  • Aperture is measured in ƒ-stops
  • F-stops correspond to fractions
  • The higher the ƒ-stop number, the smaller the fraction, and the smaller the aperture

You know what, go out and take some photos altering the aperture value on your camera. Then you’ll see what we mean!


Photography Fundamentals >> Contrast

Haje's review notes: Canon EOS 6D

After Photocritic editor Daniela came and showed me her shiny new camera - the Canon EOS 6D - I was gobsmacked. I have used my Canon EOS 5D for a while, and for quite a long time, I had been extremely happy with the photos, but living with this nagging feeling that there was something 'off' about the 5d. As soon as I picked up the 6D, I realised what it was. The Canon EOS 5D mark III is an astonishing piece of kit. The low-light capabilities are out of this world, it takes incredible photos, and the controls are so natural that it is probably the camera body I've gotten used to the fastest. It's a masterpiece of electronics and design. However, as I discovered when I first held its baby brother, it's too large.

This may come as a surprise to someone who's met me. I'm a tall guy (around 6'4" / 196 cm or so), and I have freakishly large hands. But, when I was writing a lot of books about photography, I forced myself to use entry-level cameras - not because I particularly wanted to use them, but because one of the key things I make in my books is that equipment doesn't really matter. That is very, very true, up to a point -- but given that most of my books are written for beginners, I had to 'eat my own dogfood', as they say: I figured it wouldn't make any sense to use a 5D mk III and then sing the praises of entry-level SLR cameras.

Dead Rat Orchestra -- Concert photos taken at Islington Assembly Hall, 1 June 2013.

Anyway: Last night, I did my first gig with the Canon EOS 6D, and ran into the first time where the 6D fell short. With the 5D, you can take gorgeous 22-megapixel shots in raw all day long; I never ran into a full buffer. On the 6D, however, I ended up missing several of the shots at the concert due to the camera's buffer being full.

I can't quite convey my disappointment: The 6D is a perfect camera for me in so many ways. I love the 20 megapixels, I love the ergonomics, I love the fact that it's a lot smaller and a bit lighter than the 5D. I like that it has GPS built in (great for travel photography!). I suppose it's naïve to think that any camera can completely replace a camera that's £1,000 more expensive.

Despite this one minor hiccup, I do still think I'll end up selling my 5D mk III. In the end, the consideration is this: How often do I take concert photos (not that often), and how often do I travel and take photos (frequently). The lighter weight, smaller size, and built-in GPS are worth more to me than being able to go all rapid-fire at a gig. And, of course, there's a way of dealing with this shortcoming, too: Become a slightly better photographer, and be a little bit more selective about the photos I take.

See the full gallery of concert photos taken with the 6D over in my Flickr set!

Street photography and the law

A lot is said and written about photography and the law – and to be honest, you’d be mad to get involved in the fray. Of course, I am that mad, which is why the Rights vs Respect in Photography ended up published here on the site.

Now, the other day, one of my readers, Brad, posted a rather fantastic and soberingly clear comment about what the law actually means to photographers. It was written from an US point of view, but frankly, the law is similar in much of the world. Beyond the law, however, you should be looking for a helping of ‘common sense’. This ‘common sense’ thing isn’t as common as its name would indicate, so hereby; a healthy dose of common sense and a quick refresher of what you can and can’t do when you’re out and about with your camera…

I was so happy to find this in my comments, that I figured it’d be a crying shame if it stayed hidden away as a comment on a long-forgotten blog post, so hereby, republished in all its glory. That means that some of the comments (where they are replying to other comments) are a little out of context, but I’ve linked directly to the correct comment where possible, to clarify.

Take it away Brad:

The law can essentially be summed up like this:

1. You can take a picture of anything you see – especially when you are in public.

2. You CANNOT take pictures where there is an expectation of privacy such as in a rest room or locker room. (more about Expectation on Privacy on Wikipedia)

Me to, brother. Me too.3. You cannot legally trespass, but if you are on a side walk and you were so inclined you can photograph people in their back yards or on their porch. I think the back yard is over the line though.

4. You can take pictures of people or children in any public context. BUT DON’T FOLLOW LITTLE KIDS OR YOUNG WOMEN AROUND AND SCARE THEM. Legally though, you can follow people to get that shot – remember the Princess Diana chase. Perfectly legal.

5. You cannot profit from your work without signed releases. But to restate, feel free to snap away. It is only your commercial use that is limited.

6. You NEVER have to surrender your camera to or discuss the nature of your photography with anyone without a court order.

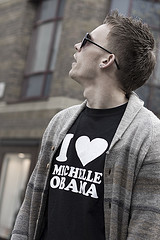
The photo with the guy wearing the ‘I ♥ Michelle Obama’ shirt is Me to, brother. Me too. by Photocritic.org, on Flickr. It was taken street-photography style without permission – but sits very nicely in my portfolio, which is perfectly legal.

Protecting your right to taking photos

I hate government oppression too. I was oppressed last summer at a pool. The Captain of the Guard approached me and asked me about the nature of my photography. I advised him that it was none of his concern as I was in a public place photographing what is in the public view. Furthermore, I told the “Captain of the Guard” to call the police expecting them to tell him there was nothing they could do about it. Without rehashing the whole story, the police can stay there and observe you. They may lie to you and try and intimidate you even making threats such as banning you from a public park (which they cannot do). Luckily, I happened to be on the phone with an attorney at the time. As an aside, you ARE required to provide police with valid ID if asked.

In a case like this, take pictures of the police officers, their badges and their cars. Indeed, take pictures of all the people involved and go public with it. Continue taking pictures of your original subjects. It is perfectly legal, they cannot prohibit it unless you are on a restricted government property or at a nuclear facility. You can also take as many pictures as you want of whatever and whomever you want including the person escorting you out of a private place(for example you are at a mall and being escorted out). If you are alone, get somebody on the speakerphone as a witness to what is being said.

Assault (fear of harm), Battery (physical contact), Terrorist Threats (threats of violence), vandalism (damage to your property) are serious offenses. If someone like an angry spouse or parent threatens you with harm or attempts to seize your equipment calmly offer them the opportunity to stand down and walk away. Suggest that they call the police or their attorney. If they do not stand down, call 911 and press charges.

How to avoid being photographed

For better or worse a person’s sole recourse is to seclude themselves should they wish to not be photographed.

So:

1. When you are in public, dress and behave appropriately or you may find your picture on MySpace or something similar. I don’t know what your son was doing when his ex photographed him, but if they are all appropriate the pictures may convey a different sense than the words the ex is using. Whatever the pictures convey however, is true for that moment in time.

2. Dress your young children appropriately even at the pool. They may be photographed. You CERTAINLY DO NOT want them to appear older or sexually appealing.

3. Encourage your teens to dress and behave appropriately. They may be photographed. Do NOT buy them clothes that you do not want them seen in.

4. Do NOT threaten or harass a photographer. You may find yourself in front of the magistrate if you do. You most certainly will if you threaten me.

5. Be conservative. Do NOT make yourself into an irresistible subject.

As for the lingerie store worker: The contents of the store are NOT copyrighted works. That is not what would prohibit this person from entering the store with a camera. Indeed, unless it is posted otherwise, he can walk into the store with his camera. He CAN be ordered to leave and must comply since it is PRIVATE property. He can enter in the first place by virtue of being a store open to the public. Permission to enter is implied. That is why your store my wish to post a prohibition notice against photography inside the store.

Now, if this is in a mall, mall security can escort him out. He can of course take as many photos of anyone or anything he wants while he is being escorted out of the store or mall.

If he is on the side walk outside the store unfortunately, you are out of luck. He does not need your coworker’s permission to photograph her.

Good photographers are ALWAYS looking for a good photo opportunity. That could be a beautiful woman, a handsome man, a child playing (some facial expressions are golden), an animal, sunset or barn. Who knows.

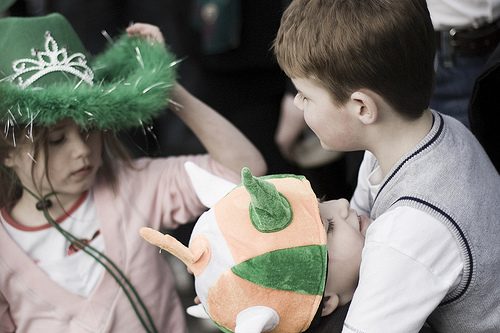
Young Jealousy Young Jealousy by Photocritic.org on Flickr – an example of a street photograph involving children. As I do not have model releases for them, I cannot sell it as stock, but (at least in the UK), I can use it in a newspaper article related to the event in which it was taken (St Patrick’s day parade), or I could post it on Flickr and use it as part of my photography portfolio.

I recommend getting your shot and moving on though. The longer you stay, the more likely you will be noticed.

I don’t know what this guy was doing at your store. If it was a one time thing hopefully he just found her an attractive subject, But admittedly, it sounds “creepy.”

There are times when I may sit or stand somewhere for more than an hour or two just taking pictures of people maybe trying to catch their expressions on an amusement park ride or a water slide. Little kids ooing at zoo animals and the like are awesome shots.

Advice, if someone is trying to seclude themselves from you (the photographer) such as moving to an area out of your view, though it may still be public, respect their privacy. If someone POLITELY asks you not to photograph them or their children you should respect that. If they are rude, screw them. Do what you want. NEVER FOLLOW A LITTLE KID AROUND.

Lastly, there is no expectation of privacy when you are in public. That is why I suggest being conservative. A “peacock” will almost always get its picture taken especially if it spreads its tail. If someone is taking your picture and you do not like it:

1. Politely ask them to stop 2. Leave if they won’t

Consult your attorney if you have any questions.

Brad

Closing notes

Please note:

This post was excerpted from a comment of the ‘Your Rights as a Photographer‘ post, and was republished as an alone-standing article with permission from the original poster.

Please note that nothing on this blog can be considered legal advice – if you have a query, please contact your attorney.

May's other-worldly photo competition

Floating on By

To celebrate the launch of my newest book, Surreal Photography: Creating the Impossible, it seemed entirely appropriate that the theme for May's competition should be surreal.

Whether you construct a meticulous composite of gods and monsters battling it out in an as-yet undiscovered universe, or create a scene at five degrees to the world we know using papier mache, we don't mind. It can be Photoshopped to Kingdom Come or created entirely in-camera, what we're looking for is a strong image.

The Ilex Press, publishers of the book in the UK, are very kindly supplying a copy of the book as a prize. You have until Friday 31 May to submit your entry to our Flickr pool and link the image in May's thread. Please remember: it is one entry per person and the image must be posted to the thread.

I think that just about covers the details, but I have produced The Rules for your reference. Good luck!

The Rules

  • If you decide to enter, you agree to The Rules.
  • You can’t be related to either me, Haje, or Gareth to enter.
  • One entry per person – so choose your best!
  • Entries need to be submitted to the right place, which is the relevant monthly thread within the Small Aperture Flickr group.
  • There’s a closing date for entries, so make sure you’ve submitted before then.
  • You have to own the copyright to your entry and be at liberty to submit it to a competition. Using other people’s photos is most uncool.
  • It probably goes without saying, but entries do need to be photographs. It’d be a bit of strange photo competition otherwise.
  • Don’t do anything icky – you know, be obscene or defame someone or sell your granny to get the photo.
  • We (that being me, Haje, and Gareth) get to choose the winner and we’ll do our best to do so within a week of the competition closing.
  • You get to keep all the rights to your images. We just want to be able to show off the winners (and maybe some honourable mentions) here on Photocritic.
  • Entry is at your own risk. I can’t see us eating you or anything, but we can’t be responsible for anything that happens to you because you submit a photo to our competition.
  • We are allowed to change The Rules, or even suspend or end the competition, if we want or need to. Obviously we’ll try not to, but just so that you know.

If you've any questions, please just ask!

This competition was launched when Photocritic and Small Aperture were still hosted by Pixiq. Unfortunately, it was lost in the transition. This is a re-posted article containing the same details, although the exact content will be slightly different.

On not taking photos and black eyes: Team Photocritic in conversation

If you missed Team Photocritic live in conversation yesterday afternoon from Ilex HQ in Lewes, you're in luck. There's a recording of our musings on our newest books, collaborating with other photographers, and setting up Photocritic. I think that there's only one major use of profanity and somehow we work cake into the dialogue. Not bad for an afternoon's work in front of a camera.

There's also 50% off the digital versions of our books in Ilex's webstore for a few more days, but you'll need a special code to claim it. And that's revealed during the interview. Mwahahaha!

Big thanks to Adam at Ilex for setting up the session and acting as technical director, being the Voice of God, and editing the recording. If you couldn't guess, we really enjoyed ourselves.

And the name I so embarrassingly forgot: Adrian Sommeling. Profuse apologies.

After the storm: where we stand with Adobe's Creative Cloud

CCNow that the dust has settled and hopefully the tempers have calmed after Adobe's announcement to move from stand-alone licensing to online subscription for its Creative Suite products, which it has rebranded Creative Cloud, I think it's time for some assessment. What are the positives and negatives of this move; for whom does it work and for whom doesn't it; and what might it mean for the industry?

The figures

Price-wise, a year's subscription to the entire Creative Cloud package will cost you £46.88 ($49.99) a month. If you only want to purchase one application, let's say Photoshop, you can subscribe to that for £17.58 ($19.99) a month. The boxed version of Photoshop was around £600 ($1,000), depending on where you bought it. You would have been looking at around £2,500 ($2,600) for the complete gamut of Creative Suite. With Creative Cloud you also get 20GB of storage thrown in and access to the Behance network that Adobe recently bought and integrated into its business.

Over the course of a year, you'll be spending £562.56 for Creative Cloud or £210.96 for the Photoshop-only package. It's going to take you three years to shell out what you would have for the stand-alone package. Within those three years you might well have upgraded your stand-alone package, at whatever price Adobe set, but the upgrades to the Cloud subscription will have been automatically deployed. Thus for a few years, it is a more cost-effective solution but there will reach a point when your subscriptions exceed the cost at which you could have previously purchased the product.

For existing Adobe customers, the situation is a little different, because your first year as subscribers is slightly cheaper, but does that really make up for then having to shell out month-on-month for a product that you've effectively already bought?

Negatives and positves

The primary concern with the subscription model is that it locks you into the system in perpetuity. In the past, once you'd bought the licence to Photoshop CS3, you had it for as long as it continued to work. With the subscription model you only have access to Photoshop for as long as you continue to pay for it. And what's to stop Adobe from doubling or tripling their subscription fees next year?

If the cost of subscription were to become prohibitive, would you still be able to access your native format files? Right now, there are other programmes capable of opening PSD files, for example Pixelmator, but could Adobe move to a more restrictive format in the future? It could, but all of this is speculation right now.

If you were at all concerned that you would not be able to use Photoshop, or any of the other Creative Cloud applications, without an ongoing connection to the internet, Adobe have assuaged that fear. You will of course have to be connected to install and license the software, and you'll be asked to connect every 30 days to validate the licences, but you'll be able to use your applications for unto 180 days offline. If you're trekking through the jungles of Borneo, you'll still be able to edit your photos on the move, even if the trees don't provide wi-fi.

Winners and losers

Many people have suggested that Adobe's primary move towards the Cloud is to avoid the scourge of pirates. Whilst it might be conceivable that it will help to prevent people from pirating their products—although I'm not convinced; if you can make something, you can break it—what they will prevent, at least until someone finds a workaround, is people using their products, and not necessarily encourage their purchase.

People pirate software for all sorts of reasons. Those who are ideologically opposed to paying for software aren't going to be mysteriously converted by a subscription format. For those who can't afford it, some will now be able to afford Adobe subscriptions, some still won't. As for those who pirated it just because they could, some of those might choose to pay, others might chose to look elsewhere, or to stick with their obsolete but free versions. Adobe will likely win some and lose some in terms of subscribers, but those that it wins will almost certainly be in it for the long haul.

Stayers and leavers

Should you then stick with Adobe for the long haul? If you're a professional who relies on Adobe's products in order to fulfil your obligations and complete your projects that provide an income for you that is in excess of the subscription fee, almost certainly. You're not losing, per se, by paying the fee and it keeps you on a par with your peers and competitors. It's also a legitimate business expense that you can write off against your taxes, which is handy.

Should your figures be more marginal, you perhaps need to consider your options. Then it will depend on how attached you are to Adobe and how comfortable you would feel switching to another provider. If you can find another application or set of applications that provides you with similar outcomes but on better terms, a switch could be in your favour.

For hobbyists, don't feel that Adobe is the only option, especially when it comes to Photoshop. Photoshop Elements is an extremely competent alternative, and significantly cheaper. It is, after all, Adobe's solution for people who don't require Photoshop's full fire-power. GIMP is free. Pixelmator is very highly thought of. Photoshop's capabilities are extensive and impressive, but if you're not making full use of them then you might not need to pay for them.

If you're wondering what I'll be doing, I shall almost certainly be taking out a Photoshop-only subscription to augment my use of Lightroom, which is my go-to editing suite, and has been confirmed as remaining stand-alone for the the foreseeable future. However, I am keeping a close eye on Pixelmator. I think it has potential as a Photoshop alternative.

To the future?

When Google announced that it was shuttering Reader, it felt as if the RSS universe were imploding. How could they possibly? What would we do? But the universe didn't implode: a feast of alternatives has sprung up, some of them far prettier and likely even more functional than Reader. Adobe's move is a divisive one, but it isn't anywhere near implosive. For anyone with the talent and the tenacity, the time is ripe for striking out with an Adobe alternative.

What do you call a group of photographers?


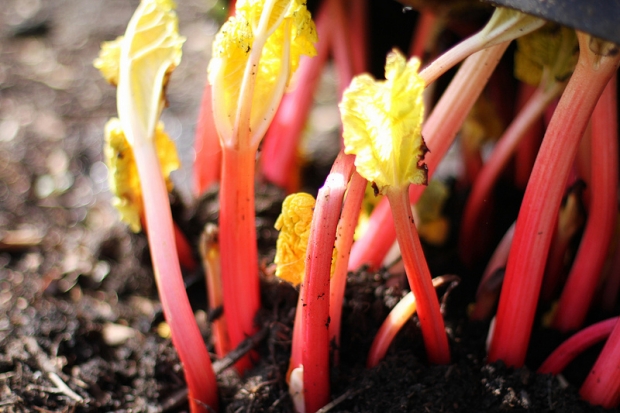
Have some rhubarb. It turns out that I don't have photos of photographers.

Boys come in blushes. Dolphins come in schools. Hawks come in casts. Magpies come in tidings. Prisoners come in pitys. And zebras come in zeals. The Oxford Dictionaries have an official list, which Sophie Goldsworthy, author of the Rough Guide to Digital Photography, pointed me the way of on Friday. Most of the list was compiled in the 15th century by one Dame Juliana Barnes, so it's hardly surprising that it includes a 'glozing of taverners' but that photographers are passed over. Court jesters weren't generally found playing around with Polaroids. Now, however, I think that the time has come to bring a little currency to this venerable collection of collectives.

What is the collective noun for a group of photographers?

Photojournalists scrambling for a headline image; music photographers leaping about the pit before a stage; wedding photographers valiantly marshalling slightly tipsy bridal parties the globe over; even if we don't always hunt in packs, I am firmly of the opinion that the worldwide community of photographers is deserving of a collective identity.

Early suggestions have included a click, an exposure, a flash, a kitbag, a shutter, and a spectrum. But what do you think? We have to at least pretend that we have some consensus about this. Suggestions or indications of support can be left in the comments section. (Should you be concerned about being mistaken for a paparazzo or an Instagrammer, feel free to diverge into sub-genres.) With any luck, we might've settled on something by the time that I return from my travels at the beginning of April.