Practice

Embracing automatic ISO.

Recently, I find myself in more and more situations where I know what I'd like my shutter speed and aperture to be, but realising that the light situation is changing around me. In a recent round of street photography, for example, I wanted to shoot wide open (f/2.8, using my 70-200mm lens), and I knew that I wanted reasonably fast shutter speeds (I spent the day shooting at 1/800 second)... But given that I was walking down Southbank in London, where there's a lot of trees, overhangs, and rapidly changing light situations, what's a guy to do? The solution, more and more often, is automatic ISO: Select the things you care about, and let your camera adapt to the changing lighting situations by varying the ISO.

It isn't that long ago since this would have been completely impossible - Most of the camera bodies I've had so far, have had rubbish quality photos beyond ISO 3200 or so. With my most recent camera bodies, however (Canon EOS 5D mark 3, which I ended up selling because I found it too heavy for everyday street photography, and replacing with a Canon EOS 6D instead), the full breadth of the ISO range is perfectly usable.

'Yah, whatever...'

The above photo, for example, I captured by setting my camera to f/2.8 and 1/800. The camera selected ISO 320 for this shot. Perfectly fine; there's no discernable noise in the image at all.

Going Macro

More extreme, however, was the example I experienced recently. I've done a fair bit of macro photography (I did write the book on it, after all), but I found myself in a situation that was nearly impossible: Taking photos of insects on the move, without my usual flashguns. What to do? I was shooting with my 100mm f/2.8 Macro attached to my Canon EOS 6D, and no light sources or light shapers. All natural meant that I needed a relatively high shutter speed (because I was shooting hand-held), and a relatively small aperture (to deal with the extremely limited depth of field). Even in bright sunlight, that doesn't leave an awful lot of light left... But it turns out that automatic ISO still does the trick:

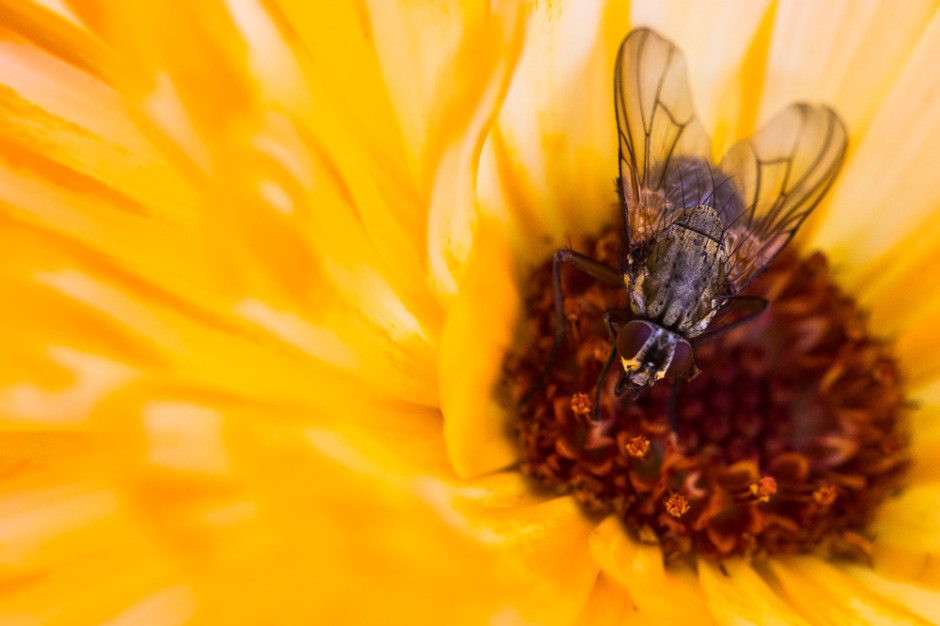
Shot at 1/800 second shutter speed and f/8.0, the camera chose ISO 4000 to fit the lighting conditions. Which, as it turned out, was perfect!

So I guess the lesson here is that on modern cameras, you can in many situations leave the camera to get things right, whether you're willing to let shutter speed, aperture, or ISO to be variable. Nifty stuff.

8 tips for better Smartphone photographs


Taken with an iPhone 4

Forgive me for stating the obvious: You get much better photos with a camera than without one. So, whilst I would much rather always be taking photos with SLR body with a sharp Prime lens, the truth of the matter is that you'll sometimes come across moments where you're just bursting to take a photo - and you may not have a 'real' camera handy.

If you're a hard-core photographer, you'll probably have a reasonably recent smart-phone. Great news: The phone comes with a surprisingly capable camera built-in.

It's not without limitations, of course, but here's eight tips to get the most out of your mobile phone snaps...

1) Clean your lens

Mobile phones are usually subjected to all sorts of abuse. Mine lives in my hand and my pocket; neither of which is the greatest environment for a clean lens.

Fingerprints, grease, or pocket fluff are the #1 reason for rubbish smart-phone photos, so check it, and clean it before shooting!

2) Shine a light

Modern mobile phones often come with impressive ISO ranges so you can take photos even in low light; but that doesn't mean you should: The small sensor size introduces a lot of noise, which isn't very nice, and certainly isn't conducive to awesome snaps.

Turn up the lights in the room, or go outside in daylight for the best photos.

3) Rez it up

If your camera has several settings, use 'em! As a general rule, the higher the resolution of your mobile camera, the clearer your photographs will be.

Bear in mind, though, that the higher the resolution of your photo, the larger its file size will be, so if you're e-mailing them, try to make them smaller before you kill your grandma's 28.8 kbit/s modem.

4) Nix the digi-zoom

Using digital zoom to zero in on your subject is fun if you want to use your mobile phone instead of binoculars, but it ain't much good if you're wanting to take photos. For photography, keep it zoomed all the way out, and crop the images later instead.

5) Steady now

When taking photographs, the more steady your camera is, the clearer your picture will be. Simples. If you can, lean your elbows on a sturdy surface, or place the phone against a lamp-post or similar for extra crispness.

6) Don't lose your (white) balance

If your mobile phone has the option of adjusting the camera using white balance, go ahead and experiment how the different settings impact on your photographs.

7) Get closer. No, even closer

To avoid having to zoom in or crop your shots later, ensure that your subject fills your viewfinder.

8) Sprinkle some editing magic

Even though your phone may have built-in editing features out of the box, consider editing them with a separate app instead.

For the iPhone, my favourite editing apps are Snapseed and Photoshop Express - Try 'em out, and use the filters and editing tools to add a bit of sizzle.

Got that? Great. Now go snap some photos you're proud of. Oh, and post them in the comments, I'd love to see what you guys come up with!

Photographing people who wear glasses

My brother has worn glasses full time for absolutely years, which has meant that I learned how to photograph him wearing them to avoid hideous green glare rather intuitively. I probably did have to think about it at some point, but I don't really remember and now I just seem to do it. That was until this week, when one of the students at Photocritic Photography School piped up and asked me what he should do when he has a portrait subject who wears glasses. For lots of reasons, the answer is never 'Ask your subject to remove them,' so what do you do?

Look at the light

Me and some wonderful green glare, taken with an iPhone

The most obvious problem that glasses will present to you is that they reflect light. Instead of seeing straight through spectacles' lenses and into your subject's eyes, you'll have a unpleasant, usually green-tinged, reflection glaring back at you.

Going back to GCSE physics, we know that the angle of incidence (or the angle at which light will hit someone's glasses) is equal to the angle of reflection (or the angle at which the light will bounce back off the glasses). If light is coming in at an angle of 31° to the normal of your subject's glasses, it'll bounce off at 31° on the other side of the normal*. There's a helpful diagram here.

Consequently, if your light source is too close to your camera the light has a much greater chance of bouncing straight off your subject's spectacles and into your camera's lens. And if the light is coming from straight behind the camera and your subject is looking straight back at the camera, you haven't got a cat's chance in hell. But the upshot is: know where your light is coming from.

* The normal is an imaginary line running perpendicular to the plane of the glasses.

Altering angles

Minimising glare is easiest by one of three means:

  • move your light source
  • move your subject
  • or move your camera

Pokey-out tongue copy

By shifting your light source or yourself, you can alter either the angle of incidence, and therefore reflection, or take your camera out of the firing line. Sometimes, though, your light source can't be shifted (say, when it's the sun) and you moving might not be an option. Then it's down to your subject.

Tilting and turning

If your subject tilts her or his head downwards, just by a few degrees, not by much, it'll be sufficient to adjust the angle of the light and prevent a reflection bouncing back into the camera lens. Or she or he could turn fractionally away from the light source; not enough to wreak havoc with your shadows, but enough to prevent that horrible glare.

Me, angled away from the light

When you ask subjects to tilt their heads or change the angle of their shoulders, you might find that their spectacle frames begin to encroach into the view of eye. At this point it becomes a trade-off between reflection obfuscation and frame obfuscation. You need to decide where your tipping point is.

Quit posing

If you opt for more candid shots, you'll be able to capture your subjects looking away or looking down and doing it naturally but still without any nasty reflections.

Downward tilt, candidly snapped.

Go with it

Sometimes, you just have say that the glare is there and it's better to have a photo with a reflection than no photo at all!

Setting up a scream-triggered photobooth - because whyever not?

If anyone had wandered along to the Maker Faire in the Elephant and Castle area of London (yes, it's really real; no, there are neither castles nor freely roaming elephants but both would be a vast improvement) on Saturday they would have found me, and the London division of Team Triggertrap, asking people if they wouldn't mind awfully screaming at the top of their lungs for us. Seriously.

You see, we'd set up the Triggertrap ScreamGrab studio because we reckoned that people summoning the exhaustive energy to scream like bellows, and then releasing it in one extended Aiouuuuuuu! would make for fantastic portraiture. And it would give Triggertrap with the sound threshold set to Very Loud Indeed™ a rather good workout. We weren't wrong!

Have a look at these if you need convincing:

And the rest you can see on Triggertrap Flickr stream.

Inspired? Want to know how we did it, so that you can give it a go yourselves? Read on!

The basics

At the least, what you need to do is to get an audio trigger that will take a photo when the volume hits a certain level, and a camera. In our case, we decided to use the Triggertrap Mobile app, but we discovered to our horror that the app itself was way too sensitive: Even with the sensitivity threshold all the way to the top, you didn’t really have to put your back into the scream to trigger the camera (in fact, speaking normally was loud enough to snap a shot). Uh-oh.

In the Android version of the app, there’s a separate slider for sensitivity, but we don’t have that level of control over the iOS app (and I did want to use the iPod Touch I had brought along, so that I wouldn’t have to tie up my phone all day).

After a spot of last-minute panicking, we discovered that there was a very simple, and delightfully low-tech solution to this: I simply stuck a small piece of packaging tape over the microphone on the iPod Touch. Hacky? Well, yes, but who cares – it did the trick!

With the tape in place, we were able to use the sensitivity slider to fine-adjust the triggering threshold. Perfect for what we were trying to do!

In theory, with the app configured and hooked up to the camera using a connection kit, that’s all you need to get the photo. Stick it on a tripod, and you’re good to go – really, everything else is showmanship. But to turn this into a far more fun experience, for us and for our sacrificial victims, we turned it into much more of a show.

The kit

For the ultimate ScreamGrab experience, I set up with the following:

  • Canon EOS 6D set to manual exposure & manual focus
  • Tripod
  • Triggertrap Mobile Dongle + connection cable
  • iPod Touch (connected to power, to make sure it didn't die)
  • Tripodclamps clamp to hold the iPod Touch in place (so that your screamers can see how loud they need to scream)
  • Canon ST-E2 flash trigger
  • 2x Canon Speedlite 580EX II flashes
  • 2x light stands
  • 2x white umbrellas

What I did

Let's start with the lighting: I added a Canon ST-E2 infra-red flash transmitter to the camera’s hotshoe, and I set up a couple of Canon EX580 II flashes on super-cheap lighting stands with umbrellas. I fired the flashes on manual output (1/16 each), then set up the camera in manual exposure (1/180 second and f/10, ISO 640) and manual focus. This meant that all the shots were completely repeatable, and I wouldn’t have to make any adjustments throughout the day.

In fact, if it hadn’t been for people being different heights, there wouldn’t have been any reason to touch the set-up at all: even the batteries in the flashes, the flash transmitter, and the camera, lasted all day long. Impressive stuff – but then, battery consumption was the chief reason why I only set the flashes to 1/16 output – in my experience, in modern cameras, you may as well let the ISO do the work, and give your flashguns a break.

Finally, I wanted to ensure that the iPod Touch was clearly visible, so people would be able to see the black ‘needle’ move on the app – so they knew how loud they had to shout to trigger the camera. To achieve that, I used a Tripodclamps clamp. It’s simple: It bolts to the tripod, then squeezes the smartphone firmly to hold it in place. It looks good, and it makes it easy to demo the device, too, which is a bonus.

Someone check for the Four Horsemen of Apocalyspe - I shot in JPEG!

I should also mention at this point that the camera was shooting JPEGs rather than in RAW. The Canon 6D shoots enormous RAW files, and since I had a fully controllable lighting situation, I didn’t expect I’d need to do a lot of adjusting the images. More importantly, the JPEGs are much much faster to download via the tethered connection, faster to process in Lighroom, and it meant that my poor little MacBook Air didn’t slump to its knees. Having said all that, I do generally recommend shooting in Raw. Here is why, and I also wrote an article about why this particular situation (controllable light, need for speed) is an exception where JPEG is acceptable. Because, yes, I’m an insufferable nerd about this sort of stuff.

Turning it into a show

To show off the images, I decided I had to shoot ‘tethered’. I was in luck; my Canon camera comes with a piece of software called EOS Utility, which enables tethered shooting. In this case, I hooked up a27″ monitor to my MacBook Air. I made sure that all photos that were taken were shown on the audience-facing big screen as soon they were shot. Great for instant gratification – even the most reluctant screamers giggled their heads off when they saw their mugs on the big screen.

Instant publishing

I anticipated (correctly) that people would want a copy of their photos – but how do you go about doing that? Quite a few people used Instagram and took a photo of their photo on the big monitor, but obviously we wanted something a little bit better than that. So, I devised a workflow.

I was running Lightroom 4, using the ‘auto import’ feature. In this way, the photos would be downloaded by the Canon EOS Utility to a folder, and Lightroom 4 would automatically import them from that folder into a library. The import script applied a preset to the image (white-balance, some vignetting, some extra contrast and some colour effects to make the photos pop out more). It also applied a description and title to the images, so it would be as quick as possible to publish them online.

From there, I only did one edit to each photo: A quick crop. This was necessary because we didn’t have a lot of time to frame people properly, and besides, a lot of people either jumped or hunched over as they were howling at the camera, so the framing was almost always off anyway.

After cropping, we just dragged the photo to the Flickr publishing tool within Lightroom, and hit the ‘publish’ button. With one person manning the computer, that meant that from squeal to Flickr, it could take as little as a minute or so, including the processing, resizing, and uploading.

We also had an IFTTT set-up, so that we could auto-tweet our ScreamGrabs. Except that Twitter sent us to Twitter Jail for too many tweets!

Other ideas?

It would really have been awesome if we could have had a printer there, and printed out people’s ScreamGrabs as they were taken – but we didn’t really know how many people to expect, and we only had two people at our little stand at any time, so I suppose we wouldn’t really have had time to deal with the logistics of printing anyway — but it would have been amazingly good fun, so perhaps that’s something we’ll do next time.

The other idea that came up, was that perhaps we should have been recording people’s screams! Playing the screams, along with a slide-show of all the photos, would have been a fantastic project, I think – but it didn’t come up as an idea until someone mentioned it to us about half-way through the day. Again, I have no idea how you’d deal with the logistics of matching up the sounds to the pictures… But it would have been great.

In the Triggertrap ScreamGrab booth, everyone can see you scream!

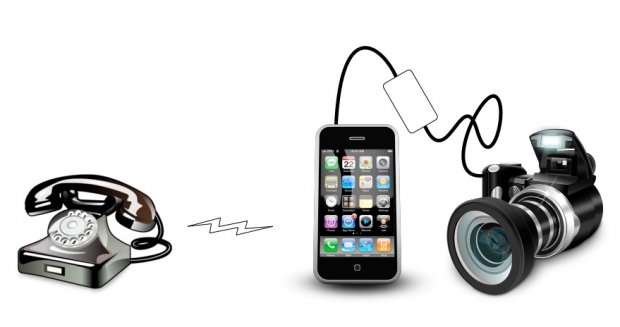
Call your phone to trigger your camera


One of the most awesome things about working on the Triggertrap is the community we've built up already. And, like any great community, we keep getting fantastic ideas via our Get Satisfaction forums.

triggertrap_tt_d2_004.jpgAs soon as Triggertrap Mobile launched, we had a fantastic idea from Travis, who wished he could trigger his camera by calling his iPhones... The big dirty secret, however, is that this is already possible, if you have a Triggertrap Mobile Dongle! The little trick is to choose the top secret special triggering sound we use in the Triggertrap App as your ring tone, and then to turn the ring tone sound to maximum. Here's how

WARNING - It's worth pointing out that if you're planning to do this, make sure you keep your Triggertrap dongle plugged in the whole time, and switch the special Triggertrap tone for another ring tone before you unplug it. The tone is meant to be listened to by the Triggertrap Mobile Dongle only; It isn't great for human consumption (For exterior use only; do not swallow; consult a doctor if you spill this sound in your eye socket, etc). Anyway.

How to trigger your SLR by calling your telephone

To be able to call your iPhone or Android phone to trigger your camera:

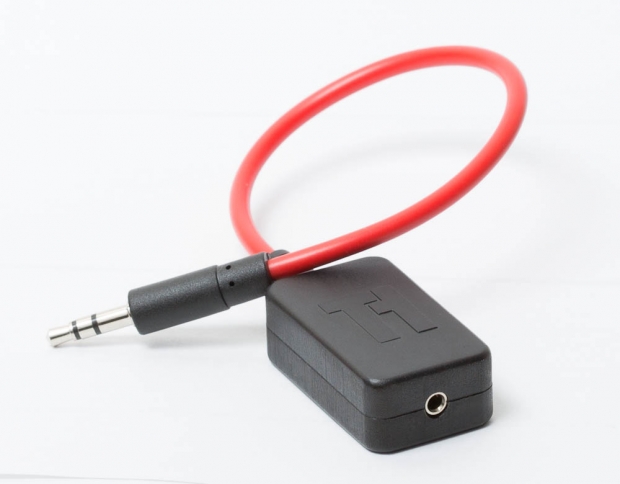
  1. Plug your Triggertrap Mobile Dongle into the headphone socket of your iPhone.
  2. Download the Triggertrap Mobile Ringtone for your iPhone as a .zip file.
  3. Unzip the tone (it's a .m4r file; Apple's special m4r ringtone format.)
  4. Install the tone to your phone2
  5. Choose the Triggertrap Tone as your ring-tone3
  6. Set up your camera using Single Shot1 and preferably manual focus, too
  7. Call your iPhone from another phone to take a photo.
  8. When you're done, choose your old ring tone3 again, before un-plugging your Triggertrap Mobile Dongle from your iPhone

Brilliant, eh? 1) You could also set it to Continuous mode, but we'll be sending a very long shutter signal to your camera (5 seconds in total), so it would be like pressing and holding your shutter button for 5 seconds. Try it now; press and hold your shutter button. If it takes 30 photos in quick succession, that's what'll happen when you use this trick to trigger your camera. If you'd prefer to just take one photo, use single shot mode!

Additional help and assistance

2) How do you install a custom ring tone to your phone?

  1. Set your computer's sound to mute.
  2. Drag the .m4r ringtone file to your iTunes. If you forgot to set your computer to mute, you'll now get a horrible sound playing through your speakers. Trust me; you don't want this sound: It's bad for your computer and for your ears.
  3. Plug your iPhone into your computer with the USB lead
  4. Click on your iPhone within iTunes
  5. Select 'Tones' from the bar across the top (this is also where you select what music, movies, and apps you want to sync to your phone)
  6. Either choose 'all tones' or just 'Selected Tones' and then tick the Trigger Tone box.
  7. Click 'Apply'
  8. Click 'Sync'.

3) How do you choose a ring tone on your phone?

  1. Go into the Settings app on your iPhone
  2. Choose Sounds
  3. Click Ring Tone
  4. Choose the ring tone you want as your ring tone. In this case, Trigger Tone. If you've only just uploaded it to your phone, it'll show up right at the top.

Using an external flash with your iPhone

Since we launched the Triggertrap Mobile, we've added lots of awesome extra functionality to the iPhone camera - and given our customers the world's most powerful application for triggering their SLR cameras. One question that keeps coming up again time and time again, however, is if there's a way of using the iPhone's built-in camera with an external strobe. screen_shot_2012_08_16_at_150216.jpg


To answer this question, we need to understand a few things about how cameras work. The iPhone - and especially the iPhone 4S - is an extremely capable camera. But it is not perfect: The biggest problem with it is that it uses a rolling shutter.

The iPhone's camera and how it works

What this means is that instead of reading the whole photo at the same time (as you would do with a film-based SLR camera, for example), the camera effectively 'scans' the photo from top to bottom, one row at the time. This process is very fast, but it's not instantaneous.

The other problem with the camera on the iPhone, is that there's no way of influencing its settings; you can focus and take a light metering from a particular point, but that's it: You cannot chose a shutter speed or ISO, and the aperture is fixed at f/2.8. It can't be changed even if Apple gave you a software slider to adjust it: This is a physical limitation of the iPhone's camera.

There are other phones that get around this by implementing much better photo cameras, complete with shutters, apertures, focus mechanisms, and even built-in xenon flashes - but not the iPhone.

How a flash works

A flash, however, is a very different piece of kit; to ensure the correct amount of power output, the flash charges its capacitors, and then dumps a high voltage through a flash tube. The amount of light coming out of the flash tube is directly proportional to the amount of power it dumps through the flash tube - a lot of power means a lot of light.

Advanced flashes even have light-meters built in, where they are able to 'turn off' the flash after microseconds worth of light, for precise light level control. This is a small part of how E-TTL flash metering works with the flash power output to get perfect exposure.

All flashes have the 'one flash only' approach, except so-called 'high sync speed' flashes. Instead of using a single flash, these flashes can synchronise with shutters at speeds of up to 1/16,000th of a second (that's not a typo- but it is absolutely incredible, from a technology point of view). I've written a separate article about high-speed flash sync, if you're curious.

So, can you use an external strobe to take a photo with the iPhone?

In a word, no.

In many words: There are several problems with getting the flash to sync with your iPhone:

The first problem we would have to overcome is to find a way of syncing the flash with the iPhone. The challenge there is that we don't actually have any way of doing that. Remember that a 'normal' shutter speed for the iPhone will be in the region of 1/15th of a second to 1/30,000th of a second (or, at least, that is what the EXIF data of your files reports when you take a photo directly into the sun) or so.

The only indications the iPhone gives that it is taking a photo is the flash (which goes on for about 300 milliseconds - that's about 160 times longer than the duration of a flash). The other indication we can access is the sound the recorded "cah-chunk" sound the iPhone plays when you are taking a photo. Whilst slightly shorter than the LED flash built into the iPhone, it is still way too long to be able to derive an exact shutter duration from - especially if you are planning to use an electronic flash. It goes without saying that trying to synchronise a 1/30,000 second shutter duration (on an iPhone) to a 1/50,000 flash pulse (on a high-end, high-speed flash gun) based exclusively on a light flash that lasts 1/3 seconds is an exercise in utter futility.

However, if we somehow found a way of getting the iPhone to report exactly when it is taking a photo, we have a secondary problem: Since the iPhone uses a rolling shutter, you cannot use the single flash approach. Even if you were able to somehow fire the flash at exactly the right time, it would only affect a very small 'sliver' of the exposure. The problem is obvious, and would look a little bit like this:

photo_2.jpg

So, the first hurdle is finding out when the iPhone camera is triggering. The second hurdle is the rolling shutter. But if you shomehow managed to overcome both of those; we're facing a third problem: Since the iPhone doesn't support any manual settings, and since flashes are too fast for the iPhone once the exposure has started, your photos will almost certainly come out over-exposed.

From the iPhone's point of view, a flash of light (or, more likely, a rapid series of flashes of light, to counteract the rolling shutter issue), is far, far more light than it expects. In the studio, you would 'expose for the backgrounds, and stop down for the flash' - which, in practice, means that if you shoot with a fast shutter speed, you kill off the ambient light (as described in my Darkening a room by adding light article). You would regulate how much of the strobe light you want to have an effect on your photos by choosing a smaller aperture.

Unfortunately, with the iPhone, you only get one aperture (f/2.8), and you have no influence over the shutter speed or ISO. So: When you take an image, your photos would be exposed for the pre-flash lighting situation. Once the flash goes off, the image would be grossly over-exposed and utterly useless for anything.

In summary

In summary; there are three reasons for why you cannot use an external flash with an iPhone: There's no way of knowing exactly when your iPhone is exposing the photo, and even if you did, you would need to ensure the photo is exposed not with a flash, but for the whole duration of the exposure. The iPhone will not report how long an exposure is (it can vary between 1/15th of a second to 1/30,000th of a second...). Even if you managed to overcome these two problems, your iPhone wouldn't be expecting the light, and you'd dramatically over-expose your images.

The work-around

The obvious work-around for improving your lighting quality for iPhone photos, is to not rely on flash synchronisation at all, but to instead use continuous light. This photo, for example, was taken with a desk lamp and the light from an iPad's backlight (!) - for near studio quality lighting:

20111026_img_0080.jpg

The Ultimate Guide to HDR Photography

Haunting, surreal, and quite possibly the first major way in which digital photography does something which film photography can’t emulate – or even come near. HDR – or High Dynamic Range – photography is nothing new, but as new tools and techniques make the artform more available, HDR photography is taking off in a big way.

If you’ve never had a go… and especially if you don’t even know what I’m on about – you’re in for a real treat…

What is HDR Photography?

paul_hdr.jpg

High Dynamic Range photography or HDR photography is an advanced set of photography techniques that play on image’s dynamic range in exposures. HDR Photography allows photographers to capture a greater range of tonal detail than any camera could capture thru a single photo.

While many imaging experts regard HDR photography as the future of digital photography, the discipline has long been in existence.

HDR photography is present in many pictures taken through modern day digital cameras. The truth is, if you are a real photography enthusiast then there is a great chance that you have taken at least one photo exemplifying HDR photography.

The real functions or even executions of HDR photography may be debatable. But no matter which website or source you consult they will always say it is a technique that employs the great use of exposure range to get distinct values between light and dark areas of the image. Its real intention is to create an image that accurately characterizes the intensity levels found in natural scenes. If you ever wondered why the picture you took was different from the scenery you actually saw, then maybe it’s time for you to learn HDR photography.

HDR Photography is the technique used to capture and represent the full (as possible) DR found in a scene with high perceptual accuracy and precision. To remember things better, think of the 3S: sunlight, shadows and subjects. These are the things that make an ordinary picture an HDR image.

The history of HDR Photography

While the technique is more commonly used now to create astounding images of art, fashion and landscape photography, HDR photography’s humble beginning is ironically designed to capture a rather fearing, shocking and destructive image – nuclear explosion.

Charles Wyckoff (the same guy who inspired Computational Photography) developed HDR photography in 1930s to 1940s. He is genius who took the 1940s Life magazine cover of nuclear explosions – an image that would later change the world. Of course the technique didn’t have the acronym HDR before, but the principles remained the same.

A deeper and perhaps more scientific understanding of HDR photography and imaging was first introduced in 1993. This was done by playing on two established photography elements: tone mapping and bracketing. A complex mathematical theory regarding differently exposed images of the same subject matter was then released two years after. Paul Debevec, a computer graphic researcher, applied this theory and combined several differently exposed images to produce a single HDR image was accomplished. Talk about putting a lot of science and even math to discipline.

Today, things are a lot easier. Thanks to the wide selection of portable and digital cameras as well as easy-to-use software, HDR is no longer limited to people studying nuclear explosion and computer graphics technology. But the technology on image capture, storage, editing and printing devices still has some limitations. And since each of these elements affect the DR of image; we need to study them if we want to get an HDR image with superb quality.

Theory Behind HDR photography

There are two theories behind HDR photography. And as the technology around HDR photography evolves so is the discipline itself. But if one wants to take HDR imagery seriously then he must first understand the concepts and theories that make up this discipline.

The most fundamental of all HDR photography theories is to take multiple shots at varying exposure levels of a particular subject. A special computer program will then combine the images together into a single image. This is just an incarnation of the original theory during the time when there are no digital cameras and advanced computers and programs were nothing more than a work of science-fiction.

The second theory is the one that capitalizes on the RAW processing software to create various exposure levels of the same image. Modern Digital SLR camera and a lot of the Point and Shoot models allow photographers to capture RAW images. A RAW image or file is the data captured by your Camera’s sensor that is not processed yet and therefore does have color information. You can manipulate this file, adjust its color, lighting or while balance.

How to gather data for HDR photographs

Taking the images is the first stage in HDR photography. You can use a simple point and shoot camera or a fully configurable digital SLR camera camera.

In both techniques you will need a camera with configurable exposure settings. All DSLRs and most point and shoot cameras have this. Certain SLR cameras have bracketing function which makes it easier for photographers to change exposure settings.

For starters, you can use the following setting: ISO 200 and Aperture Priority Mode. And as they say good things come in threes, you can take picture with three different exposure settings: EV 0, EV -2 and EV +2. You can experiment more on these but generally speaking, the more exposure versions you can have, the better your final image will be.

If you want to take more exposures as part of your HDR photos - up to 19, in fact - it's worth taking a closer look at Triggertrap Mobile, a mobile phone app that hooks up to your SLR camera. At $20 for the hardware and $10 for the software, it's an absolute bargain.

Oh, and obviously, It is recommended to use a tripod when taking HDR photo. This is because tripod stabilizes the camera and you need to get the clearest image you can get since you are experimenting on exposure values. The best way to do this is to use a shutter remote or if your camera doesn’t have one, just make sure you press the shutter button lightly.

Post-processing

ir_hdr.jpg

Incredibly, the above photo is an Infra-Red HDR photo. Awesome, eh?

Post processing is the last stage in HDR photography that you can really control. This is where technical skills merge with creative sensibility. And with the introduction of advanced digital cameras and photo editing software, HDR image post-processing is made a lot easier.

However, this does not guarantee that having an excellent HDR image will be as easy as clicking the shutter button. There may be times that the three or more images you took with varying exposure values are simply not enough. With this, the only chance you are left with is to do a post-processing of the image.

Post-processing generally involves color correction, saturation, contrast and brightness and darkness adjustment and other image element manipulation. But in HDR photography we need to concentrate on contrast and brightness and darkness adjustment. Brightness and darkness adjustment is the direct digital translation of exposure manipulation in the picture taking stage. If in the camera you adjust exposure settings, in the post-processing stage you will adjust the brightness.

The main advantage of process is surpassing the limitation of actually configuring your camera in different exposure levels. While some cameras may have eight exposure settings and therefore 8 different images, post-processing can simply give you a limitless number.

After the shoot, transfer the images to your computer. There is a merge to HDR feature in many photo editing software including Adobe Photoshop and above, Photomatix Pro, Dynamic Photo HDR and others.

Post-processing software also allows you to blend photographs with different exposures. This clearly increases the dynamic range of the final output photo. There is also tone mapping which reveals highlight and shadow details in an HDR image made from multiple exposures.

Further exploration

Whether you are an HDR photography amateur, hobbyists or a professional these websites will surely give you something to focus on.

HDR 101

The site claims that it is the first and most visited HDR tutorial on the web. It offers easy to understand tutorials as well as Photomatix software walkthrough. But we think HDR101′s best content is the monthly favorite Flickr.com HDR photos.

HDRSoft’s Resources

HDRSoft, maker of one of the most popular HDR software Photomatix gathered tutorials, DVDs and videos as well as mailing list subscriptions for all HDR photography enthusiasts.

CambridgeInColour

CambridgeInColour offers photography tutorials and forum where photography professionals and enthusiasts like you can discuss anything about photography.

Flickr’s HDR Group

This HDR group has 30,000 members and counting. Share your passion and be inspired with HDR images on different subjects taken by photographers from all over the world.

SmashingMagazine’s 35 Fantastic HDR Pictures

One of the most popular blogs combined “35 extremely beautiful and perfectly executed HDR-pictures” on different subjects and execution.

Visual Photo Guide

Camera, equipment and photography software reviews and video tutorials on HDR photography all in one place.

HDR Crème

HDRcreme is the first HDR photo gallery that lets you share photos, explore and learn about High dynamic range imaging.

Tutorial Blog’s Collection

A Single link to many great HDR Photography resources.

Photo credits

The photos in this article are from Flickr, licenced under CC/Attribution licence. See the full-size photos of Pasargad Bank Branch by Hamed Saber, Moon on Mars by Extranoise, Tour Eiffel by Al Ianni, Toronto City Hall by Paul Bica, San Isidro IR HDR Panorama and HDR 01 by CodyR on Flickr.

Top tip: a Flickr search for ‘HDR’ filtered by ‘most interesting’ is a great way to get some awesome inspiration.

Enjoy!

Hardware hacking: Fixing your X100 charger


Without the easy-to-lose piece of plastic, your FujiFilm charger is useless. Let's go DIY on its ass...

I've had a FujiFilm X100 for a while now, and I still don't completely know how I am getting on with it. Sure, I have taken some rather fabulous photos with it, like these ones:

20120215_dscf0564_600px.jpg

20120205_dscf0501_600px.jpg

20111009_dscf8681_600px.jpg

20110930_dscf8142_600px.jpg

The FujiFilm X100 battery charger problem

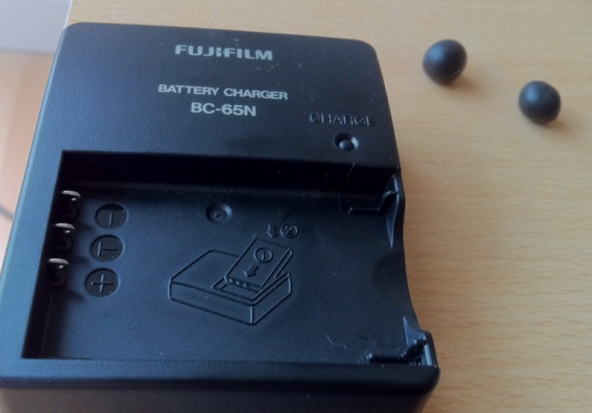
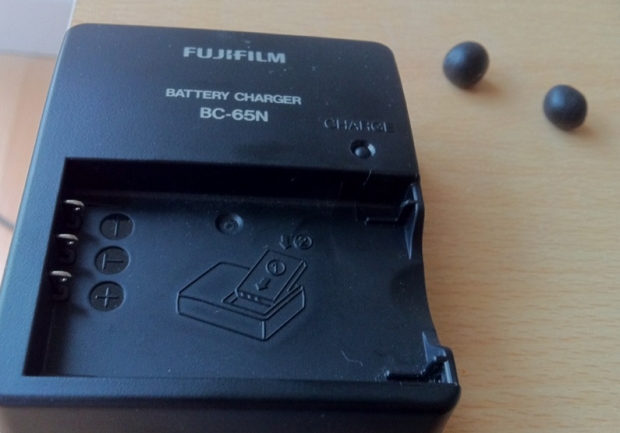
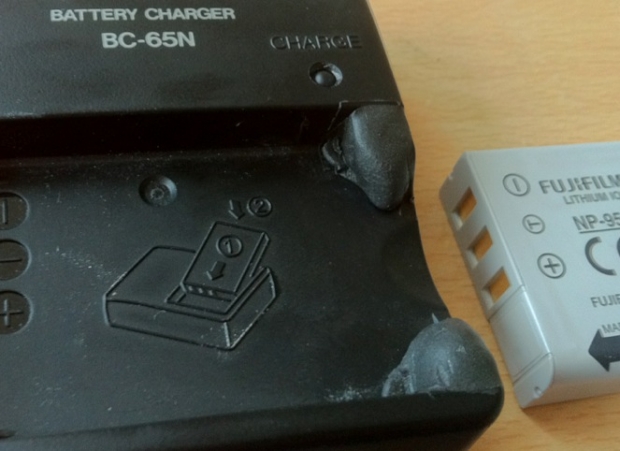
But it is not without its niggles. One of the small but incredibly annoying problems with the X100 is that the battery doesn't fit in the battery charger that comes with it. I know, it sounds completely inane, but it's true: To use the X100's battery in the charger, you have to use a tiny piece of plastic in the charger. Without it, the battery fails to make a connection, and won't charge properly. FujiFilm, if you're reading this: That was a complete bonehead move, and you really ought to be ashamed of yourself.

However, as a DIY photographer, I figured this was my chance to make my own life better. I lost the little piece of plastic nearly immediately, and was using toothpicks to hold the battery in place, but when my good friend Sarah told me about Sugru (by the way, Sugru, if you are reading this you should totally hire Sarah. She is awesome. Also, if you aren't reading this, then you obviously need a new community manager. Which brings me back to my original point: Hire Sarah.), I immediately saw a great use for it: Finally, a way of fixing my X100 charger, permanently and once and for all.

Let's get busy!

So here, offered as a deliciously simply to follow step by step guide: How to fix your FujiFilm x100 charger, by the power of Sugru:

1) Make sure you clean your charger properly; The Sugru is pretty hardy stuff, but if it's dusty or greasy, you're going to get less of a bond:

screen_shot_2012_06_26_at_190128.jpg

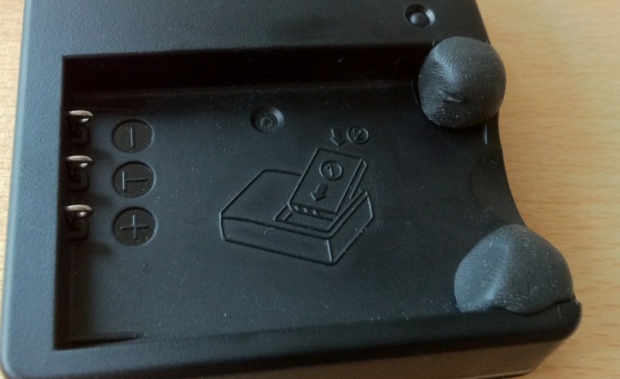
2) Take two small balls of Sugru (this was about 1/8th of a 5g packet of Sugru - or a grand total of £0.17 / $0.26 worth), and shape them into, er, balls.

3) Insert the battery into the charger, to make an imprint into the Sugru. Push it into the Sugru ever so slightly, and then remove the battery. The material will keep the shape you've just made, and harden over the next 24 hours.

screen_shot_2012_06_26_at_190142.jpg

4) Use a wet finger to gently brush off any excess material. Sure, this is an optional step, but if you're going to hack your own camera equipment, you may as well make it look reasonably good.

5) re-insert the battery to make sure it still fits properly, then remove it again

screen_shot_2012_06_26_at_190135.jpg

6) Leave it to harden for 24 hours

Congratulations! You've spent pennies on fixing a problem that FujiFilm really should have done right in the first place. More importantly, you can now use your well-earned bragging rights down in the pub, telling everyone that you've improved a piece of your own photography gear!

One simple step to improve your photos


When I'm asked what I do for a living, the responses that I get range from the infuriating: 'You must have a really great camera' to the inane: 'People write books about photography?' as well as the interesting. One of the interesting ones landed my way the other evening when I was chatting to someone whose wife enjoys taking photos.

'What one thing can my wife do to improve her photos?'

My answer was immediate, and pretty simple: 'Evaluate them.'

If you want to get better at taking photos, it's all very well being told that you need to practise, practise, practise, but you need to do a little bit more than that. You see, unless you critically assess your photos to work out what worked, what didn't, and why, all that practising will just result in a harddrive full of images that suffer from the same flaws and foibles. So you need to evaluate them: the good, the bad, and the what should I do differently.

Haje has written a very helpful guide to practical photo evaluation. His approach is both creative and technical and I would definitely recommend it for people whose photographic knowledge is above average and are serious about improving. But if you're just starting out, or if you just want to know how to make your holiday snaps that bit better, it might be a touch too complex. 

So here's a simpler version.

  • You do this at home on a big screen. Don't try to evaluate photos properly on the screen on the back of your camera. That's a recipe for disaster.
  • When you look at the photo, choose one thing about it that works. Is the composition bang-on? Have you captured the moment perfectly?
  • Then ask yourself: Why is it working?
  • Now identify one thing that isn't working. Is the exposure slightly off? Are the eyes not quite in focus?
  • In which case, what do you need to do to improve it?
  • Next time, make sure that you do it!

If you follow this process for every photo that you take, you'll quickly discover that you probably have certain photographic strengths and particular photographic weaknesses. By identifying them, you'll be able to build on what you do well, and make adjustments and improvements to remedy the areas where you struggle. With time, you should notice that you're taking better photos all round, and maybe even that what you're good at and what you find less easy, change.

Then, as you learn more, you can progress to far more thorough photo evaluations, and grow even more advanced!

Wet-plate photography


You're probably familiar with taking photos with a digital camera. If you're adventurous (or mature) enough, you've probably had a go at taking photos on film as well. As a true film aficionado it's interesting to dig deeper into the history of photography, and give wet-plate photography a shot, too. If you manage to avoid poisoning yourself or blowing up half your city, it can give awesome results!

Wet-plate photography is pretty much exactly what it says on the tin: You don't use film; instead, you expose a wet film plate (usually a plate of glass or metal) that is covered in a still-wet chemical solution. You have to 'pour' the plate (i.e. add the chemicals), 'activate' them, expose your photo, and then develop it in a very short span of time - usually less than 20 minutes. That means that you can forget about taking a quick series of photos: Once you've prepared your plate, you have to run and take your photo, run back, develop it, and see how it turned out. If you messed up, you've wasted 20 minutes, and you have to start over again from scratch.

Because your final result isn't an enlargement of a photographic print, the detail in wet-plate photos can be absolutely astonishing - it is as if you are looking at an enormous negative, chock-full of glorious, glorious detail, often without a trace of 'film grain' - because there was no film involved in the first place.

Wet plate photography as it is done today is often known as the Collodion process, invented more than 150 years ago.

It's worth noting that wet-plate photography can be quite dangerous; you are working with volatile chemicals that have been known to catch fire, oxydise or explode (nitric acid, nitrocellulose and ethyl ether). Some of the chemicals used in these processes are poisonous (pyrogallic acid, silver nitrate, zinc bromide, cyanide and denatured alcohol), corrosive (silver nitrate), or bad for you in other ways - it's definitely a good idea to get someone who knows what they are doing to give you a tutorial - in person - before you try it yourself.

What do you need to have a go?

For starters, you would need a View camera (or 'field camera', which is the smaller, more collapsible version of the same). This will usually be a large- or medium-format camera that will accept your plates. It doesn't have to be big - the world's smallest wet-plate camera has a wet-plate size that takes half-inch square plate images, but part of the attraction is the huge sizes you can work with.

Glass plates will become your negatives or positives. For positives, you'd typically use black glass, or you can experiment with aluminium or polished steel if you want a different 'look' to your photos.

In addition, you're going to need a lot of chemicals; there's the Collodion mixture (consisting of pure alcohol and various chemicals), A Siver Nitrate bath used to make the plates light sensitive, a developer to develop the plate, a stop bath (usually just water), and a fixer.

To get a proper idea of what is involved, "The Wet Plate Collodion Process" by Quinn Jacobson on YouTube is a pretty decent introduction showing the photography process.

So; it takes a lot of practice to get right, it's dangerous to your health, and taking 10 wet-plate photographs will take approximately twelve thousand times longer than taking the same number of photos with your SLR camera. Sounds like a challenge!

Most local colleges and some photography clubs that have a photography department occasionally run wet-plate induction nights - or search online. There's a few very active forums where you can learn more, and perhaps you'll be able to find someone local to you who can show you the ropes before you blow up your face, set your poodle on fire, and poison most of your city.

Good luck!

Photo Credit: Andi Todea on Shutterstock.com

Photographing Lightning with the Triggertrap


The most frequently requested feature on the Triggertrap is a deceptively simple question with a wickedly complicated answer: “Can the Triggertrap be used to photograph Lightning”. I’ve spent a lot of time thinking about this one, because it’s not as easy to answer as you’d think.

screen_shot_2011_12_13_at_153424.jpgThe problem is that cameras are not as fast as you would like. No matter how fast the Triggertrap reacts, an SLR camera has to do several things before it is ready to take a photo: Flip the mirror out of the way, and open a shutter curtain, among other things. These things don’t take a lot of time, I’ll grant you, but it’s not for nothing that “fast as lightning” is a pretty standard expression. Lightning is fast. Very, very fast.

The Triggertrap unversal camera trigger is also very, very fast – much faster than your camera, in fact. It can react in about 2 milliseconds, which makes it fast enough to use it as a slave flash trigger. However, only a flash reacts quickly enough to the Triggertrap; a camera will always have a delay. And I probably don’t have to mention that there’s no point in trying to trigger a flash in response to lightning: we have light a-plenty, but what we really want, is to get the camera to trigger.

Enter the Triggertrap: Taking luck out of the equation.

My standard method of taking photos of lightning is basically to dial in a long shutter speed (10 seconds, perhaps), and then just hold down the shutter button and cross my fingers. Eventually, you’re bound to get lucky, and get a beautiful lightning photograph.

Of course, the ‘spray and pray’ approach has its problems: There are short periods of time between exposures where you aren’t taking photos, and it’s sod’s law that that’s exactly when your lightning will strike. This gets more complicated as well if you are shooting in raw (and you should…), because depending on your shutter speed, you might find yourself running into problems with your buffer filling etc. Anyway, if we plot this approach on a graph, we get something like this:

Gaps. Gaps are bad.

So, how can you hedge your bets? Well, it’s simple: Use two cameras, and trigger them alternately. It’s pretty easy to do this using some electronics; set a timer, and make sure the cameras alternate:

No gaps! That's an improvement.

Of course, that still isn’t perfect; as we already discussed, cameras have tiny delays between shots, and if you trigger them electronically, there would in theory be no gaps. In practice, however, there are going to be times when one camera is closing its shutter, and the other one is still flipping up its mirror, and you’d still be missing your photographs. Useless!

The next logical step, then, is to make sure they overlap a little:

Ah! That's better!

Now, every milisecond of the thunderstorm would be captured; and we’d even have a tiny little bit of overlap for good measure. Fabulous.

Adapting the Triggertrap

“But Haje”, I hear you cry. “The Triggertrap only has one camera port, how are you going to get around that one?!”

Well, true, it does only have one camera port, but it does actually have two triggers built in: The Focus and the Shutter triggers. If we decide that we don’t need the ‘focus’ trigger (because we’ve pre-focused our cameras”, that frees up one of the triggers. All you’d have to do then is to create a cable that enables you to plug in two Triggertrap cables into the same Triggertrap. Easy:

By using 3.5mm sockets, you can continue to use the Triggertrap cables you already have; plug it directly into the Triggertrap to use it as normal, and plug it into the above-described gadget to split the signal so you can plug in two cameras.

The rest is all software

By overlapping the shots, you can guarantee to capture whatever is happening in the night sky; whether it's star-trails, a meteor shower, a lightning storm, or anything else you can think of!

The Triggetrap doesn’t have a Lightning mode built in, but it is fully Arduino compatible, and as soon as we get a final version of the software, we’ll open up our Github repository and open-source the code so you can hack it to your heart’s content.

Since we haven’t yet got a final version of the code, I’m not going to post my hacks here (yet! I’ll do it as a proper tutorial once we have a final release version of our source-code) – but you’ll be pleased to know that it didn’t take me very long to get a working version of the Triggertrap Lightning Trigger to work.

Now all I need is a lightning storm so I can test it properly…

Learn More

To learn more about the Triggertrap, check out Triggertrap.com. If you want one, try the Triggertrap Shop!


How much fun can you have with a giant water balloon?

If you think that the exploding water balloon thing has been done to death, no matter how awesome it looks in slow-motion, how about having a go at making a six foot version of one pop? And still filming your antics - you know, somersaults, jumping it on it from trees, that kinda thing - in slow-motion, obviously.

It's just what Gav and Dan, also known as the Slow Mo Guys, did over the summer. You can see for yourself the precise moment that the balloon gave up the ghost entirely, spewing its contents over their garden, and soaking them!

Now, it might be turning decidedly chilly here in London, but I'm still tempted to try this one. I wonder whom I can recruit to help me burst a giant water balloon? Hmmm.

Adding a protective UV filter to your Fuji X100

Nobody will ever be able to straight-facedly claim that Fujifilm's X100 is without its flaws, but by jove, is it turning it into one of my fave cameras nonetheless. One problem with this little peach is that the lens is exposed, and non-interchangeable - so if you, like me, tend to throw your camera over your shoulder, there's danger abound if you knock it into something.

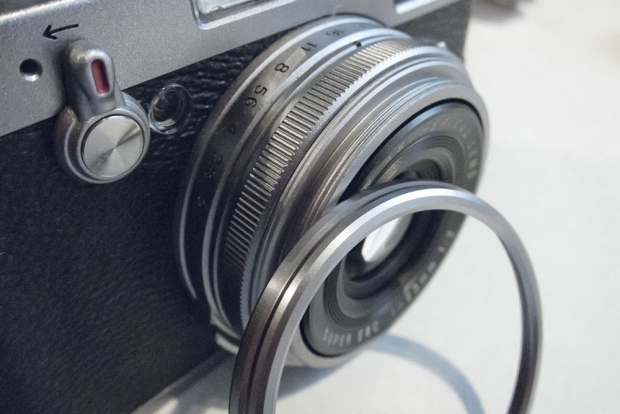
20111012_img_0089_1000px.jpgAs a double bonus hazard, the camera doesn't have a filter thread, so it's impossible to put an UV filter on the lens for protection. Or is it? It turns out that it does, indeed, have a filter thread, but it's 'backwards' - instead of having the threads facing inwards, like on most cameras, on the X100, the threading is facing out.

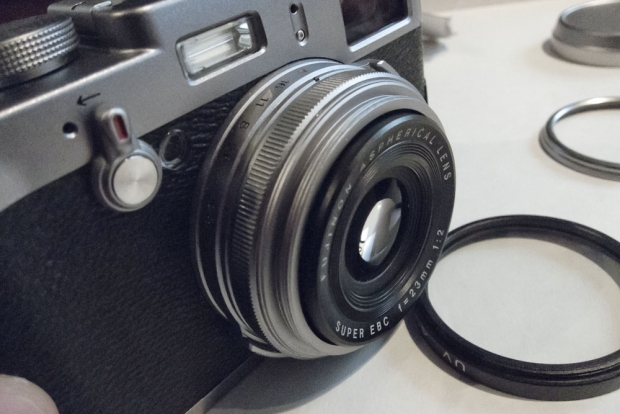
"Ah, but that's no problem", I hear you say - "Filters have threading both ways, you can just mount it on the camera backwards!". Well, that's true, but there's a second snag with the X100: Because the inner lens barrel comes quite far out of the camera body, if you simply mount a filter, the lens is liable to get stuck (if you're lucky), or be damaged (if you're less lucky).

So, how to solve this conundrum?

Easy, if a little convoluted.

You need to buy two 49-mm filters, and be prepared to sacrifice one of them to The Cause. What we're going to do, is to stack a couple of 49mm filters, in reverse, on the lens.

Step by step:

Step 1

Take off the ornamental ring

20111012_img_0090_1000px.jpg

Step 2

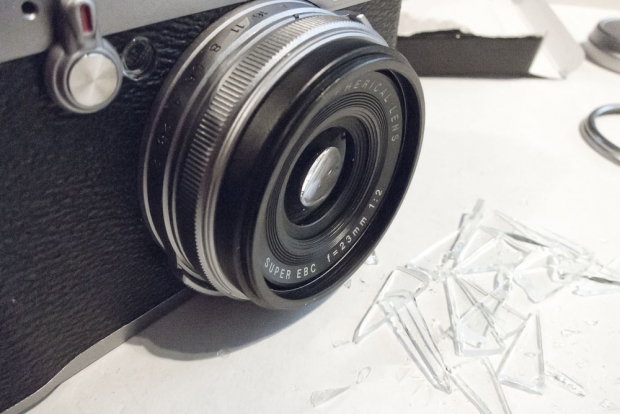
This image shows the problem we are facing: See how far that lens extends? Just attaching a filter would cause trouble...

20111012_img_0093_1000px.jpg

Step 3

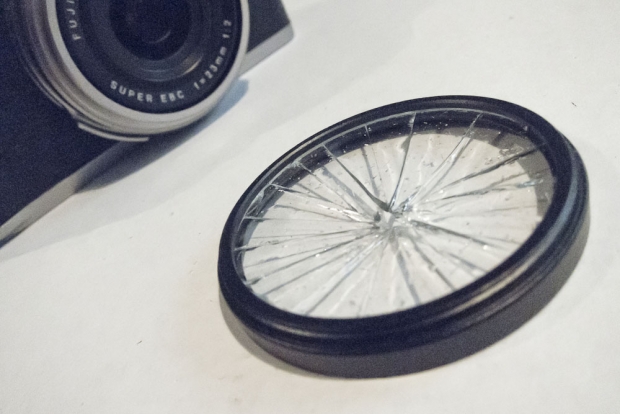
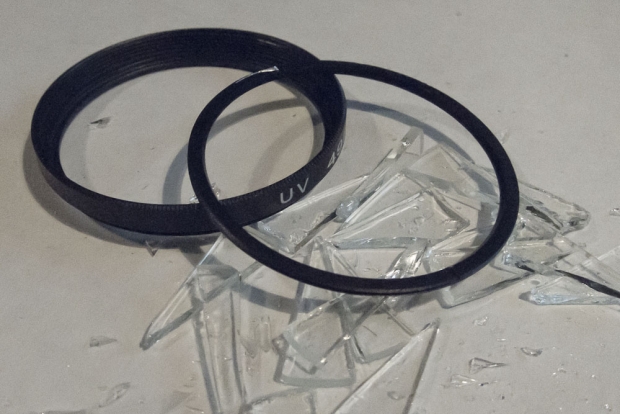
Now, the easiest way to take the glass out of a filter would be to unscrew the retaining ring in the filter. However, these can often be extremely well-attached; if you don't have a special tool, they can be very difficult to loosen. I got frustrated with my filter, and took a violent approach.

20111012_img_0094_1000px.jpg

Step 4

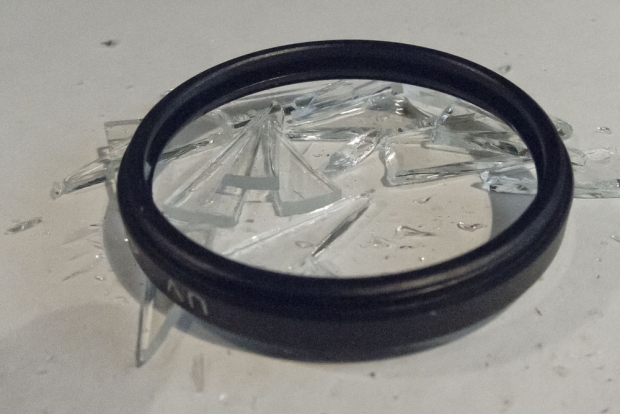
By giving the filter a sharp blow with a screwdriver, and then carefully removing the shards, I was able to take most of the glass out

20111012_img_0095_1000px.jpg

Step 5

Of course, with most of the glass removed, it was possible to take the retaining ring out. I took out the rest of the glass, and made sure there weren't any fragments left.

20111012_img_0096_1000px.jpg

Step 6

Mount the empty filter threading on your lens

20111012_img_0097_1000px.jpg

Step 7

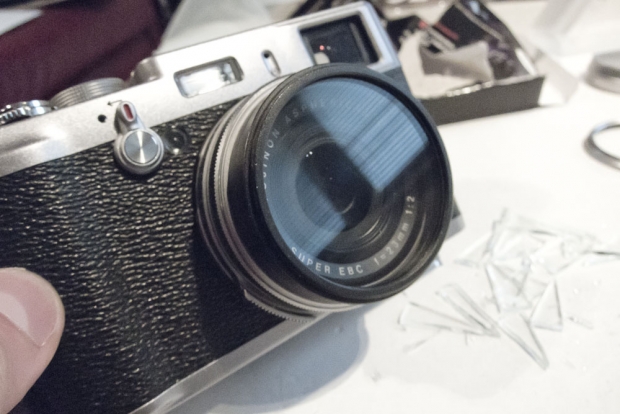
Loosely attach the second filter to the first filter. Then, operate the camera. See how close the lens gets to the filter. Slowly tighten the filter little by little, and keep experimenting with your lens. Be aware that some low-profile filters may not be thick enough to give you enough distance, so being careful at this step is a very good idea indeed.

20111012_img_0099_1000px.jpg

Step 8

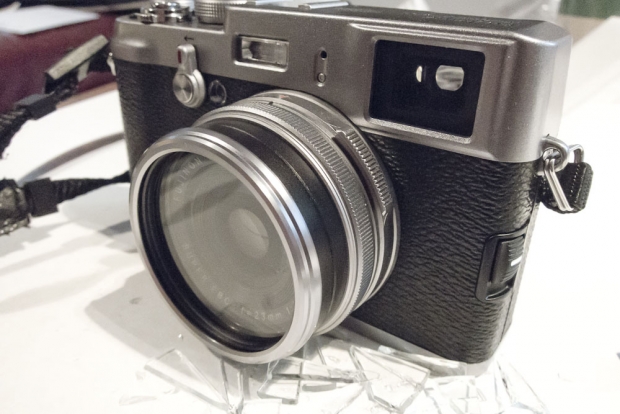
Remember the ornamental ring we took off in step 1? Put it back on, if you like!

20111012_img_0100_1000px.jpg

That's it!

So, that's how you can mount a filter on your X100 camera. Easy once you know how!

Making your own flash diffuser


The (in)famous disco twins

If you're using flashes on the go, you may have noticed that there's lots of ways you can create interesting effects: Bouncing the light of the ceiling, for example (that's possible even if you are using a compact camera, by the way), or similar.

A lot of photographers swear by Light Spheres, such as the ones marketed and sold by Gary Fong, Lumiquest and Sto-Fen. They're good products, there's no doubt about that, but I always had a problem with them: Basically, light doesn't care whether it travels through a pretty, $60 piece of plastic, or anything else.

The idea is simple: You're trying to increase the apparent size of your light source. When you do that, you can create some beautiful, soft light.

Creating the flash diffuser

But does that mean you have to spend a lot of money? Like hell it does. The other day, I was going to go take some photos of my good friend Sherlock Ohms, who was going to do a spot of DJ'ing in central London. I had never been to the venue, so I couldn't know for sure whether the ceilings were light enough to trust bounce flash, and I didn't know how big the venue was, so wasn't sure whether I could bring along an umbrella. (In retrospect, I'm lucky I didn't; there were too many people and too little space).

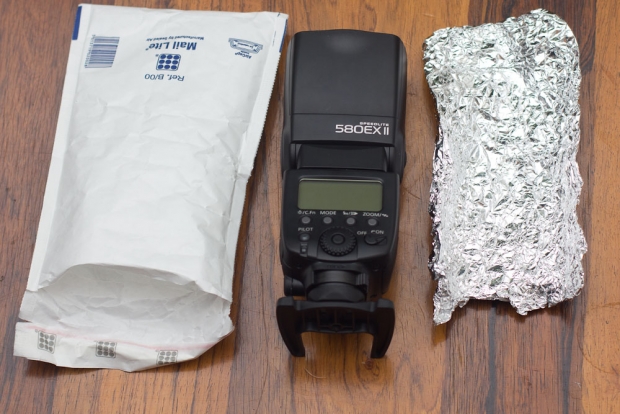
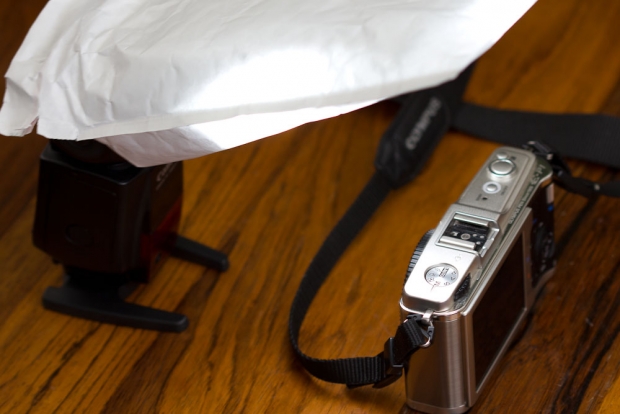
As I was standing in my living room thinking about this little conundrum, my eye fell on the Jiffy bags I use to ship out my Gray Cards (you have bought a set, haven't you? Because if you haven't, you really ought to), and I had an idea: There's no reason why a bubble envelope shouldn't work as a lovely light diffuser.

Ingredients

20110923_img_8260_1000px.jpg

A cheeky modification

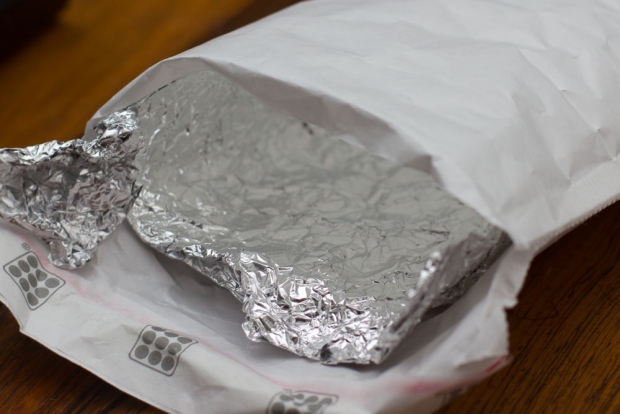
However, I wanted it to be a little bit directional as well; there's no point in lighting the area behind me, if I need the light to go forward. So I dove into the kitchen drawer and got some aluminium foil. I clad the inside of one side of the envelope with some foil, and simply stapled it into place (if I had had a little more time, I'd probably have glued it, to prevent the staples from scratching my flash).

20110923_img_8261_1000px.jpg

Final assembly

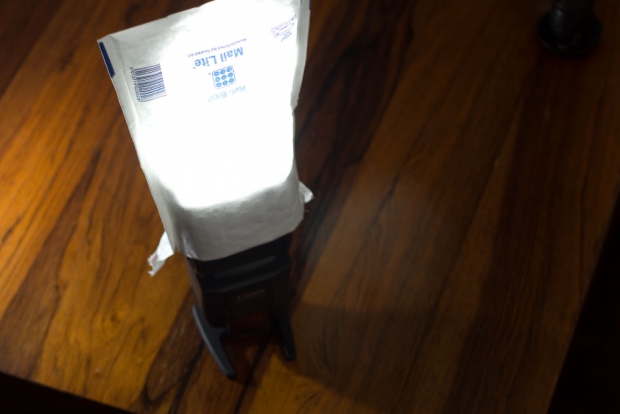
Finally, all you need to do is to insert the flash head into the top of the envelope. It fit snugly, so I didn't have to do anything else. Perfect! If the envelope had been slightly larger, a rubber band would have been sufficient to hold it in place.

20110923_img_8264_1000px.jpg

Let's give it a go!

So there you have it; a $1 envelope and about $0.05 worth of aluminium foil made a beautiful light shaper. If it works? Well, let's take a look:

20110923_img_8250_1000px.jpg

Looks like a studio shot, right? Well, the set-up shot isn't nearly as glamorous:

20110923_img_8258_1000px.jpg

And the shots of my friend who was DJ'ing?

20110923_img_8047_1000px.jpg

Don’t Be Scared of Studio Lighting

Softboxes were placed very close to the model here, meaning there is very low contrast between the specular highlights and the diffuse value, giving flattering, evenly lit skin.

To clarify, this month’s Photography Concept on Friday is not a self-help guide for photoaugliaphobics ( people with a fear of glaring lights – of course I looked that up ) – it’ll centre more around the basics of studio lighting and the basic properties of light. If you’re interested in a bit of studio lighting but don’t know where to start, or would like to know at least a little before you begin, then this month’s PCoF is for you. 

Specular Highlights and Diffuse Value

Softboxes were placed very close to the model here, meaning there is very low contrast between the specular highlights and the diffuse value, giving flattering, evenly lit skin.

Now it’s very easy to go into too much detail too quickly with studio lighting. I am writing from the point of view that you have never seen or considered the principles of lighting before, so please don’t roll your eyes too far back into your head if any of this seems obvious. Everyone starts somewhere – I started to improve my studio lighting the moment I got these concepts into my head.

Specularity refers to an object’s shininess. If you imagine a snooker ball in a pub (or snooker hall, if you’re a more reputable sort than myself), the bright white spot on that ball is the specular highlight of the ball.

Diffusity refers to how evenly spread out light is across an object. The more diffuse the light, the less contrast there is. This is represented by a more gradual transition from light to dark across an object. An object with a strong specular highlight has a higher contrast value around that highlight, as the brightness of the object changes much more suddenly.

In Short – Specular Highlights mean more contrast, Diffuse Lighting leads to less contrast.

Now, let’s look at a situation where we control the light source- we’ll ignore the different properties surfaces can have for now, to keep it simple (a snooker ball is a lot more reflective than human skin, for example. If your skin is as reflective as a snooker ball, see a doctor).

Controlling Light

There are two factors we should keep in mind for basic control of lighting. These are the size of your light source and the distance of your light source from the object being lit.


Size of Light Source

The size of your light source determines how it lights the object in question. Assuming the distance is the same, let’s look at the difference between a torch and a softbox (which look like this).

A torch has a very focused, directional beam – the light isn’t very diffuse. When you use a torch in the dark, it only lights the small area you point the torch at. On our imagined snooker ball, this creates a strong specular highlight, giving high contrast to the ball. If we replace this with a softbox, a much larger light source, we create a light source with more diffuse, spread out quality. This will lessen the contrast on our snooker ball, and light it more evenly than the torch will.

In Short – The larger the light source, the more diffuse the lighting, giving us less contrast. The smaller the light source, the more focused the lighting is on one point, giving us greater contrast.

As an extra point if you’re not confused yet – the more diffuse the light, the darker it is, due to the light available from the light source being spread more thinly.

Distance of Light Source

Due to the Afro of Doom in this pic, I had to move the light sources much farther away. This has led to a greater contrast between the specular highlight and the diffuse, which is why we see the stronger highlights on the bridge of the nose, for example. To combat this, I used my large light source for the face and brought the smaller one in for the hair.

The distance of the light source shares many qualities with the size of the light source, seeing as they are almost exactly the same thing as far as your camera is concerned. The closer the light source is to your subject, the larger it is and the further away it is, the smaller it is. Therefore, all the qualities pertaining to size of light source apply here also. There are two differences, however.

The first, most obvious difference is that the closer the light source, the less far the light has to travel, meaning the light is stronger.

The second, less obvious difference, is the difference between the specular highlight (high contrast area) and the diffuse value (low contrast area). The closer you place the light source, the less difference there is between the specular highlight and the diffuse value. The farther away you place the light source, the greater the difference there is between the specular highlight and the diffuse value.

In Short / To Simplify – All you really need to keep in your head here is that the farther away you place the light, the more contrast you will have between the shiny bit and the non-shiny bit. As you put the light closer, the difference between the two will be lessened, allowing for much more even lighting. So, for even lighting, put your light source closer. For higher contrast, move it back.

Oh Sweet Lord My Brain What Have You Done?

Essentially, explaining the basics of lighting is the equivalent of explaining the offside rule in football – it’s actually fairly simple but once you start trying to explain it, it sounds horribly complicated. It’s really not. What I suggest to you is, take this mini guide, go and rent some portable studio lighting (when I rented mine a few years ago, it only cost me £40 for a week), find some unsuspecting victims (or snooker balls) and try this stuff out. It’s not nearly as daunting as you might think. Go on, get some studio lights and try it yourself, it’s fun!

In the future, I’ll do some more lighting write ups, if people have found this useful. Just remember, if you’re still having trouble with the difference between size of light source and distance of light source, use this handy, cow based reference.

The power of going viral to “kickstart” your project


“Wow” seems to be the only word that entrepreneur Peter Dering can say about the response he’s received for his first product, which has the twitterverse buzzing and the photography world salivating.

Dering, a former civil engineer and amateur photographer, quit his engineering job last April to develop an idea he’d had for two years. He spent the better part of last year developing the Capture Camera Clip System, which is a small device that allows you to clip your SLR securely to any strap (belt, backpack, etc.)

Click-and-go

Dering was hoping to solve the problem that many SLR users face: where can you keep your camera so that it’s easily accessible but out of your way to use your hands, yet still well protected? Wearing a camera strap around your neck is great for access, but a heavy camera dangling around your neck is both uncomfortable and dangerous for the camera and lens. A camera bag offers great protection, but you may miss some great shots without your camera readily at hand.

Dering’s Capture System solves this problem with a small, lightweight device that has two components: one clips onto your strap and the other clips into your tripod mount on your camera. When the two components are secured, you have a quick and easy way of mounting your camera on your belt strap or backpack strap - or in the future your bicycle or the roof-rack of your car. There’s a quick-release button for easy access, but there’s also a redundant twist lock you can use for times when the quick-release might be accidentally triggered.

It’s a clever little piece of kit, and it was bound to be well received by the photography community - however the speed at which this is happening is what’s truly remarkable about this story.

Enter Kickstarter.com

Dering decided to use Kickstarter to try to fund the first production run of his device. His Kickstarter project went live on May 2, and by the powers of the viral qualities of the internet, he had reached (and quickly surpassed) his $10,000 funding goal by May 4.

At the time of writing this article, the project has 3,859 backers who have funded the project to $251,746 - a far cry from the $10,000 initial goal. So, how did this happen? How did a device go from no one hearing of it to being the next must-have photography gadget seemingly overnight?

The news of the gadget traveled far and wide through the type of viral speed and growth we’ve come to expect only from funny youtube videos. News was spreading fast via Twitter, Facebook, and tons of blogs. Loads of tech & photo websites, such as Gizmodo, Peta Pixel, Digital Trends and Photo Weekly Online all did articles about the Capture clip. It didn’t take long for this rush to “capture” the imaginations (and wallets) of the internet photographers.

Get involved!

The project will be funding until July 16 - so if you want to be one of the first to get your hands on the device you can pledge at least $50 on Kickstarter . Once the first run is done, the normal retail price is expected to be $70 plus shipping.

Perhaps Kickstarter is going to the next great tool for creating buzz around your photography ideas and gadgets - certainly many of the most successful projects on the site have come from the photography universe. Peter Dering seems to agree, and his gratitude is palpable: “This is absolutely mind blowing.  Backers, bloggers, facebook status updaters...thank you, thank you, thank you.  Thank you!!!”

My own Kickstarter project

So, independently of Dering's project, I have started a Kickstarter project of my own. It's photography related, it's awesome, and it's here.

This article was written by Ziah Fogel, who is part of Team Awesome: The gang working on my Kickstarter project.

Watermarking your images


I very occasionally use a small watermark on my images - but only for my travel blog, oddly.

I recently received an e-mail from Danielle, a reader who was confused that I seemed to post most of my photos online without watermarking them. We had an interesting e-mail discussion, and I received her permission to re-write the discussion into a blog post.

The case for watermarking

Photography seems to be an ever evolving art movement. As quickly as it began, it has undergone many advancements. This relatively new art practice has gone from the camera obscura to cameras built-in to our tweet-enabled, facebooking phones. Anyone has the ability to snap a photo and have it uploaded onto the web within seconds. Mind blowing? Sure. Good for business? Definitely not.

Just as quickly as advancements in technology giveth, they taketh away. Technology has made stealing photos, your sweat, blood and hard work as easy as holding down two buttons. If you don’t properly identify your photographs as your own copyrighted pieces of work with watermarks, you may find yourself hiring ip lawyers to get your intellectual property taken down and back into the rightful owner’s hands. Not watermarking your photographs with some form of logo or even simply a name is putting your work at risk.

Many photographers don’t find watermarking extremely important. In thinking that, you are putting your work out to the world to use as it pleases. Without a proper watermark, you will never know who will copy and use your photograph somewhere else. More importantly, you never know where these photographs will end up.

As a photographer, you should be aware that watermarks are there for your protection and to protect those clients who agree to be photographed. If a client should happen onto an inappropriate webpage or print that includes their picture, they will come to you looking for answers. Will you be prepared to explain the situation? As an artist, shouldn’t you take enough pride in any work you publish to include your name on it?

Some artists misconstrue watermarks as bulky and at times unprofessional looking. What they are not considering is how many different types of software and options there are to create these copyrighting texts for your photographs. Researching just a few watermarking software programs will show you that watermarks can be as simple and elegant or as bulky and obnoxious as you’d like. Of course not many artists would want a bulky addition to their work, but the point is artists have that option.

When photographs are taken out of context or away from the artist’s original concept, the integrity of the work is compromised. As photographers, we should be concerned with maintaining the utmost relevancy and honor in our work. Watermarking photographs might not be the end all to protection, but it is definitely a step in the right direction. All artists should consider taking these steps while they can because it is only a matter of time before the next boom of technology will flip the art of photography upside down once again.

What do you think?

I don't think I agree all that much with Danielle above - I do think that watermarks detract from my images, and I doubt whether watermarking is as much of a deterrent as she thinks. 

What do you think?

Today, I'm only shooting feet

_small_DSC_3339 - Version 2

We love a bit of street photography here at Small Aperture, and we’re always looking for new ways to tempt newbies to have a go at it or give old hands some ideas for their next outing pounding the streets. When Thomas Leuthard, a photographer based in Switzerland, dropped a couple of suggestions in my inbox, I asked him if he wouldn’t mind expanding on them a bit. So, here’s one of his suggestions, and I have to say, I love it. Thomas, over to you…

Today, I’m only going to shoot feet…

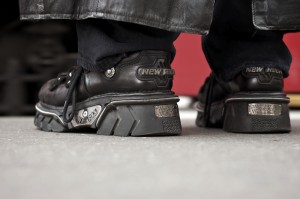
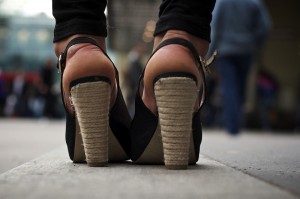
When you’re shooting on the street, it’s far too easy for your eye to get distracted. Therefore, it’s a good idea to have a small concept to concentrate on whilst out with your camera. Beginner or not, it helps to have a plan; something to hold on and to follow to. I like the concept of just shooting feet. The reason for that is very simple: feet are always out there and people wear different shoes.

In addition to saying that you’ll shoot only feet, it can help to set yourself some more boundaries. Try picking a few (or even all) from this list:

  • Detail only
  • Camera on the floor
  • From the back while standing
  • Same focal length
  • Same aperture (a small one)
  • Landscape format
  • In colour
  • A series of 10 photos
  • All in 60 minutes

I like time limitations as I find that I normally work better under pressure. It means that I know that I have to hurry up and can’t just hang around with my camera looking down at ladies’ legs. I have a mission and have to fulfil it in the time provided. (How very James Bond!)

If you target your focus, you’ll be astonished by how much you can accomplish. It doesn’t matter if you’re a beginner or an old hand, try to focus on one thing. It can be a colour, body part, accessories, or whatever you fancy, really. It is all about focussing on the essential and not getting overwhelmed by the rest of the street.

Anyway: back to our feet that we’re shooting. If you want to get a good and easy shot on a pair of shoes, try a bus stop, a pedestrian crossing, or anywhere else where people have to stand still for a moment. This is your moment and you have to be quick. Set your camera to aperture priority and try f/4. If you’re shooting with your camera on the floor, flick on autofocus. You’ll look like an idiot with your head down there, peering through the viewfinder. You might need to practise, but that’s half the fun, no?

Sure, you’re going to have to be brave, but if anyone asks, tell her or him that you study photography and that today’s topic is feet. They will think you are crazy and walk away. It’s true, people often don’t understand what I do and why I do it, but I often find that showing them some photos helps to explain it. They soon realise how beautiful street photography can be.

It’s all a question of good ideas, interesting angles, and composition. A good street photo doesn’t need to show faces. Feet are perfect, and the chances are you won’t have any legal issues, publishing someone’s feet.

Now, go forth and have fun, and try not to walk into lamp posts or anything whilst you’re looking down!

This article was guest written by Thomas Leuthard, and all of the images are his. You can see more of his street photography on his website: 85mm.

250 photography tutorials


Time for some tutorials, because at some point, we all want to grow beyond the cliché holiday snaps...

A curious thing happened with the advent of the internet - and that is that people seemed to shun photography clubs, classes, books, and even learning from your mates, and turn more towards learning from online tutorials. In some ways, that's a shame - but given how many hard-working photographers there are out there who are more than happy to share their knowledge with the masses, we're probably in a better place now that we ever have.
20110429_img_0900_3648_x_2736.jpg

The kids nowadays - and by 'the kids', I mean everybody who is currently taking photographs - are learning at an incredible rate, and most of all, we're learning from each other. The curious thing is that we're transferring knowledge in a completely new way: through the magical mystery world of photography tutorials

With that in mind, I figured I might have a look and see if I couldn't dig up a couple of high-quality tutorials to share with you all. When I set out to search for 'a couple', I soon found a dozen. Then a score. Then a couple more... And rapidly, my search completely spiralled out of control, ultimately resulting in the list you're looking at here.

Yes, there's 250 of 'em, and yes, there are a few tutorials covering the same topics... But I challenge anyone to have a look through this list and not find a few tutorials they like - and who knows, you may even learn a couple of things along the way.

Enjoy...

20110428_img_0674_3648_x_2736.jpg

1 - Digital Basics

It happens rarely that I find an article that seems to cover all the basics of digital photography, but this article hits the spot very nicely indeed. It's a one-shot introduction to the basics - nearly as good as buying one of my books! :)

Get the full skinny at Digital Basics on Photo Pursue

2 - Learn Photography in Five Steps

Panning. I think I cried the first time that I tried it. I might've had a better experience with this clear, five-step tutorial to capturing moving subjects.

Find it all on Learn Photography in Five Steps on Step By Step Photography

3 - Working with Models for that Perfect Wide-Angle Photo

So you've tried your hand at underwater photography and you love it. Now you want to try something a bit more advanced. How about including a model? Here's how...

There's more at Working with Models for that Perfect Wide-Angle Photo on Stephen Frink

4 - Avoiding the evil of red-eye

If you're using a compact camera, red-eye can turn a portrait of your best friend into a picture of the devil incarnate. This guide explains what red eye is, how it happens, and how to avoid it.

Read more on Avoiding the evil of red-eye on Small Aperture

5 - Digital Photography Tutorial

Basic ideas in photography are covered here: composition, exposure, editing, storage, and printing. There's nothing too detailed, but it does offer an entry-level guide - a perfect tutorial to forward to your clueless mum / dad / sibling who just got their first camera

Read it all on Digital Photography Tutorial on Hub Pages

6 - Beginners Guide to Photography for computer Geeks

A beginners' guide to photography written by a beginner with a sense of humour. It has everything from metering to filters, as well as a decent explanation of focal length.

Learn more at Beginners Guide to Photography for computer Geeks on Bernie Sumption

7 - How to write and sell a photo story

You're a photographer, right, not a writer? But sometimes, you need words to accompany your images. This'll help you to find the words to sell your story.

Check out the full tutorial on How to write and sell a photo story on Pixiq

8 - Understanding your Digital SLR Camera

What happens if you change your camera's aperture? How about shutter speed? And ISO? How can you make sure your camera focuses where you want it to focus? What's a good lens to have? This tutorial has it all.

The full article is on Understanding your Digital SLR Camera on Kevin and Amanda

9 - Photographing Panoramas

Photo Guide's guide to Panorama photography is a simple guide covering all the major points for photographing panoramas, including how to get the photos, and how to stitch them all together. A great introduction guide.

More at Photographing Panoramas on Photo Guides

10 - Dave Hill Quick photography Tutorial

Ever fancied giving your photos a cartoon-like effect? This tutorial shows you just what you need to do with a little HDR and unsharp mask help.

Have a read at Dave Hill Quick photography Tutorial on Abdu zeedo

11 - How to Develop your Photography Skills

Taking good photos isn't just about understanding physics and the technicalities of your camera. It's about knowing what makes a good picture and spotting the opportunities. This tutorial tells you what to look out for.

There's more at How to Develop your Photography Skills on Bama Scenes

12 - The Digital Photography Tutorial

You've filled a memory card with images. Now what? This tutorial will walk through your workflow, from post-processing and on through organisation, printing, sharing and storing.

More at The Digital Photography Tutorial on Best Family Photography Tips

13 - Beginning Photography Tips: Top 10 Techniques for Better Picture

You might have aperture sewn up and ISO is no longer giving you a headache, but what other elements contribute to a great photo? Composition, the weather, time of day, timing. This website covers ten things you need to think about.

There's more at Beginning Photography Tips: Top 10 Techniques for Better Picture on Better Photo

14 - Learning Photography

A lot of photography is instinctive: knowing what makes a good image and how best to capture. These five pointers help you to get the most out of your pictures by experimenting and practising.

More at Learning Photography on Dan Heller

15 - Understanding Histograms

The histogram. That groovy little graph that shows you just how over- or under-exposed your picture is. This tutorial walks you through the magical art of using a histogram to make sure your images are just right. Nifty!

The full article is on Understanding Histograms on Digital Photography School

16 - Six Secret Steps for Taking Great Photos

These secrets probably aren't all that secret, but they certainly reinforce what we know about taking good pictures: get as much advice as you can, keep on practising, and enjoy yourself!

The full article is on Six Secret Steps for Taking Great Photos on Free Digital Photography Tutorials

17 - How to Take Sharp Images

Great idea for a picture; a pity that it has come out a bit fuzzy around the edges. Here are seven tips to ensuring you get pin-sharp images.

Check out the full tutorial on How to Take Sharp Images on Hypergurl

18 - How to find great Locations for Model shoots

Finding a shoot location can be a headache. But have you thought about checking the geotag locations on Flickr images? What about using places you've never considered? What do you need to take with you? How about lighting? This article has got it all.

There's more on How to find great Locations for Model shoots on Lights Talking

19 - An introduction to Digital Imaging

Film cameras and digital post-processing can live harmoniously. Honest! This article tells you what hardware you'll need and explains the benefits that a bit of software can bring to a negative or slide.

Check out An introduction to Digital Imaging on Luminous Landscape

20 - Introduction to Photography: Ten Ways to Improve your Skills

If you're setting off with your first camera, this article has some useful ideas for how to make the most out of the experience, like keeping a diary and not giving up when things seem a bit tough.

Get the full skinny at Introduction to Photography: Ten Ways to Improve your Skills on Paxton Prints

21 - Crash Course Guide to DSLR Photography

You've just bought your first dSLR! Congratulations! Now what? Well, you'll want to get it out of auto mode, and this crash-course demystifies aperture, ISO, and shutter speed to help get you started.

Have a read at Crash Course Guide to DSLR Photography on Photo Guides

22 - What is correct Exposure?

A great tutorial on how to combine aperture, shutter speed, and ISO to ensure that your pictures are correctly exposed. Banish the auto mode and take control of your photography!

There's more at What is correct Exposure? on Photoxels

23 - Photography Basics

Clear diagrams show you how light passes through your camera to create an image, and explains how aperture, shutter speed, and ISO affect your pictures.

Get more at Photography Basics on Tutorial 9

24 - Camera Skills Manual

Confused by the different settings on your camera? This tutorial explains the difference between Tv and Av, and what the benefits of shooting fully manual are.

There's more at Camera Skills Manual on Worth 1000

25 - How to take Great Photos of your Projects?

Have you ever wondered how to take photos to illustrate your own tutorial? This tutorial walks you through it, from what you need to how to do it.

Learn more at How to take Great Photos of your Projects? on Ada Fruit

26 - Photography in low light Conditions

We've all been there: you're presented with a great image, but the light is on the low side to actually capture it. These suggestions should help you to get the shot that you want when things are a little dim.

The full article is on Photography in low light Conditions on How to Photography

27 - Develop your Photography Skills

An amazing step by step tutorial to develop your photography skills. It is based on basic knowledge of photography and is a great starting point for struggling photographers who want to take their photography further.

Read more on Develop your Photography Skills on Wiki How

28 - Digital Photography Tips for Beginner

This tutorial reminds you to get to know your cameras and recommends different ways to experiment with it so that you get the most out of it, and out of your pictures.

There's more at Digital Photography Tips for Beginner on Oh Blitz

29 - The Golden Hour

When is the golden hour? What is the magic effect that it has your photographs? If you want to learn how to make your photos sizzle, read on!

Read more on The Golden Hour on Small Aperture

30 - Basic Photography Tutorial

If you want to try shooting on film, need to know how to load a spiral, or would like to have a go at processing your own black and white film, you'll find the answers here.

Learn more at Basic Photography Tutorial on Silver Light Uk

31 - Taking Photographs At Unfamiliar Places

Taking photos when you're travelling can be a daunting experience. Differences in culture and outlook and just unfamiliarity with the place can be difficult to navigate. Travel photographer Alissa Everett has some useful advice.

Can't get enough? Read it all on Taking Photographs At Unfamiliar Places on Pop Photo

32 - Travel Photography Introduction

When are you most likely to take photos? Probably when you're on holiday. This guide will help you to make the most out your holiday snaps, with a look at the technical and the practical side of things.

The whole nine yard's at Travel Photography Introduction on Dan Heller

33 - Taking Professional Photos

From using plastic boxes as light diffusers to walking you through Photoshop, this tutorial aims to help you get the most professional looking pictures you can, whatever camera you have.

There's more on Taking Professional Photos on The Switch Board

34 - How to Make Great Photographs

Photography is not just about taking photos - but taking great photos. This detailed tutorial discusses just about everything you need to start photography - and sees you on your way to become a great photographer.

Read more on How to Make Great Photographs on Ken Rockwell

Composition
20100924_img_3053_5184_x_3456.jpg

Technically part of the 'basics' in everybody's book, composition still deserves its own little mini-section in this list - it's an important topic, after all - and well worth a read, of course.

35 - The Rule of Thirds

Have you heard of the Rule of Thirds? If you haven't, you've almost certainly seen it. It's a groovy trick to help you compose your images. This article explains all.

Learn more by going to The Rule of Thirds on Digital Photography Tips

36 - An Introduction to Photography Composition

From the rule of thirds, through leading lines, to different points of view, and including a whole heap more, this tutorial covers just about everything you might want to know about composition.

Get it all on An Introduction to Photography Composition on Yanki Photo School

37 - Vantage Points in Park Photography

Who hasn't taken a picture in a park before now? I bet we all have. But how can you get the most out of your local patch of green? Here're four great tips.

Learn more by going to Vantage Points in Park Photography on Photography Tutorials

DIY photography
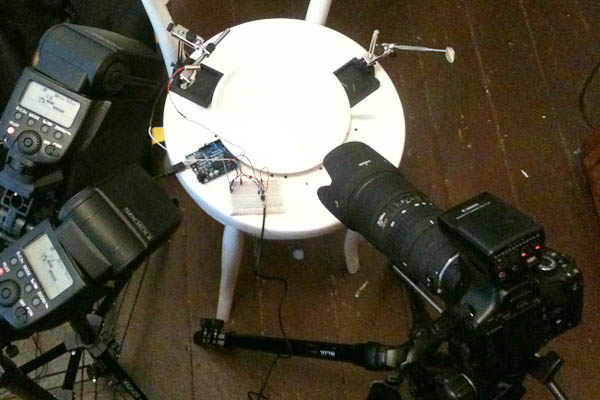
20100217_img_0116_2048_x_1536.jpg

Photographers are a curious and crafty bunch - and there's something rather lovely about building parts of your own kit. With these tutorials, you'll get the creative do-it-yourself juices flowing!

38 - How to Create a Low-Budget Reflector or Diffusor

The more you practise photography, the more things you find you need. Like reflectors. Or diffusers But, you don't have to buy them, you can make a two-in-one reflector and diffuser yourself.

Learn more at How to Create a Low-Budget Reflector or Diffusor on Pxl Eyes

39 - Making your own Macro lens for $10

If you have a can of pringles kicking about, you can turn it into a surprisingly good macro lens. It'll take an afternoon, but it'll be worth it!

Read more on Making your own Macro lens for $10 on Pixiq

40 - How to Make and Use a Pinhole Camera

Lo-fi photography can be great fun, but it also helps you to develop as a photographer. So how about trying pinhole photography? Don't have a pinhole camera? No problem - here's how to make one!

Get the full skinny at How to Make and Use a Pinhole Camera on Kodak

Equipment
20100312_img_1410_4272_x_2848.jpg

Without equipment, there's no photography - but without knowledge about your own equipment, it's all too easy to mis-invest your hard-earned cash into stuff you either don't need, or aren't able to use. This set of tutorials collects some of the info I wish I had when I first started out with photography.

41 - Compact vs Digital SLR cameras

You've just starting out taking pictures. You're not really sure how a point-and-shoot compares to an SLR. Do you really need to splash out on an SLR for what you want? This'll help you figure it out.

Give it some love at Compact vs Digital SLR cameras on Cambridge in Colour

42 - Choosing a Camera

Itching to get started in photography? The first conundrum to solve is deciding on what camera to buy. This tutorial will help you choose the one that best suits your style of photography.

There's more at Choosing a Camera on Geoff Lawrence

43 - 7 ways of ruining your photo equipment

We love our cameras. They take pretty pictures. But some things don't love our cameras, like salt and dust. Here are the top seven camera ruiners, and how best to combat them.

There's more on 7 ways of ruining your photo equipment on Digital Photography School

44 - Taking good photos with an iPhone

I always say that it's not about the camera, but its operator. To prove my point, here's a tutorial proving you can can a pretty good photo with your iPhone. Honest! Here are seven ways to make sure that you do.

Have a read at Taking good photos with an iPhone on eHow

45 - Using a Point & Shoot Camera

If you don't have access to an SLR camera, for whatever reason, you can still get great photos from a point-and-shoot. This article shows you how.

There's more on Using a Point & Shoot Camera on Photo.net

46 - 10 Super cool creativity boosting Photography gadgets

If you've a little money to spare and fancy splurging on some fun and creative photography gadgets this list of ten cool things might help you burn through your cash!

The full tutorial lives at 10 Super cool creativity boosting Photography gadgets on Creative Closeup

47 - Lenses; What do all These Characters mean?

If you've ever been confused and befuddled by the strings of near-impenetrable numbers and letters on a lens, you're not alone. And now you can feel enlightened as this article sorts out EF from EF-S and reveals the mystery of IF.

Interested? Check out Lenses; What do all These Characters mean? on Car Photo Tutorials

48 - Upgrading to a Digital SLR (Single Lens Reflex)

When you've reached the ceiling with your point-and-shoot or bridge camera, what should you look out for when you take the plunge and upgrade to a dSLR?

Read all about it on Upgrading to a Digital SLR (Single Lens Reflex) on Digi Diversity

49 - Cleaning your DSLR Sensor: Tips and Advice

If you can see spots on your images or when you look through the viewfinder, something in your camera probably needs cleaning. This article helps you diagnose where the problem is and what to do about it.

Have a read at Cleaning your DSLR Sensor: Tips and Advice on Photo.net

50 - Camera Lenses for Indoor Event Photoraphy

If you're shooting indoors, probably with limited light, you need some fast glass. This article looks at primes and zooms, wide angle and telephoto, and helps you decide what you'll need in which situation.

There's more at Camera Lenses for Indoor Event Photoraphy on Picture Correct

51 - Lens Diffraction and Photography

Diffraction. It has a nasty habit of interfering with the pictures you want to take. This article explains what it is and how to resolve it.

There's more at Lens Diffraction and Photography on Cambridge in Colour

52 - Travel Photography Equipment

You're off on your travels so naturally you're taking your camera with you. But what else do you need to pack to capture those glorious sunsets and amazing architecture? Take a look here.

Read more on Travel Photography Equipment on Dan Heller

53 - Understanding Polarizers

Doubtless you've heard of a polarising filter before now. But what does it actually do? Why do you need one? How do you use one? All your answers are here.

There's more at Understanding Polarizers on Luminous Landscape

54 - Avoid Flash Media Problems and Save your Images

Flash cards are not cheap and if you shoot digitally, you can't do it without them. This article talks you through caring for your flash media, how you can prolong its life, and how to get the best out of it.

Find it all on Avoid Flash Media Problems and Save your Images on Paxton Prints

55 - Choosing a Digital Camera

Buying a camera is a major financial investment. This website outlines what you need to look for to make sure that you get the right camera that meets your needs, at the right price.

Have a read at Choosing a Digital Camera on Photoshop Tutorials

56 - Using a tripod

After a shiny camera and a couple of lenses, a tripod is probably the next piece of kit a photographer needs. Why? What are the benefits of a tripod? What are the different types of tripod? What should you look out for? Are there alternatives? This reveals all.

Read all about it on Using a tripod on Cambridge in Colour

57 - How to Choose a DSLR Camera

Upgrading from a point-and-shoot to a dSLR can be overwhelming. This article shows you what you need to consider, how you find the right camera for you, and makes some camera suggestions.

More at How to Choose a DSLR Camera on Digital Photography School

58 - Cleaning and Maintaining Your Camera

Cameras can get dirty pretty quickly, no matter how carefully you treat them. This tutorial shows you why you need a clean sensor and how to clean it yourself.

Read more on Cleaning and Maintaining Your Camera on Paxton Prints

59 - Prime lenses (and why you need one)

Not being able to zoom might be seen as something of a disadvantage when it comes to a lens. But actually, a prime lens is rather wonderful thing that every photographer should have. This explains why.

Read more on Prime lenses (and why you need one) on Pixiq

60 - How to clean your DLSR sensor

Got a grubby sensor? (It happens to all of us.) Want to have a go at cleaning it yourself? (It's not that scary.) Here's how.

The full article is on How to clean your DLSR sensor on Better Photo

61 - Choosing your first dSLR

Your compact camera just isn't doing it for you anymore. You need more control and more options. But where's the best place to dive in for a dSLR? This article covers everything from brands to megapixels, looks at the body or glass debate, and even makes some recommendations.

Find it all on Choosing your first dSLR on Pixiq

Essays & Philosophy
20110512_img_1003_2736_x_3648_2.jpg

As I started collecting my tutorials, I occasionally found a load of articles that weren't technically tutorials - but that were simply too good to leave off the list anyway. So, hereby, in this haphazardly named section, 'Essays & Philosophy', I offer a series of these articles

62 - Knowing your Limits as a Photographer

Sometimes we are limited in our photography, maybe we don't have a macro lens to capture that bee or the landscape is actually really flat and boring. Recognising these limits can be useful, and so can knowing what to do about them.

Read more on Knowing your Limits as a Photographer on Digital Photos Secrets

63 - Getting Started as a Second Shooter

Breaking into professional photography is not an easy feat. One way to get started is as a second shooter. This article explains what a second shooter is, how to land yourself a gig as one, what you'll need and what you need to do, and how to make the most of it.

Interested? Check out Getting Started as a Second Shooter on Pxl Eyes

64 - Understanding Films

Film. If you've grown up digitally, it's a whole new world. Here's your map that explains metering, film speed, and even how to store it.

Interested? Check out Understanding Films on Dan Heller

65 - Why is the F-stop scale so weird?

Yes, the f-stop scale is weird, but it makes perfect sense as to why f/18 is a 'small' aperture and f/1.4 is a 'large' aperture when it's explained. Read on!

Have a read at Why is the F-stop scale so weird? on Pixiq

66 - Haje's History of Photography

This 3-part epic is a complete history of photography, starting in the era before film was even invented, and taking us well into the digital age. Well worth a read if you've never thought about where it all started...

Check out the full tutorial on Haje's History of Photography on Pixiq

67 - Why fake what you make?

Here I am having a questionably erotic moment with myself and a strawberry. This never really happened. - a great article about how whilst there is a pace for fakery in photography, some times, there's absolutely no need

Read more on Why fake what you make? on Pixiq

Exposure
20040602_img_3099_2048_x_3072.jpg

Easily the biggest stumbling block for new and old photographers alike, Exposure is an integral part of photography... Which seems to confuse the hell out of people rather frequently. Here's a collection of articles and tutorials to help you keep your shutter speeds apart from your apertures.

68 - Shutter Speed

Wikipedia has an in-depth discussion on shutter speed - and whilst (in true Wikipedia stylee), it's completely devoid of character, it does introduce a lot of the relevant topics in a more or less useful manner.

The full tutorial lives at Shutter Speed on Wikipedia

69 - Breathtaking Long Exposure Photography and How to Capture It

Seven great examples of photos shot with a long exposure are shown here. Then it explains how what to do, and gives you some tips for achieving something similar yourself.

Read more on Breathtaking Long Exposure Photography and How to Capture It on Designzzz

70 - Benefits of Using Manual Mode

Taking full control of your camera and setting it to manual mode can be a daunting experience, but this article explains the benefits of switching the dial to 'M'.

Can't get enough? Read it all on Benefits of Using Manual Mode on Digital Photography Tricks

71 - Understanding Aperture Priority Mode

How do you control aperture? Why do you want to control aperture? This tutorial shows which dials you need to turn and what a different depth of field resembles.

There's more at Understanding Aperture Priority Mode on Free Digital Photography Tutorials

72 - Capturing Motion with Slow Shutter Speeds

So much in photography has both a technical and a creative application. Shutter speed is one of those very things. This article shows you how shutter speed works and what you can do with it.

Find it all on Capturing Motion with Slow Shutter Speeds on Picture Correct

73 - Understanding High ISO

High ISOs don't have to be scary and full of noise, honestly! These four facts take the fear out of high ISO and low-light photography.

More tasty treats at Understanding High ISO on Dp Mag

74 - Aperture and Shutter Priority Tutorial

A dSLR gives you a wealth of creative options, but only if you take it out of auto mode and use what it has to offer. This tutorial shows you what you can do with Aperture and Shutter Priority settings.It even has suggested exercises to practise what you've learned.

Get the full skinny at Aperture and Shutter Priority Tutorial on Photo.net

75 - Understanding Shutter Speed

This tutorial begins at the very beginning with shutter speed, explaining what a camera shutter is and how shutter speed is measured, before going on to examine the impact shutter speed has on your pictures and how to control it.

There's more for you on Understanding Shutter Speed on Free Digital Photography Tutorials

76 - Understanding Exposure

So you've switched to manual mode and you're wondering just how to get your exposure right. This guide to metering will have you set on the right path.

Learn more by going to Understanding Exposure on Luminous Landscape

77 - Using Camera Shutter Speed Creatively

From capturing motion to freezing time, via 'zoom blur', this article gets creative with the effect that altering shutter speed will have on your photographs.

There's more for you on Using Camera Shutter Speed Creatively on Cambridge in Colour

78 - Understanding Long Exposures

This article uses side-by-side comparison photos to illustrate just what effect altering your exposure times can have on your pictures, including landscapes, waterfalls, fireworks, and lightning.

More tasty treats at Understanding Long Exposures on Dan Heller

80 - Understanding Aperture

Here's a quick guide to what aperture and depth of field are. There's also an explanation of the aperture limits on lenses, and how they can change depending on the focal length of your lens.

Read more on Understanding Aperture on Free Digital Photography Tutorials

81 - Understanding Camera Exposure

We know that aperture, ISO, and shutter speed combine to influence exposure, but understanding the interplay between them is not always straightforward. This article should help to explain things.

Can't get enough? Read it all on Understanding Camera Exposure on Cambridge in Colour

82 - How-To: A Primer on Long Exposures

Ever wondered how to get that cool light-streaking effect in your photos? It's all to do with long exposure, but this article will tell you how.

There's more at How-To: A Primer on Long Exposures on Digi Photo Mag

83 - How to shoot in Bright Daylight

Photographing food is tough at the best of times. In broad daylight, it's even harder. But fear not, here's how to handle it and make the most of the situation.

Read more on How to shoot in Bright Daylight on Diners Journal Blogs

Focus and Depth of Field
20110103_img_4362_5184_x_3456.jpg

Remember what I said about Exposures? Yeah - well, if the exposures don't get you, the focus will. Here we go - a collection of articles to help you get a firm grasp of focus, depth of field, and everything in between.

84 - Depth Of Field For Geeks

This is a comprehensive guide to depth of field - from circles of confusion to tilt-shift miniatures - conveyed with pictures, diagrams, even mathematical equations, and a great sense of humour.

There's more at Depth Of Field For Geeks on Bernie Sumption

85 - Understanding Depth in Field

There seems to be a bit of a love affair with shallow depth of field. But deep depth of field can be wonderful, too. This article goes through its advantages, and what you need to consider when you shoot with one.

Can't get enough? Read it all on Understanding Depth in Field on Photo tutsplus

86 - Depth Of Field

This tutorial explains what depth is field is, how to control it in your images, its relationship with focal length, and even provides a handy-dandy calculator. Nifty!

Check out the full tutorial on Depth Of Field on Cambridge in Colour

87 - How to use Shallow Depth of Field

This tutorial gives you an introduction to depth of field, explains how to achieve a shallow depth of field, and suggests when to use one.

Get the full skinny at How to use Shallow Depth of Field on Emmett Lollis

88 - How to control Depth in Field

Aperture isn't the only way to control the depth of field in your photographs. This article explains the influence of proximity to the subject and lens focal length, too.

There's more at How to control Depth in Field on The Photo Argus

89 - Where to put the Focus in the Pictures

Your photo is all about your subject, and where you put it in your composition can turn an okay image into a stunning one. This tutorial gives you four key pointers on where to place your focus.

Get more at Where to put the Focus in the Pictures on Digital Photos Secrets

90 - Getting shallow DOF in your photos

What is a shallow depth of field? Why would you want one? How do you achieve one in your photos? This articles gives you your answers!

Get the full skinny at Getting shallow DOF in your photos on Digital Photography School

91 - When to disable Autofocus

Autofocus is a wonderful thing. But sometimes you need to switch it off and do it yourself. This article explains the whens, the whys, and the hows of manual focusing.

Read more on When to disable Autofocus on Digital Photos Secrets

92 - Understanding AutoFocus

Autofocus. It's an amazing tool, it makes our lives so much easier. But if you actually understand how it works, as explained here, you can make your pictures so much better.

More at Understanding AutoFocus on Cambridge in Colour

Nature and Landscapes
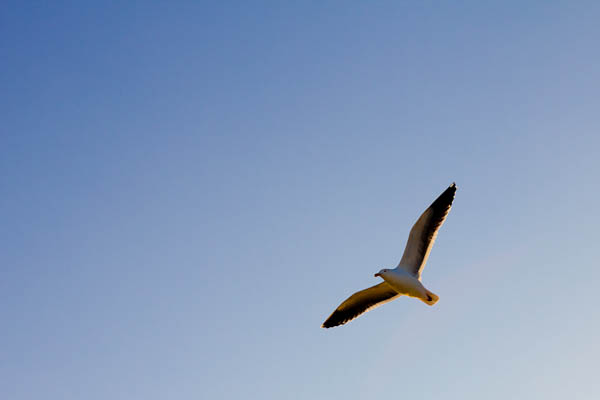
20110103_img_4282_5184_x_3456.jpg

Moving beyond the basics, two of the most exciting photography subjects are landscapes, animals, and the environment around us. Tutorials galore - bon appetit!

93 - How to create beautiful Seascapes

This tutorial guides you through capturing your ultimate seascape, from scouting a location and timing your shoot to the techniques you'll need with your camera and in post-processing.

Find it all on How to create beautiful Seascapes on Free Hobby Solutions

94 - How to: Photographing a Stunning Sunset

A sunset photograph is incredibly evocative, but it isn't necessarily easy to get right. These six top tips should set your on your way to ride into the sunset (photos).

Get more at How to: Photographing a Stunning Sunset on One Side Photography

95 - Improving Mountain Photography

Mountains make wonderful photographic subjects, but capturing one effectively can be a bit of a challenge. This tutorial covers composition, time of day, and even the weather.

Read more on Improving Mountain Photography on Learn Digital Photography Now

96 - Photographing Birds in Flight

As if photographing birds isn't hard enough anyway, if you fancy a bigger challenge, try catching them as they are careening around, hunting for mosquitoes and other food. Sounds impossible? Maybe, but with a bit of practice and this tutorial, you'll get there.

There's more at Photographing Birds in Flight on Mike Atkinson

97 - Beach Photography

There must be millions of beach photos out there and you don't want yours the same as everyone else's. This tutorial encourages you to think differently about your beach photos.

Get it all on Beach Photography on Cameras About

98 - A Guide for Nature Photographer

Light meters are useful little gadgets, but you know, our eyes do a fairly good job of judging exposure, too. Train them, and they'll be the best exposure calculator you've ever used. Here's how.

More at A Guide for Nature Photographer on Fred Parker

99 - Zoo Photography Tutorial

If you're okay with the concept of zoos, they offer excellent opportunities to practise your photography and develop particular skills; aside from dealing with animals, you encounter glass and fences. This tutorial shows you what you can learn.

More at Zoo Photography Tutorial on Yanik Photo School

100 - Shooting in the Snow

There's a lot to think about when you take pictures in the snow. It's that vast expanse of white. This tutorial should help you get a handle on exposure, metering, and lighting in wintry weather.

There's more for you on Shooting in the Snow on The Photo Argus

101 - Taking Photos in Pine Forests

Have you ever thought about photographing a pine forest? No? Perhaps you should. They're atmospheric places with a wealth of wildlife. This tutorial shows you what you're missing out on.

More tasty treats at Taking Photos in Pine Forests on Ephoto Zine

102 - How to take Great Landscapes shots when its raining

There's no need to put your camera away when it rains. This tutorial shows you why and tells you how to protect your kit, too.

The full tutorial lives at How to take Great Landscapes shots when its raining on Ephoto Zine

103 - Flower Photography

Flowers really do make wonderful pictures. They're easy to photograph and look pretty. But you can approach them in lots of different ways and learn from the process, as this tutorial shows you.

There's more for you on Flower Photography on NYIP

104 - Basic Field Techniques in Bird Photography

Wildlife and bird photography go hand in hand - but you've got to start somewhere, so this tutorial collects the basics all in one handy place.

Read more on Basic Field Techniques in Bird Photography on Mike Atkinson

105 - Landscape Photography Techniques

Professional landscape photography tips, tutorials and techniques will help you improve your scenic photography and allow you to shoot stunning panoramic pictures, with any digital camera, that are full of realism.

There's more at Landscape Photography Techniques on Digital Photography Tricks

106 - Shooting Stunning Nighttime Landscapes

If you've never really turned your hand to landscape photography and are wondering where to start, start here. It takes you through location scouting, what to wear and pack, composition, and so much more.

Learn more at Shooting Stunning Nighttime Landscapes on Paxton Prints

107 - Landscape Photography at Twilight

Did you know that there are four phases to twilight? No, I didn't either, until I read this article. It explains their different properties when it comes to capturing them as photographs.

More tasty treats at Landscape Photography at Twilight on Picture Correct

108 - How to Shoot Amazing Landscapes

Landscape photography isn't all about kit and set-up. It's got a whole lot to do with composition. This tutorial explains what to look for and how to get it right.

Read more on How to Shoot Amazing Landscapes on The Photo argus

109 - Take Better Wildlife Photos

Nature has been one of the primary subjects of photography for more than 100 years, but it turns out that wildlife isn't the easiest of subjects. This tutorial attempts to kill some of the myths and help develop your photographic thinking in the right direction.

Learn more by going to Take Better Wildlife Photos on Tutorial 9

110 - Shooting Nighttime Landscapes

Taking pictures at night isn't as counter-intuitive, or as difficult, as you might think. This tutorial gets you started, with location ideas, composition tips, and technical know-how.

Read more on Shooting Nighttime Landscapes on The Photo argus

111 - Wildlife Photography

Never work with children or animals goes the adage, but wildlife is such a great photographic subject who wouldn't want to? This tutorial walks you through the kit you'll need, the practical side of taking photos in the wild, and how to get the most out of your pictures.

Read more on Wildlife Photography on Tutorial 9

112 - Surefire Landscape Photography

The epic landscape is a picture to behold. But how do you go about achieving one? These 11 key pointers should have you well on your way to getting there.

Read more on Surefire Landscape Photography on Digital Photography School

113 - Twelve ways To improve your Digital Landscapes

From when to shoot to a reminder that you won't always get the photo you're looking for, these 12 tips should help you to get the most out of your landscape pictures.

Read more on Twelve ways To improve your Digital Landscapes on Paxton Prints

114 - How to Catch a Humming Bird

If you want to try to capture a gorgeous, fast-moving, and tiny hummingbird, it's probably a good idea to read this guide first - it ain't easy. But when you succeed, it's like winning an award!

Read more on How to Catch a Humming Bird on Prong Horn Wildlife Photography

115 - Tips For Photographing Stunning Sunrise

Getting up early for a sunrise photo might feel like hard work, but the results can be stunning. These eight pointers should make it all worthwhile.

Interested? Check out Tips For Photographing Stunning Sunrise on One Side Photography

Lighting
20110105_img_4435_5184_x_3456.jpg

Without lighting, there's no photography - but how do you get it all to work properly, and look as good as it can? There's plenty of writing about lighting on the internet - here's a smattering of the best.

116 - Strobist Lighting 101

David Hobby's website the Strobist is a great starting point for wannabe Speedlite photographers. His 101 is a great introduction to the magic of multi-strobe setups, but beware - you are liable to waste several days reading the wealth of information that's available on his site!

The whole nine yard's at Strobist Lighting 101 on Strobist

117 - Shooting & Editing a High Speed Fruity Water Splash

From the equipment that you'll need through to editing your final shot in Photoshop, this tutorial gives you the low-down on those gorgeous shots of fruit splashing into water.

Learn more by going to Shooting & Editing a High Speed Fruity Water Splash on Photo Tuts+

118 - How to Photograph Lightning

Capturing lightning can be tricky and you might not have that many chances. This tutorial, with its practical and technical insights, should help you get it right.

The full article is on How to Photograph Lightning on Weather Scapes

119 - How to take Photographs of Sunsets

Photos of sunsets are always popular. But how do you elevate yours above a holiday snapshot into something truly spectacular? This tutorial takes you through from beginning to end.

There's more at How to take Photographs of Sunsets on NYIP

120 - Don't let good light ruin a photo

When you're used to using artificial lighting, you sometimes miss the wood for the trees and forget about the awesome effect you can get with ambient light. Don't. Here's a reminder as to why ambient light can be just what you need.

Interested? Check out Don't let good light ruin a photo on Strobist

121 - Photographing Young Children with Low-Key Lighting

From the easiest lighting set-up to props that you'll need (including Mister Smiley-Face), this tutorial gives you a great overview of how to photograph young children in the studio.

There's more for you on Photographing Young Children with Low-Key Lighting on Studio on a Shoe String

122 - Why You Should Own an External Flash

If you've not yet been convinced as to why you need an external flash, this tutorial will show you just why you ought to skip off to the shops and add one of these to your shopping basket

Check out Why You Should Own an External Flash on Digi Diversity

123 - Professional Lighting in Model Photography

Interested in model photography with correct lighting? This short tutorial will help you understand various aspect and characteristics of lighting in model photography and how it works well.

Read more on Professional Lighting in Model Photography on Tutorial 9

124 - Studio Lighting Examples

Using a toy car as a model, this tutorial demonstrates the different effects that light placements will have on your studio photos. Super stuff, and makes it easy to grasp the concepts!

Learn more at Studio Lighting Examples on Worth 1000

125 - Painting with Light

Light painting is great fun and not that difficult. This article tells you what you need and how to go about capturing fun images in the dark.

Learn more by going to Painting with Light on DIY Photography

126 - Take Better Indoor Photos Using An Off Camera Flash

Flashes are great for ensuring that your pictures aren't black holes, but the light can be harsh and unflattering. This tutorial shows you how to take aperture, shutter speed, ISO, and type and direction of flash into consideration to get the best image.

Give it some love at Take Better Indoor Photos Using An Off Camera Flash on Expert Photography

127 - The 5 Lights of Nature

Photography is all about using the natural light correctly according to the situations and scenarios. This fantastic tutorial will help you underdstand the five major lights of nature which can ultimately will enable you take some stunning outdoor photos.

Interested? Check out The 5 Lights of Nature on Pixiq

128 - Shooting Photos in the Dark

Too dark to take photos? No such thing - this tutorial lays down seven basic principles to help you get the most out of pictures taken in the dark.

Interested? Check out Shooting Photos in the Dark on Photoshop Tutorials

129 - Homemade Light Box for Product Photography

If you want to give product photography a go, you'll almost certainly be needing a light box. You might not, though, want to go investing in one quite yet. So how about making one? Here's how.

Interested? Check out Homemade Light Box for Product Photography on Studio Lighting

130 - Master Photography Lighting

If you'd like to know how to capture rays of light in your photographs or how best to achieve a silhouette, take a look at this simple-to-understand article.

The full tutorial lives at Master Photography Lighting on HD Japan

132 - Glass Product Photography

Photographing anything in a glass container is fraught with peril. This tutorial begins with the kit that you'll need and takes you through the post-processing, ehm, process, to leave you with professional images.

Learn more by going to Glass Product Photography on Tim Kainu

133 - Photography Poses

Taking people photos are sometimes tricky as it is not easy to guess about the pose that might suit accordingly. In this tutorial five simple poses are discussed which can really help you in suggesting pose for variety of people.

Read more on Photography Poses on Digital Photography Tricks

134 - Photographing sunsets

Sunsets might play evil tricks with your camera, but if you follow the tips and advice in this tutorial, you'll get the better of the evening's last vestiges of light.

More at Photographing sunsets on Digital Photos Secrets

135 - Beginners Guide to Lighting Kits

Investing in lighting is a big undertaking. This guide demystifies what's available, what things do, and should help you to work out just what you need to get started.

Can't get enough? Read it all on Beginners Guide to Lighting Kits on Photo.net

136 - Understanding Basic Light Properties for Photography

Light isn't just light. It has different characteristics and comes in different temperatures from different sources. This tutorial throws some light on the subject. (Pun absolutely intended.)

Interested? Check out Understanding Basic Light Properties for Photography on Picture Correct

137 - Measuring Light

A lot of photography writing focuses on 'exposure', which is all fine and well, but what are you exposing for? In order for your camera to get the best possible photos, it needs the best possible light measurements. This article explains some of the theory - and a lot of practical aspects - of measuring light.

Find it all on Measuring Light on Dan Heller

138 - Golden Hour a Magical Time for every Photographer

The golden hour gives photos the most gorgeous warm glow. This tutorial will ensure that you can make the most of those magical two hours every day.

There's more on Golden Hour a Magical Time for every Photographer on Digital Photos Secrets

139 - 35 Photography Poses Tips/Tricks Guidelines

You might have the most attractive model in the world, but if she or he is badly posed it'll ruin your photo. These 35 pointers should help you avoid smelly armpits and two-headed bodies.

Find it all on 35 Photography Poses Tips/Tricks Guidelines on Free Digital Photography Tutorials

140 - Lightning Photography

This tutorial helps you figure out what you need practically and technically to get that perfect picture of lightning. It even has some neat post-processing ideas, too.

Can't get enough? Read it all on Lightning Photography on The Photo Argus

141 - Indoor and Studio photography

This tutorial is for those who want to excel in their abilities of indoor and studio photography. This is a step by step guide which goes over the basics to get you started.

Find it all on Indoor and Studio photography on Photo Tutsplus

142 - Using Fill Flash

You might hear the term 'fill flash' a lot but not know exactly what it is and why you might need it. Wonder no longer as this article explains what fill flash does and how it'll improve your pictures.

Learn more at Using Fill Flash on Digital Photography School

143 - Photographing Large Group in a Studio

If photographing one person can be demanding, taking pictures of a large group might feel impossible. But it isn't, and this tutorial will help you through it.

Can't get enough? Read it all on Photographing Large Group in a Studio on Studio on a Shoe String

144 - Shooting Glassware on a black background

Photographers are only successful when they are versatile in their abilities. The best photographers are able to produce mind-blowing images in all sorts of circumstances. Shooting Glassware on a black background is an cool exercise to get a firmer grip of your studio work.

Check out Shooting Glassware on a black background on Pixiq

145 - How to Paint with the Light in a Photograph

Want to have a go at light painting? It's a lot of fun! This tutorial shows you how, and gives you some ideas to get you started.

Get the full skinny at How to Paint with the Light in a Photograph on The Photo Argus

People & Portraiture
20110504_hk040155_4032_x_2688.jpg

It it weren't for the fact that people can't seem to get enough of people, I doubt there was much photography at all. Unsurprisingly, there's also a load of writing about the subject online - here's a tasting menu of awesomeness.

146 - Portrait Photography

Photographers should take photography from all direction and from every aspect. Mastering photography in one specific field is never appreciated. You can take some stunning portrait photos if you know how to take them and add wow factor to your images. This tutorial helps you exactly the same way.

The full article is on Portrait Photography on Digital Photography Tricks

147 - Shooting an orchestra's portrait

One full orchestra, all of their instruments, and only 15 minutes to photograph it. How on earth do you go about that? This article explains it all.

Give it some love at Shooting an orchestra's portrait on Pixiq

148 - Wedding Photography

If you want to make a memorable wedding you surely will be looking for some amazing photographs. This tutorial will provide you with some really cool tricks and guide-lines about wedding photography.

Have a read at Wedding Photography on Media College

149 - A Beginner’s Guide to Candid People Photography

Posed portraits have their place, but there's something incredibly appealing about the candid shot. This tutorial shows you what to look out for and how best to capture that unexpected moment.

Get the full skinny at A Beginner’s Guide to Candid People Photography on Lights Talking

150 - How to turn Photos into Cinematic Portraits

If you fancy having some fun by taking an average portrait and transforming it into something overblown and cinematic, this tutorial gives you the step-by-step instructions you'll need.

Interested? Check out How to turn Photos into Cinematic Portraits on TutsPlus

151 - Try nude photography

Taking a portrait can be scary enough; but taking a nude portrait? Well, actually, it's a very challenging and interesting form of photography. These are my insights and recommendations from my experiences.

There's more for you on Try nude photography on Pixiq

152 - Wedding Photography

Wedding photographer Jeff Ascough talks about how and what he shoots, what kit he uses, his workflow, and the finished product in the demanding world of wedding photography. An insightful read if you're thinking of starting out there.

Learn more at Wedding Photography on Photo.net

153 - Wedding Photography

If you're considering embarking on wedding photography, you'll need to decide if you're heading down the more traditional or the more journalistic path. This article assesses the differences and helps you to decide which best suits you.

Read it all on Wedding Photography on Shutter Bug

154 - Tourism and Photographing People

Photographers are always on the move and those who love traveling along with photography will surely love this tutorial as it covers almost every aspect of photographing people and tourism.

Give it some love at Tourism and Photographing People on Dan Heller

155 - The Classical Portrait lighting setup

Main light? Fill light? Background light? Hair light? If you've ever wondered about the lighting set up for a portrait shoot, this tutorial explains all the terms, what they do, and why you need them.

Read it all on The Classical Portrait lighting setup on Pixiq

156 - Introduction to Portrait Lighting

This excellent tutorial uses roll-over images to show you exactly the properties of different lights and the effects of light placement on your portraits. A must-read.

Find it all on Introduction to Portrait Lighting on Cambridge in Colour

Photoshop and Editing
20110428_img_0864_3648_x_2736.jpg

Very few photographers see 'photography' as a purists' artform anymore. It's a rare image that doesn't stand improving a little through a little bit of Photoshop (or, in my case, Lightroom) tickling - and here's an impressive array of tutorials to get you started.

157 - Fantasy art tutorial

This tutorial walks you through the post-processing steps that you need to transform an ordinary portrait into a water-nymph fantasy-styled picture, complete with stars. Now where did I leave those unicorn stock photos?

More tasty treats at Fantasy art tutorial on Lorelei Web Design

158 - Taking Clone Photographs

A very exciting and cool tutorial about combining clone photos to a single image. This gives your picture and interesting and fantastic look.This also adds some fun element to your snaps.

There's more at Taking Clone Photographs on Net Glos

159 - Replacing a Background with The GIMP

This tutorial shows you how to use GIMP to replace the background of an image so that quickly-snapped portrait can lose the clutter behind it and look a whole lot more professional.

Check out the full tutorial on Replacing a Background with The GIMP on Gimp Guru

160 - Grunge & Dark Art Tutorial

This tutorial shows you how to transform a perfectly normal, healthy looking subject into a clone of the legions of the undead. Perfect for Hallowe'en!

Read more on Grunge & Dark Art Tutorial on Dubtastic Blog

161 - 10 Easy Steps to Advanced Photography Skills

The title says it all: simple steps that will help you to improve your photography. Whether you are a beginner or more advanced, you'll find something of value amongst the collection of tips, tricks, and advice.

Read all about it on 10 Easy Steps to Advanced Photography Skills on Smashing Magazine

162 - Gradient Mapping for Better Landscape Photos

By using the gradient mapping tool, you can transform images that are a little on the flat and dull side into something with a bit more zing. This tutorial shows you how in 12 steps.

There's more at Gradient Mapping for Better Landscape Photos on Wipeout 44

163 - Fresh Photo Manipulation Tutorial

Do you fancy applying a bit of surrealist, Dali-type effect to your photos? This tutorial gives you some ideas and shows you how to do it.

Read all about it on Fresh Photo Manipulation Tutorial on Noupe

164 - Colouring an Old Black & White Photo

You probably have a stack of old photographs lying around that you'd love to have a go at retouching and giving a bit of colour. This tutorial shows you how to do just that.

Read more on Colouring an Old Black & White Photo on Tutzor

165 - Creating a Searing Hot Effect

Using a combination of the ripple, wave, and displace filters, this handy-dandy tutorial shows you how to give your pictures a sizzling heat-haze effect. Smokin'.

Check out Creating a Searing Hot Effect on 123RF

166 - Fast and easy facial retouching

This six-step tutorial shows you how to remove blemishes and smooth out skin tones to give an okay portrait a much more professional look - and to make your models look just that little bit more model-like.

Give it some love at Fast and easy facial retouching on TutsPlus

167 - Repairing an old photograph

You can restore life to your old photographs using this fabulous tutorial. It'll guide you through the entire process to repair them, from retro-broken to current-fantastic. Your grandparents will thank you.

There's more on Repairing an old photograph on Show and Tell Graphics

168 - Sharpening Techniques Explained

You've heard the term 'sharpen' before, but what does it mean for your photos? Why and how can you apply it to them? This tutorial explains all of that, and even gives you a few different methods to sharpen your images.

There's more at Sharpening Techniques Explained on Car Photo Tutorials

169 - Fake tilt-shift photography

Creating photos that look like miniatures is done through a technique called tilt-shift photography. If you don't have the hundreds of dollars that a proper T/S lens costs kicking about, then maybe a spot of Photoshop can help you along. This tutorial shows you how.

Read more on Fake tilt-shift photography on The Unofficial Apple Weblog

170 - Five ways to speed up Lightroom

If you're a little frustrated because Lightroom seems to be running slowly, here are five top tips to help speed up your post-processing software and workflow.

There's more at Five ways to speed up Lightroom on Pixiq

171 - Creating Sleepy Village Photos

You can have a lot of fun by merging together several different images to create something entirely new. This tutorial gives you the step-by-step instructions you need to achieve the finsihed product.

Get it all on Creating Sleepy Village Photos on TutsPlus

172 - Changing a model's hair colour

Well you don't have to visit a hairdresser anymore to colour your hair, especially when you want to impress your friends. You can easily do that in your Photoshop just by using few magical tools. Visit this tutorial if you want to learn it step by step.

Get the full skinny at Changing a model's hair colour on Photoshop Tutorials

173 - How to Tweak Images

Have you heard of the puppet warp tool in Photoshop? It enables you to alter the placement of key features in images, for example leaf stems or limbs. This tutorial shows you how to amend slightly awkward arm angles or deal with lines that are suffering from lens distortion.

Get it all on How to Tweak Images on TutsPlus

174 - Optimizing the look of your HDR images

So you've heard of HDR and you've seen just what it does to photos, but how do you recreate it yourself? This tutorial takes you through the process of creating an HDR photo, step-by-step.

Get more at Optimizing the look of your HDR images on Pixiq

175 - Using Layer Masks to Create Unique and Fun Images

Once upon a time, if you wanted to create a composite image you needed to expose a single frame multiple times. Not so anymore, there's Photoshop. This tutorial teaches you what you need to know.

There's more at Using Layer Masks to Create Unique and Fun Images on Paxton Prints

176 - Creating Dreamy photos

There are two skills related to photography. First skill works when you take your photos and your second skills come into play when you start editing them. This tutorial shows you how to add a touch of 'dreaminess' into your shots.

Get more at Creating Dreamy photos on Stock XCHNG

177 - Sharpening your photos using Unsharp Mask

The term 'unsharp mask' might seem completely counter-intuitive to use to sharpen images, but it's not, really! Here, you get told the origins of the term, why you need to sharpen your images, and are shown how to do it.

Read more on Sharpening your photos using Unsharp Mask on Pixiq

Printing & Exhibiting your work

20030706_img_3157_3072_x_2048.jpg

So you've taken the photos... What next? Time to make some presents, post 'em online, or create a gallery show.

178 - Exhibiting your Work

For some photographers, the pinnacle of their career will be an exhibition of their work. This tutorial tells you what to expect from exhibitions, when and when not to exhibit your work, and how to promote yourself.

Learn more at Exhibiting your Work on Photoshop Tutorials

179 - Why Prints Can look Bad

If you have recently changed cameras, there are a whole host of reasons why your prints might not look as good as they used to. Trouble-shoot your way back to perfect pictures with this tutorial.

There's more at Why Prints Can look Bad on Dan Heller

180 - How to win photography competitions

Seven invaluable tips from yours truly (who's judged enough photo competitions to write a blog post) on how to catch the judges' attention and win that coveted prize.

The whole nine yard's at How to win photography competitions on Pixiq

Topic-specific tutorials
20100208_img_9592_4272_x_2848.jpg

So far, we've been covering photography from a generic point of view - but of course, that's not how we take photos. Tutorials shine especially when the time comes to learn a specific new technique. Let's have 'em...

181 - Water Waves Tutorial

If you're going to be making waves with your photography... Okay, yeah, I went there. Photographing waves is a cool exercise in studio work - it combines a fast-moving subject with advanced lighting techniques, the risks of working with a 'wet set', and a huge amount of patience - it's not that hard, though, and the results can be rather fabulous. Give it a go!

Get more at Water Waves Tutorial on Chris Nuzzaco

182 - Infra Red Photography

So you've heard about infrared photography and you'd like to give it a go. But where do you start? And where do you end? This tutorial walks you through it.

Can't get enough? Read it all on Infra Red Photography on Galits

183 - Panoramas and Photomerge

A very good tutorial about panorama photos, featuring a good collection of picture stitched together to show an extended view of landscape. The in-depth instructions in the article help you get started - and the extra little bit of inspiration included in the article comes in handy, too!

There's more at Panoramas and Photomerge on Second Picture

183 - Doll Photography Tutorial

Photographing dolls might seem quite specific, but this tutorial provides useful information on general product photography. Don't overlook it just because of the niche subject matter.

There's more for you on Doll Photography Tutorial on American Doll Outfitters

184 - Easy Water Photography

Photographing water is never the same twice; it's fun and challenging. This tutorial gives you lots of ideas and takes you through the process of capturing coloured water droplets.

Get it all on Easy Water Photography on Free Photo Sources

185 - Night Photography Step by Step

Your adventures don't stop when the sun goes down, and your photography shouldn't have to either. Night photography can record beautiful scenes that have a fairytale world feel to them when compared to their daytime counterparts. This 6-page guide shows you how.

Get it all on Night Photography Step by Step on Photography about.com

186 - Photographing Smoke

There might not be a 'right' way to photograph smoke, but there are some tips and recommendations to help you get the most out of it. These are some of the best.

The whole nine yard's at Photographing Smoke on Pixiq

187 - Smoke Photography Tutorial

This tutorial takes you through capturing awesome photographs from everyday smoke sources. There are some fabulous pictures to set alight the flame of inspiration, too. Break out those incense sticks, sing some Kumbaya, and take it from there.

There's more on Smoke Photography Tutorial on Designzzz

188 - Basics of HDR photography

Which kinds of photos work well for HDR; which don't? What do you need to create HDR images and how do you go about it? This tutorial explains it all.

The full article is on Basics of HDR photography on Emmett Lollis

189 - How To Photograph Comets

With everything from rough dates of meteor showers to required kit, this tutorial guides you through everything you need to capture gorgeous images of shooting stars, comets, and meteors.

More tasty treats at How To Photograph Comets on Free Photo Sources

190 - Macro Photography

Taking close-up photos of small and things is always an amazing experience especially when you start enjoying it. This tutorial will provide you with useful information and tips about macro photography.

More tasty treats at Macro Photography on Photo Net

191 - How to take Worlds Best concert Photos

How do you get that iconic rock photograph? Once you've got yourself into the pit and snapped the picture that freezes time in low-light, how do you make some money from it? This article reveals all!

Read more on How to take Worlds Best concert Photos on Photo Shelter

192 - The Complete Guide to Shooting Farming Agriculture

This one wins the prize for most bizarre tutorial: How to take photos at farms. I have no idea why anyone thought this was a good idea, but it's actually pretty well written, and the photos are nifty, too.

Find it all on The Complete Guide to Shooting Farming Agriculture on Photo Tuts+

193 - Night Photography

Night Photography isn't exactly easy, but it makes for great pictures. This tutorial will help you to get the best pictures out of low-light situations.

The full article is on Night Photography on Photoxels

194 - Hunting for superior mirages

Ever seen a superior mirage? It's a mirage in the sky above an object, rather than below it. They're awesome to photograph, if you get the chance. This guide helps you find them, and them capture them with superior results.

Read all about it on Hunting for superior mirages on Weather Scapes

195 - Food photography on Wikipedia

Want to know how to make drinks sparkle, keep green vegetables looking green, and glasses stay frosty? This article is full of the sneaky tricks used by food photographers.

The whole nine yard's at Food photography on Wikipedia on Wikipedia

196 - Making a time-lapse

Making a time-lapse is fun and with Small Aperture's excellent step-by-step guide, you'll be having a go in no time. Sunsets never were this awesome!

Get more at Making a time-lapse on Small Aperture

197 - Introduction to Lomography

Off-kilter, bleeding colours, slightly blurry, but definitely fun. It's lomography. Want to have a go at it yourself? This quick and easy guide shows you how.

Read all about it on Introduction to Lomography on Lights Talking

198 - Car Photography That Sells the Car

Most of us are probably taking photos for fun or 'just for the art of it', but what happens when you actually need to go the whole hog into the world of commercial photography, as the photos are going to be used for 'something'? Photographing cars is one of those instances - if you've ever browsed eBay for second-hand cars, it's easy to see how huge the variation is in the quality there's available. This tutorial helps you along.

More at Car Photography That Sells the Car on Car Photo Tutorials

199 - Camera Toss Photography Techniques

If you're confident that you won't drop your camera, camera tossing can create some beautiful photos. If you'd like to give it a go, take a look at this tutorial.

Check out Camera Toss Photography Techniques on Designzzz

200 - Photographing Buildings a Guide

Architecture is an abundant photographic resource - it completely surrounds you. So why aren't you taking more beautiful photos of buildings and bridges? Maybe because you think it's difficult? This tutorial takes the stress out of it.

Get the full skinny at Photographing Buildings a Guide on Free Photo Sources

201 - How to Take the Perfect Spring Flower Macro Photograph

Flowers are fab photo subjects, and even better in macro. Want to have a go at some floral close-ups? This guide will get you started.

Learn more by going to How to Take the Perfect Spring Flower Macro Photograph on Lights Talking

202 - Underwater Photography

I'm a complete convert to underwater photography. But it is very different from shooting on dry land. If you want to give it go, read this first!

Get the full skinny at Underwater Photography on NYIP

203 - How to Photograph The Moon

So you like macro photography, do you? How about doing the exact opposite: Photographing outer space? Even just as an experiment, you can learn a lot from attempting to get a good shot of the moon - and this article shows you how to, er, shoot for the moon.

Get it all on How to Photograph The Moon on Photo Tips

204 - 13 Steps for Shooting The Perfect Water Droplet

Photos of water droplets aren’t hard to come by. Flickr is littered with them and although some might look impressive, they all seem to have very similar composition and formation. However, the techniques used to capture a water droplet may not be second nature to all of us and the skills learned here will undoubtedly be applicable to other photographic situations. Here are 13 steps to getting the technique right!

There's more on 13 Steps for Shooting The Perfect Water Droplet on Photo Tuts+

205 - Camera Skills Night Photography

Lighting is what makes or breaks a shot, writes the author, so it's a little ironic that night is one of my favorite times to shoot. I totally know where you're coming from - and this article is a lovely guide to stumbling through the darkness with your camera.

Learn more by going to Camera Skills Night Photography on Worth 1000

206 - HDR Explained

This tutorial explains what HDR is, what you'll need to take HDR pictures, and then how to ut it all together when post-processing for that overall HDR effect.

Get it all on HDR Explained on Free Photo Sources

207 - How to Photograph Macro Water Droplets Splashes

Photographing water droplets is an easy way to drive yourself mad, but you might be able to avoid plenty of hair-pilling and head-scratching if you read this guide first.

Read more on How to Photograph Macro Water Droplets Splashes on Hypergurl

208 - Photographing Waterfalls

With some great technique tips, for example ensuring that your images aren't too dull or too busy, this tutorial helps you ensure that your waterfall photo isn't just another waterfall picture.

Read more on Photographing Waterfalls on Luminous Landscape

209 - How to Take Great Photos of Holiday Lights

Want to take great photos of the lights on your Christmas tree, or of your Chanukiyah? This tutorial is full of advice to getting it just right.

Interested? Check out How to Take Great Photos of Holiday Lights on NYIP

210 - The Ultimate Guide to HDR photography

What is HDR photography? How did it come about? What does it mean for your pictures? This guide explains the mysteries of high dynamic range.

Give it some love at The Ultimate Guide to HDR photography on Pixiq

211 - Photography Secrets from One of the World's Top Shooters

Photography secrets from Joe McNally shares a series of stories behind some of his best shots: a great behind-the-scenes insight into some lovely photographs. A great inspiration, and best of all: you may even learn a few things!

Read it all on Photography Secrets from One of the World's Top Shooters on Creative Pro

212 - Food photography for Amateurs

This food blogger takes one image of a plate of food and deconstructs it critically, explaining just how it can be made better. This makes for an excellent read in both constructive criticism and good food photography!

Read more on Food photography for Amateurs on Jenn Cuisine

213 - The Complete Guide For Photographing Live Insects

Some photographers prefer their insects for macro photography to be standing still - but that doesn't mean you have to kill 'em to get a decent photo! This guide gives you an insight into how you can capture live insects

The whole nine yard's at The Complete Guide For Photographing Live Insects on DIY Photography

214 - Auto Racing Photography

Fast cars and race tracks make for brilliant photos, but how do you get involved and how do you go about it? This tutorial gives you lots of ideas, pointers, and advice.

The whole nine yard's at Auto Racing Photography on Luminous Landscape

215 - Winter Photography Tutorial

Winter scene photographs look amazing, but what about getting the exposure right for snow, or your camera coping with the cold? This tutorial comes with advice a-plenty to ensure you get that perfect snow landscape.

The full article is on Winter Photography Tutorial on Picture Correct

216 - Beginners Guide to Sports Photography

Want to have a go at sports photography? This tutorial goes through equipment basics, composition, what to expect when you're at a game trying to capture images, and post processing.

Check out the full tutorial on Beginners Guide to Sports Photography on TutsPlus

217 - Concert Photography

Concert photography - if you're mad enough to try it, what with nothing staying still and the light being low - is monumentally rewarding. Want to give it a go? Start here!

Read more on Concert Photography on Pixiq

218 - How To Photograph Bubbles

To quote Jaques the Cleaning Shrimp from Finding Nemo: Bubbles! Bubbles! Bubbles! My bubbles!. Erm, yes. (can you tell I've been spending just a tiny bit too long writing descriptions about photography tutorials? Especially awesome because I have my doubts whether anyone will ever read far enough down this list to actually read this, but hey. I did set out to do 250 tutorials, and by jove, will I complete this herculean task). Anyway - this tutorial is called how to Photograph Bubbles, and you win today's top prize if you're able to guess what it covers.

Read more on How To Photograph Bubbles on Learn My Shot

219 - Abstract Photography

If you want to make some cool, dramatic images you should read this fantastic tutorial. It'll help you to approach photography from a new, abstract angle.

There's more at Abstract Photography on Ron Bigelow

220 - Rural Photography

Rural photography isn't just about landscapes. There're plenty of details to pick up on an stories to tell. This guide will get you started. Strap on your wellington boots, dig out your flatcap, and let's get started.

More tasty treats at Rural Photography on Digital Photos Secrets

221 - Night Photography

From using reflections, to light painting, to cooling down and warming up images, this is a pretty comprehensive guide to taking pictures at night. Now where did I leave those night-vision goggles?

Read it all on Night Photography on Photo.net

222 - Getting started with Time Lapse Photography

Photography, from its very infancy, has been great at the art of either freezing or 'flowing' motion. Time lapse photograpy bridges the gap between motion and stop-motion, between photography and video, and between the real and the uncanny. This is a lovely introduction to the art - and a great little article to boot.

There's more on Getting started with Time Lapse Photography on Picture Correct

223 - Shooting in Low light Situations

These four pointers will help you get the best out of your low-light shots, helping you to think about composition as well as develop some practical skills.

Get it all on Shooting in Low light Situations on The Photo Argus

224 - An introduction to Food Photography

What does it take to make a plate of food look good enough to eat? These eight top tips let you in on the secrets of successful food photography.

There's more for you on An introduction to Food Photography on Digital Photography School

225 - Spectacular Night Shooting

Getting great shots at night isn't as hard as you think it might be, despite the relative lack of light. If you follow these five steps, you'll be well on your way.

Learn more by going to Spectacular Night Shooting on Digital Photos Secrets

226 - Smoke Photography

Starting with the equipment that you'll need and taking you right the way through to post-processing to capture some delicious-looking smoke photographs, this tutorial is a lovely starting point for smoke photography!

More at Smoke Photography on Paxton Prints

227 - Shooting in the Rain

A downpour doesn't necessarily mean that you have to put away your camera. This guide to rain photography helps you to freeze raindrops, to create a background haze with rain, and to have some fun with soft focus.

Have a read at Shooting in the Rain on The Photo Argus

228 - Moon Photography

We love the moon...' except that it isn't always easy to photograph. This tutorial gives you six invaluable tips and plenty of inspiration to get it right.

Can't get enough? Read it all on Moon Photography on Dan Heller

229 - How to photograph fireworks

Want to know how to capture the gorgeousness of a fireworks display? These ten tips will guide you through tripods, framing, and exposure to help you get it right.

Give it some love at How to photograph fireworks on Digital Photography School

230 - High speed Photography Tutorial

With equipment lists, hand-drawn diagrams, and photos to aspire to, this tutorial tells you everything that you need to know to get started taking photos of things moving at high speed.

Get more at High speed Photography Tutorial on DIY Photography

231 - Photographing Star trails

If you'd like to have a go at making a time-lapse of the night sky or photographing star trails but aren't sure where to begin, try here. There's lots of useful information and plenty of inspiration.

Get it all on Photographing Star trails on Dan Heller

234 - Lomo Photography Tutorial

You know, you don't have to spend money on a Lomo-camera to create lomo-style images. Nope! With good old post-processing you can get that Lomo-look. This tutorial shows you how.

Read more on Lomo Photography Tutorial on Digital Photography School

Photography Theory

20100306_img_0899_4272_x_2848.jpg

A lot of the stuff we've had so far is rather practical, but what if you want to learn some of the theory of what goes on behind the scenes? Do not despair, my fellow photography comrades, here's a load of theory for you to enjoy!

235 - How to Get Tack Sharp Photo Images

What does it take to achieve pin-sharp images, both technically and practically? This guide sets out the basics, looking at shutter speeds, focal length, and more.

The whole nine yard's at How to Get Tack Sharp Photo Images on Apogee Photo

236 - What is ISO?

If you're new to photography, ISO can seem this arbitrary scale that has some sort of effect on your pictures. This guide explains what ISO is and how it can have an impact on your images.

The whole nine yard's at What is ISO? on Small Aperture

237 - Understanding White Balance

If you come from the world of film, you may remember using filters to correct for incandescent or fluorescent lighting. Most people didn't bother and their indoors pictures invariably came out with a yellow/orange or bluish cast. In the digital world, these correction filters are no longer necessary, replaced by a feature found in most -- even the entry-level -- digital cameras called, White Balance. Here's an article explaining the whats, hows and wherefores

There's more at Understanding White Balance on PhotoXels

238 - What is shutter speed?

What sort of effect will adjusting your shutter speed have your pictures, both technically and creatively? This short tutorial has some answers - and a light dusting of inspiration, too.

Read it all on What is shutter speed? on Small Aperture

239 - Photography illustrated

A fun and unusual take on teaching photography, this site takes a couple of cartoon characters explaining photography to each other, and turns it into a somewhat-readable guide to various aspects of photography. I'm not a big fan myself, but several of my readers e-mailed the link to me, saying it helped them out - so why not!

Get it all on Photography illustrated on Worth 1000

240 - What is a small aperture?

What is a small aperture? How will altering the aperture of your lens affect your photos. This quick and easy guide should answer those questions.

Read more on What is a small aperture? on Small Aperture

241 - What is white balance?

Knowing what white balance is, how it affects your pictures, and how to control it can make a huge difference to your pictures. This introductory guide will help you out.

There's more for you on What is white balance? on Small Aperture

242 - Infra Red Basics

Infra red photography is a great challenge - and enables you to take a couple of steps into the world of the arcane and unreal-looking. With a side helping of awesome. Here's how...

Read more on Infra Red Basics on Worth 1000

243 - Understanding Lens Contrast

Many photographers — even some experienced and knowledgeable ones — seem permanently confused about contrast, especially when the word is used to describe lenses. This article thoroughly rectifies that situation, and is well worth a read if you're interested in having a deeper understanding of lenses and what you're looking for when you buy one.

There's more at Understanding Lens Contrast on luminous Landscape

244 - 8 steps to sharper pictures

I personally love this tutorial as it has helped a lot of photographers get a firm grip on how to produce sharp images without using any specific software such as Photoshop or Lightroom. 8 Simple and easy to follow steps to make difference in your images.

Check out the full tutorial on 8 steps to sharper pictures on Pixiq

245 - Your pictures; your rights, redux

This article sets out the difference between copyright and licensing rights, and highlights what you need to look for when signing licensing rights deals, even if it's only to display your pictures on a photo-sharing website.

Interested? Check out Your pictures; your rights, redux on Small Aperture

246 - Understanding Polarizing Filters

There are a lot of photographic efects you can re-create digitally easily enough... Polarisers isn't one of them, so if you're planning to take the leap into the world of landscape photography, you could do a lot worse than buying one - and learning how to use it.

Check out the full tutorial on Understanding Polarizing Filters on Cambridge in Colour

247 - Understand digital camera Sensors

For the geek among us, learning how a camera sensor actually works is very interesting indeed - this guide talks you through some of the details about how to make it tastier.

There's more at Understand digital camera Sensors on Cambridge in Colour

248 - White Balance Basics

Digital SLRs do a great job of figuring out white balance for you, but sometimes they don't get it quite right. If you understand the principles behind white balance, and how to control it yourself, your photography will come on leaps and bounds. This guide will get you started.

Can't get enough? Read it all on White Balance Basics on Paxton Prints

249 - Your pictures; your rights

What is copyright? When do you need a model release? If you want to use your images commercially, what do you need to know? This quick-and-dirty guide should help you out.

Read more on Your pictures; your rights on Small Aperture

250 - Understanding Camera Lenses

This tutorial sets out the basics in lens composition and focal length. It talks you through zooms and primes and it covers apertures. When you're starting out with glass, start here.

Get the full skinny at Understanding Camera Lenses on Cambridge in Colour

A big thank you

This epic post couldn't have happened without the help from Daniela and the rest of the Small Aperture gang. If you liked this post, head over to Small Aperture, and subscribe to the RSS feed right away. You know it makes sense.

Your pictures; your rights, redux

Beads

In the immediate aftermath of the TwitPic photo-selling furore it became clear that there can be a great deal of confusion regarding terms and conditions (T&C), terms of service (ToS), terms of use (ToU), or any other terms that you have to agree to when you sign up to any kind of photo-sharing oojimaflip.

When it comes to ToS, the devil is most definitely in the detail, and at one of our reader’s request, I’ve put together a guide to what to look for. As ever, I have to state that I’m not a lawyer; all I have to go on here is my own experience of using photo-sharing sites and, heaven help me, previous experience of drafting ToS.

Copyright and licensing rights

The first thing to get straight is that there’s a difference between copyright and licensing rights. If you take a photo (or compose a song, or write a story… you get the picture) you own the copyright to it. That means you have the right to have that photo attributed to you and you can say how, where, and when you want it reproduced, if at all.

On very rare occasions, you can sign away your copyright to your creation – and in fact I did this quite recently when the copyright of a project that I wrote was attributed to the company for whom I completed the contract, not to me as an individual – but it’s usually in very specific circumstances.

Licensing rights, on the other hand, are what you, as the copyright holder, use to allow people to use your images (or your words or your music &c). If someone wants to publish your photo, you provide them with a licence to do so. There are a plethora of different types of licence out there, which serve different purposes, allow different things, and have different implications for you as a copyright holder. Hence the confusion.

Why you need a licence, part I

You’ve been away on holiday to Mauritius and you have a selection of the most incredible photos showing the places that you visited, the food that you ate, and the sights that you saw. You want to share them with your family, your friends, and to be honest, anyone who wants to take a look because you’re really proud of a few of them. So you sign up to the photo-sharing website SooperPix that’ll let the world at large marvel at your artistic genius.

You have to sign a licence. You own the copyright to these pictures, which means that you have to grant SooperPix the right to display them on your behalf. If you didn’t, it wouldn’t be able to host them on the website and let the world look on awestruck at your awesomeness.

The issue of course is what type of licence SooperPix asks you to sign.

Licences of Awesome

If SooperPix is actually SooperDooperPix, it’ll use a licence that’s similar to Flickr’s (who recently reconfirmed their users’ rights), or Mobypicture’s, or Focussion’s, or 500px’s, or in fact a lot of other cool photo-sharing places out there. It’ll say that you grant it a licence for the purpose of displaying them on the website. The licence might even specifically state that it won’t sell your images. Here are the examples of the licences from those four websites I mentioned:

Flickr:

With respect to Content you elect to post for inclusion in publicly accessible areas of Yahoo! Groups or that consists of photos or other graphics you elect to post to any other publicly accessible area of the Services, you grant Yahoo! a world-wide, royalty free and non-exclusive licence to reproduce, modify, adapt and publish such Content on the Services solely for the purpose of displaying, distributing and promoting the specific Yahoo! Group to which such Content was submitted, or, in the case of photos or graphics, solely for the purpose for which such photo or graphic was submitted to the Services. This licence exists only for as long as you elect to continue to include such Content on the Services and shall be terminated at the time you delete such Content from the Services.

Amongst all the legalese, the key phrase here is ‘solely for the purpose for which such photo or graphic was submitted to the Services.’ You submitted the photo to share it publicly. That’s all that Flickr will do with it. (When it mentions modifying or adapting, that concerns how the image is encoded, and being able to see it in different sized versions.) It’s not going to sell on your photo.

Mobypicture:

All rights of uploaded content by our users remain the property of our users and those rights can in no means be sold or used in a commercial way by Mobypicture or affiliated third party partners without consent from the user.

Focussion:

Your photographs are (and should be) your own, you keep all your rights on them. By using our site, you give Focussion a license to use your work for the functioning of this site (e.g. to display the pictures to our visitors, and to enable comments on them).

500px:

By submitting photographic or graphic works to 500px at Upload page to your profile you agree that this content fully or partially may be used on 500px web-site for promotional reasons (such as photos at home page). By doing so, 500px will comply with the Canadian Copyright Act, which means your work will be properly attributed or quoted. No photographic content, emails, and other private information will be sold for any reasons by 500px.

Those last three sets of ToS are pretty clear I think.

Licences of Evil

However, if SooperPix is just a masquerade for SooperEvilPix that really wants to be able to sell your images and not let you profit from that sale, the licence will read slightly differently. It’ll probably say that you’ve granted SooperEvilPix, and maybe its devil-spawn affiliates and its unwashed friends as well, a licence to reproduce your images. There won’t be a caveat about ‘for the functioning of the site’, ‘the purposes for which you uploaded them’, or explicitly state that it won’t sell on your pictures. TwitPic’s ToS is a great example of this:

You retain all ownership rights to Content uploaded to Twitpic. However, by submitting Content to Twitpic, you hereby grant Twitpic a worldwide, non-exclusive, royalty-free, sublicenseable and transferable license to use, reproduce, distribute, prepare derivative works of, display, and perform the Content in connection with the Service and Twitpic’s (and its successors’ and affiliates’) business, including without limitation for promoting and redistributing part or all of the Service (and derivative works thereof) in any media formats and through any media channels.

Yes, you keep your copyright, but you’ve lost out on your licensing rights. It, and pretty much anyone else it chooses, can sell your image to anyone it likes and take the proceeds from it. You’ll be acknowledged as the copyright holder, but you won’t see a penny for your creativity. As far as I am concerned, this takes advantage of people and their creative pursuits. It’s most uncool.

An example of a website that we all know, but perhaps don’t all love, which has a ToS that’s open to interpretation is FaceBook:

For content that is covered by intellectual property rights, like photos and videos (“IP content”), you specifically give us the following permission, subject to your privacy and application settings: you grant us a non-exclusive, transferable, sub-licensable, royalty-free, worldwide license to use any IP content that you post on or in connection with Facebook (“IP License”). This IP License ends when you delete your IP content or your account unless your content has been shared with others, and they have not deleted it.

I’m not keen on that statement, which is why I don’t have any images on my practically-never-updated and very-infrequently-visited FaceBook page. The chances of one of my images landing itself on a billboard as part of a nation-wide campaign advertising probiotic yoghurt are virtually nil, but dammit, if it does, I’d quite like to profit from it, thankyouverymuch.

Why you need a licence, part II

After reading the ToS, you signed up to SooperDooperPix and gave them the licence to show off your photos to the world. Life is great: your memories are there to relive and for your loved-ones to enjoy. Things get even better when WorldsAway Luxury Holidays spots one of your idyllic holiday sunset photos, and wants to use it to headline its campaign encouraging everyone to visit Mauritius. (Aren’t you pleased that you went before the ad campaign?) They contact you and ask if they can use the photo.

You agree to terms that lets them use your photo. What you’ve done is grant them a licence. It’s a different licence to the one you granted to SooperDooperPix. This licence can take lots of different forms (how they can use the image, for how long, those sorts of things) – and you might want to get a lawyer to take a look at it – but what you’re doing here is giving WorldsAway Luxury Holidays permission to use the photo in return for payment. If you didn’t grant them a licence they’d have to look elsewhere for a picture.

If you’d actually signed-up to SooperEvilPix, the situation would be a bit different because you’ve given SooperEvilPix a different licence. WorldsAway Luxury Holidays wouldn’t approach you for a licence to use the picture; they’d approach SooperEvilPix. You wouldn’t be involved at all. You wouldn’t agree the terms and you wouldn’t see any money out of it. Yes, you hold the copyright, but in this instance not the licensing rights.

It’s all a bit biblical, because licences beget licences, but hopefully you get the picture. (Ahem.)

Finally

The key thing here is to read ToS carefully and give away as little as possible. You want to hold on to as much authority governing your creations as you can. If you’re not sure of how the terms can be interpreted, don’t sign up to them. There are plenty of good guys out there who do want you to profit from your own creativity, so you’ll find a site that meets your needs.

Please note: all of the information and quotations here were correct when I published this. Things change, just like TwitPic’s ToS did. And I’ve not gone into Creative Commons. That’s a whole other essay and this one is epic enough.