Slidestrap: a simple and stylish camera strap

I'm not a great fan of the strap that came with my camera. For a start, who wants to walk around advertising their camera make and model to all and sundry? It's a siren to wannabee muggers that I have an expensive piece of kit on my person. 'Oh yes! Do come over here and relieve me of thousands of pounds-worth of photography gear. I don't mind at all!' Neither is it especially practically designed. Usually, I sling my camera across my body, which means that a 70-200mm protruding from my hip is uncomfortable and has the potential for damage, either to the lens itself or someone or something else. And there's an awkward moment of readjustment when I bring my camera to my eye. Lazily, I've not done anything about this yet. I suppose it's an 'I've coped for this long, so why change my habits now?' mentality. But there's a Kickstarter project in town that might convince me to get my credit card out of my wallet and get a new strap.

VU's Slidesrtrap

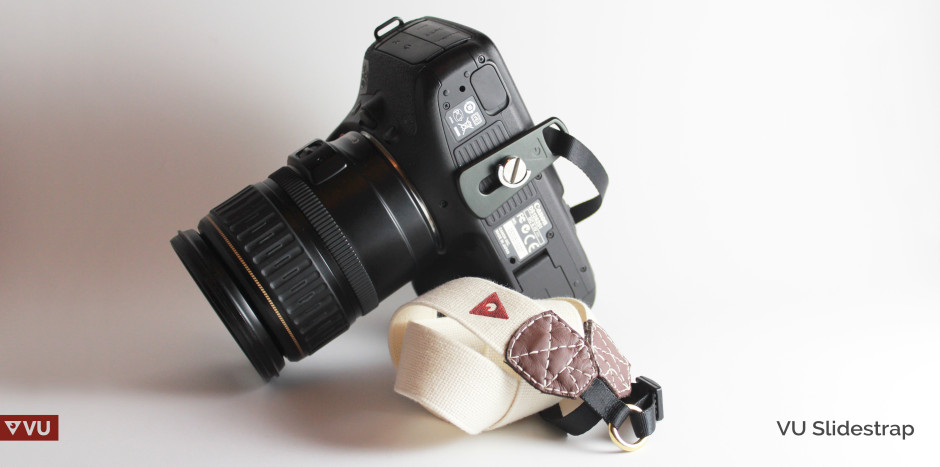
It's called the Slidestrap and it has been developed by Glasgow-based start-up VU Equipment. They couldn't find the strap that suited them (or me): not covered in repeated corporate logos or bright patterns, simple and didn’t require constant adjusting, yet made from high quality materials. The solution? To design one themselves.

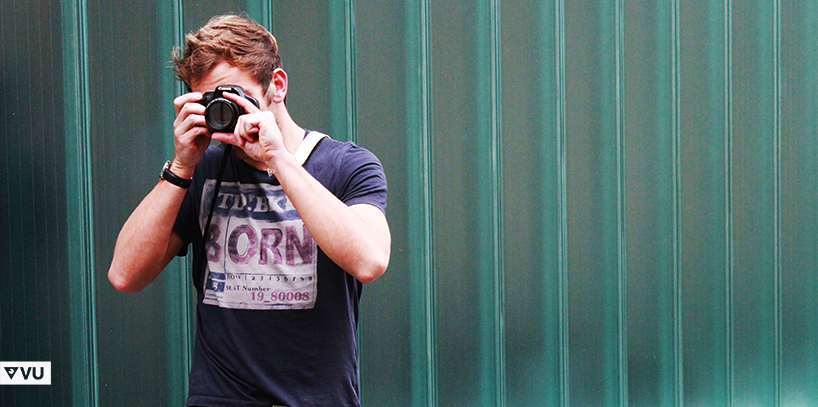
The Slidestrap has been designed to be worn across the body but without the need to readjust it to take a photo: just slide the camera along the strap. Its mounting plate ensures that lenses are carried downwards and not outwards, making them less vulnerable to knocks and scrapes. And it's made from cotton and leather: hard-wearing, comfortable, but understated.

From hip to eye in one slick movement

With 17 days to go the project is 78% funded. With a Slidestrap pledge valued at £29, it needs another 73 backers to get it underway. I hope it makes it.

3D printing a rubber stamp

As most of you are aware by now, I'm a bit of an all-round nerd, and I've been keeping an eye on 3D printing for a while now. Yesterday I took delivery of my printer, and I just wanted to share my first little project with you guys: Creating a rubber stamp. I haven't really been in love with any of the 3D printing tech... Until the Form 1 came along. Instead of using filament, the Form 1 prints using a technology called 'stereo lithography', which means that instead of depositing layers of plastic on top of each other, it uses FRIKKIN' LASERS to cure an UV-sensitive resin.

Anyway, enough about that - what I wanted to show off, was the end-to-end process of creating a rubber stamp.

Wot I used

  • MacBook Air
  • Modeling software: Side Effects Houdini FX, which is a procedural, nodes-based nerdfest of epic proportions (I also tried Blender and 123D, but Houdini 'clicked' with the way I can see myself working, so I'll continue using it for now)
  • Printing software: PreForm (comes with the Form 1 printer)
  • Form 1 printer
  • Sugru
  • Ink pad

Wot I did

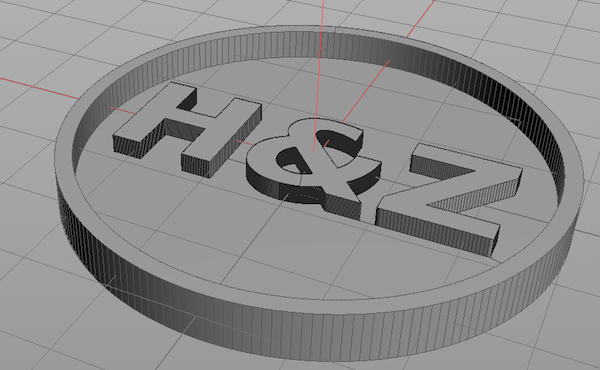
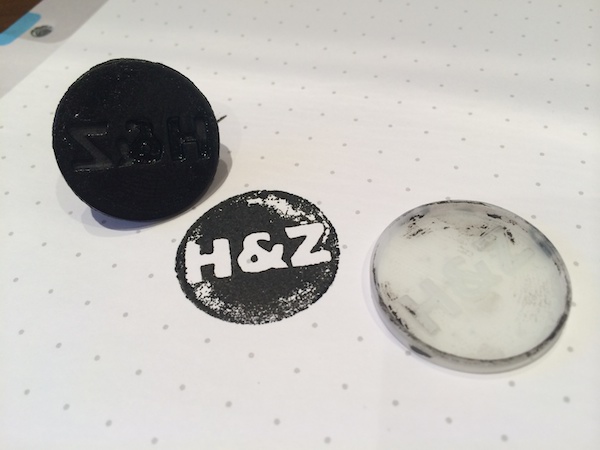
Shape Step 1 was to model the shape I wanted to turn into a stamp. In this case, I wanted to make sort of an signet stamp for my bonnie lass and I. Since our names start with H and Z, I figured it would make sense to use those letters.

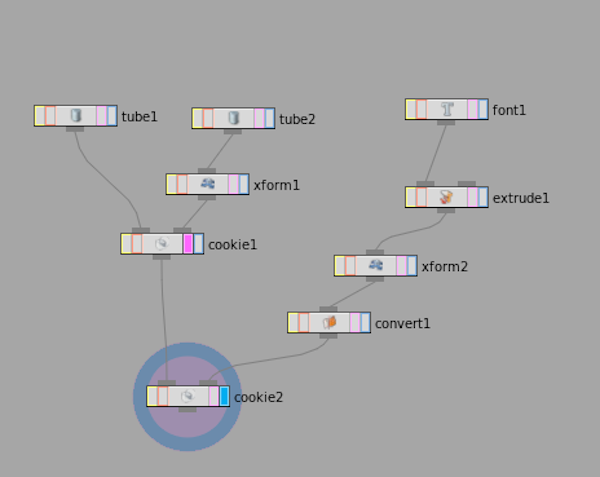
NodeNetwork The modelling itself is a little bit outside the scope of this write-up, but above is the node network representing this shape. At the top left, you can see two 'tubes' - these are the outer and inner wall of the stamp. On the right, I'm creating the text, giving it width, then placing it into the circle. The great thing about Houdini, is that if I later want to change the text, I can go into the 'Font' node, and type in something else - everything else just cascades through the node structure, and I can print another stamp easily. The two 'Cookies' you can see are boolean operations, which is combining the various shapes (in effect, adding or subtracting them)

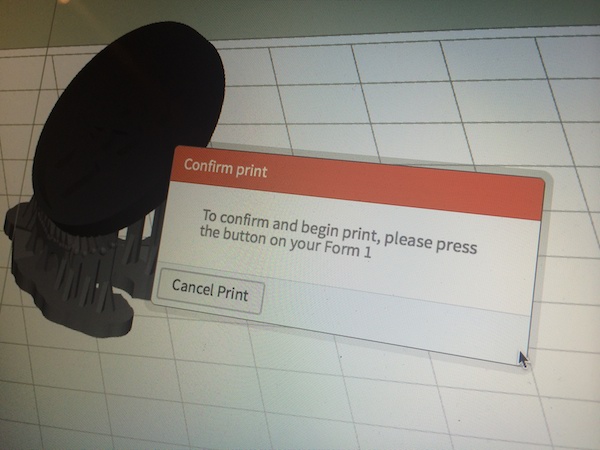
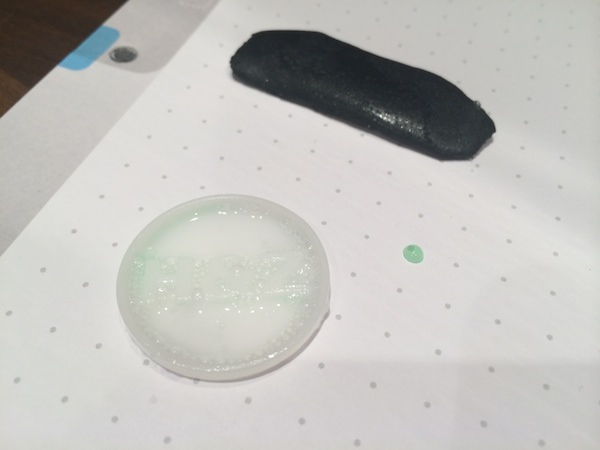
10-print With the model completed, it was time to try to print my very first 3D object! How flippin' exciting. In this photo, you can see the supports the PreForm software adds to the item - and all I had to do next is to press 'print'.

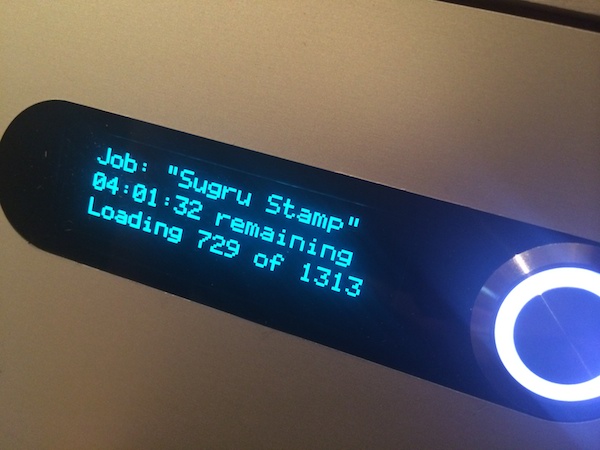
20-printing Unbearable excitement would have to be beared for about 4 hours, as I decided to print at the highest resolution. In retrospect, that was completely unnecessary and vastly over-kill (there was no way I'd be able to translate 25 micron layers to a stamp anyway...), but you live you learn!

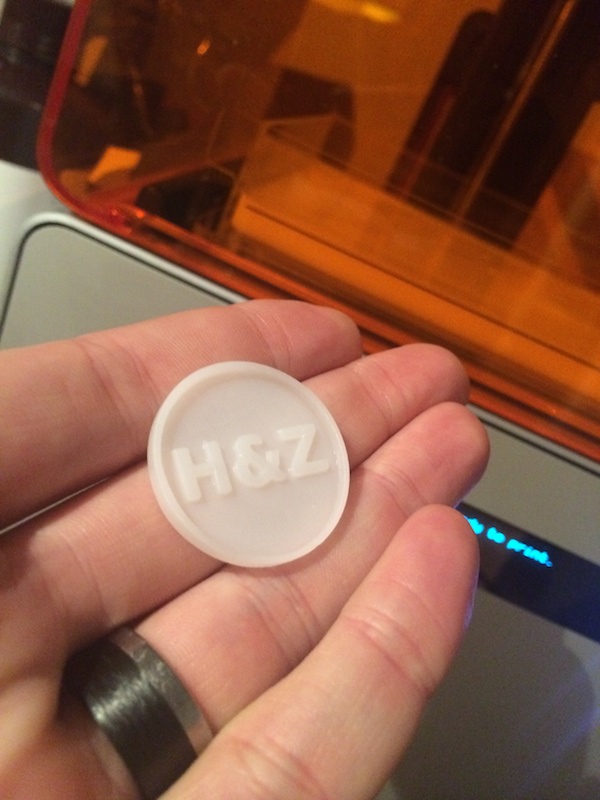
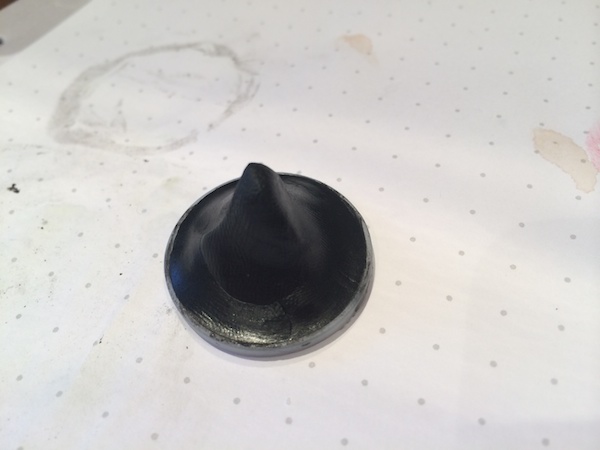
30-printed After a quick bath in acetone (I couldn't find any rubbing alcohol at 18:45 on a Friday night, and I figured 'what's the worst that can happen'? Turns out Acetone works just fine) and a spot of extra curing, I removed the supports, and my mould was ready!

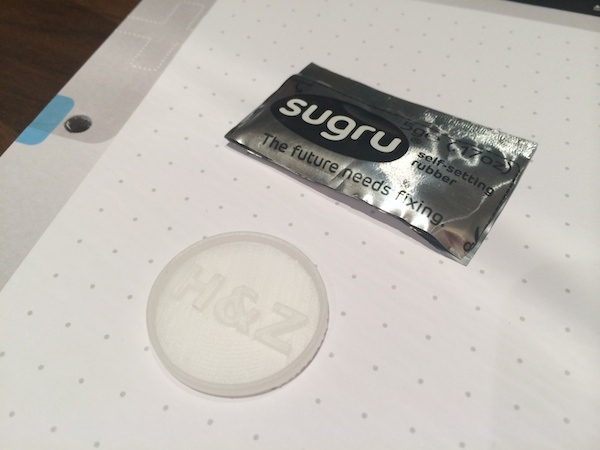
40-sugru Now, it was time to use the mold to create the stamp itself. I picked Sugru for the job (I am a relentless fanboy - Sugru is awesome, and if you've never tried it: Buy some!)...

50-soap To prevent the Sugru from sticking to the mold, I put some some washing-up liquid on the 3D printed part...

60-handle And then pressed a tea-candle into the back of the Sugru, to use as a handle.

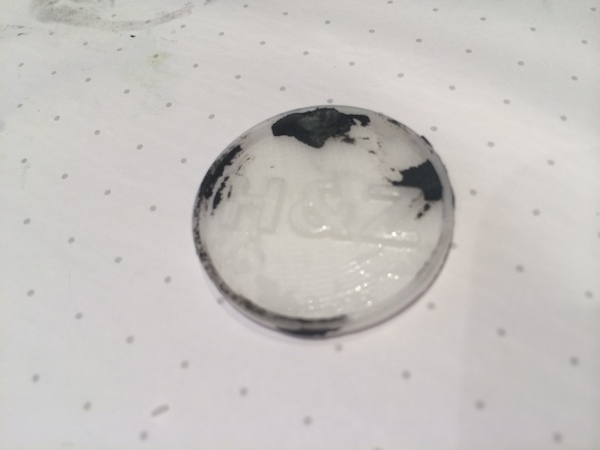
70-fail To my dismay, it turns out I hadn't used enough washing up liquid (or rather: I didn't ensure the whole part was covered), and I was also too impatient, leaving the Sugru in the mold for only an hour. When I removed it from the mold, some of the Sugru was left stuck inside.

80-fail It looked OK, but the top bit was missing, which was a bit of a shame... So I decided to try again!

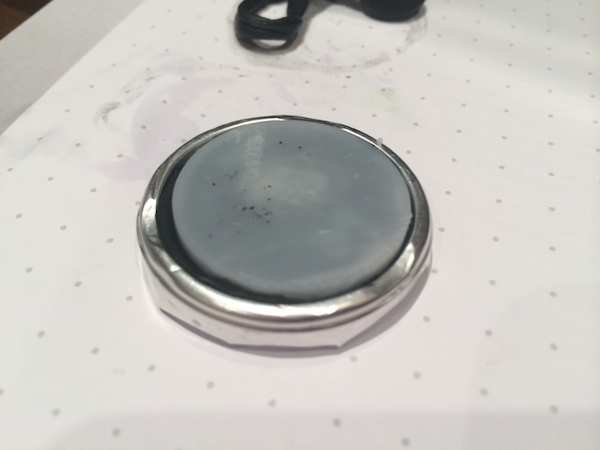
90-trying This time, I just created a handle out of the Sugru instead of using a tea candle, jsut to try something new. I did leave it to cure for 10 hours this time, to make absolutely sure it was fully set.

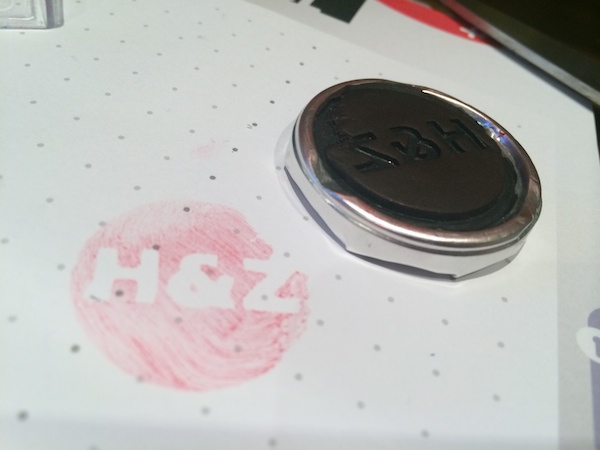
99-yay And the final stamp worked well! Hurrah!

What did I learn?

Well, it turns out that 3D printing is pretty easy. 3D modelling is harder than you'd think. Sugru is brilliant, of course. Learning new things is fun. And I'm looking forward to experiment more with casting, making, 3D printing, and other nerdy endeavours.

Next stop: Inventing and 3D printing some photography gadgets!

Elbows in, people!

The picture-taking world appears to have been struck by an unfortunate bodily malfunction pandemic that is having an unnecessarily detrimental impact on the quality of photos the globe over. The malfunction affects camera users indiscriminately, with dSLR and CoSyCa owners, smartphoneographers, and compact camera users all under threat of its effects. It manifests itself as an inability for the camera user to hold her or his arms tight into the body when taking a photo, and instead standing with elbows projecting from the body, perpendicular to the torso. These unfortunately afflicted photographers resemble chickens attempting to flap their miserably clipped wings. Symptoms of this malfunction present themselves as camera-shake and unsalvageably blurry images, brought about by the inability to hold the camera steady. It leads to the records of hundreds, thousands of precious moments being consigned to the digital dustbin, notably those involving candles and birthday cakes, because the subjects are unclear, fuzzy, or even in double. Consequently, the emotional impact of the condition is thought to be quite distressing. If caught early, the condition is entirely treatable, but without speedy rectification there is no hope for affected photos.

The impact on photos taken by smartphoneographers is regarded as especially severe, as the reduced size and weight of these devices makes them inherently more difficult to stabilise.

Treatment involves a very simple modification of the body when holding a camera in preparation for taking a photo: the elbows need to be tucked into the abdomen and the arms held close to the torso. This enables the photo-taker to hold the camera with greater security and thereby minimise the chances of a photo obscured by blur and shake. In combination with other techniques, such as holding ones breath and taking a firm stance or leaning against something secure, positive results are anticipated.

Should photo-takers find it especially difficult to modify their stances, or should conditions be suggestive of camera-shake, it is recommended that a tripod or other stabilisation device is employed.

It is hoped that a general information campaign encouraging photo-takers to move their elbows down and in will see an overall improvement in the quality of photos taken and a reduction in people mimicking poultry.

Student Focus finalists of the Sony World Photography Awards announced

After the finalists of the Sony World Photography Awards open and professional categories were announced last week, this week the ten Student Focus finalists have been unveiled. The Student Focus competition aims to support both up-and-coming photographers and the institutions where they study. It isn't just about the prizes—new cameras for all of the finalists and €35,000 of equipment for the winning student's university—but about the workshops, tutorials, and networks that it brings to them. This year, Student Focus entrants were asked to submit a single image conforming to the brief 'Tomorrow's news'. Ten of those have been selected to go through to the final and complete a second assignment.

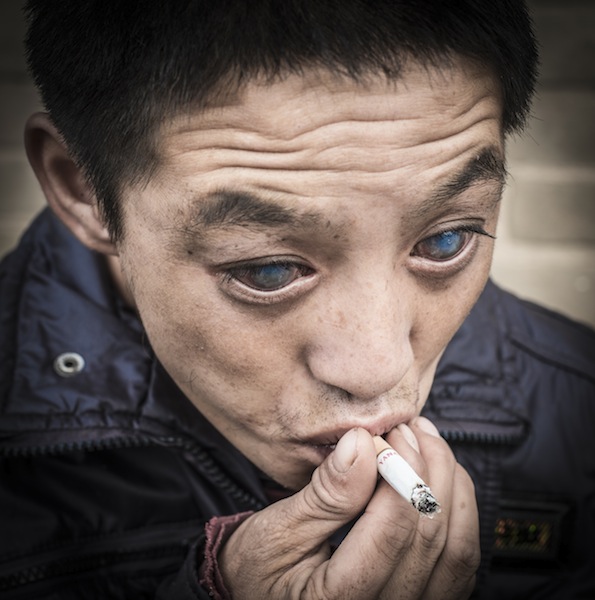
Jens has ADHD, by Tor Birk Trads, Danish School of Media (Finalist, Student Focus, 2014 Sony World Photography Awards)

  • Argentina – Nadia Navarro, Al Aire
  • Bangladesh - Rahul Talukder, Pathshala South Asia Media Institute
  • China - Li Dandan, Nanjing University of the Arts
  • Denmark – Tor Birk Trads, Danish School of Media
  • New Zealand - Chloe Riddell, University of Auckland
  • Romania - Sebastian Vacariuc, Babes-Bolyai University
  • South Africa – Russell Bruns, Rhodes University
  • South Africa – Tara Mette, Stellenbosch Academy of Design & Photography
  • United Kingdom – Scarlet Evans, Central St Martins
  • USA - Jordan VanSise, Marylhurst University

Next up: compile a series of images titled Self-portraits. They've all been awarded brand new Sony A7s for making it this far, and they must use them to create the self-portrait series.

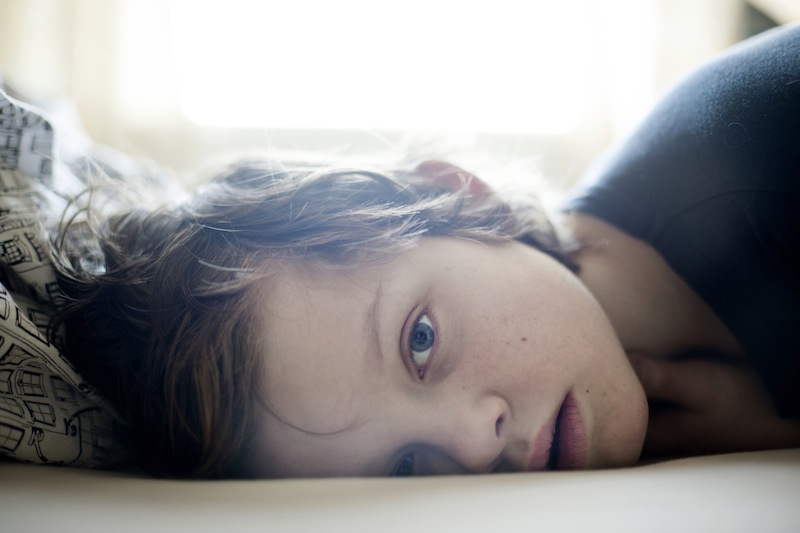
Liu Yuanhuang, by Li Dandan, Nanjing University of the Arts (Finalist, Student Focus, 2014 Sony World Photography Awards)

All of the finalists, together with their university tutors, will be flown to the awards ceremony in London in April and their work will be exhibited at Somerset House along with the other awards' finalists.

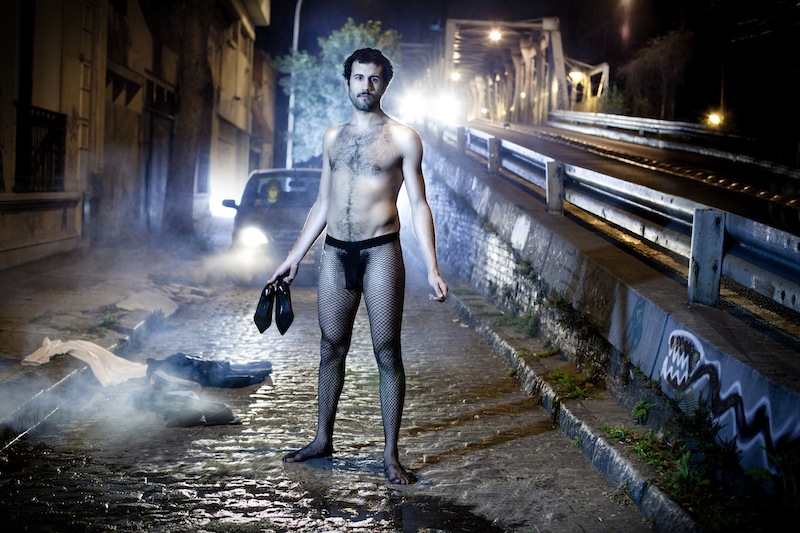
Men doesn't hide their women side anymore, by Nadia Navarro, Al Aire (Finalist, Student Focus, 2014 Sony World Photography Awards)

Bazaart: easy mobile image compositing with a social side

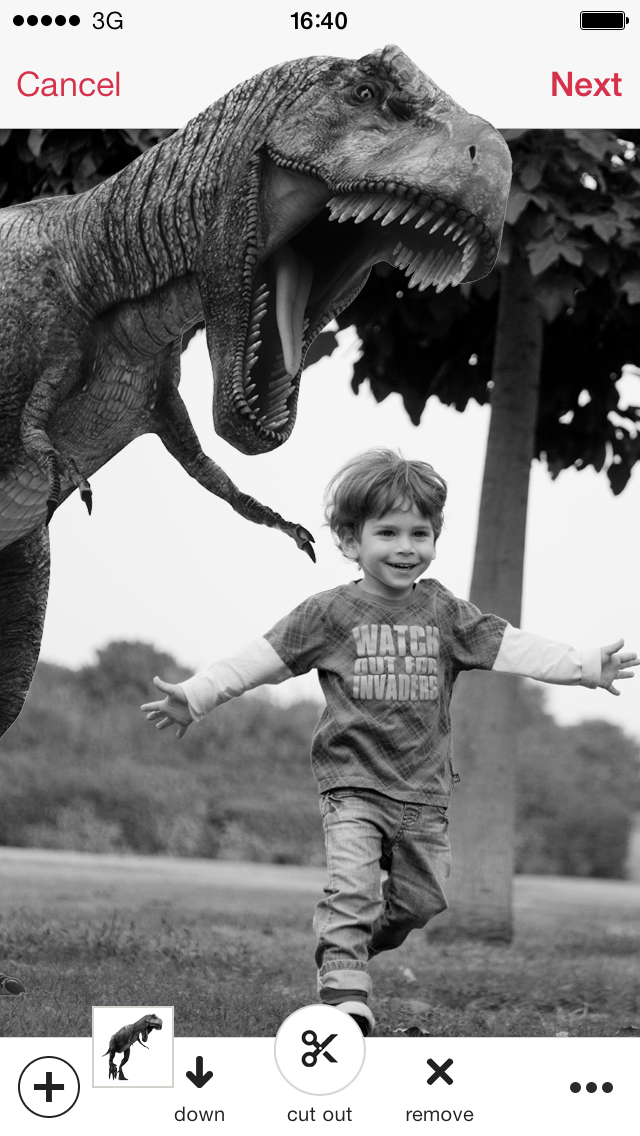
It started as a Pinterest-based fashion catalogue, but Bazaart's users saw a different potential in the app's capabilities and were more likely to be making collages with it, and not-necessarily fashion-related ones either. Like many good entrepreneurs, Bazaart's founders spotted this trend and rolled with it; as a consequence, they started to pivot away from fashion and towards creating a Pinterest collage-maker. Since then, Bazaart has continued its movement away from fashion and away from Pinterest. It's now a fully-fledged photo editor for iOS. Bazaart is now an editing programme designed to compile composite images from those on your mobile device's camera roll, together with a social sharing element. Once you've turned your brother's head into a beer bottle or given your girlfriend a bed of butterflies, you can share your composite with other Bazaart users, diverting it into searchable channels, for example 'funny' or 'art'.

Compositing made easy with Bazaart?

Tap on any photo and it breaks it down into its component images; you can follow people whose work you particularly like; and you can engage with other users. There are other mobile compositing apps out there, but they don't come with the social features of Bazaart, and that's what its founders are aiming for. They want people to think of Bazaart as a social Photoshop for the masses.

Search for other images, follow other users

Since it completed its pivot to social photography in June last year, Bazaart has enjoyed 250,000 mobile downloads, and has 100,000 monthly active users who have created over 350,000 composite images using more than 2 million photos. It's free to download, but only available for iPhone and iPad running iOS 7, or at least until the end of 2014, when the developers hope to have an Android version up-and-running.

Professional-looking web portfolios from Picmoo

If you're not looking to host your own photo website, there are plenty of photo portfolio building and hosting sites there to do it for it you. Breaking into the market might not necessarily be easy but Vlad Mereuta, a former BBC tech lead, thinks that his new platform, Picmoo, is different enough to turn some heads. For a start, there are no multi-option pricing plans. Sign up for Picmoo and you pay a flat fee of £6.99/€6.99/$9.99 a month (when billed annually; £8.75 a month when paying month-to-month) for everything that Picmoo offers, and that's quite a bit.

Picmoo provides unlimited pages, galleries, and blogs; if you subscribe to an annual subscription, a custom domain is thrown in, too.

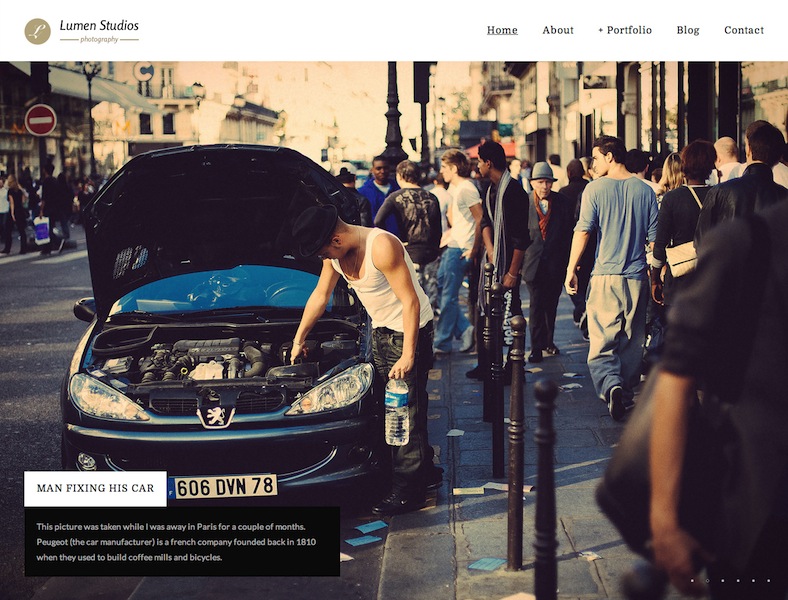
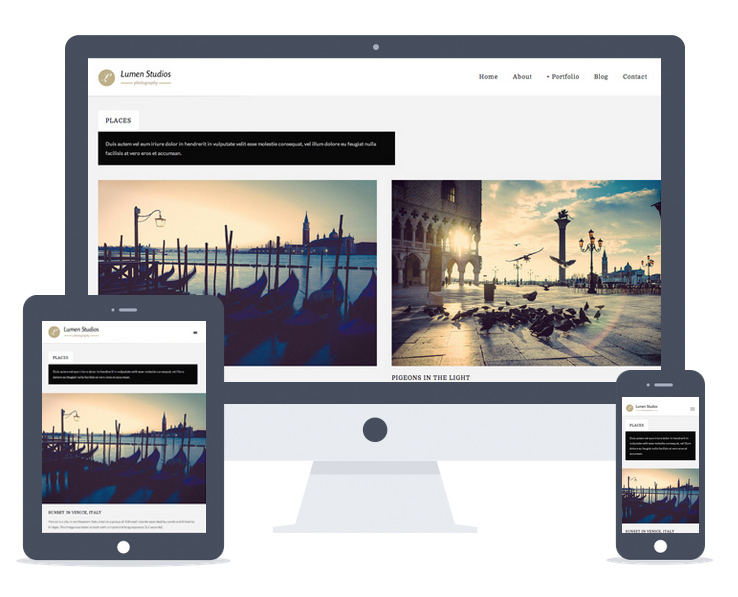
The Lumen gallery template

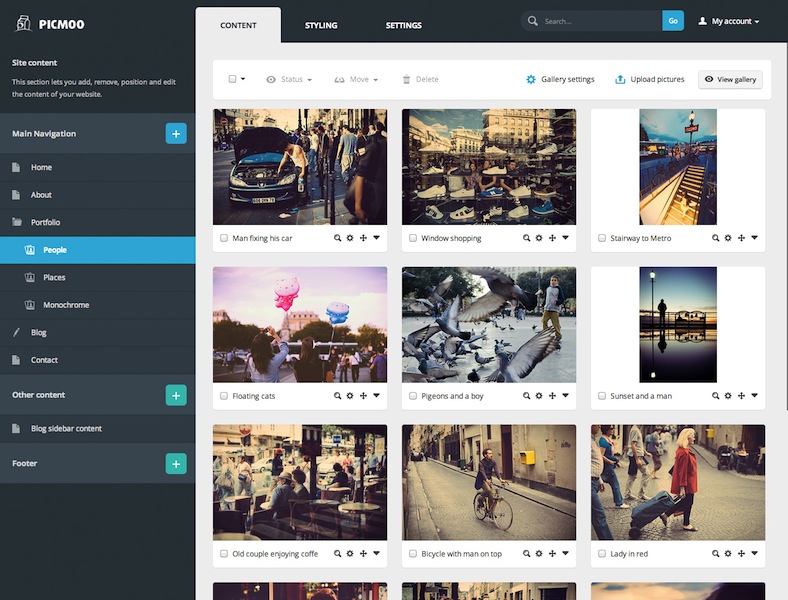
At the moment, subscribers can choose from five mobile-friendly templates for their galleries, with another seven designs in the pipeline. All of these templates can be customised from colour, to typeface, to margins to get the look that you want. When you've settled on that, arranging your content is a drag-and-drop affair.

Drag-and-drop gallery arrangement

Images can be uploaded directly from Adobe's Lightroom using Picmoo's plugin and there's integration with the likes of Flickr, 500px, and Twitter for easy cross-posting. If you're looking to migrate from a different platform, Picmoo has import tools to help you out.

Templates are responsive

I think that Picmoo offers anyone who's trying to show off their images and blog a bit on the side a very reasonable option. If you're looking to start or switch, there's a free 15 day trial to see if it's for you.

Finalists of the 2014 National Geographic Traveller Photography Competition announced

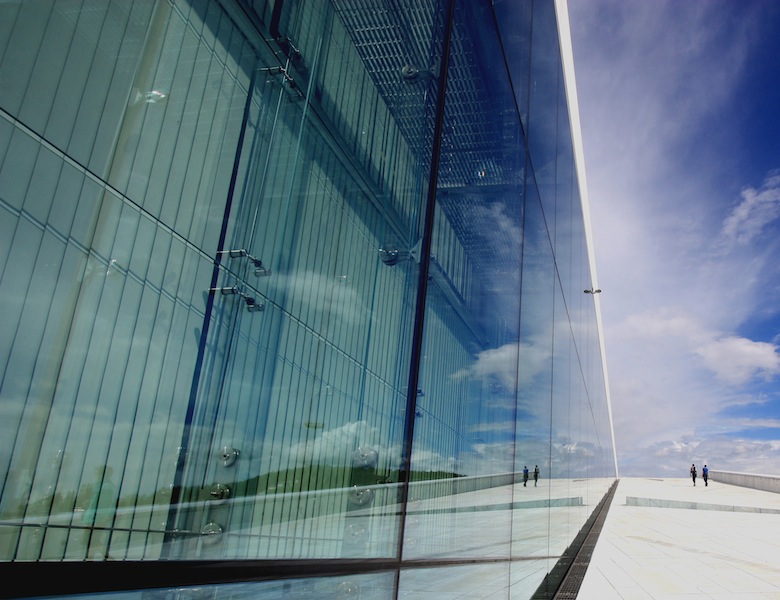
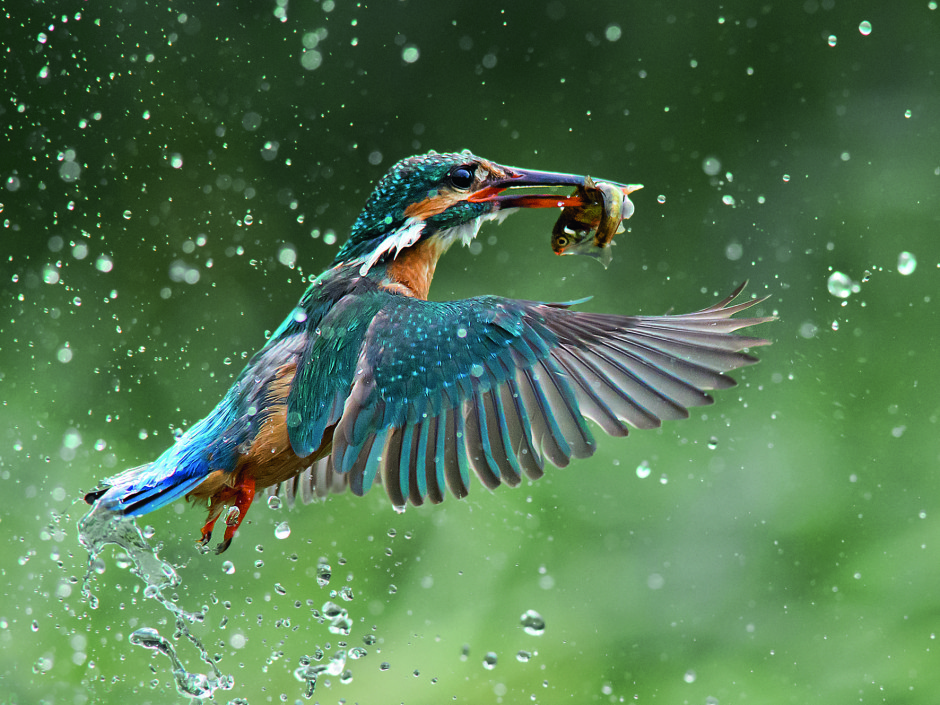
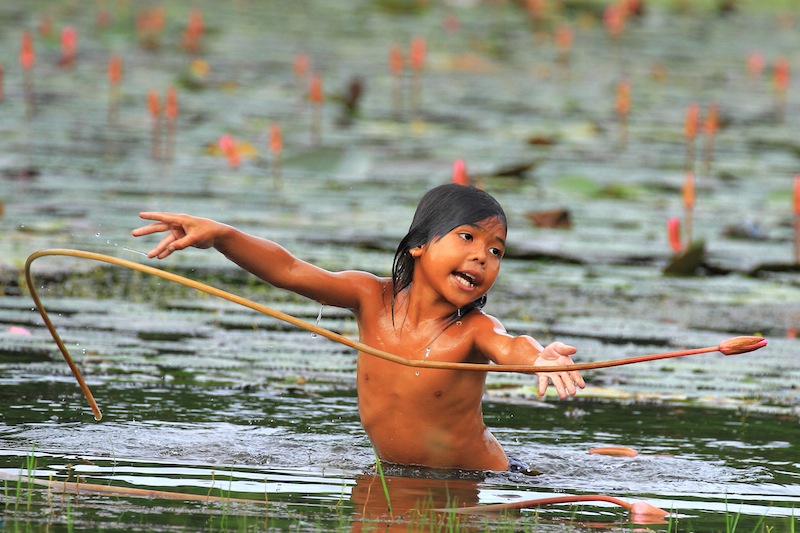
Six stunning photos have been selected as the finalists in the 2014 National Geographic Traveller Photography competition. The winner is due to be unvelied on Saturday, at the Telegraph Outdoor Adventure and Travel show. One photo from each of the six categories—action, city, iconic, modern, natural, and people—has been selected to vie for the overall title, bringing together images of beautiful birds and famous clippers.

Pat Riddell, National Geographic Traveller's editor, was delighted by the number and quality of entries to the competition, which opened in September: 'Once again, we've had a great response to our annual photography competition, and the creativity and photographic quality has been fantastic. Thank you to all those who entered.'

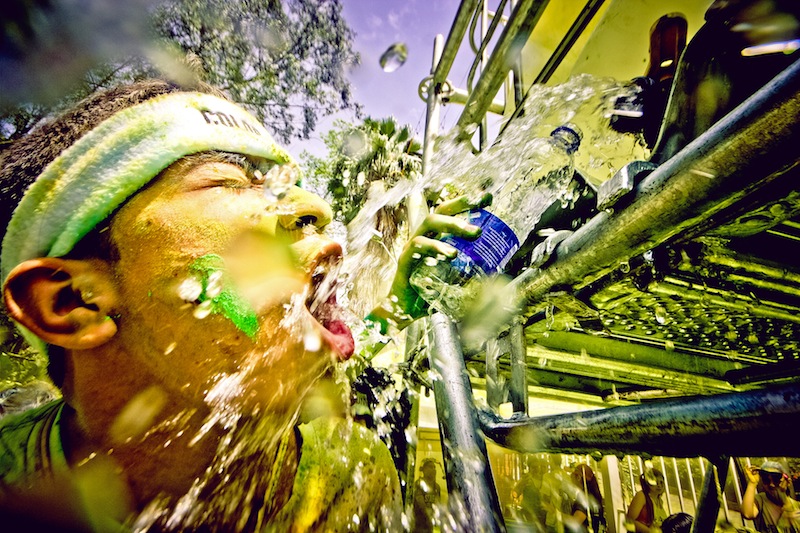
Jonathan Carvajal: The Colour Run, Columbia (Action)

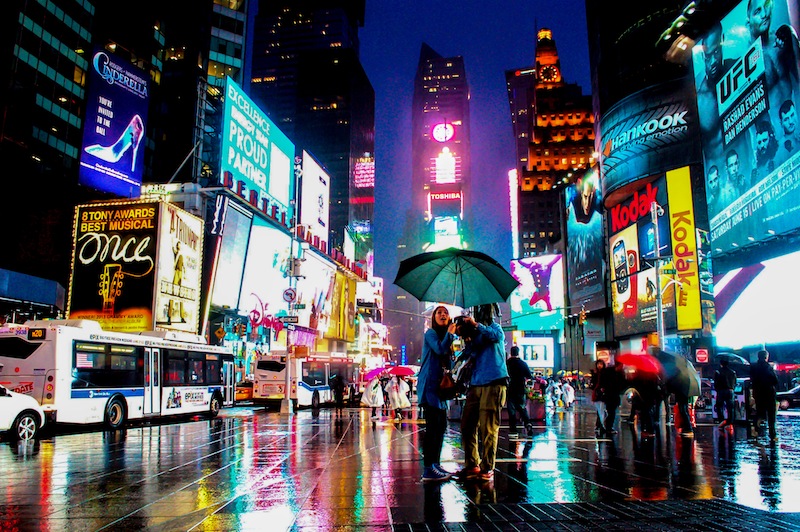
Lynda Cosgrave: Times Square in Blue (City)

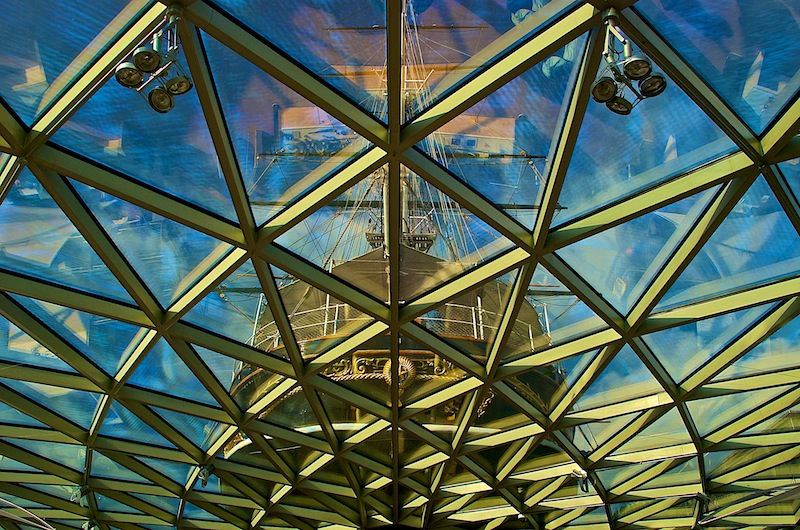
David Stearne: Cutty Sark, Greenwich (Iconic)

Jenny Downing: Oslo's Opera House (Modern)

Jaimie MacArthur: Kingfisher in Norfolk (Nature)

George Turnbull: Girl at Angor Wat, Cambodia (People)

2014 Sony World Photography Awards shortlist announced

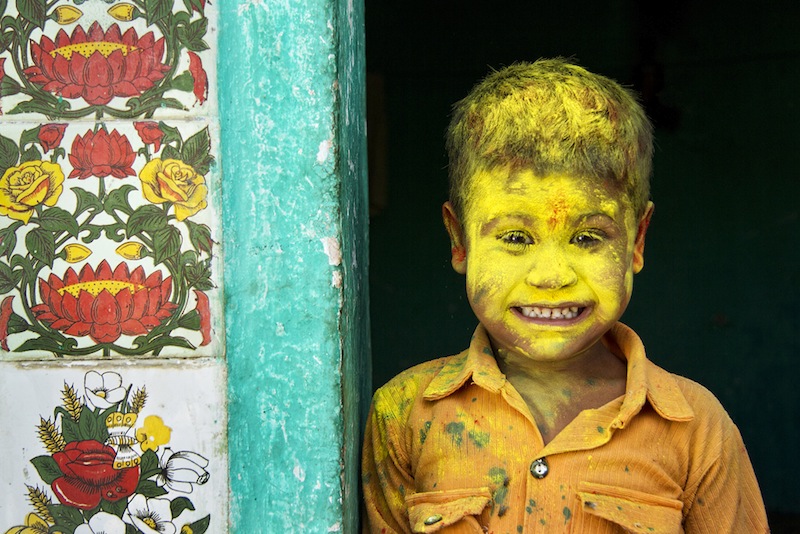
The shortlist for the 2014 Sony World Photography Awards has been announced, having been narrowed down from some 139,000 submissions by photographers from 166 countries. This year the winning entries, together with the grand prize of L'Iris d'Or will be announced on 30 April at an awards ceremony in London. All of the winning images will be on display at Somerset House from 1 to 18 May. To give you a taste of what's on offer, here's a selection of the shortlisted photos, from the Professional, Open, and Youth categories. Yellow Fellow, by Anurag Kumar (Open Category: Smile, 2014 Sony World Photography Awards)

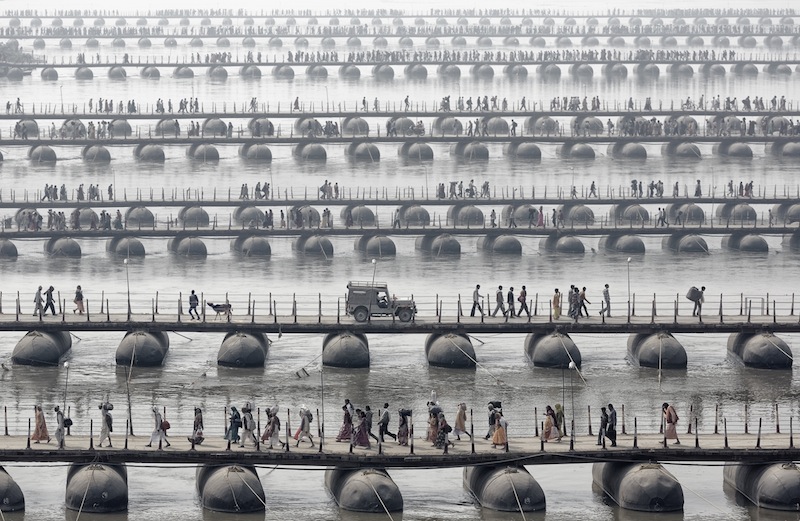
Samsara, by Wolfgang Weinhardt (Open Category: Travel, 2014 Sony World Photography Awards)

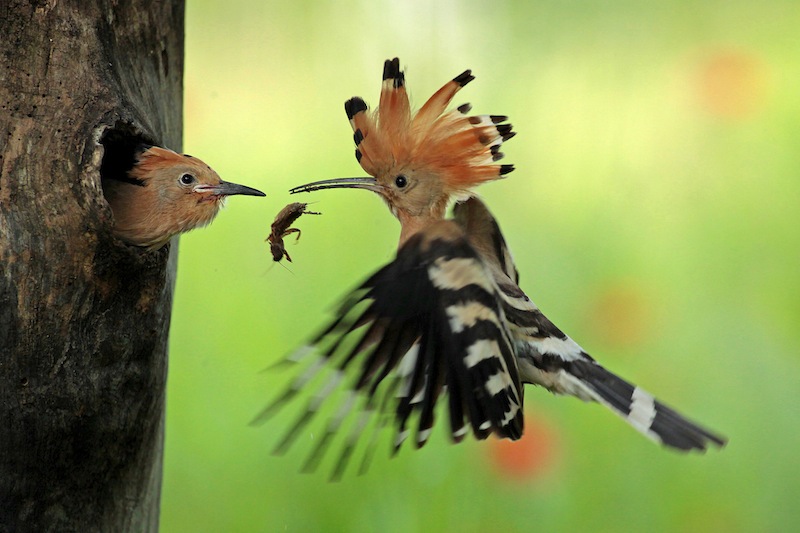
I took this photo in August in my Summer holiday. I went to a small lake near my grandparents' house to take some shots about the landscape, but first I noticed a large amount of water bugs on the surface of the water. I used long shutter speed to render the movement of these interesting insects.

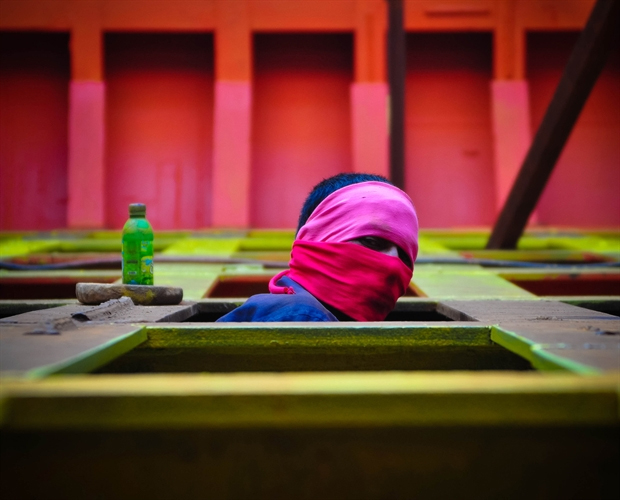
Shariful Alam, a ship painter works at Shagorer Dock at Shadarghat Ship Building Yard works hard till morning to dawn.

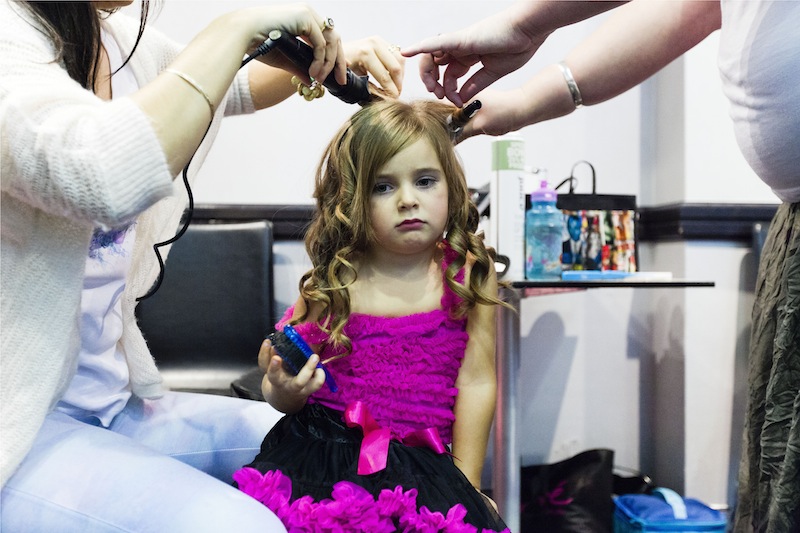
Image 1 from the Sparkle Baby series, by Chloe Bartram  (Professional Category: Arts and Culture, 2014 Sony World Photography Awards)

Untitled image from the Beards and Birds series, by Wilfred Berthelsen (Professional Category: Travel, 2014 Sony World Photography Awards)

Top tips for terrific travel photos

Seeing as Daniela is currently gallivanting somewhere in Thailand, we thought it presented us with the perfect opportunity to give you our travel photography tips. We've accumulated them from thousands of miles on the road through tens of countries. They might be useful for someone other than ourselves.

1. Be prepared

Like every good Boy Scout and Girl Guide, you need to be well prepared, before you go and when you're away. As contrary as it might sound, even if you favour spontaneous, moment-to-moment travel, a bit of planning will make sure that you get the pictures you deserve. You need to be ready for anything.

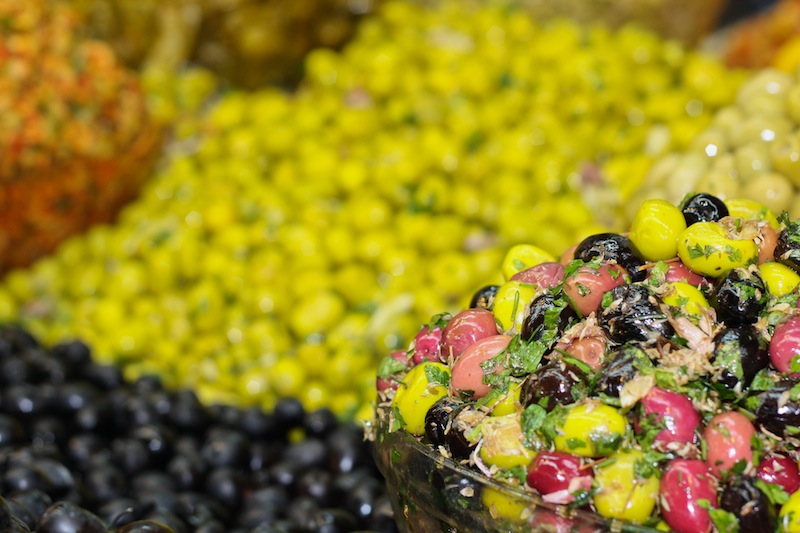
Buying supplies at the souq in Tangiers, before taking the train to Fes

Being prepared comes in three parts.

  1. First: Have an idea of what you want to see, do, and experience before you arrive. It doesn't have to be a minute-by-schedule, a wish-list is sufficient. It will help to ensure you see as much as you can and still have the chance to unwind and prevent being overwhelmed and accomplishing next to nothing.
  2. If you know roughly what you're planning on doing, it'll help when you pack your kit. Why take with lenses that you probably won't use at the expense of those you will? Trust me, I schlepped four lenses around the world and used only two of them.
  3. Finally: when you're out and about with your camera, be ready. Remember to re-set your ISO and shutter speed after a night shoot. Have you camera to hand on a bus or train, not in the luggage compartment. And have a smartphone or compact camera with you when you pop out for a bottle of water. You never know what you might see!

2. Tell the story

Every photo tells a story, and the photos from your travels should tell the story of your trip. That means it isn't just about capturing the monuments and the famous views, but about recording the little things that matter, that make a difference, that bring a trip to life.

Bar decorations in Bali, before I got sick

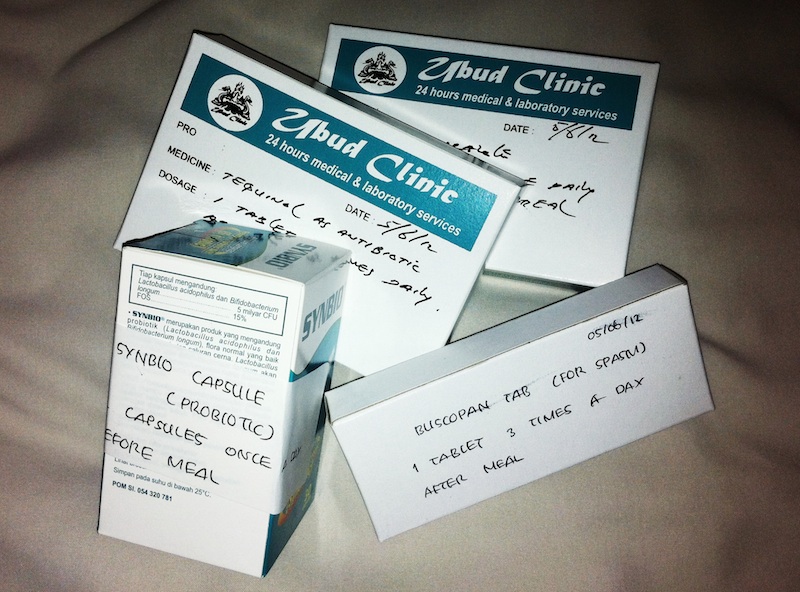
When you look at your travel photos you want to be transported back to the hustle and bustle of the souq in Dubai; your friends and family who weren't there need to sense the crush, the smell, the heat. My photos from Bali include stone lions guarding temples, the bottles of petrol you see for sale by the side of the road, and the pile of medicine I was prescribed when I fell ill. My time there is charted in pictures, big to small.

Sick. Very sick, in Bali

3. Get off the beaten track

I'm a huge advocate of eating in local restaurants and taking the bus to the isolated villages half way up the mountain. It all adds to the experience. But I mean something more when it comes to photos. When you're looking to photograph famous monuments and well-known vistas, look for a fresh approach, an unusual angle, a different feel.

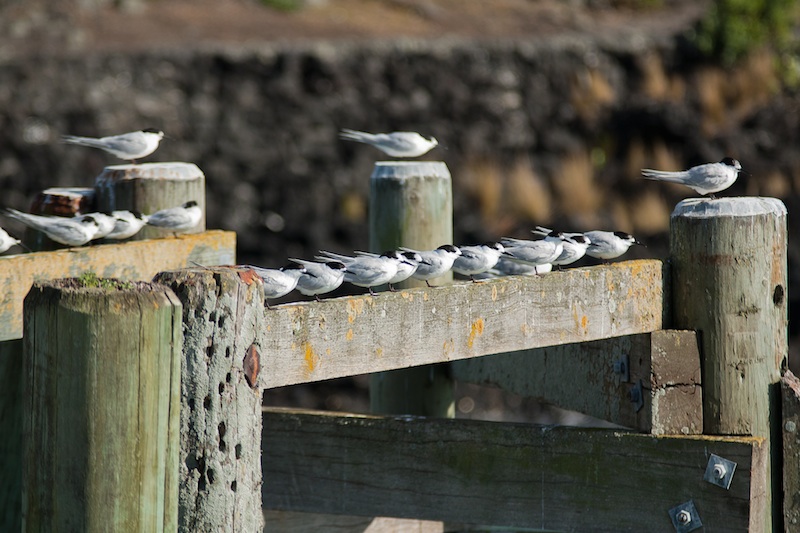
Birds in a row, Rangitoto harbour

4. Take good care

When I first used a mandolin (one to prep vegetables, not the musical instrument) I was advised that carrots are cheaper than fingers. I've a similar approach to taking photos. I'm worth more than my kit; and my safety is worth more than a photo. This means that I don't wander blithely into insalubrious parts of town flashing my camera and I don't ignore the signs telling me that landslips are likely owing to recent heavy rain.

There was a certain element of risk in getting this photo, but it wasn't off-limits

I also make a point of regularly rotating my memory cards, so that if my kit does succumb to theft or failure, I won't have lost all my photos. And if I travel with my laptop, I backup my photos to a hard drive, and if possible a cloud drive, at the end of every day.

The key thing is, your photos are worth more than your kit and you're worth more than both of those.

5. Know 'the rules'

Yes, we would like you to know the rules of photography and we would like you to know when to break them. But that's not quite the point here. We mean the local rules, customs, and mores. Can you take photos of people? Are camera allowed at religious sites? Are certain places out-of-bounds at particular times of the day? Make sure that you know what you can and cannot do; you don't want to offend anyone where you're a guest and you don't want to get into trouble. However far these customs and protocols might seem from your life, they still need to be respected.

A nod to your camera and a smile can establish if photos are permitted

6. Set your alarm

Sunrise and sunset might present you with the best lighting opportunities for your photos, with sizzling stone, luscious landscapes, and perfect portraits, but early in the morning will show you a different side to where you're staying. And you'll escape the tourist crowds, too.

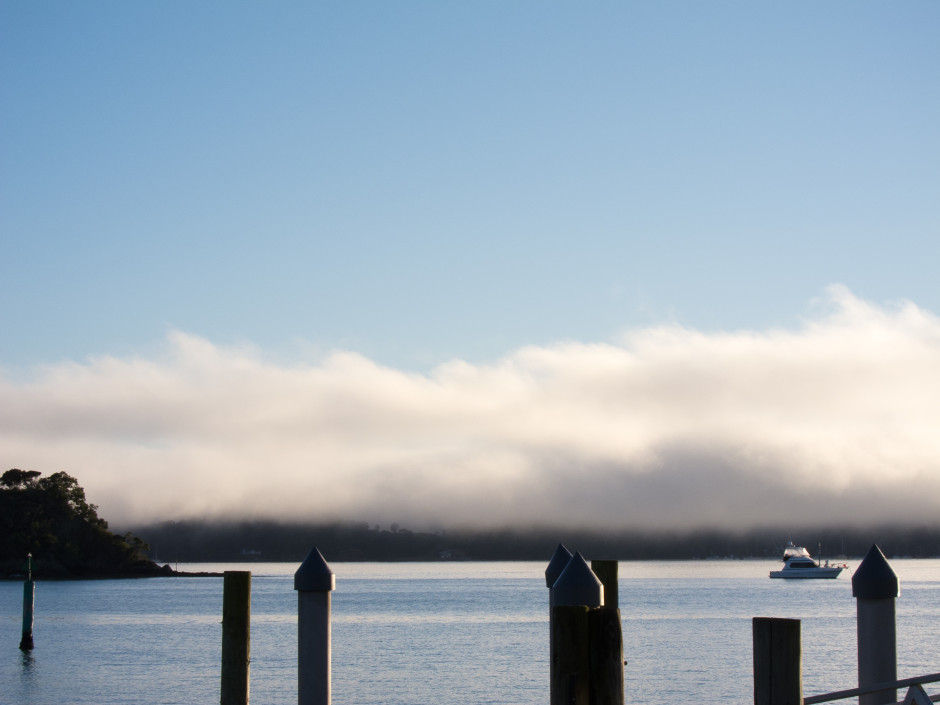
Sun coming up, Bay of Islands

7. Remember to put down your camera

Travel is about a whole lot more than your photos. It's a wealth of experiences and encounters. When you're constantly holding a camera to your face, it means that you can miss out on people, whether your family or anyone new. Remember to put down your camera from time to time, and just enjoy.

Of course, this is just the beginning, the basic principles. Haje covers travel photography in far more depth and detail in his gorgeous Focus on the Fundamentals: Travel book!

Postcards: A Martin Parr video exclusive

Only in England, an exhibition of work by two of Britain's most respected documentary photographers, Tony Ray-Jones and Martin Parr, has been running at London's Media Space since September last year. As the exhibition draws closer to the end of its six month run, Media Space has released some exclusive video footage of Martin Parr exploring a file of Ray-Jones' collected seaside emphemera. It's a sweet insight into the interests of Ray-Jones, and Parr's excitement at unveiling a little more about him.

If you'd like to see Only in England, you've until 16 March to do so. Tickets cost £8, or £5 for concessions and can be booked online. Media Space is a part of the Science Museum.

Only in England will run at the National Media Museum, Bradford, from 28 March to 29 June 2014.

Hands-on with the Fujifilm X-T1

In one of life's odd little turns, I found myself pitching up at the Fujifilm X-T1 press conference in Bangkok this lunchtime. Yes, today was meant to be a rest day between excursions, but I couldn't resist the invitation to join Daniel, the editor of ThemePhoto, just around the corner from where I'm staying. There were a few X-T1 bodies with different lenses floating around, plenty of tea and coffee, and I had the opportunity to play around with Fujifilm's newest addition: weather-sealed, dSLR-look-alike, and 16 megapixel APS-C sensored. After all that pre-amble, what did I think? Mostly, that I enjoyed getting to know it, albeit briefly, and I would appreciate being able to spend more time with it. Without a dedicated mode dial you alter the sensitivity and shutter speed dials independently, selecting 'A' on each if you want it in automatic, and switch between automatic and manual on the aperture ring to control your exposure. If you want to shoot aperture priority but manually control the ISO, you set the shutter speed dial to 'A' and the adjust the other two as required.

Compact, but SLR-styled

There's an exposure compensation dial on top of the camera, beside the shutter speed dial, and a front-facing dial that gives you more refined control over your shutter speed. Without the standard mode dial giving you 'Sport' and 'Portrait' options, it makes you think that this is a photographer's camera. Yes, there are soft-focus and toy camera options, but they're hidden away and not obvious.

However, I did find it quite tricky to adjust the shutter speed dial while holding the camera to my eye. Unless this is something that I could get used to (I'm not sure) it could get trying very quickly. I found the rings to switch between metering modes (beneath the shutter speed dial) and drive modes (beneath the ISO dial) a little awkward to adjust, too. Your milage may vary.

The four-way controller gives you control over your most-used functions, for example white balance, macro mode, and Fujifilm's film replication effects. You can make it into the camera that you want it to be.

Did I notice any lag with the EVF? Well, yes. But, it is possible to select whether you shoot EVF-only, EVF+LCD screen, or LCD-only. I thought it felt faster and less laggy in EVF-only mode. You know what I did like, though? That when you shift orientation from landscape to portrait, the information that appears on the EVF re-orients itself, too.

I tried out the 18-55mm kit lens, which handled very well, the gorgeous XF56mm ƒ/1.2, and the 55-200mm telephoto lens. I found that last one had a fairly stiff, not very smooth zoom ring, but some people might prefer that. At launch, there's no weather-sealed lens to go with the weather-sealed camera, which is a shame, but the X-mount range is growing and the weather-resistant 18-135mm is scheduled to arrive in summer this year, to be followed by two more later in 2014.

When I had the opportunity to chat with Somkiat Narattanakulkitti, Fujifilm's General Manager of Marketing and Sales in Thailand, apart from him asking me if I weren't put off by the protests, he was keen to point out how Fujifilm thinks it's important to innovate, and the X-T1 is a part of that. People want a camera that looks stylish, performs well, but isn't a cumbersome brute. Okay, so he didn't use the words 'cumbersome brute', but the X-T1 is about form and function and Fujifilm's direction is definitely to keep on keeping on. No, I couldn't get him to confirm if a full-frame camera is coming next, but it wouldn't surprise me.

At £1099 body-only, the X-T1 is a compelling piece of kit. I won't be trading in my current camera for it any time soon, but I can certainly see how some people would be tempted by it, and I wouldn't mind it for an extended stay!

Bailey's Stardust at the NPG

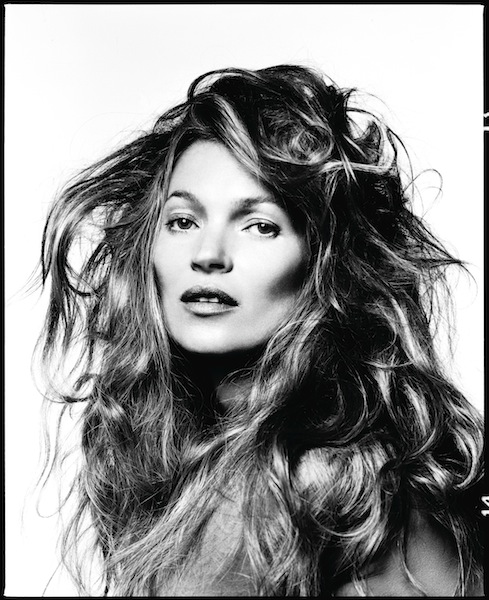
Bailey's Stardust, an exhibition of over 250 of David Bailey's portraits, opens today at the National Portrait Gallery, London, where it takes up virtually all of the ground floor. Kate Moss by David Bailey, 2013

Organised thematically rather than chronologically, the exhibition is based on the notion of stardust: we all begin as dust and we all return to dust. Lesser known portraits will feature alongside some of Bailey's most iconic work, juxtaposing fame, fortune, and glamour with famine, poverty, and despair. The Rolling Stones, London's East End, Papua New Guinea, and East Africa in 1985: it's all there.

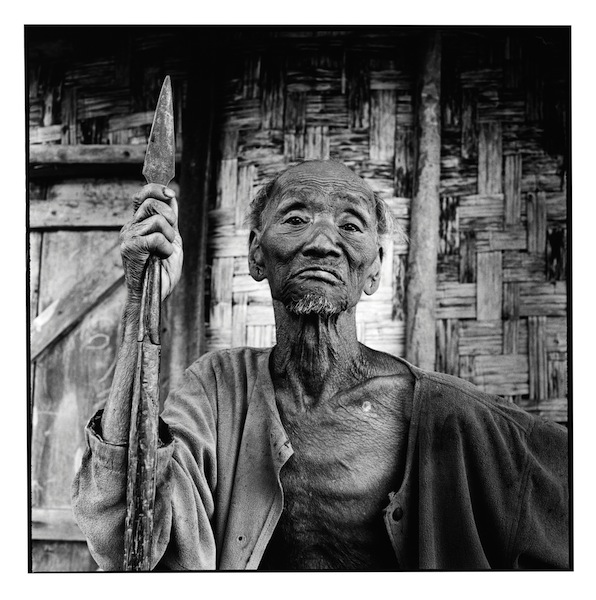
From the series Nagaland by David Bailey, 2012

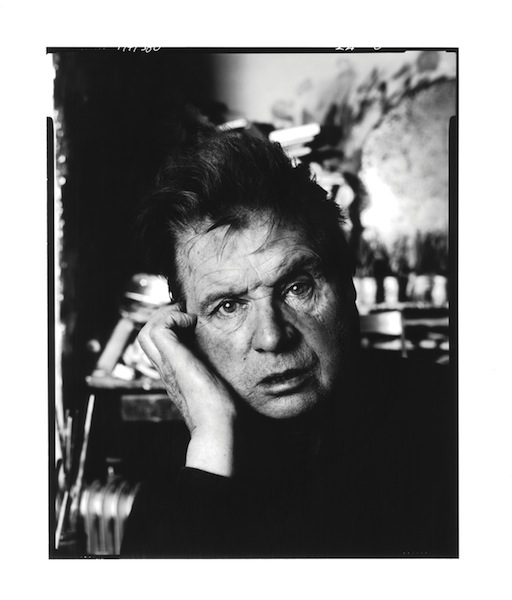
Bailey will be making new silver gelatin prints of his black-and-white portraits especially for the exhibition, showing off photographers, actors, writers, musicians, filmmakers, fashion icons, designers, models, artists, and people encountered on his travels.

Francis Bacon by David Bailey, 1983

The exhibition, sponsored by Hugo Boss, runs from 6 Fenruary to 1 June 2014 at the National Portrait Gallery, London.

The Photography Show - a quick run-down

When Mary Walker announced that after 20 years co-ordinating Focus on Imaging she thought it time for a change, it was Future Publishing that stepped into the breach to fill the photographic trade show spectacle-type hole in our lives. Future's called their incarnation of mayhem, madness, cameras, and consumerism The Photography Show. The Photography Show is running from 1 to 4 March 2014, opening at 10:00 each day and shutting up shop at 18:00 on the first two days and 17:00 on days three and four, held in halls 11 and 12 of Birmingham's NEC.

Should you want a few highlights of which companies will be setting up a stand, rather than having to wade through the entire list, I've pulled together one for you!

3 Legged Thing Adobe British Institute of Professional Photography Calumet Canon Carl Zeiss CaseLogic Daymen (they'll be exhibiting Lowepro and Joby products) Fujifilm Future (obviously) Giotto's Gitzo Hasselblad Hoya Kenko Kenro Lastolite Manfrotto Nikon Olympus Panasonic Ricoh Samsung Samyang Sigma Slik SmugMug Tamron Tokina Velbon

and The Ilex Press. Seeing as they publish my books, they also twisted my arm to go along for a day and hang around to talk Composition, Surreal, and Social.

Of course, these are the edited highlights. There's a great deal more on offer, from specialist insurance providers, a wealth of photo book printers, colour calibration firms, and, well, pretty much anything pertaining to photography. If you want all the details, its on the Photography Show's website.

Giving your pictures a toy camera makeover

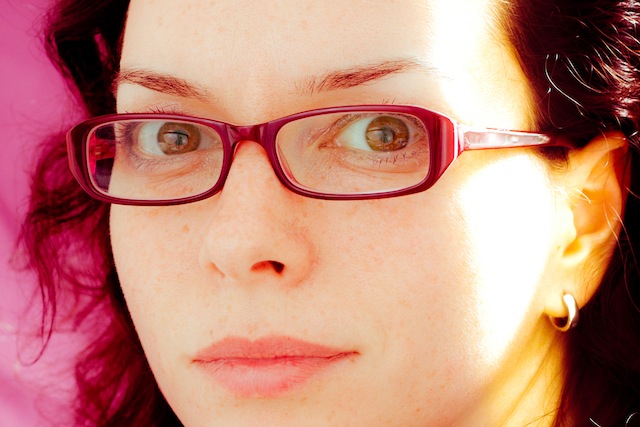
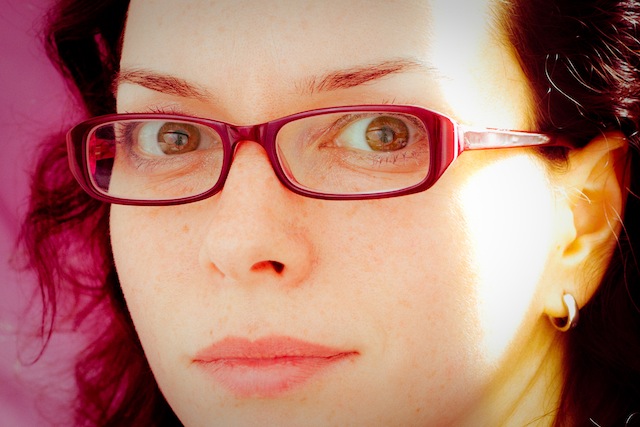
In the interests of knowing how it was done and not wishing to rely on filters or presets (or on dodgy film development practices) I had a go at converting one of my self-portraits into a toy-camera looky-likey. I doubt that it's a process I'll do too often, but for the record and because I'm sure other people might be intrigued, here's how I went about it. Before you start playing with the tonal curves and adding vignettes to your photos to make them look as if they stepped out of 1976 and were bathed in the wrong chemicals, it’s useful to know what to look for in a toy camera-esque image.

  1. Exposure: the light meters in toy cameras tend to be on the inaccurate side of calibrated, leading to badly exposed images
  2. Light leaks: sealing on toy cameras is virtually non-existent, presenting you with huge streaks of light smeared across your photos
  3. Aberrations: Cheap plastic-y lenses mean distortions and vignetting
  4. Cross-processed look: processing film in the wrong chemicals will give images odd colour casts

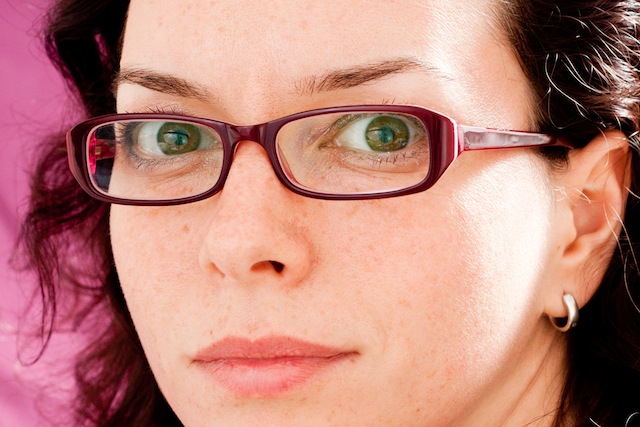
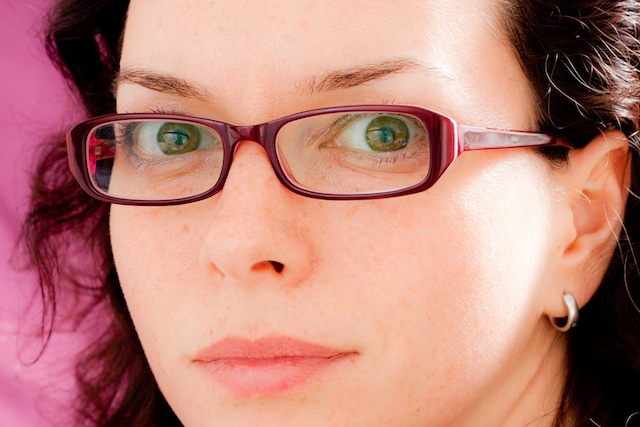
This is my recipe for a toy-camera flavoured photo. It's fairly subtle because I'd rather not feel as if my eyes are being assaulted by a sweet shop, but you can of course ramp up the numbers to get the effect that you want. We'll start with a studio shot of me. It was part of a series I took when I was getting accustomed to wearing glasses.

1. Exposure

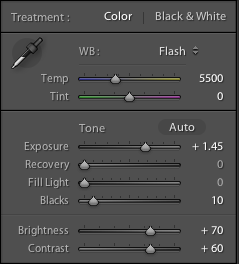
Go over the top with the exposure My first move is to increase the exposure, add some depth to the blacks, and then go overboard with the brightness and contrast. It'll look like a cartoon at this stage, but it's a base on which to build. My exact settings, for the record

2. Clarity

I pushed the clarity slider to -45 By nudging the clarity slider to the left it helps to recreate the soft mushiness of a cheap plastic lens.

3. Light leak

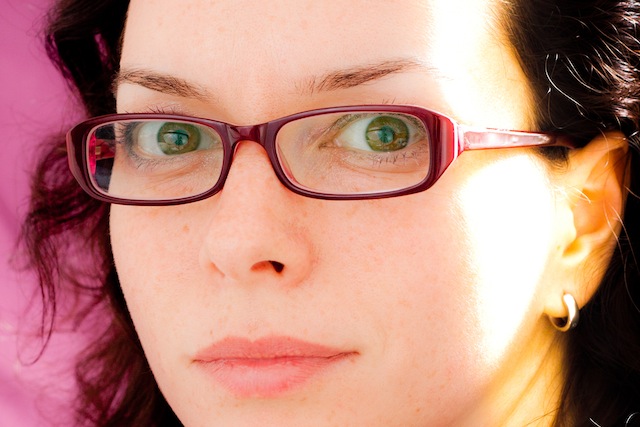
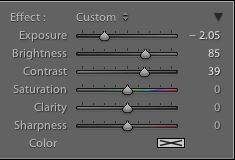
One light leak. Feel free to choose your own position. Use a pair of graduated filters to add a light leak. I placed one to the left of my ear and another right with roughly opposite settings. This produced a yellow-y smear. Settings for one graduated filter

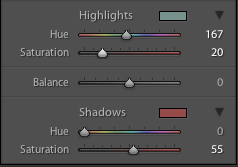
4. Split toning

If you want, you can spend hours messing with the split toning sliders to achieve wildly varying looks that could all pass for cross-processing. It'll be a case of finding what you prefer, and placing more emphasis on the reds and purples or the greens and yellows.

My chosen split tone look

I tried this image with a yellow-y green look initially, but swapped it for a more pinky-red version. You can play around a great deal with split toning

5. Vignette

Without knocking myself over the head with a plastic picture-taking-device, I add a touch of vignette, too.

6. Grain

Finally, add a hint of grain to help recreate the film feel of a toy camera. Tah-dah!

Et voila – from studious studio self-portrait to tricksy toy camera creation.

Faith: new lighting stands and tripods

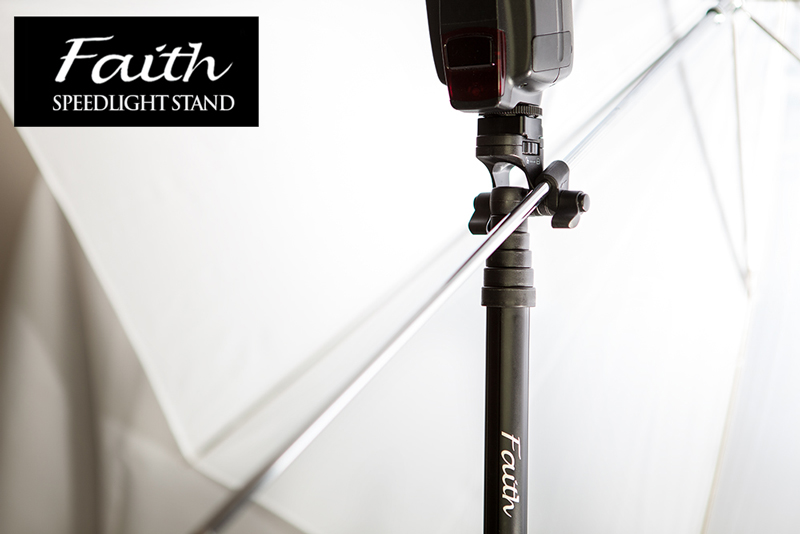
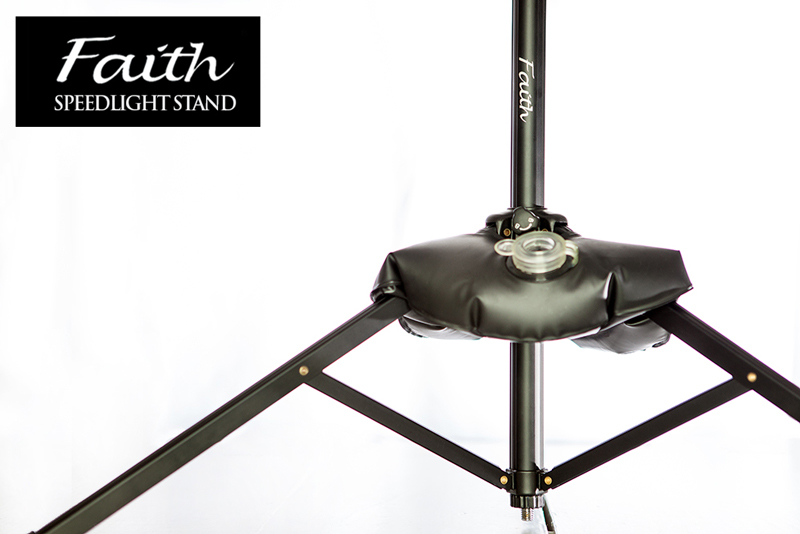
Inspired Photo Gear, the guys behind the lightweight and cute-looking Lollipod, have launched a similarly lightweight and easy-to-erect lighting stand and two tripods that can also be extended in a flash. The Faith lighting stands use the same 'pull to erect' system that the Lollipods do, but are a little more versatile than their smaller siblings, which can also be used to mount flashes. The Faith stands have an integrated umbrella holder, a cold shoe, and a concealed spike should the ground be on the soft side.

Faith SpeeLight Stand by InspiredPhotoGear

If you need to stabilise it, there's a pocket in the case bag. Just add water and it should keep things steady.

Faith SpeeLight Stand by InspiredPhotoGear

The Faith lighting stand weighs 540g, can hold up to 2.5 kg, has a maximum height 180cm, but folds down to 41.5cm for carrying purposes. It'll cost you £50, which is US$83, €61, or AU$96, and can be ordered from the Inspired Photo Gear online shop.

When it comes to tripods, there are two models on offer: smaller at £150 and bigger at £250. Either can both be erected in under six seconds, so I'm told, owing to their Flash Lock mechanism: pull the leg out fully and it will activate the auto lock function. It should take just 0.6 seconds to extend each leg and around 5 seconds to setup the entire tripod.

There's even a demonstration video to show just how fast you can erect one:

The larger tripod has a maximum height of 148cm and folds down to 39.5cm; it can support upto 30kg, and weighs 1.55kg. The smaller tripod also extends to 148cm but folds down to a more compact 33cm, weighs a slightly lighter 1.05kg, and consequently is capable of supporting 20kg. I'm not sure that the extra 10kg is worth the £100 difference in price, especially when the smaller tripod is more compact and lighter, too!

These, too, are available from the Inspired Photo Gear online shop.

Quick and dirty infrared photography

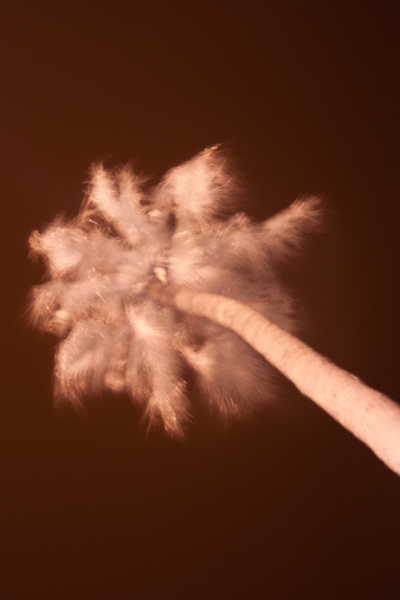
We're accustomed to taking photos with what is somewhat uninspiringly referred to as 'visible light', or the part of the spectrum whose wavelengths measure roughly 400 nanometres (violet) to 750 nanometres (deep red). However, there's an awful lot more to light than just the wavelengths we're able to discern with the naked eye, and it's possible to take photos using that 'invisible light'. In particular we can make use of infrared light (IR), which picks up at 750 nanometres, where visible light drops off, and stretching to approximately 20,0000 nanometres. Lots of people think that IR photography is the preserve of specialist infrared adapted cameras, with 'normal' cameras being insensitive to IR light owing to the 'hot mirror' that sits just before the sensor. However, these hot mirrors aren't 100% effective, and with the help of an IR pass filter, you can capture images made with infrared light.

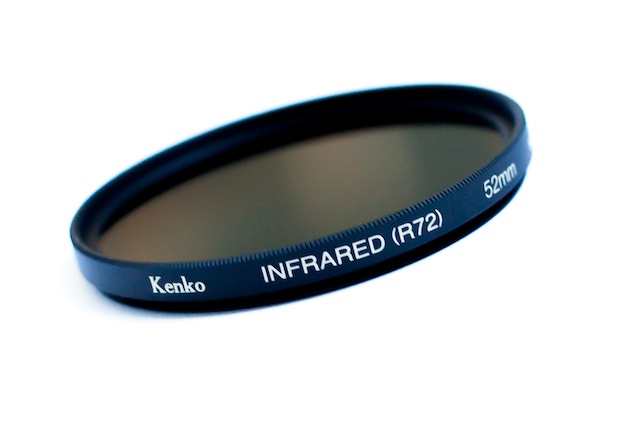
The most common filter is probably the Hoya R72, which is easy to pick up in a camera shop or over the Intergoogles. It won't allow you to capture IR waves at more than 1,300 nanometres, but that should be enough to start. You can always invest in an IR-adapted camera if you find that it really floats your boat.

R72 filter

Got your IR pass filter? Want to give it a shot? Off we go!

IR photography will present you with several hurdles: focusing, exposure, and post-processing. Overcoming all of them is more a case of trial-and-error than hard-and-fast rules and to be fair, that's half of the fun!

1. Choosing a scene

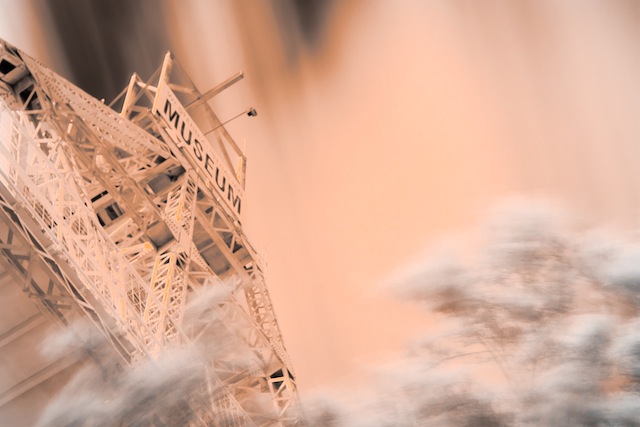
Okay, so you can pretty much photograph anything in IR, provided that there's some light around. However, the most stunning IR images tend to involve foliage, which comes out as bright white, and blue skies or water, which look deeply intense. But that's all after a bit of fiddling. More on that in a moment.

Achieved by adjusting the red hue and orange luminance sliders

Whatever you choose to photograph, it's not going to be a quick process, so you need to be somewhere that won't put you in people's way or get you into mischief. And it needs to be suitable for a tripod, too.

2. Focusing

The difficulty that you’ll encounter with focusing comes as a result of the IR filter; it blocks out the majority of visible light passing through the lens, leaving you with a dark viewfinder. You don’t have anything to work with when you’re focusing your lens. This means that you have to put your camera into manual focus and set up your shot before placing the IR filter over your lens.

Setting up your shot and then placing the filter over your lens is a bit of a faff, but seeing as you’ll be using a tripod anyway (more on that in a moment), it shouldn’t be too infuriating.

3. Exposure

As for exposure, you’re going to need to use a slow shutter speed, probably between ten and 30 seconds, to allow enough IR light to reach the sensor to expose it sufficiently. This is where your tripod comes in, obviously, as you’ll never manage to hold your camera steady for that length of time. Long exposures also have a tendency to noisiness, so use as low an ISO as you can manage, too.

4. False colour

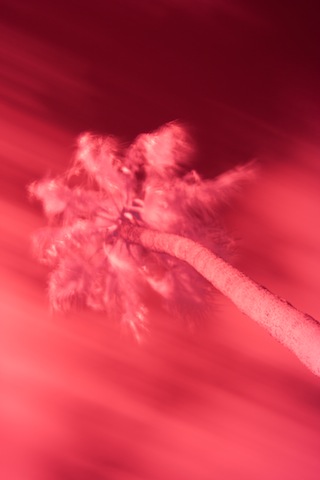
Don’t be surprised if your infrared photos emerge from your camera with strong red or magenta casts; this is known as false colour. It’s normal and it’s a simple fix in Photoshop to produce a 'traditional' looking infrared photo. If there is such a thing. It involves shifting the white balance to 2000 Kelvin and then flipping the levels in the blue and red channels. In short: open the blue channel and slide 'Red' to 100% and 'Blue' to 0%; in the red channel, 'Blue' needs to be at 100% and 'Red' at 0%. You might want to adjust the contrast and brightness, but that's the basics.

IR images come out with strong 'false colour' casts

5. You don't have to use Photoshop

After playing with the white balance However, there's a lot of fun to be had by simply playing around with other editing packages to produce ethereal-looking images. With something like Lightroom you might want to try:

  • Fiddling with the white balance and tint sliders to produce subtle pink or flaming orange images, and everything in between
  • Playing with the hue and luminance sliders to alter the colour mix of the photo
  • Converting to black and white and using the black and white mix sliders to adjust the look of the image

Really, there's no right or wrong and the range of impact that you can have with an infrared image is enormous. It's a lot of fun.

6. Hotspots

Some lenses are prone to producing ‘hot spots’, or patches of much brighter exposure that are usually, and most inconveniently, in the centre of the image. There’s very little that you can do about this in camera except to try a different lens. Prime lenses seem to be less prone to hot spots, but there are no guarantees, and using a smaller aperture will reduce its size. It's possible to try to correct it in post-processing, too.

What are you waiting for?

Orange and red saturation adjustments

Visualising studio lighting

Once you feel you’ve started to get the knack of pointing your camera at things and clicking the button, it’s time to start taking control of all the lighting in the scene. But, as it turns out, that’s bloody tricky.

I keep having to explain how to ‘visualise’ different types of lighting to people, and it turns out that it’s rather difficult – not because what I’m doing is particularly advanced, but because sometimes, it’s just tricky to make the connection between what is happening in a photo, lighting-wise, and how the lights are set up.

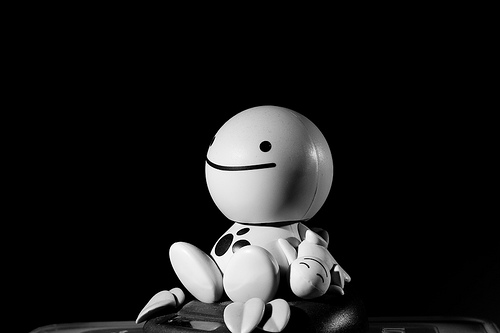
I’ve put together a collection of examples which I hope will help. For these photos, I’ve used a figurine with a nearly round head – this will be very useful to determine where the light is coming from; but remember that all of this is as valid with more complicated shapes, including people.

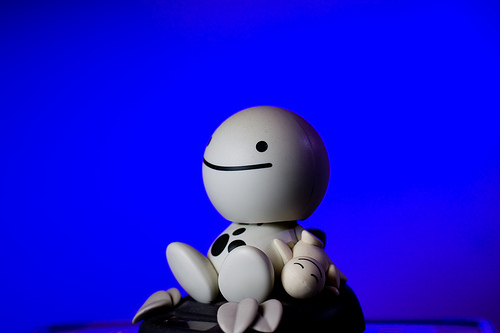
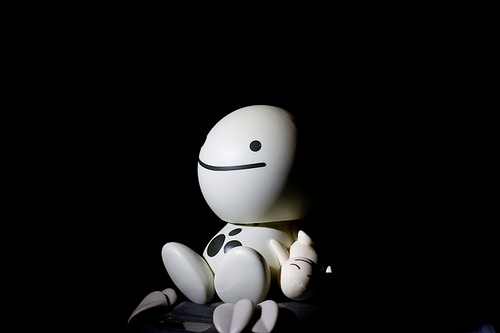
This picture of HappyHead is part of a series of photos designed to explain some basics of studio lighting.

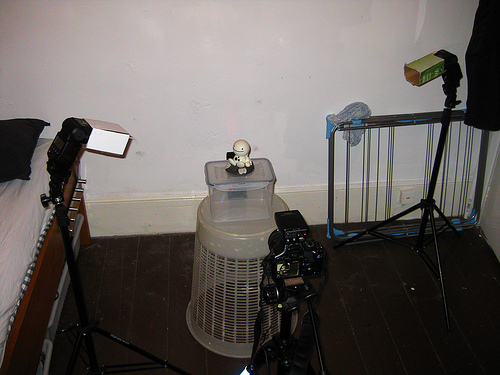
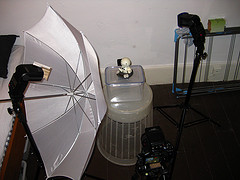
If you’re curious, this is the equipment I’m using throughout this post (and when I’m taking photos in general, for that matter).

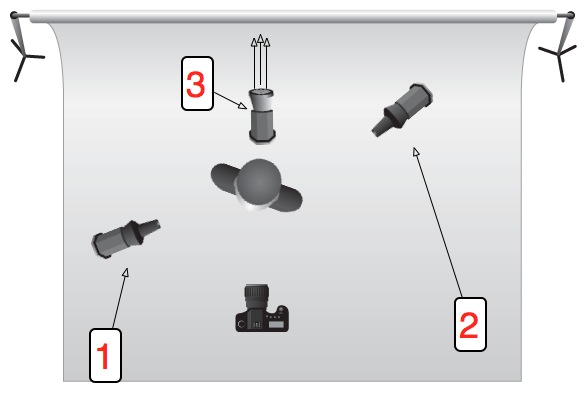
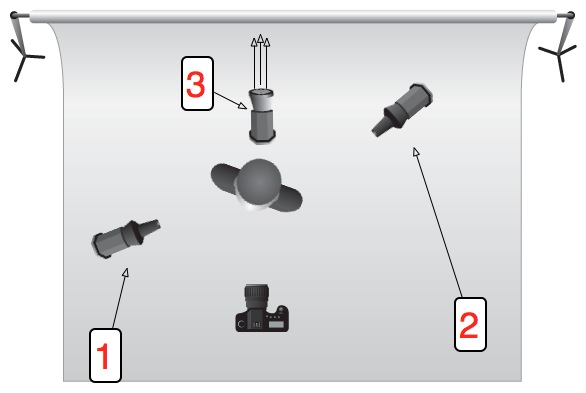
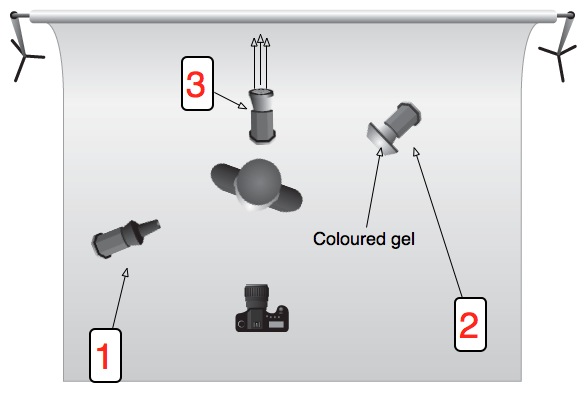
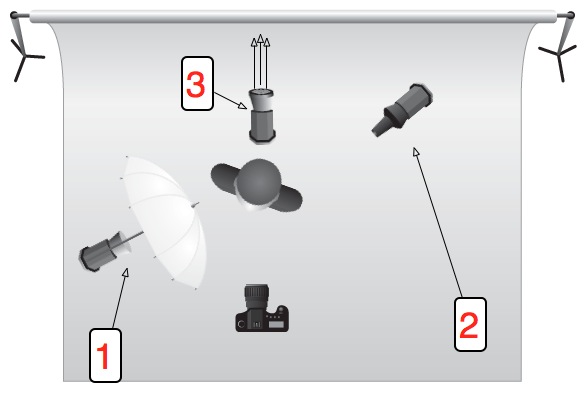
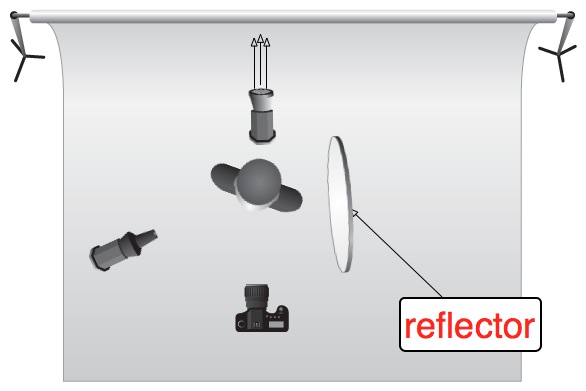
For most of the photos, the lighting set-up is like this:

Lighting setup, ItL

Check out the Flickr page for a detailed breakdown of everything you see in this photo.

Or, for additional clarity:

illu_lighting_setup.jpg

A couple of basics

Introduction to Lighting - 1 Picture 1 – Lit by a single 580EX II flash from top left (flash 1 on the schematic) at 1/32 power output.

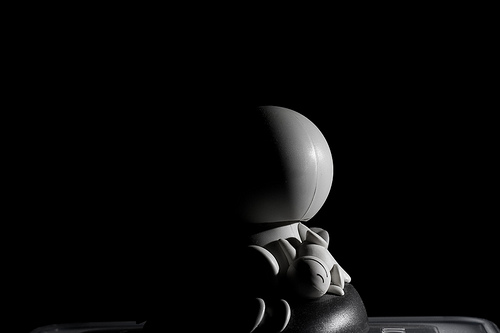
Introduction to Lighting - 2 Picture 2 – Same as Picture 1, but with an additional flash from the right (flash 2 on the schematic), slightly behind HappyHead, at 1/64 power, to lift the shadow a little.

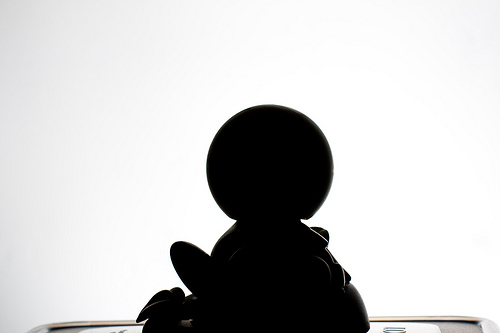
Introduction to Lighting - 3 Picture 3 – Same as Picture 2, but with an additional flash at full blast on the background (flash 3 on the schematic). Note the light fall-off to the right, due to the flash being too close to the wall, and not aimed correctly.

Introduction to Lighting - 4 Picture 4 – Shows just the flash to the right (flash 2 on the schematic), slightly behind HappyHead.

Introduction to Lighting - 5 Picture 5 – Shows just the flash behind HappyHead (flash 3 on the schematic), used to blast the background.

Troubleshooting lighting.

The observant among you will have figured out that Picture 1 + Picture 4 + Picture 5 = Picture 3. As a general rule, you can often just switch on one flash at a time to figure out which flash gives what kind of light – but only when they are in manual mode, obviously: In E-TTL mode, the flashes will attempt to compensate for the missing flashes.

So what is all of this good for?

istock_000006420114small.jpg

When you’ve perfected this lighting setup with a figurine, it’s time to replace the doll with a real, live person. Take a close look at this photo – the lighting setup is exactly the same as that we used for HappyHead!

Gels add a touch of colour

gel.jpg

Introduction to Lighting - 6 Picture 6 – introduces the use of coloured gels. This is basically Picture 1 plus the same set-up as picture 2. However, the gelled flash has a much higher power output (1/32) to help overcome the light loss from the blue gels

Umbrellas or softboxes make the light softer

brolly.jpg

Introduction to Lighting - 7 Picture 7 – This uses the same flash setup as we’ve had so far, but with an umbrella on the left-hand flash to make the light softer. Notice how much gentler the light fall-off (i.e. how much less harsh the shadow is) is in this photo compared to the ones before in this series

Preventing spill-light

Introduction to Lighting - 8 Picture 8 – Same as picture 7, but I have turned the right-side flash to the background, with the blue gels on it. Note how the blue in the background looks quite washed out. This is because the umbrella is great at spreading the light, but it also throws a lot of light onto the background, which causes the blue light to be ‘contaminated’ with white light

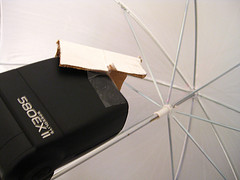
Introduction to Lighting - 9 Picture 9 – Same as picture 8, but here, I have added a piece of cardboard to the flash on the left, to ensure less of the light hits the left side of the umbrella:

Lighting setup, ItL w/ umbrella A simple barndoor

That, in turn, that means that less light is diffused onto the background, so now the blue flash can do its job better. Note that the flash output in Pic 8 and Pic 9 is identical – the only thing that changes is a tiny bit of cardboard. Incredible, eh?

Don’t forget about reflectors

Introduction to Lighting - 10 Picture 10 – Okay, back to the original (this is a different picture than pic 1, but uses essentially the same settings, so should look very similar). See how dark the right side of HappyFace’s head is? In Picture 2, I fixed it by adding a flash, but you can be more economical with your flashes

reflector.jpg

Introduction to Lighting - 11 Picture 11 – is exactly the same photo as Picture 10, except I’m holding a reflector (that’s a posh word for ‘a piece of A4 paper’) just out of the frame on the right side of the image. The light from the flash is reflected off the paper and back onto HappyFace, causing it to look much less dramatic.

From night to day with the flick of a switch

Introduction to Lighting - 12 Picture 12 – is quite similar to Picture 1, but has been set up to contrast with picture 13… Also note how the light has been moved further towards the camera (i.e. further to the front of HappyFace). This is so you can tell the edge of the head better – instead of getting the effect like in picture 7, where you can barely tell where the side of his head ends and the wall begins, here you get a clearer definition of his head.

Introduction to Lighting - 13 Picture 13 – The only difference between picture 12 and 13 is that in Picture 13, I have turned the flash lighting up the background off. Two completely different looks at the flick of a switch. It’s bloody magic, I’m telling you

Time to show off

Introduction to Lighting - 14 Picture 14 – is just showing off, really, and combines a whole series of lessons: The background is beautifully lit with a 420EX, the right side of HappyHead’s face is lit with the familar strobe, but with a red gel on it.

Iin retrospect, I wish I had umbrella’ed that strobe, because it’d have gotten rid of that bright red specular highlight just at the edge of HappyHead’s mouth.

Good luck!

This is only a very quick’n'dirty introduction to lighting, but it seems as if most people who e-mail me are actually struggling at this level – I’ll pick up with a more advanced lesson in a couple of months, I think.


Originally posted on 26 May 2011, but definitely worth dusting off and dragging out of the archives.

Mix and match with the Gura Gear Uinta

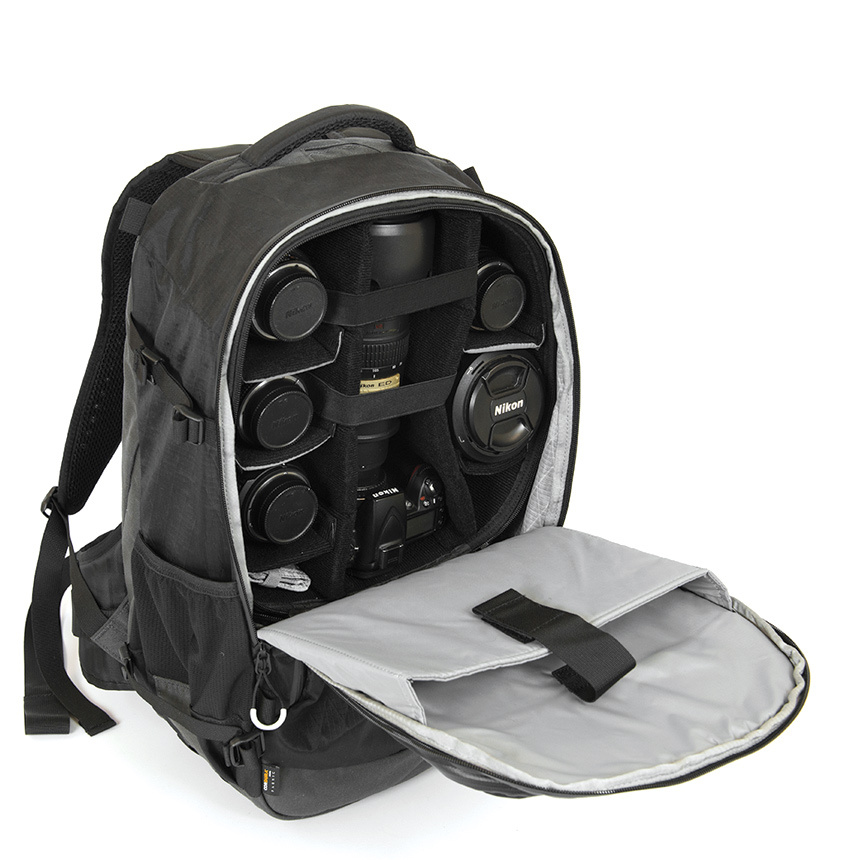
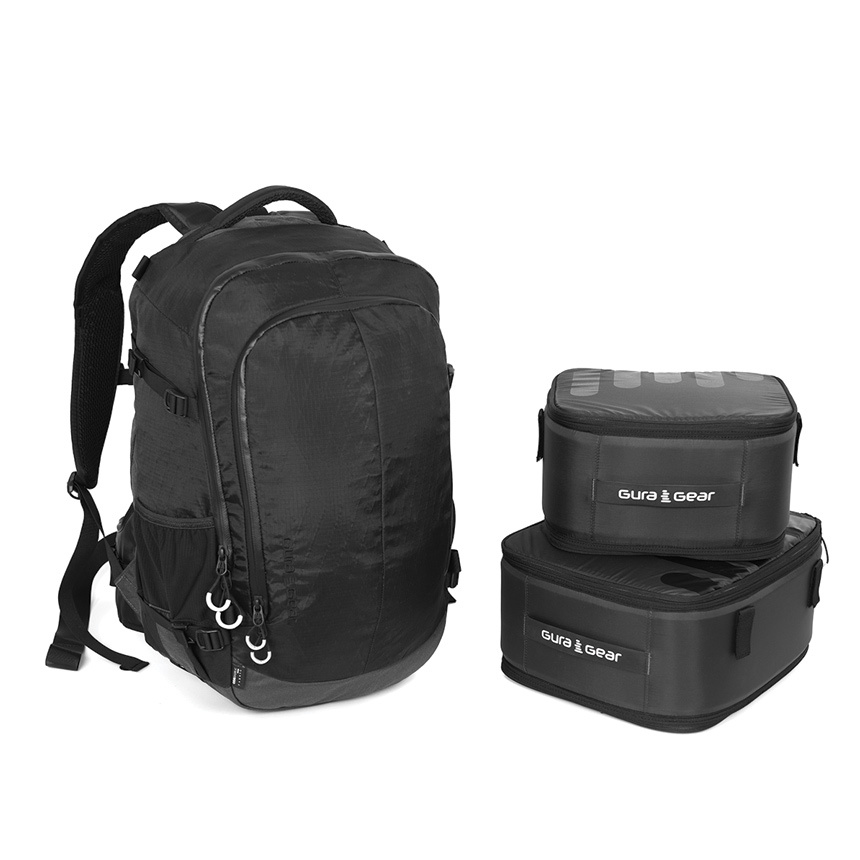
Gura Gear has launched a modular camera bag that you can chop and change depending on how you're planning to use it that day. Whether you're out for a day's street photography, a up-hill and down-dale hike, or a walk with some photography, the Uinta is intended to meet your needs. In addition to the bag, you can purchase modular inserts to secure your kit. Depending on how you want to use the bag, you can configure the modules appropriately. As well as the modules there's an additional Tripod and Hydration System, and the bag has multiple access points, is weatherproof, and has space for a 17" MacBook.

Camera gear + laptop sleeve

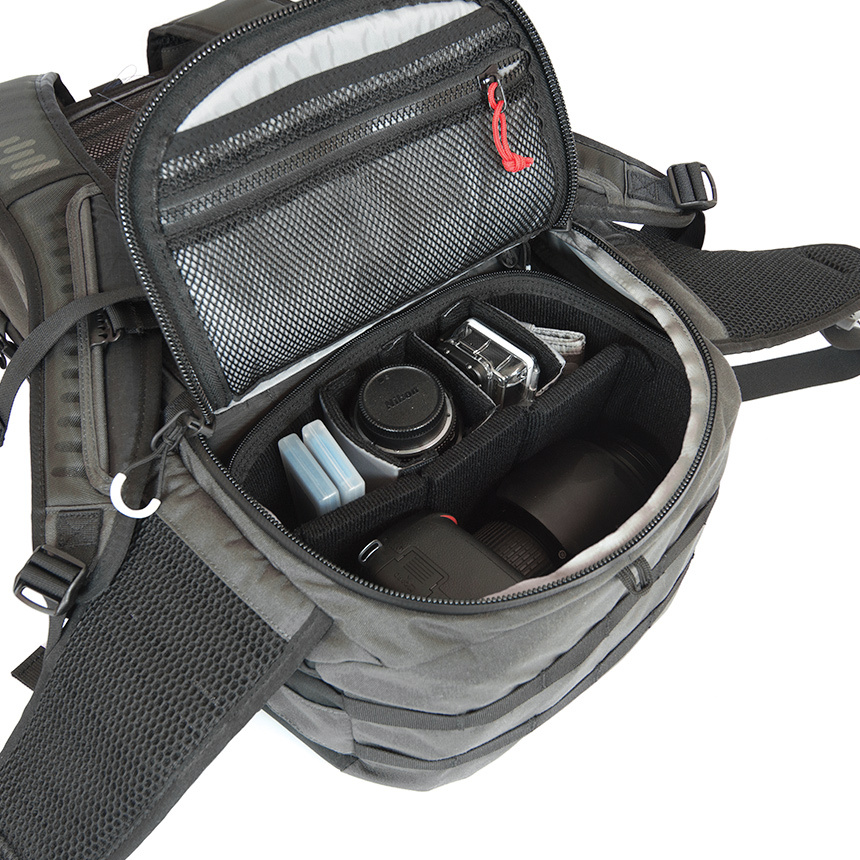
As for those mix-and-match modules, they'll let you:

  • Maximise camera storage using both the medium and small modules
  • Carry plenty of camera gear towards the top of the bag in the medium module and pack other necessities in the bottom of the bag
  • Take just a few pieces of camera equipment with the small module and use the rest of the bag for your other gear. The small module fits top or bottom in the bag, letting you distribute the weight as you need to
  • Use no modules at all and just use the bag as a bag

With one module

The bag alone costs £120; the small module is another £43, the medium module will cost an extra £55. For the bag and both modules, you'll pay out £217. For the entire kit-and-caboodle, including the Tripod and Hydration system, it's just over £241. What do you reckon, is Gura Gear's Uinta worth it for the flexibility, or on the over-priced side?

Bag + modules

If you fancy one, you can check it out on the Gura Gear website.

Emergency smartphone support: a piece of string!

It's a truth universally acknowledged that the steadier you can keep your camera, the better your photos will be. Keeping your smartphone steady can be a bit tricky because it's small and light. Sure there are smartphone specialist supports, but there has to be a cheaper, lighter way that's in-keeping with the pocket-sized nature of smartphone photography, no? I'm not entirely sure why I decided that I needed to modify an emergency string tripod for use with a smartphone, but obviously I was channeling MacGyver somewhere, so I gave it a go. If you've never used an emergency string tripod, it's a loop of string secured to your camera to help keep it steady. You might've heard of it as a chainpod.

For my proof-of-concept smartphone stringpod, I used baling twine. It's not the ideal material because it's too coarse and too slippery against the phone's casing; however, we have an abundance of it and I just needed to prove my idea. A thinner string with a less shiny finish, like kitchen string, would be better.

Take a length of string that's at least double your height and tie together the ends to form a loop.

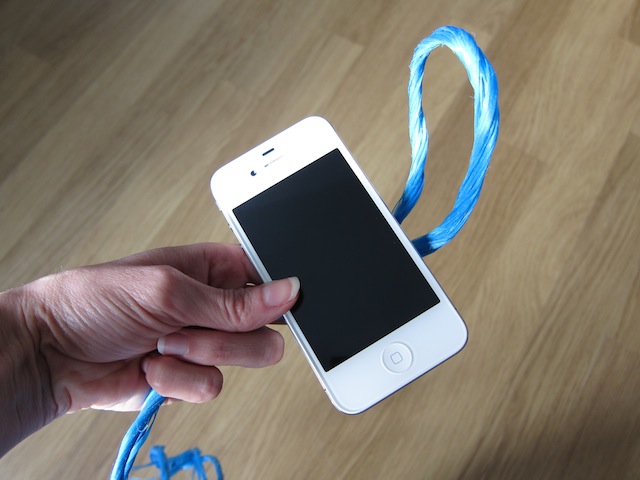
Take a loop of string and secure it around your smartphone in girth hitch

Use the loop to secure a girth hitch around your smartphone. Girth hitch: the technical name for a simple knot made with a loop. You can see better distructions here.

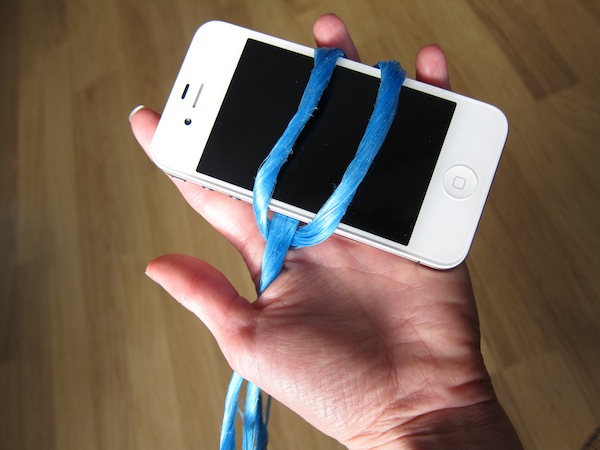
You should now have your string looped around your smartphone, and the rest of the loop hanging down from it.

Smartphone held in a loop

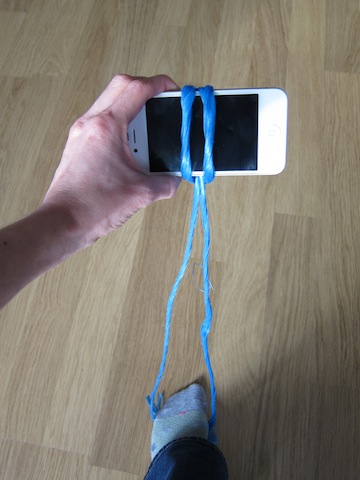
Place your foot (or feet) through the loop and pull your smartphone to taughten the string.

Stabilise your smartphone using your feet to taughten the string

That should stabilise your smartphone on the vertical axis, meaning that you can concentrate on horizontal stability. You should have a better chance of taking wobble-less landscapes and shake-free selfies now.

If you need to shorten the loop, just put a twist in it and secure it with your feet on the twist. Also: don't forget to keep your elbows in when you're taking a photo, no flapping around like chicken, thank you!

How's that for a camera stabilisation device that costs pennies and fits in your pocket?

Translating the mode wheel

If you look at the top of your SLR camera, you’ll probably find a little round dial, which has a whole load of different settings on them. Some of them are automatic settings (like the green square), some of them are ‘creative automatic’ settings (like the little runner), and others are the modes that let you do the heavy lifting yourself (P, Tv, Av and M).

This little dial is called your mode wheel, and it’s your mortal enemy, the destroyer of creativity, and the root of all evil in the world including, but not limited to, wars, swine flu, and stepping in chewing gum with a new pair of shoes.

In this article, I’m going to show you the error of your ways (if you’ve been using it), or I’ll show you what each of the settings means, what it does, and how to recreate the effect by using the manual shooting modes instead.  

Why do they upset you so much?

Good question. The creative automatic modes make me angry because they take important decisions out of your hands, but that’s not the worst of it: People who are using the creative automatic modes might, in the short term, be able to take photographs of a technical quality beyond what they would normally be able to, but if you resign yourself to letting your camera do the work and make the creative decisions for you, the problem is that you don’t understand the underlying theory behind what you are doing, and despite getting better results, you’re not becoming a better photographer.

Imagine, say, that you had an oven that would automatically detect what you put in the oven, then calculate how big it is, what you’re trying to do with it, and select the right temperature and time, before beeping at you when your Sunday roast / cake is finished or your socks are dry. (What? You don’t dry your socks in the oven? Hmm, just me, then.) Either way, the result would be perfect every time, but where’s the satisfaction in not knowing what your oven did to bake this cake? And more importantly, what if you want to take creative liberties – say, you might prefer your cookies a little bit American-style; gooey inside – or you might want to make them crispier, for example…

The purpose of this article, then, is to ensure that if you want gooey or crispy photographs, you know how much heat you need to turn on, for how long, and if your cookie tray needs to go in the top or the bottom of the oven.

Okay, enough of the dodgy similes already, let’s have it!

modewheel-whole

Right, in the picture above, starting from the top, going counter-clockwise, the modes are:

Suppress Flash

Into the warmth

Why this is even a mode to itself I have no idea – depending on why you want to shoot without a flash, the easiest thing to do is to use Program mode (but also see Tv and Av, below), which means that the flash will only come on if you tell it to.

If you’re in a low-light situation, pick a higher ISO speed – this will create a bit more digital noise in your photo, but it means that you reduce the need for using a flash. If possible, select a bigger aperture so your shutter speed becomes lower.

Remember the general rule that you can hand-hold a camera at a shutter speed which is the same as the focal length of your lens: So if you’re shooting at 300mm, you should use 1/300 second shutter time or faster. If you’re using a sexy little 50mm prime lens, you can hand-hold at 1/50th of a second. Zooms are the same: if you’re using a 17-35mm zoom, you can hand-hold at about 1/10th of a second at full wide angle, and about 1/30th of a second at full zoom.

Of course, it’s possible to bend these rules, but if you adjust your ISO speed and shutter time to stick with them, you generally get a good, blur-free exposure without having to resort to using your flash gun.

Night-time portraiture

Electric light Afro

Night-time portraiture is the only of these settings which actually has any merit, in my opinion – not because it’s that difficult to do, but until someone has explained to you how you can get good night-time portraits, it can be a little bit counter-intuitive.

Imagine you’re in Paris with a loved one, and you want to take a photo of them, at night, with the Eiffel Tower in the background. You take a photo with a flash, and you can’t see the tower. You take a photo without a flash, and you can see the tower just fine, but your friend, who naturally is unable to stand still for more than a microsecond at the time, is all blurry and hazy. What to do?

Actually, Av is your friend: In Programme and Tv modes, the flash and shutter time will combine to try to expose your foreground correctly. In Aperture-priority, however, your camera will measure the light that is available to you, and then fire the flash to ‘fill in’ the foreground.

What, in effect, is happening, is that your camera is taking a ‘normal’ photo – exposed for the background – but then also uses the flash to expose the foreground correctly.

For further control (you might decide, for example, that the full 3-second exposure to get the ‘right’ exposure for the background isn’t necessary, and that the background looks OK after only a second, or fraction of a second), you can use full manual mode. On most D-SLR cameras and some external flashguns, you can also set the flash output manually, or adjusting it up or down. This differs from camera to camera (on the Canon, you’re looking for Flash Exposure Compensation, or F-EV), so check in your manual.

Top Tip: For creative effect, try to take a photo in AV mode, but move the camera or use the zoom while you’re taking the photo. Because of the flash your foreground will be static, but you get a hugely dramatic and awesome swirling, moving streaks effect because of the lights in the background.

Sports

Skate-zo-phrenia-104.jpg

Sports mode is a complete fraud: Use Tv mode, set to a fast shutter time (‘fast’ in this case depends on the sport you’re trying to capture. For snooker, fast isn’t very fast, and 1/60 of a second should do, but for horse racing, you need a much faster shutter time), and see what your camera comes up with.

If the pictures are too dark, it’s because your camera needs to use an aperture which is bigger than your lens can do (say, it’s using ƒ/5.6 but needs ƒ/2.8 to do the correct exposure). This is signified by a blinking aperture in your viewfinder, and can be solved by either using a lens with a larger maximum aperture, setting a higher ISO speed, or using a flash gun (although, say, darts players don’t really like it when flashes are going off in their face when they’re trying to throw A HUNNNNDRED AND EEEEEIGHTYYYYYYYY).

Macro

Coloured Paper (Macro)

I know a couple of things about macro photography, and I genuinely can’t see a single good reason for that Macro mode being on a SLR camera. For a compact camera, sure: It puts the lens into a ‘focus close to the camera instead of in the far distance’ mode, which means that it’s not wasting its time trying to focus far away. On a SLR, if you’re savvy enough to have bought a macro lens, you probably will be fine with Programme mode, and if you haven’t got a macro lens, then you’re basically out of luck (unless you build your own, of course, but that’s a different article altogether).

To replicate this mode in the real world, use programme or Manual mode, use a macro lens, and snap away.

Landscape

Freedom in Black and White

Landscapes, glorious landscapes. Set your lens to manual focus, and turn it to the little ∞ (infinity) symbol. Note that it IS possible to focus past infinity – that’s because when you’re working with infrared photography, the light is refracted slightly differently, and you may actually need to focus past what is ‘infinity’ for daylight.

Anyway, your lens at infinity, set your mode dial to Av, and select a large-ish aperture. f/8 or f/11 is a good starting point.

Select as low an ISO mode you can get away with (bearing in mind the rule about hand-holding your camera, above, or just go ahead and use a tripod), and bob’s your uncle.

If you want to get advanced, and you need a very deep depth of field – say, for example – you want a person in the foreground, but you also want the background in focus – read up on ‘Hyperfocal distance’ and prepare to be amazed.

Portraiture

Shaken, Not Stirred

I can’t believe they created a separate thing for portraiture – do a search on Flickr for portraiture, and see what comes up. How can they possibly assume that one single mode fits all styles of portraiture?

Anywhoo – for getting good portraits, start with a reasonably long lens (130mm or so is perfect), stand back a little, use a large-ish aperture (ƒ/4 or so) to throw the background out of focus, and start from there.

Full automatic

This mode will select whether you use a flash or not, your ISO speed, your shutter speed and your aperture for you. It reduces your nice, expensive dSLR camera to nothing more than a big point-and-shoot. If I ever catch you (yes, you, I’m looking at you) with your camera set to the fully automatic mode, I’m afraid I’m going to have to ban you from visiting this site ever again.

Go on, live a little, flick your mode dial one notch, and enter the world of Program mode. The camera still does most of the thinking for you, but at least you are controlling it, rather than the other way around.

P – Program mode

Is one step up from automatic mode – and I confess to using it on occasion: The photographer selects everything except the aperture and shutter time, which the camera calculates for you. If it comes up with a combination of the two you don’t like, use your index finger wheel to change them – turn one way and you’ll see the aperture get smaller and the shutter speeds get faster – and vice-versa for turning it the other way, obviously. Use EV compensation to over- or under-expose your images a little, etc.

Program mode is great if you just want to get the right exposure, and you’re concentrating on just getting the photo, without worrying too much about depth of field etc. I know quite a few news photographers (!) who decided that manual mode was too finicky for them, and are shooting in programme mode most of the time. If it’s good enough for the national press, it’s good enough for me.

Tv – Shutter-speed priority AE mode

In Tv-mode, you dial in a shutter speed (say, 1/200 second), and the camera will attempt to get the ‘correct’ exposure by using the aperture to compensate for varying lighting situations.

… Interestingly, I very rarely use Tv mode, but that’s mostly because if I find myself in a situation where I want to actually control the shutter speed directly, I’m already shooting in fully manual.

One situation where it might be handy is if you’re shooting sports – say, rally racing – where you know you want a fast shutter speed, but the light can change quickly. The other situation I can think of is if you’re panning (i.e. a bicyclist comes flying past you, and you want to get them in focus while the background is out of focus), and you need a slightly slower shutter speed.

One thing to be aware of is that most lenses have a far more limited aperture range than your camera has a shutter time range. Think about it: your camera can do from several minute exposures to a fraction of a second, while your lens will only usefully span a much lower range. If you’re shooting in Tv, keep an eye on which apertures your camera is selecting for you, because if it’s getting too big, some of your photos might come out over-exposed

Av – Aperture priority AE mode

Av mode is the opposite of Tv mode, above: You select the aperture, and the camera calculates the right shutter time. Generally, I shoot either in Av or in fully manual, because for most of my photography, the depth of field (i.e. how much of the photo is in focus) is more important to me than whether the motion is frozen or not.

You get a deep depth of field by selecting a small aperture (ƒ/22, ƒ/32), or a shallow depth of field by selecting a big aperture (ƒ/1.8, ƒ/2.8).

When shooting in Av mode, still keep an eye on your shutter times – if they are very fast without you needing them to be, you may be able to use a slower ISO (switching from ISO 400 to ISO 200), which gives images with less noise. If they’re very slow, your photos might be coming out blurry, and you may want to ramp up the ISO or use a slightly larger aperture.

M – Manual

Go on. Try it for a week. You’ll love it. This is photography at its most control-freakishly delicious.

A-DEP: Automatic depth of field

...Is just plain weird. The idea is that you focus on the point that is furthest away, then on the point that is closest to you, and the camera will then focus and select the aperture you need for you. Basically, it’s using the Hyperfocal Distance (mentioned above, under landscapes), but in an automatic way which is actually more complicated to wrap your head around than just doing it yourself in the first place.

I think I can honestly say that I’ve never, ever used A-DEP before in my life, and that I don’t think I ever will. Give me manual exposure and a bit of guesswork any day of the week :-)

Go forth! Prosper!

So, in summary, what I would love for you to do is to reduce your photography to only four of the modes above: P, Tv, Av, M. if you’re feeling particularly hardcore, limit yourself to Av and M only.

And if you are a truly epic photographer with skillz beyond my wildest dreams, set your camera to M and pry the button off altogether. Chuck it away. You’ve graduated. Nothing’s gonna stop you now!


Originally published back in the mists of August 2012, but it bears repeating.