Stay in touch on Twitter - find us on @Photocritic

Haje Jan Kamps

Setting up a scream-triggered photobooth - because whyever not?

If anyone had wandered along to the Maker Faire in the Elephant and Castle area of London (yes, it's really real; no, there are neither castles nor freely roaming elephants but both would be a vast improvement) on Saturday they would have found me, and the London division of Team Triggertrap, asking people if they wouldn't mind awfully screaming at the top of their lungs for us. Seriously.

You see, we'd set up the Triggertrap ScreamGrab studio because we reckoned that people summoning the exhaustive energy to scream like bellows, and then releasing it in one extended Aiouuuuuuu! would make for fantastic portraiture. And it would give Triggertrap with the sound threshold set to Very Loud Indeed™ a rather good workout. We weren't wrong!

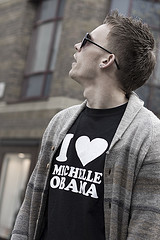
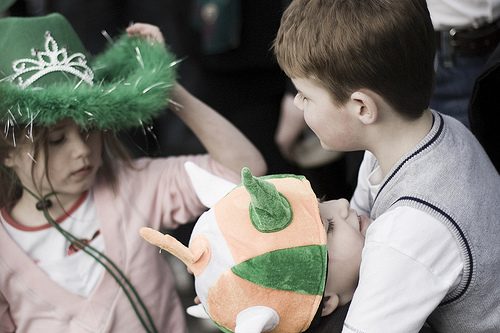
Have a look at these if you need convincing:

And the rest you can see on Triggertrap Flickr stream.

Inspired? Want to know how we did it, so that you can give it a go yourselves? Read on!

The basics

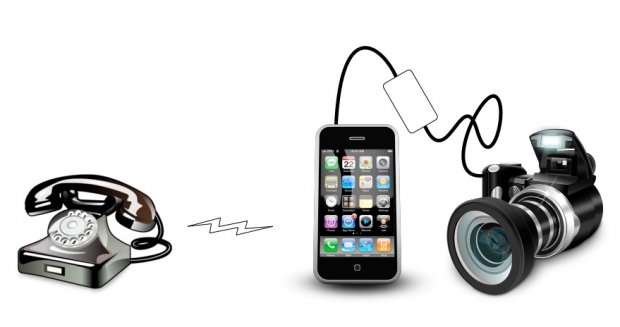
At the least, what you need to do is to get an audio trigger that will take a photo when the volume hits a certain level, and a camera. In our case, we decided to use the Triggertrap Mobile app, but we discovered to our horror that the app itself was way too sensitive: Even with the sensitivity threshold all the way to the top, you didn’t really have to put your back into the scream to trigger the camera (in fact, speaking normally was loud enough to snap a shot). Uh-oh.

In the Android version of the app, there’s a separate slider for sensitivity, but we don’t have that level of control over the iOS app (and I did want to use the iPod Touch I had brought along, so that I wouldn’t have to tie up my phone all day).

After a spot of last-minute panicking, we discovered that there was a very simple, and delightfully low-tech solution to this: I simply stuck a small piece of packaging tape over the microphone on the iPod Touch. Hacky? Well, yes, but who cares – it did the trick!

With the tape in place, we were able to use the sensitivity slider to fine-adjust the triggering threshold. Perfect for what we were trying to do!

In theory, with the app configured and hooked up to the camera using a connection kit, that’s all you need to get the photo. Stick it on a tripod, and you’re good to go – really, everything else is showmanship. But to turn this into a far more fun experience, for us and for our sacrificial victims, we turned it into much more of a show.

The kit

For the ultimate ScreamGrab experience, I set up with the following:

  • Canon EOS 6D set to manual exposure & manual focus
  • Tripod
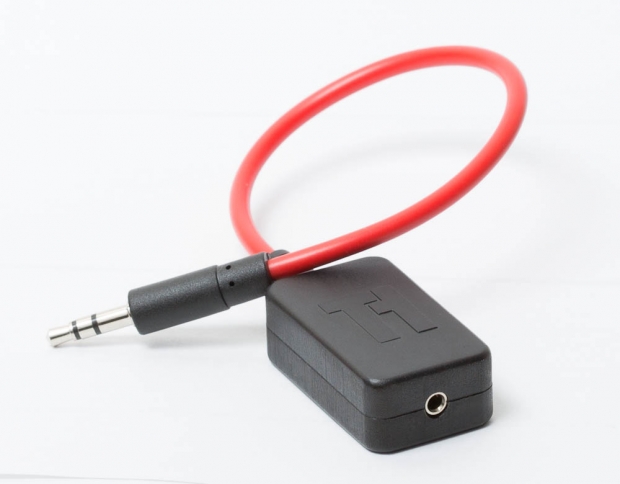
  • Triggertrap Mobile Dongle + connection cable
  • iPod Touch (connected to power, to make sure it didn't die)
  • Tripodclamps clamp to hold the iPod Touch in place (so that your screamers can see how loud they need to scream)
  • Canon ST-E2 flash trigger
  • 2x Canon Speedlite 580EX II flashes
  • 2x light stands
  • 2x white umbrellas

What I did

Let's start with the lighting: I added a Canon ST-E2 infra-red flash transmitter to the camera’s hotshoe, and I set up a couple of Canon EX580 II flashes on super-cheap lighting stands with umbrellas. I fired the flashes on manual output (1/16 each), then set up the camera in manual exposure (1/180 second and f/10, ISO 640) and manual focus. This meant that all the shots were completely repeatable, and I wouldn’t have to make any adjustments throughout the day.

In fact, if it hadn’t been for people being different heights, there wouldn’t have been any reason to touch the set-up at all: even the batteries in the flashes, the flash transmitter, and the camera, lasted all day long. Impressive stuff – but then, battery consumption was the chief reason why I only set the flashes to 1/16 output – in my experience, in modern cameras, you may as well let the ISO do the work, and give your flashguns a break.

Finally, I wanted to ensure that the iPod Touch was clearly visible, so people would be able to see the black ‘needle’ move on the app – so they knew how loud they had to shout to trigger the camera. To achieve that, I used a Tripodclamps clamp. It’s simple: It bolts to the tripod, then squeezes the smartphone firmly to hold it in place. It looks good, and it makes it easy to demo the device, too, which is a bonus.

Someone check for the Four Horsemen of Apocalyspe - I shot in JPEG!

I should also mention at this point that the camera was shooting JPEGs rather than in RAW. The Canon 6D shoots enormous RAW files, and since I had a fully controllable lighting situation, I didn’t expect I’d need to do a lot of adjusting the images. More importantly, the JPEGs are much much faster to download via the tethered connection, faster to process in Lighroom, and it meant that my poor little MacBook Air didn’t slump to its knees. Having said all that, I do generally recommend shooting in Raw. Here is why, and I also wrote an article about why this particular situation (controllable light, need for speed) is an exception where JPEG is acceptable. Because, yes, I’m an insufferable nerd about this sort of stuff.

Turning it into a show

To show off the images, I decided I had to shoot ‘tethered’. I was in luck; my Canon camera comes with a piece of software called EOS Utility, which enables tethered shooting. In this case, I hooked up a27″ monitor to my MacBook Air. I made sure that all photos that were taken were shown on the audience-facing big screen as soon they were shot. Great for instant gratification – even the most reluctant screamers giggled their heads off when they saw their mugs on the big screen.

Instant publishing

I anticipated (correctly) that people would want a copy of their photos – but how do you go about doing that? Quite a few people used Instagram and took a photo of their photo on the big monitor, but obviously we wanted something a little bit better than that. So, I devised a workflow.

I was running Lightroom 4, using the ‘auto import’ feature. In this way, the photos would be downloaded by the Canon EOS Utility to a folder, and Lightroom 4 would automatically import them from that folder into a library. The import script applied a preset to the image (white-balance, some vignetting, some extra contrast and some colour effects to make the photos pop out more). It also applied a description and title to the images, so it would be as quick as possible to publish them online.

From there, I only did one edit to each photo: A quick crop. This was necessary because we didn’t have a lot of time to frame people properly, and besides, a lot of people either jumped or hunched over as they were howling at the camera, so the framing was almost always off anyway.

After cropping, we just dragged the photo to the Flickr publishing tool within Lightroom, and hit the ‘publish’ button. With one person manning the computer, that meant that from squeal to Flickr, it could take as little as a minute or so, including the processing, resizing, and uploading.

We also had an IFTTT set-up, so that we could auto-tweet our ScreamGrabs. Except that Twitter sent us to Twitter Jail for too many tweets!

Other ideas?

It would really have been awesome if we could have had a printer there, and printed out people’s ScreamGrabs as they were taken – but we didn’t really know how many people to expect, and we only had two people at our little stand at any time, so I suppose we wouldn’t really have had time to deal with the logistics of printing anyway — but it would have been amazingly good fun, so perhaps that’s something we’ll do next time.

The other idea that came up, was that perhaps we should have been recording people’s screams! Playing the screams, along with a slide-show of all the photos, would have been a fantastic project, I think – but it didn’t come up as an idea until someone mentioned it to us about half-way through the day. Again, I have no idea how you’d deal with the logistics of matching up the sounds to the pictures… But it would have been great.

In the Triggertrap ScreamGrab booth, everyone can see you scream!

Did you know: Bulb Mode!

I've been doing a lot of talking about Bulb Mode with people recently - as this is relevant to how the Triggertrap Mobile App does stuff like HDR and Star Trail photography modes - but it only recently occurred to me that not a lot of people know what 'Bulb' mode on your camera means. Contrary to popular belief, 'Bulb' mode has nothing to do with light bulbs; it is a remnant from something that most photographers today haven't even heard of: An Air Bulb Remote. If you have an old (or retro-styled) camera, you may have spotted a small hole with a screw thread in your shutter button. It's possible to screw in a mechanical remote control here, which physically 'presses the button' on your camera when it is activated.

This is a Bulb Remote: Squeeze the bulb to take a photo. (Photo cc Denkhenk)

There are two ways these remote controls work: They either have a cable running inside a sleeve (much like the brake system on your bicycle), or a system working on pneumatic pressure. In the case of the latter, you'll have a air hose with a small piston at the end. When the pressure is increased in the air hose, the piston extends, and the shutter button is pressed.

Traditionally, the pneumatic systems had a small 'bulb' at the end, so when you squeeze the bulb, the piston extends, and the picture is taken. This is the bulb that camera manufacturers refer to when they say 'Bulb' mode.

So now you know! What's your favourite depreciated bit of photography jargon?

'Shooting Yourself' goes on sale this week!

We're nothing if not collaborative here at Photocritic, and Shooting Yourself is a great example of that - containing photos of around a hundred self-portraiture artists, curated by yours truly, and with a big load of input from Daniela (also of Photocritic fame)... It's one big orgy of words, pictures, and - yes - self portraits! Find out more over on my other website, and pre-order your copy from your favourite bookshop. If you can't wait, or if you prefer a digital copy, you can grab a virtual copy of Shooting Yourself from Ilex Instant. You've got to hurry, though, I hear Ilex Instant is about to run out! (I jest, I jest... Adam, my publisher over at Ilex, ensures me that they have plenty of digital stock)

What are you waiting for? Shuffle over and grab your copy today!

Best thing about iOS 7? The camera is bloody fast.

We already took a quick peek at the new camera app in iOS 7, but then I was able to borrow an iPhone 5 running iOS 7 off a friend, to see what changes Apple may have been making to the camera. There are lots of little improvements, but the #1 thing that strikes me about it is how incredibly, incredibly fast it is. The camera in general was one of the things I disliked the most about iOS 6, but in the newest version of the operating system, Apple have completely knocked it out of the ballpark.

Gone is the skeuomorphic "shutter closing" animation that made the camera feel horribly laggy. In the new camera app, you can take photos as quickly as you can press the shutter button. No, seriously - if your subject is bright enough, and your thumb is fast enough, you can practically record video, that's how incredibly fast it is.

It's not just really quick at taking pictures, either - you can swipe from the lock screen to launch the camera, and the code boffins at Apple must have done some serious re-coding of the camera app: It launches in fractions of a second, and and you're immediately ready to take photos.

Let's take a closer look.

At the beginning of the video below, I'm just showing how easy it is to go straight to the camera (Drag from the bottom right of the screen). Then, I'm launching the camera, then going straight into taking a load of photos in rapid succession, followed by showing off the pictures I've just taken in the camera roll:

Really impressive stuff - and that doesn't even touch on any of the other improvements on the photography side of things.

Suffice to say that I think Apple have finally created some software that's worthy of the extremely capable cameras that are finding their ways into the iPhone 5 and new iPod Touch devices. Way to go, guys, and keep up the great work for photographers!

Haje's review notes: Canon EOS 6D

After Photocritic editor Daniela came and showed me her shiny new camera - the Canon EOS 6D - I was gobsmacked. I have used my Canon EOS 5D for a while, and for quite a long time, I had been extremely happy with the photos, but living with this nagging feeling that there was something 'off' about the 5d. As soon as I picked up the 6D, I realised what it was. The Canon EOS 5D mark III is an astonishing piece of kit. The low-light capabilities are out of this world, it takes incredible photos, and the controls are so natural that it is probably the camera body I've gotten used to the fastest. It's a masterpiece of electronics and design. However, as I discovered when I first held its baby brother, it's too large.

This may come as a surprise to someone who's met me. I'm a tall guy (around 6'4" / 196 cm or so), and I have freakishly large hands. But, when I was writing a lot of books about photography, I forced myself to use entry-level cameras - not because I particularly wanted to use them, but because one of the key things I make in my books is that equipment doesn't really matter. That is very, very true, up to a point -- but given that most of my books are written for beginners, I had to 'eat my own dogfood', as they say: I figured it wouldn't make any sense to use a 5D mk III and then sing the praises of entry-level SLR cameras.

Dead Rat Orchestra -- Concert photos taken at Islington Assembly Hall, 1 June 2013.

Anyway: Last night, I did my first gig with the Canon EOS 6D, and ran into the first time where the 6D fell short. With the 5D, you can take gorgeous 22-megapixel shots in raw all day long; I never ran into a full buffer. On the 6D, however, I ended up missing several of the shots at the concert due to the camera's buffer being full.

I can't quite convey my disappointment: The 6D is a perfect camera for me in so many ways. I love the 20 megapixels, I love the ergonomics, I love the fact that it's a lot smaller and a bit lighter than the 5D. I like that it has GPS built in (great for travel photography!). I suppose it's naïve to think that any camera can completely replace a camera that's £1,000 more expensive.

Despite this one minor hiccup, I do still think I'll end up selling my 5D mk III. In the end, the consideration is this: How often do I take concert photos (not that often), and how often do I travel and take photos (frequently). The lighter weight, smaller size, and built-in GPS are worth more to me than being able to go all rapid-fire at a gig. And, of course, there's a way of dealing with this shortcoming, too: Become a slightly better photographer, and be a little bit more selective about the photos I take.

See the full gallery of concert photos taken with the 6D over in my Flickr set!

Street photography and the law

A lot is said and written about photography and the law – and to be honest, you’d be mad to get involved in the fray. Of course, I am that mad, which is why the Rights vs Respect in Photography ended up published here on the site.

Now, the other day, one of my readers, Brad, posted a rather fantastic and soberingly clear comment about what the law actually means to photographers. It was written from an US point of view, but frankly, the law is similar in much of the world. Beyond the law, however, you should be looking for a helping of ‘common sense’. This ‘common sense’ thing isn’t as common as its name would indicate, so hereby; a healthy dose of common sense and a quick refresher of what you can and can’t do when you’re out and about with your camera…

I was so happy to find this in my comments, that I figured it’d be a crying shame if it stayed hidden away as a comment on a long-forgotten blog post, so hereby, republished in all its glory. That means that some of the comments (where they are replying to other comments) are a little out of context, but I’ve linked directly to the correct comment where possible, to clarify.

Take it away Brad:

The law can essentially be summed up like this:

1. You can take a picture of anything you see – especially when you are in public.

2. You CANNOT take pictures where there is an expectation of privacy such as in a rest room or locker room. (more about Expectation on Privacy on Wikipedia)

Me to, brother. Me too.3. You cannot legally trespass, but if you are on a side walk and you were so inclined you can photograph people in their back yards or on their porch. I think the back yard is over the line though.

4. You can take pictures of people or children in any public context. BUT DON’T FOLLOW LITTLE KIDS OR YOUNG WOMEN AROUND AND SCARE THEM. Legally though, you can follow people to get that shot – remember the Princess Diana chase. Perfectly legal.

5. You cannot profit from your work without signed releases. But to restate, feel free to snap away. It is only your commercial use that is limited.

6. You NEVER have to surrender your camera to or discuss the nature of your photography with anyone without a court order.

The photo with the guy wearing the ‘I ♥ Michelle Obama’ shirt is Me to, brother. Me too. by Photocritic.org, on Flickr. It was taken street-photography style without permission – but sits very nicely in my portfolio, which is perfectly legal.

Protecting your right to taking photos

I hate government oppression too. I was oppressed last summer at a pool. The Captain of the Guard approached me and asked me about the nature of my photography. I advised him that it was none of his concern as I was in a public place photographing what is in the public view. Furthermore, I told the “Captain of the Guard” to call the police expecting them to tell him there was nothing they could do about it. Without rehashing the whole story, the police can stay there and observe you. They may lie to you and try and intimidate you even making threats such as banning you from a public park (which they cannot do). Luckily, I happened to be on the phone with an attorney at the time. As an aside, you ARE required to provide police with valid ID if asked.

In a case like this, take pictures of the police officers, their badges and their cars. Indeed, take pictures of all the people involved and go public with it. Continue taking pictures of your original subjects. It is perfectly legal, they cannot prohibit it unless you are on a restricted government property or at a nuclear facility. You can also take as many pictures as you want of whatever and whomever you want including the person escorting you out of a private place(for example you are at a mall and being escorted out). If you are alone, get somebody on the speakerphone as a witness to what is being said.

Assault (fear of harm), Battery (physical contact), Terrorist Threats (threats of violence), vandalism (damage to your property) are serious offenses. If someone like an angry spouse or parent threatens you with harm or attempts to seize your equipment calmly offer them the opportunity to stand down and walk away. Suggest that they call the police or their attorney. If they do not stand down, call 911 and press charges.

How to avoid being photographed

For better or worse a person’s sole recourse is to seclude themselves should they wish to not be photographed.

So:

1. When you are in public, dress and behave appropriately or you may find your picture on MySpace or something similar. I don’t know what your son was doing when his ex photographed him, but if they are all appropriate the pictures may convey a different sense than the words the ex is using. Whatever the pictures convey however, is true for that moment in time.

2. Dress your young children appropriately even at the pool. They may be photographed. You CERTAINLY DO NOT want them to appear older or sexually appealing.

3. Encourage your teens to dress and behave appropriately. They may be photographed. Do NOT buy them clothes that you do not want them seen in.

4. Do NOT threaten or harass a photographer. You may find yourself in front of the magistrate if you do. You most certainly will if you threaten me.

5. Be conservative. Do NOT make yourself into an irresistible subject.

As for the lingerie store worker: The contents of the store are NOT copyrighted works. That is not what would prohibit this person from entering the store with a camera. Indeed, unless it is posted otherwise, he can walk into the store with his camera. He CAN be ordered to leave and must comply since it is PRIVATE property. He can enter in the first place by virtue of being a store open to the public. Permission to enter is implied. That is why your store my wish to post a prohibition notice against photography inside the store.

Now, if this is in a mall, mall security can escort him out. He can of course take as many photos of anyone or anything he wants while he is being escorted out of the store or mall.

If he is on the side walk outside the store unfortunately, you are out of luck. He does not need your coworker’s permission to photograph her.

Good photographers are ALWAYS looking for a good photo opportunity. That could be a beautiful woman, a handsome man, a child playing (some facial expressions are golden), an animal, sunset or barn. Who knows.

Young Jealousy Young Jealousy by Photocritic.org on Flickr – an example of a street photograph involving children. As I do not have model releases for them, I cannot sell it as stock, but (at least in the UK), I can use it in a newspaper article related to the event in which it was taken (St Patrick’s day parade), or I could post it on Flickr and use it as part of my photography portfolio.

I recommend getting your shot and moving on though. The longer you stay, the more likely you will be noticed.

I don’t know what this guy was doing at your store. If it was a one time thing hopefully he just found her an attractive subject, But admittedly, it sounds “creepy.”

There are times when I may sit or stand somewhere for more than an hour or two just taking pictures of people maybe trying to catch their expressions on an amusement park ride or a water slide. Little kids ooing at zoo animals and the like are awesome shots.

Advice, if someone is trying to seclude themselves from you (the photographer) such as moving to an area out of your view, though it may still be public, respect their privacy. If someone POLITELY asks you not to photograph them or their children you should respect that. If they are rude, screw them. Do what you want. NEVER FOLLOW A LITTLE KID AROUND.

Lastly, there is no expectation of privacy when you are in public. That is why I suggest being conservative. A “peacock” will almost always get its picture taken especially if it spreads its tail. If someone is taking your picture and you do not like it:

1. Politely ask them to stop 2. Leave if they won’t

Consult your attorney if you have any questions.

Brad

Closing notes

Please note:

This post was excerpted from a comment of the ‘Your Rights as a Photographer‘ post, and was republished as an alone-standing article with permission from the original poster.

Please note that nothing on this blog can be considered legal advice – if you have a query, please contact your attorney.

Kickstarter: Photographer looks at what happened to the Olympic Mascots

I can't lie - I'm pretty partial to Kickstarter (and that's not just because I'm a prolific backer on there, nor because I've done a campaign myself)... So when our old friend Joe Giacomet reached out and told Photocritic about his project Cash for Gold, I was hooked... Struggling a bit there, Wenlock?!

Cash for Gold is a satirical look at the London 2012 Olympic Legacy and sees London Olympics mascot Wenlock a year on from the end of the Olympics.

Poor Wenlock is now an alcoholic, depressed and disheveled inside a cash for gold shop cashing in his 3 gold medals.

The image is being crowd-funded through Kickstarter -- quite possibly the first Kickstarter campaign I've seen that's targeted at funding just a single image - but what an image it is!

Check out the video below, and then bounce along to the Kickstarter page for Cash for Gold, for the rest of the deets.

Mark your calendars: remote camera triggering webinar on Thursday

If you're free on Thursday at around 2PM EDT (7PM BST, or see this handy link for the correct time zone near you), you're in for a treat: Triggertrap and Datacolor are doing a webinar on remote camera triggering! It's like a seminar, but online!Most cameras have a range of creative remote control capabilities you may not even know exist. In this exploration of remote camera control possibilities we will cover the basics of shooting tethered to a computer, remote release devices, time and interval shooting (including interval shooting for combination into video streaming later) and remote triggering via long-run wired and wireless connections.

Applications will include, but are not limited to: commercial, stop-motion, wildlife, city and landscape photography.

It's a 1-hour seminar with David Saffir and C David Tobie, discussing the creative approaches you can use to trigger your camera remotely!

You can register for the seminar on the Datacolor webinars page today.

Enjoy!

Olympus getting out of cheap compact cameras? Good!

The news that Olympus is ditching their compact camera division this week caused quite a stir, but I can't help but think that the camera manufacturer is on to something. I've long thought that entry-level compact cameras are a Bad Idea. Nikon's line-up is a great example: Their SLRs are phenomenal. The Nikon 1 series are incredibly capable machines. But their $80 entry-level cameras are best avoided. It's not a particularly closely guarded secret that they're contract manufactured in a completely different factory, the design isn't done by the core Nikon team, etc. Basically, the entry-level cameras don't look or feel like Nikons.

The same goes for Olympus, but they also have a couple of other challenges they're facing.

I think Olympus is probably better off without these fellas.

There are two ways to look at this:

1) If your first camera is a cheap Olympus camera, you might be happy that it didn't break, and you'll buy another Olympus further down the line

2) If your first camera is a cheap Olympus camera, you might be appalled by the build quality, and decide to go elsewhere.

It's a hard gamble, because for cameras that are sold for less than a ton, it's pretty obvious that camera manufacturers have to cut corners somewhere. Cheaper enclosures and naff colours mean that they look and feel cheap. Cheaper LCD screens makes it hard to see how good your pictures came out. And cheaper lenses, sensors, and processors means that the camera will be slow, that there's a physical limit to how good the photos can be, etc. On top of that, the cheapest cameras often end up in the hands of people with the least of a clue - the very same people who could benefit the most from having a more 'intelligent' camera.

So, in deciding to pull the plug on their cheapest cameras, Olympus is making a wise move: They probably can't (and shouldn't) compete in a market that's a race to the bottom: Developing a cheap camera that is designed to be as good as it can be means spending a metric arse-tonne of cash on development, then another huge amount on manufacturing an enormous quantity of them, then piling in the marketing dollars to shift 'em. And even then it's a gamble, hoping that Nikon or another bottom-end manufacturer didn't happen to release a slightly better (or slightly cheaper) model a couple of weeks before you did.

Good riddance, I say: Olympus can now continue focusing their attention on the spaces where they are true innovators: The Olympus OM-D, the other mirrorless cameras, and their superzooms.

Why white-balance lens caps don't make sense

400x400_expocap.jpg
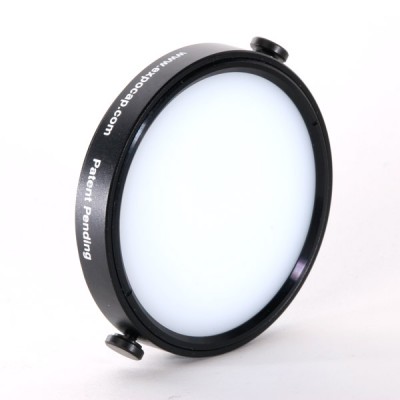
It may be purely coincidental, but over the last few days, I've heard a lot of buzz about various products that clip onto the front of your camera to help you white balance your images. The idea is that you place
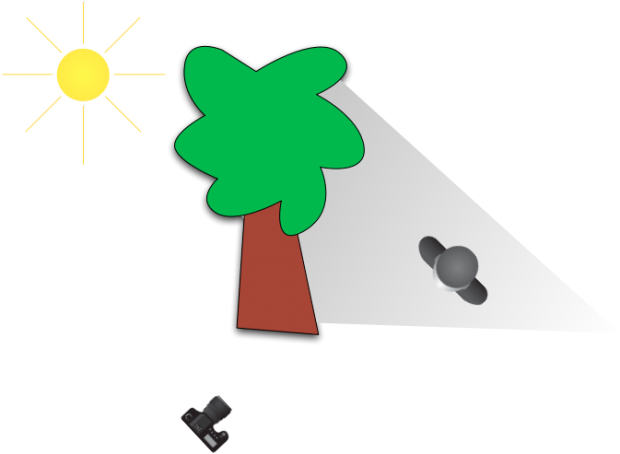
 a special lens cap on your camera, snap a photo, and use that color as a reference color when you edit your photographs. The devices come in lots of different types: full-covering caps, dome-shaped caps, home-made versions made out of coffee filters or Pringles caps, or any number of other surfaces.

In theory, it's a great idea, but it has a flaw: A white balancing cap like this measures all light that hits it. Can you spot what the problem might be?

Imagine your lighting set-up is like this, for example

shade2.png

You are in the sun, but your subjects are in the shade. Your white-balancing cap will measure the light that's hitting your camera (direct sunlight - or around 5,500 Kelvin or so). However, your subject will be in the shade (around 7,000 Kelvin or thereabouts).

The outcome is utterly predictable: Your white balance is going to be miles off.

So, what's the solution? It's simple:

Don't white-balance where you are taking photos from... White-balance what you are taking photos of.

Brand new site celebrating time-lapse photography!

It's pretty incredible what you can knock up in a day if you're suitably caffeinated–or slowly on your way to getting sozzled. In the case of the Triggertrap Company Hackathon, I decided to build a site celebrating one of my favourite hobbies: time-lapse photography.

A screen shot of a website? What's next, an interpretative dance recital of a haiku poem? Actually, come to think of it, that's not such a bad idea.

Primelapse.com is the name, and it is a collection of a load of rather fabulous timelapses from around the world, organised by location, technique, and theme.

If HDR photography is your poison, we've got you covered. Looking for time-lapses from California? Done. How about a load of timelapses taken from space? Yeah, sure, why the hell not.

It's a brand new site, so there's a load of things I still want to add to the site, but for now, we've got the first hundred or so timelapses live on there, so why not pop over and have a look?!

The Disappearing Review & why I left Pixiq

Back in November 2012, I received an e-mail from the Powers that Be at Pixiq, stating that they had unpublished a post I wrote back in June of 2011, entitled 42nd Street Photo: One to Avoid, after they had received a formal complaint from the photographic retailer about the post I had written. As far as I can tell, it appears that 42nd Street Photo approached Barnes & Noble directly, requesting that the post is taken down. Pixiq's editorial director decided to fold without first discussing the matter with me, and instructed the Pixiq editors to take the post down.

Obviously, if the editorial director feels that the post was worthy of being taken down, he is probably right, but as someone who is rather passionate about copyright, and the protection thereof, I found it rather interesting that 42 Street Photo decided to use the DMCA to get my post taken down.

Of course, since I'm now back on Photocritic, I can publish whatever I like without a gag order, and the review is back where it belongs: On-line, for anyone to read.

Copyright Infringement?

This was the photograph 42nd street photo claimed was copyright infringement, as I didn't have 'permission' from them to take a screen shot.

As far as I can tell, the DMCA portion of 42 Street Photo's complaint pivoted on the fact that I had a screen shot of the 42 Street Photo included as part of my blog post:

Says 42 Street Photo: "The author has unlawfully taken a screenshot of the 42photo.com Web site and logo without the express written consent of the copyright holder, 42nd Street Photo."

Now, this is quite interesting, because this isn't technically a copyright infringement; It falls both under US fair use laws, and UK Fair Dealing laws: Using a screen shot in this manner would fall under both news reporting or criticism.

Of course, it is scary to receive a letter from a lawyer saying that you're accused of something under the DMCA, but does that warrant removing the whole blog post?

Libel?

The other part of the complaint from 42 Street Photo is that my negative review might somehow fall under defamation legislation. That's an interesting angle to take. However, for something to be defamatory (whether it's published defamation, in which case it is known as libel, or a more transient defamation, in which case it might be slander), it has to be both malicious and false. It also, generally, has to be about a person - it is rather difficult to defame a company.

Whether my blog post was malicious is neither here nor there, but it most certainly wasn't false.

It is interesting, then, to see how a company like 42 Street Photo decided it was appropriate to turn to the law to try to get negative posts about them expunged from the internet.

Specifically, they wrote that: (...) this post is a highly subjective description of a one-time event allegedly experienced by someone other than the author (...).

'The person other than the author' in this case was my fiancee, now my wife, so the suggestion that I might not know or understand the full details of the case is quite funny.

As for 'highly subjective' — Well... Yes. Of course it is highly subjective; that is sort of what online reviews are all about.

More worryingly, however, is that they claim that the post is "libelous, tortious, harmful and/or defamatory", based specifically on quotes like “42nd Street Photo: One to avoid” (the title of my post) “Tales of dodgy behaviour and atrocious customer service” (after they went through a series of weird business practices that), and “an apparent lack of care about fraud prevention” (charges added to the order by someone who wasn't authorised to do so by the card holder).

So, what's the problem?

42nd Street Photo's lawyers were using playground bully tactics - and Pixiq let themselves be bullied.

Anyway, the worrying thing here is in two parts:

1) By equating a online user review that 42 Street Photo disapproves of as 'harmful' or 'libellous', they are in effect saying that any negative reviews are somehow illegal. I can't quite figure out what they are getting at, but I suspect that 42 Street Photo has received one too many negative reviews, and that they are now trying to do some serious damage limitation — that's the only reason I can imagine why they suddenly decided to take action on a 532-day-old blog post buried deep in the bowels of a very active website.

2) That Pixiq decides to bow to their request by removing my post.

Now, point 2 could be completely innocent (they acted before they read the request properly), mildly immoral (they are trying to get 42 Street Photo to advertise on the site, and don't want to rub them the wrong way), or deeply worrying (negative reviews of any kind are permanently banned from Pixiq, completely ruining the credibility of the site in the process).

What now?

The discussion on the above continued for a while, but I never actually got a response from Pixiq about why they decided not to stand up for one of their writers.

I should add at this point that I have been in journalism for a long time, most notably, I suppose, as the editor of T3.com. We did occasionally get ourselves into some legal wrangling after we wrote something, but that's sort of the way of the world: You write something, someone takes offence, and tries to do something about it. The big difference, however, is that you'll usually find that your publisher will stand up for you: They have a large legal team on staff, and will help defend their editors and writers, if they have done their due diligence.

The fact that Pixiq decided to roll over, and pull my article without even discussing it with me was ridiculous. I'm vaguely amused with 42nd Street Photo's legal petulence, but I'm furious with Pixiq for not shrugging it off for what it was: It was a schoolyard bully squaring up to them, and they ran away without taking on a fight they knew they would win.

I don't know about you, but I think I'm better off here at Photocritic, where I can tell 42nd Street Photo what Pixiq should have said: Your request is hogwash, and the review is staying. Have a lovely week.

Further Reading


Pixiq.com site goes down, leaving authors and readers in the lurch

Sterling Publishing apparently shut down the popular photography blogging site Pixiq today, only a few days after serving notice to all their bloggers, stating that the staff would no longer be required. Barnes and Nobles have a few things to celebrate this week, including a 20% hike in stock value when the rumours of Microsoft sniffing around their Nook e-book reader started seeping out on the internet.

That didn't stop Sterling Publishing (who operates the Pixiq brand) from shutting down the entire Pixiq.com site, posting a message on the site's homepage stating that the site no longer is active.

The message reads "Thank you for visiting www.pixiq.com. Sorry, this website is no longer active. For information about Pixiq books, please visit www.sterlingpublishing.com", and it appears that Pixiq just flicked off the switch, weeks before their contracts with the bloggers expired.

Er, okay then...

Farewell, Pixiq. You had a good run.

The site didn't communicate its intention of shutting up shop ahead of time, neither to its readers nor to the dozen active writers on the site.

"This is ridiculous", says one of the Pixiq bloggers. "It means I can't get my content back, even though the copyright was still mine, even though I had specific talks about that

Luckily, Photocritic staff Daniela Bowker and Haje Jan Kamps had a backup of their content, and were able to publish all the content on Photocritic.org with a minimum amount of downtime.

None of the editorial or management staff from Pixiq could be reached for a comment as this article was published.

Call your phone to trigger your camera


One of the most awesome things about working on the Triggertrap is the community we've built up already. And, like any great community, we keep getting fantastic ideas via our Get Satisfaction forums.

triggertrap_tt_d2_004.jpgAs soon as Triggertrap Mobile launched, we had a fantastic idea from Travis, who wished he could trigger his camera by calling his iPhones... The big dirty secret, however, is that this is already possible, if you have a Triggertrap Mobile Dongle! The little trick is to choose the top secret special triggering sound we use in the Triggertrap App as your ring tone, and then to turn the ring tone sound to maximum. Here's how

WARNING - It's worth pointing out that if you're planning to do this, make sure you keep your Triggertrap dongle plugged in the whole time, and switch the special Triggertrap tone for another ring tone before you unplug it. The tone is meant to be listened to by the Triggertrap Mobile Dongle only; It isn't great for human consumption (For exterior use only; do not swallow; consult a doctor if you spill this sound in your eye socket, etc). Anyway.

How to trigger your SLR by calling your telephone

To be able to call your iPhone or Android phone to trigger your camera:

  1. Plug your Triggertrap Mobile Dongle into the headphone socket of your iPhone.
  2. Download the Triggertrap Mobile Ringtone for your iPhone as a .zip file.
  3. Unzip the tone (it's a .m4r file; Apple's special m4r ringtone format.)
  4. Install the tone to your phone2
  5. Choose the Triggertrap Tone as your ring-tone3
  6. Set up your camera using Single Shot1 and preferably manual focus, too
  7. Call your iPhone from another phone to take a photo.
  8. When you're done, choose your old ring tone3 again, before un-plugging your Triggertrap Mobile Dongle from your iPhone

Brilliant, eh? 1) You could also set it to Continuous mode, but we'll be sending a very long shutter signal to your camera (5 seconds in total), so it would be like pressing and holding your shutter button for 5 seconds. Try it now; press and hold your shutter button. If it takes 30 photos in quick succession, that's what'll happen when you use this trick to trigger your camera. If you'd prefer to just take one photo, use single shot mode!

Additional help and assistance

2) How do you install a custom ring tone to your phone?

  1. Set your computer's sound to mute.
  2. Drag the .m4r ringtone file to your iTunes. If you forgot to set your computer to mute, you'll now get a horrible sound playing through your speakers. Trust me; you don't want this sound: It's bad for your computer and for your ears.
  3. Plug your iPhone into your computer with the USB lead
  4. Click on your iPhone within iTunes
  5. Select 'Tones' from the bar across the top (this is also where you select what music, movies, and apps you want to sync to your phone)
  6. Either choose 'all tones' or just 'Selected Tones' and then tick the Trigger Tone box.
  7. Click 'Apply'
  8. Click 'Sync'.

3) How do you choose a ring tone on your phone?

  1. Go into the Settings app on your iPhone
  2. Choose Sounds
  3. Click Ring Tone
  4. Choose the ring tone you want as your ring tone. In this case, Trigger Tone. If you've only just uploaded it to your phone, it'll show up right at the top.

Montblanc photographs the entire world at the same time


Now how's this for a brilliant idea - Montblanc have come up with a PR stunt that has participants around the world to take photos at exactly the same time. In “The Montblanc Worldsecond”, the company launches their ambitious photo project that invites everyone to capture moments of beauty photographically. A specially developed mobile photo app (for iPhone and Android) features a countdown function, ensuring that all cameras of will take a picture at the very same instant.

The photos are then uploaded to the worldsecond.montblanc.com Web site, creating a stunning mosaic of globally shared moments, of “Worldseconds”.

The Montblanc Worldsecond mobile app will be available for Apple iPhone and Android phones in November 2012. For further information, visit the website.

Is stock imagery getting too specific?


As a stock photographer, you have to make your money any way you can. I suppose there are only so many saleable photos of 'businessman on mobile phone', but when you look at stock sites, you'll often find photos that are just a little bit ludicrously specific. The funny-guys over at CollegeHumour spotted that as well, and created this rather fabulous video about it:


So, the question - dear readers - is stock photography getting way too specific, or is this the only way that stock photographers can still carve themselves out a niche?

Review: The Long Exposure eBook

Long exposure photography is about capturing space and silence, like visually holding your breath; it is about capturing the beauty and calmness of a scene... And it's really good fun to boot!

The new book by Ireland-based David Cleland is a fantastic introduction to the process of capturing long exposure photographs. It documents the simple steps he employs every time he embarks on a long exposure photo shoot.

bookinside.jpg

The e-book covers everything from the equipment you will need right through to post- production processing in Adobe’s brilliant Lightroom 4. This guide has been written with the beginner to the long exposure process in mind; however, the enthusiast and professional alike may find something of relevance also. The know-how in this book will enable you to capture stunning long exposure images on even the simplest of camera set-ups.

More info? Head to David's website - and dont' forget to keep an eye on his Twitter, while you're at it!

Becoming a better photographer - with Photo Forensics!

If you've been anywhere near a technology magazine in the past few months, you can't have failed to see a series of Tamron adverts, showing off their 'astonishingly compact and leightweight' lens with 15x zoom lens. However, when I was having a peek at the advert, I started wondering what, exactly was going on here.

The advert in question is this one:

screen_shot_2012_09_26_at_144731.jpg

Now, don't get me wrong, this is a lovely photograph. But I can't help but wonder whether we're all victim of somewhat false advertising here. There are a whole load of things wrong with this photographer, and as an observant student of photography, I'm sure you can spot at least some of them. Take a close look at the image, and think like a photographer - what are you seeing?

Depth of field

One of the problems I had with this photograph, are the claims about zoom length and depth of field. The two photos are a wide shot and a very up-close photos, and since this is a 18-270mm lens, it stands to reason that Tamron have taken one photo at each of the focal lengths. So, that means that the widest possible aperture the main photo could have been taken at, is f/6.3 (this is a f/3.5-6.3 lens after all). As such, the top photo would have been taken at 270mm and f/6.3.

screen_shot_2012_09_26_at_144735.jpg

The shadow and highlight on the adult's arm, along with the highlight portion on the boy's arm would indicate that the light is coming from above and left in this photograph. Lovely; but that leaves us with some questions. If we follow the 'sunny 16' rule, this photo would have to be taken at ISO 100 with 1/100th of a second at f/16.

However, there's a very distinct shallow depth of field thing going on, which leads me to believe that this image will have to have been taken wide open - at f/6.3. That's entirely possible, of course, but then the camera would have to be shooting at 1/4000th of a second or thereabouts. No problem, but there appears to be some motion blur on the droplets falling off the oar in the background - indicating that this image will have been taken with a shutter speed of 1/200 or less.

Of course, all of this is possible if they used a Neutral Density filter (in this case, to get from 1/4000 to 1/200, you'd need a ND4 filter or thereabouts) when taking this photo, but as far as a like-for-like comparison goes, that seems a little bit weird for an entry-level consumer lens.

screen_shot_2012_09_26_at_153319.jpg

Another argument for why this photo doesn't quite stack up in my mind, is that for this particular lens, you only have to focus up to about a 30ft / 10m distance. After that, you've focused to infinity, which means that even at f/6.3, you actually have pretty decent depth of field. If the top photo is taken from the distance implied by the bottom photo, I'd say that something really curious is going on in these shots: To me, it looks that the distance to the boat is about 10 meters - and if that is true, then the picture is a physical impossibility without extensive photoshopping.

Or rather: I can't really see how a 270mm f/6.3 lens could have taken this photo from the distance the bottom image would imply - especially considering how the boy is perfectly in focus, whilst the boat just in front of him, and the paddle just behind him is out of focus.

If you ask me, it looks as if the photo was taken from much closer than the inset photo claims, the lens blur on the foreground (on the boat) is genuine, whereas the person in the background has been blurred in Photoshop, after carefully applying a mask around the boy. That would certainly explain why there doesn't appear to be any further depth of field fall-off between the man's elbow / paddle and his face - they all seem to be blurred the same amount, which seems unlikely if the photo was taken in the way it is implied

Lighting

The other thing that I find weird in this photograph, is how it looks like the lighting is quite different in the two photos. If you look at the smaller, inset photo, you can see that the life vest the boy is wearing is significantly brighter than his face. On the main photo, however, we are getting remarkable detail and dynamic range in his face.

In fact, the fact that we have perfect definition in the directly sunlit arms of both the people in the photo is astonishing; you'd expect a lot less definition in the shadows in this image... Which makes me believe that this photo has either been through some rather extensive photoshopping to lighten the shadows (nothing wrong with that...) or that a reflector was used to achieve the top photograph.

Again, of course, there's nothing wrong with using a reflector, or photoshopping a photo to make it look better, but I can't quite help but think that whatever is going on here, it would take some expert photoshop or lighting skills to get that much detail out of the photo - and if that is the case, is it a honest comparison between the two shots?

No help from Tamron

Of course, I wanted to find out for myself how these photos compared to their originals, so I e-mailed Tamron back in May to get my hands on higher-resolution versions of the photos used in this advert. Back then, I received an out-of-office e-mail from their press office, but I never received a reply to that e-mail, nor to any of my other enquiries. A shame; I think it could have been really interesting to see how far off I was in my 'photo forensics'.

What can you learn?

Anyway - the point of this article isn't to point fingers - it is entirely possible that Tamron's photos are entirely above board, and that the photos shown are direct-out-of-the-camera versions of photos taken with the Tamron 18-270mm lens...

The point I'm trying to make is that you can learn an incredible amount about a photograph by just looking at it, without having any additional information about the equipment used. The key to learning something from this exercise is to ask the right questions, and apply everything you know about photography to the image to 'reverse engineer' how it was taken.

I made a habit of analysing photographs I've seen in magazines a long time ago:

  • Where does the lighting come from? Is it natural lighting, flood, or flash lighting? How is the light managed / adjusted / reflected / diffused?
  • What is the shutter speed and aperture likely to be?
  • What angle was the photo taken from?
  • What focal length lens was the picture taken with? Was it taken with a telefocus or a wide-angle lens?
  • What digital enhancements were done on the photo before it ended up on print?

By spending 30 seconds on any photo you see around you, you can train yourself to become a better photographer, even when you are miles away from your photographic equipment!

From iPhone to Instant print, in one far-fetched leap


When I logged into my Kickstarter account today, I was met by the Impossible Instant Lab, and I was intrigued. The IIL is a way of making real photographic Polaroid prints from photos taken with your iPhone. When I first saw the video, I was wondering; Could this possibly be a joke?

Allow me to explan: The IIL appears to take a square crop from the middle of your iPhone, and turn that into a Polaroid print.

So far so good, but in the mind of a photographer, the science just doesn't stack up: On an iPhone 4 screen (which has a 1136-by-640 pixel resolution), you are essentially getting a 640x640 pixel crop. That's 0.4 megapixels.

Now, Polaroid prints have never been known for their astonishing quality, but even the least ambitious of Polaroid cameras has significantly higher resolving power than 0.4 megapixels. In fact, if you have a look at a high-resolution scan of one of Impossible Project's own films on Wikipedia, you can see that there's a lot of data to work with.

Don't get me wrong, there's definitely a place in photography for the 'lo-fi' or 'toy camera' styles of photography. In fact, I heartily encourage people to buy a crappy little film-based camera ($30 from eBay), and borrow the darkroom equipment at your local photography club (usually less than $30 including paper and chemicals, for about an hour), to learn more about photography, and to gain a deeper understanding of photography and how it works.

However... If you are using a $400 printing device to 'print' photos to pieces of film costing $3.75 per sheet, by using a twentieth of the resolution available from a $600 photography device, you're probably doing something wrong...

Check out the Impossible Instant Lab on Kickstarter to make up your own mind.

Flixel brings your iPhone photos to life


Flixel is an iPhone application that lets people easily create 'living photos'. Where traditional photos are completely still, a living photo contains a portion of seamless and infinitely looping motion. Whether it's hair blowing in the wind, or a flickering fire in the background of an otherwise still image, the effect can be mesmerizing.

shredding.gif

Flixel is a platform for discovering, creating, and sharing these beautiful (and occasionally quirky) living photos. The creation process is simple: record a short scene, 'paint' the portion of the image that will animate, then share on a variety of social networks including Twitter, Facebook, Tumblr, and Flixel's own.

After seeing rapid growth upon its initial launch in April, the company assessed feedback from its community and proceeded with a complete refresh of its platform. Flixel 2.0 makes it faster and easier than ever to create, view and share this incredible new form of art.

beach.gif

Flixel's transformation has included the ability to create living photos at double the original frame rate and in full color, while dramatically speeding up the viewing experience. Flixel provides fast and simple creation for the average person, while still providing artists the fine-grained creative control they need.

walking_by.gif

Inspired by Kevin Burg and Jamie Beck's 'Cinemagraphs', LeBlanc stumbled upon these beautiful moving images in late August 2011, and was immediately intrigued by the possibility of an iPhone experience.

"We were so enthralled by Cinemagraphs but burdened by the complexity and time required to create them." said LeBlanc. "With Flixel, we feel we've now achieved a creative experience that blends speed, simplicity, and art - pushing the boundaries of photography."

To showcase the beauty of this new art form, Flixel has produced a music video composed entirely of living photos created with its application:


For more info about Flixel, check out Flixel.com