Practice

Spending money to make money

moneys

A couple of days ago, I did an article on making money via stock photography, and one of my eagle-eyed readers pointed out that you had to pay for the service I recommended.

I had a bit of a think, and was trying to make up my mind if I should write something more about the topic, ‘if it is worth investing money into trying to make money off photography’. Obviously, in most business, you are dependent on making an investment in order to start earning anything, but can the same be said to be true for photography?

Before I had time to formulate my thoughts, one of my regular readers who is also an old friend dropped me an e-mail which pretty much sums up my opinions on the matter – I’m sure he doesn’t mind if I reproduce it here:

Yeah, you do have to pay, but the thing is, if you manage to sell a couple of images, you can make that money back easily. They seem to have one of the best systems out there, and it’s all about having faith in your product.

If you don’t think your photos are good enough that you will be able to sell them, then paying for the service is not for you. If you believe your pictures are good enough to compete, then you’ve got yourself a winner.

I’ve been able to make a profit from this website over the past 3 months, and I’ve had my account for about 7 months. In total, I’m running at a loss, but if the last 3 months are anything to go by, I’ll be running a profit overall from next month onwards.

I’m really excited, actually, it’s the first time I’m making money off my photos. Even if I end up not making much from this, I can say I’m making money of photography, which has been a life-long dream for me.

YMMV, of course, but I’ll stick with Photostockplus for as long as they’ll have me.

Thanks a lot for that, Tim.

Agree? Disagree? First, have a look at the original post, and let us know, below!


Do you enjoy a smattering of random photography links? Well, squire, I welcome thee to join me on Twitter -

© Kamps Consulting Ltd. This article is licenced for use on Pixiq only. Please do not reproduce wholly or in part without a license. More info.

Making money with your photos

To most photographers, Photography is – and always will be – a keen hobby. Some of us, however, are burning to take the hobby to the next level, and want to start making some cash from it. Perhaps not enough to buy a Ferrari, or even enough to pay the electricity bill, but at least enough to be able to buy a couple of photography toys along the way.

I worked as a photographer full-time for a couple of years, and ended up deciding that the lifestyle wasn’t for me. Even though I jacked in my career as a photographer, I’m still making money off my photos.

How? Well…

Over the years of working as a photographer, I built up a pretty sizable library of photographs. Some of them are covered by some sort of restriction (model release, contract, or otherwise), meaning that I cannot publish them further, and that means they are of no value to me further.

Where I do still make quite a bit of money, however, is by selling stock photos.

A stock photo is an image that someone could conceivably want to use for something. Imagine if you’ve taken a photo of a pretty girl holding a mobile phone to her shoulder, and typing on her laptop at the same time. If you have a model release for the picture (i.e if the model doesn’t mind her photo being used, and you’ve got a piece of paper confirming that), there are a thousand and one uses for the picture. A newspaper may be doing an article about stress. A magazine may need an image to illustrate the dangers of mobile phone use. An job advert might need to appeal to a female audience. The possibilities are endless, but key to all of this is your photo.

Now, think wider. Fabulous landscapes. Extreme macro photos. Portraits of people doing things. Photos you’ve taken of events, actions taken by police, and stuff like that. Let me give you a piece of advice right now: As someone who works in the automotive trade, I can never find enough photos of police making arrests of motorists, of speed cameras, and of speed humps. You’d think it was obvious, but I guess it’s not. Point being? Take pictures of everything around you – it costs very little to keep the pictures on-line, and you never know what people are going to need.

There are people out there making fortunes off photos they have taken of different types of boats, certain plants, and who have libraries of photos of different types of food. You’d be amazed.

Selling your pictures

So what do you need to do to get in on the action? Well, first of all you need to be a pretty good photographer, but that bit is easy – you’re reading the right blog, at least :) From there on, you need to find a way to sell your photos. At first, I used to sell my photos via my own website, being naive enough to think that there would be people out there who would find my photos. In reality, picture editors in newspapers, magazines, and books are two things: a) extremely busy and b) extremely lazy. If they spend 10 minutes to find a photo on a website, why should they trawl the web to find a different photo?

So essentially you need to find someone who can sell your photos for you. It’s slightly counter-intuitive, but think about it: The bigger a website is, the bigger the chances are that a picture editor can find an image right there and then. And more importantly, the bigger the chance is that they will end up buying from you.

I’ve tried a variety of different sites out there, but ultimately I ended up settling on Photo Stock Plus. For one thing, the website has a lot of functionality that others don’t, but most importantly, they took care of me right from the beginning.

You can sell stock photos, which is a big bonus to begin with, but you can also sell prints and gifts featuring your photos to friends and family via a slick eCommerce interface.

Bulk upload tools make uploading your photos easier, and if you decide to go with a pro account, you’ll get all sorts of fancy-arse possibilities, including your own URL, possibilities to pick from a stack of designs, getting special assignments from commissioning editors, good deals on business cards and flyers, and even a press pass (which, personally, I doubt will be worth jack, but then I’ve got a ‘real’ one, so I’ve never tried it).

No reason to be worried about your photos either – The site will watermark them all for you, and Photo Stock Pro keep full track of all of your photos for you. You can set your own prices too, which is exciting in itself – charge too high, and nobody buys, charge too low, and it won’t be worth your time – but I’ll be writing more about that in a future article.

And the really clever bit? They only take a 15% commission, which is next to nothing, compared to some of the other sites out there, and you can try it all for free before you decide if you like it or not. Give it a shot!

Playing with your pictures

sketchafter

So taking photos should be fun, right? Right! And sometimes we want to have a bit of fun with our photos themselves, right? Right! So, ehm, what can we do with our photos to play around with them a bit more? Well, we’ve been pooling braincells over here at the Small Aperture mansion, and just before they expired from over-use, we came up with the following.

First of all, you could go out and buy yourself a toy camera. But maybe you don’t really want to. Perhaps you’d rather fiddle with photos you’ve already taken with your top-of-the-range dSLR. In which case, Photocritic has the perfect tutorial for creating your own post-processing pre-sets in Lightroom.

Or perhaps you’d prefer to go the vintage route? Take a look at Photojojo’s four ways to vintage-ify your pics. This one covers all sorts, from post-processing ideas to tips such as vaseline on the lens or shooting through an old stocking.

Over at befunky.com they’ve what feel like hundreds of different effects that you can apply to your pictures. My personal favourite would be the speech bubbles, though.

And Gareth, a member of the Small Aperture Scriptorium, has this easy method to cartoon-ify your pictures. Begin by selecting an image. How about this one?

And then:

  • Open said selected image in Photoshop
  • Create a duplicate layer
  • Turn that layer to black and white using desaturate (Image>Adjustments>Desaturate)
  • Duplicate the black and white layer and invert it (Image>Adjustments>Invert)
  • In the layers panel, set the blend mode to Colour Dodge
  • You should now have three layers. Select the top layer, the inverted one, and go to Filter>Other>Minimum to add the sketch effect. The higher the value of the pixel radius, the more pronounced the sketch effect.
  • If you want to re-add colour, duplicate the bottom layer (the non-black-and-white one) and add it to the top of the stack. Set the blend mode to Colour.

Tad-dah!

I’m off to do silly things with photos now.

The 10 Second Pre-Shoot Camera Check

settings

I’ve been there many times – half way through a photo shoot you suddenly stop and think. “Oh… no.. I did a photo shoot in the dark yesterday. Please don’t tell me my ISO is still set to 800″… And some times, it turns out that yes, I really am that stupid.

A pre-shoot camera check makes a lot of sense, but what should you check before you run off to do a shoot? Myself, I’ve gotten in the habit of taking a single photo. If the camera shows me the photo afterwards, it means that I’ve remembered to put a memory card in the camera, I’ve got my battery, and there’s a lens attached (No, I don’t forget attaching a lens very often. But, to my gravest of shame, it has happened once that I rocked up at a shoot without a lens. Luckily, I did have one in my camera bag. That could’ve gotten very very embarrassing.)

Anyway, there’s a small list of stuff worth checking before you get all snapper-happy, and my good mate Brian Auer is more than happy to run us through it..

Read the full 10-second camera check over on Epic Edits!

Banning photographers from photography events

_48667099_summerfieldscorescopy

If you’ve ever been to the UK (or, indeed, anywhere in Europe), you know that football (as we like to call soccer over here, since it’s played with your feet and all that) is a pretty big deal. The sports sections thrive on covering the sport, it’s all over the news, and the fans lap it all up.

One football club decided they wanted to let only a single photography company take photos at their matches (presumably in return for a lot of money), effectively banning all other media outlets from sending their own photographers. Needless to say, it caused a bit of a stink.

The Plymouth Herald (relevant because the game was Plymouth versus Southampton – the latter being the photography-banning jokesters) resorted to reporting on the story using hand-drawn cartoons instead of actual photographs.

The Sun newspaper, which I normally despise on principle for being a load of mind-numbing populist hogwash, ran the rather witty “Opposition 0, Plymouth 1″ headline, and then proceeded to report on the game without mentioning the ‘opposition’ team name once.

I have a feeling Southampton FC will overturn their daft move pretty soon…

Your pictures; your rights

I've turned this one into a card. Pretty, no?

I have to admit, I’ve been giggling to myself at some of the comments that are popping up on the sites that have covered the Vampire Weekend image controversy. There seems to be confusion in monumental proportions regarding who owns the rights to a picture, to people’s images in a picture, and what you can—or can’t—do with a picture that you own. Confused much? We’ve put together the Small Aperture Quick and Dirty Guide to Photographs, People’s Images, and Rights. Just remember that we’re not lawyers.

Copyright

This one's mine!

If you shoot a picture, you own the copyright to it*. No one can reproduce it or otherwise make use of it without your permission.

*) The only exception is if you have explicitly signed away your rights. This might be part of your job contract at work – for example if you are taking photos for work, during work hours. In the UK at least, you can only sign away your copyright in writing, and you have to sign the document where you do so. Ticking a box on a website wouldn’t be sufficient.

Moral rights

You also own the moral rights to pictures that you take. In short, that means that your pictures should be attributed to you, and you can ‘protect their integrity’, or stop people from manipulating and distorting them.

Images of people: commercial, editorial, and personal use

If the picture features a person or people who are easily identifiable, you will require a model release, which is essentially that person’s or people’s consent, to use the picture for commercial purposes. If the picture of a yak farmer leading his herd down the mountain is just going to sit on your Flickr stream as part of your holiday snaps from Outer Mongolia, you don’t have to worry. Sell the picture to the publishers of the Encyclopaedic Guide to Mountain Yak Rearing, you’ll need a model release.

But, there are some exceptions to this. Inevitably.

Caveat number 1: Crowd scenes and itty-bitty people on the horizon whom you can’t make out properly (or similar)

You’re standing amongst the crowd at the London Marathon and you manage to snap the perfect shot of hundreds of spectators standing at Canary Wharf, cheering on the runners. It’s so perfect that Nike wants to use it in a commercial campaign. Do you need model releases from everyone in it? Not if they aren’t recognisable individually (even if someone says ‘But I knew I stood right next to that lamp-post all day’), in this instance it wouldn’t be reasonable.

These guys manning a laminating stand (in the middle of the street in Fez, at about 10pm) are probably obscure enough for me to get away with this shot. Probably.

Caveat number 2: Famous people doing famous-people things

It’s pretty much a given that famous people’s pictures taken when they are doing famous-people things, such as tripping the light fantastic up the red carpet at film premieres, opening yet another megalithic shopping centre with a false smile affixed to their faces, or taking an amazing catch at a cricket match, are fair game. But that’s only for personal (i.e. Flickr or your portfolio site) or editorial (i.e. news reporting or reviewing related to the picture) use.

You couldn’t use a photo of Tom Cruise attending a movie premiere to advertise toothpaste—no matter how shiny his teeth are—without a specific model release. And as far as Tom Cruise is concerned – good luck getting one of those.

Caveat number 3: Famous people doing stupid-people things

You’re out having a quiet meal with your best friend when you spot Cruella Manningly-Kneesup, Secretary of State for Juggling, Air Guitar, and Space Cadets locked in a passionate embrace with someone definitely not her husband. In fact, it’s Marco Poloco, whose company was recently awarded the government contract to supply rocket launchers and hover cars to the Space Cadet programme. Hmm. Is something fishy going on? Maybe! Obviously neither of these two is going to give you a model release for the picture that you snap with your ever-handy compact camera, but publishing it would be in the national interest – so you wouldn’t have to worry about privacy or libel too much.

Still the same applies as above: you couldn’t use the same picture of Manningly-Kneesup and Poloco in an advert for birth control. As much as you would like to.

Ownership of rights vs ownership of an artefact

I've turned this one into a card. Pretty, no?

Selling a copy of a picture is different to selling the rights to a picture. I use some of the photos that I take to make greetings cards. Mostly, I make them to send to my friends and family, but every now and then a misguided soul will ask me if they can buy one to send to their great aunt Marjory. I might’ve sold this person a copy of one of my pictures, but that’s it. All they own is the physical artefact, nothing else. They can’t reproduce it or make derivative works from it. Come to think of it, the same goes for the people to whom I give these cards.

Selling rights

Selling the rights to a picture means selling the rights to use a picture. There are different ways of selling the rights to use your pictures, because the number of times it can be used, and how, and where, will be dependent on the contract you agree, and that’s not really for this post. But the simple explanation is that if anyone wants to use a picture that you took, they have to at the very least ask your permission first. Then you can ask them for some money to do so. Okay?

And finally

Remember that you’re allowed to take pictures in UK public places without let or hindrance, and that we’re not solicitors, so all of this is for general guidance only, mkay?

What went wrong?

Flying without wings

A good friend of me recently posted on a social media site that a recent photo shoot he had done had gone horribly wrong; sure, some of the photos came out all right, but none of them fulfilled the ‘vision’ he was hoping for from his shoot.

It’s heartbreaking when a lot of effort doesn’t pay off – but all you can do is to chalk it up as a writing experience. Analyse what went wrong, and then don’t do that again. It’s a slow way of learning things, of course, but things learned the hard way are generally learned properly – so there is a bit of a silver lining after all.

What can you do when you feel as if you’re properly starting to get the hang of photography, but you still want to learn more? There’s a simple trick you can use… And it really works, trust me.  


Even photos that come out very well deserve a second thought. If I was in this situation again, what would I do differently? (click for full size)

Some of you might know that I’ve spent a lot of time working towards my advanced motorcycle licence with the Institute for Advanced Motoring. It’s bloody hard work, but it’s awesome as well: It serves to illustrate that even though I’ve got my full motorcycle licence, I didn’t really have much of an idea about how to keep myself in one piece on two wheels.

The IAM course (which, incidentally, is built on the Police system for Motorcycle Control. Check out Motorcycle Roadcraft or Roadcraft, the car version. It’s a bit of a revelation) teaches you to become psychic on the roads; I find myself slowing down for hazards that don’t even exist yet, I change lanes instinctively before something dangerous happens in my line, and I do overtakes on split-second decisions. And I can control my motorcycle better than I thought ever possible. It feels bloody awesome.

Haje, I didn’t come here to read about your two-wheeled prowess…

Because studio work is generally repeatable, it's a great candidate for constant improvement.

Okay, okay, my apologies. But trust me, there is a link here: All the things that are relevant to learning how to control a motorcycle at speed are relevant to photography as well; the ‘psychic’ element comes in when you’re working with studio work, for example – once you understand your equipment well enough, you can visualise what happens if you just add a smidge of power to your fill light, or add a slight warming filter to your main.

And, like riding a motorcycle, it feels flippin’ brilliant when you know something is going to happen. Then you do it. And then you check what happened. And it worked. It makes you feel great about yourself. Only recently, I was standing next to a photographer who was struggling to get the shot they wanted. Without even looking at their settings, I surmised they were shooting in Program mode, when what they wanted was a particular shutter speed to get a panning shot right. So I told them that a 1/45 second shutter time might be easier. They looked at me, changed their setting, and rammed home the shot. And bought me a pint, which I thought was a nice touch.

Once bitten, twice shy: If you can't learn from other people's mistakes, you've got to learn from your own. No, I agree, this caption doesn't really make sense, but I don't really have anything to say about this photo.

Anyway – I’m not the greatest of photographers, but the trick about getting much better at what you do, is to do everything consciously – even things that are instinctive. What I mean by that is that if you feel you need to change a setting or a lens, go ahead and do it. But the important bit is to go back to it later. Find out why you felt that way. ‘Because it was the right thing to do’ is not a valid reason – there was something that made you ‘feel’ that you could improve your photo in one way or another.

That feeling is extremely valuable. That’s your experience talking, and you have to talk back: It’s a skill, but more importantly, it is a skill you can develop with practice. So, if it’s practicable, stop right there and then, and have a think. Why are you making a choice to make a change? What is wrong with the photos you are getting, and what will the effect be of making the change? The answer to those questions will help you develop and become a better photographer. But you have to be conscious about it. Write it down, add it to your Flickr notes, tell other photographers about your choices. It doesn’t matter how you do it, but make sure you vocalise it. The next time you’re in the same situation, the perfect photo will roll out effortlessly.

Oh who are we fooling, I’ve never taken a perfect photo. And nor will you in your lifetime. But that’s the point: You become a better photographer by polishing one aspect of a photograph every time – and hopefully, the photos you take will be closer and closer to perfect for every day of shooting.

Didn’t you mention a simple tip?

God, I don’t half ramble on, don’t I? Do forgive me, I get very excited about photography. And motorcycling, for that matter.

It's worth re-visiting your photos after some time. This one, for example, sat in my archives for five years before I realised it was actually sort of a wicked shot - all it took was some Lightroom magic to make it sparkle.

Anyway: The real reason I started burbling along about motorcycling is that this is a tip I learned as part of my IAM training. Replace ‘ride’ or ‘drive’ with ‘photo shoot’ below, and you get the gist of the tip.

After every photo shoot, spend one minute to think about one thing you would improve about your most recent shoot. Don’t worry if you made lots of mistakes. Don’t worry if everything went wrong. Pick one thing you would improve. And think about how you could improve it.

The great thing about picking just one thing is that it’s bite-sized. You can process one thing, and you can come up with a plan with avoiding it next time. Missed the sunrise? Get up earlier. Didn’t get the photo of the soccer goal? Stand somewhere different. Scene too bright? Bring neutral density filter. Got your camera equipment stolen? Buy a big Rottweiler. Couldn’t get the toddler to smile? Bring that hyper-colourful hawaii shirt your wife hates so much. It’ll make the kids smile, trust me.

Eventually, you become good enough a photographer that most of your development will come from your own experience and the fact that you are challenging yourself. Always remember, though: There is always something you can improve. But only if you’re consciously working on it.


Do you enjoy a smattering of random photography links? Well, squire, I welcome thee to join me on Twitter -

© Kamps Consulting Ltd. This article is licenced for use on Pixiq only. Please do not reproduce wholly or in part without a license. More info.

Building a laser trigger for your camera

Forgive the rubbish picture - I was prototyping, so it's less than clear what's going on here. The important bits are in the schematic above. Honest, it's piss easy.

There are loads of reasons for why you could want to trigger your camera remotely – to avoid camera shake, for example, or to be able to take a photograph of yourself without having to rely on a timer. If you want to build more ambitious projects, however, you may have to consider getting more exotic.

I recently built a little device which triggers my camera whenever a laser beam is broken. It is about as simple an electronics project as you can pull off, but it’s going to form the base of a couple of other cool projects I’ll be working on going forward (stay tuned…), so I figured I’d do a quick post explaining how I did this.  


Talking to the camera

This looks a lot like a headphone jack, but it is not - headphone jacks are 3.5mm, this is 2.5mm.

Even though it isn’t strictly necessary, I decided to use my Arduino (check out Arduino.cc) as the base for this project.

I say ‘not necessary’ because you can build this project using just electronic components, which makes it all a lot simpler – however, what I really wanted to do is to build a base on which I can build further in the future. If you want to get more advanced, it becomes a lot easier to use a programmable micro-controller like the Arduino, so I figured I may as well start where I mean to continue.

I stripped the wires from the remote lead. Connecting green and red triggers the camera.

To interface with the camera, I decided to keep things as simple as possible, and I used the 2.5mm jack port on the side of my Canon EOS 450D. If your camera has a different remote control port, you should still be able to use the tips described in this post, but you’ll have to source the actual plug yourself.

Using the remote control port has several advantages, the biggest of which is that it’s really easy to trigger the camera this way. All you need to do is to make a connection between two wires! I bought a couple of cheap remote controls from China and used one of ‘em to interface with my camera, but you can go into your local electronics store to pick up a 2.5mm jack for next to no money…

Triggering the camera with the Arduino

This is the most important part of this mini-project: As soon as you can trigger the camera with the Arduino, only your imagination will stop you from coming up with ways of using this. Because the Arduino will accept input from any number of sources, you can program it to take photos in just about any circumstance imaginable. Just a few ideas:

  • Motion sensor (trigger the camera when it senses movement)
  • Heat sensor (take a picture when the)
  • Sound sensor (take a picture when the dog barks or the phone rings)
  • Telephone trigger (Hook up the arduino to a mobile phone. Call or SMS the mobile phone to take a picture)
  • Timelapse photography (Program the Arduino to take a photo every minute)

There are a few different ways you can use the Arduino to trigger the camera – I considered using a relay, but the problem is that even very fast relays are quite slow, so I decided to use a transistor instead:

You! At the back! no sniggering at my atroceous schematic drawing skills!

The Arduino sends a signal to the transistor, which connects the two leads leading to the camera, which triggers the camera.

Forgive the rubbish picture - I was prototyping, so it's less than clear what's going on here. The important bits are in the schematic above. Honest, it's piss easy.

Getting the laser trigger to work

I hooked up a LDR (Light-dependent resistor) with a pull-down resistor to ensure that it wouldn’t trigger randomly to the analog sensor pin 0 on the Arduino. The programme uploaded to the Arduino is as follows:

 int sensorPin = 0;  int sensorValue = 0;  int cameraTrigger =  13;    void setup() {    pinMode (cameraTrigger, OUTPUT); }   void loop() {    sensorValue = analogRead(sensorPin);    if (sensorValue > 700) { // trigger is quite low, might need to be higher in daylight      digitalWrite (cameraTrigger, LOW);    }    else    {      digitalWrite (cameraTrigger, HIGH);      delay(10);      digitalWrite (cameraTrigger, LOW); 	 delay(1000); // Take max 1 pic per second    }  } 


Pull-down resistor to ensure true readings, and a LDR to do the actual light measuring.

With the arduino all programmed, I just had to add the LDR.

Now, I rigged up a laser module aimed at the LDR, and I checked what the common sensor values were – turns out that it drops to about 200 when the laser beam wasn’t hitting the sensor, and goes up to about 900 or so when it is hitting the sensor. I set the sensor trigger to about 700 to give me some leeway.

In the above snippet of code, the interesting stuff happens in the loop: Basically, it checks if the sensor has gone ‘dark’. If it hasn’t, it simply checks again.

The bright pink bit in the photo here is the laser beam hitting the LDR.

If the Arduino detects that the sensor has gone ‘dark’, it triggers the camera for 10 milliseconds, then untriggers it. This is to ensure that the camera doesn’t continue taking photos for the duration of the beam being broken – I have my camera set to ‘one shot’ anyway, but by adding this line of code, it should still work if the camera is set to continuous shooting when the shutter button is held down.

When the Arduino detects a broken beam, it takes a photo, then waits for a second, before checking for a broken beam again. If it’s still broken, it’ll take another photo and then waits another second.

Does it even work?

Yup. But a video says more than a thousand words so check ‘er out:

(forgive the crummy video quality, but you get the idea)

So, er, what the hell can you use this for?

It’s all a little bit theoretical at this point, because I haven’t actually used the trigger for anything useful yet. For one thing, it’s not very portable yet, but I’m planning to take a version of this and solder it all together so it’s a bit more sturdy. At least I know it works, which was the purpose of the exercise.

I have a couple of fantastic ideas for how I can create some pretty cool projects where the camera can just stand there and take photos automatically. Think birds on a bird-feeder, people walking through a doorway, balls in flight, etc.

If you plan to use the kit to take people by surprise, you may have to hide the lasers away a bit better. In a cleanish room, the red laser is pretty much invisible anyway (although it shows up in specs of dust etc), but if you want the sensor to be completely invisible, you can just use an IR laser instead – it’ll make it invisible to the naked eye.

Disclaimer

I haven’t broken my own camera equipment doing any of this, but if you balls things up, there’s a good chance you might. Be careful, know what you’re doing, and don’t come running to me if you blow up your camera, please!


Do you enjoy a smattering of random photography links? Well, squire, I welcome thee to join me on Twitter -

© Kamps Consulting Ltd. This article is licenced for use on Pixiq only. Please do not reproduce wholly or in part without a license. More info.

Protecting your copyright in a digital world

Part 2 of 2. You may be interested in reading part 1, "What is copyright, and how do infringements harm you?", first.

I've spoken at great length about why I have such a problem with people stealing my content in part 1 of this article... But what can you do about it?

Finding infringing content

Unique strings of text – It turns out that most people who nick my content with malicious intent are doing so via the RSS feed. Probably because, in addition to being immoral, they are lazy. I decided to turn this to my advantage: I inserted a unique string and a date-stamp into my RSS feeds.

In theory, because this unique string only exists in my RSS feed, it should never show up in Bing, Yahoo, Google or, well, anywhere on the internet, really. If/when it does, I know someone is doing something they aren’t supposed to. Searching for this unique string should ideally result in zero search results. Invariably, however, it never does.

Copyright web services

Apart from inserting a unique string, you can use a service like Copyscape to scan for infringing content. Their Copyscape Premium service is fantastic: Point it at your site map, and for only $0.05 per page, it will take all your pages and compare them to the internet. They score your content against other content. High-scoring content obviously is likely to be plagiarised or infringing in one way or another, so you can take action.

Of course, Copyscape only works for textual content. For photographers wanting to track whether their images have been ‘borrowed’, there is Tineye, and their more hard-core PixID service.

Dealing with infringing sites: Start easy!

If you think that someone has used your content by accident, or out of ignorance, there’s no point in chucking the book of the law at them. A friendly e-mail (cc’d to yourself so you remember to follow it up in a week or so) is usually more than enough to get them to take the content down.

I have found that the number 1 reason for the ‘friendly e-mail’ approach failing is that there isn’t an easy way of contacting the owner of the site… I’m not being difficult, but if it takes me more than about 10 seconds to find the contact e-mail address (check the header, sidebar and footer for anything that reads ‘about us’, ‘contact us’, or similar) or a feedback form, they’ve already wasted enough of my time. On to step 2:

Finding contact details

One of the big problems with many websites is that it is difficult to find out how to contact people. If their ‘About Me’ page or ‘contact us’ pages are absent, broken, or just hopelessly convoluted to use, you have to get clever. I tend to use a site called Domain Whitepages, which will give you 3 pieces of information: Who registered the domain, Who is the domain registrar, and who hosts the domain.

The person who registered the domain is usually the person you want – but many people have made this information private, or it might be out of date.

Your next point of call is the web host. These are the people who own and run the physical server on which the website is running. Look up the host’s website, and do a search for ‘copyright’ and ‘dmca’. If you can’t find either, look for ‘abuse’ or ‘report an issue’. Most web hosts have a mechanism for contacting them with abuse-related e-mails. If you sent a DMCA notice (more about that below) to the host, they will generally respond extremely quickly – I often had responses within an hour – anything longer than 12 hours is quite rare.

If you really can’t figure out who is hosting the server, your last option is to go for the domain registrar: This is the people who have registered the internet domain (like ‘photocritic.org’ or ‘google.com’). If you have to serve a DMCA notice to them, things will take a little bit longer, but if they can’t contact the owner, they’ll pull the plug on the whole domain, which tends to get the owner’s attention really quickly.

Fighting back with the DMCA

After your e-mail, the Digital Millennium Copyright Act – or DMCA – is going to be your second response to any issue of copyright. The DMCA is an US piece of legislation which doesn’t apply in any country except the USA, but I’ve sent DMCA notices to all sorts of countries (including, interestingly the UK, although the appropriate document in this country would be a ‘Notice and Take Down, or a NTD document), and while the legalese on the DMCA notice might be incorrect for, say, Germany, copyright law tends to be similar in most countries, and they’re not going to split hairs over receiving the wrong form: The important thing is that someone is breaking a law, somewhere.

To use a DMCA notice, you need the following: Your details, the details of the original and infringing content, and two particular snippets of legalese which swears on pain of death (ok, not quite – but nearly) that you’re convinced that you are in the right and they are in the wrong. Below is an example of the form letter I have been using.

Example DMCA notice

I have been using the following format for my DMCA notices to great effect:

[your address]
[today's date]

DMCA Notice of Copyright Infringement

Dear Sir or Madam: Upon a routine copyright check, I discovered that the example.com site infringes on my copyright.

The copyrighted work at issue is the text and images appearing on my site here:
- http://photocritic.org/nude-girlfriend-photography/

The URLs infringing on our copyrighted material include:
- http://example.com/nude-girlfriend

Please ensure that the infringing content is taken down within 48 hours.

You can reach me at [e-mail address] if you require further information or clarification.

I have a good faith belief that use of the copyrighted materials described above as allegedly infringing is not authorized by the copyright owner, its agent, or the law.

I swear, under penalty of perjury, that the information in the notification is accurate and that I am the copyright owner of an exclusive right that is allegedly infringed.

[my signature]

Mr [my name]

If the person you are sending the notice to demands the notice to be sent in by fax (surprisingly many do, actually), check out Interfax – they let you e-mail them a PDF document, and they fax it on for you. Fantastic, because, well, who even has a fax these days?

In the above, it is important to add your full mailing address near the top of the document. Create a list of all the article originals, and then the corresponding list of the articles on the infringing site.

First off, send this to the contact e-mail for the site. If that fails to get the content removed, send the same thing to the web host’s copyright or abuse team a week later. If that fails again, send the same thing to the domain registrar after another week. Do add a note to the letter stating whom and when you sent the notices to before, because the host might want to know before they decide to shut down a server.

But… Does it work?

Here, have a random photo I took this week-end. I'm quite proud of it. And this post is nearly 4,500 words long or so, so I figured you needed a break for a few seconds. Enjoy.

The DMCA form is incredibly effective. In the past year, I have sent out around 50 formal notices to people infringing on my copyrighted content, and all but two of these infringements have been taken down. One of them is in Vietnam (which doesn’t have any meaningful copyright legislation, so I’m out of luck, basically) and India (which does have legislation, but is notoriously lack at enforcing it, and the site owner is simply ignoring me. Particularly annoying because it looks like it might be a pretty high-profile site). I am still looking into how I might convince them to take the articles down, but I fear it might take more time than it is worth to me.

Out of the fifty or so, the hosts deleted the articles most of the time. Some times they placed a block on the pages (so the pages would result in a 403 forbidden page), some times they deleted it from the database (causing a 500 internal server error when trying to access the page), some times they shut down the whole site (showing a ‘if you own this site, please contact the host immediately’ message), and other times they found more elegant solutions.

In at least three cases, the site owner never contacted the host, and the whole site was taken down. In one case, the domain registrar decided to take the domain name offline, which means that while the domain itself is still available via its IP address, most of its users were unable to get to it.

What if the DMCA notification doesn’t work?

Excellent question. You could seek further legal help, but be warned: things often get complicated really quickly: The person infringing might be based in Romania, using a server in Russia on a Chinese domain name. If that happens, you’ve drawn the short straw: Where do you begin?

The best approach: If there is any aspect of the business which is operated out of the US (Say, they use Google Adsense, in which case, fill the AdSense DMCA complaint – the content will continue to exist, but at least you can send a message). Especially check the domain registrar – you’ll often find that even ‘foreign’ domains can be registered via an US registrar, and they should be susceptible to a sternly written DMCA notice.

From personal experience, I’d say that the DMCA approach is effective in well over 90% of cases, and I decided I didn’t have enough energy (or hours in the day!) to try to go beyond that.

What if there is a particularly rampant infringement?

In theory, you could start a lawsuit whenever someone steals a single piece of content from you. In practice, you’d me mad to do so, and honestly, it is a lot of hassle to go to court. Sometimes, however, you come across a case where you can’t see any other option.

I’ve had a couple of cases where the site in question wasn’t just copying my content, but went very, very far beyond that as well. One of them had ‘borrowed’ around 50 of my articles, the other one had systematically ‘borrowed’ every single one of my articles, all the way back to the start of Photocritic – yes, nearly 400 articles.

Let’s just say that I thought they were taking the proverbial piss. So, in addition to my standard DMCA letters, I included invoices for unauthorised use (number of articles multiplied by how much I would have charged to write those articles as a freelancer) with the letter and started talking to a solicitor. I can’t go into details about either of the cases, but suffice to say that both companies ended up paying significant amounts of money for their infringements.

Dragging people to court is not necessarily an approach I would recommend: litigation can be very expensive, but when things get just a little bit too silly, getting the legal system involved early on can ensure that people sit up and pay attention.

Disclaimer

I have rudimentary legal training in UK media law, but my training is several years old, and you’d be insane to take legal advice from some random bloke off the internet anyway. Nothing in this post is meant as actual legal advice – talk to your solicitor, that’s what they are there for!

Further Reading

This is part of a 4-story series:

  1. What is copyright, and how do infringements harm you?
  2. Protecting your copyright in a Digital World (this article)
  3. Just because it's in my RSS feed, doesn't mean you get to steal it
  4. Ignorance is no excuse

In addition, you might enjoy Police Fail: Copyright, what is that? and Even Schools Don't Care About Copyright...

Publishing your own photo book

finis

A while ago, I was talking with my good friend Randy Kruzan, who told me he had self-published a book – or, as he likes to put it – how he made the transition from “being a fool with a camera to being a fool with a book”.

There’s a lot of things that go into creating your own book (I should know, I’ve helped friends and clients self-publish things in the past, and I’ve been published with my own stuff) – but the interesting thing is that a lot of the things that take time aren’t the things you’d think…

I managed to talk Randy into writing a guest article for me here on Photocritic, explaining how his book came about, and what you should do if you want your photos to end up as a coffee-table book yourself.

The beginning

I was in a rut. No, that’s too cliche. I was between myself… yeah, that’s pretty accurate. My creative needs were being stifled by day-to-day work as a software engineer. On top of that, I was doing more of the same freelancing and, I have to tell you, there’s only so much left brain activity I can take. My right brain was screaming “There must be something more!” and there was. Is? Whatever.

Dave Browne, a friend of mine, former co-worker and fellow photographer, recently came back from an 18 month trip around the world. Upon his return we started having coffee once a week when schedules permitted. It would be melodramatic to say this changed my life, but it definitely put things in perspective. Call it a shove in the right direction.

Discussing photography with him is always enlightening, more for me than he, I think. He told me he was working on a book that he was going to publish himself. I had been playing with the very same idea for months but never found the time nor motivation, until he brought his book the next time we met.

It was gorgeous! The photos were taken on his trip with a Diana (that’s a plastic camera you pay real camera prices for through Lomo). The paper and finish were top notch, the design and layout were complimentary and it truly equalled traditionally published books.

Cylinder Head
Cylinder Head by Randy Kruzan on Flickr

That was enough motivation, on the way home that night I decided to stop stalling. First I had to wrap up open freelance projects and stop taking more. Then I could get to work on my book. A couple of weeks later I was free(er).

After seeing Dave’s book, I realized mine could be better than I had been thinking about. Knowing I would never be good enough for myself (too critical), I asked him if he would help out with my book. He agreed and now I had an editor as well as someone to handle design and guide me through layout.

The middle

My theme was to be loss and abandonment, things left behind. I had several dozen photos fitting this theme taken over the last 4 years. Some black and white, some color and taken with two different cameras. Geographically they were split between Washington State and Illinois. Overall a nice smattering of styles, composition and colors.

I wanted a landscape oriented book with full bleed, so I cleared out any photos in portrait orientation. Next to go were any with focus or other technical problems. Eventually it filtered down to 32 photos. Now I could send them to Dave and get the editing and layout process underway. This is where it really pays to have someone you can collaborate with. Another eye, unbiased and critical, is invaluable.

We whittled those 32 photos down further. Some were just too bland, too flat. Others were great pictures but against the bulk of the remaining lot, didn’t fit anymore. Here I learned another lesson, to be flexible, to change direction if that’s where the photos are leading you.

In my case, the theme of abandonment and loss had transformed into something a little different. The majority of photos I started out with were structures that were either abandoned or left to fall apart, but this didn’t stand out right away until we started cutting shots. The stack I was left with wasn’t saying loss any longer, it was saying something about persistence in the face of ruin. Yeah, these things were left alone or abandoned or simply neglected, but looking at them I could see that they were also surviving.
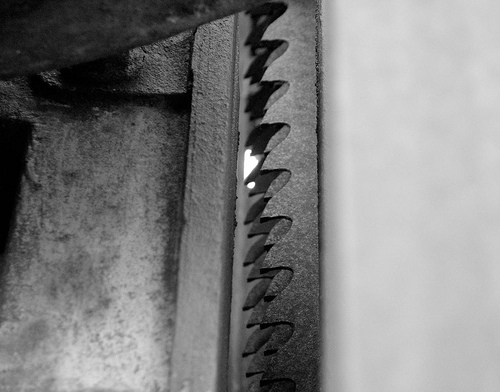
Mill Series no.6
Mill Series #6 by Randy Kruzan on Flickr

By the end of a few rounds of this, I was down to less than 14 pictures. With a revised theme in mind and to add more bulk (you’ll see why that’s funny later), I set out to shoot some new photos, and reshoot some I had liked originally but rejected for technical reasons. While I did this, Dave began working on my layout and design. Out of another 50 or so new pics, 12 made my first cut. 7 were finally selected and sent to Dave, who approved. My count was now up to 21 and he had picked one for the cover. It wasn’t the one I had picked but after the title was added, I capitulated. It looked right. Dave is always right, ask him.

The end

All that was left was for me to write up the copy for my title and copyright page and an introduction, then it was up to him to tie it all together. We were almost done.

Almost. (Since you’ve already been reading this in a little voice in your head, go ahead and insert snickering laughter here)

In the last few weeks before we finished, I waffled on the title. Nothing I was coming up with fit, and every change meant a revision to part of the intro. If that wasn’t bad enough, I had second thoughts about some of the images. I wanted to pull some, add others. I realized I was still fighting for the old theme and kept trying to find ways to work that in somehow. That realization (and Dave telling me to leave it alone) was enough to get me over the last little hurdle and just give in to it. The final book is about things at the end of their useful lives, their defiance in the face of decomposition and neglect. I chose “finis” which is the temporal end. I subtitled it “Exploring the end”, revised my into copy and we were done.

He delivered, unintentionally, the final assets on my birthday and two days later my book was in manufacture. I used the same company he did, Viovio, since I had already seen the quality first hand. Nine days later I had the first print in my hands, and I have to say, I love it. With 21 images and the copy pages, it only comes to 12 paper pages! I laughed out loud when I opened the box and saw that. It didn’t occur to me during production that I was only going to have a 12 page book. It doesn’t matter. Dave did a great job, I am really happy with the pics and I think it’s a neat little book. Literally.

That’s my story about how a fool with a camera became a fool with a book.

How to self-publish

Now let’s talk about self publishing. What it is, why you should do it and what you stand to gain.

The road to publication

We’re photographers. As photographers we speak to the world through images we share. It’s natural to want to share those with as wide an audience as we can, and often dream of having our work recognized. The road to recognition for most of us is long, and unfortunately, sparsely populated. Oh, and, that road ends in a cul-de-sac, which is really just a fancy dead end, albeit one with a turn around. For those of us on this road, our turn around is self publishing.

Mill Series no.5
Mill Series #5 by Randy Kruzan on Flickr

First, a little clarification. When I say self publish, I am not talking about the photo books you can have made at Shutterfly and similar services. For those, you pick a template, add pics and captions, pick your binding, and you’re done. Those are fine for keepsakes, and I’ve made them for birthdays and such, but they’re not the same caliber as an honest-to-goodness book.

What we’re talking about here is a product that when you’re done you can be proud of and looks professional.

So… What is self publishing?

Put simply, self publishing is paying to have your work published.

Traditionally, a publisher pays you to write or put together a book of your work. You get some portion of sales from the book and they handle the rest. Maybe it works out and you get another book deal and repeat the process.

When you publish your own work, you get to have all the fun. You pick the content. You come up with the design and layout, and edit it yourself. Promotions? Marketing? All you, baby! It can be a lot of work, and often is. Maybe it even SHOULD be! The sense of accomplishment and satisfaction of finally getting your first copy in hand after all of that work is worth it.

Will it make me famous?

Hmm. Stranger things have happened! Look at that guy Jared from the Subway commercials. At the very least, it can allow more people to enjoy your work and who knows what that can lead to.

Fine. Will it make me rich?

Probably not. I know that’s not what you want to hear, and I don’t want to crush any hopes you might have, it’s just not very likely. Like any other adventure, you’ll get out of it what you put in. You might make some money. For me, if I sell one copy more than I bought, I’ll be stoked. If I make enough money from self publishing books to buy a new prime or two, man, I’ll be on cloud nine.

Then why self publish?

Unless you already have a book deal, or are pursuing one and are extraordinarily lucky, incredibly persistent or some combination of those things, self publishing is the perfect way to share your work with the public NOW. Indeed, it may be the only way you’d ever get a book published, but that’s fine! You don’t need to be famous and your work doesn’t have to be well known to publish yourself. You might be a virtual nobody (case in point, myself), but a nobody with a book (dude, me again). If nothing else, it’s an exercise to see if you can do it.

Just remember… Always look on the bright side of life

I had this conversation with my friend and editor, Dave Browne, where I told him I didn’t have any illusions about doing this book. I don’t expect to become famous or land on some best seller’s list, but it would be nice to sell a few. He put it this way: “Buy two books. Keep one for yourself. If you sell two in a year, your demand will have outstripped supply!” Sure, it’s only two books, a minor detail, but your sales will have doubled in your first year.

Benefits of self-publishing

Do a little searching on the Internet for folks who self publish and you’ll find artists, authors, comic book artists and a whole host of others who have either had publishing contracts in the past or were pursuing them and were unhappy about how little control they had as new authors.

SP is a different world: yours.

You have complete creative control. What’s on the cover, how the book is laid out, what images and text go where, it’s all under your control.

You market or promote as much or as little as you want. Self publishing is perfect for photographers who run their own websites or blogs or have an online presence where they can advertise and promote their books.

You don’t have to hold inventory. Because self publishing is typically print on-demand, nobody actually holds your book in inventory.
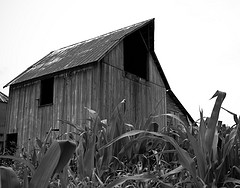
You only pay manufacture on the copies you want to buy. If you want one copy of your book or twenty, you only pay manufacture on those copies. When someone else buys your book, they pay manufacture as part of the total cost.

You don’t have to handle sales and fulfillment. Unless you’re buying copies to hold onto and sell yourself, the printing company you’re using will handle taking money and shipping the books out to people who buy it.

You can make money on sales. Blurb is one company that allows you to set your own prices on your books at no extra charge. For companies that allow you to do this, there is a base rate (the price of manufacture) and you set your sale price, the difference between the two is yours.

You hold all the rights. The rights to your work are yours alone. Unless the company you’re dealing with has some clause to the contrary, you are the sole rights holder. If you find that’s not the case when shopping around, find someone else.

How to self publish

Or: ‘How I made self publishing made for you, without any guarantees that the same will work for you, but you could do a lot worse than starting here anyway’

Do you really want to do this? It might seem like a no-brainer, but it’s the first question you should ask yourself. There will be at least some monetary expense and of course the cost of your time. If you get a friend to help like I did, you should consider their time as well. Are they up for it? Start here. If you can’t commit, don’t start. Wait until you’re ready.

What’s it about? Do you want to tell a story with your photos like a photo essay? Or is it many stories? Is it just a portfolio? Is there a common theme it should have? Is it mixed photo and text, for example, like a guide book? You can always change this as the project progresses, but you should start out with a solid idea and build on it.

Know your choices, know the requirements – Shop around the service you’re going to use (or for that matter, shop around FOR services if you haven’t yet, see below). Do they have a product that matches your ideal book size and layout? What, if any, are the minimum page count requirements? Do you have images big enough for that size book? (I’ve included a link to a pixel to print size calculator at the end)

If you’re not using a service-provided tool (Blurb has an excellent book builder) then chances are high your final work will need to be a PDF, and any fonts you use will need to be embedded in the PDF. Check their publishing guidelines and know what you need to conform to in your final layout.

Will it bleed? – This is another point to consider before you actually start gathering up your prospects. If you’re going to do a full bleed book, where the image runs to the edges of the page without a border, then it’s probably best to choose photos that are all of the same orientation. No-bleed pages, or even multiple images per page, is less restrictive.

Gather, review, cull, repeat – Find all of the photos you think might work for your book. Digital is the way to go here, if your pics aren’t digitized already they’re going to have to be for printing, so really just do this now. If you have a favorite photo app with a workflow you’re used to, great- go with it. If not, the simplest thing to do is just copy (not move) all of the prospective images to a folder called “My Awesome Book”. For each round of review, make a new folder and only copy those images that make the cut into it. It’s draconian but when you have to dig up something from an earlier revision, you’ll know where it is.

Review your choices. Do they match what your book is about? Are there technical flaws you don’t like (and don’t want to or can’t fix)? Do some just not feel right? You’re never destroying pictures by excluding them, you should be as critical as you want here.

When you’re done reviewing and have made your choices for the next round, open them all up so you can view them in a batch. How does it look? Are you short of meeting the minimum page count? Add if you need to.

Repeat this process until you feel you’re at that point where they’re all good, then sleep on it and review again once more. If it’s still OK, then you have your final set.

Copy editing – Write all of your copy in a simple text editor. You’re not going to format your text until you’re in the layout stage, so simple text works well. It makes it easier to work with.

Regardless of how much text your book has, it’s a good idea to have it copy edited. Even if it’s simply asking your most grammatically advanced friend to review it, get a second set of eyes on it. Proof read. Spell check. Grammar check. Send me a check. Ahh, gotcha ;)

Cover yourself – You can’t judge a book by it’s cover… yeah, yeah, yeah, we do it anyway. Choose a legible font, no matter how cool the squiggly one you found looks. If your book is about puppies, don’t put a truck on it. Unless the puppies are stealing it. That would be awesome.

I prefer simple, but it’s your book. Choose a picture that represents the book.

Final touches – If the publishing service you went with doesn’t automatically build the copyright and title pages, spend a little time to see how those are laid out. I like to mirror the copy (font, placements and sizes) from the cover on the title page. Then the copy page, then the intro. Spend some time getting it right, good fit and finish is one of the things that sets a good self published book apart from the rest.

Layout and conversion – All of the SP services have different guides, sizes and requirements. This is why you should figure out ahead of time what the print guidelines are. Decent services will provide you templates to assist in the layout. In Design or similar publishing and layout software experience pays off here, my friends.

If you need to treat your copy in fancy ways, do it in this stage. Fonts, colors, leading, etc.

Most of the services I looked at all accept PDFs of at least the inner contents and a separate PDF for the cover. Fonts usually have to be embedded in the PDF. Viovio lets you do one PDF for the front cover and another for the back. If you’re not using tools (or using a SP service that doesn’t have tools) then PDF is the only way to go. Again, and I can’t stress this enough, follow their guidelines and requirements.

A simpler alternative – Layout can suck. It can be confusing and a pain. If it’s not your cup of tea, find a SP service that has a book builder tool. As of this writing, both Viovio and Blurb have such a tool available. These tools give you varying degrees of control over colors, styles, fonts, picture layouts and so on and so forth. If you’re going it alone and don’t have In Design skills, this may be your best bet. Don’t fear it. Embrace it.

And finally a word on rights – To nutshell it: If it’s not yours, don’t print it.

You must own or hold the rights to everything you publish in your book, or get written or other specified permission from the rights holder in order to use their materials. There are all kinds of details and legalities surrounding this, but that’s the high level and if you’re in doubt, don’t use it.

Not all publishers are equal
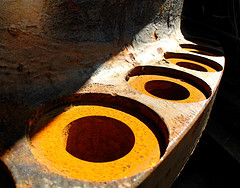
Orange HolesWhen you’re shopping for a publisher keep these things in mind: size, cost, quality and the ability sell your book.

Product types – Do they have a book that matches your desired size and layout (portrait, landscape or square)? It’s also a good idea to look at the minimum page requirements. For some products you simply might not meet the final page count.

Costs and fees – How much are they charging you for your book size? Is it comparable to other publishers? What about retailing fees- are there any? Viovio, for example, will only let you set your own price and collect money on sales of your book if you pay for a $35/year membership. Other companies might not charge a fee, but may be limiting in some other factor like available sizes.

Print and paper quality – Before you settle on a publisher, be sure to read reviews from people who have used them. Solicit opinions from friends and colleagues. It’s also a good idea, if you can afford it, to print a sample book from a company you’re considering. It doesn’t have to be fancy, the idea is just to get it in your hands where you can judge the print and paper quality yourself.

Retailing – If your goal is to market your book and make money from sales, you should also look for the ability to retail your book through the publisher unless you’re planning on buying inventory to hold and sell yourself.

Popular doesn’t always mean great – Read reviews from other SP authors on the services you’re considering using. How do people feel about the final result? Was their system easy to use and navigate? Were there gotchas along the way?

To ISBN or not to ISBN, that is the question…

ISBN stands for International Standard Book Number. It’s a 10 or 13 digit code that uniquely identifies your book from every other book in the world. This is supposed to make cataloging easier or faster or some such thing.

Amazon’s CreateSpace is one of the SP services that will assign your book an ISBN if you don’t have one already, because your book will be sold through amazon.com.
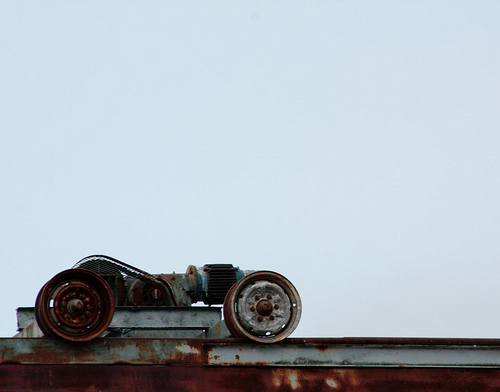
Dead Lift
Dead Lift by Randy Kruzan on Flickr (and also the cover of his book; ‘Finis’)

If you’re not planning on selling your SP book through a wholesaler, bookstore or other retailer, you probably don’t need an ISBN at this time. If you are contacted by a publisher who wants to publish and distribute your book, they will handle ISBN assignment at that point because part of the ISBN is the publisher code.

Get help, man – If you’re serious about self publishing your work and don’t have the skills (or the discipline) to manage the creation of your book, and don’t know someone who does, you’re in luck. Sort of. You just have to pay for it.

Some companies, like Blurb and BookSurge, offer professional help with editing, layout, design and/or final preflight. You can even buy a professional review for your book.

Making it better through collaboration – I honestly believe that my own book would not be half what it turned out to be if it weren’t for my friend who handled editing duties. Obviously if I felt he wasn’t up to the task I wouldn’t have asked him, so keep that in mind if you approach your friends or colleagues.

Once you’ve acquired help, figure out who is doing what. Better yet, you should have an idea of what you need help with before you go asking. If they’re only agreeing to do cover design, for example, you might not want to push book layout on them as well. If they’ve agreed to copy edit, let them. Don’t assign work and take it away.

Keep it fun, and be open to criticism and feedback. It is your book, but if you’re asking advice, at least hear it with an open mind.

Getting them to commit to your project is just as important as you making sure you respect their time and effort. You both have to be on the same page. (Booooooo, bad pun, I know)

Closing – The subject of self publishing could really be turned into a book itself, and I hope that I’ve been helpful here in this space sharing my own SP story and giving some information and advice.

Thanks very much to Haje for the invitation to guest write on Photocritic.org, it was a much needed break from the 140 character world of twitter.

About the author

Randy Kruzan is a photographer and author well disguised as a software engineer. He lives near Seabeck, Washington with his awesome family. Tweet him up @randykruzan on twitter or on the Internet at randykruzan.com

Randy Kruzan’s book can be purchased from Viovio

More resources

Publishing and print on-demand services

Blurb – blurb.com

Viovio – viovio.com

Other resources

Amazon’s self publish and print on demand – createspace.com

Amazon’s assisted publishing – booksurge.com

Pixel to print size calculator at ScanTips.com – scantips.com/calc.html


Do you enjoy a smattering of random photography links? Well, squire, I welcome thee to join me on Twitter -

© Kamps Consulting Ltd. This article is licenced for use on Pixiq only. Please do not reproduce wholly or in part without a license. More info.

A shot at street photography

london-street-2009-03023

Recently, I realised that while I do an awful lot of writing about photography, I’m not actually spending all that much time actually taking pictures myself anymore.

A sad state of affairs – especially as I recently bought a gorgeous Canon 50mm f/1.4 prime lens. (I could rant about prime lenses for hours, but I’ve done so in a previous post, which (if I may nest my parantheses and be so bold as to recommend one of my own articles) is well worth a read), and I have a fabulous city right on my doorstep.

Anyway, so I have never really done that much street photography before, but I figured it’d be a crying shame not to have a go at it…

For someone who hasn’t done much (read: any) street photography before, I think I did pretty well – these are some of my favourites:

Mean Fiddler

Mean Fiddler

This photo, Mean Fiddler by Photocritic.org on Flickr, was a lucky one indeed. Shot from the hip just as he was finishing playing a song, the colours came out magnificently, and I got quite lucky with the focussing as well – Seeing as how I was shooting from the hip at f/1.4, it wasn’t as if I had a lot of leeway with my depth of field.

Technical Details: Canon EOS 450D with a Canon 50mm f/1.4 prime lens. 1/320 second at f/1.4 and ISO 100, metered in Aperture-priority AE with a -2/3 stop EV bias. More tech info here.

"Is he taking a picture of me?"

"Is he taking a picture of me?"
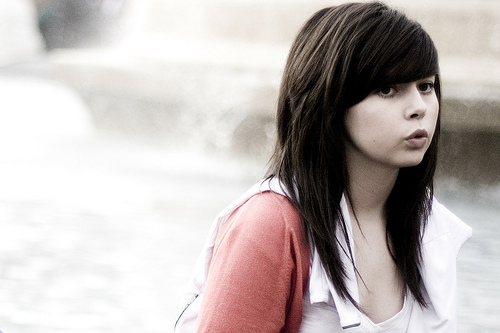
This photo, "Is he taking a picture of me?" by Photocritic.org on Flickr, was taken in the midst of a St Patrick’s day parade on Trafalgar square. She was hanging out with some of her friends in front of a fountain, and the light kept catching her, so I figured I’d try and capture that. The back-lighting was quite tricky (and, considering that all of these photos were taken on a single attempt, with one shot at getting it right, I think I got lucky), and I’m happy that I was shooting this in RAW, because I needed to do a few adjustments to make the photo come out well.

Technical Details: Canon EOS 450D with a Canon 50mm f/1.4 prime lens. 1/1250 second at f/1.4 and ISO 100, metered in Aperture-priority AE with a -2/3 stop EV bias. More tech info here.

Dreaming over Coffee

Dreaming over Coffee
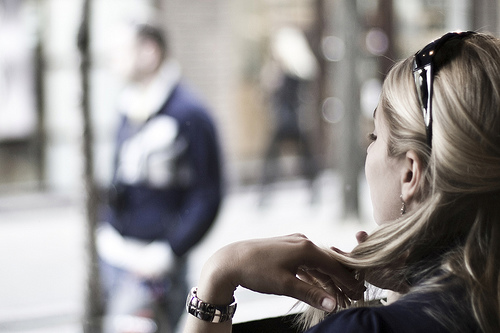
This particular shot, Dreaming over Coffee by Photocritic.org on Flickr, came about right at the beginning of the walkabout in London – I was in line for the queue at Nero coffee, and spotted this girl, who was sitting there, enjoying her coffee, and being rather blase about checking out the cute guys walking by – what is more summerly than that? When the moment came, I simply lifted the camera to my face, snapped the shot, and paid for my coffee. Simples.

Technical Details: Canon EOS 450D with a Canon 50mm f/1.4 prime lens. 1/200 second at f/1.4 and ISO 100, metered in Aperture-priority AE without EV bias. More tech info here.

Me too, brother. Me too.

Me to, brother. Me too.
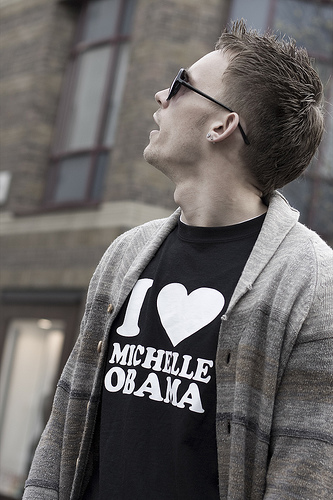
This one, Me to, brother. Me too. by Photocritic.org on Flickr, was taken immediately after the girl above. We were sitting on the statue in the middle of Seven Sisters, and were watching the world go by. This fellow just showed up, stopped right next to me, and stared at the sky for a bit – His T-shirt made me laugh, so I couldn’t not take the shot.

Technical Details: Canon EOS 450D with a Canon 50mm f/1.4 prime lens. 1/200 second at f/2.8 and ISO 100, metered in Program-mode AE with a -2/3 stop EV bias. More tech info here.

MOAR!

If you want to se more, you can see the whole set on Flickr.

Also, if you haven’t seen many updates from me recently, it’s because I’m out of the country for a while, doing a load of photography and eating a lot of lovely food while visiting my parents in Mumbai, to be precise. When I come back, I’m finally moving back to London again – if I can find myself a place to stay, that is.

The world through a lens: Photo etiquette

etiq-5

As all photographers know, travel photography can be about more than safeguarding memories. Holidays are the perfect time to discover new cultures and customs, be outside of one’s comfort zone, eat new food, and, of course, really get stuck into the different lenses and ISO numbers. Coming home with that perfect picture of something or someone that fascinated you makes the enjoyment of the getaway last that much longer.

The way the local population expects you as a photographer to behave with your camera may be very different in countries other than your own. This Photo Etiquette may, however, not be easy to understand or adhere to, especially when it comes to photographing people as a subject, so we decided to have a closer look at what you might encounter…

When travelling, I find that shots of sights, animals and nature are often rewarding, but not enough. Photographing people gives a richer texture to the cultures you have visited. In hindsight, I have often regretted foregoing on a large part of the experience, simply because I did not know whether it was okay to take photos of people.

Not wishing to be photographed

Many people do not wish to be photographed, for many different reasons. Native peoples, such as some Native Americans in the US, might refuse being photographed because they believe a mirror does not reflect reality, but a persons’ soul. A picture, taken by a device that relies heavily on mirrors, may therefore capture and enslave the soul. Sometimes, this restriction only counts for infants and children, as their souls are fragile, and can more easily leave the body.

Others, such as some Caribbean cultures, believe that a representation of a person may be used in ‘sympathetic magic’ to cast voodoo spells on the person in question. Others again, especially in tourist areas, do not want to be in photos because, frankly, they are sick of them. Try to imagine how you would feel if a constant stream of tourists would come by your office and photograph you.

In some countries, such as China, taking someone’s picture without their consent is simply extremely rude. Others might feel they are not photogenic, and do not want their face to be splashed all over Flickr. And you need to be wary that some locations (places of worship, official buildings and structures, museums and military bases) may prohibit photography for security reasons.

If all that was not enough, you also need to consider the implications of a photo. If you might land someone in trouble for taking the photo (if photographing individuals at a political rally etc.) you might want to reconsider taking the photo. In other words, there should be a lot of prudence and respect on your part as the photographer.

Permission is key

Figuring out when it is okay to take a photo and when it is not will help you bring home more than just pictures of puppies, buildings and your travelling partner. The best way of finding this out is simply by asking. I have been asked for money in exchange for a photo on several occasions in India, and you will have to consider whether that money is worth the photo. If you deem it is not, just smile, shake your head and move along. Alternatively, they might ask you to buy something off them. Again, by all means do, if it is something you wanted, and if you think the price is worth the photo, if not, just keep going.

But, in general, rule number one is, get permission. It is essential that your behaviour and attitude is not one of right, but one of friendly coexistence. When you smile and nod while pointing at your camera, it is pretty clear what you want. This might sometimes mean that your photo will not be as spontaneous as you might wish, but at least you will not end up in sticky situations where the subject feels their personal space, or religion is violated. Especially on the topic of photographing children, you need to be very cautious, make sure to ask the parents or guardians for permission, no matter where in the world you are.

Rule number two is respect people’s wishes. If a person refuses your request of a photo, just move along and find other subjects. This will sometimes mean you do not get a photo at all, but do not try to sneak one in if someone has already said no. Never forget that there will be other opportunities for photos elsewhere.

If they ask you to stop; stop…

Rule number three is that if someone asks you to stop taking photos, either verbally, by turning away, by looking uncomfortable, or by running for cover, as happened to me in Vietnam, stop. No matter the reason why someone might want you to stop, it is important that you keep in mind what Darren Rowse said on his blog: people are not tourist sites. They have feelings that must be respected. And you will only end up with photos of people with their backs turned to you, and minimal amounts of goodwill. It is just not worth it.

And finally, if you wish to finish a friendly exchange with a stranger whom you just took a photo of on a high note, you may wish to show them the photo afterwards if you have a digital display. It is not only courteous, but it has sometimes caused me to have a multitude of other subjects wanting to be photographed to see themselves on the little screen, including in Indonesia and Vietnam.

This article was written by Meke Kamps for Photocritic


Do you enjoy a smattering of random photography links? Well, squire, I welcome thee to join me on Twitter -

© Kamps Consulting Ltd. This article is licenced for use on Pixiq only. Please do not reproduce wholly or in part without a license. More info.

What's your photographic kryptonite?

My post about being down and out over dance photography the other day garnered quite a lot of comments and more e-mails that I’ve had over a blog post in quite a while… So now I’m properly curious…  


Of course, there are lots of difficult things about different genres of photography. Portraits can be devilishly difficult, because it can be fiendish to get a good rapport with a model. Sports photography can be tricky because things are moving so fast – and indoor sports are even worse. Music photography can be a right bitch; landscapes are tricky because it’s all been done before; photographing fireworks is just plain hard; nude photography can be daunting because it’s a bit taboo, Food photography is hard because the photography subject spoils nearly immediately… and don’t even get me started on Macro

In fact, I can’t really think of a single genre of photography which doesn’t bring its very own set of challenges to the table… What I’d love to know, however, is which particular genre is which gets you every time… Cast your vote below, and sound off in the comments if you’ve got a particular arch-enemy!

What do you think is the trickiest photography subject?

View Results


Do you enjoy a smattering of random photography links? Well, squire, I welcome thee to join me on Twitter -

© Kamps Consulting Ltd. This article is licenced for use on Pixiq only. Please do not reproduce wholly or in part without a license. More info.

Dealing with negative critique

It is relatively self-explanatory that doing a photo critique is quite difficult. What few people stop to think about, however, is that receiving a photo critique can be as difficult – if not more difficult: When you move beyond mere snapshots and start putting more of yourself into your photographs, you are a lot more intimately involved with the work you are putting out there.

Putting your photos up for criticism – whether it is at your local photography club, via a site such as DeviantArt, or even when asking a good friend to give some feed-back – is like putting your own head in the guillotine and taking a chance.

Nonetheless, it’s one of the best ways to improve as a photographer, and one of the best lessons you’ll learn is to discover how to deal with negative photo critiques…  

Hayley in the 1950s
Hayley in the 1950s by Photocritic.org, on Flickr

1) It may come across as crass, rude, or wrong, but there may be a kernel of truth in it.

If someone tells you “LOL learn how 2 autofocus, you dweeb”, you need to do 2 things: Live in the happy knowledge that whilst your camera might have had an off day, at least you know how to string a grammatically correct sentence together.

And perhaps that picture is a little bit blurry, now that you look at it closely…

Take a step back, and take commentary on face value. If you honestly can’t say you agree with a piece of criticism, that’s perfectly fine, as long as you are objective enough to be able to try and see it from their viewpoint.

2) They might disagree, but they are your audience.

Ultimately, you are the photographer, and what you decide is how the final result gets done. Nobody can tell you what to do, and if you like your photo, then you’ve won one of the huge battles.

At the same time, it’s quite possible that the people ripping your photos to shreds are the people you were trying to target: whether you’re thinking about selling them as microstock, as art works, or just to give your mum a present is irrelevant.

Your photos are out there for interpretation, and if you care about the message you are sending, you’ll have to go the extra mile to make sure that they aren’t getting misinterpreted.

3) As soon as you let ‘em go, you no longer own ‘em.

It’s the curse of all writers and poets: They spend months – years, even – crafting their masterpiece, and then nobody ‘gets’ it. They all ‘get it’ wrong. Tell you what though, that’s where part of the beauty comes from: If you are taking a photo which you meant to symbolise the innocence of youth, and your first 10 commenters feel it’s a strong commentary on, say, child abuse, then they are per definition right.

It is not your job to interpret your own photographs, it is your job to take them. This is a good thing: if people can make up their own story to go with the photograph – their own connotations and bias, as it were – they are much more likely to connect emotionally with the photograph. If this is achieved; if someone is caused to feel something because of your photo; your mission is complete.

4) They talk. You shut up.

Remember that, just like you are not there to interpret your work, you’re not there to defend it either.

In a way, the best thing you can do is to never respond to any criticism. Let’s be honest – you will never be able to re-create the EXACT same image ever again anyway. Take the criticisms on board as points of reference for future photographs.

Learn from your mistakes, learn about what makes your audience buzz, and learn from your own opinions of your work.

5) Remember that the best works might be universally hated: Be thick-skinned.

Technical aspects of your photographs might be objective: A photo can be accidentally over-exposed, blurry, or have some rubbish in the background which makes your photograph less-than-perfect. Once you start killing the technical foibles of your photographic work one by one (don’t go too perfectionist on it though, it’s not useful to end up deleting all of your photos because of every little detail), the actual creative work starts shining through, and this is where the worst potential for getting hurt comes from.

You can kick yourself for small technical mistakes in your photographs (and you’ll continue making them for the rest of your photographic career), but if people start critiquing your artistic choices, it’s a different thing altogether.

The important thing here is to believe in your own work 100%: If you feel you’ve done it right, and if the image is an accurate representation of what you were trying to do, then all you can do is to shrug off their comments and move on.

Just think about it: Pink Floyd, The Decemberists, Pendulum, Metallica, Billy Joel, Leonard Cohen, Zero 7 – they’ve all been called ‘the best band ever’ by reviewers at one point or another, and yet it is never difficult to find someone who doesn’t care about – or even actively dislikes – them.


Do you enjoy a smattering of random photography links? Well, squire, I welcome thee to join me on Twitter -

© Kamps Consulting Ltd. This article is licenced for use on Pixiq only. Please do not reproduce wholly or in part without a license. More info.

Making Google love your photo site

title-tag

You’re working as a photographer, you take fantastic photos, and you’ve even got a pretty sweet website to show off your work… So why is your web server just sitting around in the corner, smoking a fag and nipping at a cup of coffee? Why aren’t the buyers running the door off its hinges, and, come to think of it, where are your damn groupies, already?

The internet is a cold and heartless place, and the biggest source of traffic to any website should be coming from search engines (Photocritic, for example, gets about 70% of its traffic from search engines. Mind you, it’s mostly people looking for pictures of nude women. Go figure.)

Just a bit of mischiefLuckily, there are quite a few things you can do as a photographer to make your site really zing in the search engines – and for the sake of making a nice round figure (and, of course, so the Digg and Reddit crowds will love it like a kitten loves tuna fish) – here’s a lovely top-10 list to get you started! 


For the sake of photography, you can basically optimise your site for two types of search: Text search (what most people think of when they think ‘search’) and image search (take a guess…).

It’s worth noting that this list is in no particular order – but the more of them you implement, the better you are likely to do.

First of all, check out the phenomenal SEOMoz, and check out their ‘Google Search Engine Ranking Factors‘ document. It outlines a lot of the stuff you need to know about making your site accessible to Google etc, the most important of which is ‘Don’t use Flash / Flex to build your site’, and ‘Make sure you haven’t inadvertently blocked search engine spiders from entering the site by using a drop-down menu for your navigation system’

1 – Update often

First off, you could do a lot worse than making sure to update your site frequently, no matter what kind of content you have. Many SEO experts have observed that Google tends to give higher ranking to sites that are updated more frequently.

That might mean that, instead of posting 100 new photos once a month, you post 10 or 12 every 3 days. Another way to have new content often is to have a blog. Sprinkle your photos throughout the blog content and the search engines will eat them up like the proverbial fat lady at a cake sale.

2 – Context and categorisation is king

Context is important. The search engines want to know what your site is about. You might want to use the word “photo” in all of your filenames, to keep the context of a photography website consistent.

The next step is to stop and think for a secon – what types of photos do you take? Try to organize them into categories and maybe even sub-categories, so that you have some context for each page. See Rolf Hicker’s Photography website for a good example of photo categories. Of course he also…

3 – Place text near your photos

Once you’ve placed your photos on their pages, the nearby text becomes important. Google gets clues about the content of images from the text near them. Consider using captions or quotes that have the same keywords as apply to your photos, and place them next to the photos for maximum value in the search engine ranking.

Linnea Lenkus Fine Art Portrait Studios website, for example, is an excellent example of good use of quotes next to the photo. Contrast this with the Chesler Photo site doesn’t come up on the first several pages in a “maternity” image search, despite having a whole gallery of such photos, probably due to not having enough textual content on the site.

The Digital Photography School website is another fab example of the use of text on a photography page.

4 – ALT tags are your friend. Use them

When you add an image to your website, you’re using an <img src="[URL]"> tag. You can – and should – add attributes to this tag, including an alt attribute.

Put an explanation of what the image depicts in your ALT tags. Not only do you make it easier for blind people to navigate your site (although why blind people would want to visit a photography site remains a mystery to me…), but it is one of the few sure-fire things that a search-engine has to go on when deciding what your photographs are about.

In addition to using keywords in your ALT tags, make sure that the actual file-name contains the same keywords.

Remember that your alt attribute can have spaces; use dashes to separate individual words if you want your filename to contain multiple words.

Don’t stuff the “alt” tag with lots and lots of keywords, however, or it will appear to be spamming; just describe the image honestly in the same way you would describe it to someone over the telephone.

Example: <img src="http://pixiq.com/images/kitten-eating-tuna.jpg" alt="Photograph of a black and white kitten eating tuna. Nom!">

The Mackins Design Studio website is an example of good use of descriptive alt tags as well as filenames. As a counter-note: PremierPhotographer Pat McNulty’s site doesn’t come up on the first several pages of an image search for “castles” despite having a castle category – there could be many reasons for this, but not using ALT attributes will be at least part of the reason.

5 – Add a blog to your site

You probably never knew that Photocritic started off as a blog-belonging-to-a-photo-site, but it’s the truth. I guess it says quite a lot about me as a photographer that the photography blog became at least a bazillion times more popular than my photography site(s), but I guess it was a godsent: I was always a better writer than a photographer anyway.

Maybe it’s because blogs are generally updated regularly, but images used in blogs are often numbered in the top of image search results, even for blogs which have as their regular topic something that has nothing to do with the keyword. See Mr&Mrsijunky’s blog for a good use of blog with photos. In addition, it’s a lot easier to SEO the hell out of a blog than to make an image-led site really fly. Sad, isn’t it?

6 – Start using the TITLE attributes

Use the image “title” tag. Similar to the “alt” tag, it isn’t compatible with all browsers, yet, but will be accessible to Firefox users, and the spiders from Google and other search engines will see it. You can put text similar to what you put in the alt tag in this tag.

Usability expert Roger Johansson explains:

[The ALT attribute] is not meant to be used as a tool tip, or more specifically, to provide additional information about an image. The title attribute, on the other hand, is meant to provide additional information about an element. That information is displayed as a tooltip by most graphical browsers, though manufacturers are free to render title text in other ways.

If you fancy geeking out about alt vs title tags, Johansson’s blog is the place to go…

7 – Keyword the hell out of your page title

Use keywords in the page title. The page title is a header tag that causes text to appear in the top bar of the window when the page is open in your browser.

Each page of your website should have a different title, a title that contains the keywords applicable to that page, but in title form, not as a list. Check out the browser window title of this very blog entry for a good example…

Also check out how the home page of Photocritic uses different keywords in the title tag, when compared to all the other pages on the site. This differentiation is designed to guide users (and, I admit, search engines) to the right place.

8 – Use keywords in the page URL

That really means the HTML filename for that page. Don’t name your pages page1.html and page2.html. A much better name would be castle-photo-gallery.html or dover-castle-panorama-photos.html

9 – Keep an eye on your directory structure

Use image folders and sub folders. Put all of your images into a folder called “images” when you upload them to your web host. Then, use sub-folders for common categories. The image named Sorbie_Castle.jpg should be in /images/castles/, for example. Not only does it make it easier for yourself, you’ll be able to

10 – Be smart when linking

Anchor text is the text that appears on a page when there is a link; it’s the text that is underlined and/or in a special color to denote a link. These anchor text links should be descriptive, and – if possible – contain keywords relevant to the page you are linking to.

If you put a link to your castles page somewhere else in your site, don’t say “click here” to see my castle photos. The text comprising the link should have the keyword in it, so it should say see my “castle photos” and the words “castle photos” would be the link to that page.

Do this on your own site and encourage others who link to you to do the same. You can even provide actual text they can use to link to you which contains your keyword. A good way to do this is to have a small note at the bottom of every page inviting people to link back to you, and including a link to a page containing the appropriate code with your keyword in the anchor text.


Do you enjoy a smattering of random photography links? Well, squire, I welcome thee to join me on Twitter -

© Kamps Consulting Ltd. This article is licenced for use on Pixiq only. Please do not reproduce wholly or in part without a license. More info.

Nude photography 101

nude-thumb.jpg

Portraiture is one of the most exhilarating forms of photography. It’s rewarding, exciting, challenging, and a lot of fun. But people have a way of hiding from the camera: Clothes. Nude photography is essentially portraiture sans clothing, which is what makes it such a fun topic to explore and develop as a photographer. Personally, I’m completely convinced that a photographer who starts developing their nudes also becomes a better portrait photographer.

One of the things people frequently e-mail me about is how to get started in nude photography – some of you want to make a living out of it, many just want to have a go and experiment, but don’t know how to begin.

Of course, Photocritic already has a series of articles on the topic already, including an introduction, and an interview with acclaimed nude photographer photographer Renoux.

Well, today you’re all in for a phenomenal treat, as my good friend Tammy guest-writes an article on taking the first steps into nude photography, by inviting your girlfriend to model for you.

Needless to say, depending on what you do for a living, this article may not be ‘safe for work’.

Take it away Tammy…

nude-1.jpgLet’s start with the basics: You already know that your girlfriend is gorgeous. While you may not be a digital pro, you’re still pretty handy with a camera, and you’d love to be able to capture some of your girlfriend’s natural beauty – if you’ve never tried before, here are a few tips to get you on your right way!

Ask permission.

Much like that nervous first date, the prospect of nude photography can be a little scary and intimidating, both for the photographer and the model. Though most women enjoy feeling beautiful, they also realise there is only room for so many supermodels in the world, and many women are self-conscious about how they look, particularly in the nude. There is great security in clothing and taking it all off, even for a camera, can be like having an audience when you’re at your most vulnerable.

If you are interested in taking nude photographs of your girlfriend (or girl who is a friend. Or boyfriend, for that matter), make sure you sit down and really talk to her about this ahead of time. If she doesn’t appear convinced, perhaps it’s worth reminding her how beautiful you think she is and that you’d love for her to be able to see for herself and let you try some nude candid shots. She might not leap on the opportunity, but give her some space to mull about it.

nude-2.jpgSometimes the best things come to those who can wait patiently. Chances are good that if she didn’t have sex with you the first night, she might will not be ready to jump into nude photography the first time the two of you talk about it either.

Less is more.

Trust is an important aspect of every relationship, and there is definitely a deep kind of trust that needs to be present before a woman feels open to this sort of photography. Do not pressure her to do anything that she doesn’t feel comfortable with. In fact, do everything you can to make sure that she feels comfortable. Involve her ideas, discuss her fears and concerns, and find out what she might like to try.

Nude : Anonymous
Nude : Anonymous by Photocritic.org on Flickr

It might help to thumb through some photographs or magazines for ideas and possible poses. See what she likes. If she’s nervous about exposing a body part like her nipples, illustrate different ways that she can pose nude without having to show whatever part she’s shy about.

Of course, there’s myriad ways to get around the whole nudity thing – even if a model is naked, they don’t have to look it in the photographs. Come to think of it, even if they do look naked, you don’t have to show off all (or, indeed, any) of the ‘naughty bits’:

You can ask her to cup her hands around her breasts so that she feels less exposed. Or the first time she poses, let her warm up to the idea in a sexy lingerie outfit or a skimpy swimsuit in the bathtub. If she’s worried about her frontal view, she can pose on her stomach. Try shots that focus on the small of her back, her bottom, and her neck (they’re all vastly sexy bits of the body, if you photograph them right!).

If she’s worried about showing her face, allow her to hide it – get creative, and it doesn’t have to be of detriment to the final result. Try profile shots, silhouette shots in a dimly lim room, or experiment with black and white photographs. Often, you’ll find that subtlety is hot, and truly sexy photos are often the ones that hide more than they show, anyway.

If she’s concerned about anything, big or small, make sure to take her concerns seriously – I know we’re harping on about this point, but that’s only because it’s important: Listening and paying attention to detail are two of the greatest things you can do to help her relax and feel completely comfortable with the idea of being in front of the camera

nude-3.jpgGet Close. Closer. Nope, still not close enough.

The main focus of your photographs should be your girlfriend. Don’t be afraid to experiment with close up shots and interesting angles. If your girlfriend has a particular feature that you find very erotic or sensual, try to highlight that feature in the photo.

This is your chance to experiment and discover new sides both of her and what you think of her – and if the photos turn out as well as you hope, then chances are that she’ll appreciate your, er, appreciation as well!

Don’t act like an idiot.

After you find something she’s decided she’s willing to try, make sure to mention how beautiful you think she will look. Especially for a woman who feels shy or self-conscious, reassurance is a must. If she’s never posed nude before she may feel like she doesn’t know what she’s doing.

It’s important for you, as the photographer, to be prepared to offer assurance and encouragement, but most of all, instruction: you see how the photos are turning out, so you have to offer direction. Show her that you know what you’re doing, and even if you don’t, by all means at least act like a professional :)

nude-5.jpgRemember that she’s your girlfriend, not a porn star, and not a stripper (unless, of course, your girlfriend is a stripper or a pornstar, but in that case you’ll probably not really need this write-up).

If you are respectful and loving, chances are that she will relax and get more into this. Make it about her and about how beautiful you think she is, and she’ll return the appreciation.

Talk about how the photos will be used

A final word of warning: Taking the photos will be a learning experience for both of you, and you may end up with some mighty fine photographs. Nonetheless, take care to talk about how the resulting photographs will be used, and who will see them: Nude photographs might not be something that your girlfriend wants the entire world to see. Before you rush right out and upload them all onto your Facebook or MySpace pages, make sure you defer the control of the photos back to her. The photos are of her, so she should be the one to decide what you can and cannot do with them. Don’t be surprised if this is a private activity that she wants kept between just the two of you.

nude-6.jpgThat means that if she wants the memory card formatted, or requests that you delete certain images that she doesn’t like it’d be rather rude not to.

Once she trusts that you’re really not going to do anything with the photos that she isn’t okay with, the chances are good that the next time you experiment with a camera she’ll be more relaxed and more willing to try different things.

Have fun!

If you’re being tense and worried about the experiment, it isn’t going to work. if you have to, take the memory card out of your camera, and just shoot ‘blanks’ for the fun of it. Get used to seeing nude skin through the viewfinder, and make sure your girl is comfortable with the sound of the shutter, the lights of your flashes, and with taking instructions throughout the shoot.

Basic rule: If you’re not both having fun, someone’s doing something wrong.

Good luck!

Models: Preparing for a photo shoot

The modelling industry is very competitive. Every photo-shoot is a chance for a model to show herself at her best, and any model is only as good as their last shoot – so there’s a strong incentive to make each photo-shoot count towards

This article highlights some recommendations that a model may want to review in order to prepare him or herself for a photo-shoot. While digital photo processing software such as Photoshop can work miracles, neither a model nor a photographer will take as much pride in highly photoshopped pictures. If you take the time to prepare well in advance of your photo-shoot, you will feel more confident and as a result, look better. 


Part 1: Show your body and skin at its best!

1. If you work out, you may want to vary your routine to show off the muscles you’re most proud of. Or, a week before the shoot, you may want to increase the intensity of your workout. For example, if you usually do aerobics or body shaping, switch to working with gym equipment for a couple days. You will notice how well your muscles will respond. In no way does this mean you need to have a stereotypical fashion model’s body. Exercise can be great for any body and can boost confidence – and confidence is really what makes you attractive.

2. Moisturize: Hopefully you moisturize your skin regularly. If not, certainly apply moisturizer on the days before and morning of the shoot. To make your skin look smooth, supple and glowing, consider using with a hydrating cream containing exfoliators such as hyularonic or glycolic acid.

3. Remove: If you shave, do so 2 days before the shoot, in order to give your skin a chance to recover. If you do it yourself, follow the main rules of depilation to avoid irritation and ingrown hair:

- cleanse your skin and exfoliate before depilation
- do not stretch your skin when depilating
- do not apply too much pressure when shaving or using hair depilation cream
- do not run the shaver over one and the same spot several times or you can create irritated spots. If you have to, reapply shaving cream.

4. Color: Instead of using a solarium and prematurely aging your skin due to UV damage, consider using self-tanning creams and bronzing products. Choose a light type that gives you a chance to regulate intensity with each application and to avoid disasters like uneven color, lines and spots. Experiment with these products well in advance of your shoot, so you know that the color will look right for you. Try to avoid tan lines.

5. Watch it: Avoid too much salt and iodine in your diet. Salt can lead to water retention in the skin and the skin surface does not look smooth and tight but tired and bumpy. Iodine, for example in sushi and marine dishes, can trigger break-outs. Include more fiber into your diet it will help your body to get rid of toxins, and drink plenty of water.

6. Spots: If you do get a pimple the day of the shoot, do not touch it, as you will make it redder and harder to cover. Most photographers have no problem with one or two pimples as these can be easily covered with makeup or digitally removed by photoshop. If you have serious acne problems, be sure that your photographer knows this in advance.

Caution: Do not experiment with new skin treatments the night before the shoot. Any new treatment can cause skin irritations or allergic reactions. Test out the treatments well in advance of the shoot in order to know how your skin will react and how long your skin needs to recover.

Part 2:

Okay, your skin and body look great! What else you can do to prepare for a photoshoot?

1. Hair: If you dye your hair, make sure that you have had your roots recently treated. Studio lighting can exaggerate dark roots.

2. Nails: Make sure your finger and toe nails look clean and manicured. Use a clear nail polish which will go with any color clothing. If you must color your nails use a neutral white or cream. Red nails will look strange if your outfit is blue.

3. Makeup: If there will be a makeup artist at the shoot, arrive with no makeup on. Otherwise, you will loose time and potentially irritate your skin (and your photographer) when the makeup comes off. If you will be doing your own makeup, remember that photography lighting and the heat from the lights tend to make the skin look shinier than usual. Do not use any shiny or bright make-up that might cause reflection or glare during the photoshoot. Apply a base to smooth your skin and make it look consistent. Use mascara to bring out your eyes. Bring several colors of lipstick that you can apply depending on the color of clothing.

4. Wear antiperspirant. Avoid using any deodorant which may stain clothing.

5. Tattoos: If you have tattoos, experiment to see what make up will cover them naturally. If you are interested in being a traditional fashion model, don’t get tattooed, as many photographers don’t like them. On the other hand, tattoos can make a portrait more interesting – just make sure the photographer knows about them ahead of time.

6. Posing: Practice your poses before the shoot. This is especially advisable if you are a beginning model. Flip through some magazines and find the poses you like. Practice your facial expressions and poses in front of a mirror so you can see how you look at your best. Often exaggerated or unusual poses look most interesting. Wild and disheveled hair may be better for you than the well-groomed look. Do not be afraid to experiment and try new things. It will be much better than standing like a stick in front of the camera.

7. What to wear to the shoot: If your shoot is glamour, swimwear or lingerie, wear loose fitting gym clothes which have no elastic bands. Do not wear underwear. Underwear leaves lines on the skin, which can require 30-60 minutes to disappear.

8. Get plenty of rest: Have a good night’s sleep the night before the shoot. Avoid partying the night before a photoshoot. Alcohol and cigarette smoke, even smoke in the air, can make your eyes red and puffy. Also, if you are a smoker bring down the number of cigarettes your smoke or stop completely before the shoot. Smoking deprives skin of oxygen and nutrients and makes it look gray.

Invest the time to make yourself look the best you can be so you can feel confident during the shoot. If you feel great about yourself, you will exude confidence. Confidence shows and will help to make your photos the best they can be.

This article was written by Eden Fenrick for Photocritic. If you fancy writing a guest article, get in touch!


Do you enjoy a smattering of random photography links? Well, squire, I welcome thee to join me on Twitter -

© Kamps Consulting Ltd. This article is licenced for use on Pixiq only. Please do not reproduce wholly or in part without a license. More info.

Do snappers have a responsibility?

footie.jpg

For photographers who sell microstock, or who sell a photo every once in a blue moon, getting serious pay-outs for a single photo may sound as a dream. For those of us who deal in licenced photography, however, serious levels of payment aren’t unheard of. Personally, my best-selling set of photos have netted me a fair sum of cash: They’re very specific, and get sold again and again.

Today, I stumbled across the work of Thomas E. Witte, in a brilliant article over on Sports Shooter. Witte managed to snap a couple of photos that turned out to be pure gold dust: A high school football player who doesn’t have any feet. The photos netted him $12K.

What makes me wonder, though: Could it be argued that the photographers have an obligation to their subjects directly? Should Witte give the football player some of the money he earned in this case? Or does the opposite apply — like for photographers who cover conflict zones — that if you get involved, you are immediately unable to do your job properly? 


It could be argued, of course, that the photos of Bobby Martin – the football player in the photos – are exploitative. After all, the only thing he is doing is what he loves: To play Football. In the grand scheme of things, Martin is probably unlikely to make any money of his passion: The big bucks are in the NFL, but a legless NFL player is probably not going to happen in our time. The alternative is the Paralympics, which is at least partially sponsorship-driven, and has made stars of a few games (like Wheelchair Rugby, as shown in the highly recommended film Murderball).

So, as fellow photographers, how should we feel? Personally, I am torn. On one hand, I want to say “Good work, Witte, for creating a motivational icon of Bobby Martin”, I mean, hell – there aren’t a lot of people who would have the guts to face the big burly opponents on the football pitch if you’re half their size, and especially if you lack legs. Without Witte’s work, chances of anyone finding out about Martin are slim. By showing his strength to the world, Witte’s photos could be a motivation to a generation of less-abled people.

On the other hand, I’m tempted to say “jeez, Witte, this is just a bit harsh. You’ve made a lot more money out of these photos than you expected. How about you split the cash with Martin? Keep $6K for yourself, and give $6K to him. It’s only polite.”

And finally, the cynic and paparazzi photographer in me goes, “Sod it, it’s a white-hot photo, and you deserve every penny you can get. What happens to a photo after you’ve taken it isn’t your problem, congrats on making a nice pile of cash out of it”.

Do photographers have a responsibility to their subjects?

View Results

How do you feel about these photos? Do photographers have a responsibility to their subject? Vote above, and let me know your opinions in the comments, below!

The photo in this article is a thumbnail taken from the Sports Shooter website, used under UK Fair Dealing law. The photograph is © Thomas E. Witte. To see the full version and more photos by the same photographer, please check out the source article


Do you enjoy a smattering of random photography links? Well, squire, I welcome thee to join me on Twitter -

© Kamps Consulting Ltd. This article is licenced for use on Pixiq only. Please do not reproduce wholly or in part without a license. More info.

Case study: Selling your photos on-line

a-fotoviva-4.jpg

A lot of people take photos. No, seriously. A lot of people. But the number of people who actually do something with their photographs are an absolute minority. I decided to catch up with a friend of mine – Jason – to see how he turned his hobby into a multi-million, global sales success.

Okay, so I’m full of it: he barely even breaks even. But still – he’s found a cool way of trying to do something with his photos. And that’s worth taking a closer look at, methinks! 


a-fotoviva-2.jpgI’ve stumbled across Jason’s site, fotoviva, several times before I even got to know him. It goes to show that this global village of ours isn’t always as big as we think, I guess.

Jason is a web designer who’s an old-timer in the world of photography: He’s been taking photos for about 15 years, but always on a hobby basis. He’s a Nikon fan (Boo! Okay, just kidding), and shoots most of his photos with a modest D50. The results certainly make it worth it, however!

Occasionally, he takes photos that are so good that they deserve to be shared – but how? There are so many venues where you can show off or sell your photos, but Jason decided they weren’t good enough for him: Either they were a bit lacking, or they weren’t quite what he was looking for.

There are some great pieces of on-line gallery software out there, but they are limiting in that you can’t sell your work. The sales galleries? Well, they’re a bit crap too. So, being the ever-creative soul he is, Jason decided to just go ahead and start from scratch.

a-fotoviva-3.jpg“Basically”, he says, “I launched it as a site to try and sell my own pictures as canvas and poster prints 5 months ago. Then I realised that there are so many really good photographers out there, completely unknown, yet they have no idea about the internet or how to create a website to sell their work and earn some extra cash.”

So he opened up his website to other photographers as well. “When I find a photographer whose work I like”, Jason explains, “I ask them if they would like to try and sell some of their pictures using my site.”

It’s not exactly a new approach (it’s what I do over on 3Songs.org for concert photography, for example), but it’s a win-win situation. As Jason sees it: “This helps build up my site, and offers the other photographers an outlet to sell their prints”

I think Jason’s Foto Viva website is one of the more elegant photo gallery / sales solutions I’ve seen, so I thought I’d share it with you guys.

a-fotoviva-4.jpg

So, he’s got a successful website and is a pretty accomplished photographer. Surely, that means he’s had all his dreams come true? Not quite… “One day I would like to spend at least half my time taking photos”, he admits, “not only
in England but around the world, whilst continuing website and graphic design on a much reduced scale.”

Spoken like a true photographer, that is.


Do you enjoy a smattering of random photography links? Well, squire, I welcome thee to join me on Twitter -

© Kamps Consulting Ltd. This article is licenced for use on Pixiq only. Please do not reproduce wholly or in part without a license. More info.

Oi! You! No pictures!

istock_000000880427xsmall.jpg

A few months ago, I ran a story on how the UK government was trying to restrict public photography. It seems as if they’re now playing the back-pedalling game in a big kind of way. Once the petition hit 60,000 signatures, the Prime Minister’s office issued a statement which can be summarised into ‘uh, no, we never intended these kinds of changes to be made’.
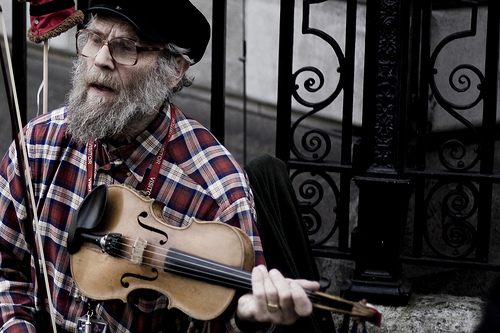
What I really want to know: Do you have any stories of instances where people tried to stop you from taking photos? Leave a comment!

Have you ever been stopped from taking a photo?

View Results

It’s hard to tell if the guy who set up the petition was, in fact, petitioning the wrong people (the government wasn’t imposing restrictions, but private security firms might have been), or if the government have gone ‘whoopsie, a lot of people feel strongly about this, let’s try and save our skins’. Either way, the text of the statement is as follows:

Thank you for signing the petition on the Downing Street website calling for the Prime Minister to stop proposed restrictions on photography in public places.

This petition has already attracted over 60,000 signatures from people who obviously share your concern. Not surprisingly, the idea that the Government might be poised to restrict your ability to take photos has caused some puzzlement and even alarm.

We have therefore decided to respond to this petition before its closing date of August, in order to reassure people.

The Government appreciates that millions of people in this country enjoy photography. So we have checked carefully to see if any Government department was considering any proposal that might possibly lead to the sort of restrictions suggested by this petition. We have been assured this is not the case.

There may be cases where individual schools or other bodies believe it is necessary to have some restrictions on photography, for instance to protect children, but that would be a matter for local decisions.

So… Do you have any stories of when you were prevented from taking a photo by slightly over-zealous security personnel? What happened? What did they say? What did you say? Did you have to stop taking photos?

(Photo © iStockPhoto)


Do you enjoy a smattering of random photography links? Well, squire, I welcome thee to join me on Twitter -

© Kamps Consulting Ltd. This article is licenced for use on Pixiq only. Please do not reproduce wholly or in part without a license. More info.