Feature Articles

To protect your camera equipment, fly with a pistol...


I was in the pub the other day, and got to talking with a camera-man who does seriously high-end video stuff. He travels with a lot of equipment all the time, including some ridiculously expensive high-speed video equipment. Of course, everything he owns is fully insured, but insurance isn't everything: He is on the road around 300 days every year, and if something gets stolen or breaks, you have a big problem: It's extremely hard to get a replacement part for a Phantom Flex if you're standing on a mountain-top in Tibet somewhere.

So, he shared a little secret with me: He found the perfect way of protecting his £140,000 ($210,000) worth of equipment he travels with: He travels with a pistol.

Now, of course, there are lots of flights that won't let you check ammunition, but most will allow you to travel with an unloaded fire-arm. On top of that, a starting pistol costs as little as $50.

So... Why does this work? Well, a starting pistol is classed as a firearm, but it isn't actually illegal anywhere. In addition, since you aren't bringing any ammunition, you're basically just packing a small toy gun that isn't good for anyone. However, the airlines are über-paranoid about losing a firearm: Doing so, would cause tremendous amounts of problems for everybody concerned, and so, any luggage containing a 'firearm' is especially tagged and tracked through the luggage systems.

"Of course", my new-found friend said, sipping from his gin and tonic, "It does take me longer to check my bags, but there's no way they'll take the risk of losing them - and so when I travel to very important jobs, my starter pistol comes with me..."

I've never tried it myself, and I haven't looked into the rules, but it does sound like a pretty elegant (if ridiculously extreme) solution to the fear of losing your camera equipment whilst on the move...

Photo (cc) by Mr Smashy

HDR: Making impossible shots possible


If you've ever been faced with photography situations with extreme contrasts, you know that basically, you're out of luck. Say, for example, you are taking a photo out of the door of a building.

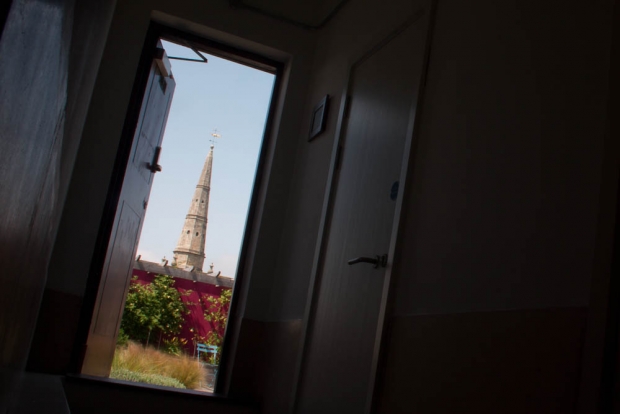
You have to make a hard choice; are you going to expose for the outdoors? If so, you end up with something like this:

img_2510.jpg

... And your indoors are completely useless and dark.

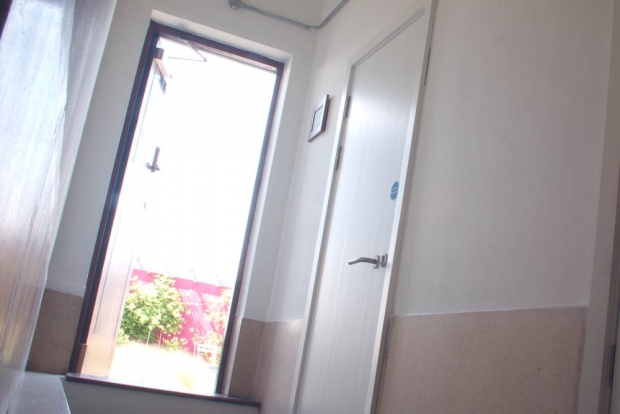
Alternatively, you can decide to expose for the light inside the building:

img_2514.jpg

But clearly, that's hardly going to do much good either.

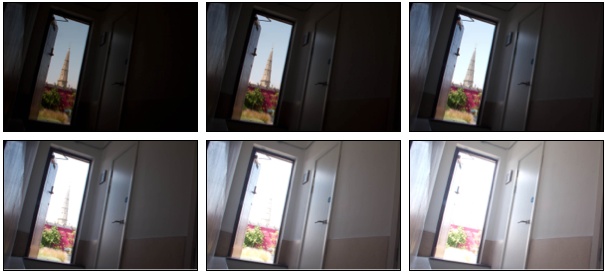
The solution is HDR photography, where you combine a series of exposures:

hdr.jpg

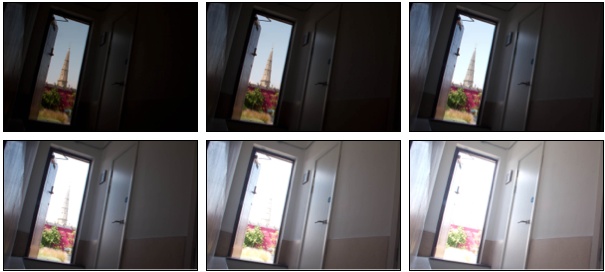
Into one single exposure:

img_2508_hdr.jpg

Okay, so I'm more than happy to admit that this quick example (shot with the Triggertrap Mobile Long Exposure HDR mode using my iPhone to control my Canon EOS 550D - that was what I was testing when I did this one) is hardly the finest example of creative HDR ever created - in fact, it's a distinctly rubbish picture. Nonetheless, it reminded me how powerful HDR can be, and how it completely changes the game for what is possible in photography.

Time for a week-end project?

So, If you've never given it a go before, make it your week-end project: You can easily do a manual HDR set by changing the settings on your camera between each shot; or use the Automatic Bracketing feature built into most cameras to get a 3-shot bracketed set.

And if that isn't enough for you (for example, if you're instead itching to do a 13-exposure HDR for some crazy reason), there are automated solutions that'll do the exposures for you, including Triggertrap Mobile or Promote.

For an in-depth guide on HDR photography, check out the Pixiq Ultimate Guide to HDR Photography!

Nutty Photo Project: Locks on Toilets

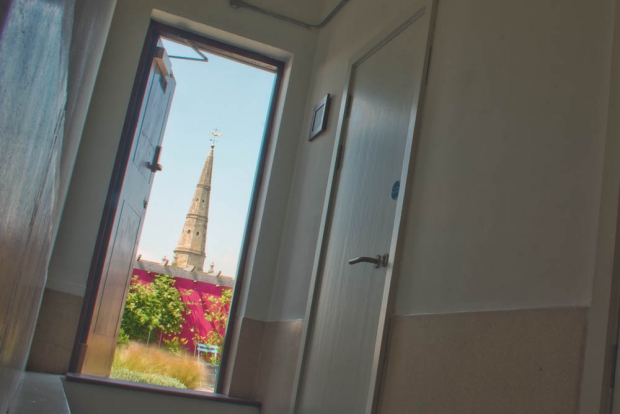
3302708559_2998963341

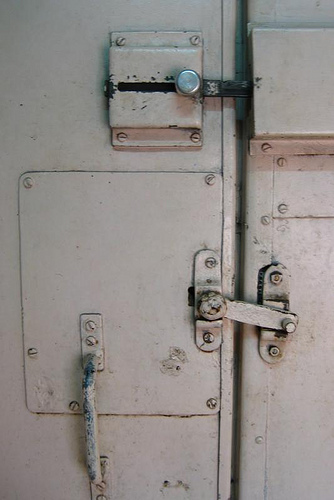
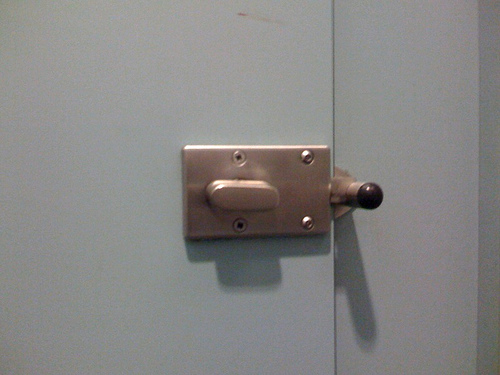
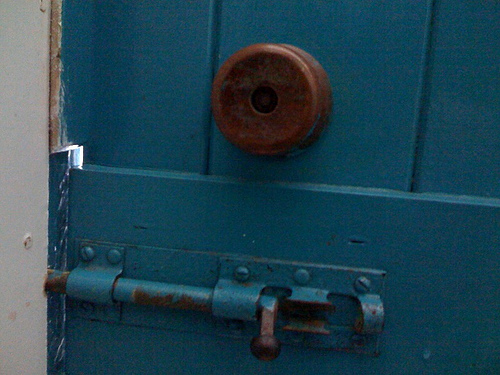
For the past five years or so (with variable amounts of passion – usually low-level, when-I-can-be-bothered. When I bought an iPhone, more often), I’ve been doing an odd little photography projects titled ‘Locks on Toilets’. What is it? Well, it does precisely what it says on the tin: It’s a relatively large collection of photographs of devices that lock the toilet door so nobody can barge in on you while you’re attending to your business.

It’s an odd little project, which I came up with when I was hideously drunk one night – like all great ideas, in other words, and I just sort of continued doing it. Of course, it’s a lot more fun if it’s a collaborative project, so I hereby invite you to join in the slightly odd fun…  

So, what is this all about?

I could spin you a line about how the one thing that all humans have in common is the need to relieve themselves, and how that’s a beautiful thing. Of course, it’d be a complete load of shite (if you’ll forgive my contextually-appropriate french).

Thing is, I don’t have any idea why I’m running this project – I just know I’m having fun doing something that’s so completely and utterly pointless that it becomes awesome.

Show me some examples!

Well of course I will:

Train
Train

Boeing 777 somewhere over Russia.
Boeing 777 somewhere over Russia

Covent garden
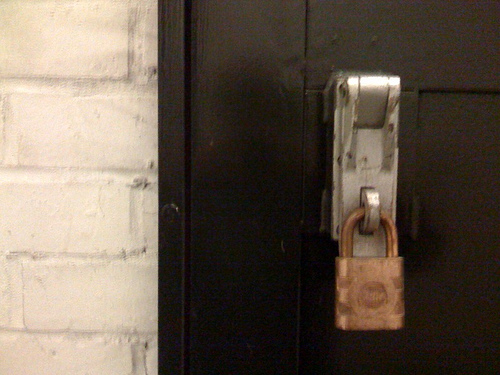
Locked with a padlock!

Paddington train station, London, England
London Paddington

Portmellon, Cornwall, UK
Portmellon, Cornwall

Pub in Bath
The no-lock lock in a pub in Bath

Puzzlewood in Forest of Dean

How can I get involved?

First off, you may wish to join the Locks on Toilets group on Flickr – there’s currently nearly 450 entries there, but there’s always space for more! In the group, look at some of the submissions, and submit your own if you fancy it. The group will accept any and all submissions, but it’s cool if you, in the title, add the name and place of the establishment, and it’s cooler than a penguin’s plums if you also geo-tag the photos, so I can eventually do a mash-up plotting all the photos on a map.

Now, I can totally understand if you can’t be bothered using your main pride-and-joy flickr account to do this – I don’t do that either. My main account on Flickr – Photocritic – I keep for stuff I’m actually proud of in some capacity, and I use my alternate account – isharq for stuff which I’m not too fussed about, including this account, so if you fancy it, you can set up a second account.

Go on, it’s all just a bit of fun!

Tell me about your nutty projects

I’ve written about other weird projects before, but I’m curious… What floats your boat?

Have you got any crazy ideas / projects / things you do when you think photography is in danger of getting just a little bit too serious? Leave a comment, I’d love to hear about ‘em!

Hardware hacking: Fixing your X100 charger


Without the easy-to-lose piece of plastic, your FujiFilm charger is useless. Let's go DIY on its ass...

I've had a FujiFilm X100 for a while now, and I still don't completely know how I am getting on with it. Sure, I have taken some rather fabulous photos with it, like these ones:

20120215_dscf0564_600px.jpg

20120205_dscf0501_600px.jpg

20111009_dscf8681_600px.jpg

20110930_dscf8142_600px.jpg

The FujiFilm X100 battery charger problem

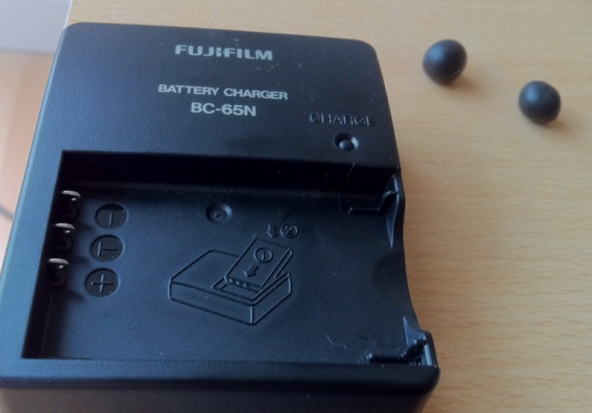
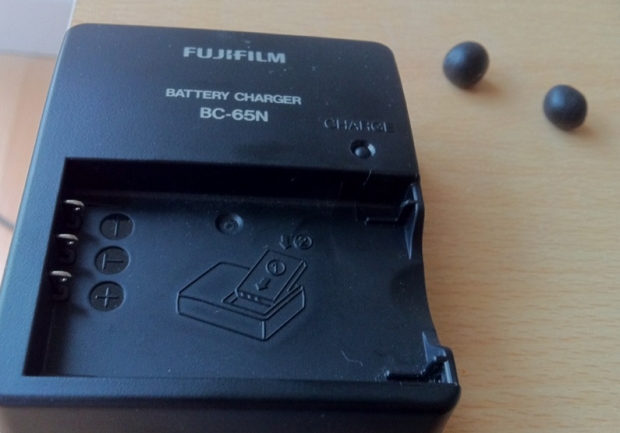
But it is not without its niggles. One of the small but incredibly annoying problems with the X100 is that the battery doesn't fit in the battery charger that comes with it. I know, it sounds completely inane, but it's true: To use the X100's battery in the charger, you have to use a tiny piece of plastic in the charger. Without it, the battery fails to make a connection, and won't charge properly. FujiFilm, if you're reading this: That was a complete bonehead move, and you really ought to be ashamed of yourself.

However, as a DIY photographer, I figured this was my chance to make my own life better. I lost the little piece of plastic nearly immediately, and was using toothpicks to hold the battery in place, but when my good friend Sarah told me about Sugru (by the way, Sugru, if you are reading this you should totally hire Sarah. She is awesome. Also, if you aren't reading this, then you obviously need a new community manager. Which brings me back to my original point: Hire Sarah.), I immediately saw a great use for it: Finally, a way of fixing my X100 charger, permanently and once and for all.

Let's get busy!

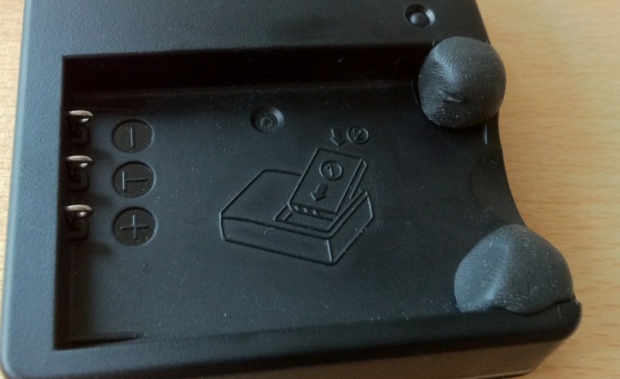
So here, offered as a deliciously simply to follow step by step guide: How to fix your FujiFilm x100 charger, by the power of Sugru:

1) Make sure you clean your charger properly; The Sugru is pretty hardy stuff, but if it's dusty or greasy, you're going to get less of a bond:

screen_shot_2012_06_26_at_190128.jpg

2) Take two small balls of Sugru (this was about 1/8th of a 5g packet of Sugru - or a grand total of £0.17 / $0.26 worth), and shape them into, er, balls.

3) Insert the battery into the charger, to make an imprint into the Sugru. Push it into the Sugru ever so slightly, and then remove the battery. The material will keep the shape you've just made, and harden over the next 24 hours.

screen_shot_2012_06_26_at_190142.jpg

4) Use a wet finger to gently brush off any excess material. Sure, this is an optional step, but if you're going to hack your own camera equipment, you may as well make it look reasonably good.

5) re-insert the battery to make sure it still fits properly, then remove it again

screen_shot_2012_06_26_at_190135.jpg

6) Leave it to harden for 24 hours

Congratulations! You've spent pennies on fixing a problem that FujiFilm really should have done right in the first place. More importantly, you can now use your well-earned bragging rights down in the pub, telling everyone that you've improved a piece of your own photography gear!

Copyright Infringement: Ignorance is no excuse.

"Hey", I see you think. "That Copyright Notice Looks Familiar..."

This morning, I caught a blogger who rather brazenly had 'borrowed' some of my articles. It isn't the first time this has happened, of course, but in this particular instance, I was particularly insulted; the blogger in question was running a thriving photography business, and had happily stuck his own copyright notice on my article.

This is part 4 in my series of articles about copyright. If you want to start at the beginning, start with What is copyright, and how do infringements harm you, then skip along to Protecting your copyright in a digital world. If you can still stand more of this sort of thing, part three in the series is Just because it's in my RSS feed, doesn’t mean you get to steal it.

Got all that? Great - let's continue with part 4 then...

In this particular case, it was even more impressive than usual - this particular blogger has a whole section on their website on copyright, which includes choice phrases like "All information and material posted on this Website are subject to copyrights" and "use (...) is expressly prohibited, unless prior written permission has been granted."

In quite a few of the recent cases of infringement I've dealt with, the 'defence' has been "I didn't know it was not allowed", or "This is for my own personal use only". I've got to say, I do feel a little bit bad about going in all guns-a-blazing, when I'm met with 'I didn't know'. On the other hand, that's not really how things work. If you are driving a car, you are expected to keep on top of changes in traffic law. If you're a doctor, you're expected to keep an eye out for which drugs you can prescribe for something. If you're a sailor, you have to learn the laws of the water. If you're in advertising, there are certain things you can't say or do to promote your product. If you're a teacher... If you're a football player... You see where I'm going with this.

As a blogger, you are a publisher.

What many people don't seem to understand fully, is that blogging is publishing. Sure, it might be that hardly anybody reads your blog. It's possible that you have your site mostly for your own use only. And it is very, very easy to remove or edit a piece of writing from a blog if anybody takes offence. Nonetheless; the activity of making something publicly available on a web site is still publishing; as the site's publisher, you're responsible for all and any content that goes live on the site.

If you're a publisher, you are liable for any laws you break in the course of your publishing activities. Including copyright infringement.

There are some edge cases here, of course. For example; a forum owner technically 'publishes' all content on a forum, but isn't necessarily legally responsible for everything posted by their members. However; if a member is consistently posting copies of articles to the forum, they might still be on rocky ground. There is at least one large forum run by police-officers, for example, that flaunts copyright law as if there is no tomorrow... Which doesn't mean that that particular forum couldn't get a particularly nasty surprise at some point in the future.

Ignorance is no excuse

The point is; if you participate in any activity, you're expected to know the laws and rules relevant to the activity you're participating in. If you don't, then - I hate to say this - tough luck. Ignorance is no excuse.

It is a shame, really; to drive a car, you have to take a licence; if you buy a house, you have to take some legal advice. On the internet, however, nobody tells you what is appropriate behaviour - and what isn't. It's extremely easy to pirate music (in fact, the embarrassing truth is that it only very recently became as easy to buy as to pirate music online - and services like Rhapsody, Spotify, Pandora and iTunes have a lot to do with that), it's still often easier to obtain movies without paying for them than to get them legally, and if you run a blog, it's very simple to get a lot of high quality content by simply taking it from other websites - like this one.

I've had enough of it, though. I'm not spending most of my life creating content that I think people will like, just to have someone else nick it and publish it on their own websites. If that's you, then the next time I find you, expect an invoice in the post.

Because ignorance is no excuse.

Disclaimer

I have rudimentary legal training in UK media law, but my training is several years old, and you’d be insane to take legal advice from some random bloke off the internet anyway. Nothing in this post is meant as actual legal advice – talk to your solicitor, that’s what they are there for!

Further Reading

This is part of a 4-story series:

  1. What is copyright, and how do infringements harm you?
  2. Protecting your copyright in a Digital World
  3. Just because it's in my RSS feed, doesn't mean you get to steal it
  4. Ignorance is no excuse

In addition, you might enjoy Police Fail: Copyright, what is that? and Even Schools Don't Care About Copyright...

How to keep your photos safe: Backup routines!

As photographers, we spend a lot of time thinking about how to take the most beautiful photos ever. Do you spend enough time keeping them safe?

How often do you back up your photos? If you have to think for more than a fraction of a second to answer that question, the real answer is 'not often enough'

There are a few important steps to creating a backup strategy.

Choose what to back up

This is the easiest bit. Think about this: What do you want to back up? The answer, here, is probably either 'my photos', or 'my photos and lots of other stuff'.

I do both - but I go out of my way to take better, more frequent, and more redundant backups of my photos, because they're more valuable and important to me.

Choose how to back it up

Automatic back-up at home - Until recently, I was using an Apple Time Capsule; but I've had two of the damn things fail on me within a year (and I've written a separate rant about that elsewhere). So I've upgraded to a Drobo FS instead (Amazon US / UK) - Firewire 800 and fully-redundant RAID means that even if one of the drives kick the bucket, I don't lose any of my precious files.

Along the same trait is Automatic back-up over the internet - In addition to my Drobo, I use a service called Mozy, which is an online backup service (for more about why, see 'store the backup' below). It's pretty clever, actually, for about $5 per month you get unlimited storage, and it takes backups in the background, all over the internet. By having your back-ups off-site, your stuff is still safe even if someone steals everything in your house, there is a fire, or similar horribleness. I signed up for a 2-year subscription, set it up, and haven't looked at it since (apart from checking if it's still backing up every now and then. It is. I'm impressed.)

If you don't like Mozy - or if you're looking beyond just backups - there's always Dropbox, which is a bloody good solution, too; very well integrated, includes some clever sharing features, and is tightly integrated with your computer OS - you can even use it to keep folders synced between your different computers, and they have a clever online file browser, too.

Right: That's 50,000 photographs just waiting to be destroyed because someone opened the hard drive enclosure to take a photo...

Consider RAID...

... Over a network: RAID solutions can work in many different ways - you can do them over a network (Check out 'Network Attached Storage' on Amazon (.co.uk or .com)).

... Hooked up directly to your PC or Mac: As far as stand-alone RAID goes, you can buy ready-built solutions (Like the G-Tech G-Raid 3TB FireWire 800 / Hi-Speed USB solution available from Amazon.com, or the WD MyBook 2GB solution from Amazon.co.uk) - but there are loads of other options available, too.

If you're feeling thrifty and a bit DIY-tastic, you can build your own RAID solution by getting two big harddisks. I'm rather fond of Western Digital Caviar Green drives; they are reliable, quiet, and cheap-tastic: Amazon.co.uk / Amazon.com. In addition, you'll need an enclosure. The Drobo seems to be the gold standard, but you don't have to spend that much money; Look for Firewire 800 enclosures if your computer supports it - if not, USB2 or FireWire should do the trick.

Check your backup integrity

3281381941_88a30e70cb_o.jpg

I was kicking myself when I thought I might have lost this photo - turns out that I did have a backup of it, despite deleting the folder by accident. Phew! Click for bigger version on Flickr

Remember that you have to be sure that what you are backing up is actually working: There's no good in taking a backup of a corrupted file. Obviously, you can't check every file for integrity every time, but what you can do is to ensure that you keep older backups, too.

Only recently, I discovered that I had deleted a folder of pictures by accident several months ago. If I had only kept a recent snapshot of my pictures folder (as it were, pun fully intended), I'd have been buggered. Luckily (or rather: due to having a sane backup strategy), I was able to dig out an older backup of my photos folder, which still contained the deleted folder, and I was able to restore my photos. Phew!

For important shoots, I immediately burn them to DVD - that way, I know I have a backup somewhere which isn't being touched.

Think about where you store your backups

Okay, so perhaps this bank vault is a bit over-kill, but if your photos are valuable to you (say, if you're a commercial photographer, or if you can't stand the thought of losing them), you might want to consider renting a deposit box, and keep a backup of your photos on an external harddrive there. You only need a tiny bank box, so it shouldn't cost the world.

iosafe_solo.jpg

It's important to think about how you are storing your backups. Remember that you're backing up for all sorts of reasons: If your computer breaks, and external harddrive is handy. But what if someone breaks into your house? It's no good having a full set of backups on external harddrives if the thieves can just take them with them, too. House fires, floods, etc - there are lots of reasons why keeping your backups in your house is a good idea (they're easily available), but there are risks, too.

If you do have to keep your backup harddrive in your house, you can't do much better than ioSafe's brand new Solo G3 backup solutions. They are fire and water-proof (so likely to survive a house fire, and subsequent fire department rescue operation. They aren't exactly good for travelling (the unit sitting under my desk weighs approximately a billion tonnes), but the flipside of that is that they're also practically bullet-proof. In the beforementioned housefire, that's a very good thing: If you can find your ioSafe Solo in the remaining rubble, it's probably there, hugging your data gently.

iosafe_portable.jpgPersonally, I keep the harddrive connected to the network hidden away in the attic. That way, a casual thief is unlikely to run off with it, so even if my computer is stolen, I don't lose my photos.

In addition, I keep a backup on an external drive which I leave at my parent's house - it's low-tech, and the backups are generally about 2 months old every time I swap the drive over, but it's better than not having it handy.

Finally, I have the Mozy backups - although they would be a pain int he arse to restore: I'd have to download hundreds of GB of data. There's an alternative way, too: ordering DVDs or an external harddrive with your data, but that, too, is a pain... In short, Mozy is my absolute last resort.

And finally... Try recovering the backup

The best thing that might happen to you is that you go your entire life without ever having to restore a back-up. Nonetheless, it is an extremely good idea to try it anyway.

If you're unable to restore your backups (perhaps there's a problem with the backups? Maybe the restore feature of your favourite backup package isn't working?), you may as well not bother with the hassle of backups at all: they're only useful if you can use them if the worst happens.

The bank vault and harddrive photos are from iStockPhoto.

Choosing your first dSLR camera

With a slightly better screen than the others, the Nikon is an attractive choice in the bargain-SLR category

Whenever a new excuse for buying stuff (Christmas? Birthdays?) rolls around, the retailers are rubbing their money-grabbing little paws in glee, in anticipation of making a killing over the holiday seasons. Be that as it may, fact remains that there is a lot of choice out there, and whether you are buying your first camera, or whether you are out shopping for a friend of family member, you might need a hand.

Welcome to the 7th edition (!) of my in-depth guide to choosing an entry-level dSLR camera: What should you be looking for, what should you be buying, and why? It’s all in our handy shopping guide, right here… 

Where should you even begin?

Once you’ve decided to start looking for a dSLR, you might have some reason in mind already. Perhaps you feel as if you’re outgrowing your compact camera, whether that’s creatively or technically. Maybe you’re not really feeling as if you’re challenging yourself enough as a photographer. Either way, you’ve decided to go play with the big boys – welcome aboard!

The first and most important thing you need to know is that there aren’t any really bad digital SLR cameras out there.

In fact I would argue that there aren’t actually any bad digital cameras on the market anymore in general – stick to a respected camera brand, and you’re home free. If we’re looking at compact cameras, you can buy a respectible camera for under $100 – the Canon Powershot A2200, for example wil set you back $99 or thereabouts, and is a lot of camera for your hard-earned dollars.

Anyway, we were talking about dSLR cameras. Here are a few things you should be looking at..

Things to consider before making your choice

Do you already own a SLR camera?

If you have already bought into a particular brand of camera, take a good, hard look at your lenses. If you’ve bought a lot of high-end lenses and flashguns etc, swapping from one brand to another might have a lot of hidden costs in them. On the other hand, if you have a lot of old, tattered equipment with scratched lenses, see it as an opportunity: eBay off the lot, and start afresh.

Canon or Nikon?

This is a perennial question which I’m not going to go anywhere near.I defy anybody to be able to tell the difference between a camera taken with a Canon or with a Nikon camera. Or a Sony. Or a Panasonic. Or a Sigma. Things have moved on hugely since the raging Canon-Nikon debates of the early 1980s (and they scarcely made all that much sense then).

Whichever camera system you buy into, you’re going to live with for a while (probably), so do think about it. You – not your camera equipment – is going to be the bottleneck, so don’t worry too much about what you might have heard form the old graybeards…

Buying into a system?

You know best what kind of a photographer you are. If you’re likely to start buying high-end lenses (or ‘fast glass’, as it’s frequently called among seasoned photographers), then you have two choices: Canon or Nikon. There are a lot of other people out there building great DSLR cameras, but once you start talking seriously high-end equipment, it’s one of the two big ones, I’m afraid.

On the other hand, if you are a semi-serious hobbyist, don’t discard other camera brands out of hand: Sony, Olympus and Panasonic are building some very capable cameras indeed – with some serious money-saving opportunities, too!

Body or glass?

If you have to choose between buying an expensive body and cheap glass or a cheap body and expensive glass, then go for the posh lenses. Every time. Personally, I am still using lenses that I bought nearly 10 years ago, even though I’ve changed my camera bodies half a dozen times since: You can take fantastic photos with an entry-level body and expensive lenses.

Putting bargain lenses on a top-level body is, frankly, a complete waste of money. Even better: Buy yourself a nice prime lens, and be amazed at what your camera body can do.

Megapixels?

In general, don’t worry about megapixels – most dSLR cameras come with 10 megapixels or more, and that’s enough. Hell, there’s even a prominent group arguing that more pixels aren’t necessarily better, and that 6mpx is all you need, really. I’m inclined to agree – you very rarely use them at full resolution anyway. What I’m trying to say is that Megapixels should be the last thing you look for in a digital camera in general – and a dSLR especially.

screen_shot_2011_11_25_at_080324.jpg

The above photo was taken with... an iPhone. Proving that any camera can take a good photo.

So, to summarise:

  • Don’t worry too much about the brand of your camera body
  • Buy Canon or Nikon if you anticipate dropping a lot of money on lenses in the long run
  • Spend your money on lenses, not camera bodies
  • Oh. and also consider looking into EVIL cameras - they're smaller and lighter than SLR cameras, but you keep the ability to swap lenses, and they can take great-quality photos! (loads more info about EVIL photography here)

3 great bargains

So, you’ve decided to leap into the pool of DSLRs, but you want to spend as little money as possible? These three cameras are your best options:

Sony Alpha A390

93449.jpgThe Sony Alpha 390 is an absolute bargain, and a great entry into the world of SLR. You get 14.2 mpx (more than enough), RAW image format (which is a must), and an incredibly nifty little feature: In-camera optical ‘SteadyShot’ image stabilisation! This means that any lens you connect to the Sony Alpha camera will be image stabilised – this is a feature you pay tons of money for in the lenses of other camera manufacturers!

The Sony Alpha lenses are compatible with Minolta AF and Konica lenses, so you get a reasonably good choice of glass, and the camera has a pretty wide shutter speed range of 30 seconds to 1/4000th of a second.

On top of all this, the Sony can be picked up with a fabulous kit lens – sure, it’s not the best glass you can buy, but who cares when you’re eager to get started. You can always chuck away (or eBay) the kit lens later, and upgrade to something better, once you know what kind of photos you’re likely to be taking!

You can get the Sony Alpha 390 with a kit lens from Amazon.com for about $449 and from Amazon.co.uk for about £349.

Canon EOS 1100D / Canon Rebel T3

canon_1100d_t3.jpgThe world of digital cameras has come a very long way indeed. I remember buying my first DSLR in the mid-to-late 1990s, and, well, you’d pay a small fortune for something that wasn’t all that amazing.

These days, though, you’re not needing to spend that much money to pick up a big-brand SLR camera. Obviously, Canon felt Sony and the other budget-DSLR manufacturers breathe down their neck, and they had to respond. And boy, did they respond: The EOS 1100D / Rebel T3 is one heck of a camera. Sure, so they’ve cut a few corners here and there, but, frankly, I don’t give a damn.

Personally, if I were to buy a SLR today, I’d buy one of two cameras: A Canon EOS 5D mk III (which costs a small fortune), or a 1100D / T3. Why? Because the imaging sensor is brilliant, and you can start saving up to buy lenses that will be with you and your camera system for a decade or more. When you finally out-grow the 1100D, eBay it and buy a mid-range camera (like the Canon 600D), or start looking at spending serious money for a serious camera (Canon 5D mk III if you want full-frame coverage, 7D if you don’t) – but none of the money you spent on lenses was a waste: It’ll all still be there, ready for you to snap away.

Of the bargain-snappers, only the 1100D / T3 has a CMOS sensor – which makes a surprising difference in image quality: Not necessarily better, but for some reason the grain on a CMOS sensor at higher ISO is a lot more similar to film than CCD sensors pushed to the limit… All of which means that the 1100D photos ‘feel’ more natural when you look at them.

You can get the  Rebel T3 from Amazon.com for about $490 or the Canon 1100D from Amazon.co.uk for about £400 – both with a Canon EF-S 18-55 kit lens.

Nikon D3100

nikon_d3100_angle_medium.jpgNikon’s baby camera is the D3100 – and it’s another bloody strong contender to the bargain crown. It comes with a super-advanced light meter – the 3D Matrix metering system borrowed from far more expensive Nikon cameras, which means that the Nikon is definitely the most capable in terms of getting the light measurements right.

The other thing the D3100 gets right is that it has a fabulous 3-inch LCD screen on the back of the camera, which makes a huge difference when you’re checking your photos in the field, to ensure you've captured what you're looking for all right.

Just like the Canon camera, the Nikon is an opportunity to start climbing the ladder – Buy the most expensive lenses you can afford, get some tasty flashguns, and they’ll be with you for a long time indeed.

I have to admit that I’m a Canon man at heart (I’ve used Canon cameras since I stole my dad’s Canon A1 out of the cupboard when I could barely walk. I didn’t break it, luckily), but it’s starting to seem as if Nikon currently have a nicer progression through the cameras – the D3100 is a peach, and the D5000 or D5100 – which is the next step up without being that much more expensive – is a deceptively simple, yet very serious, camera, for serious photographers.

You can pick up a D3100 from Amazon.com for about $640 and from Amazon.co.uk for £440 or so.

So… What should I choose?

If you want to take the step from compact cameras to SLRs, but foresee that you’ll continue being a casual amateur, go for the Sony. It’s a great little camera, a fantastic bargain, and the lenses available are not bad at all.

If you are ambitious in your photography, grab a dice. Throw it. Even numbers are Canon. Odd numbers are Nikon. They’re both absolutely brilliant cameras, and – considering what you get for your money – bargains. The Canon has a slightly better imaging sensor (but you wouldn’t be able to tell until you’re at higher ISO speeds) and the Nikon has a marginally better light meter (which doesn’t make that much difference in real life) and a better screen (which does). Seriously, if you’re having trouble making up your mind, throw the dice. It’ll save you a lot of headache.

Any final tips?
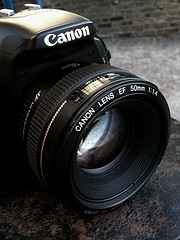
Buy a cheap camera body, then invest in some lovely lenses. You know it makes sense...

I know I’ve repeated this several times in this article, but if you’re new to SLRs, I would advise to buy the entry-level model from a manufacturer. Start taking photos – you won’t out-grow your camera body for a while, trust me on that, but you might out-grow your lenses. Start by buying a ‘Nifty Fifty‘ (a 50mm prime lens). Most manufacturers have a f/1.8 which is good and a f/1.4 which is great…

Once you have one of those, start thinking about the type of photography you do. If you want to start shooting macro, you’ll need to start looking into a macro lens. If you want to photograph gigs or wildlife, you’ll want a fast tele-zoom (I can’t recommend Sigma’s 70-200mm f/2.8 DSM lens highly enough – it’s a bargain for what you’re getting). If you’re more into in-door or landscape photography, you want to go wider – but only you know exactly what you want.

Buying cheap lenses is false economy – unless you don’t really know what you want to take photos of. If you’re just experimenting, flailing around a little (as we all are, at first), stick with your prime and your kit lens for a while. If you find yourself at the wide end of your kit lens most of the time, perhaps it’s a sign you need to spend a bit of cash on a wider lens. If you’re constantly at full zoom… well, you figure it out.

If you’re worried about spending hundreds – if not thousands – of dollars (or pounds, should you be on my side of the pond) on glass, go ahead and rent the lens you’re considering for a few weeks. Does it do everything you want it to? Is it too heavy? Does it feel right? Is it fast enough? If you’re not happy, rent a different lens, and keep searching. When you find the right lens(es) for you, you’ll know it – and that’s the right time to start shelling out the big bucks.

Seriously: Buy glass first. (If you want to learn more about lenses, I've got everything you could possibly want to know right here...) Worry about camera bodies later. By the time you have bought some serious lenses, you’ll know what you need from a camera (wide angle? Full-frame sensor. Sports? Fast, high-frames-per-second camera. Walking a lot? Buy a capable, but light-weight camera body… Etc)… But it’s a supremely silly thing to do to spend a lot of money on a camera body until you know what you really want/need.

So, Haje, what do you use?

I love my Canon 450D. Its cheap as chips, but does the trick!I’ve had a lot of cool cameras in my time – I worked as a freelance photographer for a while, and bought all the top-shelf gear. At one point, I drove around in a £1,300 car with £49,000 worth of camera equipment in the boot. I think it’s pretty safe to say that I’m a gadget nut, and a camera aficionado to boot.

… Which is why it might surprise you that currently, my main camera is... a Canon EOS 550D. It’s not the newest camera on the market anymore. It never was the best. But it does everything I need from a camera: It’s plastic, so it’s reasonably light weight. It’s relatively sturdy. It uses SD cards (which plug straight into my MacBook Pro – it’s a small thing, but I like it).

The five-fifty takes all my lenses (I have loads, but the ones I’ve used in the past 6 months are a Sigma 17-35mm f/2.8-4.0, a Canon 50mm f/1.4, a Sigma 70-200 f/2.8, and my Lensbaby G3 lens), and it doesn’t look too conspicuous. It’s also cheap enough that I’m not too crazy worried about it getting stolen or dropping it. All in all: Perfect for my uses. And it's one cheapest camera you can buy with a Canon badge on it.

This article was first published in 2007, but has been updated with the most relevant information every year since. It was most recently updated in April 2012.

The power of iPhone HDR

There's no doubt that HDR is a popular form of photography (I did a bit of a how-to, if you're not familiar with it), but mostly, I can't help but thinking that it's a bit of a specialist field.

Until, that is, I started using it on my iPhone. Most of the time, I don't need it; but the other day, I wanted to take a photo of a piece of graffiti. If I were photographing this properly, I'd have brought a SLR, and waited for the sun to go away so I could get even lighting across the whole image, but in this case, it was only going to be a quick snapshot.

I did my usual thing when I take photos with my iPhone:

  1. Point
  2. Shoot
  3. Done

img_3269jpg_.jpg

So, as you can see, it's a graffiti piece of God on a Sea-Doo. I thought it was pretty funny (those Porteños - that's people from Buenos Aires - really have a quirky sense of humour), but part of the image was missing.

The problem was that the direct sunlight was washing out the highlights on the far right, but the foreground was correctly exposed.I also tried exposing for the highlights (by pressing my iPhone's screen on the far right side, on the sphinx), but no avail: doing that plunged my right-hand side into deep darkness.

This is a great example of how limited dynamic range can make a photograph impossible: It is either too light, or too dark, and there's nothing you can do about it: You've hit the limits of the imaging sensor.

Or have you?

High Dynamic Range to the rescue

So, by using HDR processing, the iPhone takes two photos quickly after each other, and uses a HDR algorithm to use the dark bits from the light image, and the light bits from the dark image, to ensure you get an even exposure. In effect, you're cramming in a load of extra information - much more than the sensor is really able to capture in one exposure - into a single frame.

The result is nothing short of pure magic.

For the sake of comparison, let me post them both underneath each other here:

Non-HDR

img_3269jpg_.jpg

HDR

img_3270jpg_.jpg

Astonishing, eh? Now, we have detail both in the highlights AND in the shadows. Of course, it still isn't a masterpiece - it's still, unmistakably, a snapshot - but it's a technically much better snapshot than the first one.

And that's worth celebrating, I think.

The birth of Mirrorless Cameras

screen_shot_2012_03_26_at_141328.jpg

The development of the EVIL (Electronic Viewfinder / Interchangeable Lens) platform has been a long time coming, and in a way, it has been pretty much inevitable.

From one end of technology development, digital compact cameras and bridge cameras have been getting more and more advanced.

At the same time, camera manufacturers realized that SLR cameras aren’t just for the photographic elite and advanced amateurs anymore. Anybody who wanted to start do a little bit more serious experimenting with photography was reaching for entry-level SLR cameras, which led some manufacturers (especially Sony) to launch more affordable and simpler digital SLR models.

A gap in the market...

In the gray area of very advanced compact cameras and very simple SLR cameras, there was a very obvious gap – which was eventually filled when Olympus revived their PEN name.

The Olympus PEN brand was first used in the late 1950s, with a series of very innovative cameras. The PEN name was attached mostly to non-interchangeable lens rangefinder. The first few models were ‘half frame’ cameras, which, at the time, was the smallest camera to use the standard 135 film.

This ‘rangefinder’ word is important: Instead of having a mirror, so the photographer can see what they are photographing through the camera’s lens, you would look through a small hole next to the lens, which would give you an approximation of the picture you were about to take – much like you would get on film-based compact cameras and disposable cameras.

The half-way house: digital rangefinder cameras

screen_shot_2012_03_26_at_141338.jpg

When Olympus launched the PEN EP-1, it immediately drew comparisons to the cameras from another camera manufacturer who have a long history in the world of rangefinder cameras: Leica.

Leica is one of those camera brands that most serious photographers have heard of, but that leaves amateurs scratching their heads. Hand-built in Germany, the Leica company is well-renowned for building high-precision, high-quality camera instruments that retail for obscene amounts of money.

In 2006, Leica introduced the M8, which follows in the footsteps of a long and rich history, going all the way back to the Leica M3, a rangefinder camera launched in the mid-1950s. The M8 was the first digital rangefinder from Leica, and it is still considered a very capable camera today. However, it doesn’t have Live View, so there is no way of seeing what you are doing – until after you have done it. A true purist’s camera, then, but considering that it was launched already in 2006, it was also an intriguing look into the future of what was to come…

Technology matures, and EVIL cameras become possible.

screen_shot_2012_03_26_at_141317.jpgThe introduction of the EVIL cameras is the culmination of a lot of technology coming to fruition, finally: Up until 2008 or so, there had been several attempts at launching cameras with electronic viewfinders (Among others, I remember the miserable experience of using a Canon Pro90 bridge camera in 2002 or so), but the technology, on the whole, was pretty much useless.
Using the camera’s sensor to display what the camera was seeing ‘live’ on a small screen in a configuration similar to that of a SLR camera was a brilliant idea. It wasn’t without problems, however: The imaging sensors were of poor quality imaging sensors – especially in low light – and the low-resolution displays available at the time made a pretty hopeless combination. Most people who gave EVF (Electronic Viewfinder) cameras a shot quickly returned to the safety of the SLR camera.

Meanwhile, in the Compact camera world, more and more people were using the LCD display exclusively, ignoring the optical viewfinder. Camera manufacturers were noticing this, of course, and decided to concentrate on making the LCD displays better, and ditched the optical viewfinders from their cameras.

Eventually, when live view became good enough that the viewfinder became superfluous, the technology was ready for EVIL cameras: Why should the users have to put up with the humpback design of SLR cameras when the mirror and pentaprism part was superfluous?

Exactly.

Customers wanted smaller, lighter cameras that didn't compromise on image quality; they didn't want the weight and size associated with the SLR platforms, but they did want the flexibility of being able to select the perfect lens for the job.

The rest, as they say, is history...

And so, the EVIL cameras were born...

creative_evil_268x300.jpg

The above is an extract from the introduction chapter of my brand new book, Creative EVIL photography. I'm biased, of course, but I think it's a fantastic book.

Whether you've already bought an EVIL camera, whether you're considering it, or even if you don't think you'll ever go near one, but just want a thorough introduction to photography, this is the book for you.

It has just popped up for sale on Amazon.com and Amazon.co.uk, so head over and buy your copy today!


The world's 25 most beautiful travel destinations

 Are you a photographer? And a traveller? Well, then I have a treat for you! I was doing some research for my upcoming book 'Focus on Travel Photography' (It's not available yet, but it's the follow-up to Focus on Photographing People), about awesome places to go for your travel photography fix.

These are some of the awesomest-est places. Bring your camera, return with photos. Simple!

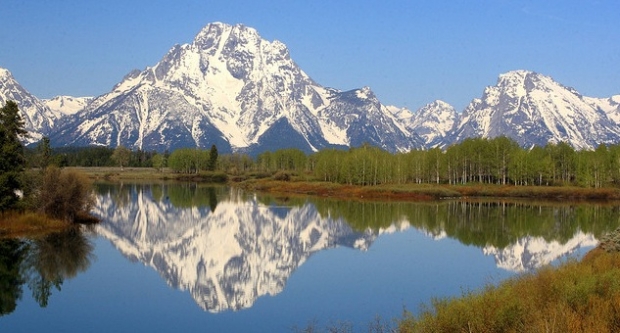
oxbow_bend.jpg1. Oxbow Bend, Grand Teton National Park, Wyoming - Right near the winding Snake River, Oxbow Bend produces a great array of colours throughout the day. Photographers will love the colour palette that they get when they take photos here.

2. Denali National Park, Alaska - On the beautiful Mt. McKinley, Denali National Park is home to many animals that can be easily found and photographed. You can view these animals from the many hiking and nature trails throughout the mountain. Photographers can take photos of moose, wolves, and even the occasional grizzly bear.

paine.jpg3. Glacier National Park - Glaciers swooped through Montana centuries ago and produced the breathtaking landscape seen at Glacier National Park. Many lakes also speckle the land, and make for gorgeous photos of sunrises and sunsets.

4. Central Tower of Paine - Rugged landscapes paint the horizon at Central Tower of Paine. This area has numerous different hiking trails in which you can view lakes, glaciers, granite towers and mountains.

5. Baja Peninsula - Located in Mexico, Baja Peninsula has a desert landscape that draws people in. It is also located near the sea, which allows rare photos of the juxtaposition between the sea and the desert. http://www.virtualmex.com/baja.htm

angkor_wat.jpg6. Angkor Wat - Home to rare animals, interesting people and amazing views, Angkor Wat in Cambodia is truly a photographer's dream city. If you want to be able to photograph culture and beautiful landscapes, then Angkor Wat is the perfect place for you.

7. The Cave Temples - India's Cave Temples are breathtaking. They are comprised of 34 caves that were carved into the Charanandri hills, and are home to amazing, ancient architecture.

8. New Guinea - The small country of New Guinea is full of rich culture and tradition. Here, it is still possible to find people who live directly off of their land; these people haven't heard of internet or telephones and are completely cut off from media.

9. Sicily, Italy - The historical town of Sicily, Italy is home to many religious festivals that occur throughout the year. It is a beautiful place to photograph culture and ancient architecture.

10. Maasai Mara National Reserve - Found in Kenya, the Maasai Mara National Reserve is home to a large variety of animals and nature. Wildlife photographers will find this place enchanting.

11. The Arctic - If you are feeling adventurous and love the cold, then the Arctic is a wonderful place to photograph. It is home to many exotic animals including polar bears and walruses. These animals are both being run out of their habitats due to global warming, and might be extinct in the future, so photographers might be getting once in a lifetime photos if they travel to the Arctic.

midway.jpg12. Midway Atoll - Hawaii produces striking landscape photographs, but The Midway Atoll is home to some of the most beautiful nature backdrops in the state. Mountains and volcanoes line the horizon along with massive trees and fields of pristine land. The Midway Atoll is also home to very exotic wildlife, most of which shows very little fear of humans, so it is a great place to photograph these rare animals.

13. Canadian Rockies - The Rocky Mountain range goes through parts of the United States and Canada. The Canadian chain of the Rockies, especially, are a sight to see, because the landscape is full of towering mountains and lush valleys, with many glacial lakes.

14. Lake Mead Recreation Area - Just east of Las Vegas, Nevada, Lake Mead Recreation Area is a park that is scattered with desert mountains, volcanic formations and badlands. It is a wonderful place for landscape photographers to visit.

15. Lake Tahoe - California's Lake Tahoe is full of azure water and astonishing waterfalls. Its beaches are amazing as well.

bandhavgarh.jpg16. Bandhavgarh National Park - If you would like to photograph tigers, then Bandhavgarh National Park in India is the place for you to go. It is one of the last places in the world where tigers still roam in the wild and can be seen in their complete natural state.

17. Namibia - Africa is home to some of the world's most exotic animals. Namibia, Africa is no different. It is a pristine place that has a gorgeous colour palette that makes landscape photographers fall in love. Wildlife photographers will swoon over the animals that roam the land.

18. Four Corners - The Four Corners in the American Southwest have a gorgeous horizon that is full of mountains and deep valleys. During sunsets, the lakes reflect the hundreds of different hues that can be seen over the mountain tops.

19. Lakes District - Austria's Lake District is a superb landscape destination. You can camp at many places in the Lake District. It has a gorgeous array of light that in one day can range from foggy, soft light to romantic, bursting sunsets.

20. Chartres, France - Located in the south of France, Chartres is deep in the countryside. It is a beautiful place that is full of vibrant people and rolling hills.

21. Cote D'Azur - France's Cote D'Azur is an amazing place to try underwater photography. The seas are full of schools of fish and lush greenery.

22. New Zealand - Home to rolling hills and colourful oceans, New Zealand is a gem to photograph. Shooting in New Zealand is very relaxed, and there are numerous places to go. You can choose to shoot the scenery of the country, or head underwater and shoot the exotic animals that live near the coast.

fish.jpg23. Red Sea - If you are looking for a unique place to shoot photos, then look no farther than the Red Sea. A prime destination especially for underwater photographers, it is home to coral reefs and a vibrant marine life.
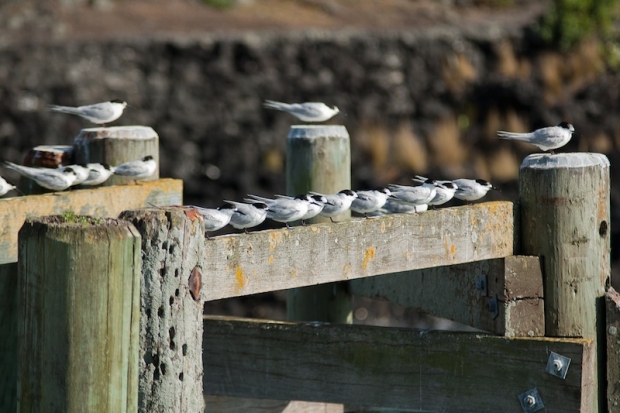
24. Chicago - Chicago, Illinois is a grandiose city in northern Illinois. Not only can photographers get amazing street shots here, but Chicago is also home to both ancient and modern architecture that will always draw photographers in.

25. Paris, France - Drawing thousands of tourists each year, Paris, France is a bustling city that is bursting with life. It has ancient architecture that will make wonderful photos, plus it also has a large, vibrant culture that makes great street photographs.

Photographers travel all over the world to capture breathtaking photos, these twenty-five places have some of the best landscapes and wildlife this world has to offer. If you are looking to take your next photographic adventure, then research some of the places on this list, because one of these places might just give you the perfect photographic opportunity.

Photo credits (all creative commons on Flickr): Angkor Wat by Chi King; Oxbow Bend by Frank Kovalchek; Torres del Paine by Camila Ochoa; Midway Atoll by US Fish & Wildlife Service; Bandhavgarh by KoshyK; and Fish, by Nattu.

One simple step to improve your photos


When I'm asked what I do for a living, the responses that I get range from the infuriating: 'You must have a really great camera' to the inane: 'People write books about photography?' as well as the interesting. One of the interesting ones landed my way the other evening when I was chatting to someone whose wife enjoys taking photos.

'What one thing can my wife do to improve her photos?'

My answer was immediate, and pretty simple: 'Evaluate them.'

If you want to get better at taking photos, it's all very well being told that you need to practise, practise, practise, but you need to do a little bit more than that. You see, unless you critically assess your photos to work out what worked, what didn't, and why, all that practising will just result in a harddrive full of images that suffer from the same flaws and foibles. So you need to evaluate them: the good, the bad, and the what should I do differently.

Haje has written a very helpful guide to practical photo evaluation. His approach is both creative and technical and I would definitely recommend it for people whose photographic knowledge is above average and are serious about improving. But if you're just starting out, or if you just want to know how to make your holiday snaps that bit better, it might be a touch too complex. 

So here's a simpler version.

  • You do this at home on a big screen. Don't try to evaluate photos properly on the screen on the back of your camera. That's a recipe for disaster.
  • When you look at the photo, choose one thing about it that works. Is the composition bang-on? Have you captured the moment perfectly?
  • Then ask yourself: Why is it working?
  • Now identify one thing that isn't working. Is the exposure slightly off? Are the eyes not quite in focus?
  • In which case, what do you need to do to improve it?
  • Next time, make sure that you do it!

If you follow this process for every photo that you take, you'll quickly discover that you probably have certain photographic strengths and particular photographic weaknesses. By identifying them, you'll be able to build on what you do well, and make adjustments and improvements to remedy the areas where you struggle. With time, you should notice that you're taking better photos all round, and maybe even that what you're good at and what you find less easy, change.

Then, as you learn more, you can progress to far more thorough photo evaluations, and grow even more advanced!

Twenty-five 365-photo projects to keep an eye on

Every year, thousands of photographers embark on an artistic year-long journey known as a 365 Project (or, given that 2012 is a leap year, presumably a 366 day project this year...)

The idea with a 365 Day Project is to force yourself to take a photo per day. It doesn't sound very hard, but trust me: A year is a long time, and I've never managed to finish one myself...

Here is a collection of 25 talented and brave people who've thrown themselves into battle:

1. Kalie Garret: Kalie Garret has mastered the art of self portrait photography. She is constantly pushing herself to work harder and go farther in her photos, and it shows. Her photos consistently get better and better.

20120124_img_1609_1000px.jpg

Screen-shot of photo 11/365 by Kenneth Edwards

2. Kenneth Edwards: Kenneth has been on Flickr for a few years now and switches between film and digital quite often. His photos carry a sense of realism that many photographers abandon whenever they discover Photoshop.

3. Amy Musgrave: If you want to see a cute 365 day project, then definitely follow Amy Musgrave. So far, her photos have been heavily featuring of her adorable son. The photos are technically fabulous, and her son is so cute that you can't help but say, "Aww" every time you look through them.

4. Amber D: Amber is a young photographer who's doing brilliantly on her 365 Day Project so far! She is one to watch in the up coming year.

5. Nikki Chicoine: Nikki is almost half way through her photo project, and she has completed one before, but she will finish her project in 2012 and she is definitely a photographer that is worth looking into. She turns photos into beautiful photo manipulations every single day.

20120124_img_1610_1000px.jpg

Screen-shot of photo 12/365 by Torrie Brown

6. Torrie Brown: Torrie is a young photographer that has really found her style. Her photos are consistently good, and she has very original concepts.

7. Kristy Dankova: Kristy is a wonderful photographer. She has the ability to take a simple photograph and turn it into magic. Her concepts are strong and her skills are there. She also started her project in 2011, but she is still one to watch as she pushes forward and has the determination to finish her project.

8. Amy Geleibter: Amy is not only a wonderful photographer, but she is also a beautiful model. Modelling is a big part of 365 Day Projects since it is a self portrait project. Amy has conquered modelling and is able to emote the feelings that are necessary for her photos to pop.

9. Glenda Lissette: Glenda's project has started out very strong. So far, she has done both photo manipulations and very simple photographs and has succeeded at both.

10. Delaney V.: Delaney is new to the 365 Day Project, but so far she has started out strong. Her photos are a bit experimental, but so far her experiments have been well received.

20120124_img_1611_1000px.jpg

Screen-shot of photo 20/365 by Ana Pinto

11. Ana Luísa Pinto: Ana is at the very beginning of her project and so far has started out strong. She has very strong skills and her photos are technically superb.

12. Laura Dilliberto: Laura has conquered photo manipulations and is taking flickr by storm. She truly is an artist and has created beautiful image after beautiful image since her 365 Day Project began.

13. Johanna: Johanna is a German photographer that has an eye for photography. She is about halfway through her project and has had very good photos in her project thus far.

14. Marina Refur: Marina is a photographer that has learned to create magic in her photos. She takes simple photos and turns them into dreamlike images that give her audience chills.

15. Evan Wescott: Evan will finish his project in 2012, and has thus far had a beautiful project. His photos are teetering on the edge of fantasy, but they have just enough realism in them that shine through the pool of all of the other photographers embarking on this project.

20120124_img_1612_1000px.jpg

Screen-shot of photo 155/365 by Emma Johnson

16. Emma Johnson: Emma has started out strong in her photos, and has yet to miss a day. She is constantly experimenting with her photography, which has done wonders for her project.

17. Rachael Dowda: Rachael is a young photographer that has beautiful photographs of adolescent life. She truly has been able to capture the essence of youth in her photographs.

18. Mark Arica: Mark is a landscape and architectural photographer that is beautifully capturing the world around him in his photo project.

19. Tony Bull: Tony has mastered the art of taking photos of the people around him. His project is reminiscent of a project of snapshots, but they are all beautiful and full of life.

20. Esther Rica: Esther's project is full of family photos, photos of her everyday life and well-thought-out conceptual photos. She has a great mixture on her site and is definitely worth watching.

20120124_img_1613_1000px.jpg

Screen-shot of photo 9 / 365 by A Has

21. A Has: A Has is an everyday-life type of photographer. You can tell that he takes his camera with him everywhere and has mastered the art of capturing everyday events.

22. Lins Grant: Lins is a beautiful landscape photographer that is doing a magnificent job at capturing the landscapes that surround his home. He is taking great strides in his photos to get better every day.

23. Camiel Schoonens: Camiel is using the project to shoot photos of memories instead of doing planned out conceptual shoots. This is a refreshing project and will be a stream that's certainly worth a looksie once she is finished.

24. Marie-Aude D.: Marie-Aude has been taking photos of everyday items as well and is also capturing memories. A memory 365 Day Project is becoming increasingly popular in beginner photographers and 2012 has shown a great amount of these projects popping up.

25. David: David is a self-proclaimed photographer that became a photographer when his daughter was born. He is using his project to take photos of his adorable daughter's growth and this is definitely a project to watch if you are looking for the cuteness factor.

A 365 Day Project can be an incredibly amazing journey, but also can be an incredibly difficult one to complete. All of these photographers have taken on this journey and are determined to complete it with flying colors.

A note on copyright: The photos-of-photos in this post are used under the 'criticism and review' provision of UK copyright laws.

Bouncing around with the BeetleCam


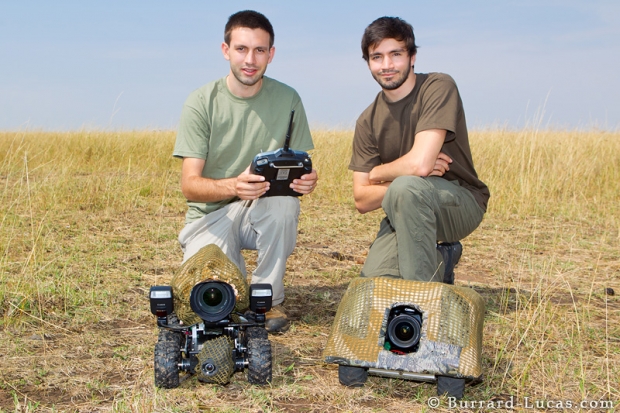
Will Burrard-Lucas (left) and Matt Burrard-Lucas (right) with two BeetleCams. Masai Mara, Kenya.

Back in 2009, The Brothers Burrard-Lucas - Will and Matt, an ingenious duo of wildlife photographers - set off to Tanzania to test out their home-made camera buggy, the BeetleCam. The idea was that a camera mounted on a small remote-controlled vehicle would allow them to capture close-up shots of animals in the wild that they wouldn't be able to achive with their cameras firmly in their hands or mounted on tripods. And it worked. Up to a point. Unfortunately they lost a camera in the process, and BeetleCam came off far worse in its single encounter with a lion.

However, the photos that the original BeetleCam had managed to help capture convinced Will and Matt that they really were onto something; the BeetleCam would allow them to take ground-breaking photos of wildlife. So undeterred, Will proceeded to rebuild and modify BeetleCam in 2011. He came up with two new versions: one with more advanced capabilities and the other with an amoured shell that should be able to withstand the inquisitive approaches of big cats.

With their modified BeetleCams, they set off to the Masai Mara to test them out again. And this time, they returned whole - if battered - and with a host of super-impressive photos. Take a look for yourself up there, or head to the BeetleCam site to see even more.

Flush with success, they've decided not to keep BeetleCam all to themselves, either. If you'd like your own one, they start at £1,250 for the basic unit and then increase with all the exciting optional extras that you can build in to them. Interested? Get in touch with them and they'll see what they can do.

Then it'll be your turn!

How to do time-lapse photography

photocriticorg_gizmodo_20110103_img_4377_0_620x3491.jpg

Sunrises make for glorious time-lapse scenes

If you've ever seen the sun come up quickly over the city in CSI, or that fox decomposing in the title credits of True Blood, you've seen time-lapse in action. Here's how to do it...

Time-lapse is where photography meets video. Essentially, all you do is that you take a load of photos, and then play them quickly after each other–like a flip-book cartoon–and watch the frames come to life. Taking a photo every second compresses half a minute into a single second; with glorious results.

All you need to create your first time-lapse masterpiece is a tripod, a camera, an intervalometer, and a good idea.

In order to create your first time-lapse photographic movie, first you will need to think of an idea that you want to convey. Sunsets in the desert, a flower wilting, or (if you're really ambitious) a human being going from cradle to grave - it's all possible.

Taking the photos

So, to begin taking photos, set your camera on your tripod and make sure it stays in the same position throughout the whole process. Next, you can start taking your photos. You can do this by hand, but to get the timings smooth and your video looking better, try using an intervalometer. There's many different types of 'em out there - including ones you can buy for about £15-20 or $20-$30 from Amazon, and, of course, the Triggertrap, which comes with time-lapse features built in.

As a general rule, the more photos you take, the longer your final movie will be. Make sure that you also keep your camera on the same settings while you are photographing your scenes, otherwise there will be a noticeable difference in many of your photos in the final product–I find that Aperture Priority (Av/A) and manual focus works well; that way, the depth of field stays the same, but the camera will compensate for any fluctuations in lighting.

Stringing them together

Once you are done taking your photos, then you can upload them to your computer and lace them together by using a video editing software. Choose a video editing software that you are comfortable with and import the photos into the program. The photos will import in the order that you took them and each photo will automatically be assigned a time per frame. The time per frame is the amount of time that each photo will appear in your video. You can go to your tools and manually enter times that work for your video's concept. Most videos play at around 30 fps, but you don't have to play your video at full speed; you can choose to let each frame last two or three frames of your video, for example.

Overall, time-lapse photography can be a beautiful form of photography. It can be a simple process at first, but as you up your skills, your movies will take longer to produce, and they will become more complex. You can start introducing camera movement during the timelapse, for example, or come up with other cool effects.

If you are feeling adventurous this weekend, then grab your camera and try your hand at time-lapse photography. It is a fun way to spend a few hours, plus your final product will be a video that you can share with your friends and family. Keep practising–it's a lot harder than it sounds!

Need some inspiration?

Earth | Time Lapse View from Space, Fly Over | NASA, ISS from Michael König on Vimeo.

Life of flowers (Жизнь цветов) from VOROBYOFF PRODUCTION on Vimeo.

Good luck!

10 ways to improve your photography


Think outside the, er, manhole cover.

One of my favourite things about photography is that it's so accessible as an artform. To create a painting, you can't expect to be able to deliver anything if you go and buy some canvases, brushes, and some paint without any training or idea what you're trying to do (although, to be fair, some modern art does give that impression)... In photography, you can take your very first photo, and it'll come out well-exposed, and it'll be of roughly whatever you pointed your camera at. Cool beans, now let's take a look at how we can get better...

1. Invest in Good Equipment

The photographer makes the photo, not the camera, but there's nothing wrong with considering some new equipment every now and again. For some people, upgrading to the latest and greatest is all the inspiration they need to get out there and take better snaps. You don't have to buy a fancy DSLR, but really research your next camera and find one that truly fits your needs.

Nowadays there are hundreds of different types of cameras that you can choose from, so really put some thought into what you will be using your camera for before you invest in one.

2. Learn how to Use your Equipment

Another great tip is to read your camera's manual. Reading the manual will give you the edge; it will allow you to know your camera inside and out and in turn you'll understand the mechanics of a camera.

After reading the manual, play with it; try taking photos in every photography modes, and try setting youself little challenges - like "only taking photos at ISO 1,000 today" or "this week, I'm using manual focus only" or similar. Your photos may not necessarily come out better, but inventing games to help you understand your camera better is a huge step forward. Want some more fun exercises? Try 10 ways to break photographer's block

3. Take a Photography Course

Community colleges or community centers often offer fairly inexpensive photography classes. It could be to your advantage to take one of these courses and learn a few tips and tricks from your fellow classmates and from your teacher about the technical aspects of photography. Alternatively, there's plenty of books out there that could help you along - perhaps one of mine? ;-)

4. Try Something New

Don't be afraid to try something new in your photos. For example, if you normally take photos of your family and friends, then you can try out new lighting, or new settings on your camera. You could also try shooting at different times of the day. Night photography is a whole new world compared to day time photography, so don't be afraid to try something new and experimental in your photos.

5. Find your Niche

Find what you like to take photos of the most, and specifically work on that aspect of photography. Many people gravitate towards portrait photography, but give other branches of photography a chance as well. You never know, you could fall in love with architectural photography or pet photography.

Whatever you find you like best, try to become really really good at it - it won't be easy, and it'll be a lot of hard work - after all, if you love doing it already, it won't feel like work!

6. Take your Camera Everywhere

Always carry your camera! You never know when the perfect photo-op will arise, so it is a good idea to always have your camera close. Also, if you keep your camera with you, then you will be able to practice your photography more and more each day.

7. Be adventurous

Be adventurous in your photos. You can travel with your camera and go on many adventures with your camera in order to learn more about photography.

Going on adventures are fun, normally inexpensive, and can be fun getaways from the stresses of everyday life; they also make great photo memories. So, grab your family and go on a mini adventure one weekend. Whatever you do,  don't forget your camera!

8. Join an Internet Photography Community

Online photography communities are abundant and are super supportive. Photography communities are home to photographers who are beginners all the way to professional photographers. Joining a community can help you get the feedback you need to take your photos to the next level.

9. Look through Magazines and Photo Books

Researching photo techniques is a great way to create higher quality photos, and there is no better way to do so than to look through magazines and photography books. By looking at the photos in these publications, you can learn all about certain qualities of photography such as point of view, framing and color balance.

Lacking inspiration? Try my lust of 50 must-read photography books!

10. Have Fun!

The best advice for taking better photos in 2012 is to have fun! If you aren't having fun with your photography, then it will show in your photos. Photography is a fun form of art, so don't be shy and have as much fun as you can with your camera.


ISO: the biggest change in photography the past 10 years!

We all know that the triumvirate of exposure are shutter speeds, aperture, and ISO. It's this dastardly trio that operates like security guards to photons, standing there, ear-piece in their ears, saying "Oi, if you're name's not down, you ain't coming in". The head security guard, Mr Aperture is restricting the flow of how many photons can come in at the same time. Dr Shutter Speed is opening and closing the doors to the club for various amounts of times - if he opens the door for a long time, lots of people get in. If he throws the door open and kicks it shut again, only a few people get in. Professor ISO is the allegory-wrecker who just stands there, scratching his head, wondering how the hell he fits into this whole 'club' scenario.

The ISO game-changer.

The point I was going to make, however, is that something has changed over the past ten years, and ISO has taken over power impressively quickly...

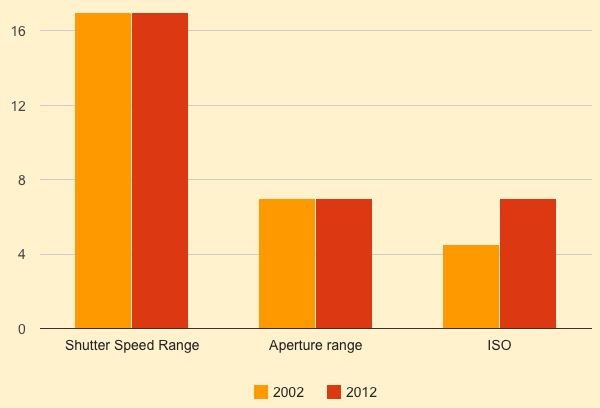
Shutter speed has remained stable; typical shutter speeds on a SLR camera range from 30 seconds to 1/4000th of a second. That's 17 stops of difference.

Apertures remain unchanged; typical aperture ranges for a standard prime lens go from f/1.8 to around f/19 or thereabouts. That's about 7 stops of difference.

However, the biggest change comes from ISO-land. Only 10 years ago, you'd be nuts to use films slower than 3200 or so (don't get me wrong, I loved my ISO 3200 T-Max... But that bad boy was grainy.). On digital cameras, ISO 1,000 was merely 'manageable' in 2002... That's only ~4.5 stops - a lot less than the range of light adjustments you get out of your ISO settings.

Compare that with the shots that are coming out of the current generation cameras. The Sony NEX-7, for example, was determined to have "quite useable results"at ISO's up to 6400, and the same verdict fell for the Nikon D3 camera:

screen_shot_2012_01_19_at_141944.jpg

That, ladies and gentlemen, is huge. It means that whilst the aperture and shutter speed range has essentially stood still for ten years, useful ISO ranges have increased from 1000 to 6400 - or from about 4.5 stops to 7 stops of useable range, which means that ISO now matches your aperture control when it comes to being able to control the brightness of your photos.

It might sound pretty subtle, but if you think about it, it's quite the revolution: It means that ISO, which used to be merely a fine-adjustment tool only 10 years ago, can now be used as a major component in your exposure decisions...

When more than just the horizon splits your frame

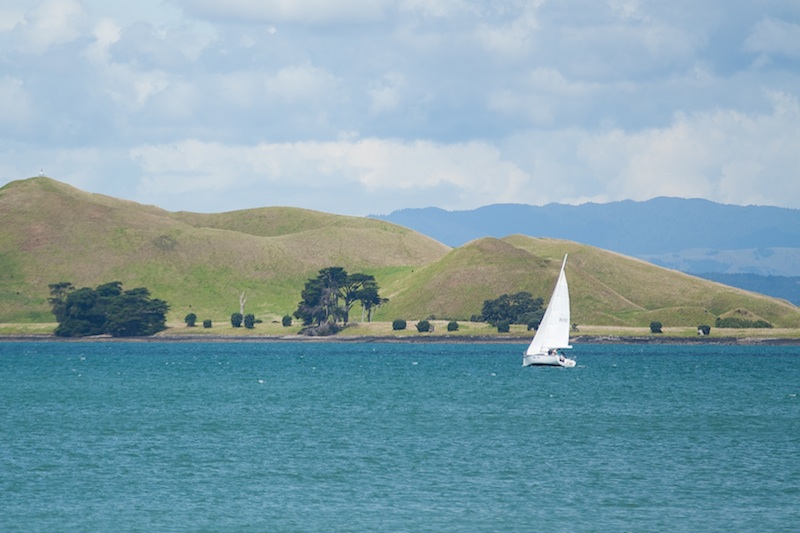
Horizon on the upper third; shoreline on the lower third. Perfect!
I'm doing quite a bit of landscape photography at the moment; it was my photographic resolution for 2012, and seeing as I'm travelling right now, felt like a sensible choice. This of course means that you'll be subjected to a hefty quotient of landscape articles for the foreseeable future. I'm sorry if that doesn't float your boat, but I'll do my best to keep them entertaining and informative.

So there I was, at the top of Rangitoto, a volcanic island just off of Auckland, snapping away at some landscapes, when it occurred to me: it's a cardinal rule of photography that horizons shouldn't run through the middle of photos, you should apply the rule of thirds. If you want more emphasis on the area above the skyline, you place the horizon on the lower of the two imaginary lines dividing your frame into thirds. Should you prefer that more attention to rest on the foreground, place the horizon on the upper third dividing line. That we know.

What, though, should you do when there's more than one dividing line in an image? For example, if you've a series of islands in your frame. Or a shore line and a skyline right in front of you. Yes, the horizon is the horizon, but these strong lines can also have a nasty impact on your photos if you manage to get one of them smack-bang in the middle of your frame, too.

If you've two dividing lines running through your image, ideally one would go closer to the upper third and the other towards the lower third, with both avoiding the middle. That should keep things dynamic, and prevent your image from looking flat and dull. The first image up there does just that: the shoreline is on the lower third, the horizon is on the upper third. Bingo! But, geography isn't always that accommodating towards geometry - and let's face it, it's why photographing landscapes can be so inspiring - so sometimes you will need to get a bit creative with your cropping.

The skyline might be running along the upper third tri-line, but it does nothing for the shoreline

Take the examples with the solitary yacht. The first one (above) has the skyline is running mostly along on the upper third, but the shoreline is perilously close to the centre. By cropping a bit from the lower half, I've been able to place the shoreline on the lower third, giving it an overall better feel.

Pushing the shoreline, and indeed the skyline, lower, has a more pleasing impact

That shoreline is so strong in this image that it needs to be properly accommodated to prevent the photo from looking oh-so-obviously split in half.

In fact the blue of the sea is so strong in this picture that if you wanted to, you could even push it a little further down the image, which pushes the actual horizon closer to the centre of the frame. Of course, that might not float your boat at all!

An even lower shoreline might work, too, given how strong it is

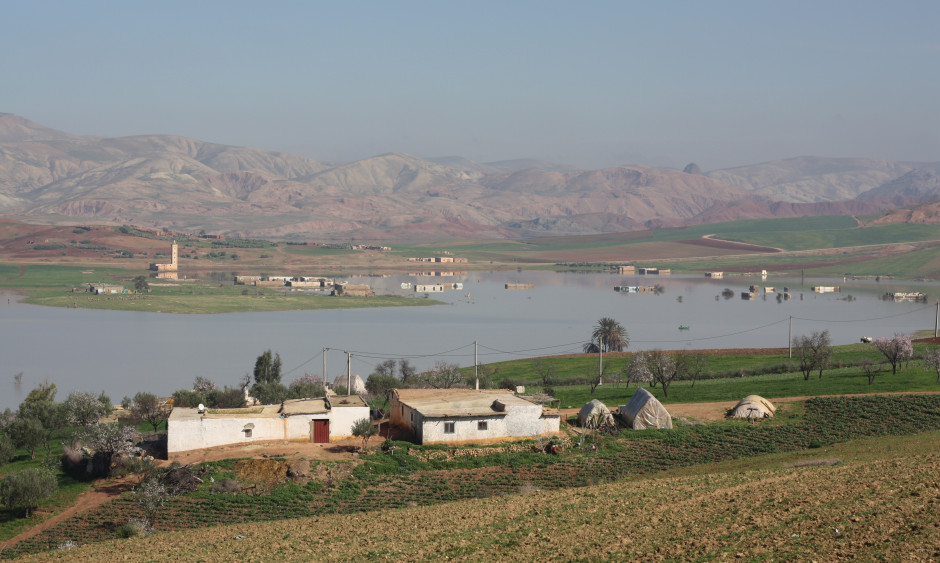
If you've an image where you have three or more strong dividing lines running through it, the chances are that one of them will end up running straight across the centre of the frame, with others above and below it. Provided that the central line isn't overwhelmingly strong and obviously bisects the scene, there should be sufficient movement across the entire photograph to keep it fluid and interesting. You can see that in the photo of the flooding I took in Morocco (down below). The floodplain runs through the centre of the image (look carefully and you can see the reflections), but the skyline and the shoreline are both strong enough to stop it from coming over as boring. In other words: don't worry too much.

When there are multiple dividing lines running through your images - use your judgement!

Finally, don't forget that if you're using a non-destructive editing package, there is nothing to stop you from playing around with the composition of your image until it looks right. Apart from making that picture look pretty, it'll also ensure that the next time you encounter a similar situation, you'll have a better idea of what works and you'll have to do less fiddling in your editing suite.

Oh, actually, this is finally: make sure your horizons are straight.

The wild blue yonder of straight horizons

Horizons: they are very definitely meant to be level in our photos. Whenever I see a lop-sided horizon, it sets my teeth on edge. Nature intended that they be straight, at least as far as our eyes can see, and our inner ear knows this. A wonky horizon will likely make anyone looking at it feel uncomfortable, as their eyes will be telling them one thing and their feet another, but they won't necessarily be able to pin-point why. And you definitely don't want that.

They also seem to be something that I am perenially unable to get right when I take a photo. (Unless I'm using a tripod, of course, then you use a dinky spirit cube in your hot shoe.) I know that they need to be level, so I try my utmost to make them that way, but they always need tweaking. I don't know, maybe I stand funny, or something.

The fix, however, is easy. Whether you're using a free online editing service or have the mighty power of Lightroom or Aperture behind you, there're tools to straighten photos. I've picked two as examples - one free, the other paid-for and swanky - to give you an idea.

If you use Pixlr (Pixlr.com, possibly my new free online suite of choice, following the demise of Picnik), it's very simple. Upload your JPEG photo into Pixlr Express, select Adjustment, and then Rotate. Then all you need to do is use the slider to alter the angle of the image so that the horizon comes up straight. There's even a useful grid to help you get it right.

Straight horizon


Use Lightroom 3 and you have three straighten options, all of which are found in the Crop panel on the right-hand side. The first is under the Crop tool, and you adjust the angle by eye, using a grid overlaid on the image to help you. The second uses the slider, allowing you to adjust the slant of the image by a precise number of degrees. The third is by far the easiest. Click on the Angle tool and then use it to draw on your image, following the line of the horizon. It'll correct the angle of the image to that line. Simple! (And it also works the same for vertical alignment, too, ensuring that buildings don't lean to the left, or whatever.)

Of course, if you want to deliberately set your skyline askew, there's nothing wrong with that and you can use these same tools to achieve that end. Just make sure that it's off-kilter enough that it's easily identifiable as deliberate. (And I'm reliably informed by one Haje Jan Kamps that a purposefully skewed horizon is called a 'Dutch Tilt'.)

Doing it deliberately with a Dutch Tilt

If you're now permanently unable to look at another picture without being able to spot the wonky skyline, I'm sorry. But you never have an excuse to be riding off into a crooked sunset again!

The most photogenic festivals in the world

Are you dreaming of travelling the world, camera in hand? Sure, you can go to the world heritage sites, the famous waterfalls and the prettiest viewpoints around the world, but if you really want to capture the essence of a place, it's worth doing some planning, and capturing the festivals and events that make the local cultures sparkle with awesomeness.

I've collected 25 of the most photogenic festivals and events around the world - Time to start saving some pennies and dusting off that passport!

1. Carnival - Carnival is a festival that is celebrated in many Catholic areas around the world. The Carnival in Rio de Janeiro though is by far the most famous. It is a huge event and lasts for almost an entire week. People flock to this festival for its colorful costumes, parades, and cultural festivities.

20110201_img_0416_600px.jpg

Chinese New Year: And this is before the streets fill with people!

2. Chinese New Year - The Chinese New Year is an amazing festival to photograph. Every year, there are many colorful floats and clothing items all over the streets of China. It gives photographers a chance to see the beauty of the Chinese culture.

3. Dia de los Muertos - Dia de los Muertos is a traditional Spanish festival that occurs each year in November. It is a day for honouring the dead, and it is full of traditional ceremonies and beautiful alters that each family makes for their dead loved ones. It has been compared to Halloween in the United States, and it's famous for getting a little bit crazy...

screen_shot_2012_01_24_at_161926.jpg

Photo: Dia de los Muertos (cc) Sébastien Prescott on Flickr.

4. Diwali - Diwali is a huge festival of Hindus. It is a celebration of happiness and joy, and it is a great place to photograph the culture of Hindus.

5. Cocuk Bayrami - Cocuk Bayrami, or Children's Day, is a Turkish holiday. On this day, children from all over Turkey dress up in national costumes and sing and dance.

6. May Day - May Day is celebrated all over the world. It is a festival that often includes children and is full of colourful costumes and different cultural events depending on the country that you are in. Search the internet to find a May Day festival near you.

7. St. Lucia Festival of Lights - St. Lucia Festival of Lights or St. Lucia's Day is a December festival, celebrated in much of Scandinavia. It is full of beautiful, traditional costumes, and candles a-plenty; great opportunities for photography!

screen_shot_2012_01_24_at_162337.jpg

Photo: Đèn trung thu (cc) HienMtd on Flickr.

8. Trung Thu - Trung Thu is a traditional Mid-Autumn Festival in Vietnam. It is a festival that focuses on children and education. During this festival, there is a parade of lanterns in which children take part in.

9. Mardi Gras in New Orleans - Mardi Gras happens all over the world in many Catholic areas. It is normally a part of Carnival, but in many places it is celebrated instead of Carnival. If an American photographer doesn't want to travel too far to photograph an amazing cultural event, then they should go to Mardi Gras in New Orleans.

20110413_img_4228_600px.jpg

Photo: Songkran: it gets wet, but it's really good fun!

10. Songkran - Songkran is a Thailand festival that celebrates the new year. It is a national holiday, and is often full of water fights that make amazing photographs.

11. Tomatina - Tomatina is a festival in Spain that is a massive tomato fight. Photographers that flock to this festival definitely need to invest in a good cover for their cameras, otherwise they might get tomato sauce on their lens!

12. Boryeong Mud Festival - The Boryeong Mud Festival is held in South Korea each year and it is full of fun. Every year the citizens of South Korea go to the streets and have a massive mud fight. It is definitely an exciting festival to take part in - keep your camera well protected, though!

screen_shot_2012_01_24_at_162717.jpg

Photo: Stanford Holi : Best Friends (cc) Chris Willis on Flickr

13. Holi - The Indian Holi festival is a very widely known festival that happens after the full moon in March. It is often considered a festival of thanksgiving, and it draws extremely large crowds each year.

14. International Pillow Fight Day - International Pillow Fight Day happens all over the world and is a joy to watch. On this day, people head to the streets and start pillow fights with fellow participants. This is a fun and exciting event to photograph - check the website to find out where your local event is going down!.

15. Burning Man - The Burning Man festival is an annual festival in Nevada. It is a festival that is dedicated to art, self expression and self-reliance. Well, that, and an extraordinary amount of drugs, of course. Not all Burning Man participants are happy to be photographed, but ask for permission and snap away!

screen_shot_2012_01_24_at_162931.jpg

Photo: Queen's Day 2008 (cc) Hans S on Flickr

16. Koninginnedag (Queen's Day) - Koninginnedag is a festival in my native Netherlands that is held to celebrate the Queen's birthday. It is also a day in which everyone wears orange, gets inordinately inebriated, and goes to swim in the canals. Quite extraordinary, really...

17. Festa de Sao Joao - The Festa de Sao Joao is held in Brazil each year and it is the celebration of the summer solstice. People come from all over Brazil to light bonfires and do many traditional dances during the longest day of the year. flavorsofbrazil.blogspot.com/2010/06/happy-midsummer-feliz-festa-de-sao-joao.html

18. Homowo Festival - Homowo Festival is held in Ghana each year. It is a traditional festival from the Ga people of the Greater Accra Region. It is an event that not many photographers frequent, but it is a gorgeous festival filled with life and traditional ceremonies that are not seen very often.

19. Harvest Moon Festival - The Harvest Moon Festival in China is held every lunar month. It is full of traditional ceremonies and romantic festivities.

20110531_hk310102_600px.jpg

Ballooning: Join in for some spectular photo opportunities!

20. Balloon Festival - The Albuquerque International Balloon Festival is a breathtaking event to photograph. Every year, thousands of hot air balloons are set off into the air in Albuquerque. It is a must see event for every photographer. Of course, ballooning

21. Ku'omboka - Ku'omboka is a festival that is full of traditional culture in Zambia. It is held each year on Easter and it is full of traditional ceremonies and cultural events. http://www.liyoyelo.com/news/kuomboka.php

22. Lake of Stars Music Festival - The Lake of Stars Music Festival is a three-day long music festival held in Malawi each year. The festival is full of local music stars and even some big name international ones. It is a great place to photograph the culture of Malawi.

23. Cherry Blossom Festival - The Cherry Blossom Festival is held all over Asia and is a beautiful festival to photograph. The festival begins each year whenever the cherry trees bloom. People flock from all over Asia to view the gorgeous flowering trees.

screen_shot_2012_01_24_at_163234.jpg

Photo: Cherry Blossom (cc) Kiuko on Flickr.

24. Naadam - Naadam is held every year in Mongolia. It is a huge festival full of parades and classic Mongolian dancing. It is a wonderful cultural experience.

25. Pushkar - Pushkar is a festival in India that is considered one of the largest camel fairs in the world. It is held in India and it is full of camels, livestock such as chickens and cows and live music that plays well into the night.

Photographers all over the world flock to each of these festivals - with great reason; there's something about their celebration that makes people spring to life; and there can be little doubt that the joie de vivre shines through in your images as well!

Red eyes and how to avoid them

The Red Eye phenomenon is something that occurs when you take a picture of someone. If you have a compact camera and you’ve taken a few rolls of pictures, chances are that you have stumbled across the phenomenon, during which the eyes of your subject end up glowing an eerie red glow.

It's easy to avoid, and easy to fix if you failed to avoid it, but  in this article, we'll take a quick look at the science behind red eyes, and the steps you can take to avoid it.

Why does this happen?

If an eye had absorbed all light, then this wouldn’t happen. In fact, if an eye had been theoretically flawless, the red eye effect would not have existed at all. What happens when you see the red eyes on pictures, is that the flash is reflected in someone’s eye. The reflection is red because of all the blood vessels inside the eye:

redeye_01.jpg

So… How do we avoid red eyes?

Removing the red eye effect can only be done by changing one of three things: The size of somebody's pupil, or the distance between the flash and the lens. Changing either of these things will reduce or remove the red eyes completely.

1) Turn off the flash.

This is the point most people forget about. Obviously, if you can do without a flash, either by increasing the light in the room, by switching a faster ISO value, or using a faster lens

redeye_02.jpg

No flash; no red-eyes. Simple!

2) Move the flash further away from your lens

This is a bit harder with compact cameras, but if you have an SLR, you should definitely get an external flash that connects to the hot shoe of your camera. For one thing, these flashes are a lot more sophisticated than the internal ones, but they are also are significantly further away from the lens. Because of the additional distance, the reflection from the back of your eyes never reaches the lens, and the red-eye effect is reduced or removed:

redeye_03.jpg


3) Make the iris smaller.

The final thing you can try is to make people's irises smaller: You may have noticed that the red-eye effect is stronger in low light (it's a little bit obvious; that's the only time you'd be using a flash anyway, right?). The reason for this is that if someone's eyes are adjusted to low light, the aperture of their eyes (their irises) will be large:

redeye_01.jpg

However, if there was a way to simply reduce the size of their irises, you'd get much less of a red-eye effect, simply because mot as much light would be able to hit the lens:

redeye_04.jpg

So, how do you make someone's eyes smaller? Here's three ways:

You could try to turn on the anti-red-eye function that probably exists on your camera. This function usually sends off a few short flashes, or it will shine some other sharp light into your “victim’s” eyes. This makes their irises smaller, and the problem diminishes.

Turn on more lights. This has the same effect as above, but it also has some other advantages: One, you get more even light, two, depending how sophisticated your camera is, it might fire a less powerful flash, giving a more natural light. Three: you might get away without using a flash altogether.

Make sure your subjects aren’t drunk. Have you ever noticed that if you take a set of photos at a party, how there seem to be more and more occurrences of the red eyes? Not a coincidence. People who start to become intoxicated have slower reactions – this applies to eyes as well. The eyes just won’t contract as quickly, leaving you with red-eyed pictures.

Finally a quick note on compact cameras

Switching to a faster lens on a compact camera is obviously not possible. What few people realise, however, is that almost all compact cameras have lenses that gather much more light when they are fully zoomed out.

In low light, you should therefore consider zooming out and go closer instead of using the zoom to frame your pictures. On an SLR camera, look for a lens with a larger maximum aperture.