Feature Articles

Perfect Portraits

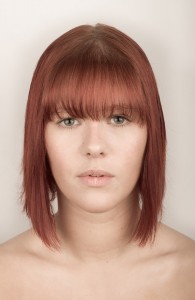
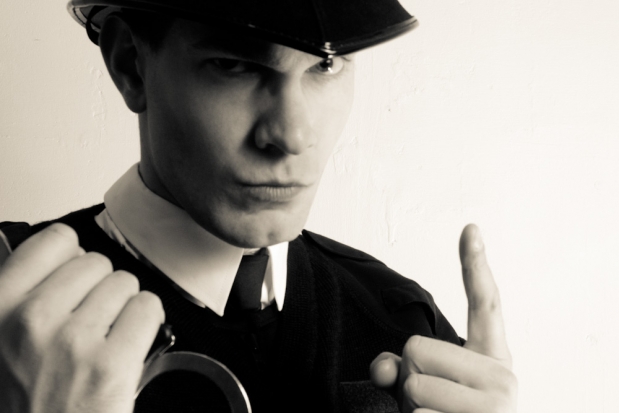
An example of a studio lit portrait. Portraiture, face pics, mush captures, gob snaps. In today’s PCoF (it’s what all the cool kids and hip youngster-dudes are calling Photography Concept on Friday) we’ll be dipping our toe into the gigantic swimming pool that is portraiture. It’s a metaphorical swimming pool. Into which we metaphorically will be dipping our metaphorical toe. Got it? Good. I can feel myself starting to waffle already, so I will resist the charms of loquacity and press on.

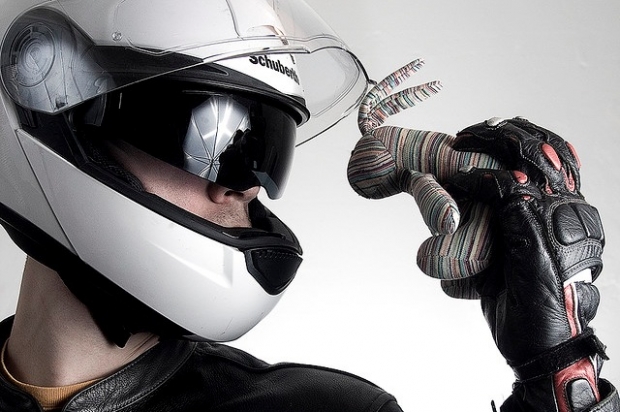
A natural light portrait - this ladybird wanted in on the action. No I did not pin it to her thumb.

Essentially, there are two sides to portraiture: lighting and, for want of a less hateful phrase, ‘people skills’. Lighting is a massively complex subject, and there are many, many blogs, books and videos out there to teach you the basics and more. I’m going to focus on the ‘people bit’, as repeating basic lighting theory is horribly boring and can be found elsewhere. Not only that, but the actual interaction with people and how you get the best out of them is the bit I actually enjoy.

First, however, I will briefly look at a couple of technical basics that you should follow to take your portrait from 'holiday snap on your mum’s compact' to 'ooh, very professional!', whether that's Venture Photography-style light and bright or far more whimsical magazine-style images.

Basics

In most cases, the eyes should be the focus of any portrait (in most cases), so ensure that the eyes are in sharp focus. Anything less and you should be throwing it away, I’m afraid. Composition is also of the utmost importance. The ‘rule of thirds’ (as explained by our very own Duncan Howsley here) should be kept in mind at all times. Of course, don’t be afraid to break the rules every now and then if it works for the shot.

Finally, on the subject of composition, pay close attention to your backgrounds. If you’re not shooting someone against a plain background, you really want to avoid having anything too busy going on behind your subject. There’s nothing worse than getting home after a shoot and loading up that shot you were so pleased with, only to find that there’s a double decker bus growing out of the side of her or his head.

Even if your portrait is well lit, technically sound, in perfect focus and head object-free, if the subject of the shot looks awkward and uncomfortable (unless that’s the intention of the image, of course) the image is, essentially, a big ol’ failure. So how do you get them to act natural?

Relaxing Your Subject

An example of a studio lit portrait.

First off, talk. Talk, talk, talk. Give your subject directions on what to do. Give them positive feedback, even if it’s going horribly. You’ll find that the more you praise (‘good’, ‘that’s great’ and ‘yeah that looks really nice, let’s do a couple more like that’), the more their confidence will build.

Not only that, but talk to them in general. Show an interest, get them chatting, perhaps between lens and lighting changes. Not only does this help you get a bit more background about the kind of person they are, it helps them to relax a little more. Finally, don’t be afraid to tell them when they’re doing something wrong, just do it constructively. Tell them what is working, but that they’re doing a thing with their eyebrows that looks insane, and oh Lord it needs to stop. Except more constructively than that.

I often find that people get very dry-eyed and ‘blinky’ after a relatively short space of time, so a little trick I like to use is getting the sitter to close their eyes while I compose and then asking them to open their eyes and look into the lens. Not only does this keep the subject more relaxed, it adds a bit of movement to the equation, meaning that there is less of a posed look to the shot.

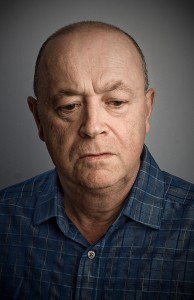
An example of an "on location" portrait for a magazine.

In general, movement is good. Although it can feel cheesy, getting the sitter to turn their head into the shot can also remove some of that stiff, posed element, as they spend less time keeping their head perfectly still. To avoid blinking, I sometimes count people in, so they know when to not blink. Check with your subject whether they like this or not, though, because I find some people are straight up terrified of a countdown and will pull crazy, panicked faces.

Don’t spend too long framing your shot – get used to framing quickly. The longer you make your sitter wait for you to take the photo, the more anxious they become, and the less natural and relaxed they will look. Just imagine being on the other side of a dSLR with two large softboxes pointed at you, waiting for a good four or five seconds for a flash to go off, trying to keep your eyes open and a fixed smile on your face for the duration.

A nice, cheeky one is to tell your subject that you’re just ‘testing the lighting’. This doesn’t have to be a complete lie: you could indeed be experimenting with your lighting setup. This little trick sometimes has the effect of the subject completely relaxing, in a ‘oh, well this shot doesn’t even count’ sort of way and you can snap them while they’re totally off guard. Sneaky, eh?

Another studio image, captured during a quiet spell.

Finally, make sure you switch up the poses quite a lot. Not only does this allow you to get a good idea of the subject’s best side, it also allows you to keep them busy and distracted. This will make them forget about the fact that there’s a camera pointed at them, as they’ll be busy taking on the directions you’re giving them. In short – practice, practice, practice. The above advice is the most relevant for very simple headshot setups with ‘normal’ people, or anyone whose job doesn’t involve being photographed five times a week.

Good portraiture, in my opinion, is essentially about tricking your subject into forgetting that there’s a camera pointed at them, even if it’s just for a split second. The examples in this article, shamelessly taken from my own portfolio, have been chosen because I think they all reflect that philosophy in some way.

So, on your ‘to do’ list this weekend – grab an unsuspecting friend and have a portraiture session with them. See what you get out of it! You might just get hooked.

Temporal aliasing in video

You have seen it in countless car advertisements and well-polished movies / programmes about cars: As the car is accelerating, the shiny metal alloy wheels seem to slow down, and briefly turn backwards, before becoming a big blurry mess again.

But how? How? And how come have you never seen that happen in real life before? And why does the article-writer insist on using braindead rhetorical questions instead of just getting on with the blasted article?

Anyway, this effect is known as the 'wagon wheel effect', or 'temporal aliasing'

You can see it in many different circumstances, where something rotates. Take this fantastic example:

Why?

Imagine a 3-spoked alloy wheel. The wheel is symmetrical, which is quite important. Now, imagine that you are looking at the wheel as it is fixed on a car, rolling along at high speed. You won't be able to even tell how many spokes the wheel has, as it is all a blur. If you were to take a picture of the car with a very short shutter time (1/1000 of a second usually does it), and look at the image, you can see and count the spokes, because you will have frozen the motion.

When working in film or television, you aren't actually capturing the motion, you are capturing a series of still frames. In the case of television, 29.9 frames per second (let's call it 30 fps, for the sake of simplicity). That means that if your camera happens to take a picture every time the wheel has turned a 1/3rd, 2/3 or full revolution (because the axis of symmetry is every 1/3rd of the wheel. A 4-spoked wheel would require 1/4th of a rotation etc), it would appear that the alloy wheel is standing still, while the tyre is whizzing along, pulling the car with it.

If your camera's shutter aligns perfectly with a rotation that can be devided by 1/(the number of spokes), the wheel appears to stand still. If there is an offset, it appears to turn slowly forward or backward, depending on the timing difference.

How?

The easiest way to capture the effect on film is to accelerate slowly - that way, your car's alloys will definitely align with the camera's shutter time, and you will get the slowly-forward-to-still-to-slowly-backward motion. You could also let the car roll, so its deceleration causes the same effect.

A more advanced way to do it, is to use mathematics. You will need to find out how long the circumference of the wheel is, and how many spokes the wheel has.

If a wheel has a circumference of 2 meters (that would be normal for a regular saloon car, I believe. Corrections welcome), it will do a full revolution every 2 meters travelled. On a 3-spoked alloy, the wheel crosses the axis of symmetry every 2/3 meters. When filming with a camera that shoots 30 images per second, that means that you will want the car to be travelling 2/3 meters every 1/30 second, or a multiple thereof. In other words: at 20 meters per second, or 72 km/h (45 mph)

The formula:

Required speed = (circumference / number of spokes) / (fps)-1

Why never in Real Life™?

Actually, it is possible to see this phenomenon in real life. If you look at a car through the safety barrier (guard rail) between two directions of traffic, you might be lucky. If it is dark, and the streetlights flicker (they normally do, at either 50 Hz or 60 Hz, depending on the electrical system of the country you are in), you might also see the effect. In full daylight and with unobscured view, however, it is a theoretical impossibility.

A different example

Now that you know how it works for cars, you should also be able to explain how this awesome video works:

stunning bass-string shot from urbanscreen on Vimeo.

I'll give you a hint: The strings on a double bass vibrate somewhere in the region of  40Hz - 180Hz or so, and the camera this was shot with (the Canon 5D MarkII) shoots video at 30 fps or so...


Do you enjoy a smattering of random photography links? Well, squire, I welcome thee to join me on Twitter -

© Kamps Consulting Ltd. This article is licenced for use on Pixiq only. Please do not reproduce wholly or in part without a license. More info.

Re-visit your older photos


Every now and again, I may be doing something completely different, and a photo I took many days, months, or even years ago, springs to mind. Occasionally, I decide to dig through my archives and take a look at it - and some times, this leads me to re-edit a lot of the photos I've taken a long time ago.

This happened again recently. Many years ago, I did a photo shoot for a theatre outfit which is called Tmesis Theatre these days - a physical theatre troupe consisting of a couple of deeply impressive physical theatre performers.

Adobe Lightroom to the re-rescue

By the power of Lightroom, I decided to see if I couldn't do a re-edit of these photos, and turn them into a coherent set of photos. The great thing about Lightroom is that you can create a set of edits, and then copy them onto a whole batch of images - which is what I did here. I edited one of the images very carefully - I decided to use two-toning, with a particular amount of grain, and a very specific 'look' to the images.

I copied the settings from that one image to all the others in the set, before cropping the images one-by-one, and tweaking the settings for each image (mostly for contrast and/or exposure).

The resulting gallery looks nothing like the original set of images I took - and yet, as a set, it works incredibly well. I'm currently looking into seeing if I can't make them work as an exhibition.

So, what's the lesson that can be learned from this? You're never finished with your photos: Keep them around, and re-visit them from time to time on (as the case is at the moment) a rainy day. You never know what hidden treasures you haven't yet tapped into, from the deepest depths of your archive!

Never judge a book by its cover

Screen shot 2011-02-05 at 11.23.53

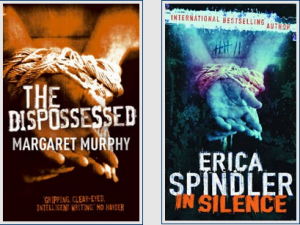
You should never judge a book by its cover, right? Definitely right. It’s not just that you might pick up a guide to traditional olive harvesting techniques when you were expecting a steamy tale of love and seduction that crosses ethnic divides in the Levant, but that you might be looking at a different book entirely. Have you ever noticed how often stock photos are recycled for book covers? No? Don’t worry, not one but two websites have.

The Rap Sheet has been calling out publishers on their copy-cat covers for over four years now (amongst many other literary things). They’ve amassed an impressive selection of images that get used again, and again, and again on books. Some images seem to be especially popular for a particular genre of books, Russian crime novels, for example. Other pictures manage to span genres with remarkable ease: from private investigator thriller to guide to getting a tattoo.

From investigation to ink

Euro Crime focuses on European crime literature, film, and TV, but every now and again it turns up some cover clones. It shows you publishers’ penchants for snow scenes highlighted with red, lightbulbs, bound hands, and the colour turquoise. Is it just that these things work, or that they can’t be bothered to be a bit more original?

Enough with the bound hands already!

Obviously the greater variety of pictures that gets used means all the more work for photographers, but a bit of definition is what authors need, too. I don’t want to walk into a bookshop and be confronted with yet another sepia-toned shot of a gaunt woman shrouded in fog beneath a gas-lit street lamp. Maybe it’s a damning indictment of literature; if you’ve read one book with the malnourished miserable mysterious woman on the cover, you’ve read them all. If that is the case, don’t admit to it! Do something about it. And if it isn’t the case, then credit authors with the originality that they deserve.

Dammit, one day, when my cookery book gets published, it won’t have a stock photo on its front cover. Do you think I want it being mistaken for some chest-heaving instalment in an insipid saga of teenage vampirism?

(Headsup to the Steampunk-tastic Wondermark.)

Keeping your photos safe whilst travelling


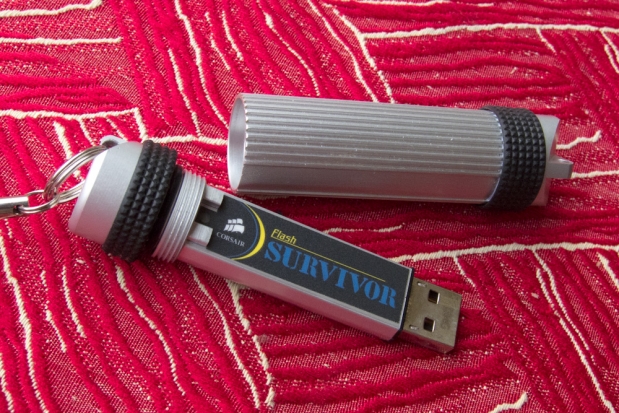
the Corsair Survivor is a near-bulletproof USB drive. Perfect for backups!

 As some of you will know, I'm currently travelling around the world for a few months, and I'm writing this from a rather lovely balcony outside our hotel in Hoi An, Viet Nam.

As a traveller, I'm worried about many things; I've had a ton of vaccinations, I'm on malaria medication, and you're living with a healthy suspicion of the food you're eating (no problems so far; knock on wood). There is one thing that is a bigger worry to me than any of this, however: Losing my data.

I've written about my backup routines when I'm back home in the past, but when you're on the road, you're living with all sorts of other challenges. My internet connection is slow and flakey at best (non-existent at worst), and Vietnam's government has taken to blocking various websites (including blocking Facebook). Given Egypt's most recent insanity (blocking all internet access for the whole country) and the ongoing shenanigans of China's government... Basically, it's not safe to assume that you'll be able to take backups in the cloud whilst travelling.

So, what else is a poor traveller to do? As a writer and photographer, I cannot risk losing all the photos I've taken, and the work on the books I'm currently writing on.

Offsite backups, on-site

My solution goes a little bit like this: Every day, I take a back-up of my stuff, using Apple OS X's built-in backup solution, Time Machine. I take this back-up onto a fantastic little drive, the Iomega eGo Helium. It's a tiny, palm-sized, USB-powered 1TB harddrive, that cost a paltry $130 from Amazon - certainly one of the better investments I've made.

Because of the way Time Machine works, I know I'll have a completely up-do-date copy of my entire system, my software, my writings, pictures, music, and all my financial information (even though I keep my finances and accounts in the cloud using Xero anyway, it's good to know that I have a separate backup, too) on that little big hard drive.

Whenever I leave the hotel, I take the hard drive with me: It lives in my day-pack, which I 'lock' (i.e. use the waist strap to fasten it) to the table, chair, or motorbike wherever I go. This means that my back-up drive is probably safe. It'd better be: I also keep (some of) my travel money and my passport in that backpack. Meanwhile, back at the hotel, I have all my data on my laptop, either hidden in the hotel room, or locked in a hotel safe, if there is one.

The idea is this: If I lose the backup drive, I can buy a new one, and go back to keeping backups. If I lose my computer (i.e. it gets stolen, or it breaks in one way or another), I have to find an Apple store and buy myself a new one. It'd be expensive, but that's what travel insurance is for: And all my data would still be safe on my laptop.

What about when you are with your laptop?

There are times, obviously, where me, the backup drive, and the laptop will necessarily have to be in the same place. When I'm flying, for example, I make sure that the hard drive is in my checked luggage, whilst my laptop is with me.

When I'm sleeping, the Iomega drive lives under my pillow - next to my passport and a spare credit card. The idea is that even if somehow a thief manages to steal every single other thing I own, I still have my data, a way of getting out of the country, and a credit card to help me solve any bad problems.

What about the really important files?

I have a small subset of files that are so important that if I lose them, I'm buggered. It includes the manuscripts to my unpublished books, copies of my passport and credit cards, all that sort of fun stuff.

Those files are about 2GB in size in total, and I back them up religiously: They are automatically backed up to DropBox, an online backup service, whenever I do have an internet connection. In addition, I back it up to a Corsair Survivor, a shock-proof, water-proof, and extremely rugged USB thumb drive. It lives in my pocket, and looks inconspicuous enough that I think I should be able to hang on to it even if I were robbed (knock on wood) in the street.

Finally, I e-mail manuscripts in progress to my Google Mail account whenever I have an internet connection.

Dude, are you paranoid or something?

Probably. But I think this is one of the situations where the phrase "Better safe than sorry" comes in ringing true.

I decided to be paranoid after doing the worst-case-scenario maths: If I were to lose my data and my laptop at the same time, the only way I can continue working and get the books done before deadline, is to get on a plane back to the UK, get my backups from storage, buy a new laptop, restore it all, and head back to Vietnam. It would cost me thousands and thousands of dollars - and probably cost me at least of week of time.

Put simply; if the worst were to happen, I probably wouldn't be able to afford to continue my nomadic lifestyle - which I'm rather enjoying at the moment, and would like to continue for a while!

This article was first published on Small Steps, my travel blog.


Do you enjoy a smattering of random photography links? Well, squire, I welcome thee to join me on Twitter -

© Kamps Consulting Ltd. This article is licenced for use on Pixiq only. Please do not reproduce wholly or in part without a license. More info.


What is copyright, and how do infringements harm you?

Part 1 of 2. At the bottom of this article, there's a link to an article detailing how you can defend yourself against copyright infringements. If you're looking for practical advice, that might be the best call.

Hi. I’m Haje. I’m a writer and a photographer. I am probably not the best writer in the world, and I’m certainly not the best photographer in the world. And yet, I make my living as a writer, which means that I’m good enough that quite a few editors and publishers out there think that it is worth paying me money to write.

A lot of my writing goes into magazines and books, but I also do a lot of writing for free, especially here on Pixiq. Why? Well, I have a lot of words in me which are pining to escape, and I rather like having an outlet where I am my own editor: I decide what gets published, what gets said etc. And I take a perverse pleasure from looking at the statistics. Put together, my top 3 most-read articles (smoke photography, macro photography and top 50 websites) have been read more than a million times. That’s a lot of people reading what I have to say about photography.

Of course, whilst the content on Pixiq is ‘free as in beer’ for my end users, I do enjoy some benefits from running a moderately successful blog. My books are selling quite well, which is at least in part because people become aware of me and my blog. I make enough money via Google AdSense to pay for my hosting costs and to buy a bottle of beer every few weeks… And, well, I enjoy the fact that people are reading and commenting on my stuff: Without my blog, I wouldn’t have nearly as big an audience, and I enjoy the feeling of being ‘on the pulse’ of the photography community across the internet.

When people steal my content on the internet, I get very angry. At some point, I decided to fight back. This post explains why and how. 

You’re not just going to rant, aren’t you?

Well yeah, pretty much. Sorry. But I’ve learned a lot from fighting copyright theft throughout the years, so if you want the actually useful advice, check out part 2 of this article, that's where I'm actually trying to help you.

What is copyright?

I know that there are a lot of people who are fiercely against copyright – who feel that music should be freely available, that all software should be downloadable, and that people protecting their copyright are devils. If you are among those people, you’re probably not going to like this post much, but stick with me – or at least read ‘How copyright infringement harms me’, below.

Copyright is really quite simple: Whenever you create something, copyright is also created. This happens completely automatically: you don’t have to register your copyright, you don’t have to stick the silly little © symbol on your work, and you don’t have to stand next to the master copy of your copyrighted work with a katana and a grim look on your face to make people understand that something is copyrighted. In fact, it’s usually more correct to assume that something is copyrighted.

Whilst most of the words I’m typing now are in the dictionary (unless I mispell them, in which case they wouldn’t be in the dictionary, but that’s a different point altogether), the order I choose to put them in is my ‘creation’. This creation is something that belongs to me: I have the right to decide who gets to use these words, for what, and under which conditions. I can decide that everyone who reads it would have to give me a cookie or a copy of Wired magazine, for example. Nobody would, of course, but that’s not the point: I get to decide.

I am creating something that is my property, and if someone decides to copy this and upload it elsewhere, my property is being ‘stolen’.

There are ways of losing your copyright, but (in the UK, at least) all of them involve signing a piece of paper. Your work contract, if you are a journalist, might assign the work you produce to the copyright. Wiley Publishing published my first book, but I have a contract which stipulates what they are allowed and not allowed to do with the words I have written, and how much money they owe me if someone decides to make ‘Macro Photography: The Movie’. (No, seriously. Movie rights is part of my contract.)

If my good friend Maxwell Lander (link not always safe for work) asked me nicely if he could use one of my articles on his site, I can grant him permission (in effect, I would be extending a licence to his site), or deny his request. The copyright would still be mine, so if someone found my article on his site, and wanted to re-use it elsewhere, they would have to come back to the copyright holder (myself) to ask for permission before re-using it.

Copyright vs. other types of theft

The problem with copyright ‘theft’ is that it isn’t analogous to other types of thieving. If you were to steal my laptop, it is easy to understand why I would be upset: I don’t have a laptop anymore, and you have my laptop: You have clearly deprived me of something that used to be ‘mine’. Short of going all Proudhonesque, I think most people can agree that it’s ‘wrong’ to take something which belongs to somebody else. Copyright is often more difficult to understand for people.

If I have bought a copy of Mark Helprin’s Refiners Fire, and I’ve finished reading it, you might ask me to borrow it. I’ll lend it to you, of course, because I think everybody should read Refiners Fire. As far as Helprin is concerned, nothing bad has happened: I have bought the copy of the book, and I’m allowed to do whatever I want with it. I can set it on fire. I can read it every week for the next 15 years. I can give it away via BookMooch, sell it on eBay, or lend it to my friends, if I want. No problem here.

If I have bought a copy of The Decemberists’ Castaways and Cutaways, I could do much of the same: I can lend it to my housemate, sell it to a friend, or throw it away when I’m tired of it. I can even transfer it to another medium: At the moment, I’m listening to that very album on my laptop, where it lives in glorious, high-quality M4A format. The ‘loophole’ here is that I still have the CD: I can see it from here. If I were to sell the CD, however, I’d be in trouble: The CD is the ‘licence’ for me to listen to the music.

In both the above situations, I have made a physical purchase. If I were to photocopy the book for a friend (never mind that it would probably be more expensive to copy the book than to just order another copy from Amazon or something), I’ve made a transgression. If I were to give a copy of the CD, I’m in the wrong. It’s pretty easy to understand, too: When I make a copy of a CD or a book, I’m depriving the artist/writer of royalties. As a (struggling) writer myself, I can see how that is upsetting.

Where it gets more complicated, is how I routinely give away my content for free (you’re reading my blog now, aren’t you? Did you pay? Of course not, and I don’t expect you to), but still be upset when someone steals it? You can’t steal something that’s free, can you?

How copyright infringement harms me

I'm the guy on the left. That is my angry face. I don't make my angry face too often, but people nicking my content might see it...

There are many ways you could be in infringement of my copyrighted content: Turn it into a book and sell it under your own name, and chances of me finding out are very slim. Print out copies of an article for your photography club, and there’s no way I would ever know. And still, I wager that most people would agree that the former is worse than the latter. Why? Because now someone is making money off the back of my hard work. If it turns out that what I am writing here is worth money, then I should be the one benefiting from it, right?

Most of the time, infringements happen when someone takes one of my articles and posts it to their own website, either manually (by copying and pasting the text from my site) or automatically (by taking the RSS feed and showing it on their site in its entirety). This means that my articles show up on another site, which harms me in several different ways:

SEO – I have spent a fair bit of time (and some money) ensuring that my sites are designed and developed to best practice Search engine optimisation (SEO) rules, which, in turn means that I rank better in the search engines. There’s no big secret to how to do this – I wrote a separate article about making google love your photography site, in fact.

One of the things that influences your rankings is content duplication. In theory, when people take my content and put it elsewhere, it dilutes my chances of people finding my site. This means that I get less traffic to my site, which in turn reduces the benefits I get from posting my articles for free. The other sites probably don’t promote my book, they don’t give me their advertising money, and they don’t make me feel like a super-hero.

Cold hard cash – I don’t make a lot of money off this site. Most months, I only barely manage to pay for my hosting costs for my server, domain, etc.

Control and reputation – If it turns out that I write something that is incorrect, I am relatively likely to correct it. Imagine if I wrote something that was completely wrong, and might actually damage your camera – if that were to happen, I would immediately post a retraction, a correction, and make people aware of it over Twitter etc.

However, if someone has copied the article to elsewhere, those articles would remain out there – some times, with my name attached… and if someone follows that advice and breaks their camera, what would happen then? I would feel terrible, which is bad enough, but it also puts my reputation at risk.

Cross-marketing – There’s a picture of my books in the sidebar of my site. Every time you see my site, you see a picture of my book. You may not buy it. You may never even notice it. But the next time you’re in a book shop, you might spot it. You might remember it. You might buy it. And for every book I sell, I’m likely to be contacted by a publisher to be able to write another book.

Principle – Many of the people who steal my content don’t do it out of malice. Often, they just get really excited by something I have written, and want all their friends to see it, too. It’s flattering, in fact, but in the process they break the law and upset me. Often, a quick e-mail is enough to help them realise why it upsets me, and the content vanishes quickly. I even had someone send me a lovely box of chocolates and a post-card by way of apology once.

There is a second group of people who nick my content though: The ones who do it to make money. People who systematically steal other people’s content in order to try to get a little bit of traffic from search engines, which they then monetise in one way or another. Affiliate sites selling photo equipment, for example, or sites that simply want to run advertising on my content. Or even unscrupulous photographers who want extra traffic to their site to try and sell their photographic services.

This hurts me in two ways: not only am I competing against my own content in the search engines, but if someone clicks on their adverts instead of mine, this hurts me in the wallet, too: The $0.0001 per click that I would have gotten goes to someone who willfully breaks the law. It’s not about the money (I’m not poor enough to start a fight every time someone steals a fraction of a penny out of my pocket), but about the audacity of doing that, and thinking you can get away with it.

But you have an RSS feed! Isn’t that just begging for it?

Actually, never mind the previous picture. This is my real angry face.

For the longest time, I was running a truncated RSS feed: Basically, you see the first 100 words or so, and nothing else, you’d have to click on the link to come read the full article. Then, a while ago, I had a few people e-mailing me, asking me very nicely if I couldn’t please change it to the full RSS feed, because they preferred reading my site in the feed.

I looked into it, and decided to go for it, for several reasons: I could add advertising to the RSS feed, so in theory I wouldn’t be out of pocket (in addition, fewer readers on the site means, in theory, less bandwidth costs – but that’s moot: I’d rather pay the costs and have more people on my site). In addition, I’m a bit of a geek, and I love Google Reader – I want to be able to catch up with things that way, without incessantly loading up more pages.

A few people immediately started using my RSS feed, piping them into other sites, and essentially creating a clone of my site. They mistakenly thought ‘Hey! He’s got an RSS feed, so it’s okay to syndicate his content’. As we discussed above, in ‘what is copyright’, that’s not the case at all: I might leave a copy of my book on a photo copier machine, but that doesn’t mean I’ve agreed that people can copy it at will.

Think about the examples from the beginning of this article: Making a copy of a 500-page book is a lot of effort and costs a fair whack of money, so people are unlikely to do it. Making a copy of a CD is a lot easier. Scraping my site is even easier, and using my RSS feed to nick my content is easier still: but just because it is easy, doesn’t mean it’s legal.

My RSS feed has a copyright notice in it which currently reads:

Please note that all Photocritic content is © 2001-2010 Kamps Consulting Ltd. This RSS feed is provided for personal, non-commercial use only.

If you are not reading this material in your news aggregator or RSS reader, the site you are looking at is guilty of copyright infringement. If you spot this anywhere, please contact legal@kamps.org so we can take legal action immediately.

As we said: As the copyright owner, I’m fully within my right to create all sorts of outlandish conditions of use of my own content. In this case, the only conditions are ‘personal use’ (so, don’t distribute it on- or off-line) and ‘non-commercial’, (so, don’t try to make money off my content).

From my perspective, I’m not all that fussed if people e-mail each other copies of my articles: As long as I am not competing against myself in Google et al, it’s not a fight I’m likely to find worth fighting. The great thing about most RSS readers is that they are ‘closed communities’ – Unless you are logged into Google Reader, you can’t see any feeds. This means that search engines don’t index RSS readers – as such, they are not in competition against me for search engine traffic. If someone re-publishes my content on their site, that’s a different matter altogether.

Disclaimer

I have rudimentary legal training in UK media law, but my training is several years old, and you’d be insane to take legal advice from some random bloke off the internet anyway. Nothing in this post is meant as actual legal advice – talk to your solicitor, that’s what they are there for!

Further Reading

Further Reading

This is part of a 4-story series:

  1. What is copyright, and how do infringements harm you?
  2. Protecting your copyright in a Digital World
  3. Just because it's in my RSS feed, doesn't mean you get to steal it
  4. Ignorance is no excuse

In addition, you might enjoy Police Fail: Copyright, what is that? and Even Schools Don't Care About Copyright...

Flash! Flash Gordon? Flashdance? No, flashgun photography

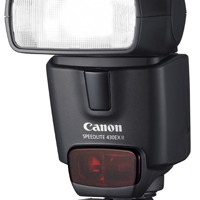
flashgun

What do you mean by flashguns, Gareth? Are you talking about ostentatious weaponry?

To be fair, I’m sure you’ve heard of flashguns before, but I needed an excuse to start with a bad joke. This week’s Photography Concept on Friday is about flashguns, and why you should consider taking the plunge and buying one.

Flashguns come in a variety of shapes, sizes and prices, each having their pros and cons. They all share the same selling point, though – a flashgun allows you to have much greater control over the power and direction of your flash.

Most flashguns fit snugly into the hotshoe on top of your camera (that metal thing that sort of looks like a giant staple… sort of… ) and give you an immediate creative advantage. Here’s an exciting bullet point list of what you can do with flashguns that you can’t with most built in flashes:

  • You can angle the flash to fire in a direction other than directly at your subject
  • You can manually alter the strength of the flash
  • You can add a diffuser to your flash
  • It reduces the chance of red eye, as explained in an earlier PCoF by our very own Matthew Druin.

Now you may be wondering ‘Why on earth would you want to fire your flash somewhere other than at what you’re photographing? That’s a bit postmodern isn’t it?’ As a portrait photographer, I’ll use the example of a headshot to explain why it’s beneficial to be able to control the direction of your flash.

When you point your flash directly at someone’s face for a headshot, the quality of light is often both too strong and too ‘hard’. This can create nasty big, sharp shadows on someone’s face. Direct flash can also have one of two other effects: your subject either ends up looking very shiny and sweaty, or their entire face is bright white, save for their irises, as if they were part of some kind of benevolent alien race.

A flashgun allows you to bounce your light off the ceiling, wall or other object by taking advantage of its ability to swivel and move. This diffuses the light and allows it to spread before reaching your subject, giving them a more naturally lit appearance.

With a flashgun, you can manually set the strength, or power, of your flash. This is an advanced technique and will take practice but the results can be fantastic. A common example of manually setting the strength of a flash is when shooting a portrait with a bright light source behind the subject, such as the sun (a fairly bright light source, I’m sure you’ll agree). A small amount of what’s known as ‘fill in flash’ will allow you to do just that – fill in the light that will be missing from the front of your subject. Now, a shot that would usually result in a sihouette has turned into a dramatic, interesting portrait. Good eh?

If that sounds daunting, don’t worry – most modern flashguns have what’s known as a ‘TTL’ or Through The Lens mode, where your flashgun talks to your camera (not literally – if this is happening, go see a doctor) and automatically sets the correct flash power depending on your camera settings and direction of your flashgun.

Adding a diffuser to your flashgun provides you with even greater control over your light source. They’re not too expensive but are, essentially, glorified yoghurt pots that have been shaped correctly to fit over the head of the flashgun. When bouncing the light off an object with a diffuser attached, you get two stages of diffusion, making the quality of your light even better.

I didn’t even get to off-camera flash yet or the idea of using multiple flashguns to light a scene, but I think that’s enough for you to digest for now. I’ll leave you with an example of a portrait I took using a flashgun:

Suda51 of Grasshopper Manufacture, photographed using a flashgun.

As an on-location portrait photographer for magazines, a flashgun is absolutely essential for me. In this diptych, I used a flashgun with diffuser attached. The flash was pointed upward and was bounced off the ceiling, back down onto the subject. What you will notice is that aside from the small dot of light within the pupil, it isn’t apparent that a flashgun was used at all. This is the sort of effect you’re looking for.

Now have you taken all that in? Promise? Good. Off you pop, then.

Dodging and burning


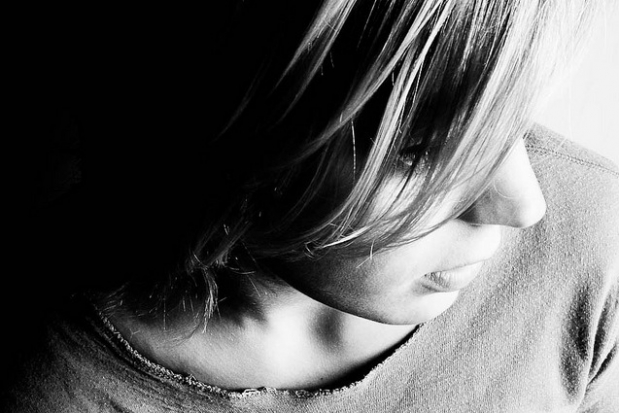
This image has extensive burning (at the back of her head) and dodging (top right) done to it - with remarkable effect!

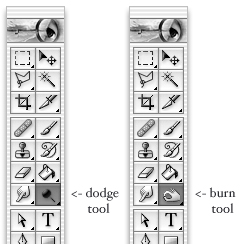
If you've spent any time in Photoshop editing your images, you'll have noticed a "dodging" and "burning" tools. They are used for making an image lighter and darker respectively, but why the odd icons? Why is there a lollypop and a fist as part of your Photoshop tool palette?

As you may have guessed, it's a hangover from the darkroom days - and it's a technique that is great fun to play with if you're ever printing your own images.

How a darkroom enlarger works

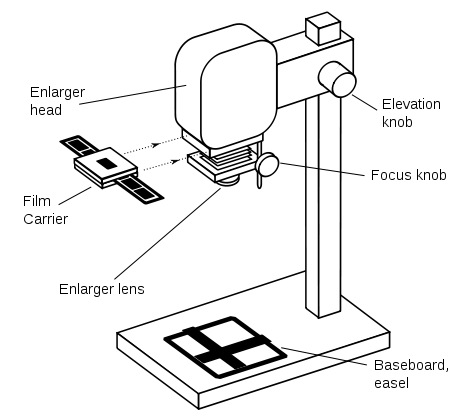
enlarger.jpg

A darkroom enlarger is sort of like a camera, but 'backwards'. In a camera, you have a lens that gathers light and projects it onto a film plane. A darkroom enlarger also has a lens, and the film is pretty much in the same place as in a camera, but a light bulb is placed on the opposite side of the lens. By turning the light bulb on, the lens 'projects' an enlargement of the image onto photographic paper.

You can 'focus' the lens so your image is sharply in focus on the paper, you can choose a more or less sensitive paper (analogous to picking a higher or lower ISO film), and you can choose a longer or shorter exposure (which turns the lamp on for longer / shorter). You can also select a different aperture on the projection lens, which has much the same effect as on your camera: A smaller aperture requires a longer exposure, etc.

To determine how light or dark your print is going to be, you choose an 'exposure' by choosing how sensitive the paper is you are using, you choose an aperture, and a 'shutter speed'. Just like with your camera, it's possible to over- or under-expose your image at this point.

Its worth keeping in mind that your photographic film will be negative, and the paper is negative as well - the dark portions of the film will become light on the final print, and the light areas on the film will be dark on the print.

Dodging in the darkroom

dodge.jpg

To dodge means to avoid something by a sudden quick movement, or to move quickly to one side or out of the way. It's a pretty good description of how you would dodge something in the darkroom. In the darkroom, you would use a piece of black paper on a thin stick - which, when seen in silhouette, looks a little bit like a lollypop.

When dodging in the darkroom, you would traditionally select a slightly longer exposure (it gives you a bit of time to work). Then, when your paper is being exposed by the light, you could make some portions of the image lighter by moving the dodge tool between the lens and the paper. Because some parts of the paper get less light, they are lighter on the final print.

Burning in the darkroom

Burning is, as you might have guessed, the exact opposite; When burning, you would traditionally do 'half an exposure' normally (or whilst dodging, as above), followed by another exposure of the same paper. Because the enlarger head is firmly fixed and the paper doesn't move between exposures, 'stacking' exposures like this is no problem.

When burning, you would use a tool that would block some light, but let some light through.The areas you are 'burning' will come out darker: more light on the paper causes the print to be darker.

For the burning process, it is useful to have a tool where you can easily change the aperture (i.e. the size of the hole that lets the light through) - and it turns out that your hand is the perfect tool. By changing the shape of your hand, you can make a small hole for the light to pass through for fine work, or you can create quite a big hole, for darkening larger parts of the image. Hence the hand icon in Photoshop!

Life as a technical editor


This is my Tech Editor face. If you see it, you're in trouble.

I am quite in demand as a technical editor for photography books, as you can see from the list of books I have listed on my 'company' web site, But what does a tech editor do? And what is the difference between a good and a bad tech editor?

When the books I wrote went through the technical editor mill, I have to admit that I was a little bit disappointed - Sure, I was incredibly grateful for getting feedback on my writing, but the 'feedback' was limited to only actual technical errors. I figured 'damn, here's a fantastic opportunity to get some insights from a fellow photography author, but all I am getting is "This picture appears to be taken with a larger aperture than indicated. Please confirm".

When that happened, I figured that I could do a better job than that, and contacted my publishers to see if I could help out. It turns out it isn't very well paid - I mean, the pay isn't horrible, but it's nowhere near my normal freelance / consulting rates. So why do I bother?

What I get out of technical editing

Between you and me, I get a lot more out of tech editing than just the money. It is exciting to be involved in the production of new books, for one thing. It is also very interesting to see manuscripts in their raw form, and to realise that authors differ wildly in lots of different ways. Some authors write their books very tightly integrated (i.e. the photos illustrating points are key to each individual chapter, and it seems as if the chapters are written around a set of illustration images), others are less integrated.

Some authors can barely string a sentence together (which is fine - that's where the copy-editors come in. The important part is the content, after all), whilst others deliver flowing prose that verges on poetry. And, as you might imagine, there are a lot of people that are teetering somewhere in-between. I'm quite happy to admit that I've learned a lot from tech-editing other author's books - and there can be little doubt about that I'm a better writer for it myself.

Of course, I also get the fuzzy feeling of knowing that someone else's book is a tiny little bit more accurate, more complete, and a smidgeon better because I was involved.

What does the technical editor add to the manuscript?

I can only speak about what I do myself, really, but it's a pretty thorough process:

Check all factual information in the manuscript - That includes names mentioned (Is it the right person? Is their name spelled correctly?), dates listed (do the dates make sense? Do they match the EXIF data of the images being used as examples?), any photographic equipment used (are they still on sale? Does the equipment do what the author claims it does?), etc.

Look at every photo in detail, at 100% magnification - Are they sharp and in focus? Do they need further post-processing to look good in print? Is the white balance correct? How do the images look in context with other photos in the same chapter?

Check the EXIF data of every image - You'd be amazed how easy it is to get the camera data muddled up in captions: A 1/160 second shutter speed turns into a 1/60 second shutter speed, for example, or the author writes that they were shooting wide-open with a 17mm lens whilst the EXIF data seems to think we are talking about different equipment. It isn't the end of the world, of course, but if a publisher is going to go through the trouble of hiring a technical editor, we may as well get it perfect - especially if people are going to try to use the exposure settings as starting points for their own photographs.

Query any inconsistencies - Some times, you look at a photo and think "There is no way this image was taken in the way the photographer says". Perhaps the lighting is off; maybe there's some reflection that shows that they used another piece of equipment, etc.

Finally, I will go through and see if I can think of any key pieces of information or advice that have been missed out. Do I know of any great tips, alternative ways of doing things, or faster methods to accomplish the same result? If so, it goes into my tech editing notes.

What happens with the tech editing notes?

The tech editor's notes go back to the author of the book - who then gets to decide whether to do anything with the advice. Some times, they might decide to rewrite a section, they may just update the text or caption based on my comments - or they might decide that they disagree with my comments, and simply move along and leave it as-is.

Not changing anything based on the technical editor's comments or suggestions is okay, of course - the author is the boss. Personally, I find that sometimes the technical editor has misunderstood my point, that there wasn't a factual issue, but that the explanation was too poor, and that that led to confusion.
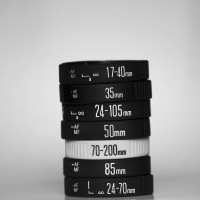
So how can I hire a tech editor?

There are a lot of good photography tech editors out there, and a quick google search should help you on your way. Or you could just point your browser at my site, and see if I can't help you out, of course :)


Do you enjoy a smattering of random photography links? Well, squire, I welcome thee to join me on Twitter -

© Kamps Consulting Ltd. This article is licenced for use on Pixiq only. Please do not reproduce wholly or in part without a license. More info.

Creating strong narratives in video

You don't need top-end camera equipment to create some compelling videos - In this video, I'm using a Nokia N8 mobile phone to explain the basics of narrative in videos!


Do you enjoy a smattering of random photography links? Well, squire, I welcome thee to join me on Twitter -

© Kamps Consulting Ltd. This article is licenced for use on Pixiq only. Please do not reproduce wholly or in part without a license. More info.

Macro photography with your mobile phone


In my second round of videos for the Nokia N8 Camera School, I'm getting up close and personal – with some bumble bees. In this video, you’ll see the Nokia N8′s macro mode in action, and the results? Well, let's just say that the compact camera manufactures have plenty to be getting worried about...


Do you enjoy a smattering of random photography links? Well, squire, I welcome thee to join me on Twitter -

© Kamps Consulting Ltd. This article is licenced for use on Pixiq only. Please do not reproduce wholly or in part without a license. More info.

So you call yourself a photographer?

If single lens reflex cameras are banned - can you use a twin-reflex camera instead? The point's moot now anyway, by the look of things.

If someone asks you if you’re a photographer, what do you say? ‘Yes, I’m a photographer.’ Or ‘No, I take pictures, but I’m not a photographer.’ It’s something that’s been playing on my mind recently, and something that I’ve been debating back-and-forth with a friend of mine who is, as far as I am concerned, a bona fide, hand-on-heart photographer, a veteran of the analogue campaigns, with a portfolio to prove it.

The dictionary definition of photographer is pretty straightforward, it’s a person who takes photographs.

And then there are numerous variations on the phrase ‘Owning a camera does not make you a photographer; it makes you a camera-owner.’

By the dictionary definition, just about every single person in the UK is now a photographer, what with the ubiquitous camera-phone and the millions of images uploaded to FaceBook every month. By the slightly more philosophical statement, there are plenty of people out there taking photos, but they can’t all be called photographers.

So we’re at something of an impasse. It seems as if we have a society of potential photographers, but not one of actual photographers.

I’m pretty convinced that every single camera-owner isn’t a photographer. Would you say that someone who owns a dSLR but never takes it off of automode and owns only the kit lens is a photographer? And is someone who is trying her or his hardest to get the most out of a point-and-shoot not a photographer? Nope, the camera that you use, or don’t use, doesn’t make you a photographer (or not).

Still, I’m not too keen on the idea that there is some mythical ability quotient that you have to fulfil before you’re granted the title Photographer, either. Who exactly is it who decides what constitutes ‘good enough’ in this situation? It’s not as if there’s a medieval-style Guild of Photographers who grants us apprentice, journeyman, or Master Photographer status. Ability is a bit too subjective a term to decide if someone is a photographer or not, thinksme. And honestly, don’t we all take bad photos?

Is the divide professional, then? Do you have to make your living by taking photographs to be a photographer? Well, no, I don’t think so. Think of it this way: would any of the players who competed in the 1995 Rugby World Cup be too pleased if you said that they weren’t really rugby players because they happened to be accountants, doctors, and members of the armed forces in their other lives? Why else do we have the most useful terms ‘professional’ and ‘amateur’ in our vocabularies? Photography, and by extension being a photographer, is not something that is determined by money-making status.

There is a common theme running through these slightly manic arguments about who is or isn’t a photographer, though. It might not be about the kit that you own, but it is about doing the best with what you have. It isn’t about whether or not your photos are good enough to be exhibited at the Royal Academy, but whether you strive to make your next shot better than your last shot. And it definitely isn’t about whether or not you earn your living from photography, but it is about wanting every photo that you take to be as good as you can make it.

Being a photographer is about practising a craft. It’s about wanting to create something; it’s about wanting to improve; it’s about wanting to learn.
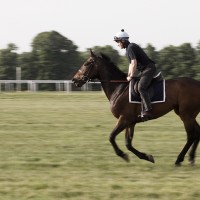
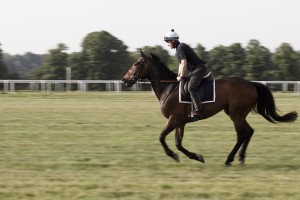
So next time someone asks you ‘Are you a photographer?’ think about this before you answer: are those pictures that you take an expression of something, and part of a learning curve? If they are, then you’re a photographer.
Product photos with a mobile phone

When you think 'Product shoot', you probably wouldn't immediately think of taking a load of photos with your mobile phone... or would you? I'm exploring how you can take fantastic product photos - with a Nokia N8.


Do you enjoy a smattering of random photography links? Well, squire, I welcome thee to join me on Twitter -

© Kamps Consulting Ltd. This article is licenced for use on Pixiq only. Please do not reproduce wholly or in part without a license. More info.

Looking at composition

IMG_1365

People have been obsessing over composition – and the theory and maths behind it – for thousands of years. Pythagoras discussed it, Ancient Greek architects used it, and Fibonacci sequenced it. But what does it actually mean for you and me when we take a photograph?

Essentially, the resulting rules of composition help us to create pictures that please the eye and are easy to understand. Composition can make or break a picture, but is so often overlooked. Let’s look at some of the main ideas people are using.

Rule of Thirds

One of the oldest rules in of composition is known as the rule of thirds. It’s easiest to understand if you imagine a grid across your picture, splitting it into nine equal rectangles.

Basically, the rule says that placing your subject(s) on any of these lines will make for a better composition. Let’s look at some examples of the rule of thirds to help explain it:

The rule of thirds applies to landscapes...

...and to portraits

Roughly speaking, the horizon is placed on the bottom of the two horizontal lines (although it also works on the top) and lined up the subject with one of the verticals. You can also place extra emphasis on focal points of the picture by positioning them where the lines cross, such as the girl’s face in the second photo.

Maybe try imagining these lines next time you look through the viewfinder, and adjust your shot to see if it works better. It doesn’t have to be exact!

Symmetry

Almost the polar opposite of the rule of thirds, symmetry can change a photo from ordinary to extraordinary, especially when used in unexpected ways. Using symmetry in portraiture can be very unsettling, but also very effective! To get perfect symmetry in your photos, it’s probably easiest to use a tripod to frame the picture exactly as you want it to appear (and remember, a little ‘cheating’ in image editing software can also help you along the way).

Sharp Symmetry, by Scintt

Place of Contemplation, by Martin Gommel

Leading Lines

Leading lines are exactly what they sound like – they cut through the image, drawing your eye down them and into the picture. These are often used in landscape and architectural photography, and a favourite technique for photos of roads and railings. Often used to great effect when leading to a vanishing point, and frequently combined with symmetry, this can also have very dramatic results. Again, a tripod will help give you set up your shot for the composition you want.

Airport Symmetry, by Doris Hausen

Vanishing Point, by Luigi Caterino

Other techniques

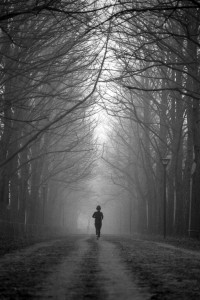
I’ve only scraped the surface of the different techniques used by photographers to give their pictures the composition they want. Try using elements in the composition to frame the subject (such as the trees in the picture with the runner), and maybe try different techniques on the same picture – it might be the easiest way to find the one that works.

Ignoring the Rules

The theory behind what makes a ‘good picture’ can certainly be off-putting for many. After all, isn’t a good photo about how it makes you feel rather than how perfect it is? Possibly. But understanding conventions helps us decide when to follow them, but also when to break them for dramatic effect. So go experiment with unusual crops, dead-centre subjects and skewed horizons – you might just discover something amazing!

All photos used in this article are used according to Creative Commons licences. If you have strong reservations against your photos appearing on Small Aperture, please contact us, and we’ll get them taken down. Please support the artists creating these photos by clicking on the photos to take a closer look at their work!

Macro photography for $10

So, you like the idea of doing macro photography, but you think you can’t afford it? Think again – with less than £10 worth of equipment, a little bit of sweat and tears (and blood, if you, like me, are a bit on the clumsy side), and you can build yourself a surprisingly good macro lens. Don’t believe me? Well, have a look at the article, and think again!

Of course, as I’m using a Pringles can to make this lens, you also have the opportunity to pause for a snack. Now that’s the type of DIY projects I like.

So you want to take pictures of things up close, do you? You have gone tired of all the regular ways of doing so? Ready for bellows and reversing rings, but can’t afford them? Have no fear, there is a far cheaper way to get a reasonably good result!

Also, Before we go any further… Need I say that you do all of this on your own risk? If you chop a finger off, ruin a lens or your camera body, it’s your own fault, and your own problem. Just be really careful, and you should be fine.


Cannibalising lens covers

This project takes base in cannibalising a few of the lens- and body covers that most of us have laying around. These are great, seeing as they are already created to connect to the camera – the easiest way to get the correct bayonet fittings to attach stuff to your camera body and lenses!

Obviously, the covers are solid, which is no good to us. So, in order to get them into an useful state, I attacked them with a Dremel tool.


Such a grind…

Carefully chopping the fronts out of a camera body cover and a lens cover takes quite a bit of time, not least because I wanted to do it as neatly as possible.

When you are done, remember to matte the cut by using emory paper (sanding paper): You want to make sure it doesn’t reflect light.


Pringles tube to the rescue

What you make the actual distance tube out of is relatively unimportant, as long as it is completely light-proof. I decided to use a pringles tube because I have done projects in the past with them, so I knew that they were approximately the right size. It turned out, in fact, that it was exactly the right size. Nifty.

After removing the top and decantering all the lovely crisps into a bowl (nope, I’m not affiliated with Pringles. And the jury is still out if the crisps type have any impact on the photo quality of the end product), it was time to attack the bottom of the tube…


Sparks! Oh, the pretty sparks!

Cutting out the bottom of the pringles can caused a lot of pretty sparks, so I couldn’t resist the temptation of taking a few shots.

Ladies: sorry about the unwashed hair, beard stubbles, messy room, and general colour mismatching of this photo. If this turns you on, marriage proposals go on an ePostcard to the address at the bottom of the article.


So… Why the lens cover?

There was no logistical reason for why I decided to cut holes in both the body and the lens cover, other than that I thought it might come in handy later. With the final design, it turned out to not be necessary. It did, however, come in quite handy: The lens cover cap works as a flare-reducing hood, and it helps protect the electrical contacts built into the lens. In addition, it makes it easier to grab on to the lens as it is stuck in the tube.

Chalk that one up to luck rather than than planning, but cut a hole in a lens cover as well, because it makes your life easier, and it reduces the chance of putting one of your lenses out of commission. I don’t know about you, but I prefer to keep my lenses in one piece. I’m not that rich: I’m writing an “on the cheap” guide.


A Sticky situation

So, once the pringles tube had a big hole in the bottom, I set out to attaching the body cover and the Pringles tube.

Any strong glue should do. I suspect a hot-glue gun would probably be best, but I was out of glue sticks, so decided to use epoxy glue instead.

Anything to make the two pieces stick firmly to each other. If the glue you use sets translucent, you may want to take a black felt-tip pen and colour it dark, to prevent light leaks.


Firmly attached

After the epoxy glue had set, I had to try to see if it fitted on my Canon 20D.

Sure enough, it was a perfect fit.

Professionality aside, I gladly admit to doing a minor victory dance at this point.

A snug fit – banishing light

My idea was to use black felt to block out the light leaks from outside the lens.

The particular lens I decided to use for this project is the cheapest Canon standard lenses, namely the Canon 50mm f/1.8 MKII.

It is just the right size, and despite being cheap as chips, it has a couple of tricks up its sleeve – more about that in a minute. Ideally, using an older lens would be a better idea – especially if it has manual aperture controls.

By wrapping black fabric (in my case, a t-shirt I didn’t really like anymore) tightly around the lens, I managed to block out all superfluous light.


Textile Hack

I’ll gladly admit that getting it right took a couple of tries, but eventually I found exactly how much fabric was needed. To hold the bundle together, I decided to tape it all together.

After this, the lens fitted snugly in the Pringles container. Not only did it not fall out, it slides quite easily, so if you need to move it, you can just push or pull it to where you need it. Once you let go, it stays put. This is actually quite important, as it’s part of the focussing strategy: You don’t focus using focus rings, but by moving the lens closer or further away from whatever you are photographing.

pringles_diagram.png

Finally: Taking photos!

Right, everything has come together, and now it is time to do the fun stuff: Take pictures!

Depth of field in Macro photography

You’ll probably find that, essentially, you have no depth of field at all. In macro- and microphotography, moving an item half a millimetre forward or backward from the lens changes things dramatically. Of course, you’ll learn soon enough to draw this to your advantage, but there is actually something you can do to increase your depth of field, if only a little: Stop down the lens – more info about that here.

Focussing

Focussing is a serious challenge with microphotography, and it can be bitterly frustrating: The slightest movement throws the object completely out of focus, and even finding your object again can be a nightmare.

My only advice: Try it slowly. Wave your object in front of the lens, and then try focusing it by holding it in your hand, looking through the viewfinder. Once you get the hang of it, understanding how it works, you can try and set it up in a static setup: You are going to want to use a remote release button or the camera’s self timer to reduce shutter shake, so make sure everything is sturdily set up!

Exposure

The internal light-meter is actually a good starting point – it isn’t always accurate, but it gives you an idea. The great thing with digital SLRs, of course, is that you can try and err as much as you like. And trust me, there will be a lot of that while you try and figure out macro photography.

Taking the photo

As mentioned briefly earlier, you’ll want to hold the camera perfectly still. Use the self-timer or use a remote shutter lead to make sure everything is perfectly still.

The photo below is off a simple Bic ballpoint pen (it was the first thing I had to reach).

It is by no means a great macro photo, but it does give an impression of how big things get. That is an un-cropped photo, by the way: I have the photographs below in all their 8 megapixel glory.

The reason for the glare in this photo is that the inside of the Pringles tube was still metallic. The light was bouncing around on the inside of the tube, causing it to look very fuzzy.

Ballpoint pen – Canon 50mm f/1.8 stopped down to f/16, shutter time approx. 10 seconds, ISO 100. Not cropped. (see bigger version)


Ballpoint pen – Canon 50mm f/1.8 stopped down to f/4.0, shutter time approx. 0.3 seconds, ISO 100. Slightly cropped. (see bigger version)

Now in video form!

This article was published in Make Magazine vol.6, and in late 2009, Make Magazine made this their Video Project! I’m proud to say that Kip and the rest of the Make team made a great video guide of it – check it out:

Further improving the system

The first change I made to my initial design was to add a layer of black paper inside the Pringles box. Ideally, black felt or another completely light-eating surface would be better, but felt costs money, and I decided to keep this project as cheap as possible.

Photos taken with the system

During my further experimentation, I decided to have a go at a pack of matches that was conveniently within an arm’s length:

(For all three images, click on them to see them bigger on Flickr. While you’re there, why not add them as favourites while you’re at it?)

Postscript

I hope this article has inspired you to build a macro lens of your own. It is a tremendous amount of fun, and in the process you are likely to learn a lot about photography and optics: Which, in turn, will improve your overall photography performance. You can’t lose!

Protest photography

Tamil separatist supporters demonstrating in London. The 'stop' barrier was pure chance.

I kinda missed out on the whole student protest thing when I was at university. The skirmish around the loss of grants had already been lost, round one in the tuition fees bout went to the Government before my time, and the Iraq war was yet to come. What was left? Better rights for water voles on a four mile stretch of the River Avon? Probably.

But gee whizz! The whole of Europe has been making it up for it this year. Athens, Paris, Lisbon, London, and Rome have seen angry mobs rampaging through the streets demonstrating against police brutality, changes to the retirement age, austerity measures, the imposition of increased student tuition fees, and a probably corrupt and almost certainly inept Prime Minister. And it has all been captured with some superb photography.

Which got me thinking. If you are intent on photographing a demonstration, and something with the potential to turn nasty, how should you go about it?

Preparation

If you’re photographing a planned demonstration, make sure that you know the route. Suss out good vantage points for the beginning, the end, and points along the way. (Barriers or bollards to stand on are a good start.) You’ll want shortcuts between key places, as well.

Tamil separatist supporters demonstrating in London. The 'stop' barrier was pure chance.

Wear appropriate clothing: something inconspicuous that will allow you to move easily and run if you have to.

Dig out your press card if you have one. If you’re in the UK, print off a copy of the police guidance on photography, just in case.

Take as little kit as you can get away with. Your main camera with one lens – so ideally the most versatile that you have – spare memory cards and batteries, and a second camera if you can manage it.

On the day

Be nice to the police. Be co-operative. (I took a few minutes to chat with the officers who were policing a protest by Tamil separatist supporters in London. I found out lots of useful information. They knew who I was. We all won.)

I turned around; he was looking straight at me. Boom!

Even if it doesn’t look as if things will turn hairy, make sure that you have an exit strategy at every point.

Stay alert: both to get the photos that you want, and to stay safe.

Getting photos

Crowd scenes can convey the enormity of the protest, but what’s of greater interest are the individual stories. You want the quirky and unusual and you want to tell the narrative of the protest. So look out for the grandmother marching with her grandchildren, stay alert for flash-points, and keep a watch for the unexpected.

She joined the International Women's Day march, in her owner's handbag!

Don’t delete anything. You never know what might be in the background on closer inspection.

Be brave, but don’t be stupid.

Finally

Your safety is the most important thing. Put that first all the time, whether to stop yourself from tumbling from a lamp post and breaking your neck, or not being in front of a mounted police charge. Mmmkay?

How safe is your digital reputation?


If the Evil Bunny gets hold of your Facebook, all hope is lost.

We live in the digital millennium, in a world where your passwords are protecting so much information, that it's probably wise to start thinking about how safe your data really is.

As a photographer trying to carve out a niche for yourself, your digital reputation is extremely important: If my Twitter stream suddenly started being filled with a lot of spam, for example, you'd unsubscribe pretty quickly, wouldn't you? Of course you would.

When you think about it, if someone could look inside your brain and get access to all your passwords, many of us would be worse off than if they stole our house keys.

What happens if someone compromises your passwords?

Stop and think for a moment: What would happen if someone had all your passwords? Could they get into your calendar? Could the hackers see your address book and phone numbers? Could they read your e-mails? Could they access your internet bank and transfer money out of your account? Could they post embarrassing things as you on your website, blog, or social networking sites?

I realised a long time ago that a lot of my reputation and financial stability hinges on my passwords being safe.

So, what can you do to stay safe?

Pick safe passwords

It's no good to pick passwords that people can easily guess; that much is obvious. There's no point in using "Meke" as my password, because anybody who knows me would know that's my sister's name.

Same thing with other obvious pieces of information; It's not hard to find out somebody's birthday (it's often a piece of public information on Facebook) or their mother's maiden name (in these times where marriages sadly often don't last, your mother's maiden name is as likely as not to be her current name). In the case of my own mother; she was remarkably progressive, and never took my father's last name. Whenever my bank asks me for my mother's maiden name as a security question, I sigh and give up. "It has been her name for over 60 years. How is this going to help your security"?

Of course, in the name of security, I made up a new mother for myself, whose name is nothing like my own mother's. (Mum, if you're reading this - I'm proud of you and your name, but you just ain't secure enough for me!)

Anyway; Passwords. Don't use words that are in the dictionary, don't use foreign-language words, and don't use obvious substitutions. "P3SSWORD" is marginally better than "P4SSWORD", for example, because the hackers have figured out that 4 is often used for an "A", etc.

Personally, all my passwords look a little bit like "6MT#2o,UGrI^eBY", "A1_U3YiqR'&guybc" or "3Fs-wOhT/n5MG". Spot a pattern there? No, well that's sort of the point. Use a mixture of upper and lower case letters, use numbers and symbols, and pick something utterly unpronounceable.

Don't use the same password twice

Now that we've learned to use secure passwords, what's next? Well, it doesn't help how secure your password is, if you use the same password for everything.

Why? Well, imagine your password is "asdqwe123", and you have been using it for absolutely everything since the dawn of the internet. You will have hundreds of logins by now, and you will have told each of these sites your password.

Do you really trust all of these sites with all the information you have stored on all other sites? Because that's essentially the compromise you are making.

Don't think that your passwords are safe, neither: A recent case worth keeping in mind was the Gawker network. Last weekend, Gawker had a security breach, where 1.2 million logins and (encrypted) passwords were stolen. In other words: If you are one of the 1.2 million people who ever made an user account to make a comment on Gizmodo, Lifehacker, Jalopnik, or any of their other sites, your password is potentially compromised.

Worse; it seems as if the passwords have already been cracked: Thousands of people were suddenly tweeting about Acai berries, seemingly in connection with the above breach, because people had been using the same passwords on Twitter as on one of the Gawker site.

Password theft is not a one-off, either. The enormous social media site Reddit had a security breach where media containing their backups was stolen, potentially leaking usernames and passwords to criminals.

The list goes on: People have stolen passwords from the government, open source movements and social networks. On top of all this theft, there are a lot of dastardly attempts out there where cybercriminals try to trick you into giving them your details - a practice known as "Phishing".

So, What is a poor social media debutante to do?

I realise this is pretty tricky: As I am writing this, I have no fewer than 576 passwords and logins for various sites. If I were to have a different password for each of those - and especially if my passwords are all resembling "/MZYIougB2)4q" or "3'z1tNgk>Wyq!EjY!" - I would have locked myself out of each account.

Nonetheless, the only thing you can do, is to try to find a way to never use the same password twice. That way, if your password to Lifehacker's commenting engine was stolen, at least the thieves can't post embarrassing stories as you on Facebook.

Software to the rescue

Personally, I use a piece of software called 1Password, from Agile Web Solutions. It can generate safe passwords, and it keeps track of your passwords for you. The trick is to use a single, extremely high quality password to protect all your other passwords. I only use that password for 1Password, and nowhere else; Of course, I now have to trust 1Password to not break or lose my passwords, but I'm happier to trust a heavily encrypted file of my 576 passwords, than any other way of doing things.

1Password has a couple of bonuses in addition to taking care of your passwords for you: It stores your bank and credit card details, completely encrypted of course, and supports 'secure notes', where you can basically store anything you like, and whenever you quit the software, it'll be securely encrypted.

The added benefit of using something like 1Password instead of the password saving functionality built into your browser, is that if someone were to steal your computer, they still can't get access to your passwords and sites.

Rotate your passwords regularly

Of course, the two above steps are great containment strategies: You are making it difficult for someone to break into one of your accounts, and if they do somehow manage to break in, they can't get access to any other accounts.

The final step is to regularly change your passwords for high-risk logins.

So, what do I mean by a high-risk login? Let me give you an example: I'm particularly paranoid about my mail e-mail account: All the other sites I use tend to have "Password Recovery" features: You click a button that reads "I forgot my password", and they send you a new one by email. That's great, but what happens if the thieves are controlling your e-mail account? All the hard work you have done to protect your passwords is wasted; they can get at them from the source.

So: Protect your e-mail password as if it was your most valuable possession. It may very well be true. Change it once per month - no exceptions.

The other important passwords worth changing frequently are your internet bank, your PayPal password (because your money is on the line) and your FaceBook password.

The latter is important because you can log into other site using FaceBook Connect; if you lose your FaceBook account, you are effectively losing a lot of passwords at once (That's the case with any OpenID or Single Sign On solution, by the way). In addition, if you lose your FaceBook account details, you may be opening yourself to various forms of blackmail or embarrassment. I'm sure you can think of a few things you wouldn't want your mum to read, thinking it came from you, for example.

In short...

So: A quick summary: Pick a secure password. Only use each password for one site. Change them regularly. Take extra care of your money and e-mail.

Photos, nativity plays, and the Data Protection Act

Olive

This is just a quick reminder to anyone going to see their child, grandchild, niece, nephew, or house elf perform in the school nativity play or concert: the Data Protection Act does not prohibit you from taking photos or making a video of the performance for your own personal use.

Obviously you wouldn’t be able to sell your video of Class 3B singing ‘Oh Little Town of Bethlehem’ to the Israeli or the West Bank Tourist Boards, but if my school productions were anything to go by, you wouldn’t want to, anyway. Still, no one can stop you from snapping away for the family album, so says Christopher Graham. He’s the Information Commissioner, he knows about these things.

If you need to point anyone in the direction of the specific guidance issued by the Information Commissioner’s Office, you can find it here.

Anyone for a quick rendition of ‘Hark the Herald Angels Sing’?

(Thanks to Amateur Photographer for the reminder.)

Need another holiday gift idea?

lensbracelets

Recently, we gave you some nifty ideas for small holiday gifts. Here’s another that would be a perfect stocking-filler for your fellow photographer friends.

These lens bracelets were created by Adam Elmakias and come in seven different designs. They’re available for only $10 a piece, or get all seven for $50.

And for those of you wondering why you didn’t think of this brilliant idea first, read Adam’s blog to see how he came about the concept for the bracelets and got them manufactured.

Top tips for sports photography

Canter by Daniela Bowker

Chances are, there’s some sport that you’re interested in, dear reader. Even if football, rugby and the like isn’t for you, there’s always table tennis, trampolining or tiddlywinks. Even if you’re not much of a sports fan, sports photography can be a lot of fun and can seriously challenge your skills, giving you a chance to improve. We’ve put together a little handful of sporty tips, tricks and techniques to give you the edge.

Technique – Panning

Canter by Daniela Bowker

Panning is a technique that is mostly found in motorsport photography. It involves tracking your subject as it whizzes past you at speed. The desired effect is to keep your subject in focus but allow the background to blur, getting across that sense of fast movement. Essentially, the key is to keep your subject in the same position in the frame for the entire duration of the shot. This keeps your subject sharp. It’s not easy, but it’s worth mastering, as it looks fantastic. You can almost hear the car going “VROOOOOM!”. Maybe.

Technique – Manual Focusing

Ugrás / Jump by Peti_205

You’ll mostly see this technique being used in motorcross, snowboarding and biking – basically anything with a ramp for those braver (and crazier) than you or I to fling themselves off. You’ll see most photographers manually focus on a ramp or a bump in the track. Then they can get their framing and composition right, and just wait for the shot to come to them. It’s a tried an tested technique which can yield brilliant results. So give it a go!

Tip – Become A Clairvoyant

Played On, by Jim Campbell

Don’t worry, you won’t need to buy any dream catchers or crystal balls – I’m talking about learning to predict where the action will be. It helps, of course, if you’re familiar with the sport you’re shooting. If you can work out where the action is going to be, you can get yourself into position before it even happens. Then you wait. the last thing you want is to be fumbling around, missing great moments. Get there first, get there early.

Tip – Don’t Just Go Where The Ball Is

Aggie Women's Tennis - 51 by StuSeeger

Often, it can be a good idea to check out what’s happening around the action, there are some great photos to be had when you nab a shot of a furious footy manager on the sidelines, an ecstatic crowd reaction following a goal, or the jubliant player celebrations. Sometimes, the story isn’t just where the ball is.

Tip – Pay Attention To Faces

Photo by Gareth Dutton

Admittedly, this isn’t much use in motorsport, because you can’t see their faces, but when shooting anything else (alright fine, not fencing either) a good photo (OK, nor Formula One) can be turned into a great photo when you capture an expression in there too. Anxiety, joy, despair – there’s nothing like sport for making grown men cry.