manual focus

An auto-focusing modes primer

Autofocus is such a wonder-tool in our cameras that I'm sure quite a few of us have no idea how we ever managed to take tack-sharp photos without it. But how many of us actually use it to its full potential? There's a bit more to auto-focus than the single or one shot default. Without further ado, here's a quick primer into the different auto-focusing modes you're likely to find on your camera, and when best to make use of them.

One or Single shot

This is probably what you think of as 'auto-focus'. You point your camera at your subject, you line up your auto-focusing points over it, you half-depress the shutter button, and the camera attempts to focus on the subject. When it finds focus, it 'locks' onto it until you complete the depression of the shutter button or release it and re-focus your shot. This mode is great for most subjects that don’t move a lot.

The apples weren't going anywhere; one shot was just fine

Canon calls this mode 'One shot'; you'll see it marked as 'AF-S' on Nikon, Fujifilm, and Sony cameras; Olympus refers to it as S-AF and Pentax as AF.S.

Continuous or Servo mode

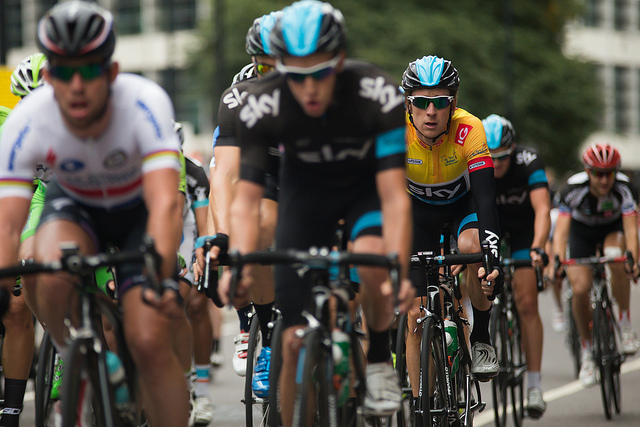
When you're shooting fast-moving subjects and want to keep them in focus, try using continuous or servo mode. While you half-depress the shutter release button, the camera will repeat the auto-focusing operation in order to keep your subject sharp as it moves across the frame.

Tracking something fast moving? Try AI Servo or AF-C mode.

Canon reckons its servo mode can track subjects approaching or receding at upto 50 kilometres per hour, making it good for capturing plenty of sports.

Nikon, Fujifilm, and Sony refer to this mode as AF-C; it's marked as AI Servo on Canon cameras; on a Pentax you'll see it as AF.C; and it's C-AF on an Olympus camera.

Intelligent or Automatic auto-focus

'Intelligent' focus is a half-way house between single shot and continuous auto-focus. When you half-depress the shutter button, the camera is set to recognise movement in the subject. For subjects that don't move, the camera will use one shot auto-focusing. Should it detect movement from the subject, it will automatically switch to continuous auto-focus and start to track the subject.

Animals (and children) often favour AF-A mode

While this mode might seem like the best of both worlds, and it can be very handy particularly if you're photographing children or animals, it can sometimes be a bit of a let-down and isn't quite fast enough to deliver the results you want.

Canon calls this mode AI Focus AF. It's AF-A on Nikon and Sony cameras, while Pentax refers to it as AF.A.

Manual focus

It was learning to align the focusing markers in an SLR that first got me hooked on photography, almost 30 years ago. Back in the early 80s, auto-focus was only just beginning to make its way into cameras. Now we often wonder how we cope without it. But still, there are times when auto-focus simply won't do and you need to switch to manual focus, maybe for macro shots or some landscapes. If there's no obvious manual focus option on your camera, try looking on your lens: there's likely a switch to be flicked there.

Macro shots can benefit from manual focus (Image by Haje)

Often, but not always, your camera will help you by beeping or flashing when it thinks that you might have achieved focus on your subject. If you're using live view rather than through the lens, try using the manual focus assist option that lots of cameras have now. Rather than displaying the full frame, it zooms in on the area where you've focused, making it easier to hone in with precision on your subject. It's a useful tool to demonstrate just how big a difference a small adjustment can make to your focusing, too.

Exploiting your camera's capabilities

Your camera is gifted with heaps of different tools to help you get the shots that you envisage; there's more to it than exposure and metering. Don't forget to make use of them - that's why they're there!

Lensbaby launches a fisheye lens

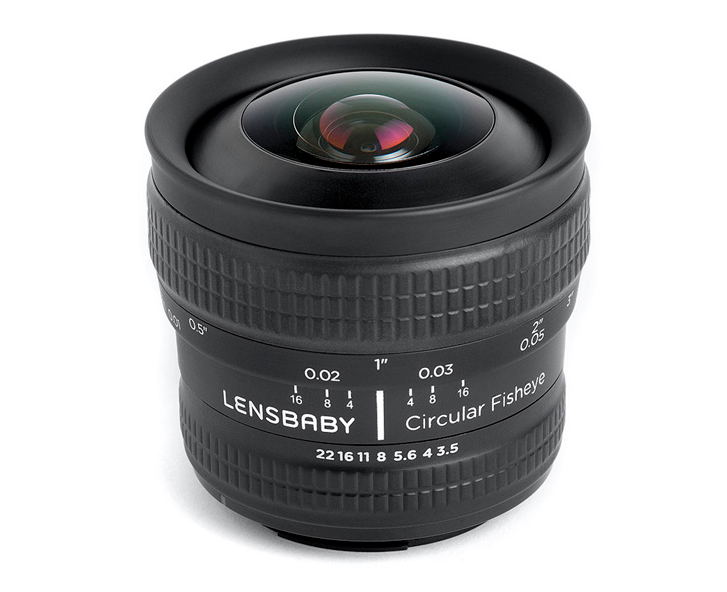
Lensbaby has just announced a 5.8mm ƒ/3.5 circular fisheye lens with manual focus for Canon and Nikon mounts. Although it has been optimised for APS-C sensors, you can use it on full-frame cameras. You'll be left with a smaller image circle is all. It should be able to focus as close as ¼", going all the way to infinity, and offers an 185° angle of view. At a smidge under $300, it's an extremely affordable addition to you kitbag, it just relies on you using its focusing ring to get your subject sharp, rather than on your auto-focus. If you're not sure that you can stretch to a Canon or Nikon-made lens, it's an intriguing alternative.

There are some sample images over on the Lensbaby website, too!

It's not on sale yet, but you can pre-order from Adorama. Canon's here; Nikon's here and both are priced at £299.95!

How to do time-lapse photography

photocriticorg_gizmodo_20110103_img_4377_0_620x3491.jpg

Sunrises make for glorious time-lapse scenes

If you've ever seen the sun come up quickly over the city in CSI, or that fox decomposing in the title credits of True Blood, you've seen time-lapse in action. Here's how to do it...

Time-lapse is where photography meets video. Essentially, all you do is that you take a load of photos, and then play them quickly after each other–like a flip-book cartoon–and watch the frames come to life. Taking a photo every second compresses half a minute into a single second; with glorious results.

All you need to create your first time-lapse masterpiece is a tripod, a camera, an intervalometer, and a good idea.

In order to create your first time-lapse photographic movie, first you will need to think of an idea that you want to convey. Sunsets in the desert, a flower wilting, or (if you're really ambitious) a human being going from cradle to grave - it's all possible.

Taking the photos

So, to begin taking photos, set your camera on your tripod and make sure it stays in the same position throughout the whole process. Next, you can start taking your photos. You can do this by hand, but to get the timings smooth and your video looking better, try using an intervalometer. There's many different types of 'em out there - including ones you can buy for about £15-20 or $20-$30 from Amazon, and, of course, the Triggertrap, which comes with time-lapse features built in.

As a general rule, the more photos you take, the longer your final movie will be. Make sure that you also keep your camera on the same settings while you are photographing your scenes, otherwise there will be a noticeable difference in many of your photos in the final product–I find that Aperture Priority (Av/A) and manual focus works well; that way, the depth of field stays the same, but the camera will compensate for any fluctuations in lighting.

Stringing them together

Once you are done taking your photos, then you can upload them to your computer and lace them together by using a video editing software. Choose a video editing software that you are comfortable with and import the photos into the program. The photos will import in the order that you took them and each photo will automatically be assigned a time per frame. The time per frame is the amount of time that each photo will appear in your video. You can go to your tools and manually enter times that work for your video's concept. Most videos play at around 30 fps, but you don't have to play your video at full speed; you can choose to let each frame last two or three frames of your video, for example.

Overall, time-lapse photography can be a beautiful form of photography. It can be a simple process at first, but as you up your skills, your movies will take longer to produce, and they will become more complex. You can start introducing camera movement during the timelapse, for example, or come up with other cool effects.

If you are feeling adventurous this weekend, then grab your camera and try your hand at time-lapse photography. It is a fun way to spend a few hours, plus your final product will be a video that you can share with your friends and family. Keep practising–it's a lot harder than it sounds!

Need some inspiration?

Earth | Time Lapse View from Space, Fly Over | NASA, ISS from Michael König on Vimeo.

Life of flowers (Жизнь цветов) from VOROBYOFF PRODUCTION on Vimeo.

Good luck!

10 ways to improve your photography


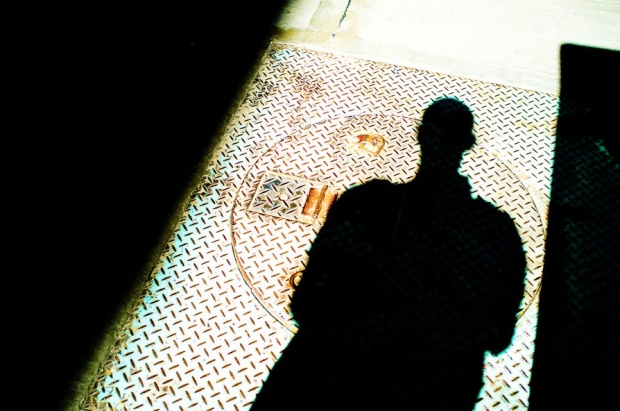
Think outside the, er, manhole cover.

One of my favourite things about photography is that it's so accessible as an artform. To create a painting, you can't expect to be able to deliver anything if you go and buy some canvases, brushes, and some paint without any training or idea what you're trying to do (although, to be fair, some modern art does give that impression)... In photography, you can take your very first photo, and it'll come out well-exposed, and it'll be of roughly whatever you pointed your camera at. Cool beans, now let's take a look at how we can get better...

1. Invest in Good Equipment

The photographer makes the photo, not the camera, but there's nothing wrong with considering some new equipment every now and again. For some people, upgrading to the latest and greatest is all the inspiration they need to get out there and take better snaps. You don't have to buy a fancy DSLR, but really research your next camera and find one that truly fits your needs.

Nowadays there are hundreds of different types of cameras that you can choose from, so really put some thought into what you will be using your camera for before you invest in one.

2. Learn how to Use your Equipment

Another great tip is to read your camera's manual. Reading the manual will give you the edge; it will allow you to know your camera inside and out and in turn you'll understand the mechanics of a camera.

After reading the manual, play with it; try taking photos in every photography modes, and try setting youself little challenges - like "only taking photos at ISO 1,000 today" or "this week, I'm using manual focus only" or similar. Your photos may not necessarily come out better, but inventing games to help you understand your camera better is a huge step forward. Want some more fun exercises? Try 10 ways to break photographer's block

3. Take a Photography Course

Community colleges or community centers often offer fairly inexpensive photography classes. It could be to your advantage to take one of these courses and learn a few tips and tricks from your fellow classmates and from your teacher about the technical aspects of photography. Alternatively, there's plenty of books out there that could help you along - perhaps one of mine? ;-)

4. Try Something New

Don't be afraid to try something new in your photos. For example, if you normally take photos of your family and friends, then you can try out new lighting, or new settings on your camera. You could also try shooting at different times of the day. Night photography is a whole new world compared to day time photography, so don't be afraid to try something new and experimental in your photos.

5. Find your Niche

Find what you like to take photos of the most, and specifically work on that aspect of photography. Many people gravitate towards portrait photography, but give other branches of photography a chance as well. You never know, you could fall in love with architectural photography or pet photography.

Whatever you find you like best, try to become really really good at it - it won't be easy, and it'll be a lot of hard work - after all, if you love doing it already, it won't feel like work!

6. Take your Camera Everywhere

Always carry your camera! You never know when the perfect photo-op will arise, so it is a good idea to always have your camera close. Also, if you keep your camera with you, then you will be able to practice your photography more and more each day.

7. Be adventurous

Be adventurous in your photos. You can travel with your camera and go on many adventures with your camera in order to learn more about photography.

Going on adventures are fun, normally inexpensive, and can be fun getaways from the stresses of everyday life; they also make great photo memories. So, grab your family and go on a mini adventure one weekend. Whatever you do,  don't forget your camera!

8. Join an Internet Photography Community

Online photography communities are abundant and are super supportive. Photography communities are home to photographers who are beginners all the way to professional photographers. Joining a community can help you get the feedback you need to take your photos to the next level.

9. Look through Magazines and Photo Books

Researching photo techniques is a great way to create higher quality photos, and there is no better way to do so than to look through magazines and photography books. By looking at the photos in these publications, you can learn all about certain qualities of photography such as point of view, framing and color balance.

Lacking inspiration? Try my lust of 50 must-read photography books!

10. Have Fun!

The best advice for taking better photos in 2012 is to have fun! If you aren't having fun with your photography, then it will show in your photos. Photography is a fun form of art, so don't be shy and have as much fun as you can with your camera.